How to Use the Attendance View (Signing In/Out)
This document explains how to use the ChildFriendly attendance module to view room activity, pin important rooms, manage staff and child attendance, move children between spaces, track nap times, and sign children in and out efficiently and compliantly.
Last updated 4 minutes ago
Step 1: Access the Attendance Module and Choose a Layout
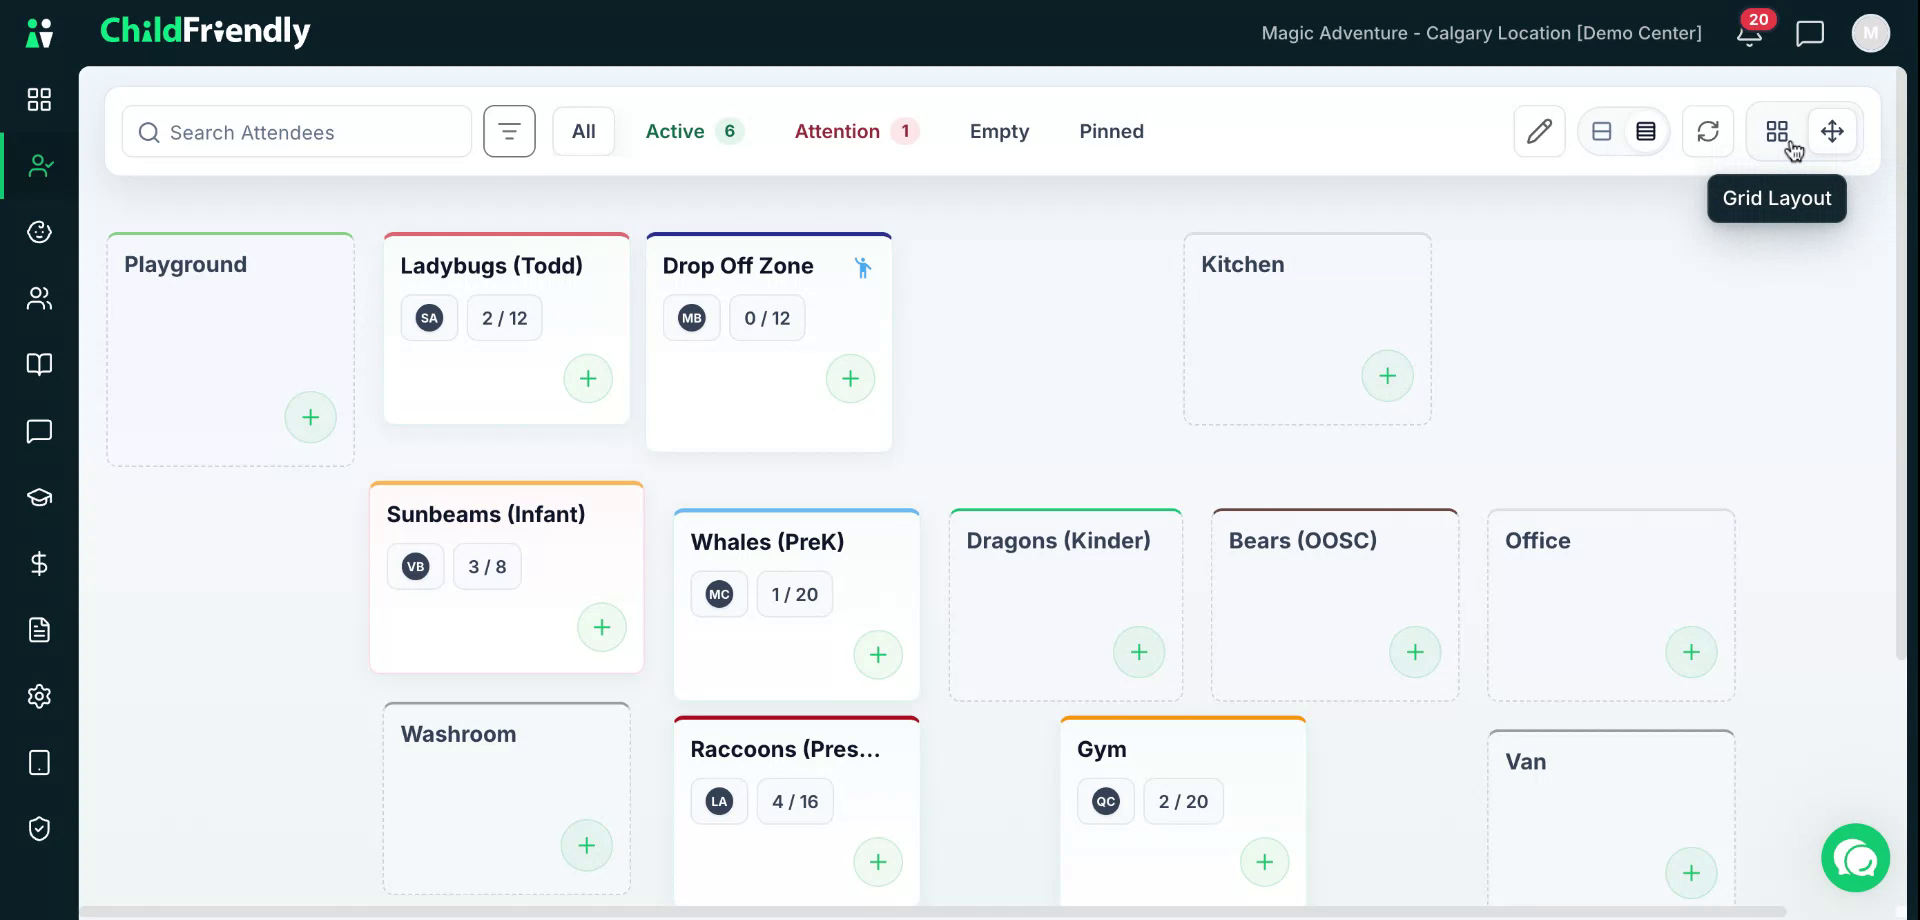
Ensure you are in the Attendance module, which provides a visual layout of your center, including rooms, outdoor areas, gym, cleaning areas, prep, and more. You can view this module in two ways: Canvas or Grid. The Canvas view shows a physical floor plan of the center with all rooms displayed. To switch to the grid layout, click the Grid option to view the rooms in a card or grid format.
Step 2: Switch Between Clean and Detailed Views
In Grid view, you can choose between a Clean view and a Detailed view.
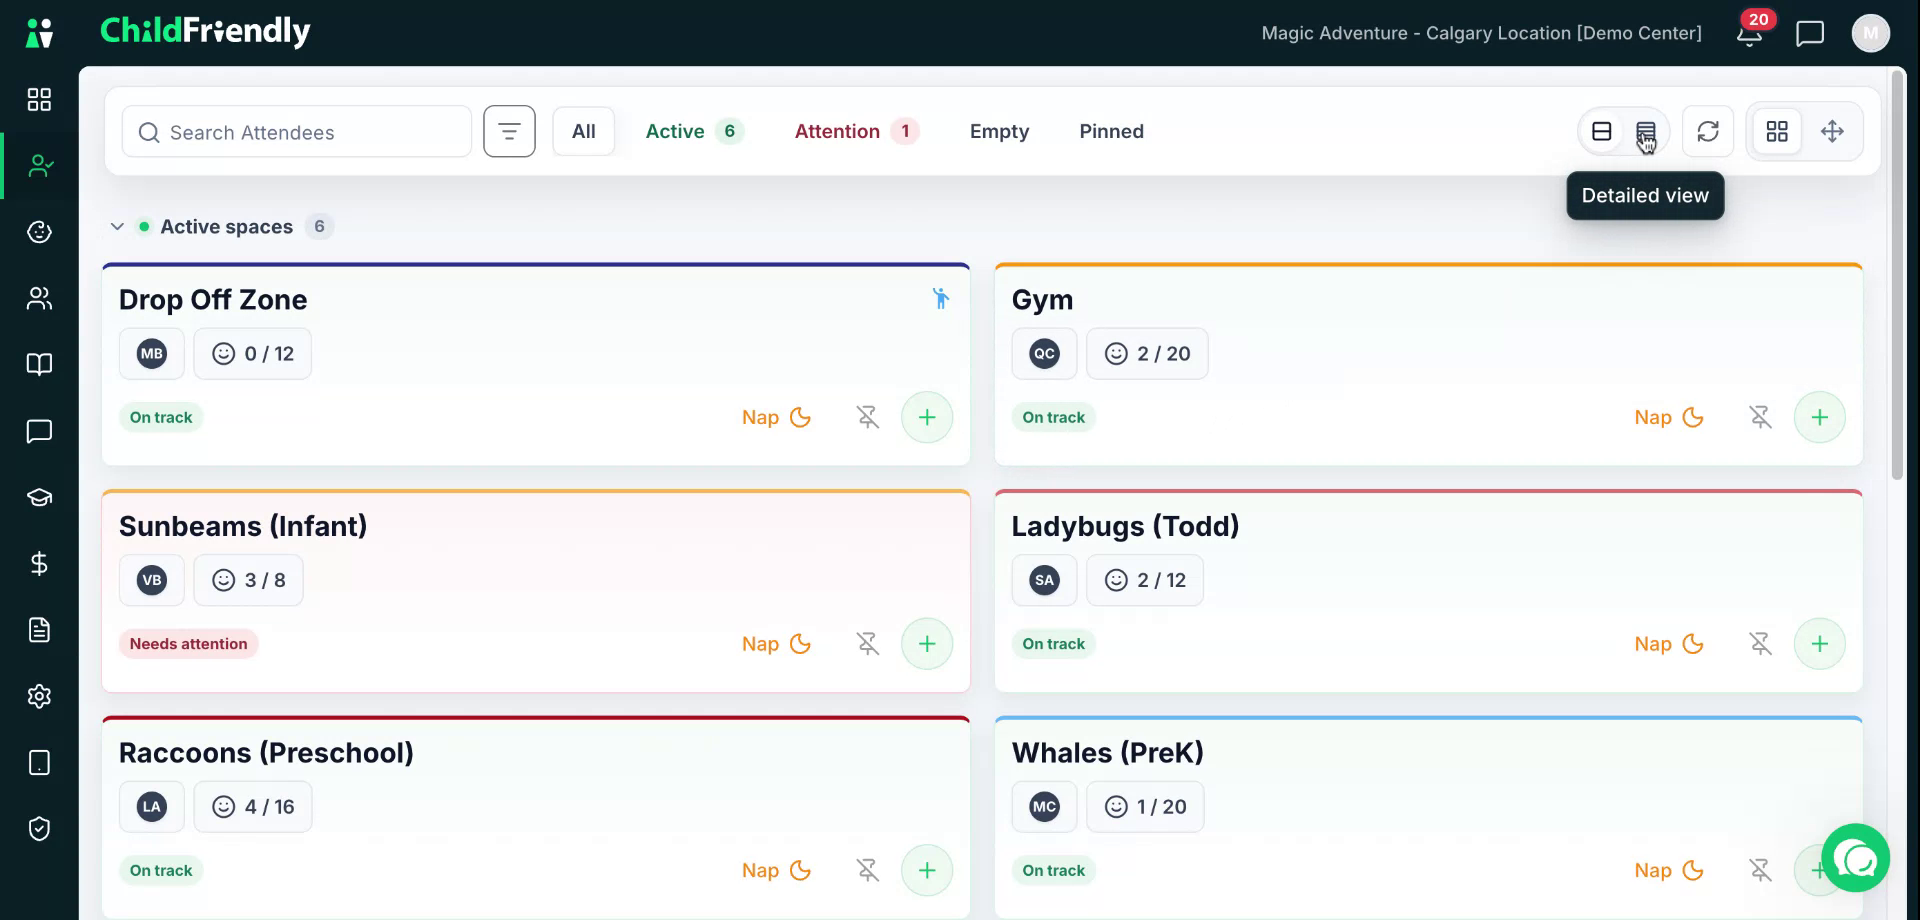
Select Clean view to see a simplified card for each room showing key information such as the number of staff and children currently in the room and other basic details.
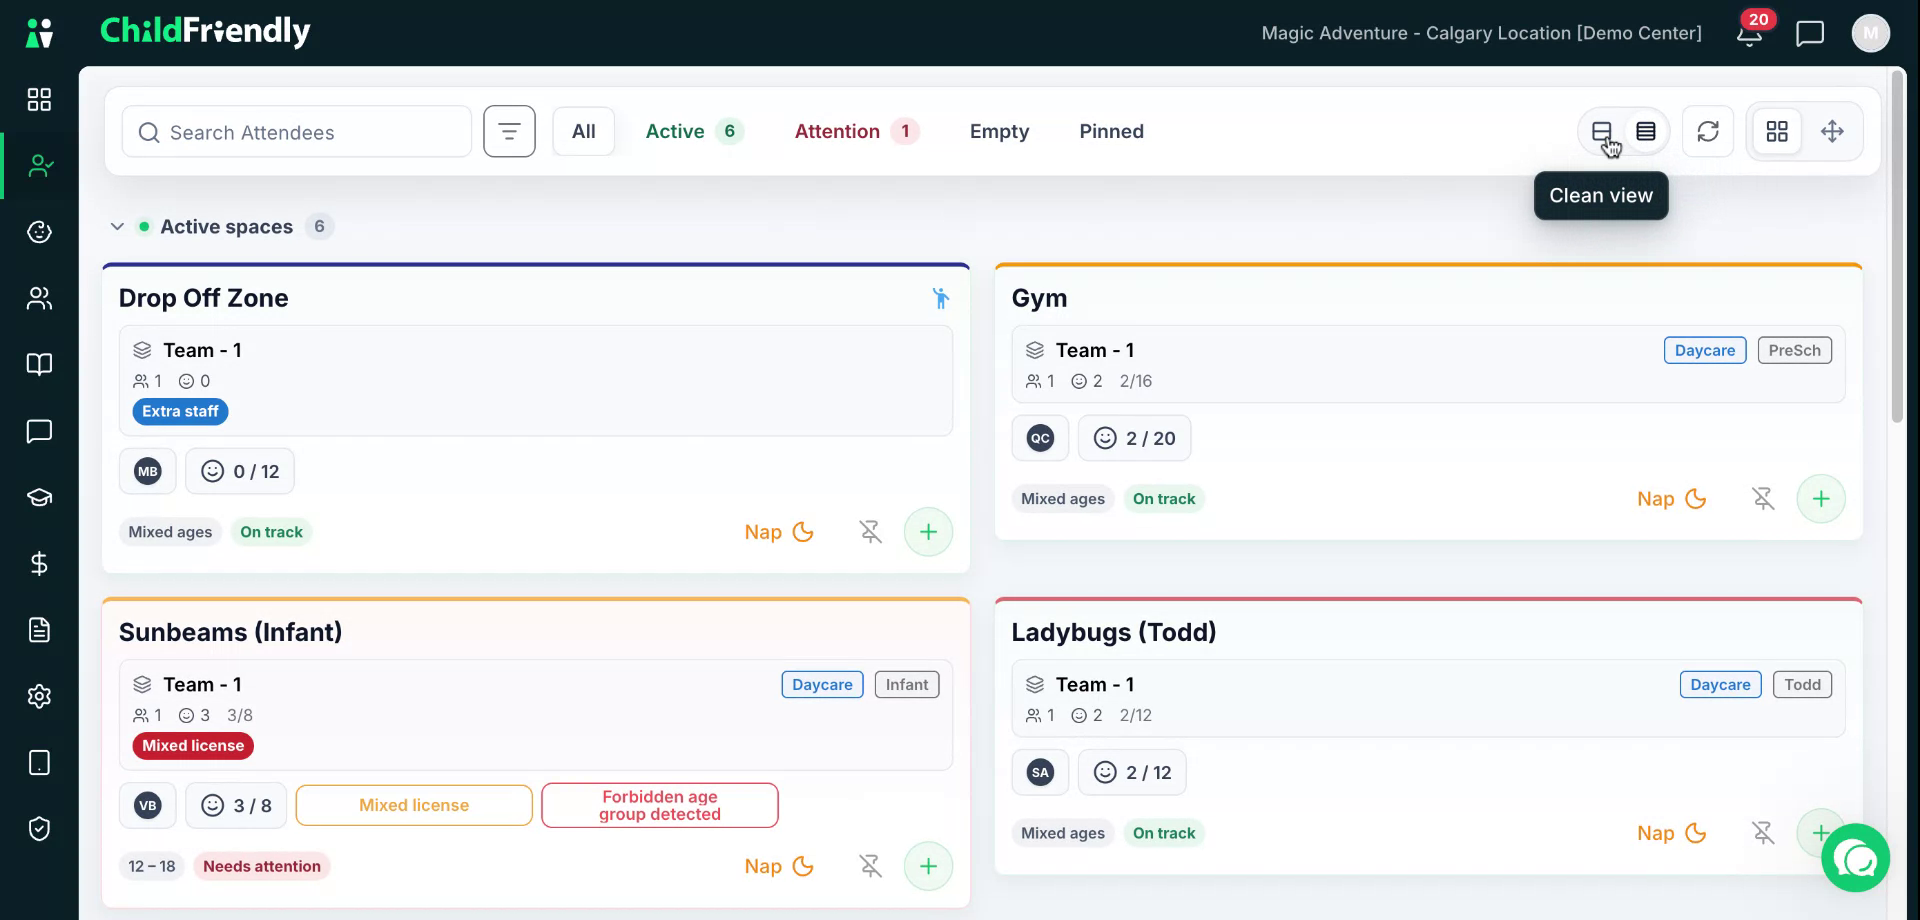
Select Detailed view to see more comprehensive information about each room, including additional activity details and team information.
Step 3: Use Pinned Rooms for Quick Access
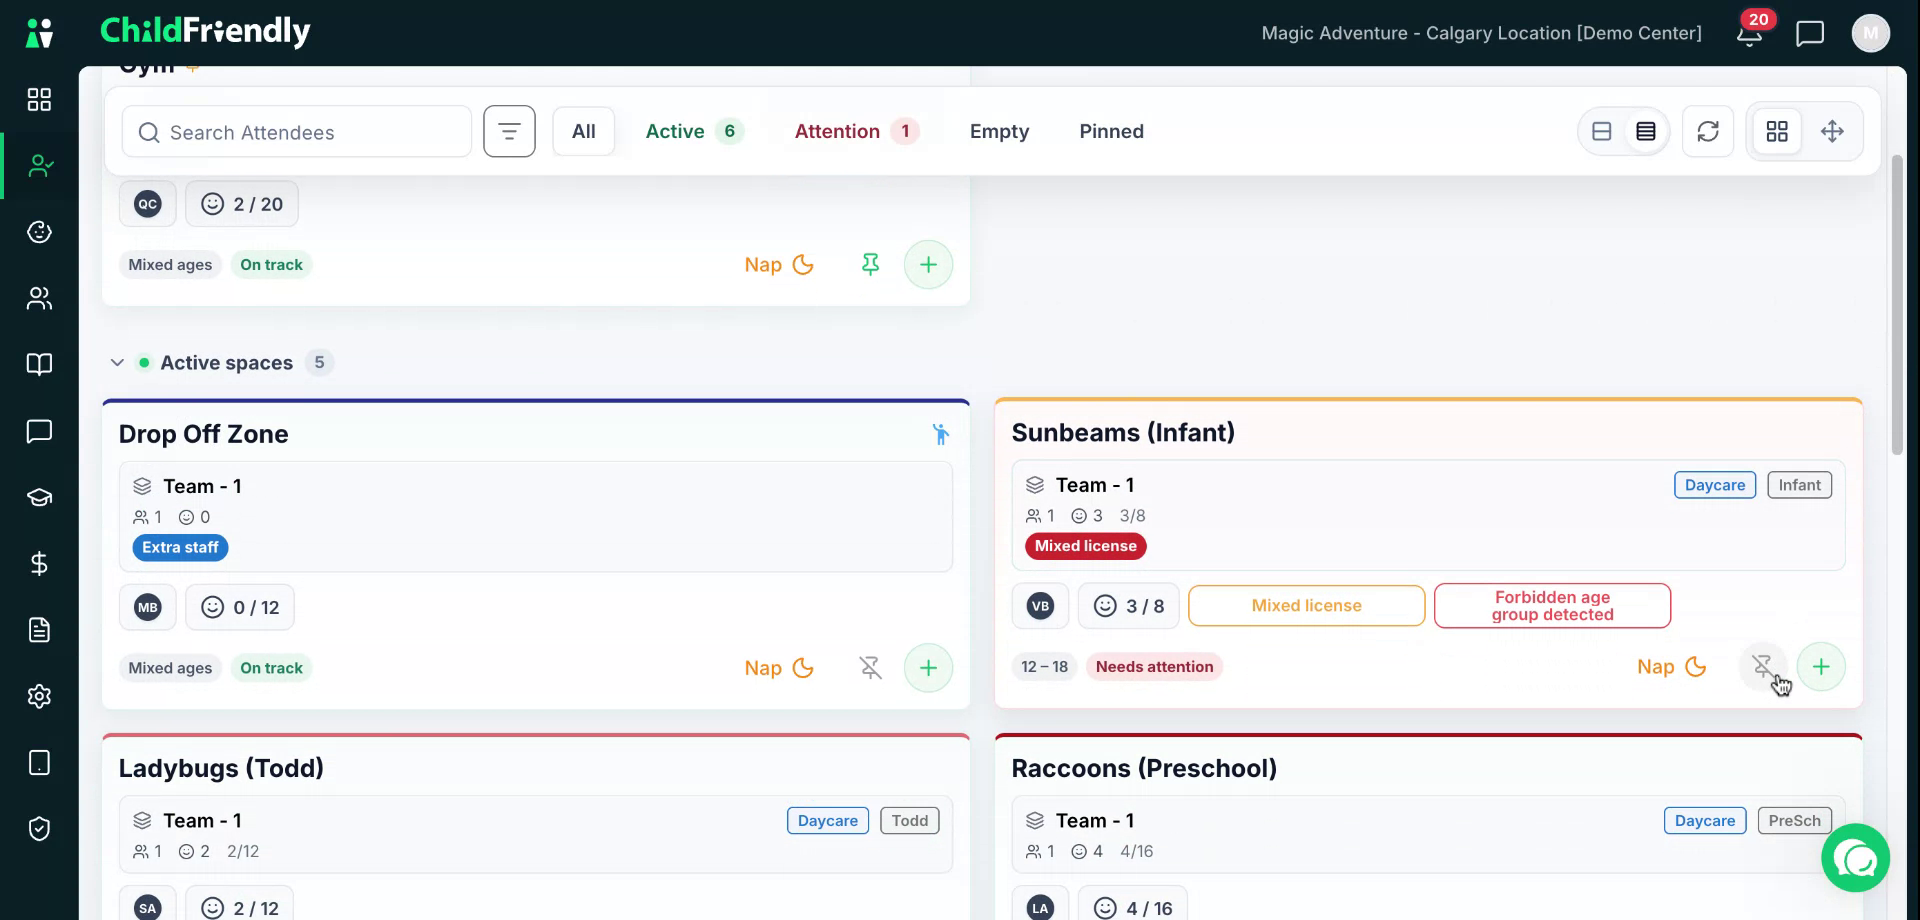
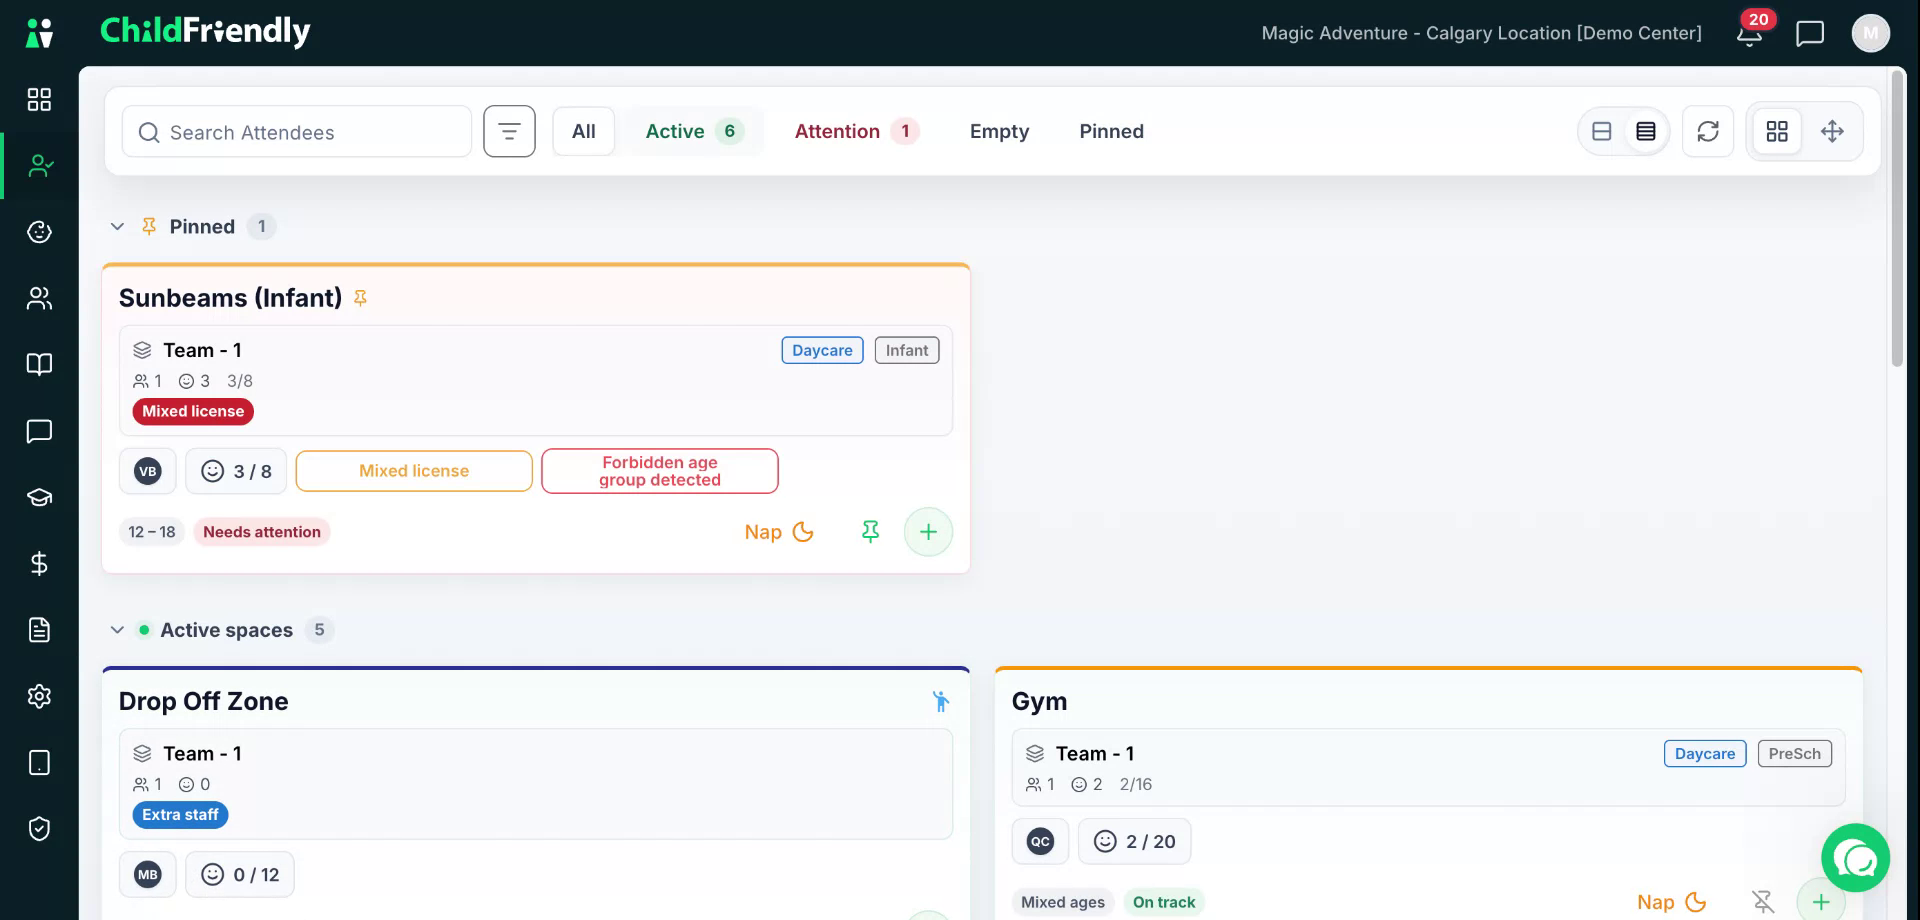
In Grid view, your pinned rooms appear at the top, followed by any rooms that currently have activity. Pinning is useful for frequently used rooms (for example, the Toddler Room and Playground), so you do not have to scroll to find them each time.
To pin a room, click the pin icon at the bottom of the room card.
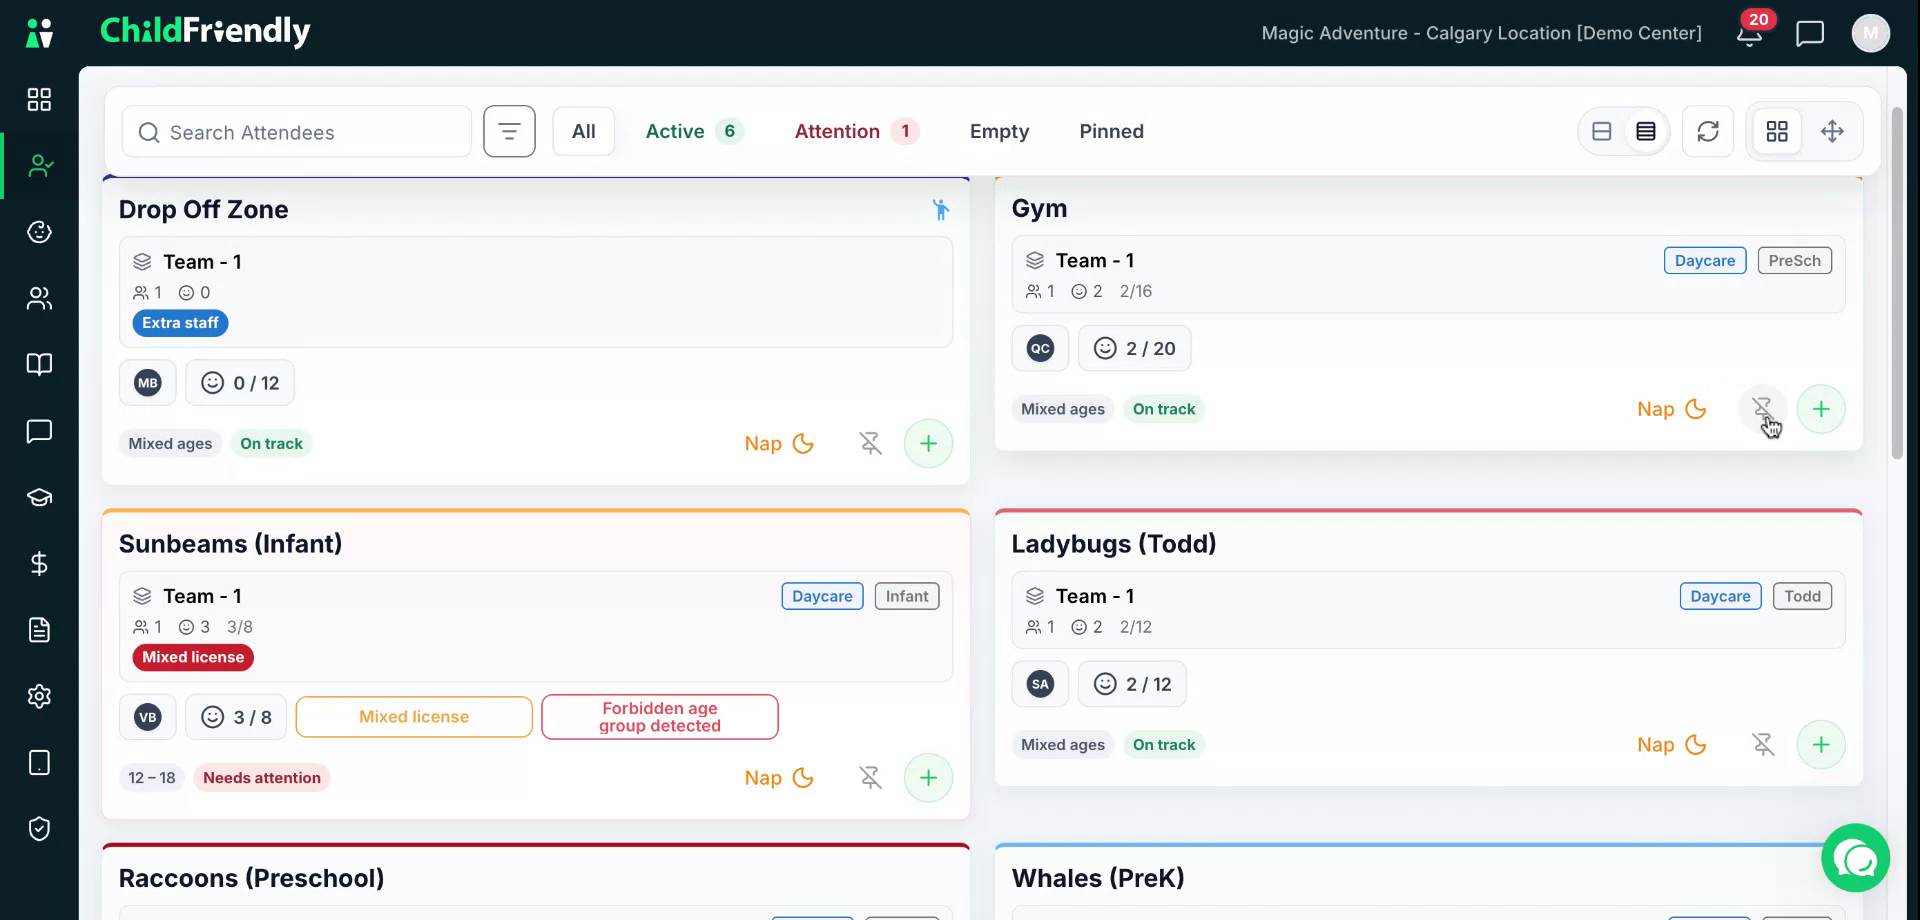
The room will move to the pinned section at the top.
To unpin a room, click the pin icon again, and the room will return to its normal position in the list.
Please note that pinned rooms are specific to each individual user and do not affect other users’ views.
Step 4: Filter Rooms by Activity and Attention
At the top of the Attendance view, select All to see all spaces, whether or not they currently have activity.
To see only spaces with children or staff present, click the Active tab; this displays only rooms/ spaces that currently have staff or students.
To see rooms/spaces that require immediate attention, click the Attention tab.
This view highlights rooms that are out of ratio, have insufficient staff, or have other compliance concerns. Click on a space in this view to see details about the issue.
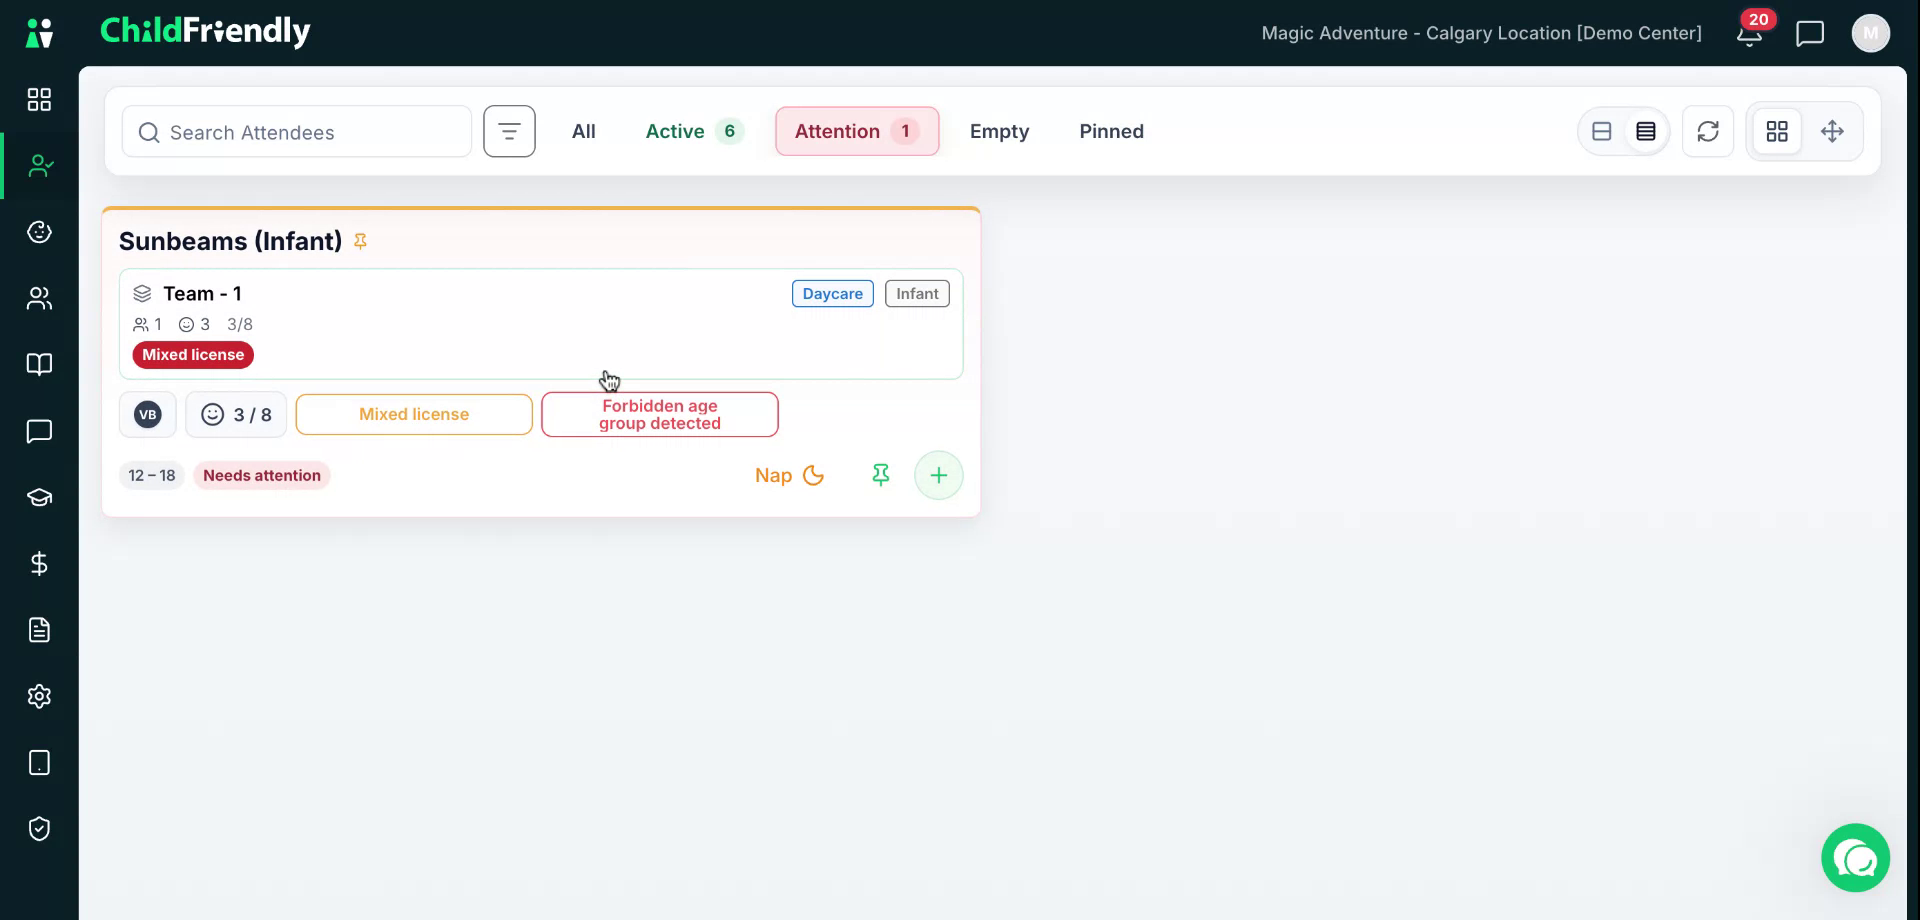
For example, you may see a warning such as “forbidden age group detected,” which must be addressed immediately.
Step 5: Review Room Compliance and Team Details
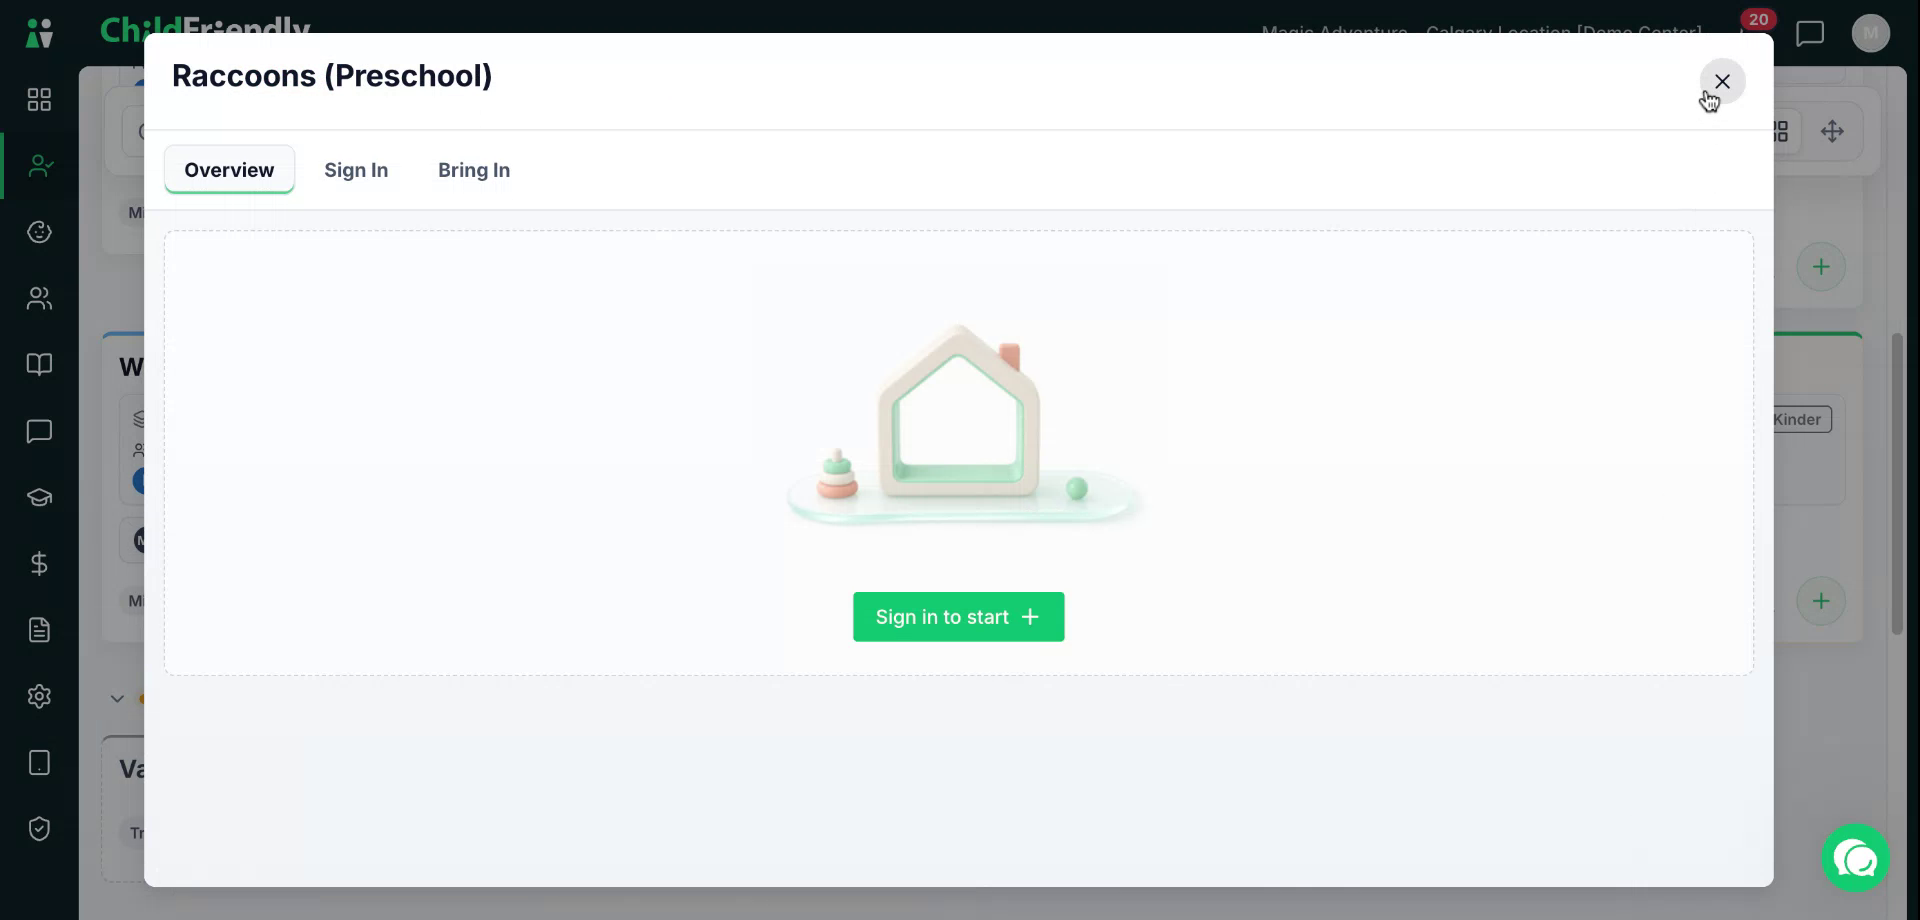
Click into a room/ space to view more information.
In the Overview section, you will see each team, their license type and the ratio being applied based on the children's birthdays that are signed in. Click on a team to view everyone currently in the team/ subgroup.
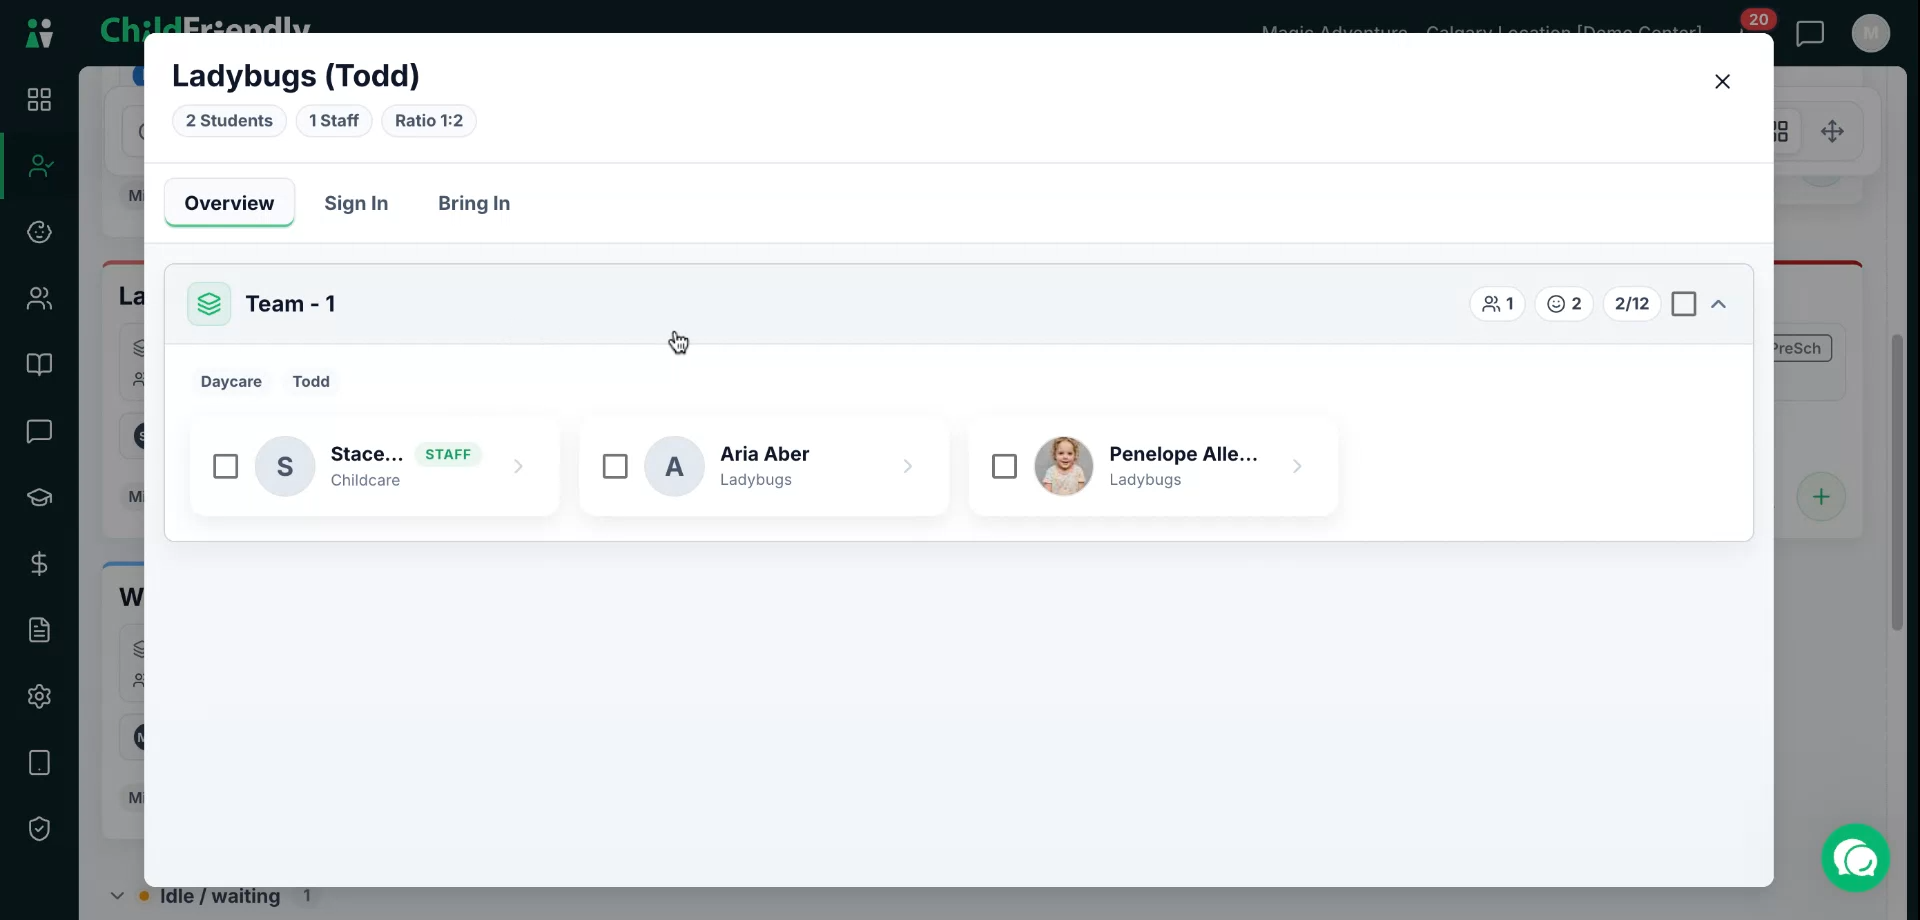
The numbers in the top right of each team represent:
Number of staff in the team
Number of children in the team
Ho wmany children are signed into that team out of the maximum allowed number of children in that team/subgroup at one time
If there is an “extra staff in” indicator (blue waiving icon), it means there are more staff in the room /space than required for the ratio.

Step 6: View Individual Child and Parent Information
Afterer clicking into a room and then team, you can click a child’s name to open their details.

Here you can see important information such as medications, meal restrictions, allergies, and other health or care notes. You can also view basic parent/guardian information, including their status and pickup authorization.
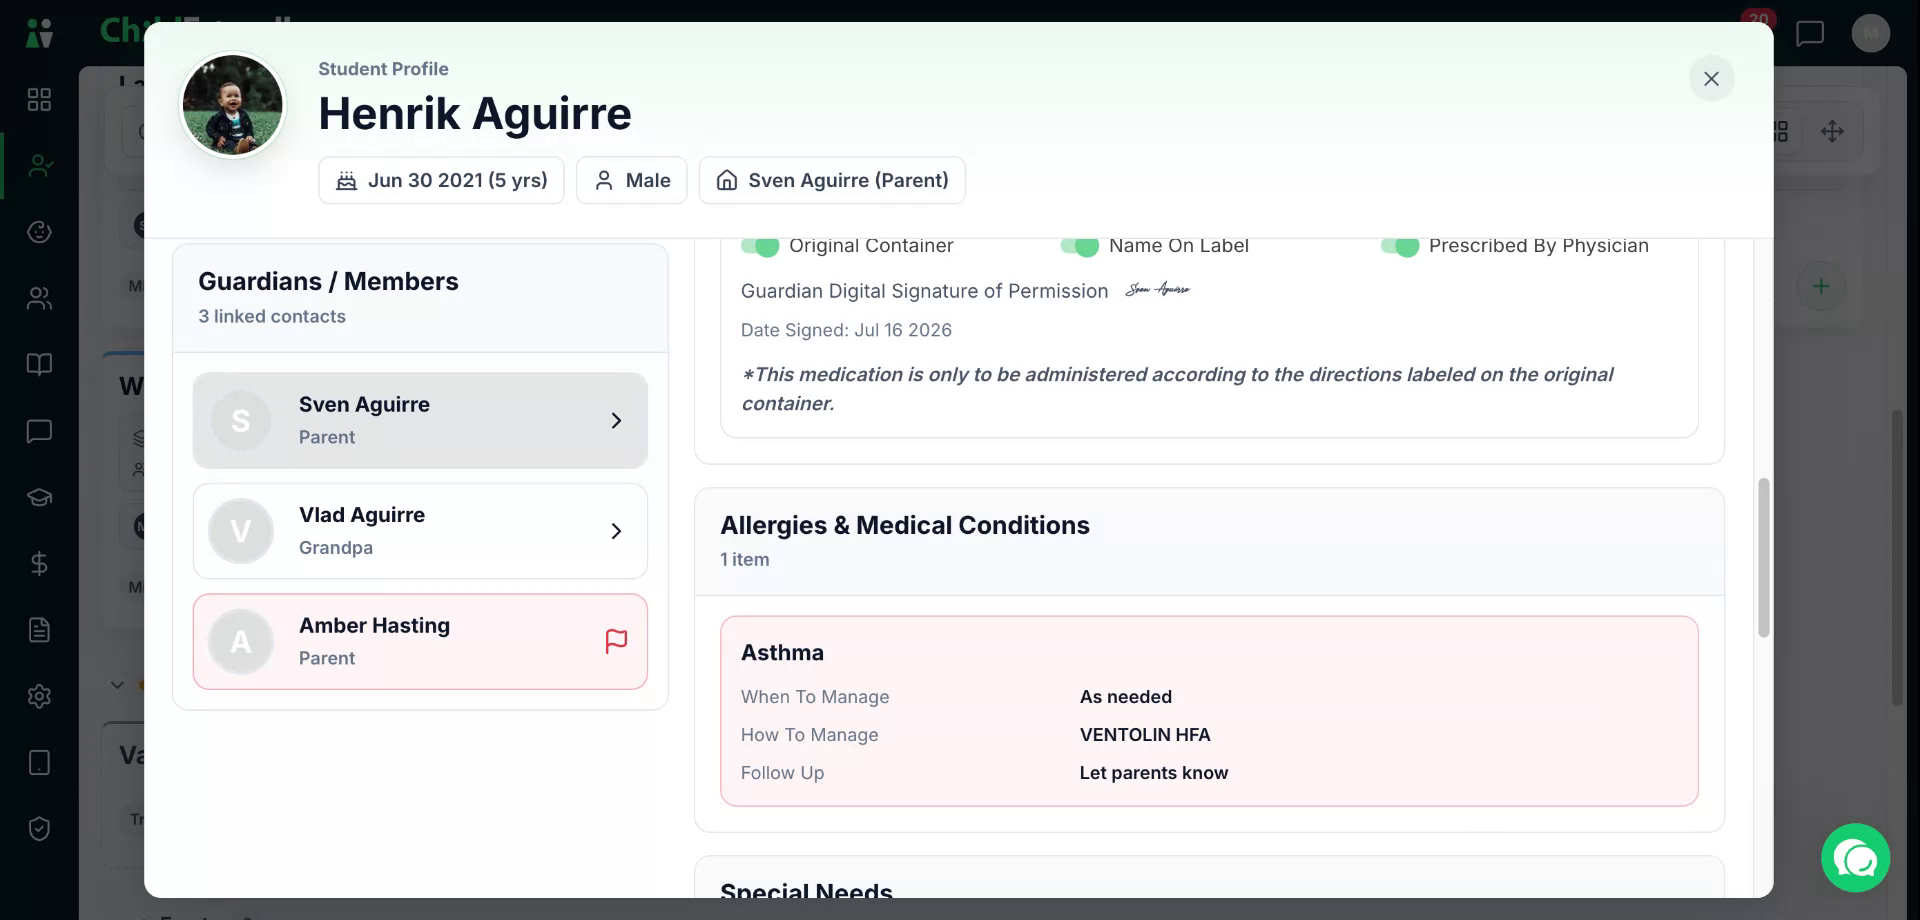
In this example, you can see that one parent is flagged in red.
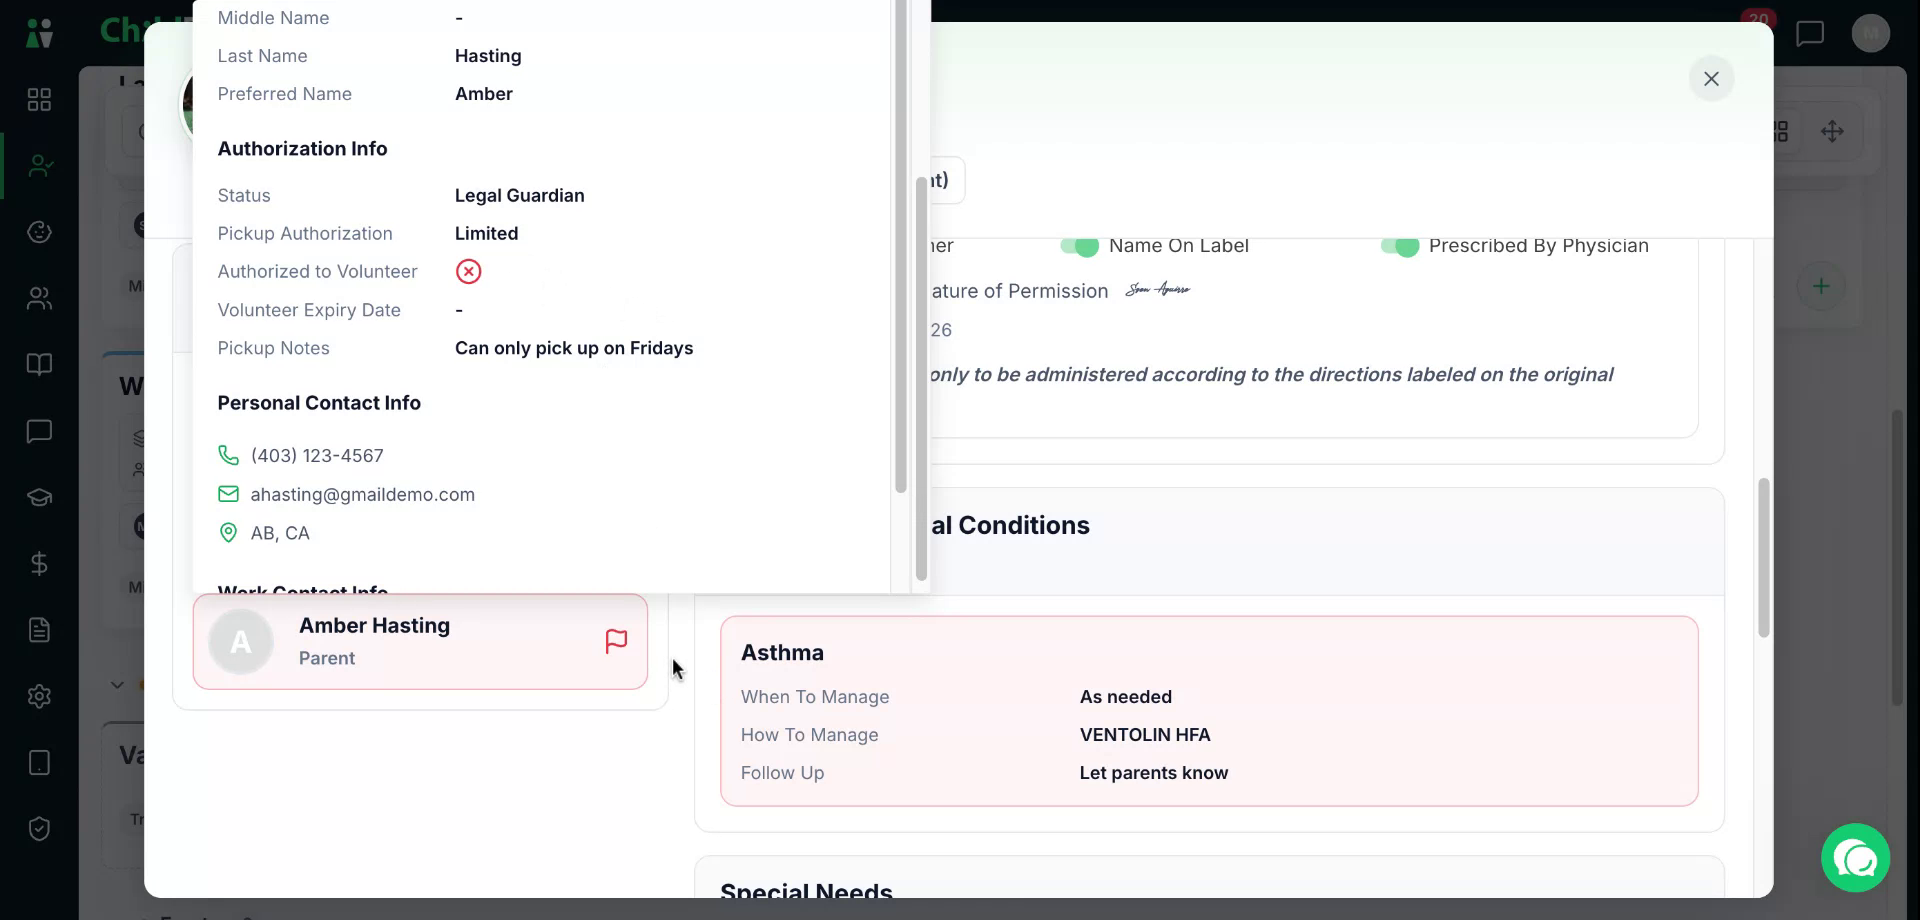
Click the flagged parent to see why they are flagged.
The details will indicate any restrictions, such as “limited pickup access” or a rule like “can only pick up on Fridays.”
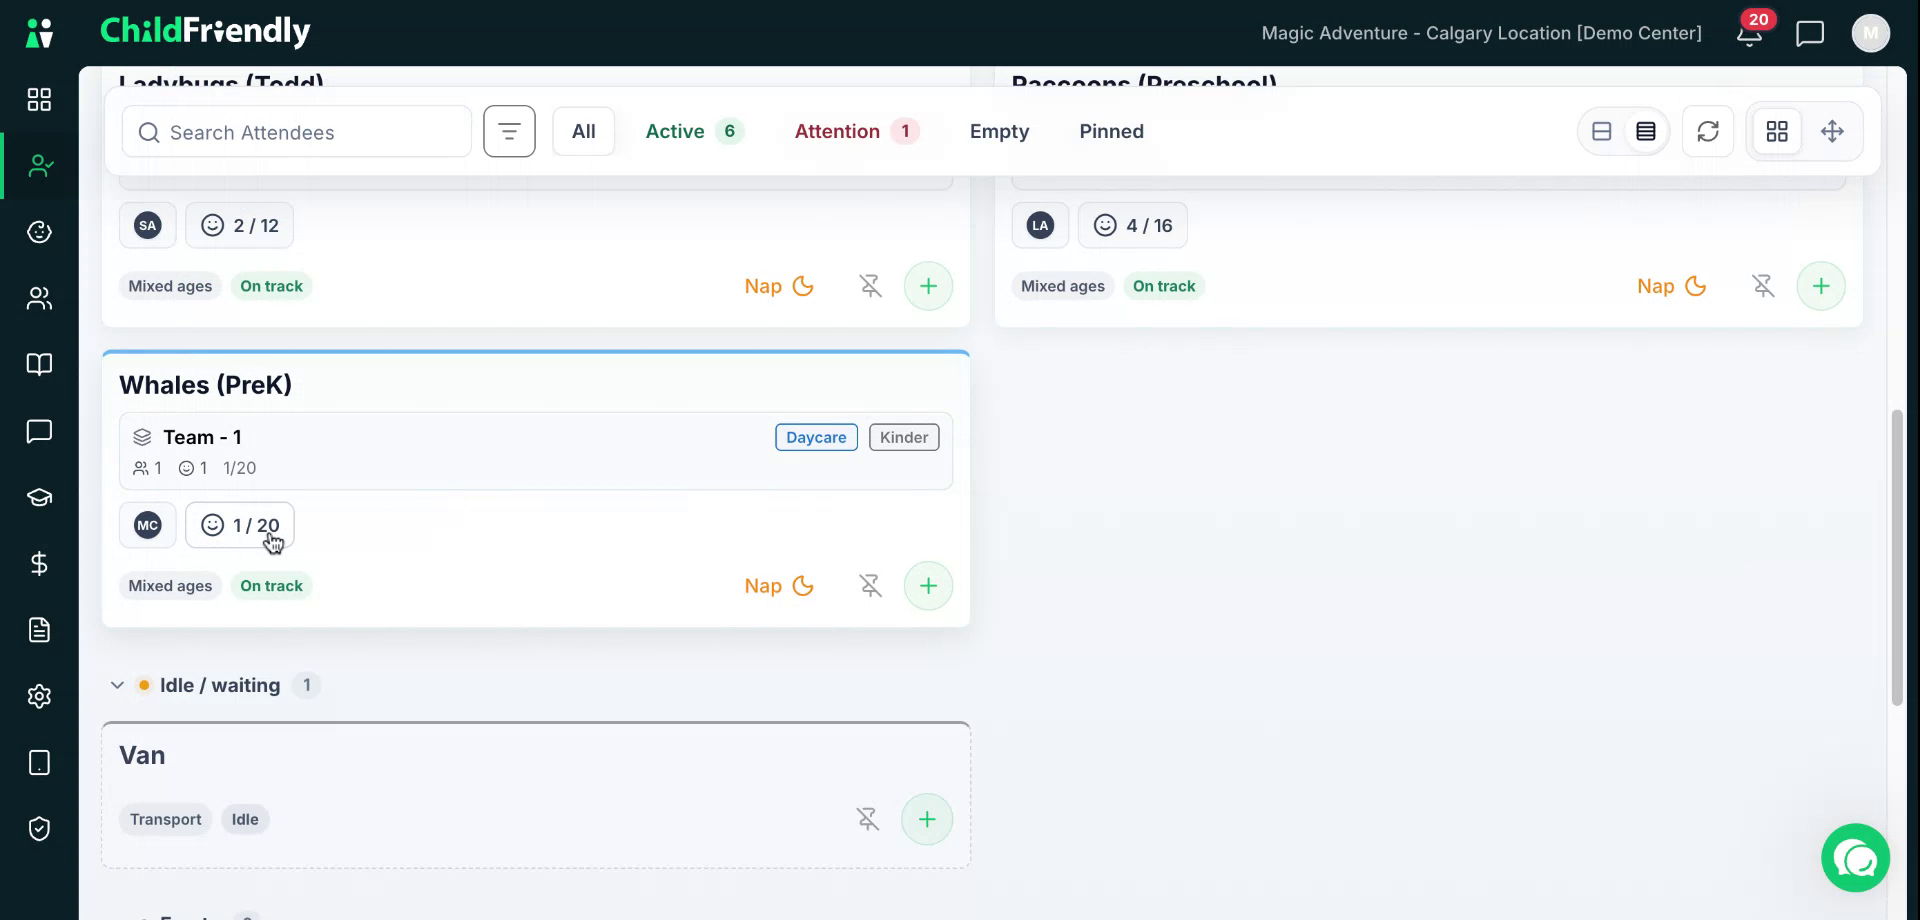
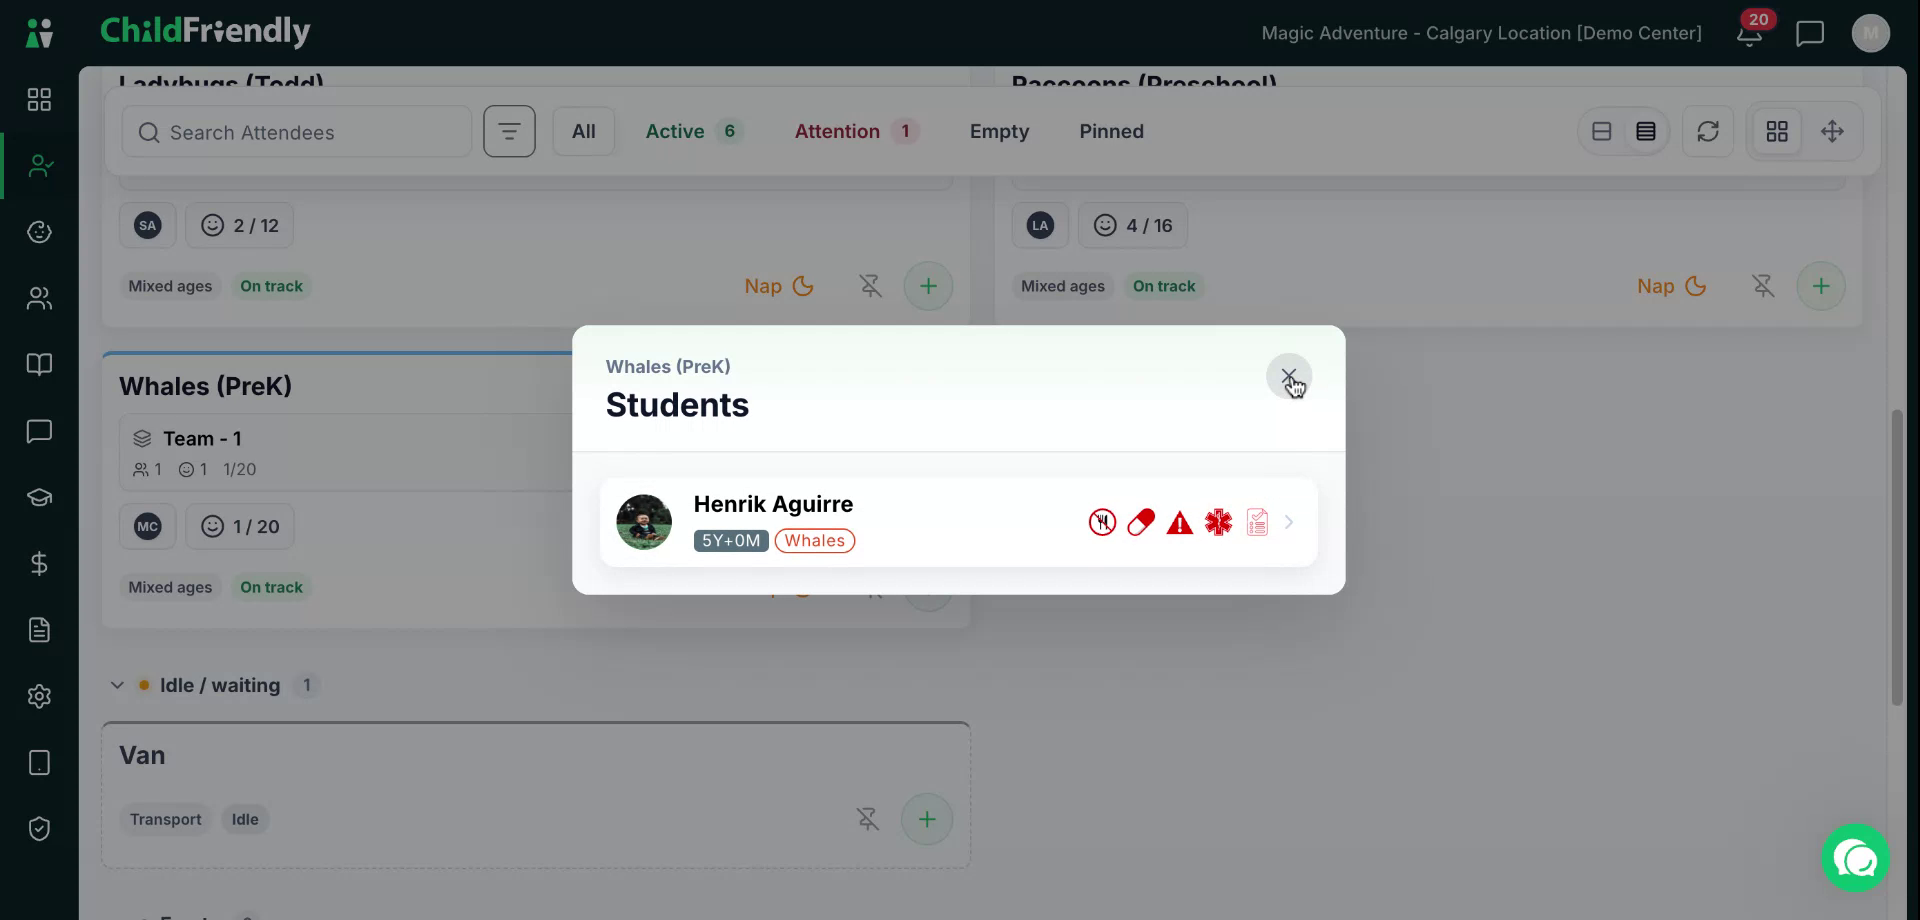
You can also click the team number within a team to quickly review the children in that team.
This opens a snapshot of the children, including symbols next to each name that indicate meal restrictions, medications, allergies, and other flags.
Refer to the symbol legend in the specific symbols training for detailed meanings.
Step 7: Create a Team and Sign In Staff
When signing someone in at the beginning of the day and no team yet exists in that room, you must first create a team. Click the green plus icon to add a new team.
Remember, a team is simply a subgrouping within a room or space. Teams are how you group children within that space for supervision purposes, and they are governed by your licensing max group sizes.
You can have more than one subgroup or team within a space at the same time, as long as the staff and maximum number of children in each team follow your licensing regulations. For instance, on the playground, you might have a toddler team and a preschool team—each with their own separate children and supervising staff—sharing the space simultaneously.
If licensing comes to inspect, they don't want to see all the children mixed together. Instead, they will want to see exactly which children are being supervised by which staff members, and that the supervision within each subgroup complies with maximum group size requirements.
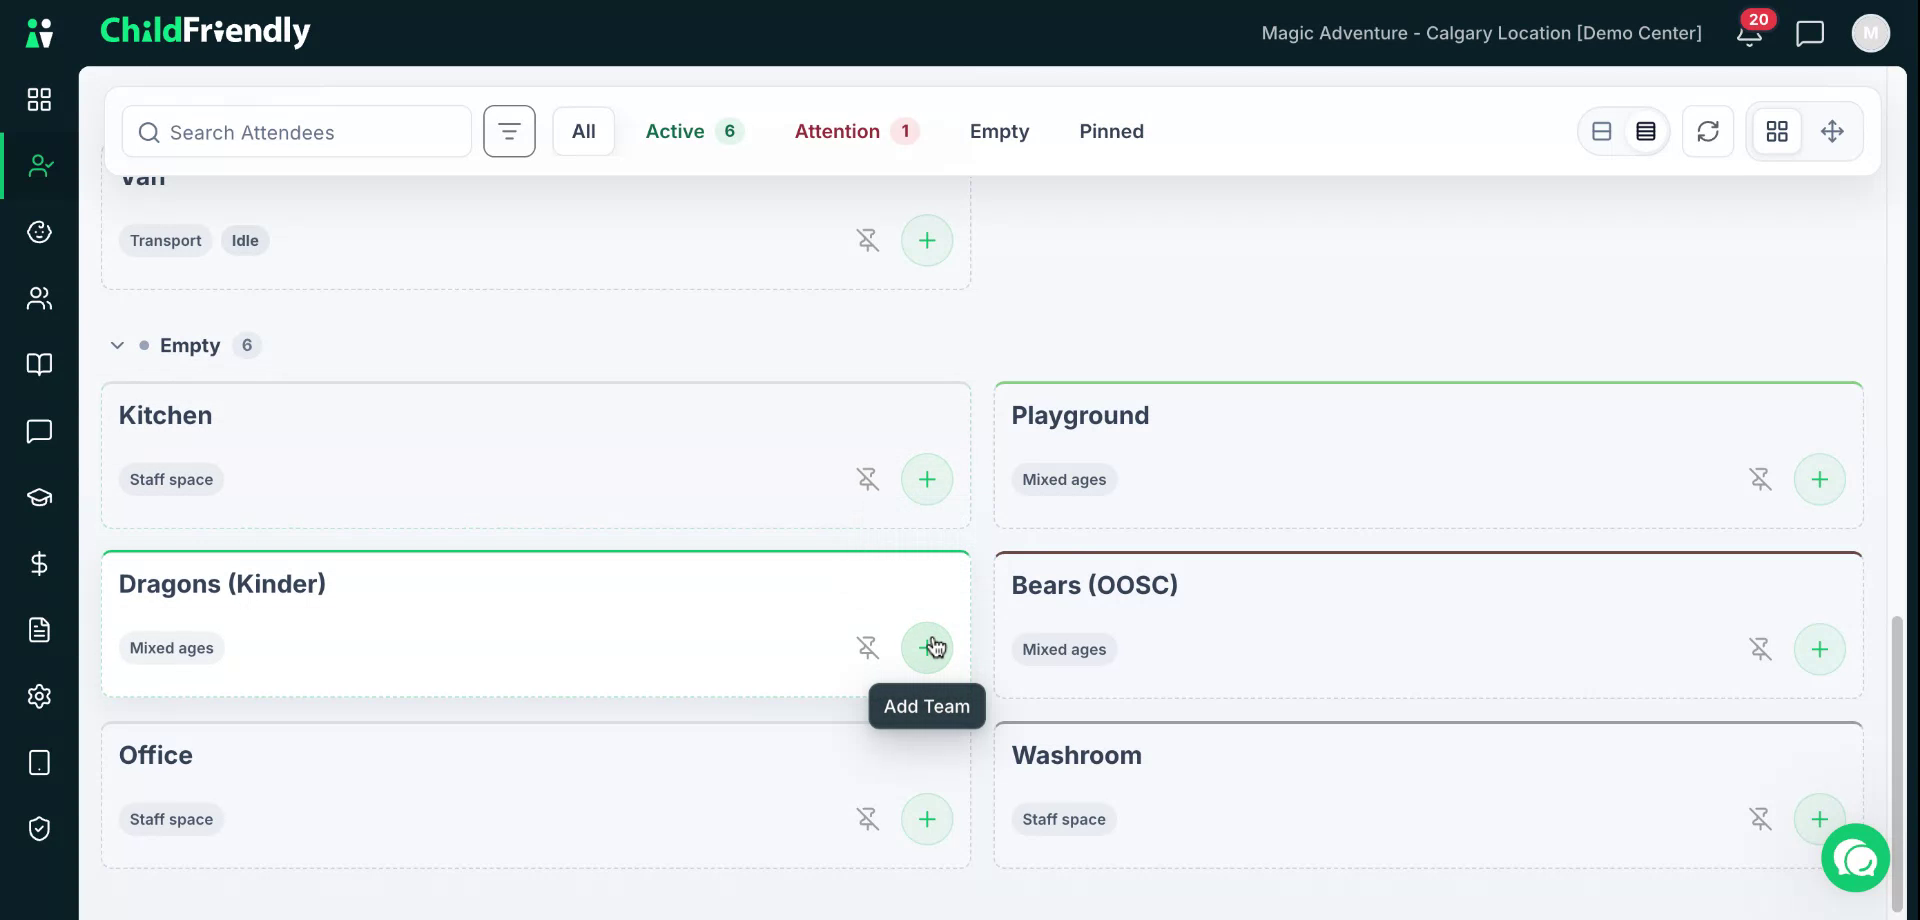
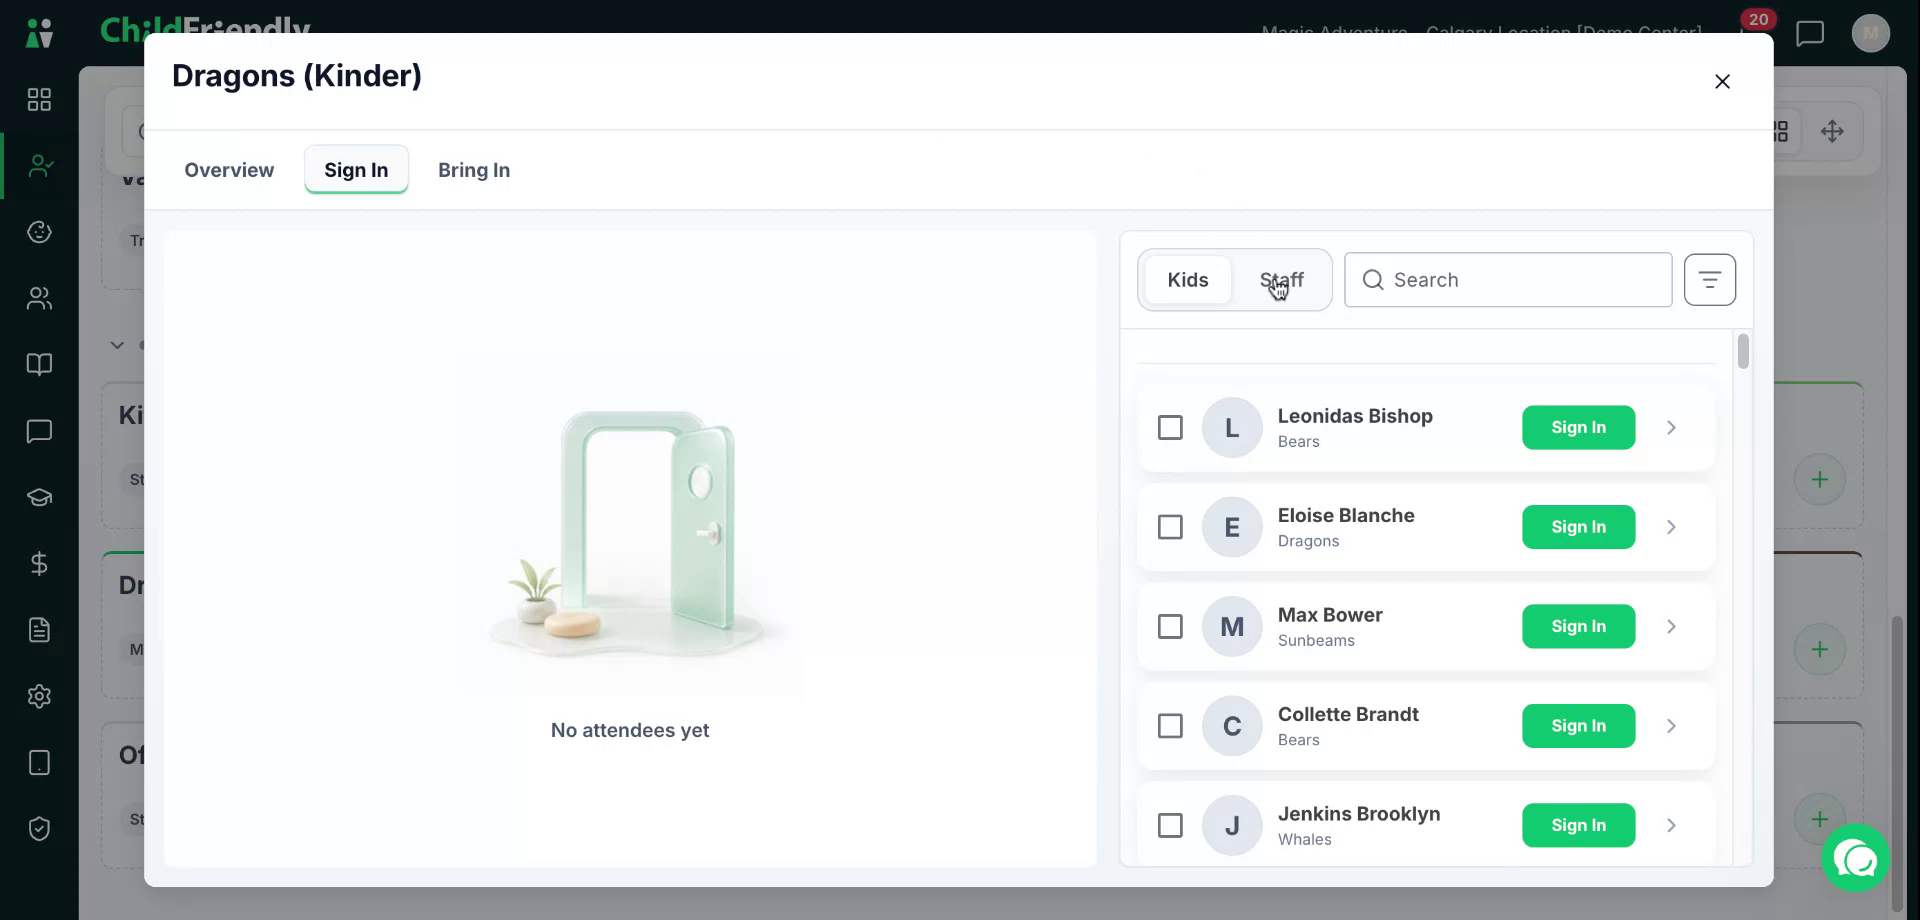
In the sign-in window, at the top, select either Kids or Staff as appropriate.
If signing in a staff member, verify that the default task is correct for that room.
Default tasks can be set for each room in the Setup module. If you need to change the staff member’s task, choose the appropriate task from the list.
Remember, tasks track staff hours for payroll and grant reporting, such as wage top-ups for specific roles. For instance, in some states or provinces, staff receive additional pay per hour for direct childcare duties, but not for time spent working in the kitchen. Similarly, staff might be paid different hourly rates for transportation versus childcare. For this reason, task tracking can be customized in your Setup module to match your center's specific needs.
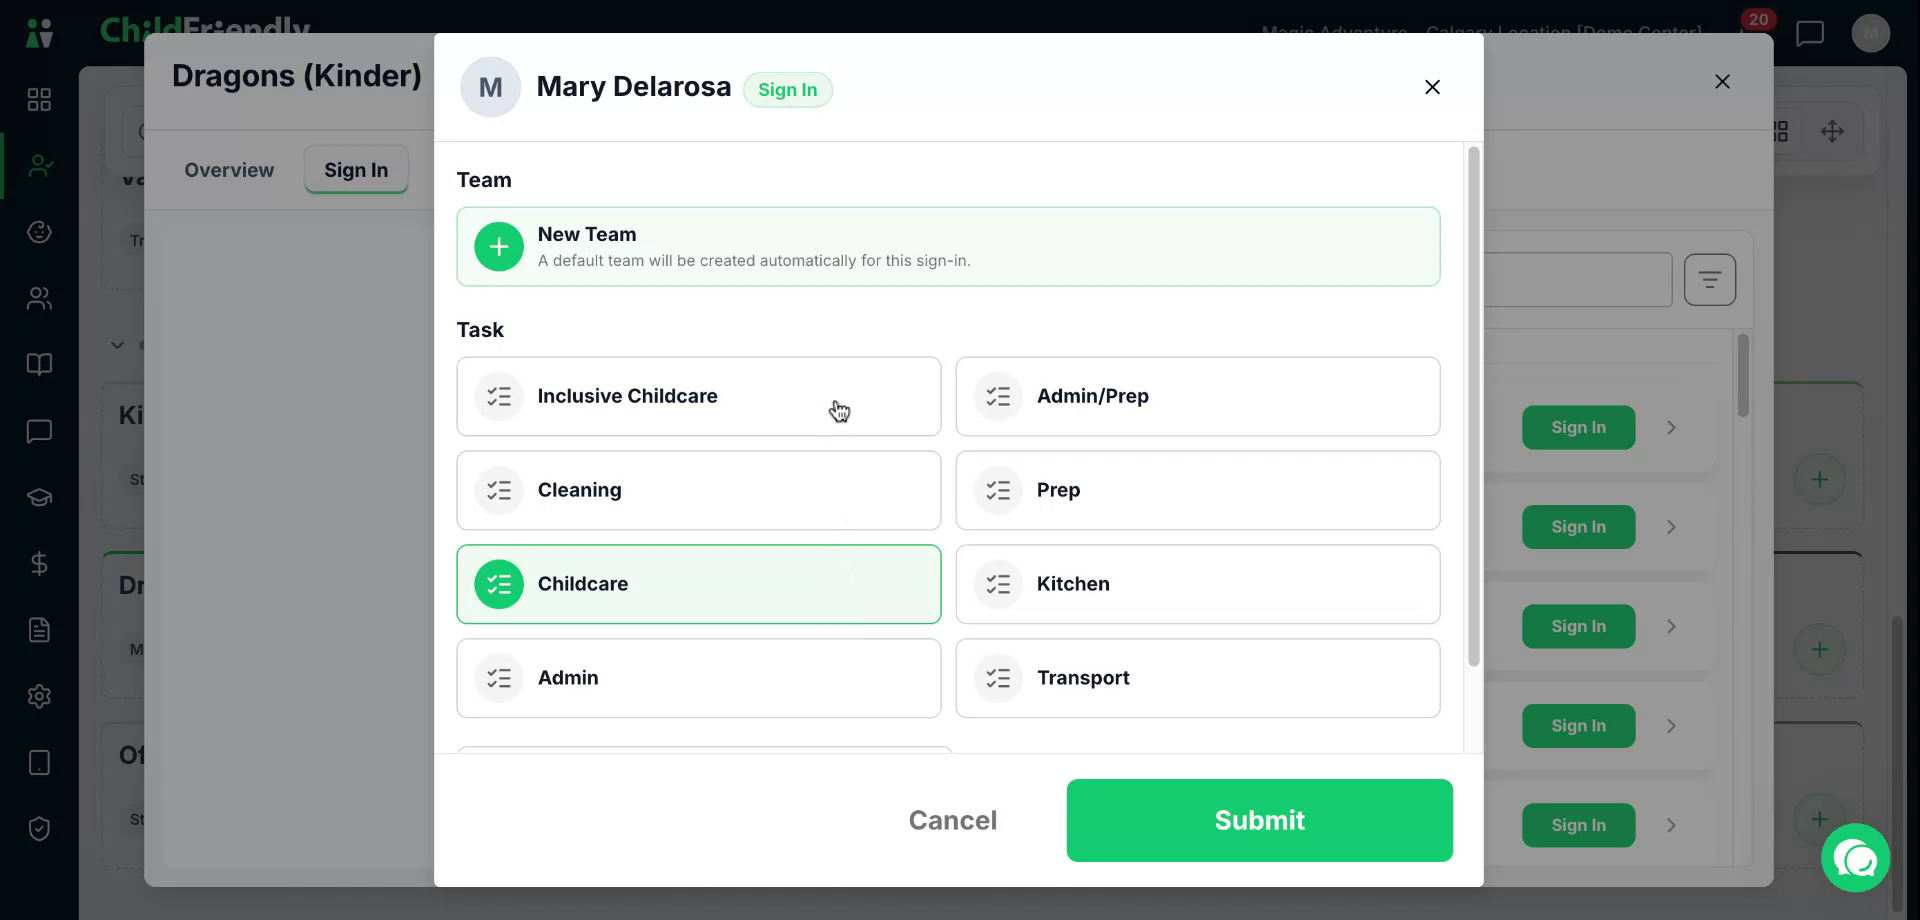
Confirm that the sign-in time is accurate, then click Submit to sign the staff member in.
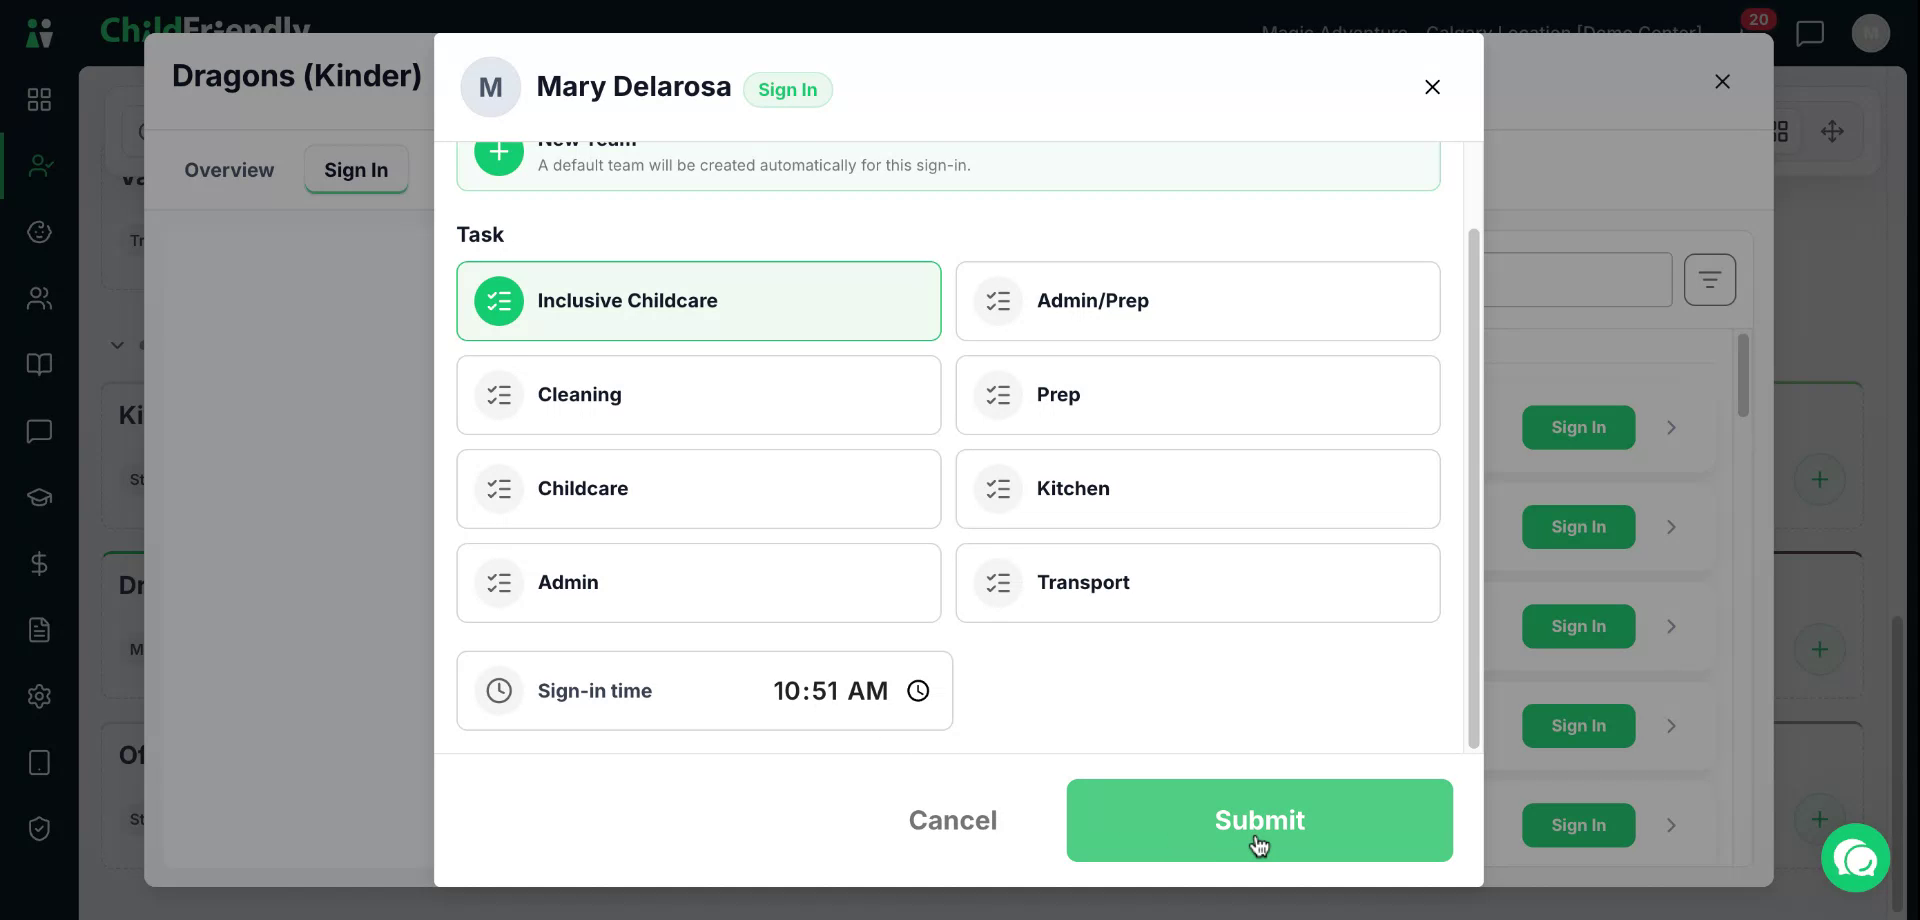
Continue adding staff to the room as needed.
Step 8: Sign In Children to a Room
To sign in a child, locate the child or children you wish to sign in from the sign-in window or list.
You can filter the list by room (for example, “Dragons”) to narrow the results.
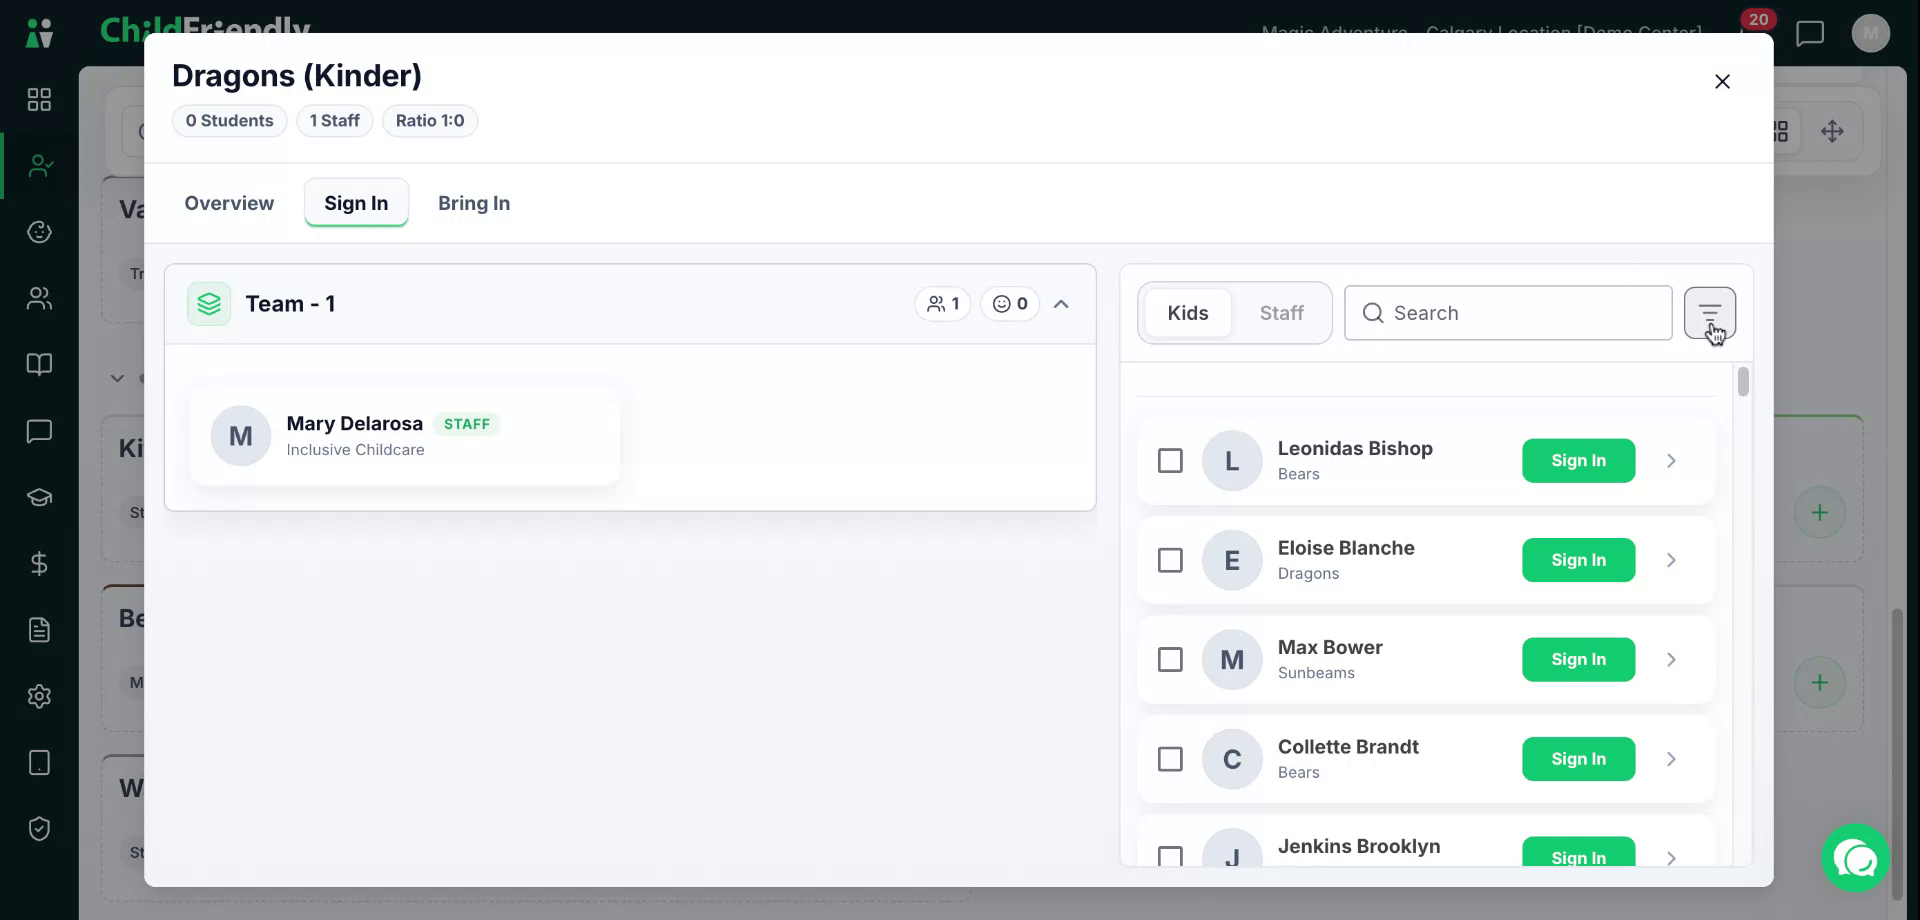
Alternatively, use the search field to find a specific child by name.
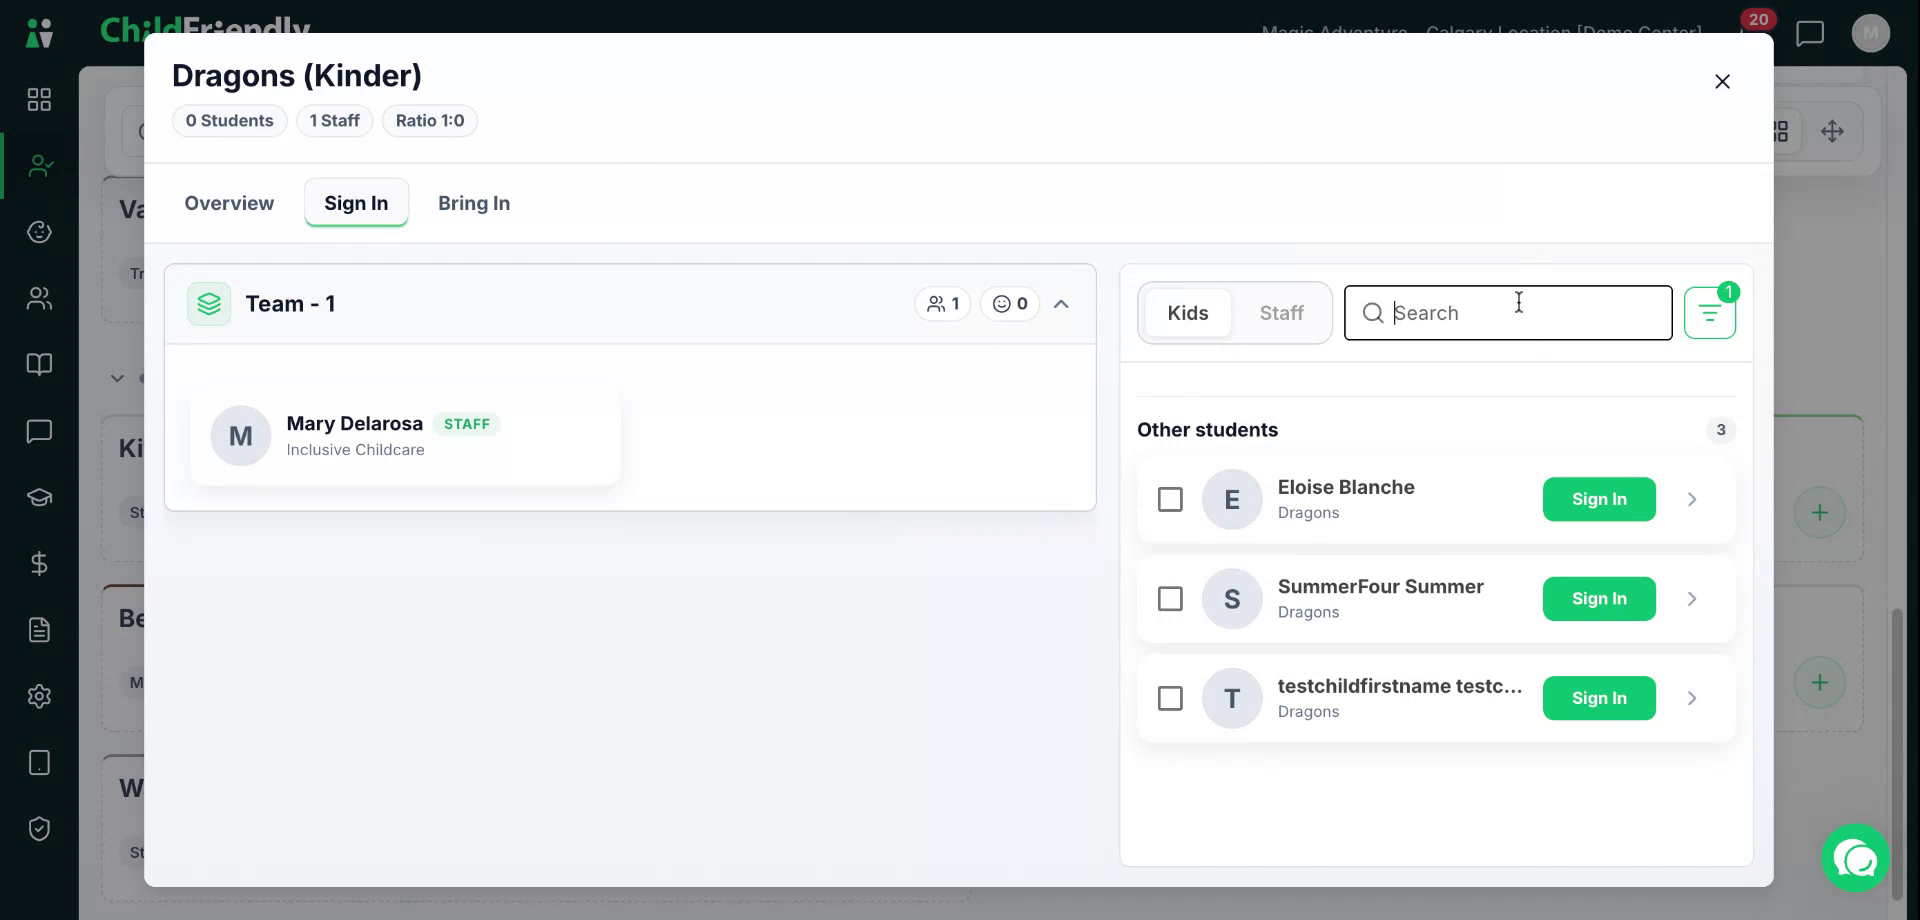
You may select multiple children at once if needed.
After selecting the children, click Sign In.
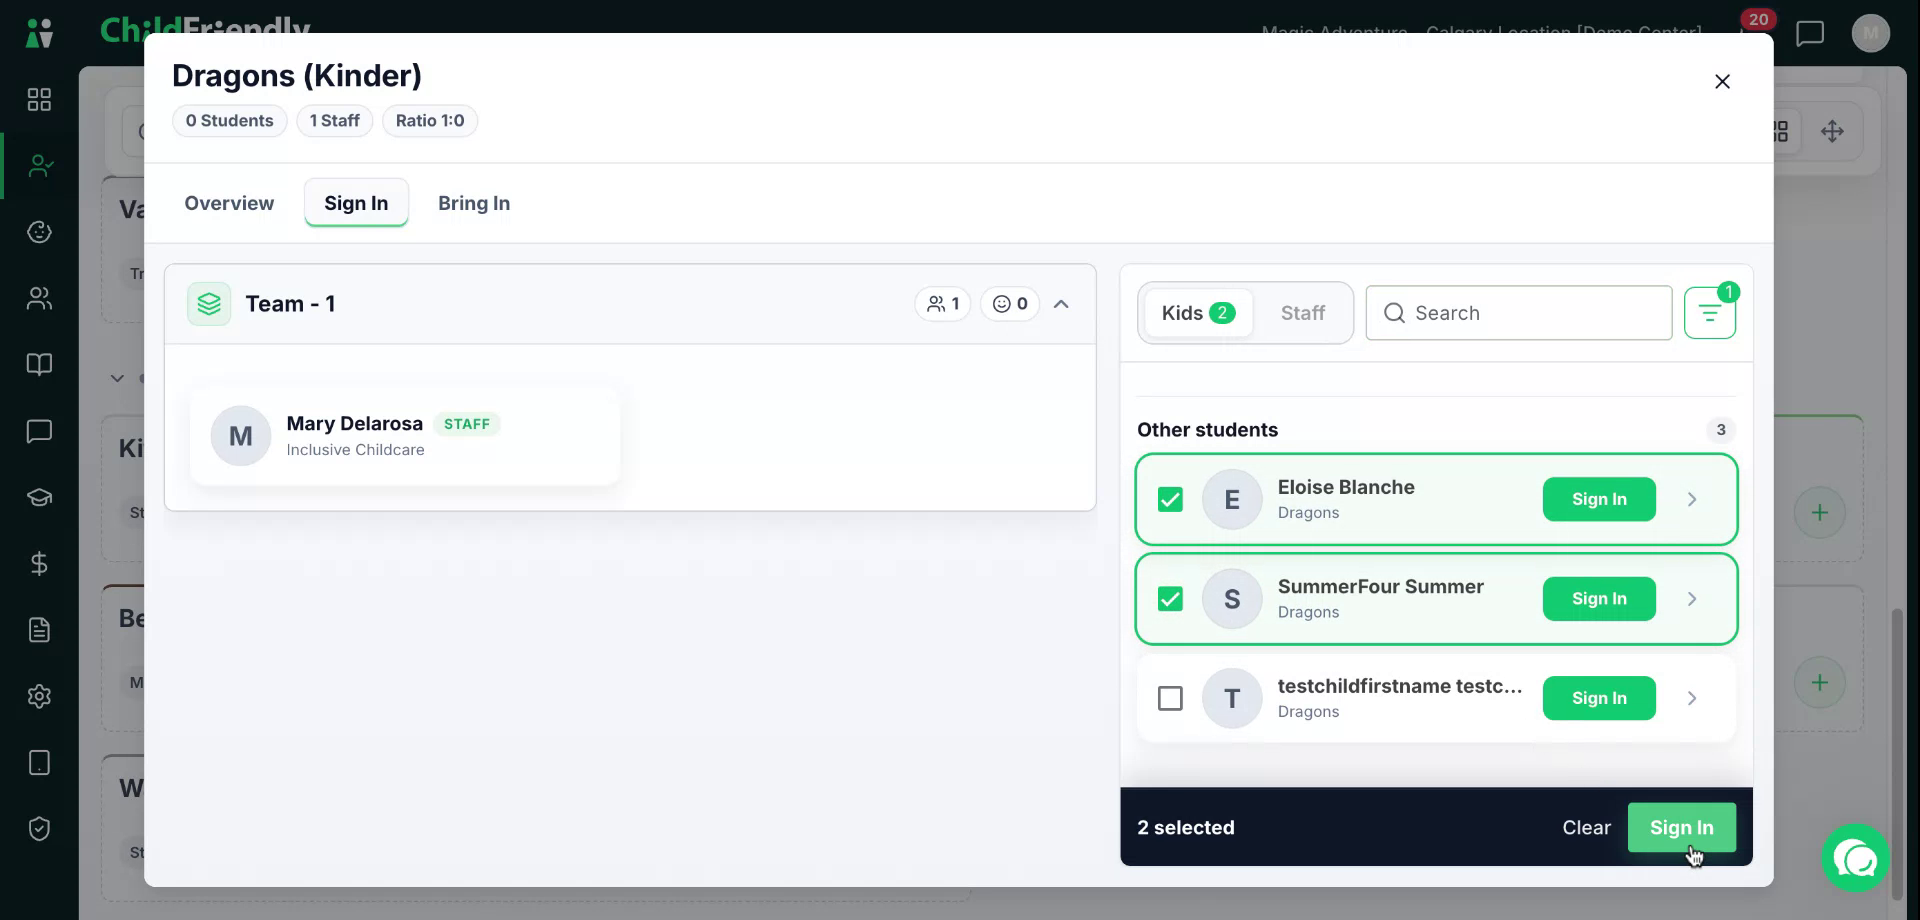
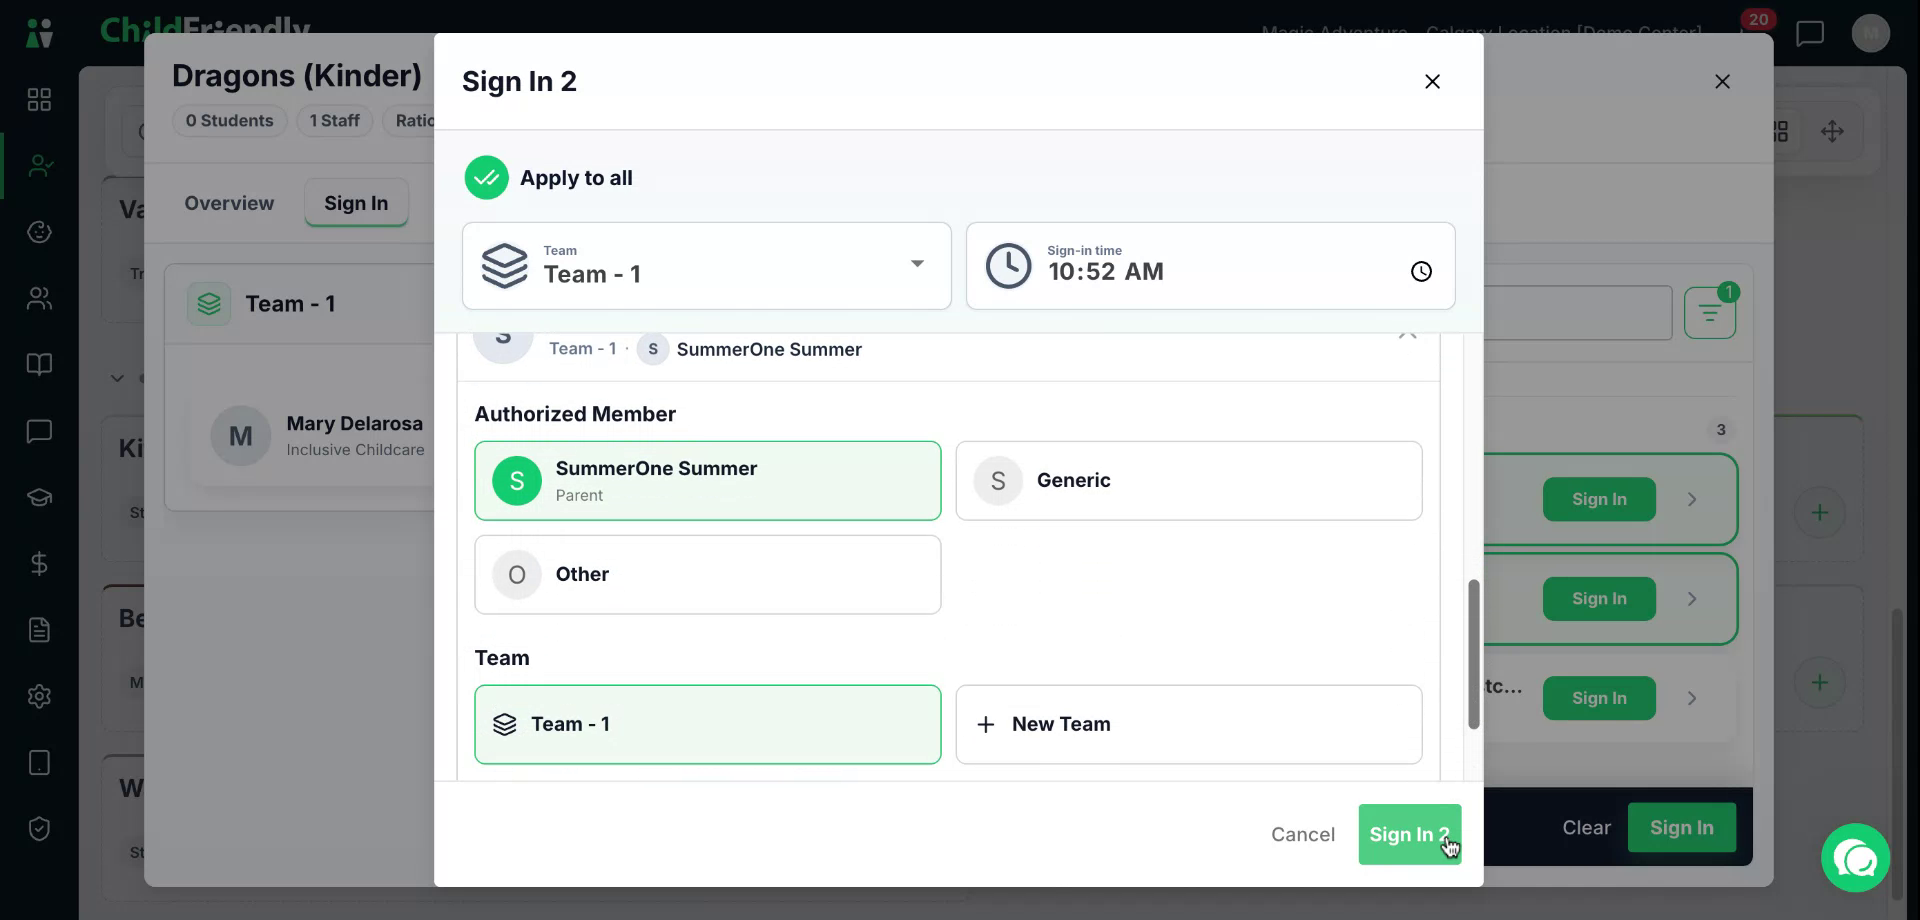
Use the dropdown arrow to choose the correct parent or family member who is dropping the child off.
Once selected, click Sign In to complete the process.
Step 9: Move Children or Teams Between Spaces (Option 1: Move from Current Space)
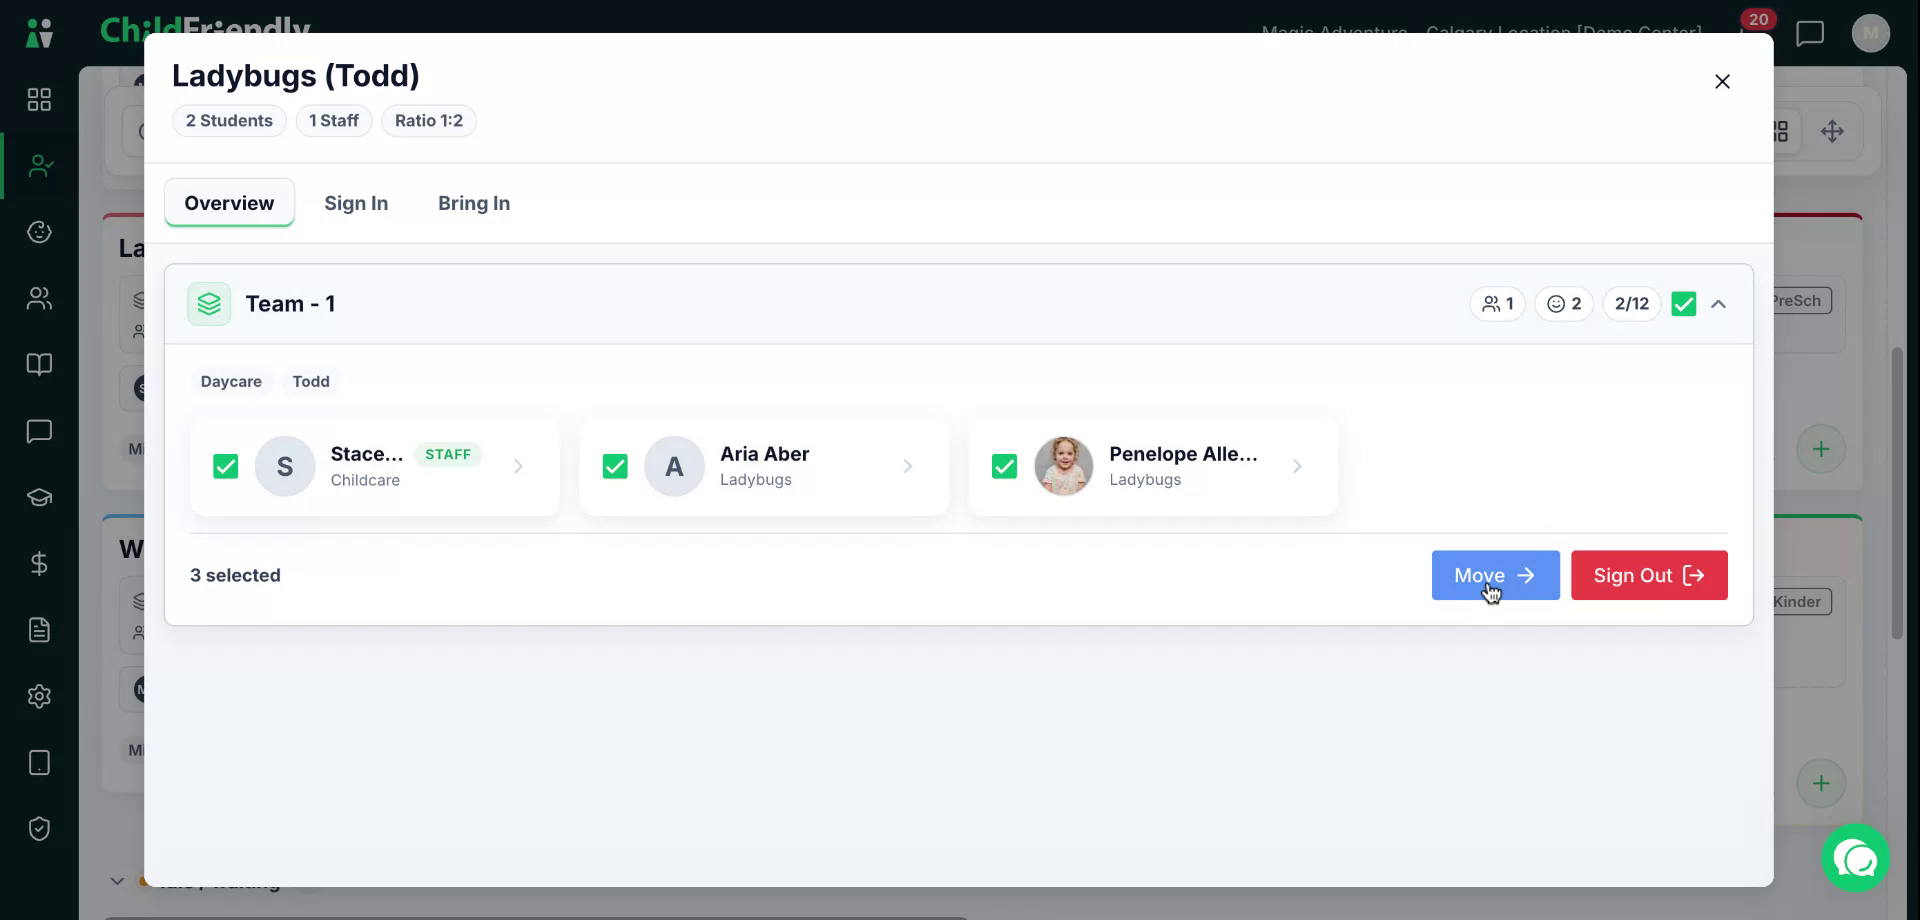
To move children or entire teams to another space, first click into the room containing the team or children you want to move.
Select each child you wish to move individually, or select the entire team by clicking the square “Select All” box for that team.
Then click Move.
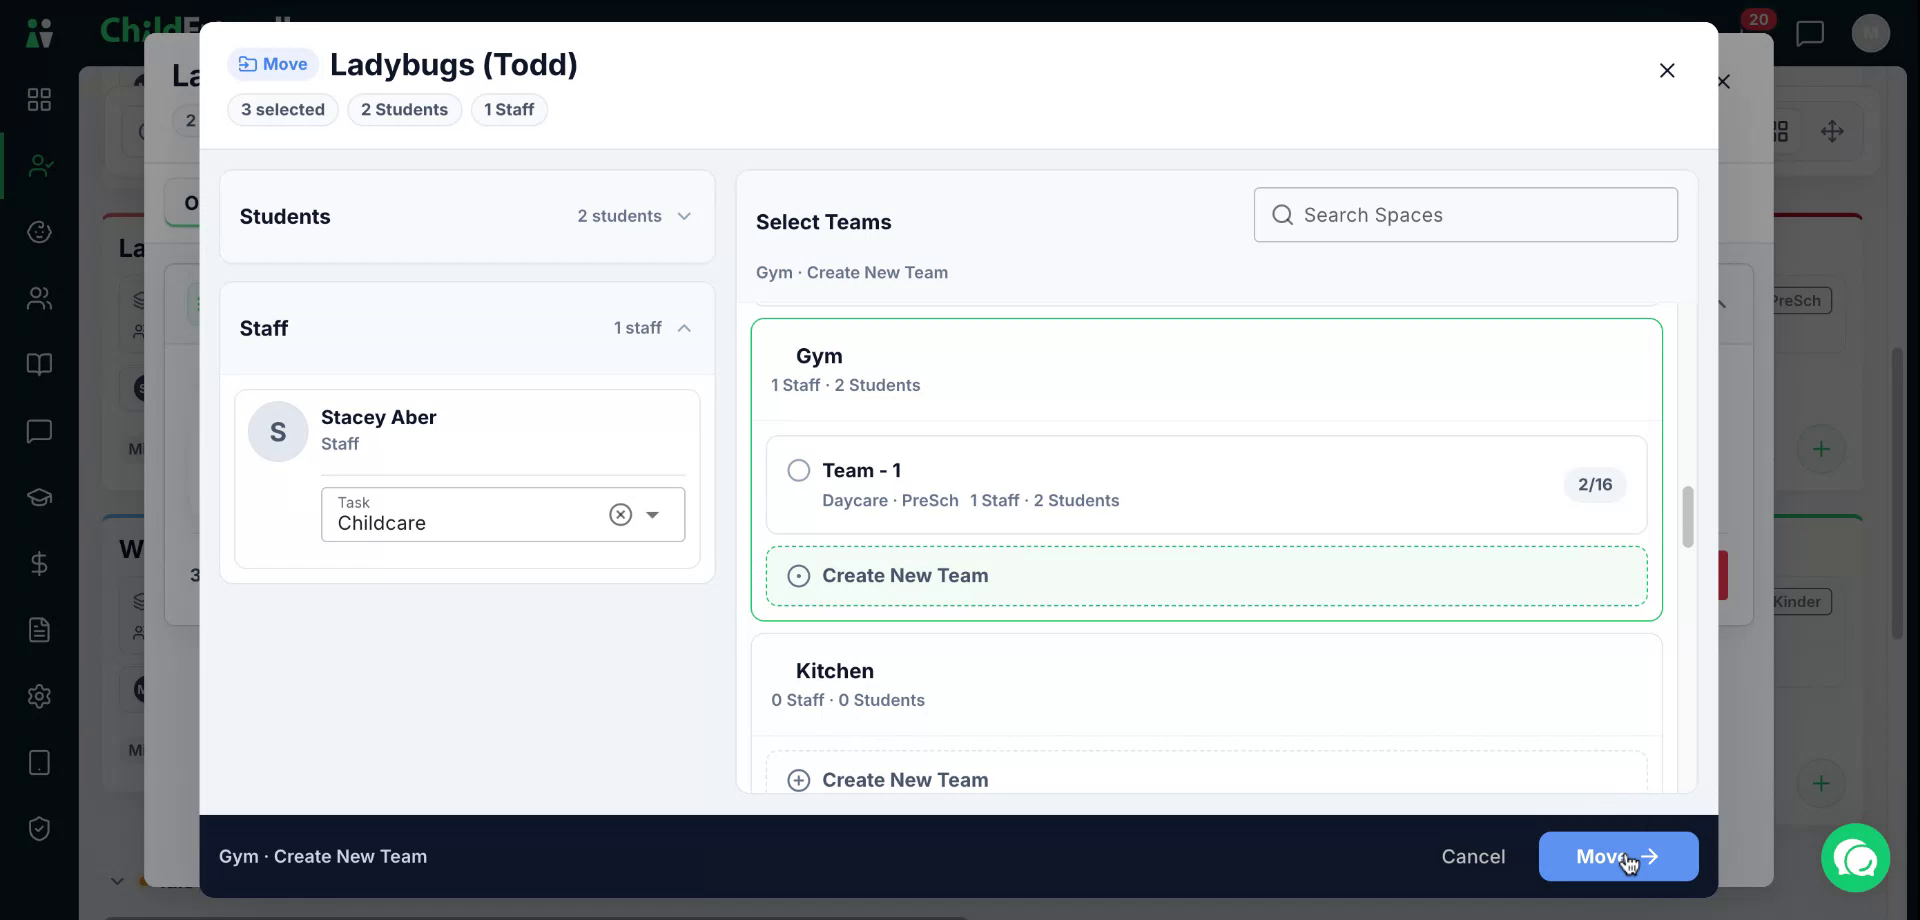
Choose the destination space where you want to move them. You can either create a new team in that space or add them to an existing team. In this example, create a new team and then click Move to confirm.
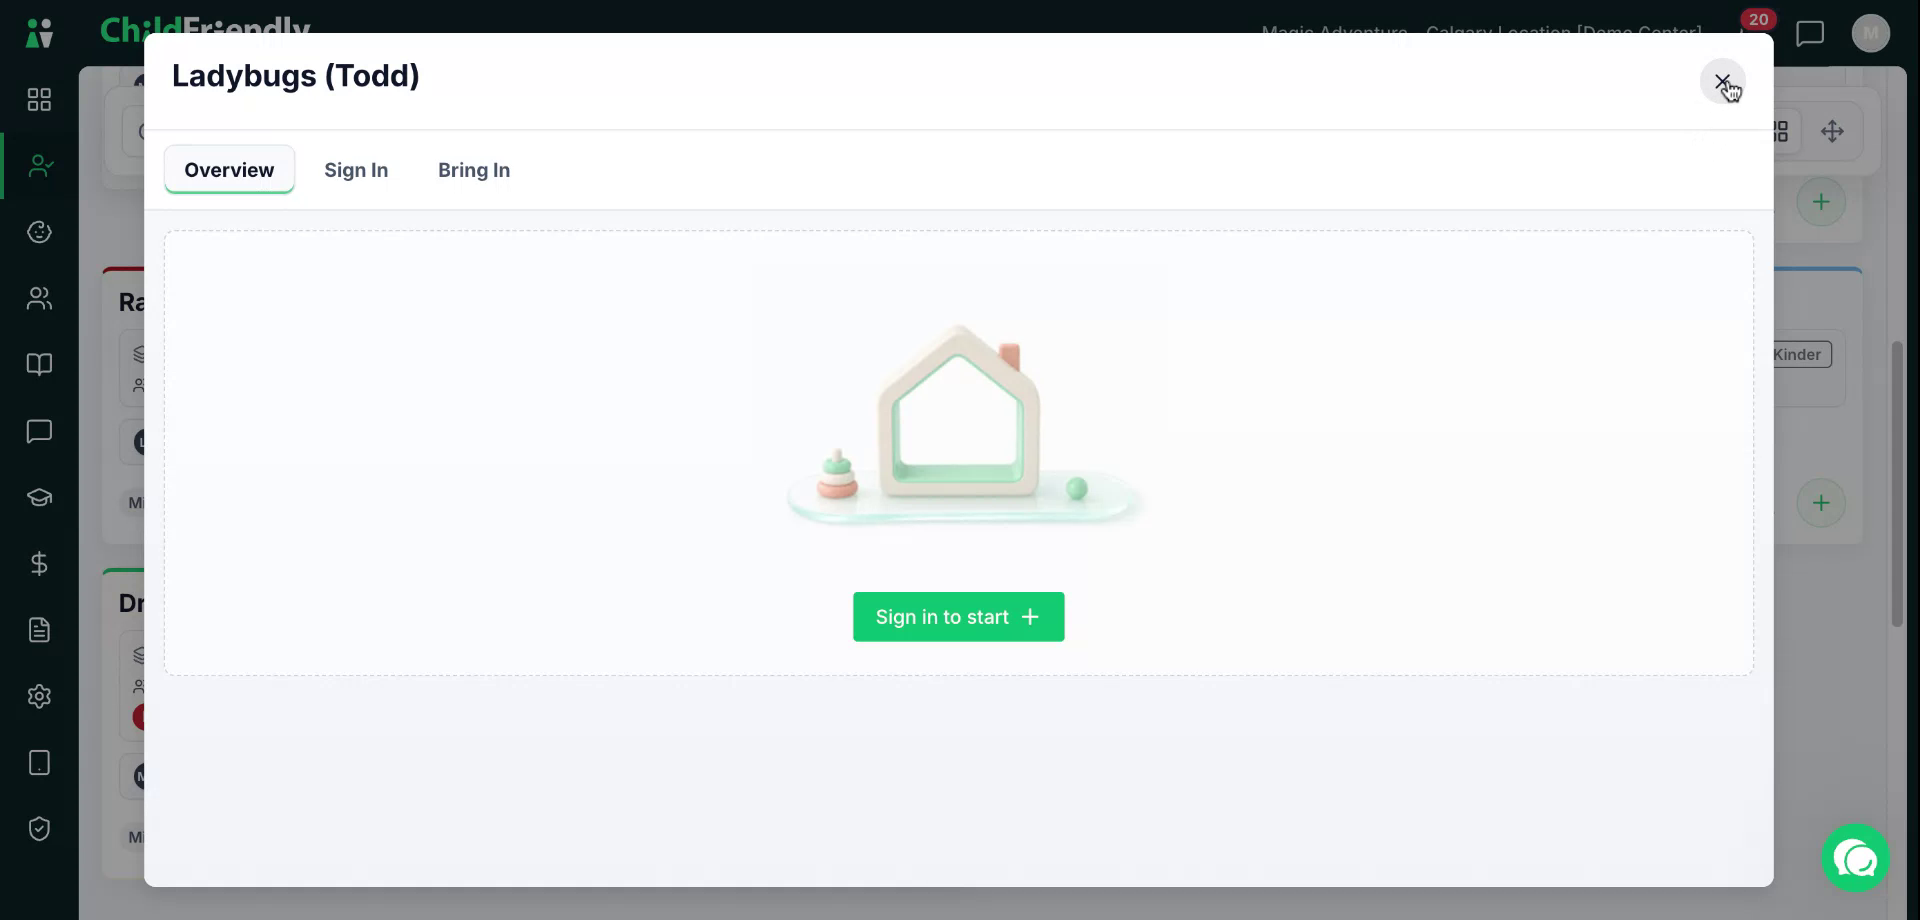
The original space will now show no activity.
The new space will show the moved children/team as active.
Step 10: Move Children or Teams Between Spaces (Option 2: Bring In to New Space)
The second option for moving children is to start from the destination space. Click directly into the space where you want to bring children or a team.
Click the Bring In button.
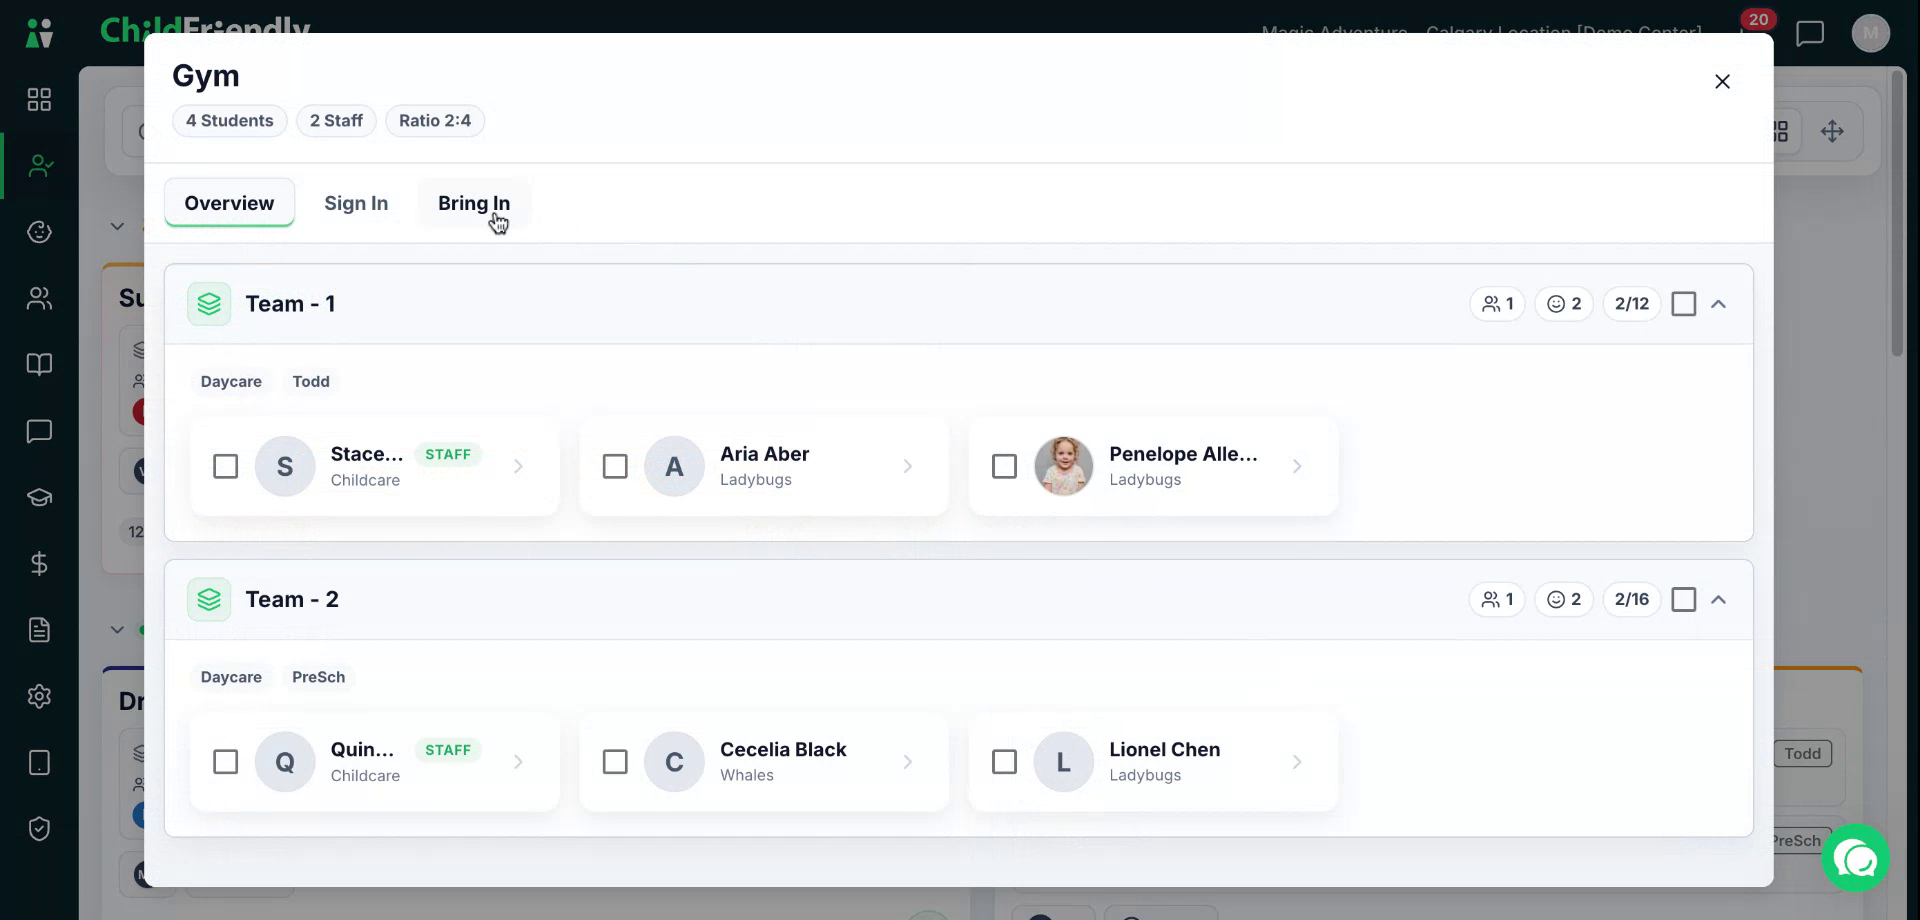
From the list, select the child or team you want to move into this space.
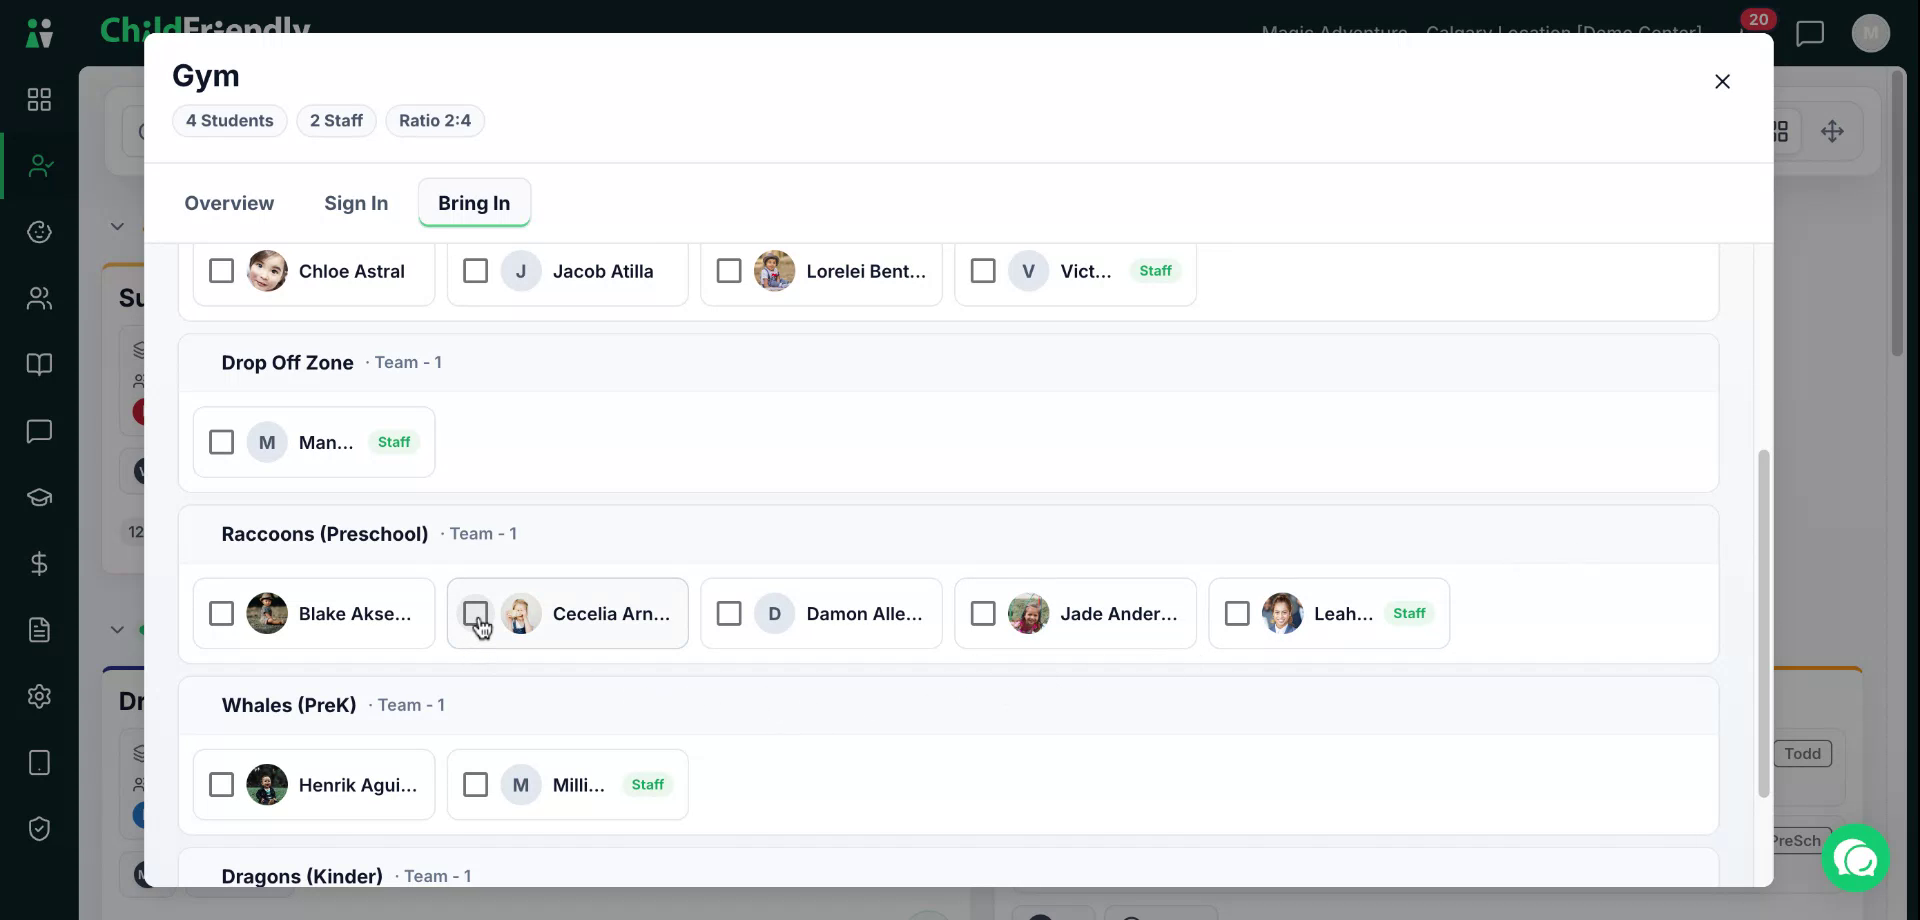
After selecting the child(ren) or team, click Bring In to complete the move.
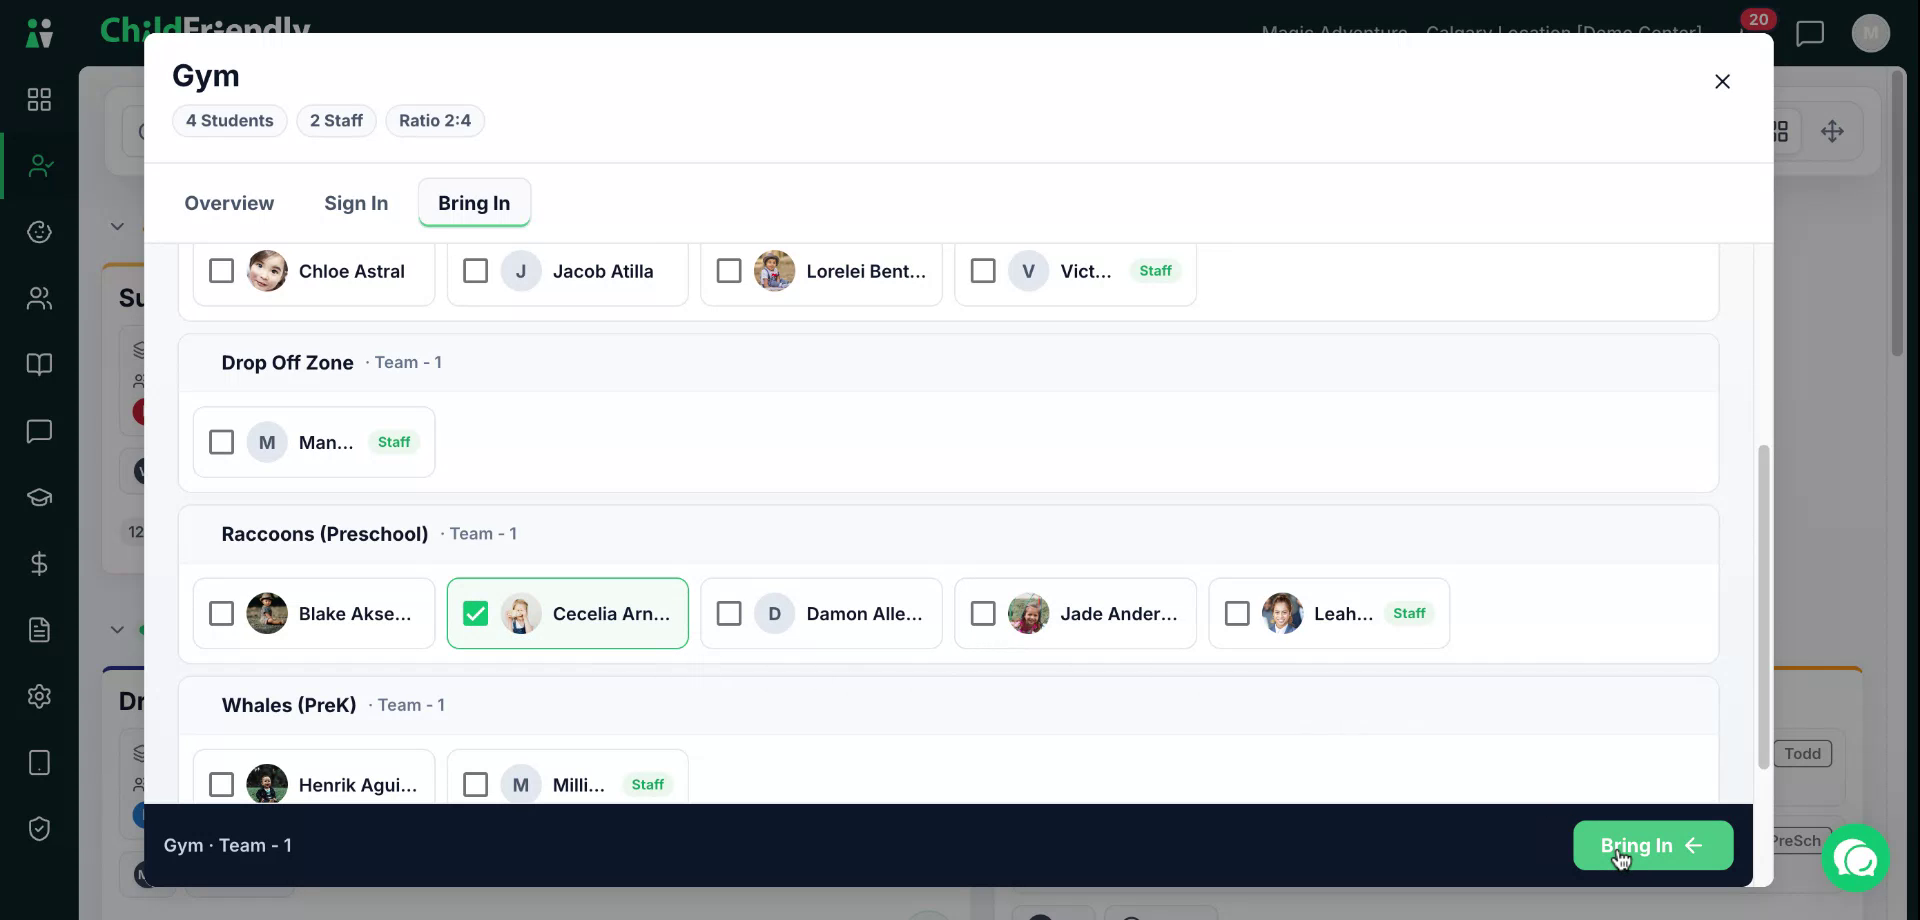
The selected child(ren) will now appear in the new space and be removed from their previous room.
Step 11: Use the Napping Feature
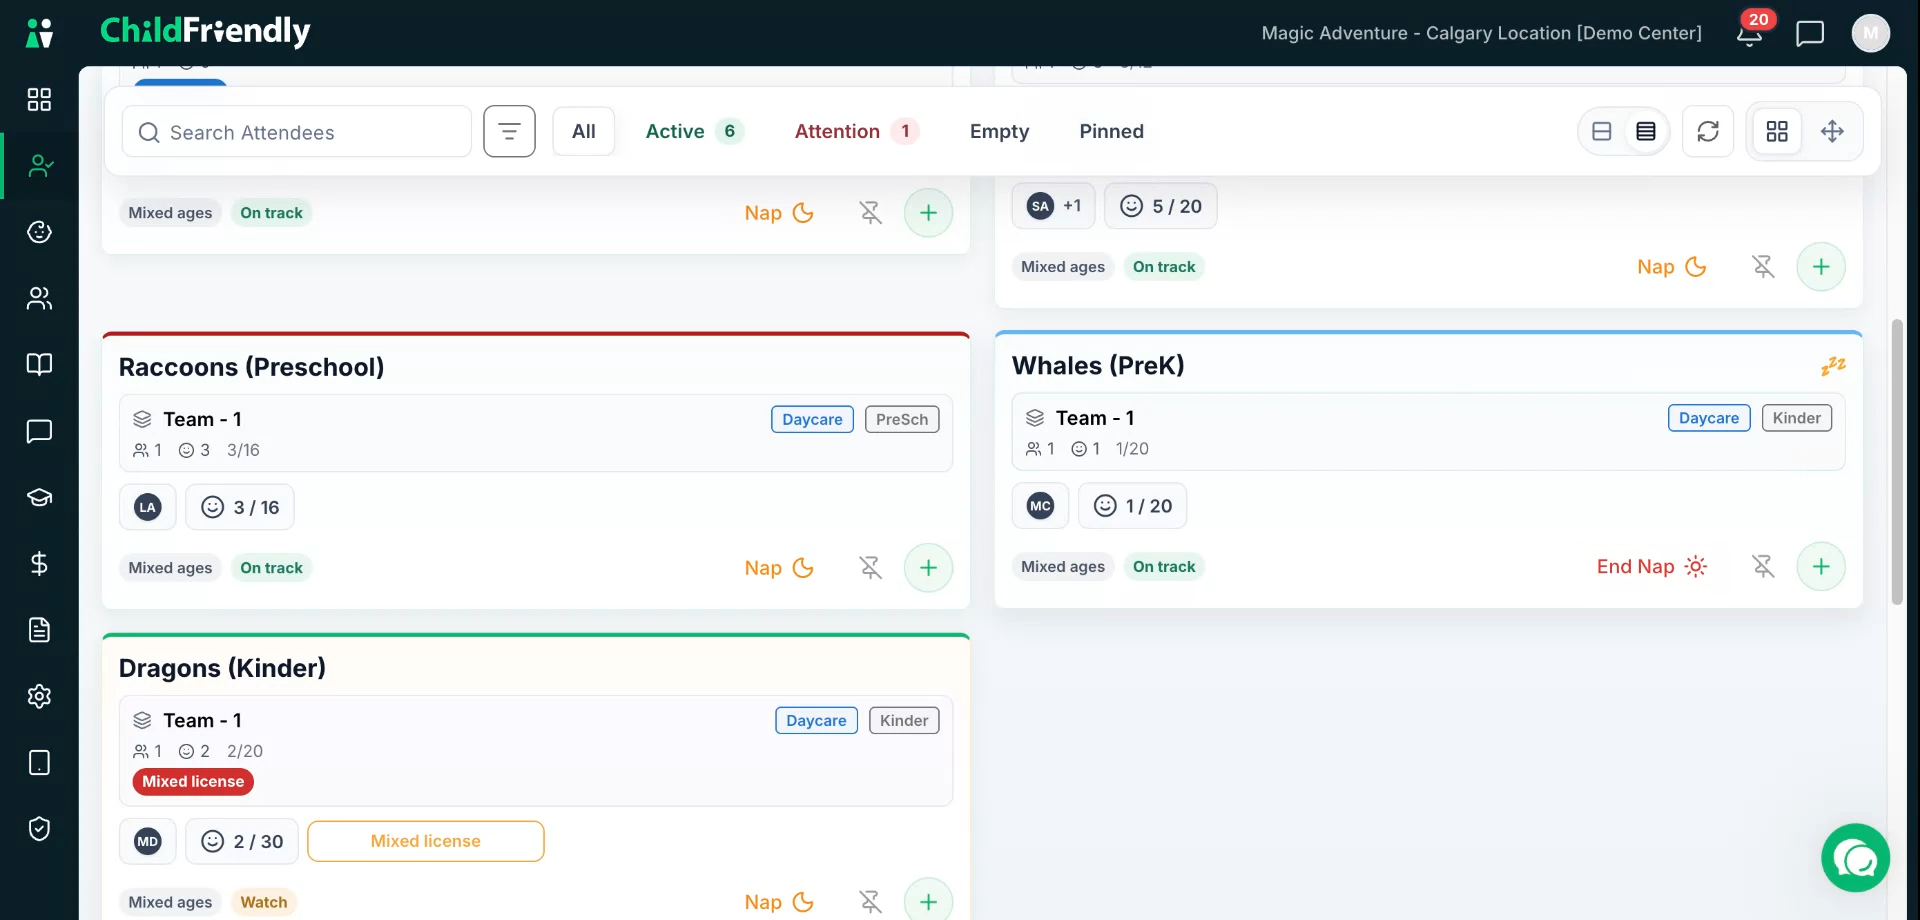
The napping feature lets you quickly see if a room currently has children who are napping.
To indicate that children are in nap mode, click the Nap icon for the room.
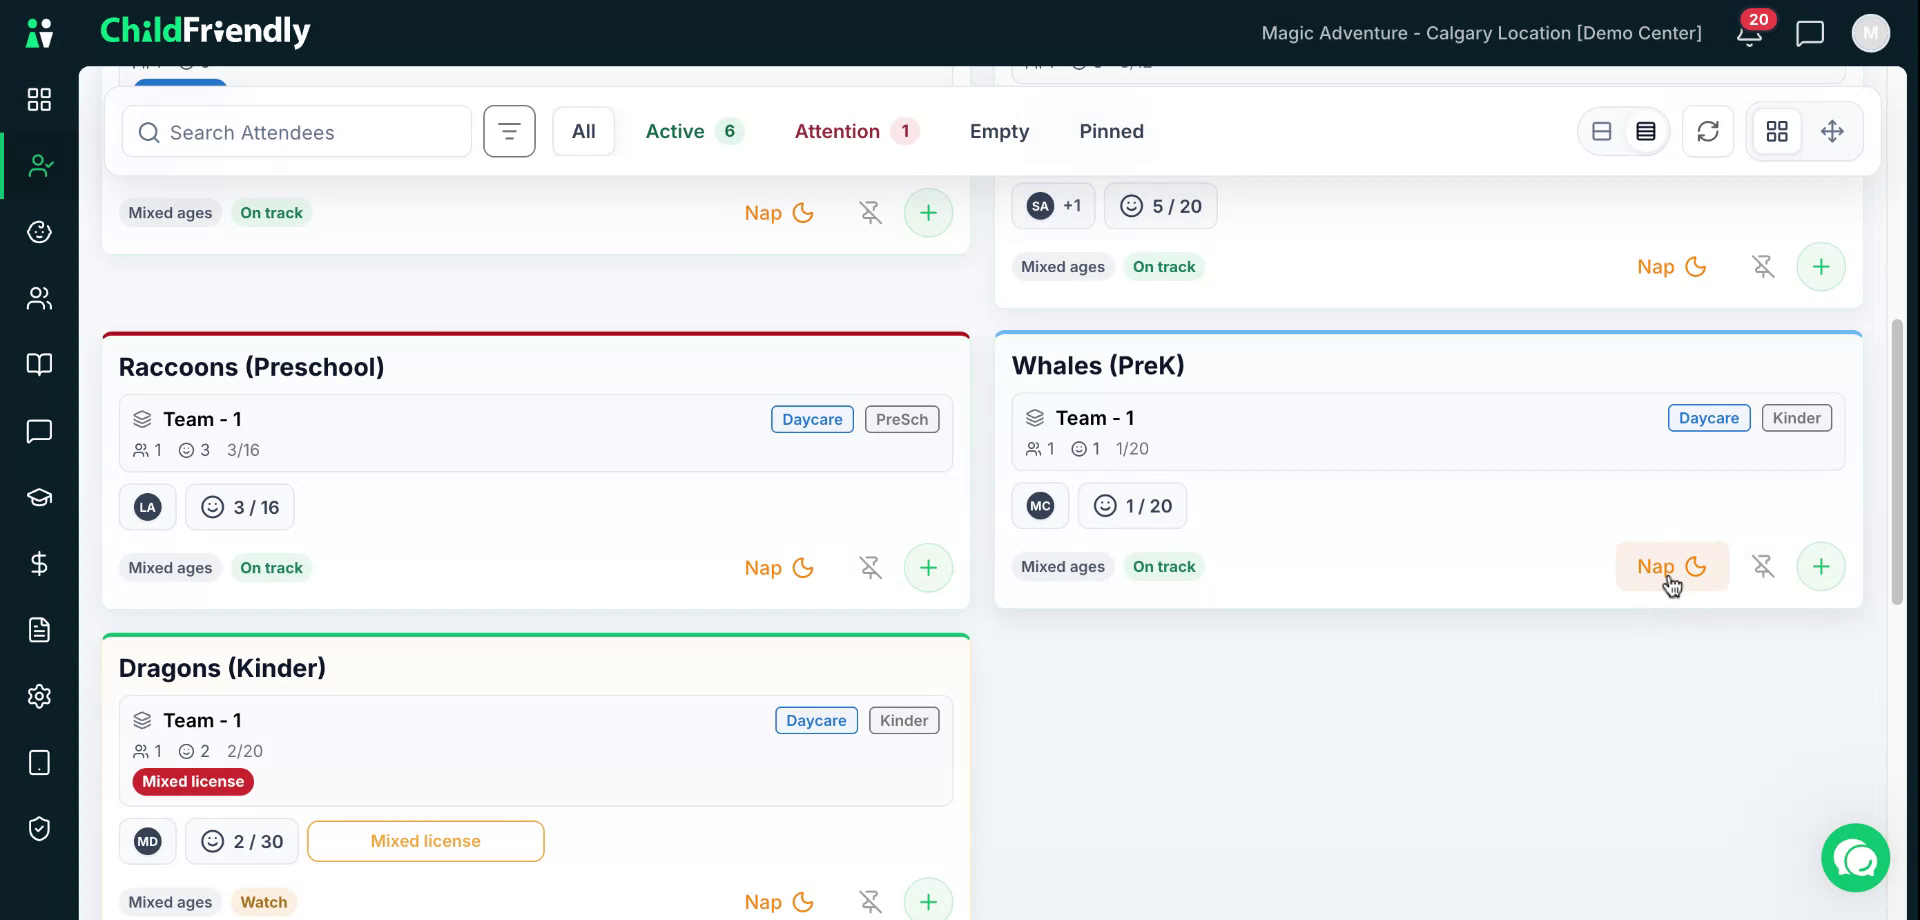
A “Z” symbol in the top-right corner of the room card will appear, indicating that children in this space are napping. Be aware that in some jurisdictions, staff-to-child ratios may change while children are sleeping, and the system will adjust required ratios accordingly.
When nap time is over, click End Nap to return the room to normal status.
Step 12: Search for a Child or Staff Member
Use the search bar at the top of the Attendance module to quickly find a specific child or staff member. Type the name and the system will highlight their current location.
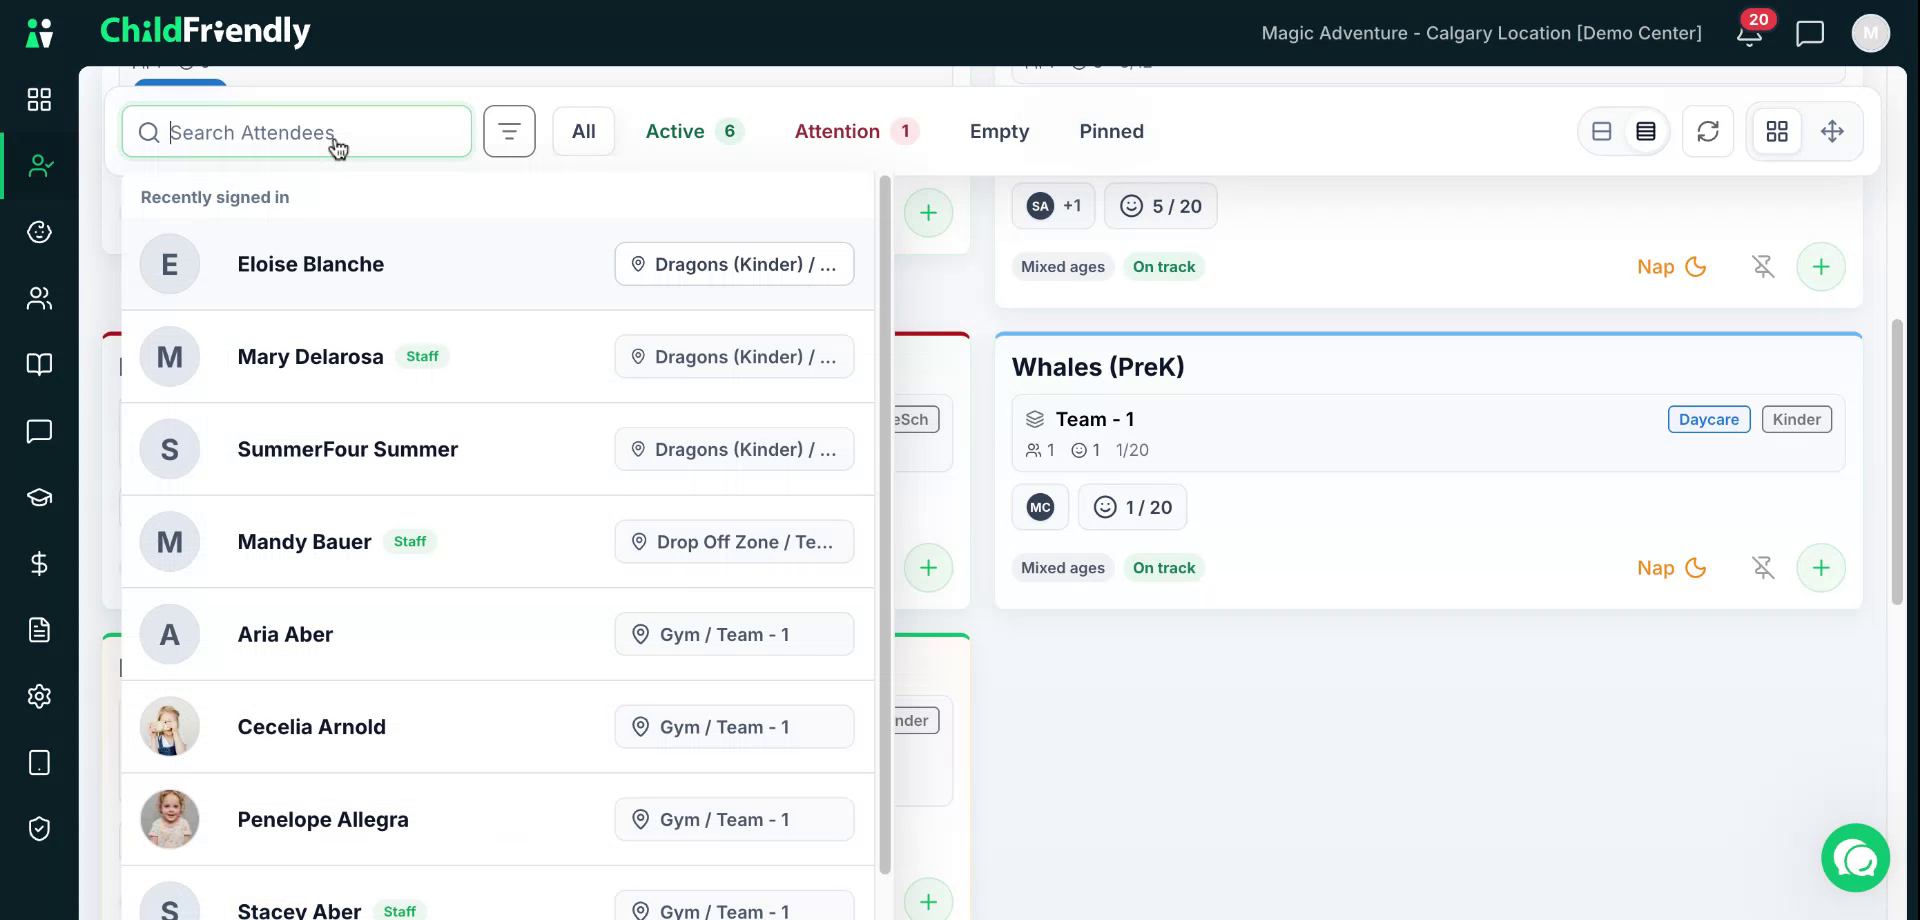
This is especially useful at the end of the day when children might be in different areas, such as outdoor spaces, during pickup.
Step 13: Sign Out a Single Child
When signing out a child, you must select an authorized portal member who is picking the child up.
Start by selecting the child, clicking Sign Out, and then choose the authorized portal member from the dropdown list.
Parents or guardians who are flagged in red (for example, with limited pickup access) will still appear in the list.
Ensure you select the correct authorized portal member for that pickup, then click Sign Out.
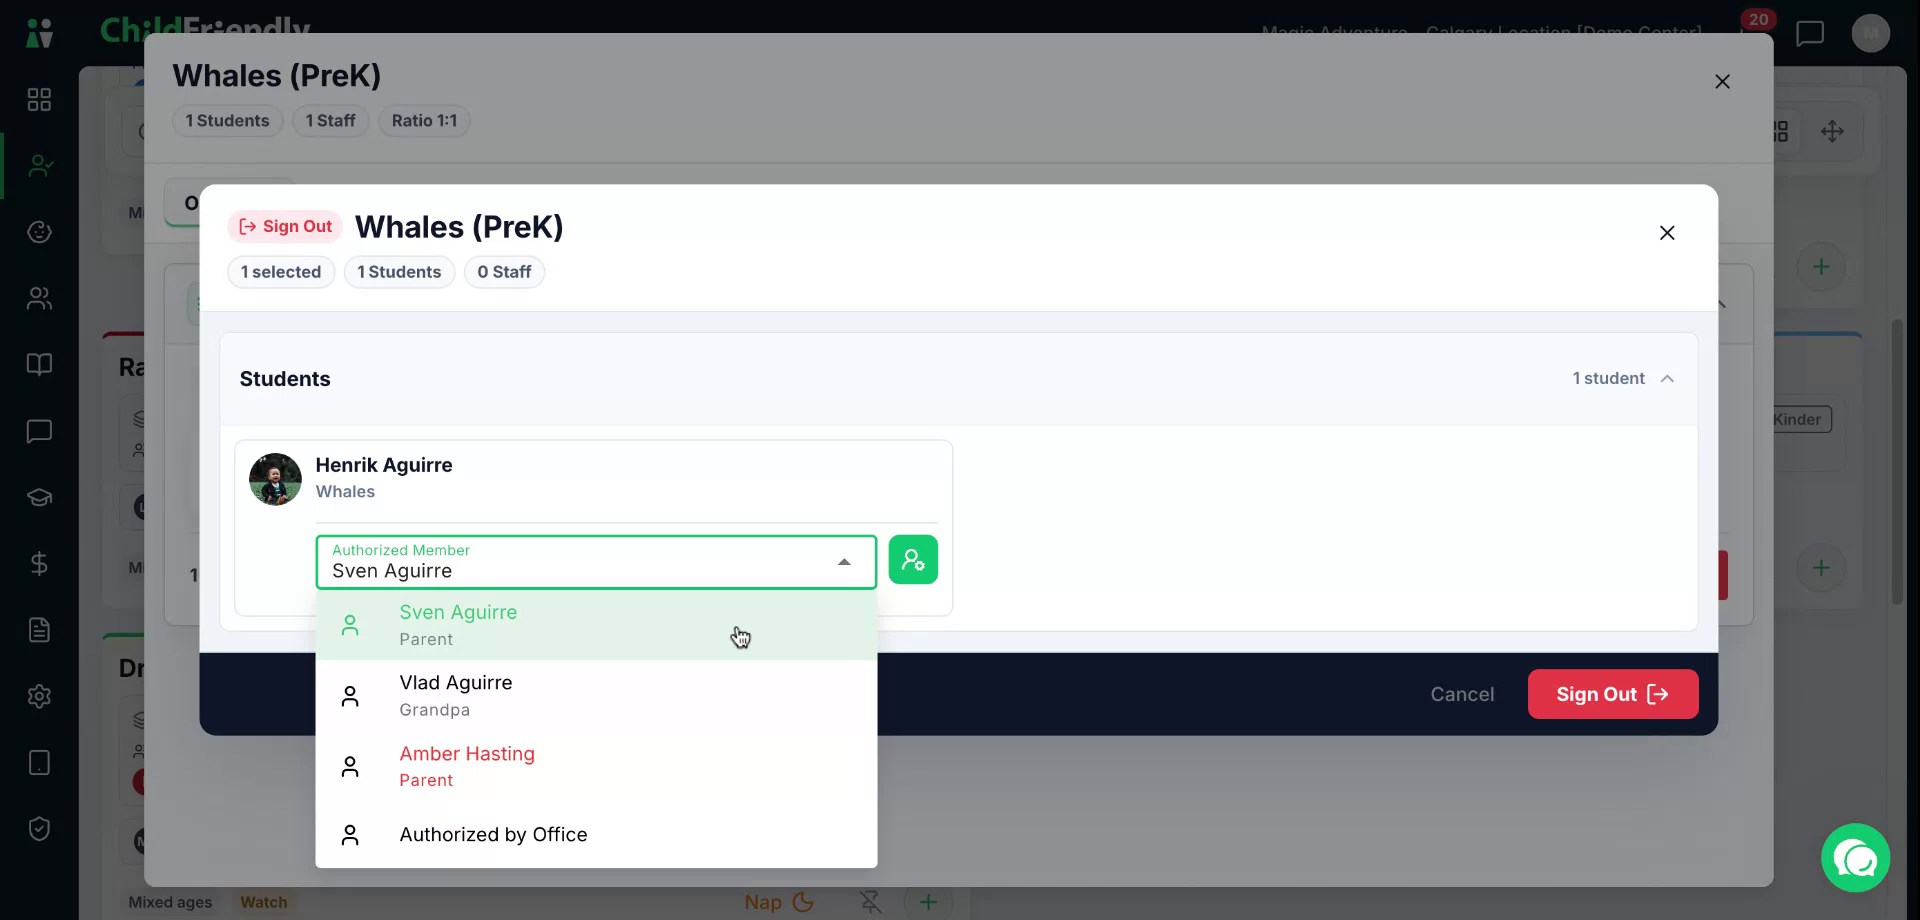
The child will now be signed out of daycare.
Step 14: Sign Out Multiple Children or People at Once
If you need to sign out several children or staff members at the same time, you can do this in bulk. This is expecially useful when transporting groups of children to school.
Select the relevant group and click Select All if you wish to sign everyone in that list out.
Then click Sign Out.
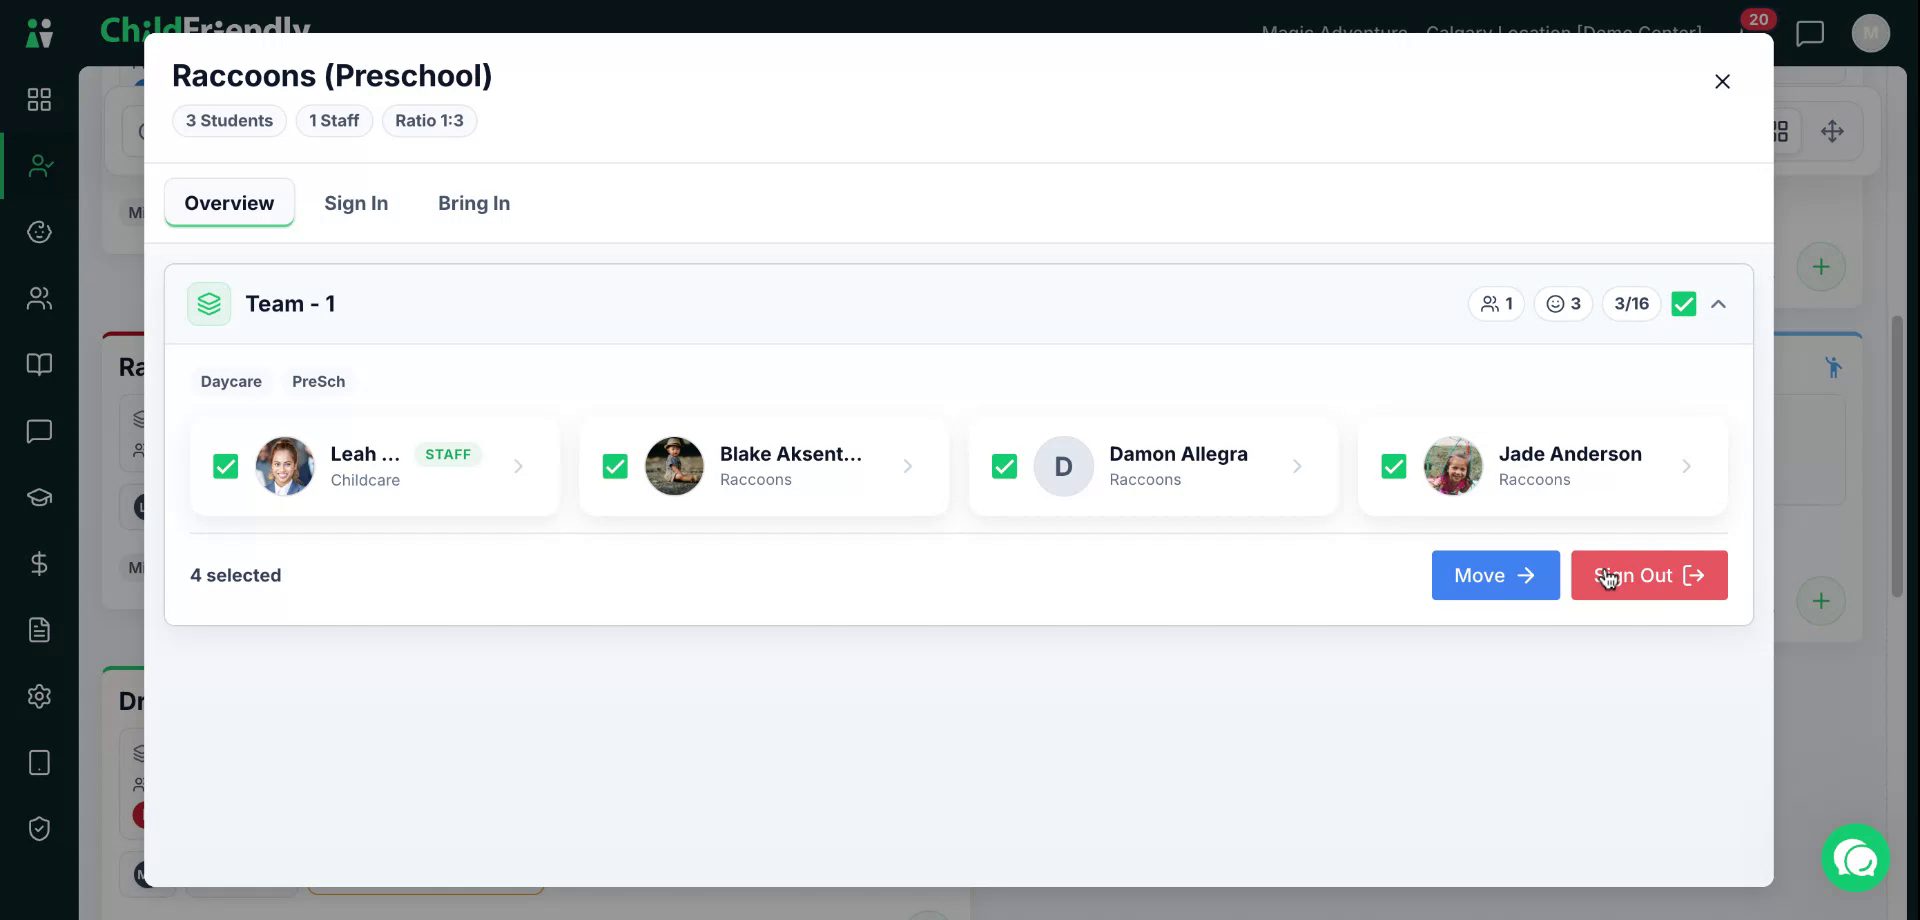
Next, choose the correct authorized portal member for the group from the dropdown list.

Make sure you have selected the proper authorized individual.
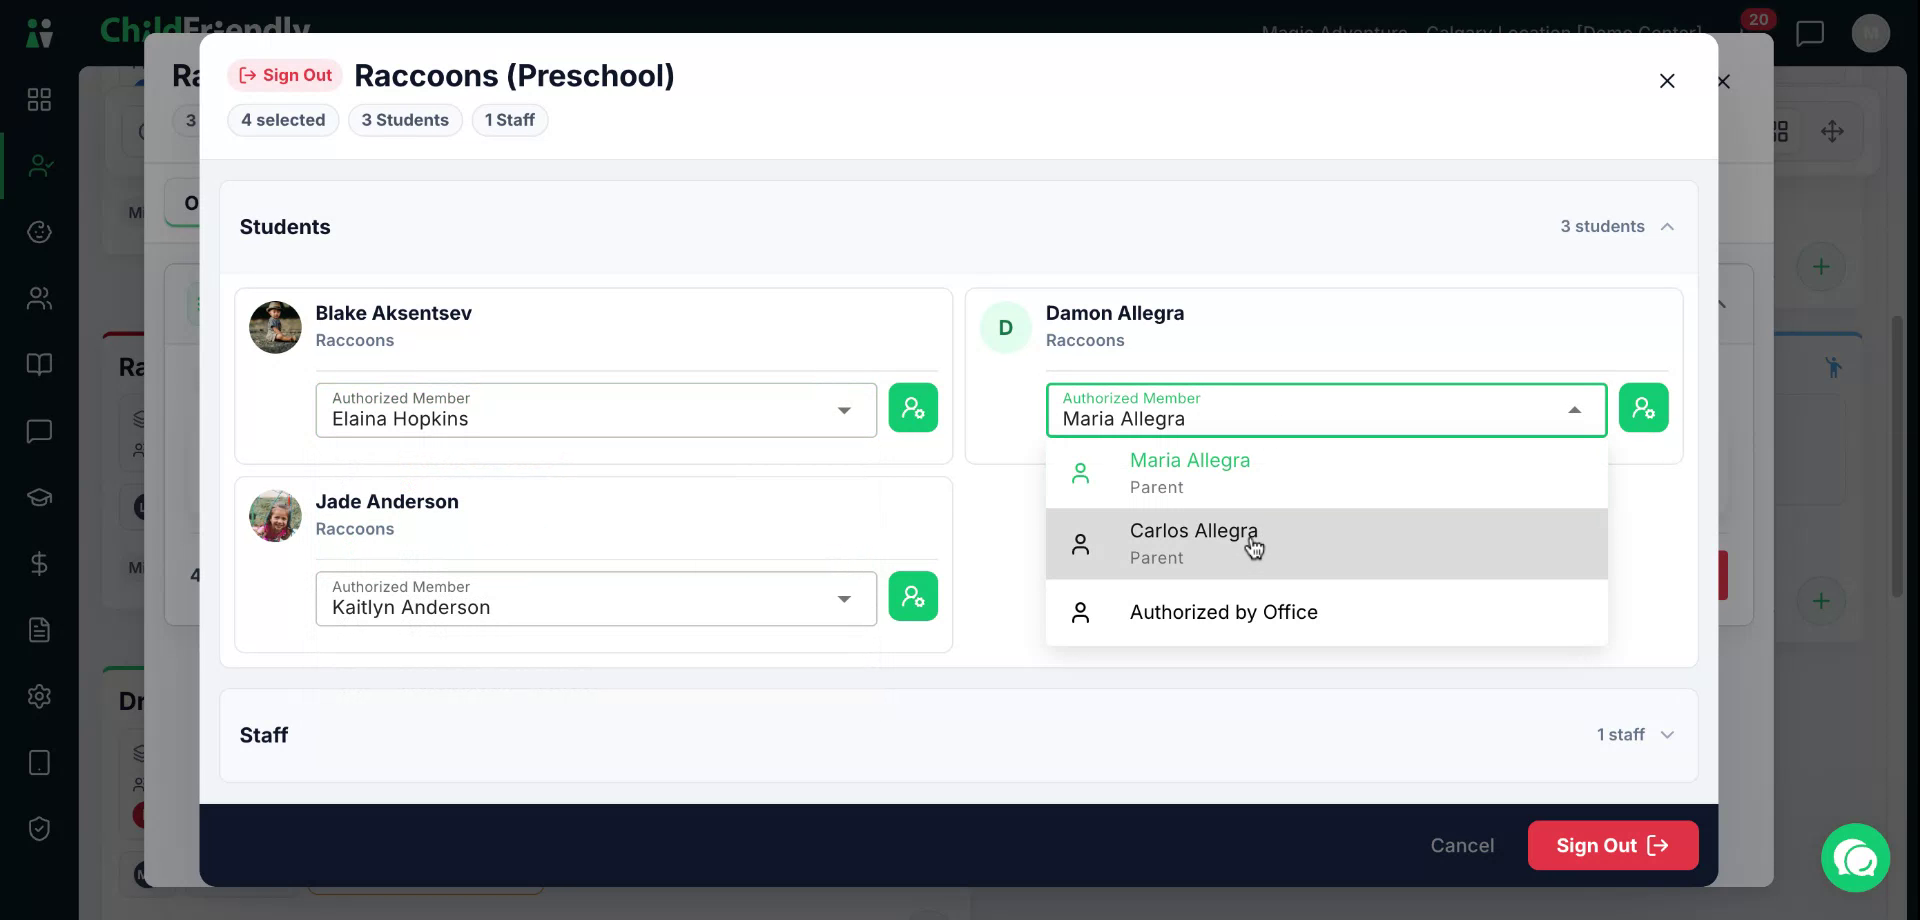
Finally, click Sign Out to complete the bulk sign-out process.
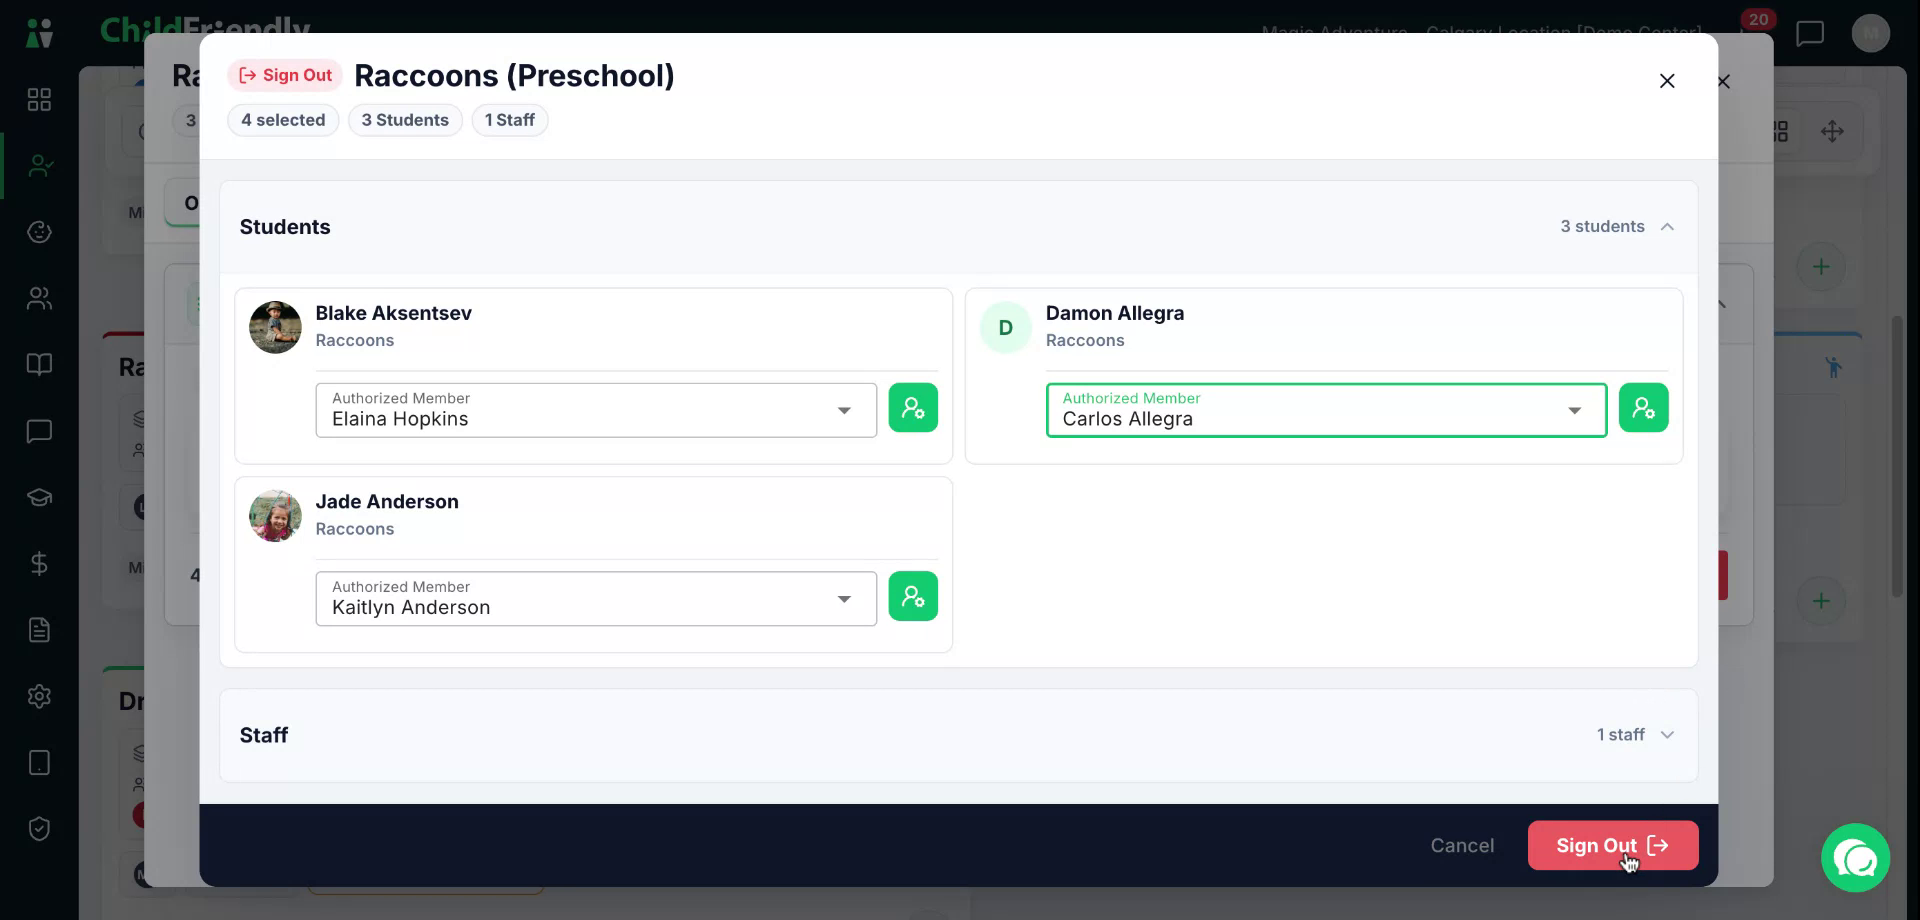
The selected children or staff members are now signed out.