Admissions Dashboard Part 2: Onboarding, Waitlists, and Leaving
This article explains how online applications flow into the Admissions Dashboard, how to configure automated emails, manage onboarding checklists, handle waitlists, and offboard children in the Leaving stage.
Last updated 1 day ago
Step 1: Start from the Online Application Form
Parents can register online either via an embedded form on your website or through a shared URL link. The embedded code or URL link is available in the Communicate module under Forms.
Using the URL link, parents see your center’s application form with your logo.
They select their location and enter the required information.
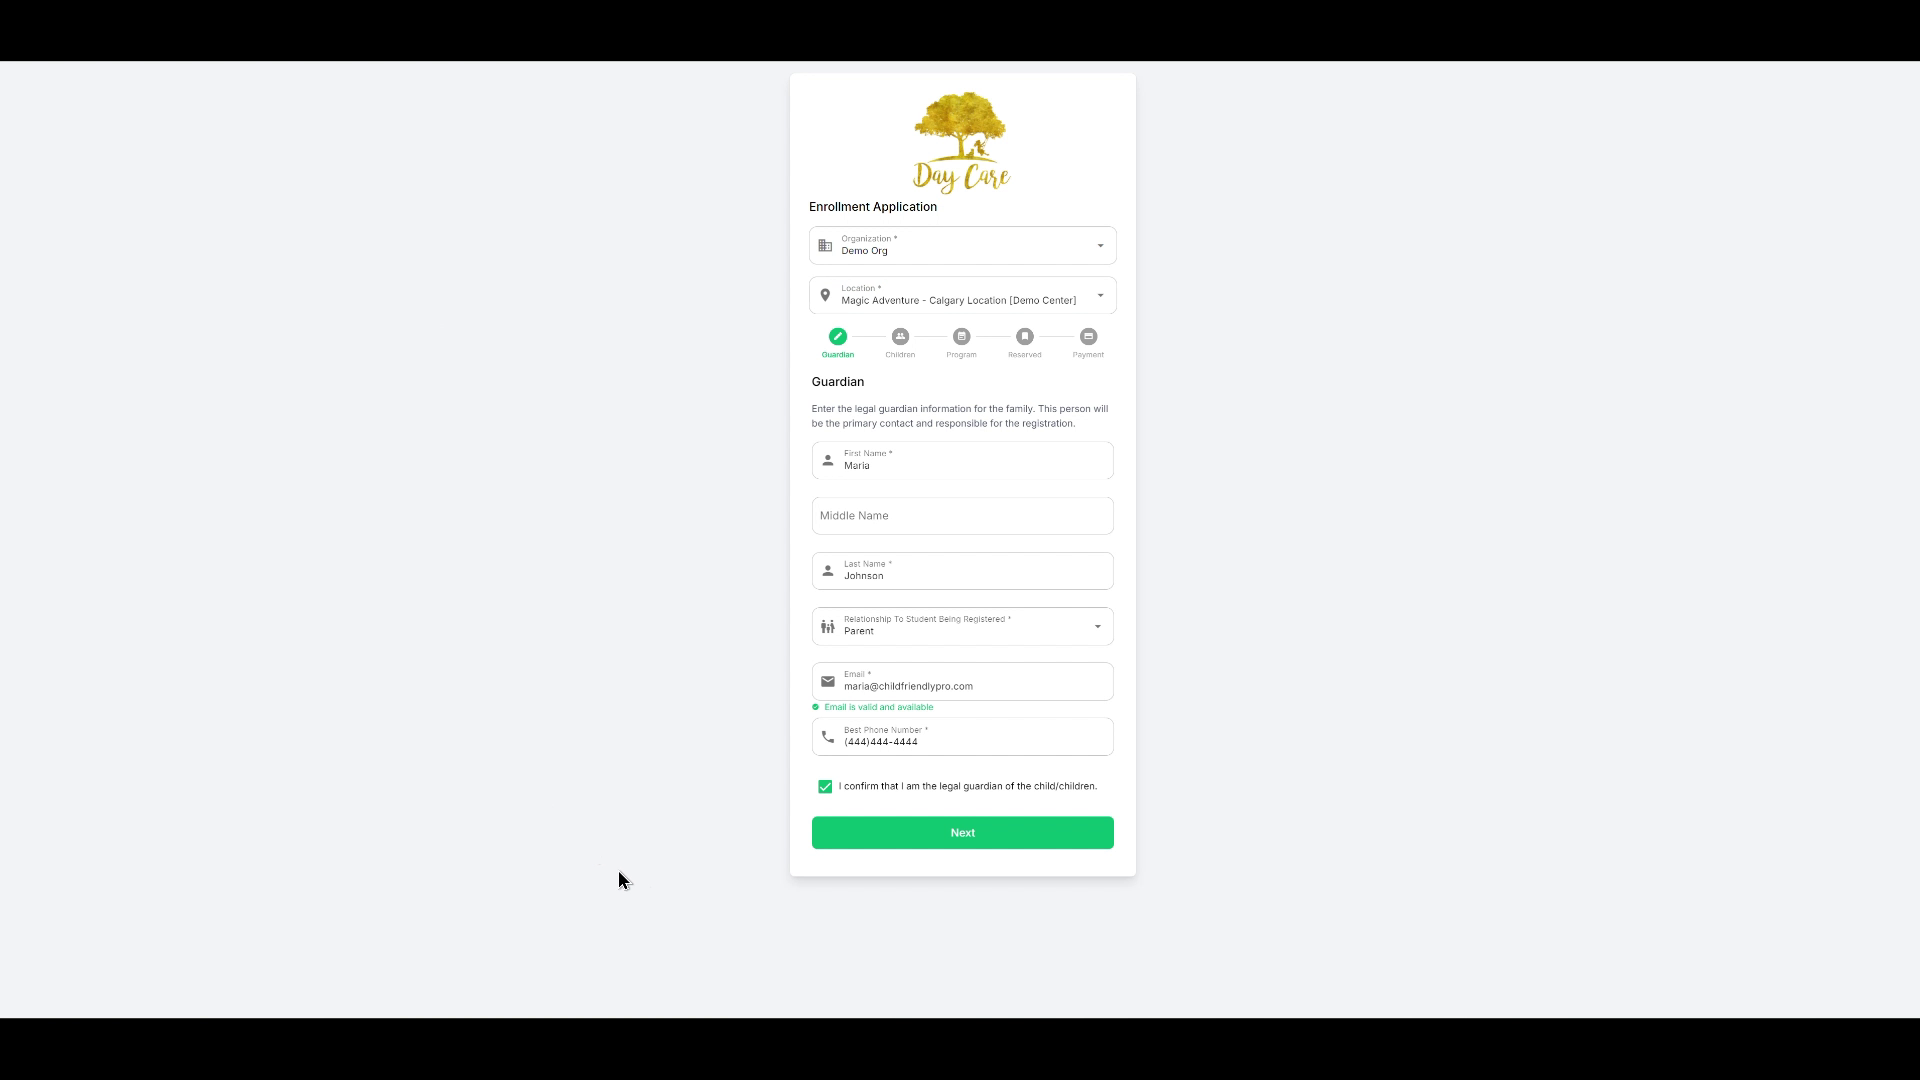
After completing the parent details, they click Next and enter their child’s information.
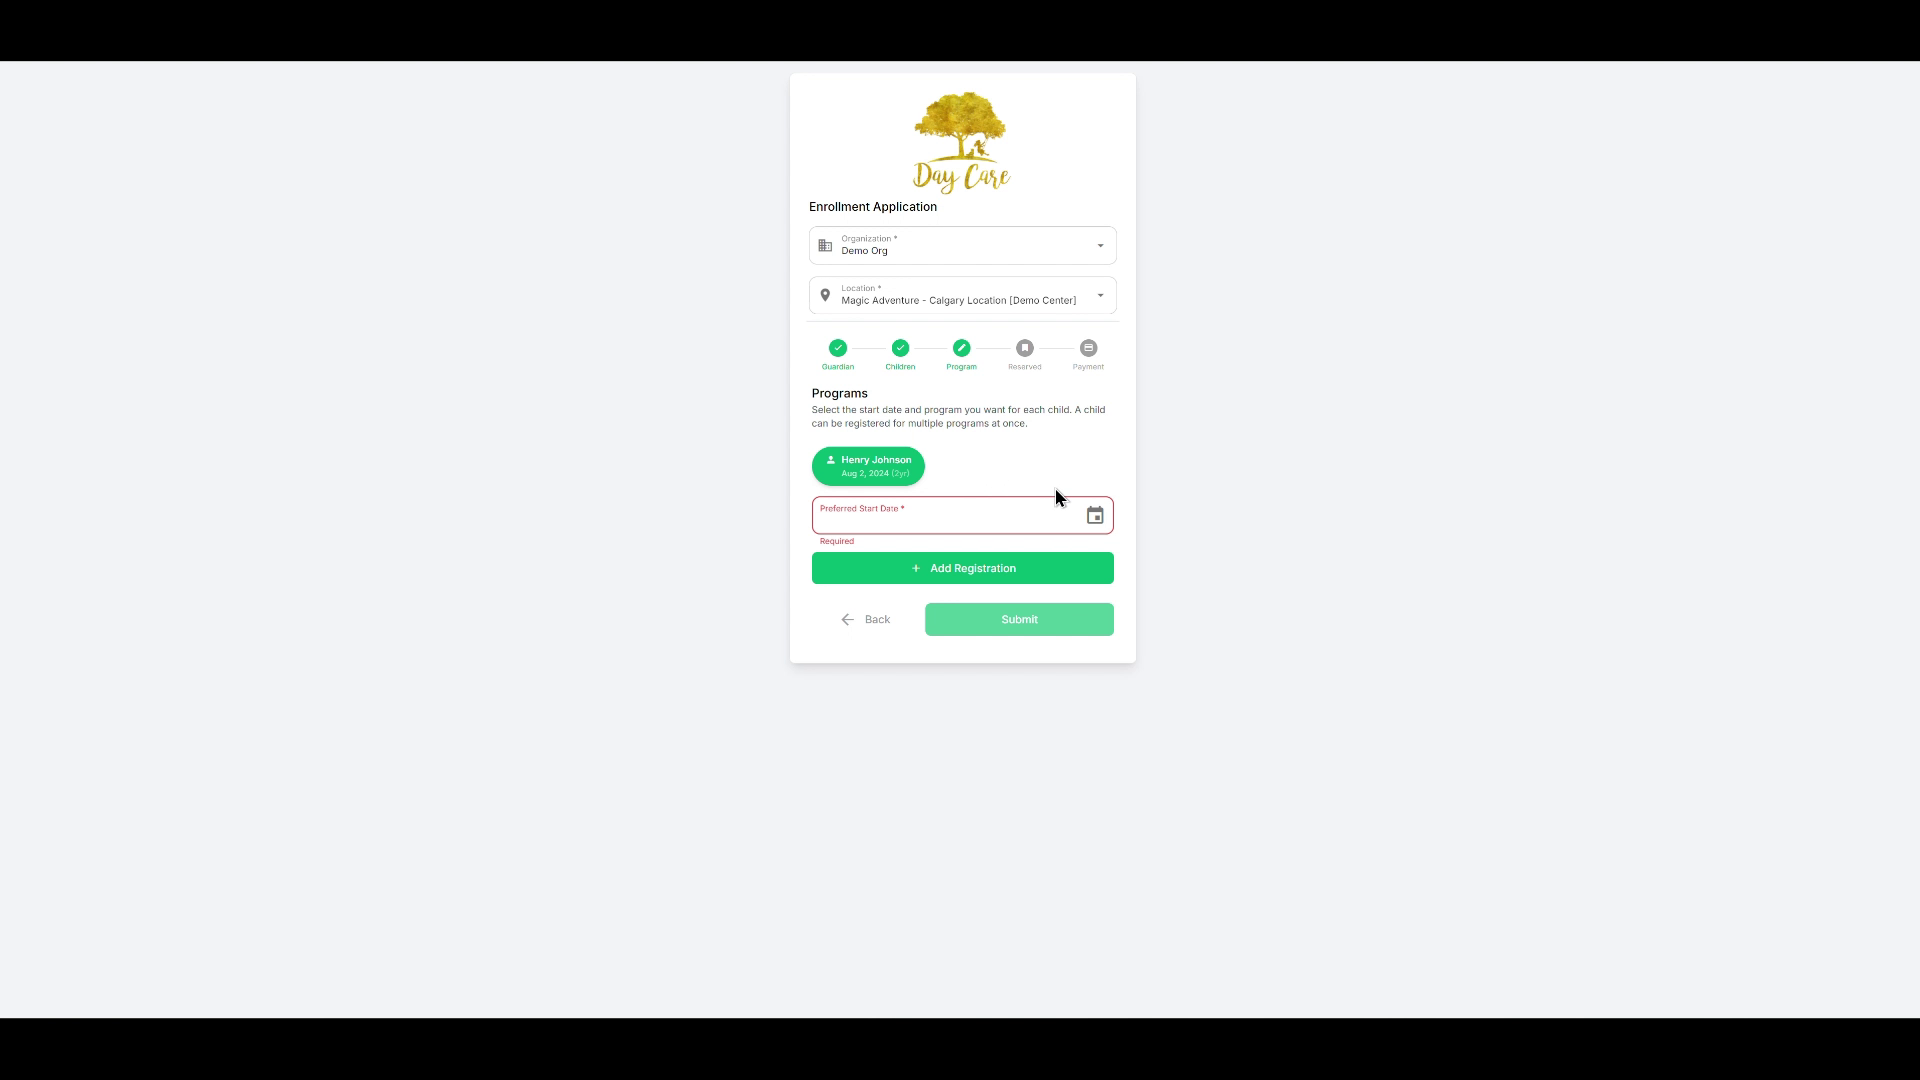
Step 2: Choose Start Date and Program Options
The parent selects the preferred start date.
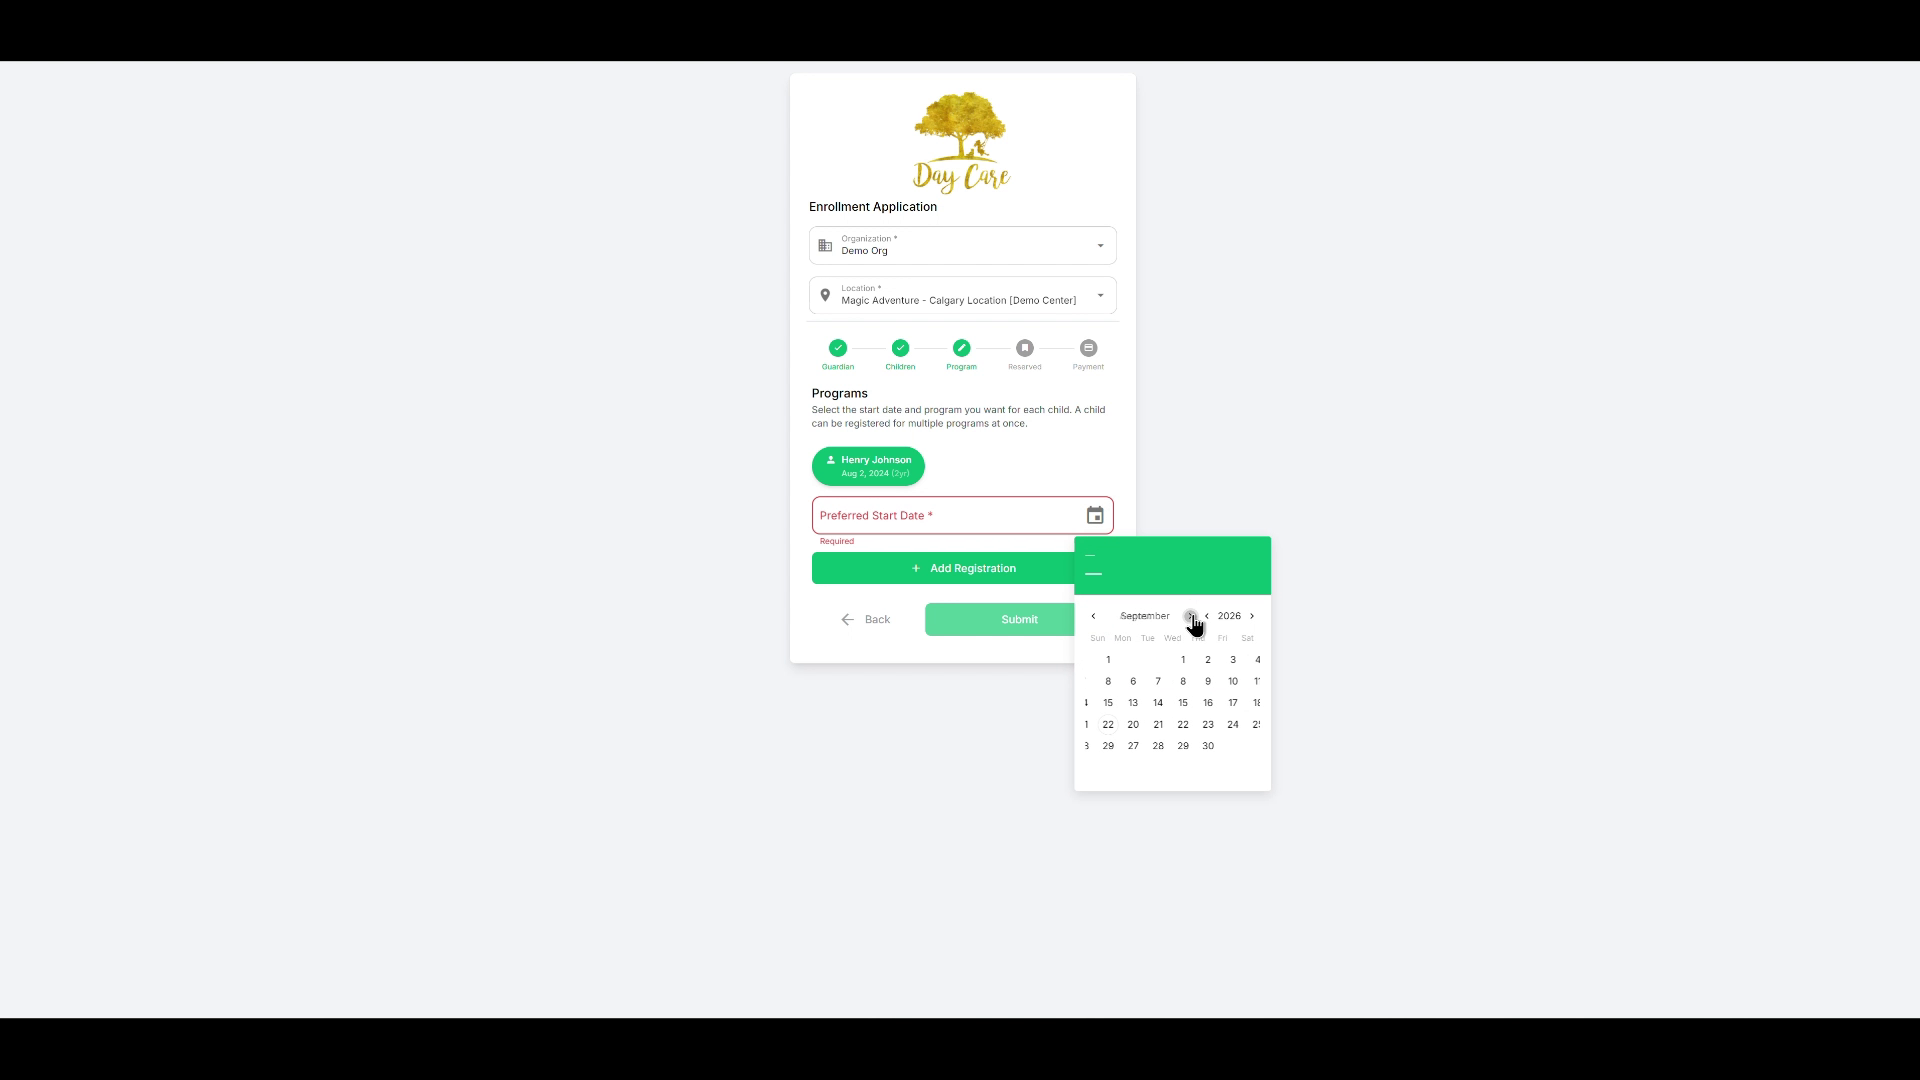
Based on the combination of the start date and the child’s date of birth, the system automatically offers the programs that child qualifies for as of that start date (for example, the toddler program).
In this example, the toddler program is available with two options—full-time or part-time—based on the center’s settings.
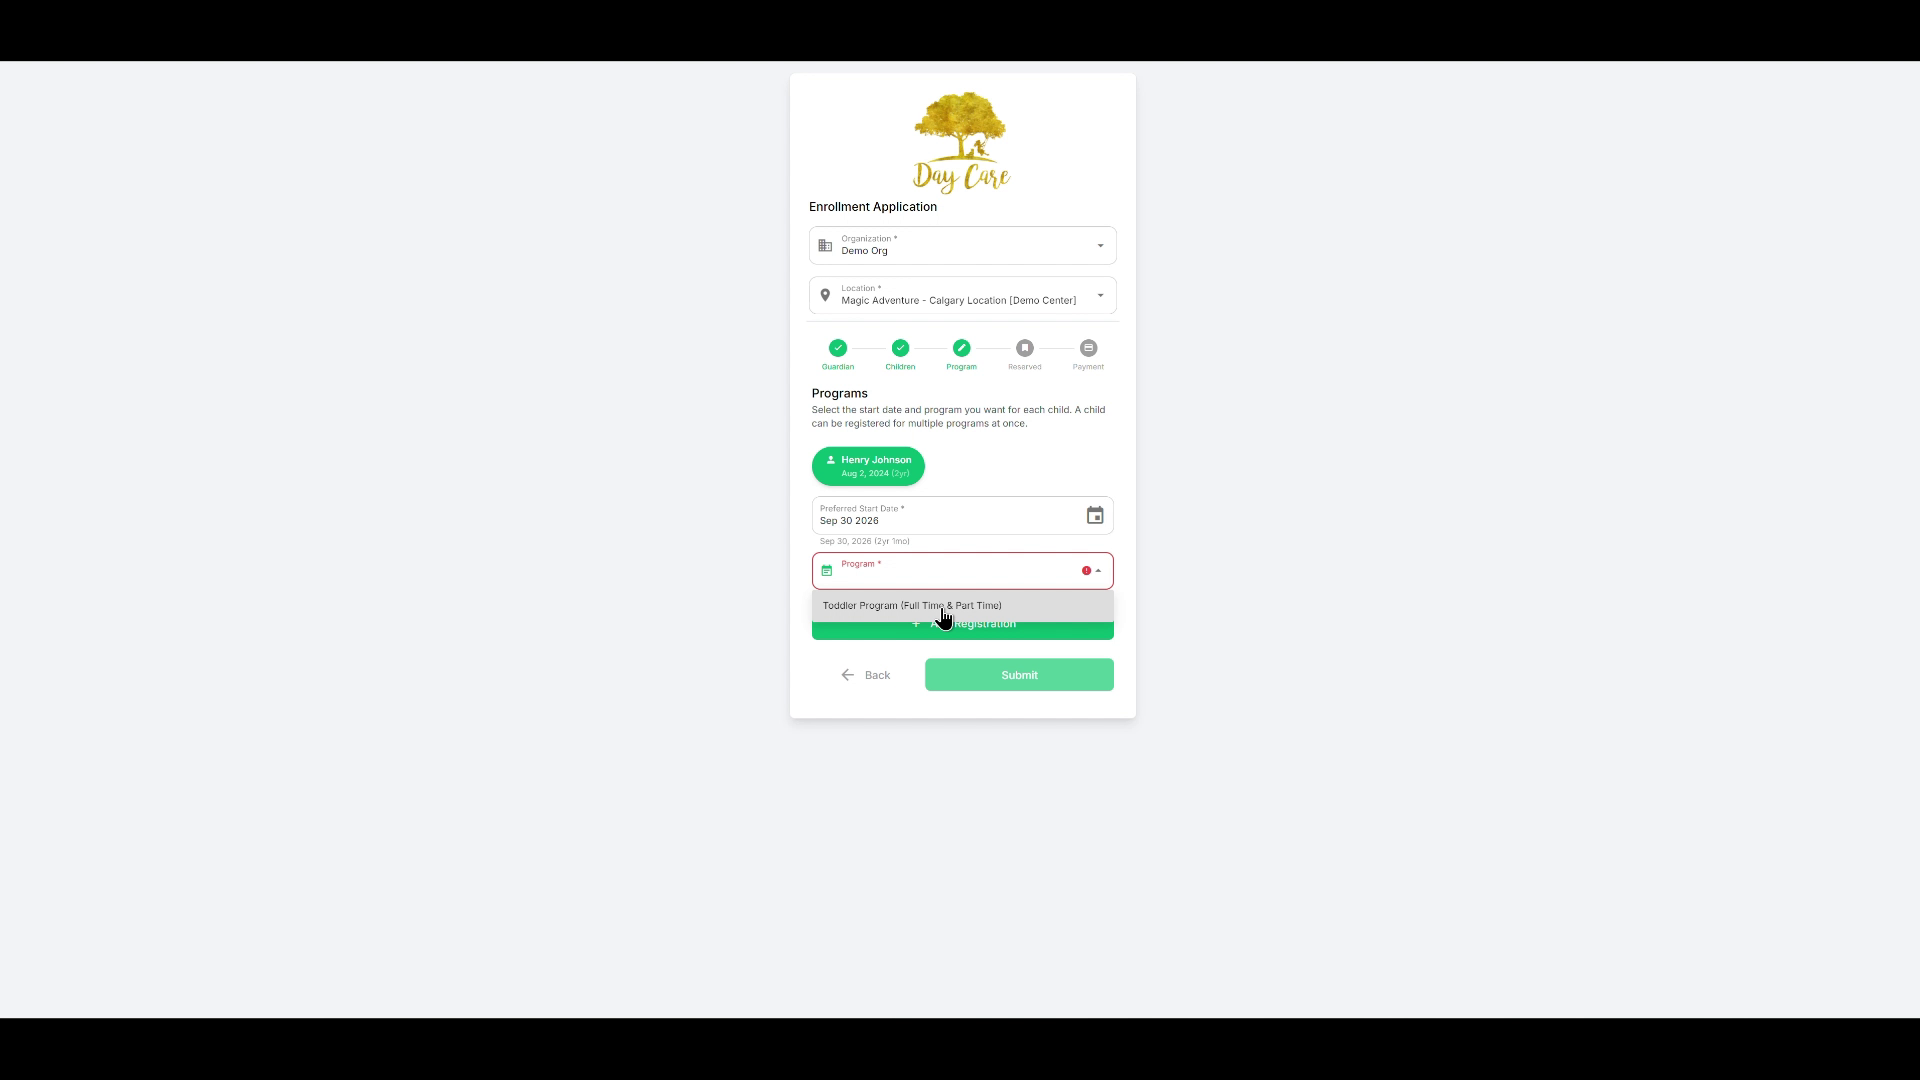
If part-time is chosen, the parent selects the days of the week they need care, and the system checks availability.
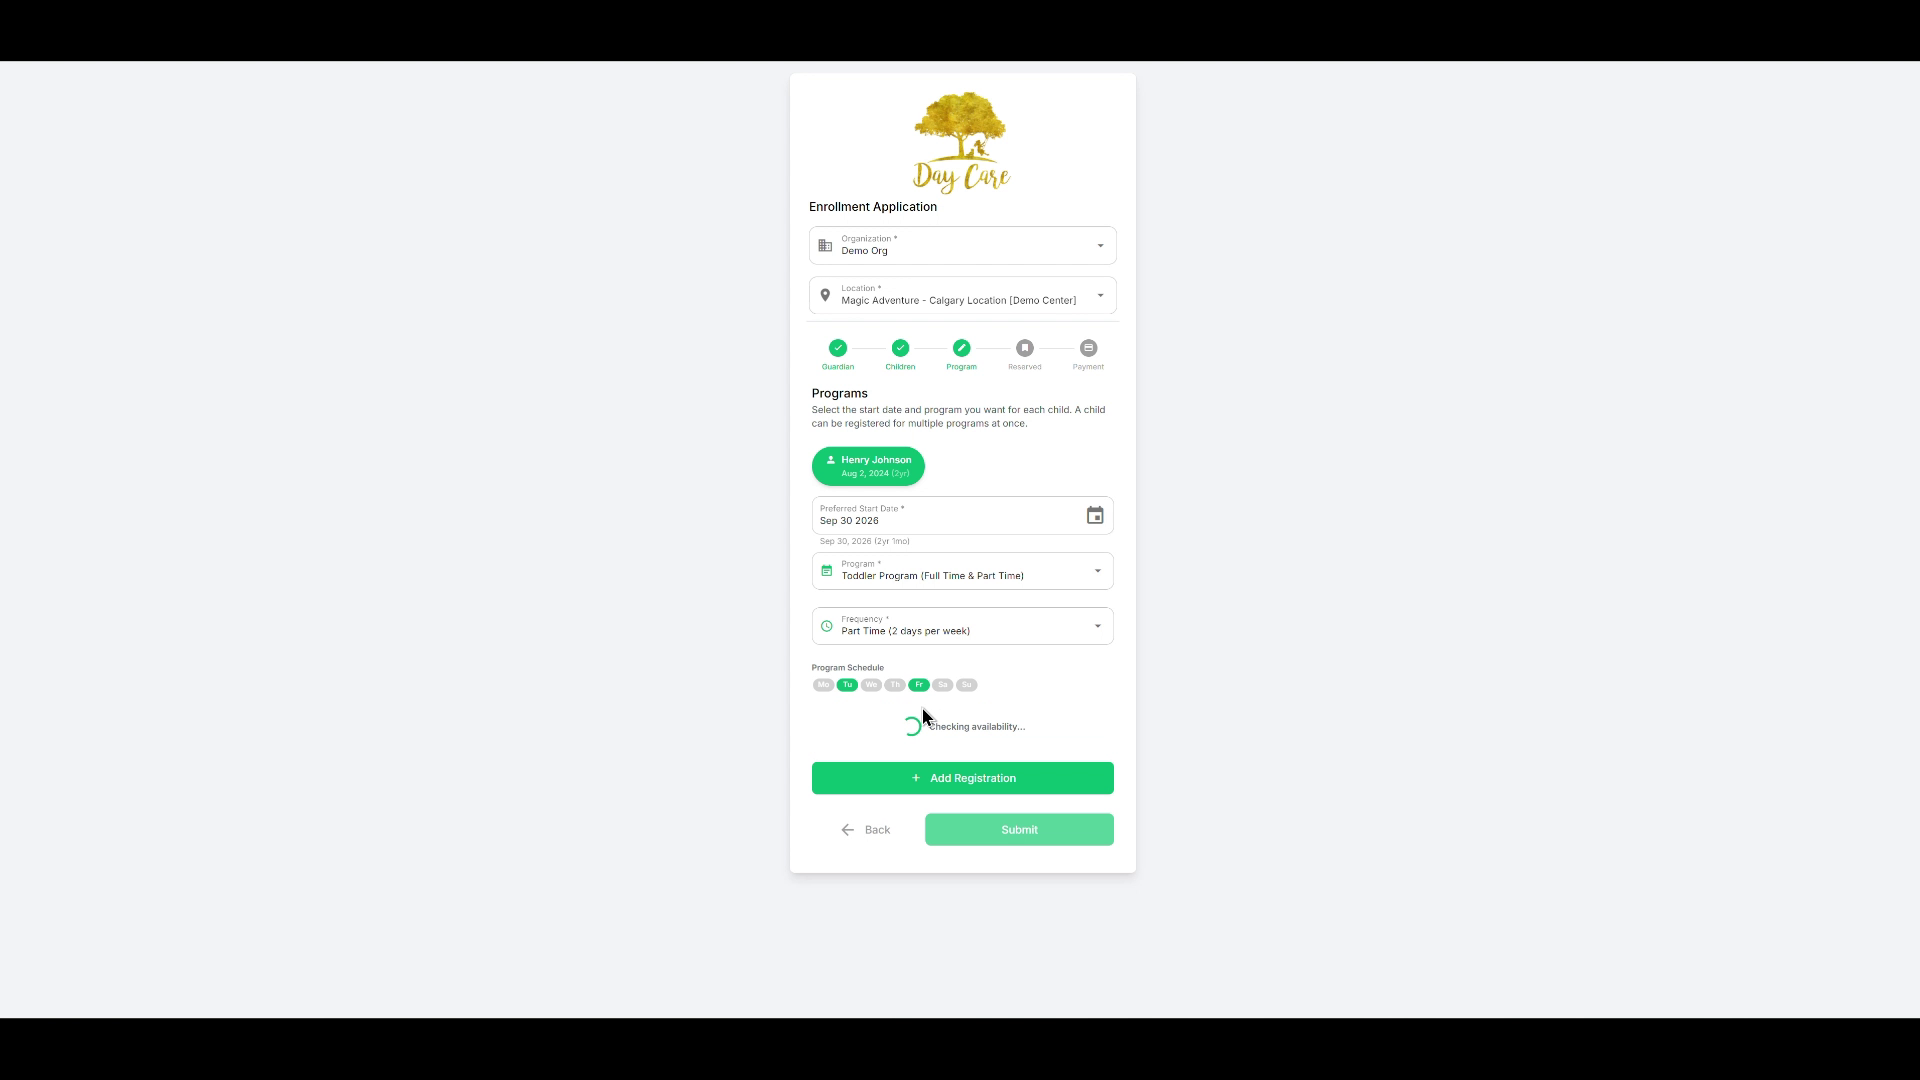
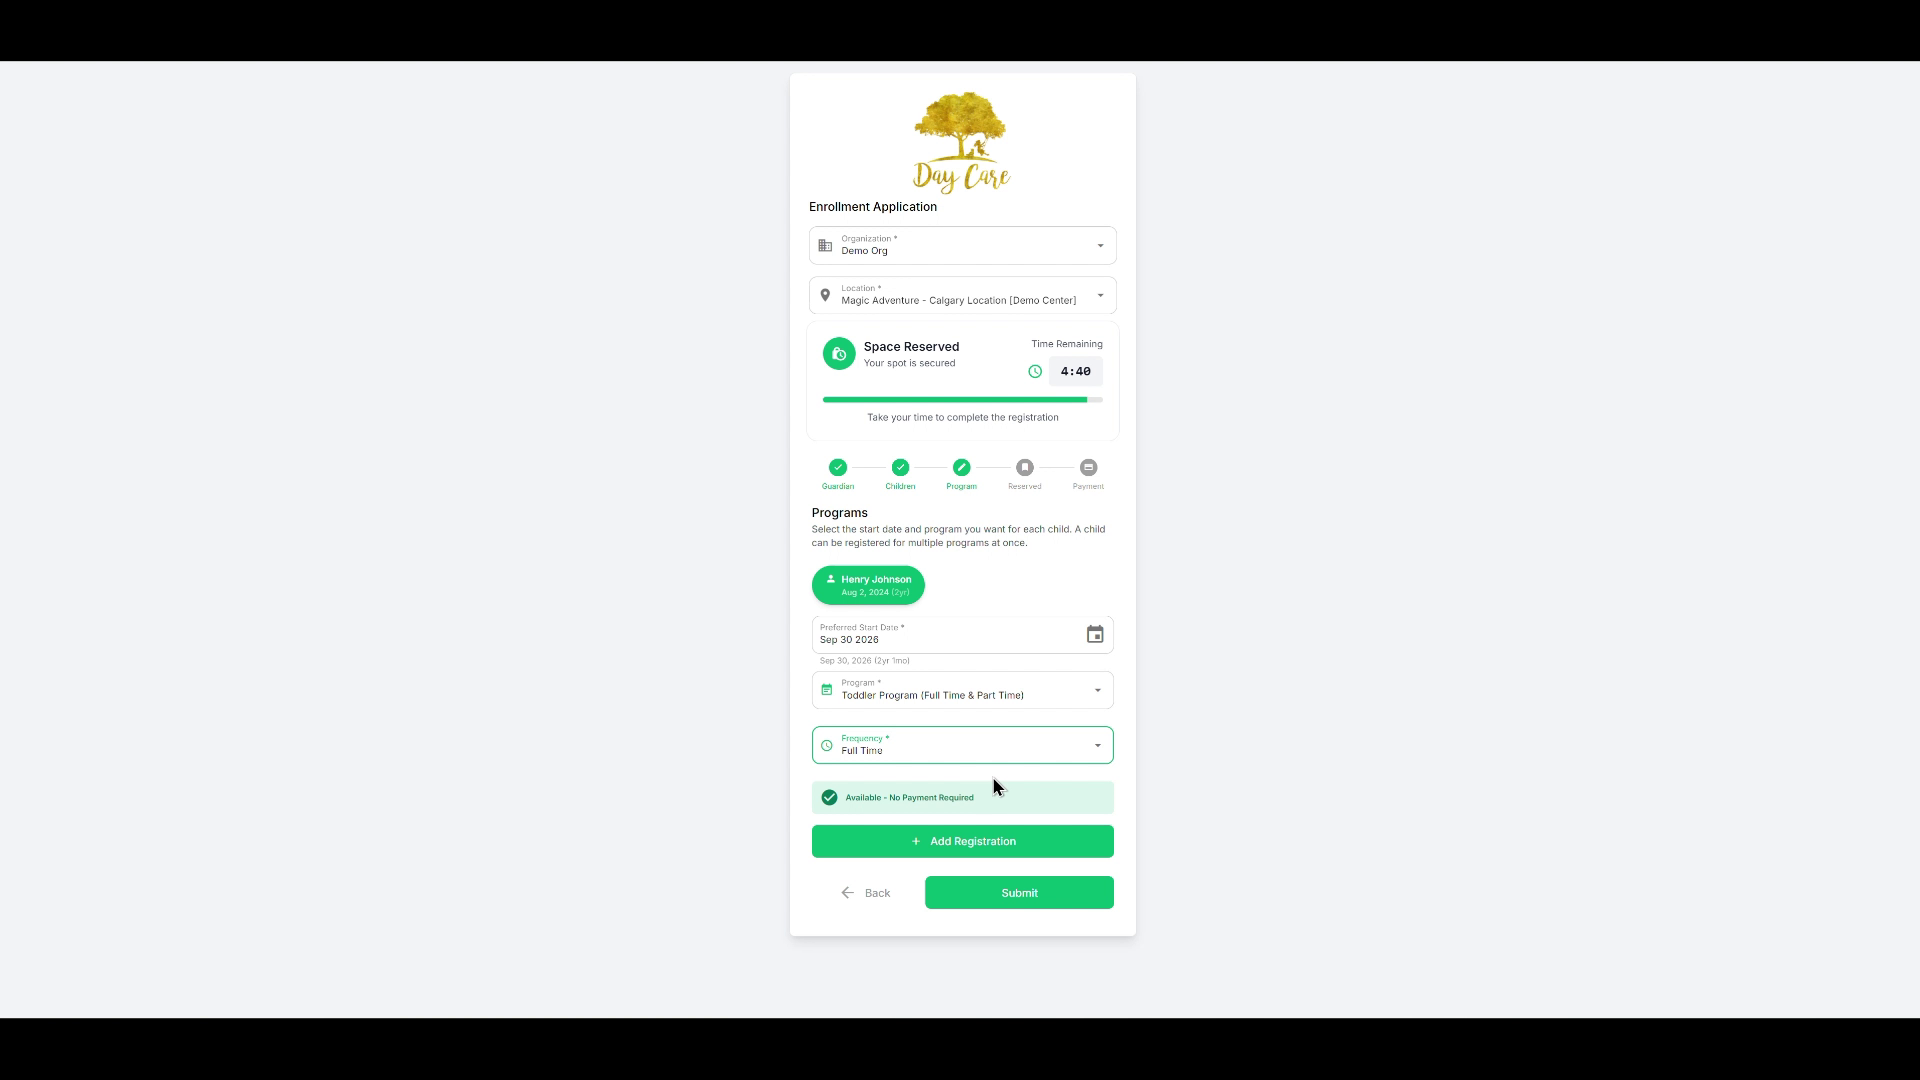
Alternatively, they can choose full-time.
If a deposit is required for the chosen program, the system will prompt for payment and the parent will enter credit card details. In this example, no deposit is required, so the parent simply clicks Submit.
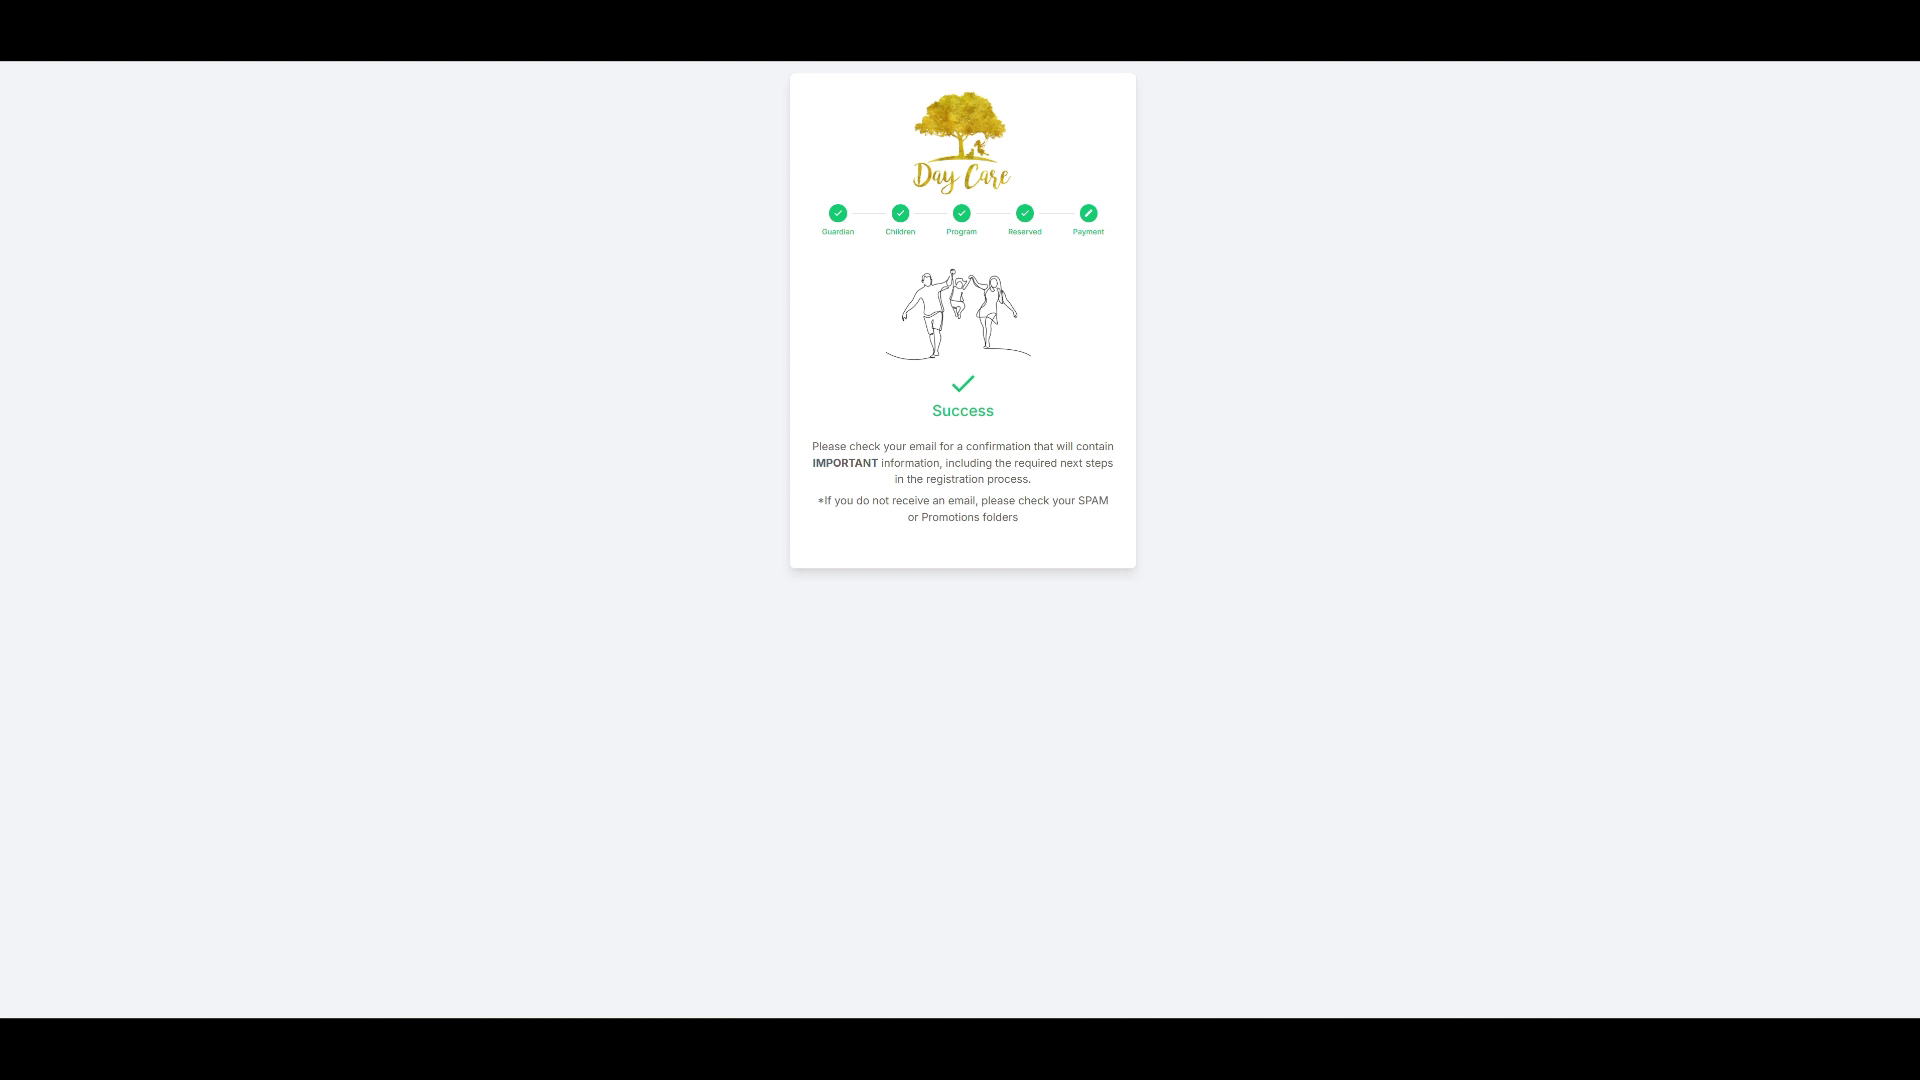
After submitting, a success message is displayed.
The parent then receives an email with temporary login credentials for the Parent Portal, where they complete remaining registration steps (e.g., emergency contacts). This email is fully customizable.
Step 3: Customize the Application Confirmation Email
Return to the Admissions Dashboard and open the Set Up module.
Go to your center’s settings and configure the automated email sent after someone applies for enrollment.
You do this by navigating to the center, selecting:
Custom, Automated Emails, then locating the Application Confirmation email.
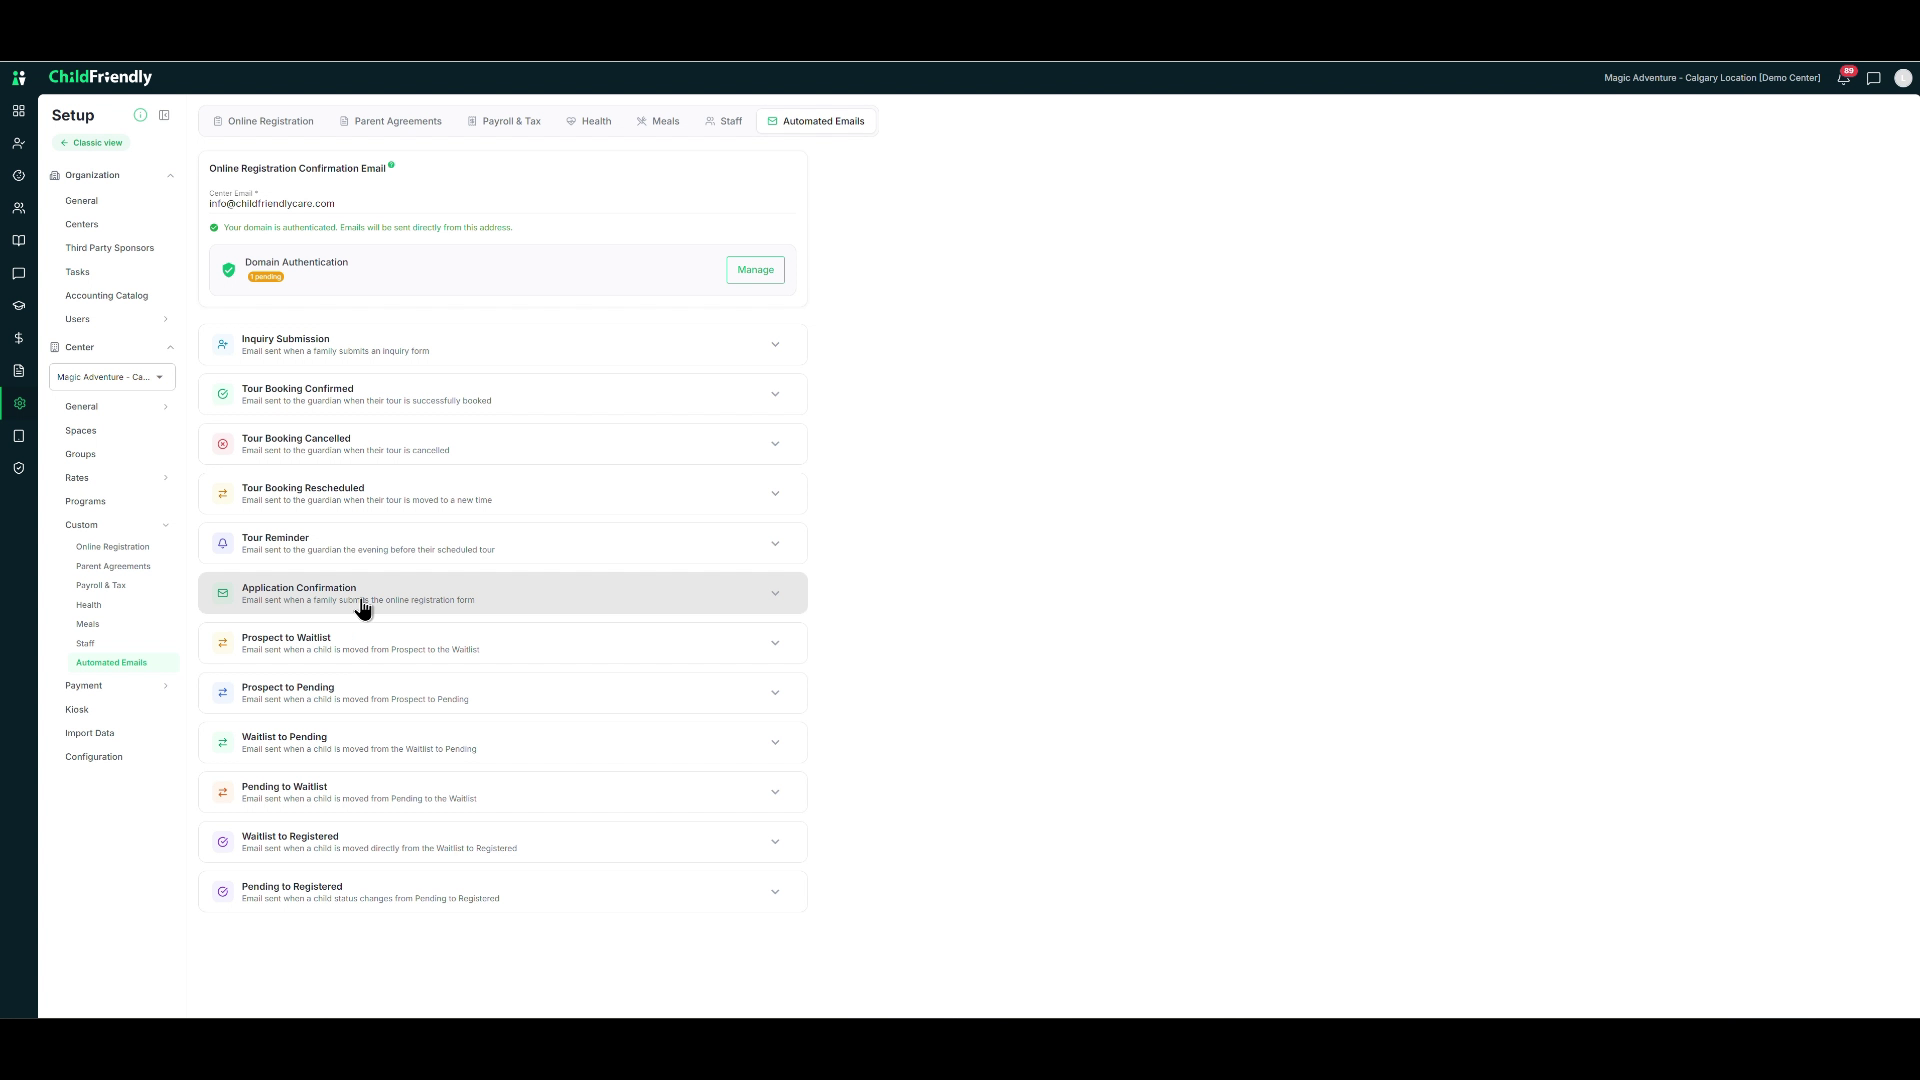
Click the email to expand and edit the various sections.
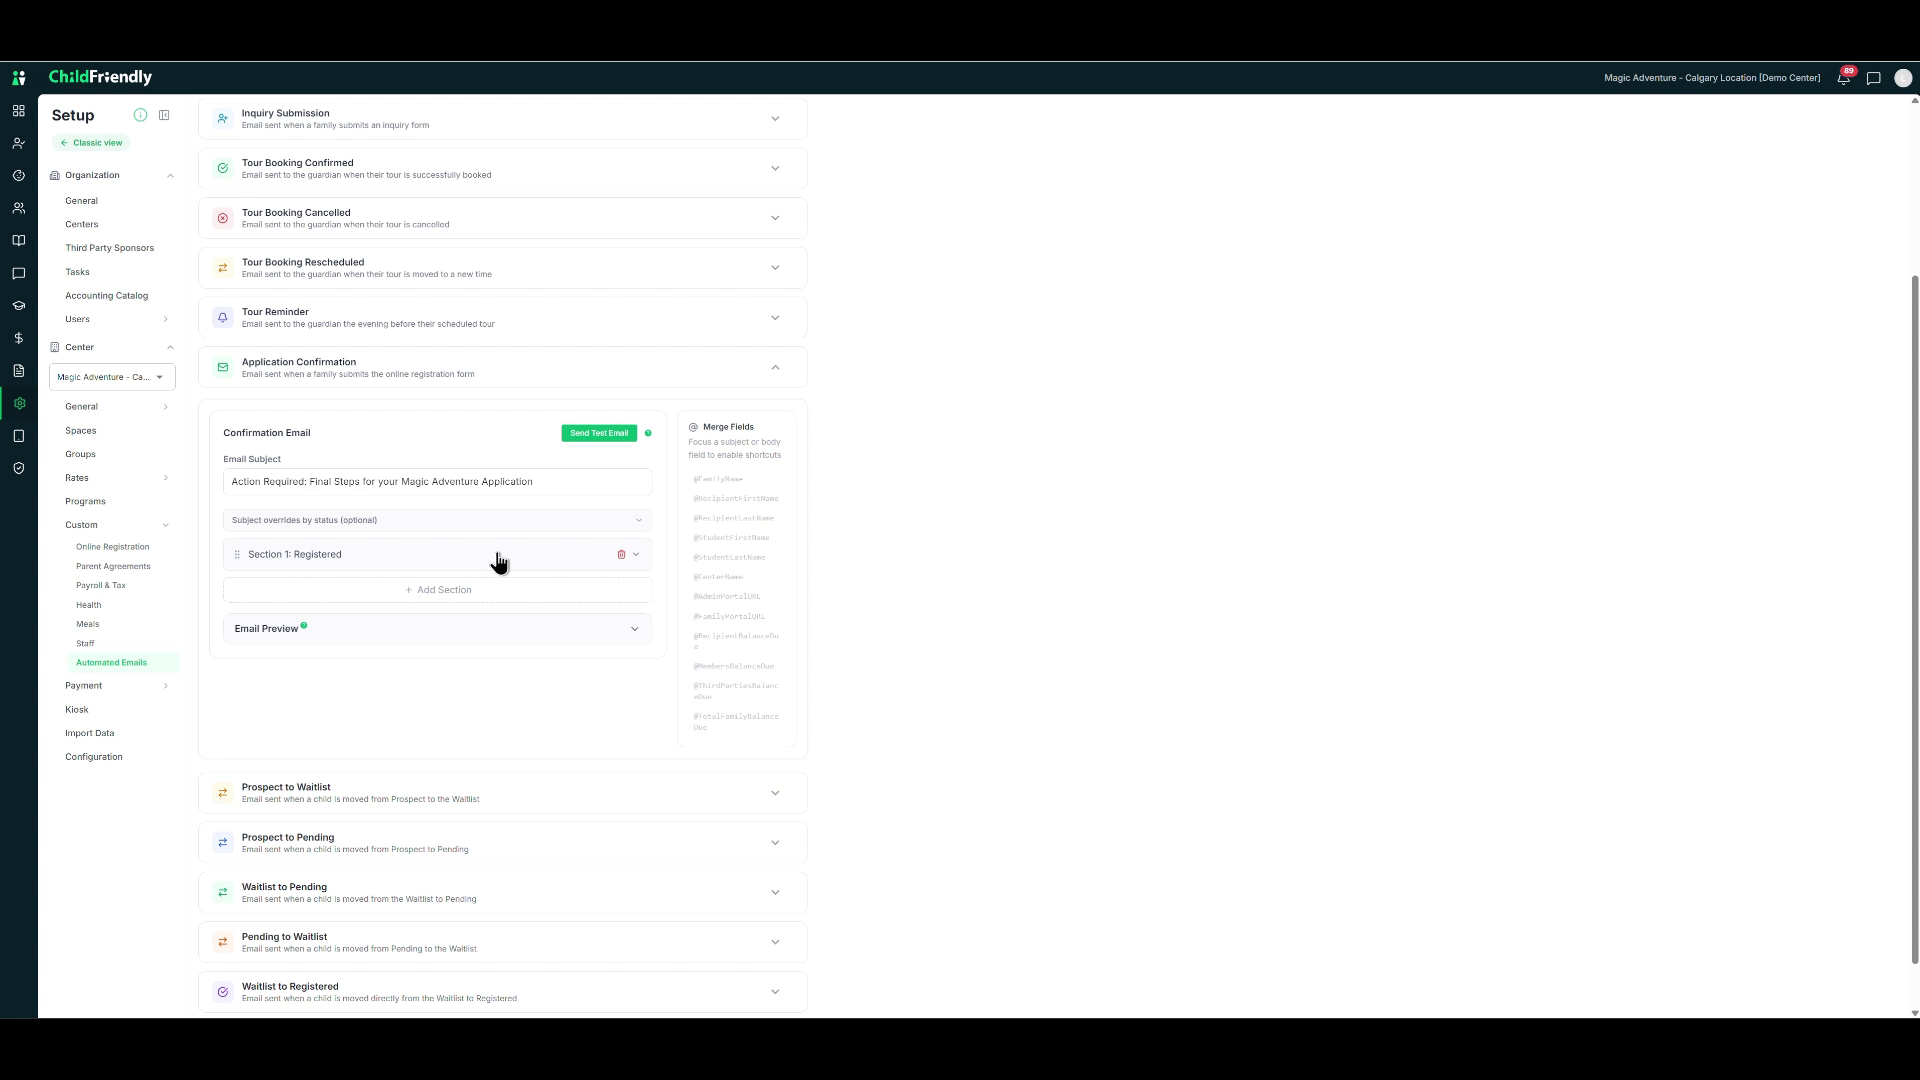
In this email, you can:
Add handbook information and policy links.
Include instructions for first day preparation.
Clarify that this is an application and that a separate confirmation email will be sent if space is available.
The preview shows the top section (what they registered for, account details, Parent Portal login, and password) followed by your customizable content.
You can also customize other automated emails, such as:
Moving a prospective student to the Waitlist
Moving to Pending registration
Changing Waitlist → Pending, Pending → Waitlist, or Pending → Registered
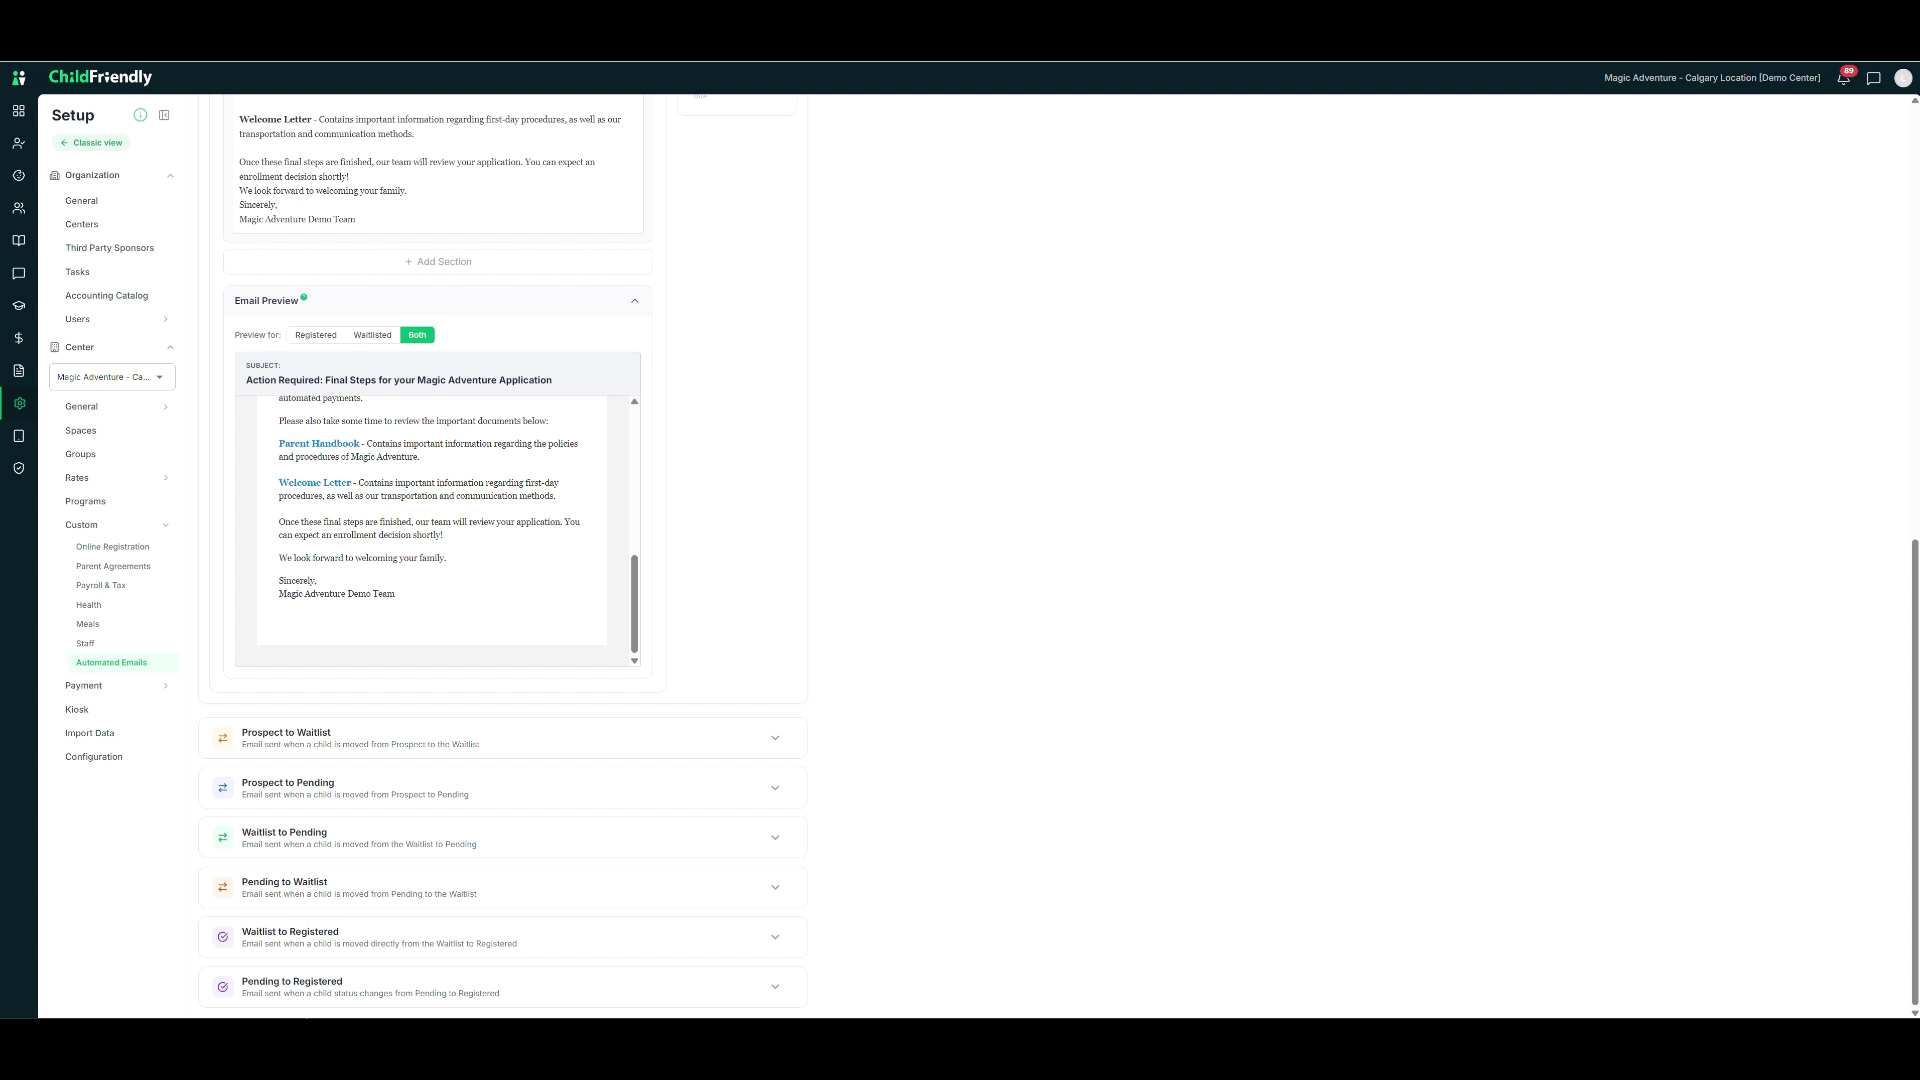
All of these emails are configurable to keep your processes streamlined and communication clear.
Step 4: Review New Applications in the Onboarding Dashboard
Return to the Admissions Dashboard.
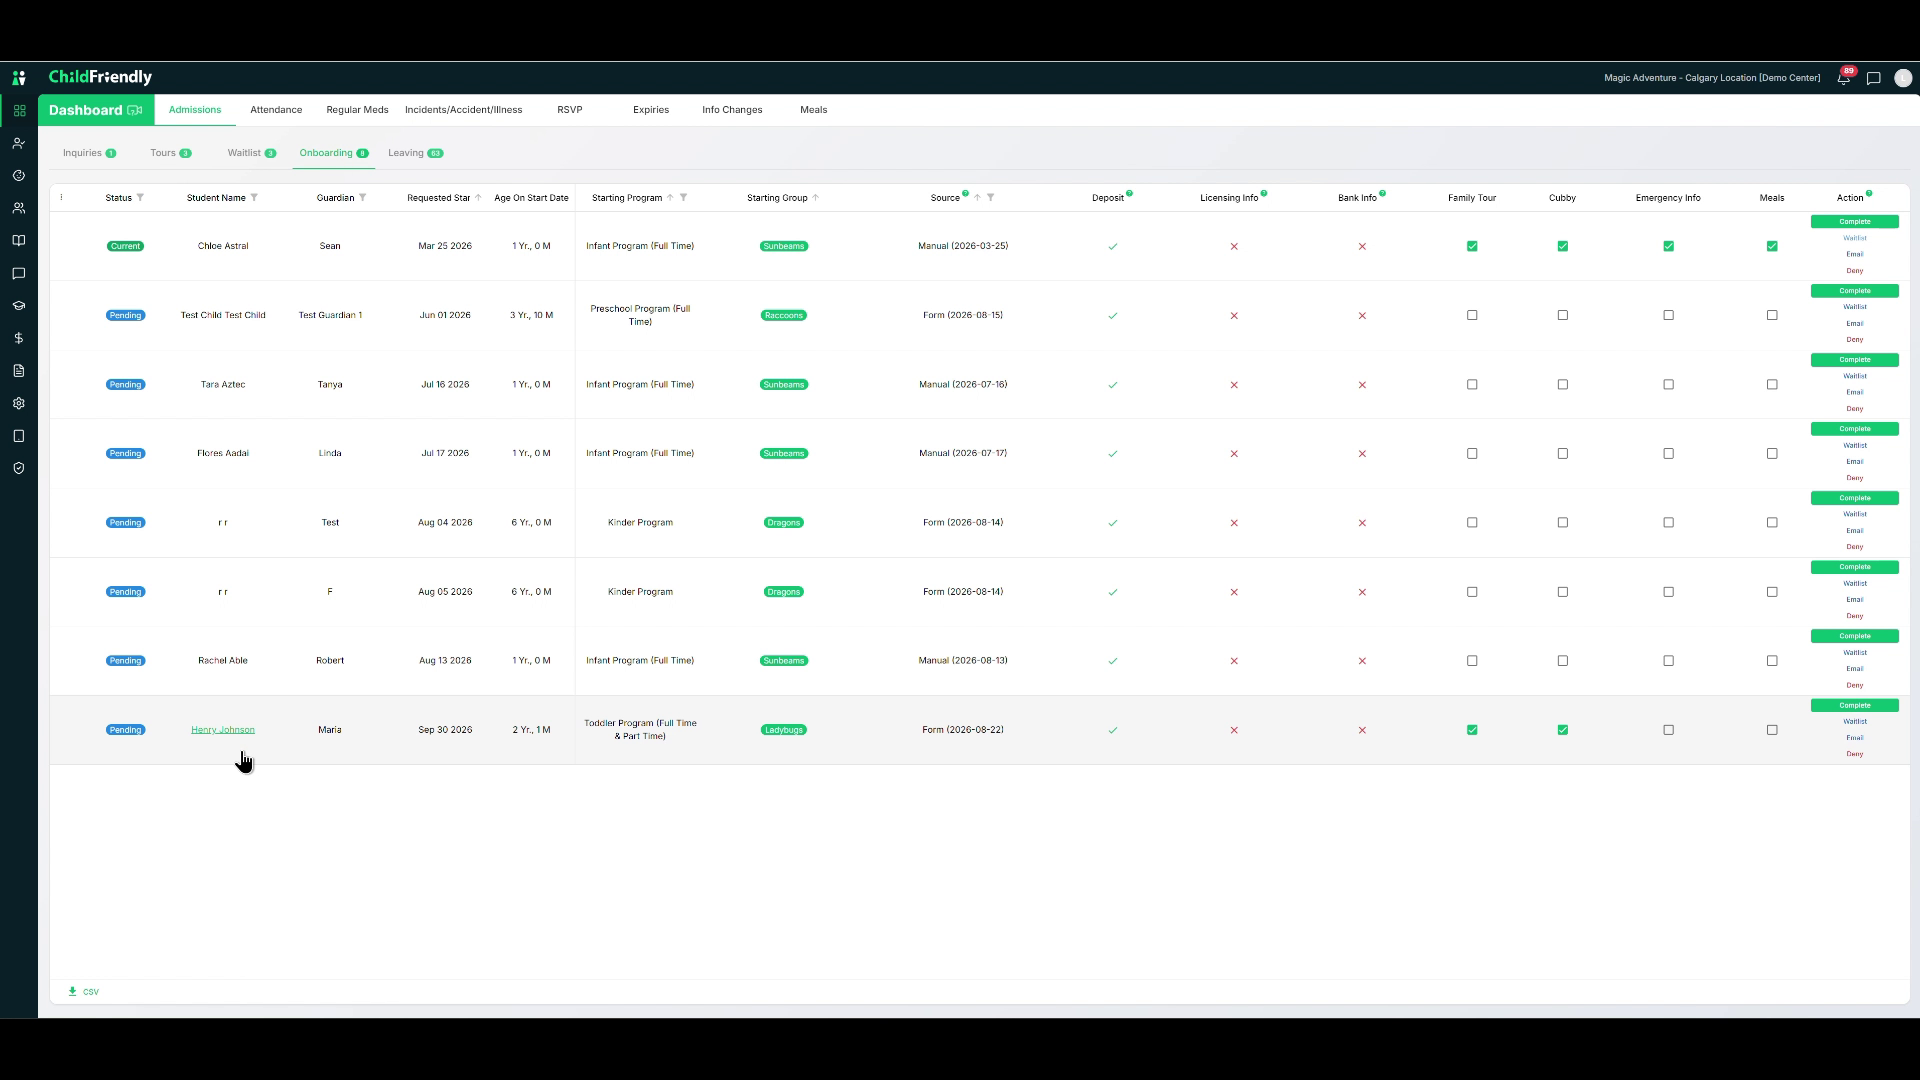
You will see the newly applied child (for example, Henry Johnson) in the Onboarding dashboard with a Pending status.
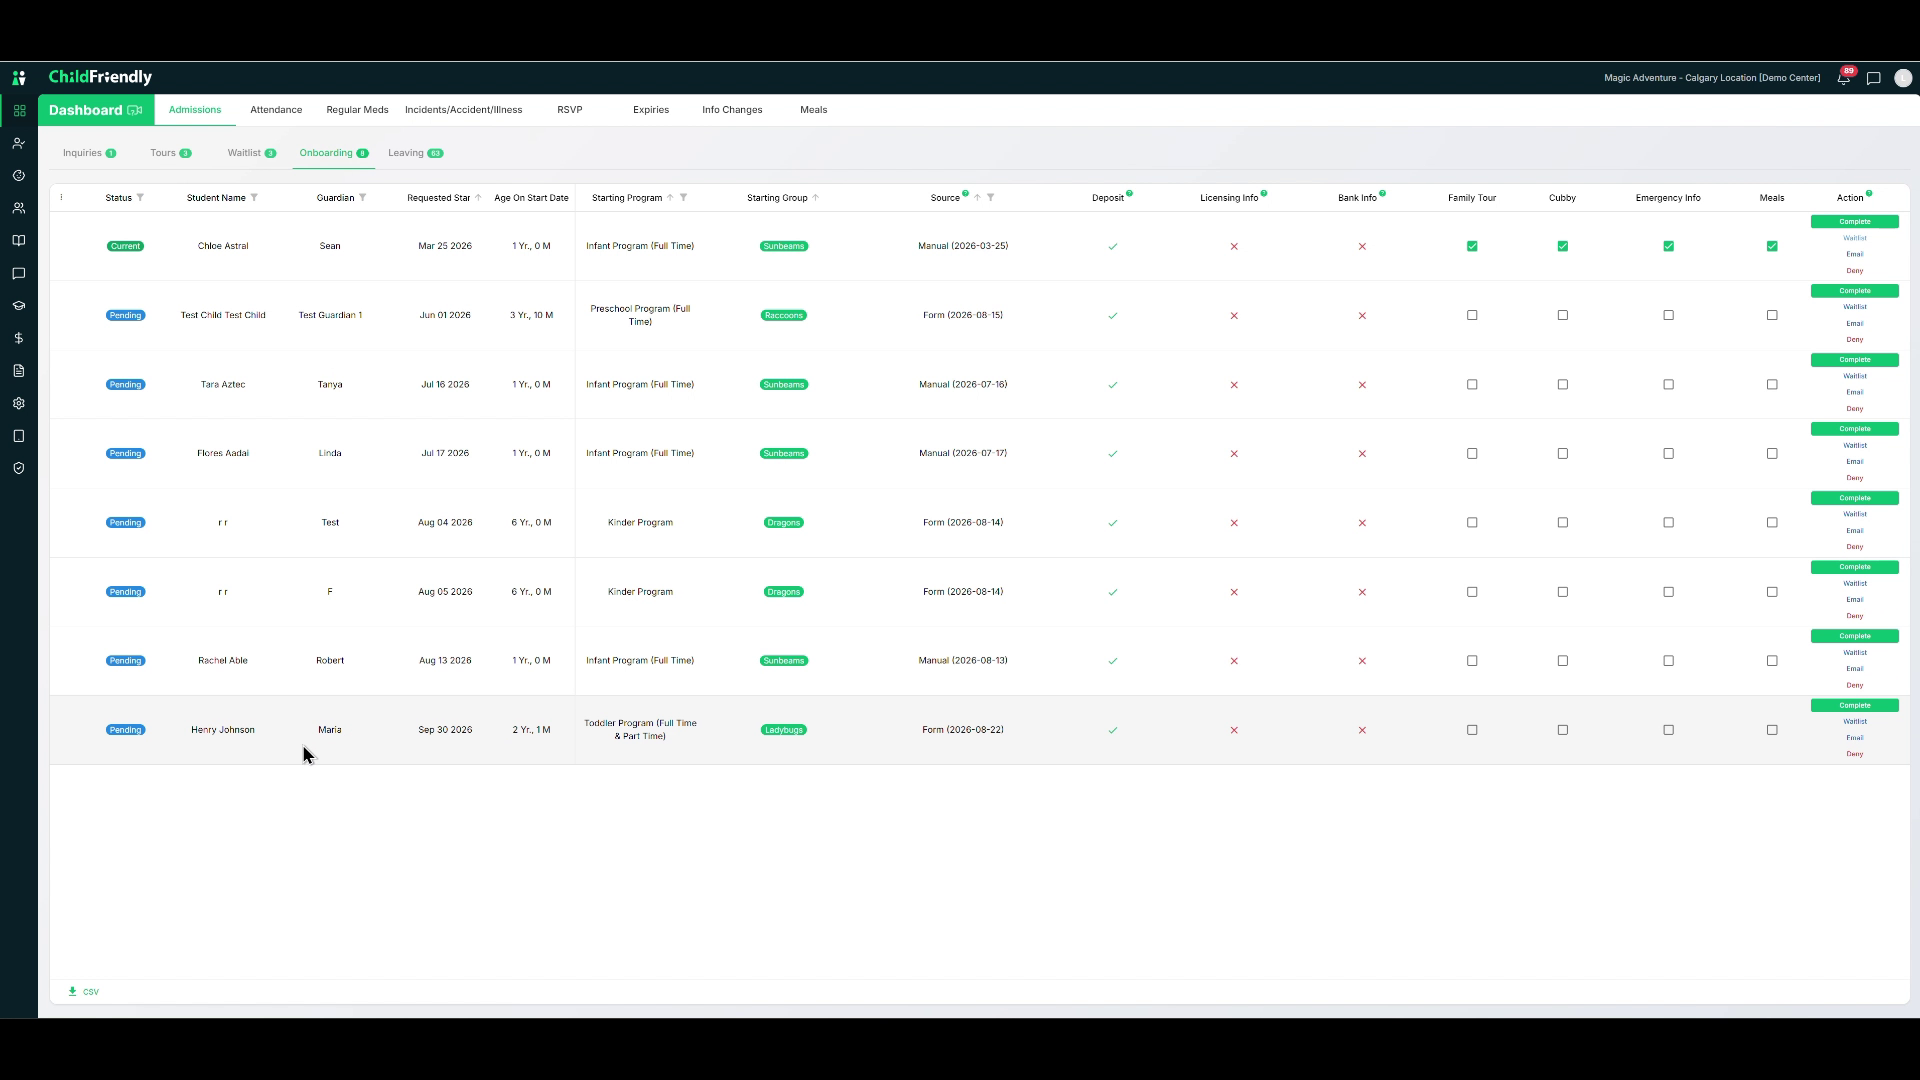
You can view basic information and use the sorting arrows or filter icons along the top to filter by various criteria.
On the far right, the action items allow you to:
Deny the child’s enrollment
Email them a reminder with all outstanding items they still need to complete
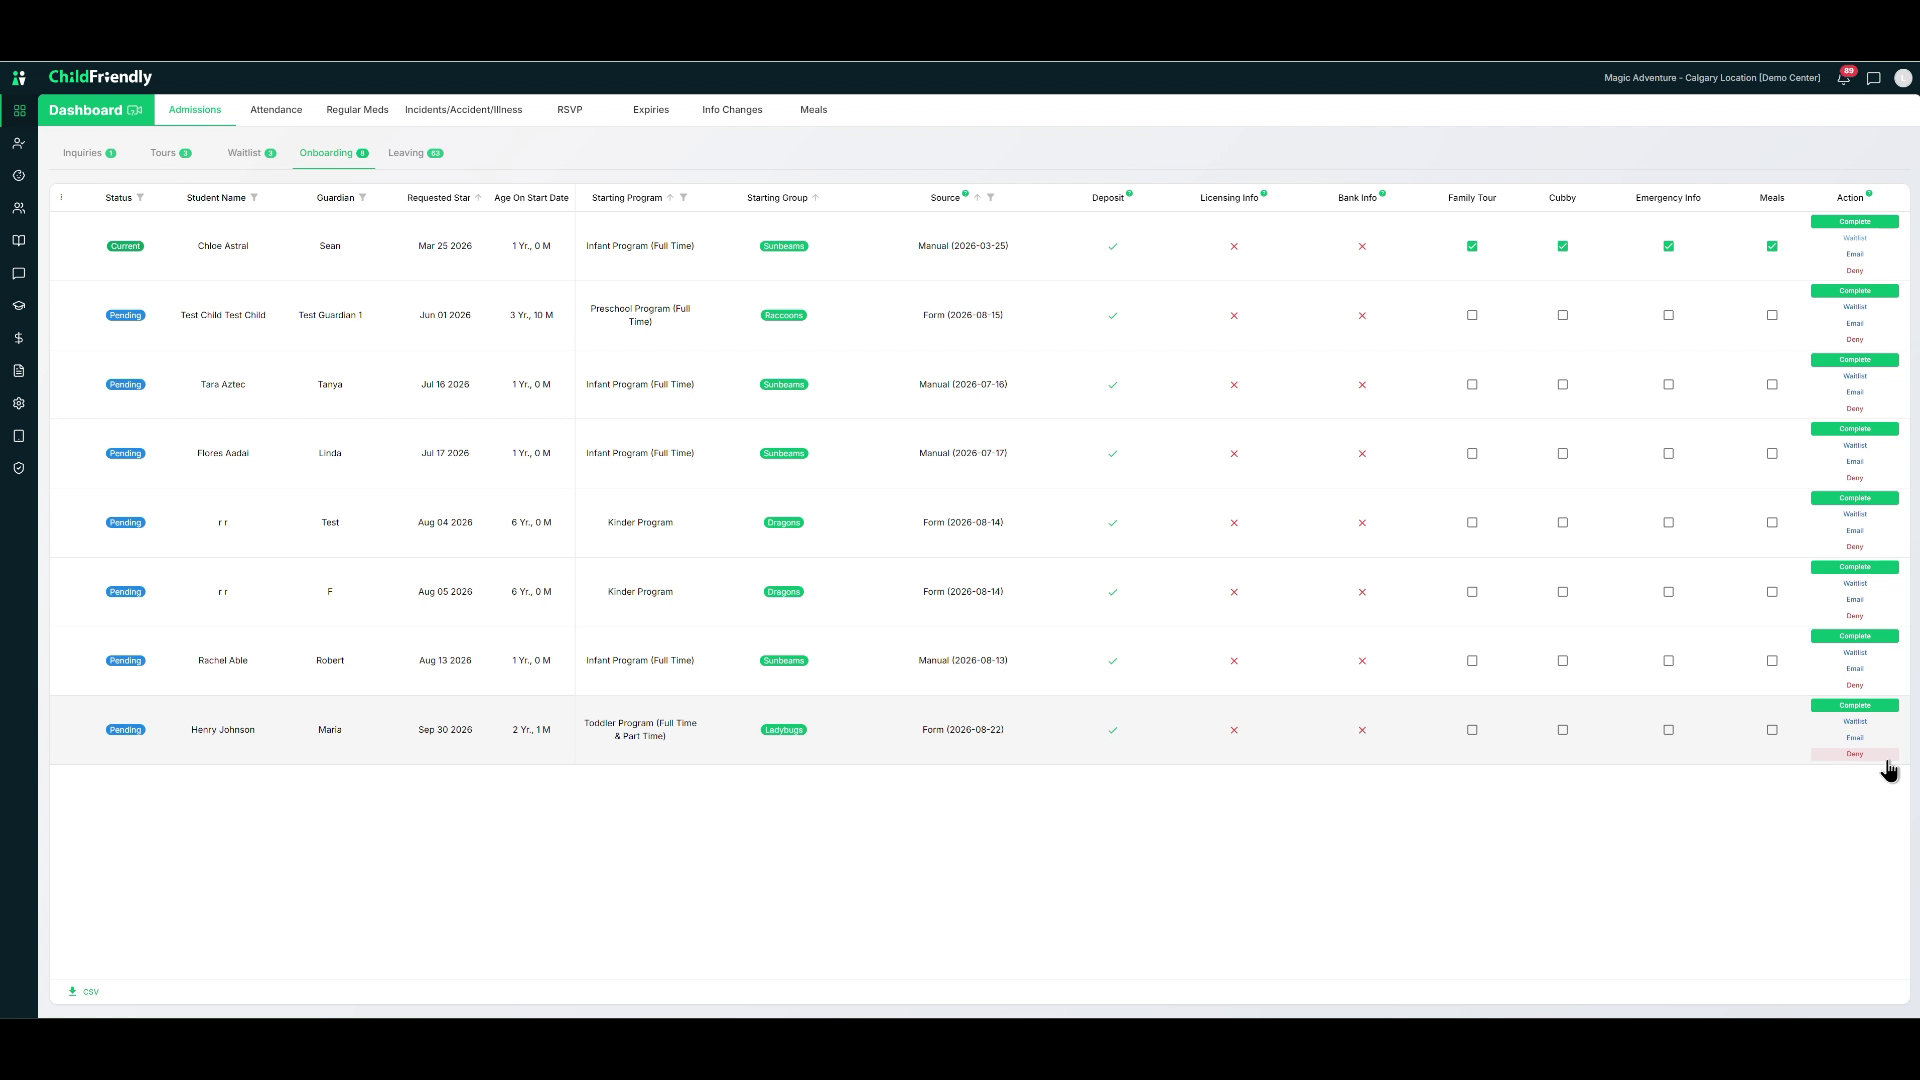
Move to Waitlist, which transfers the child to the Waitlist tab
Complete the onboarding once everything is finished, removing them from the Onboarding tab
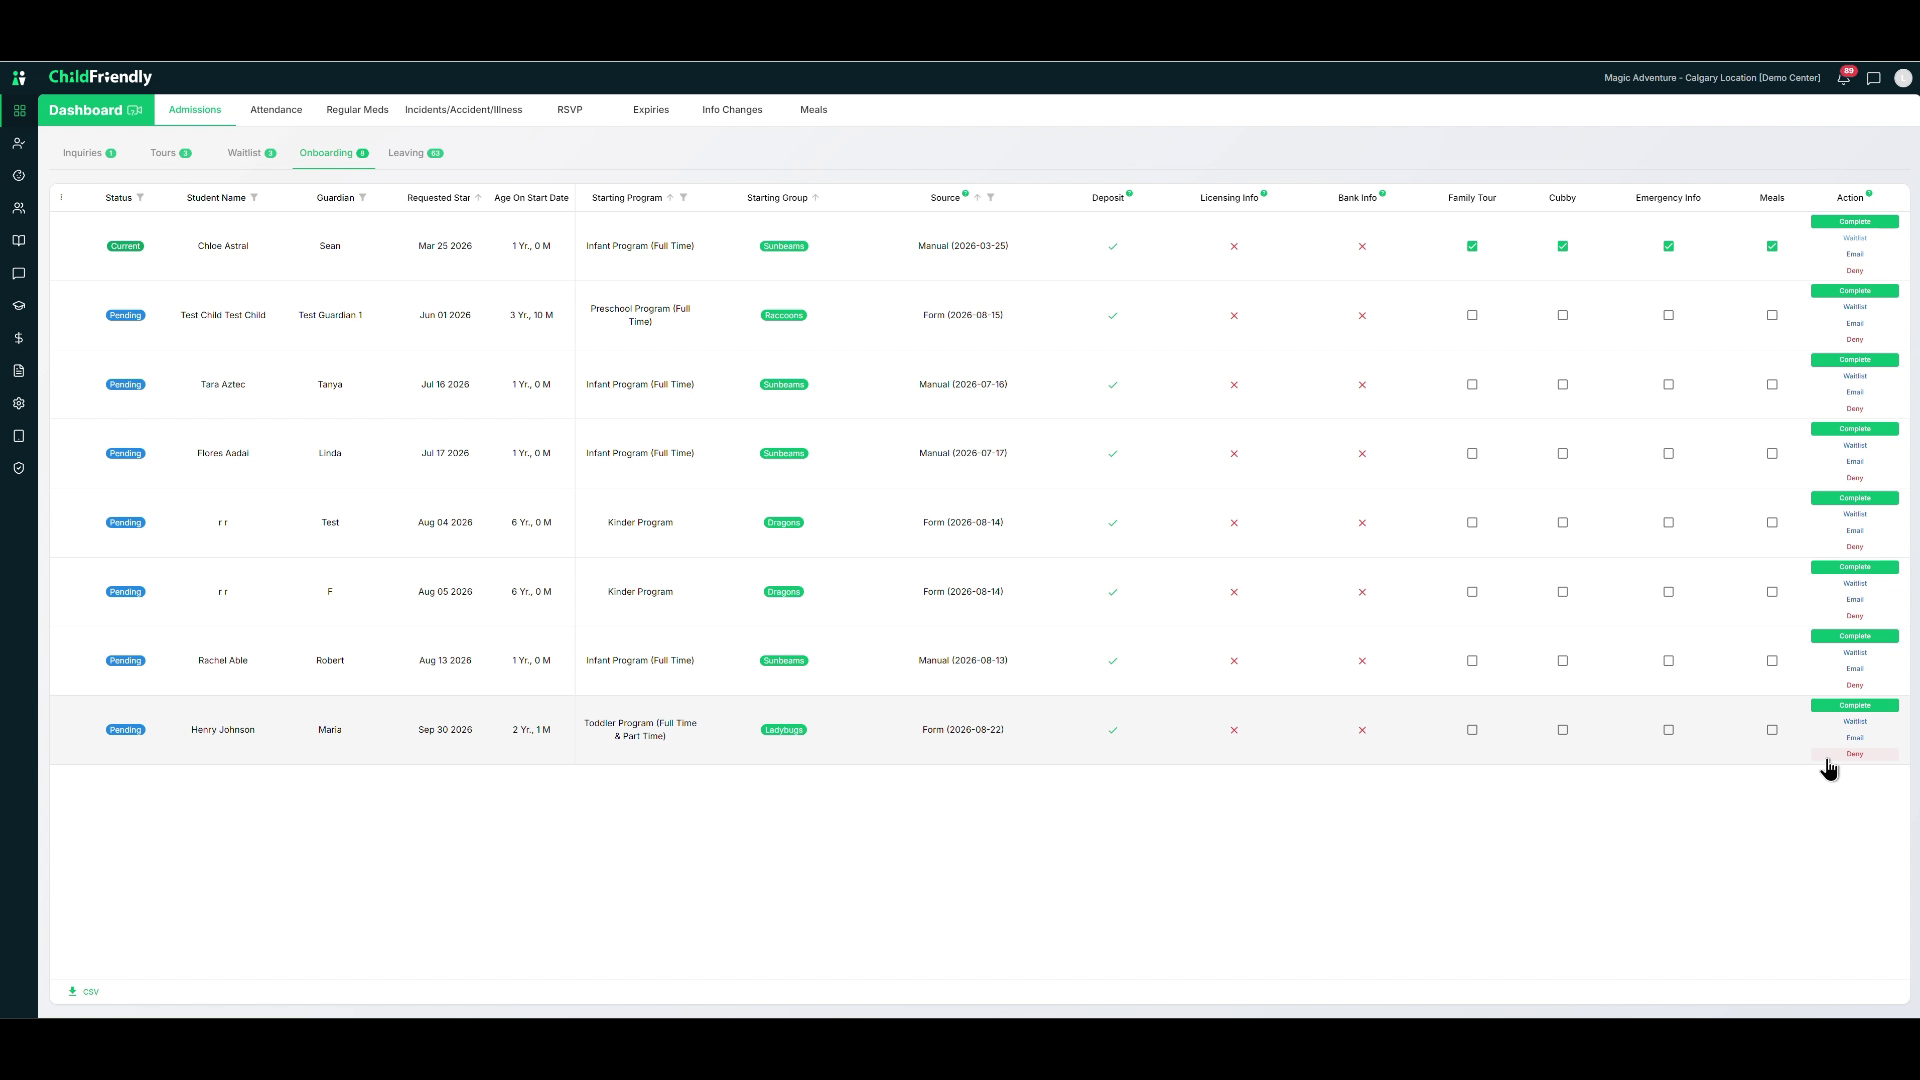
Only press Complete after all onboarding items for that child are fully done.
Step 5: Manage and Customize Onboarding Checklist Columns
The Onboarding tab displays a series of columns representing checklist items that must be completed before a child is fully registered and onboarded.
The first three columns are automatically updated by the system:
Deposit – marked complete when the deposit (if applicable) is paid online.
Licensing Info – marked when parents have filled out all required licensing details (allergies, medical conditions, emergency contacts, etc.) in the Parent Portal.
Banking Information – marked when families have entered payment details (PAD or credit card).
These checklist columns are fully customizable to match your internal processes.
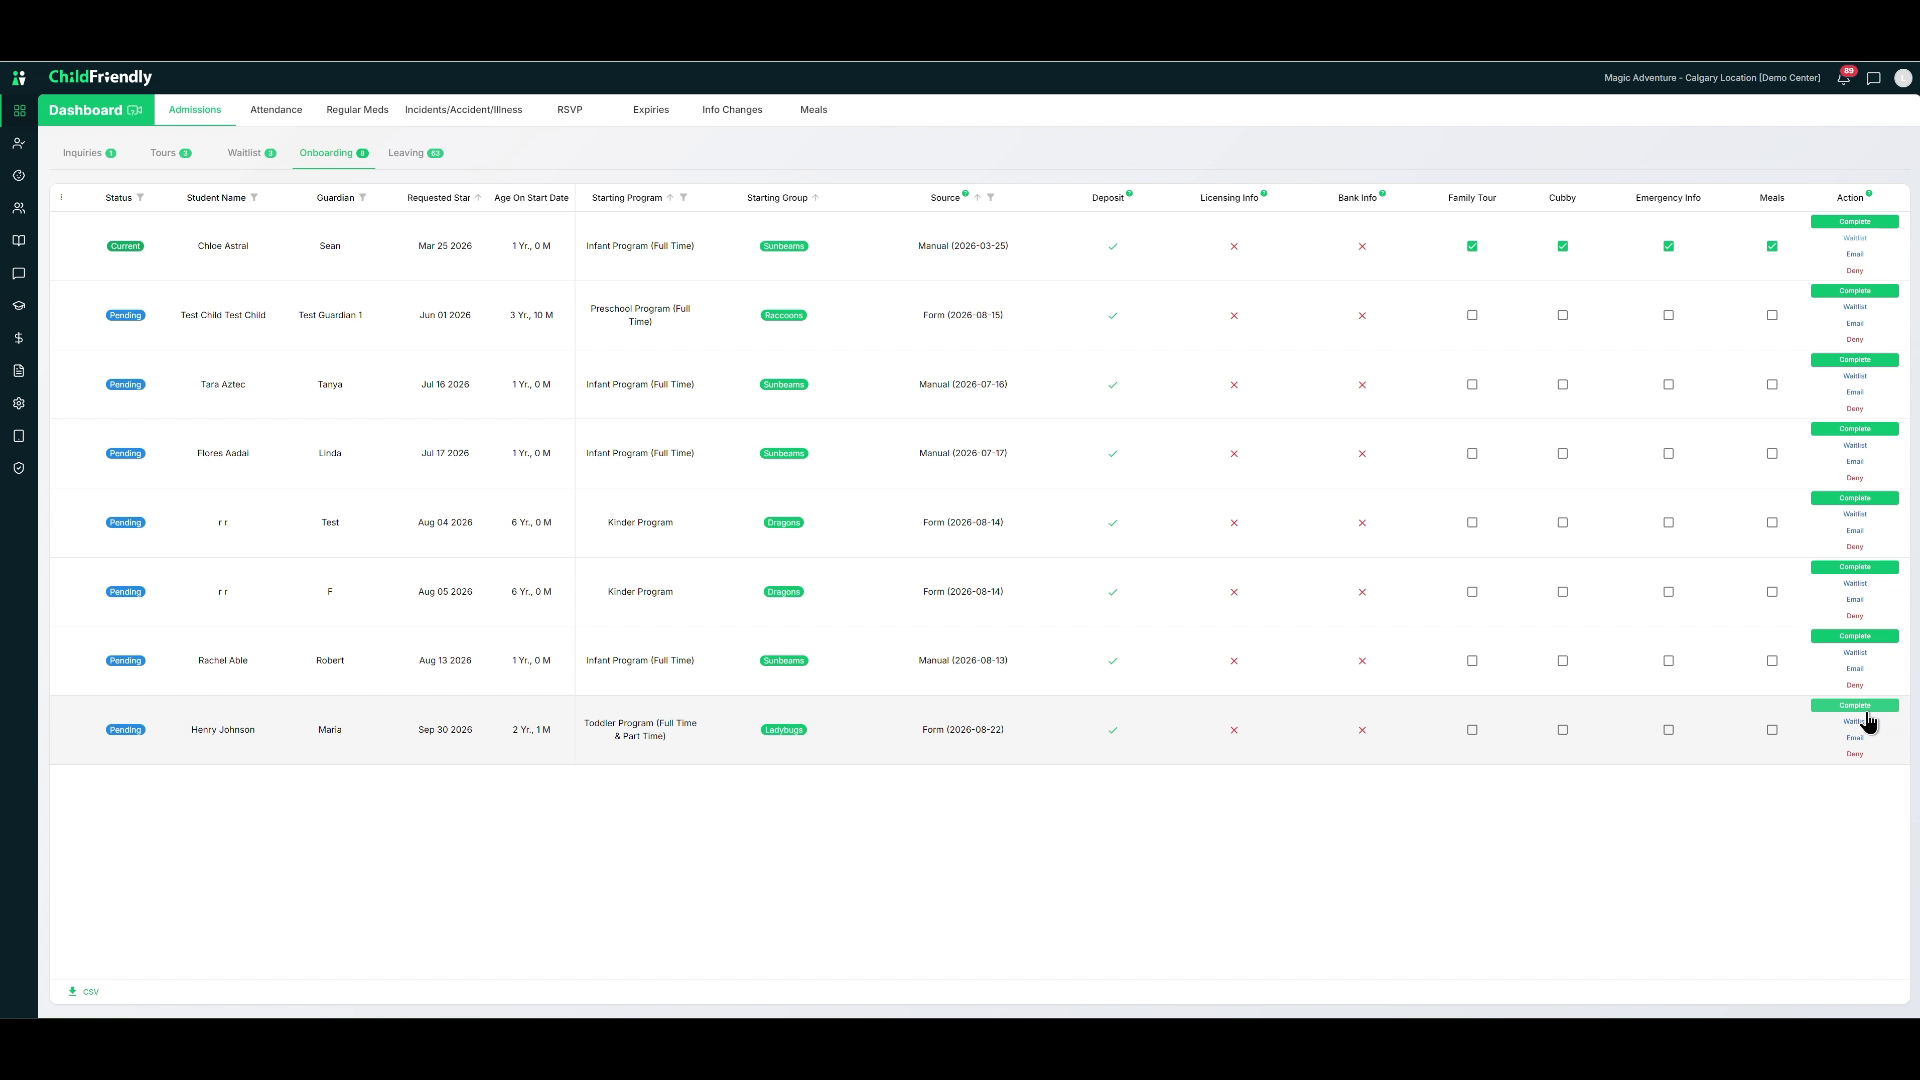
In the demo center, examples include:
Confirming that every family has had a tour
Creating a cubby
Printing the emergency information form and placing it in a physical binder
Adding the child to a meals list, and other center-specific tasks
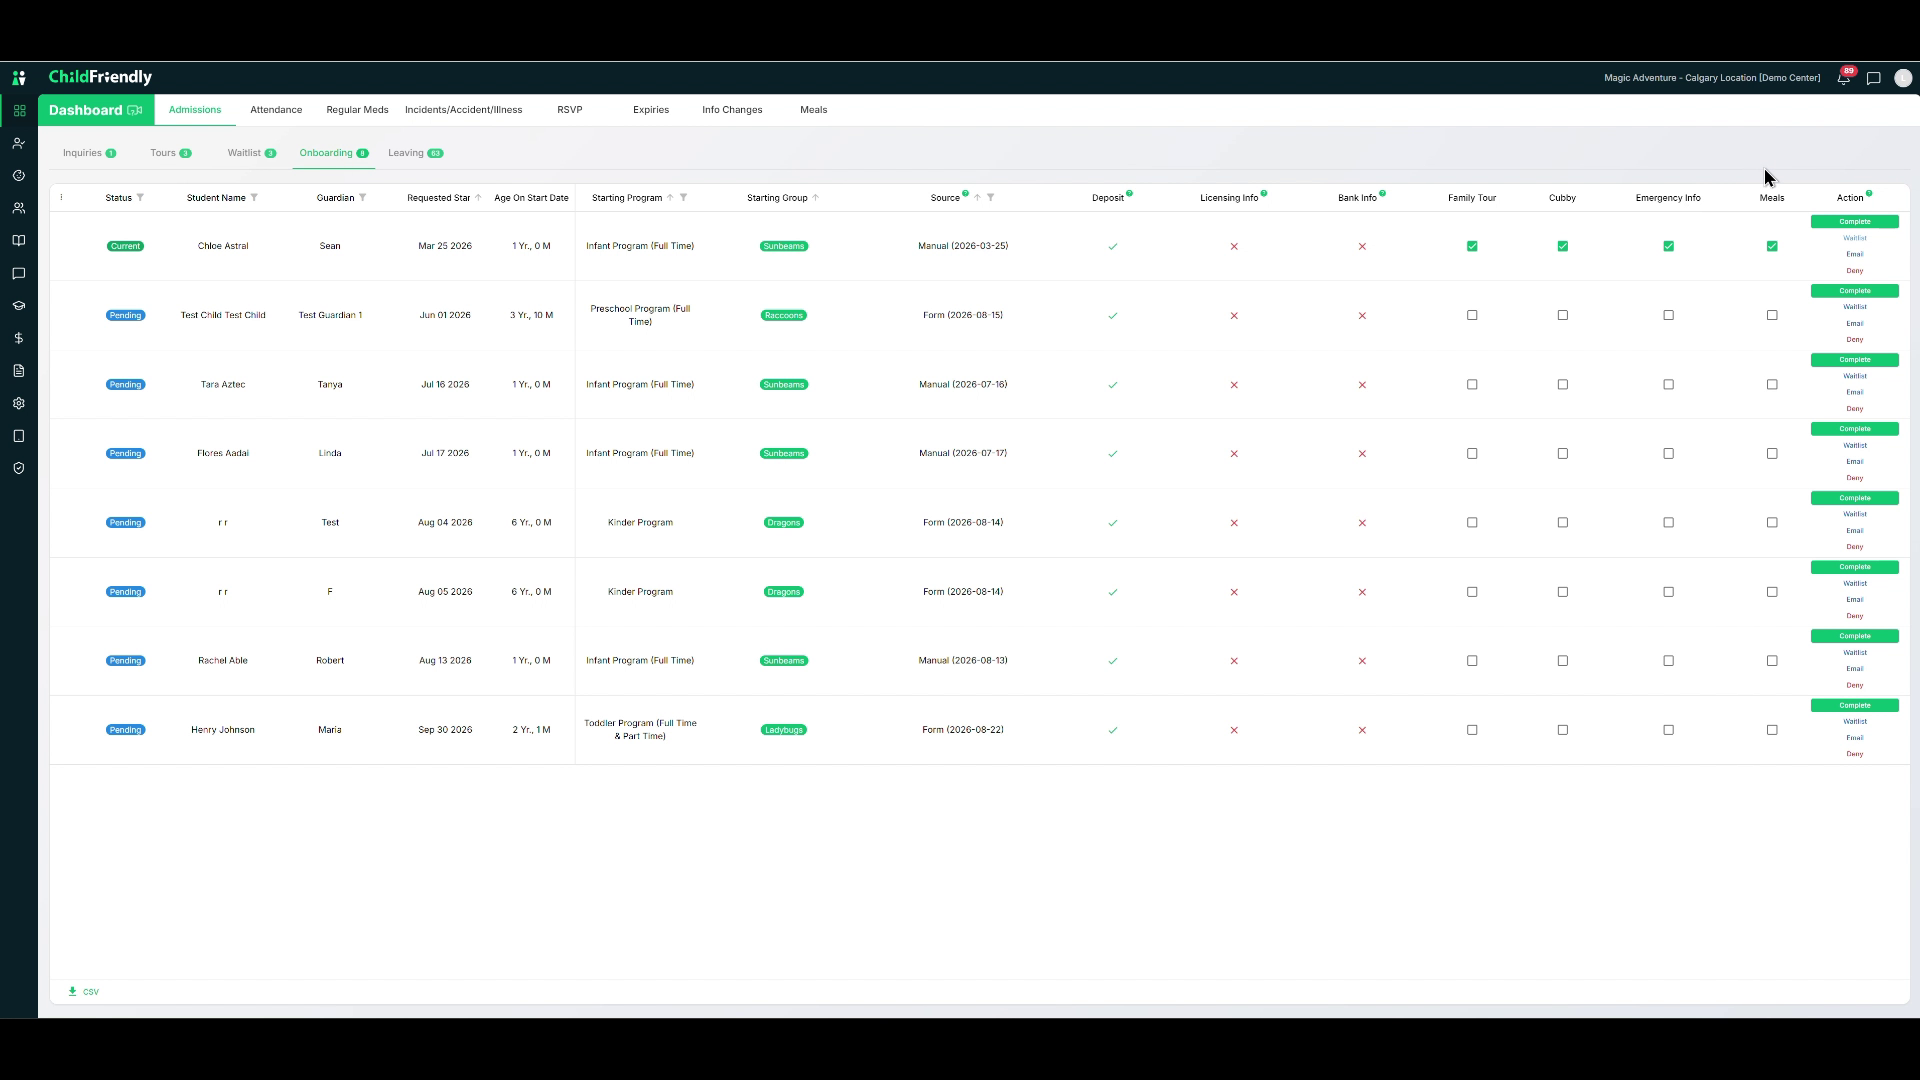
To customize these fields:
Go to the left-hand side and click the three dots.
Select Add or Remove Custom Fields.
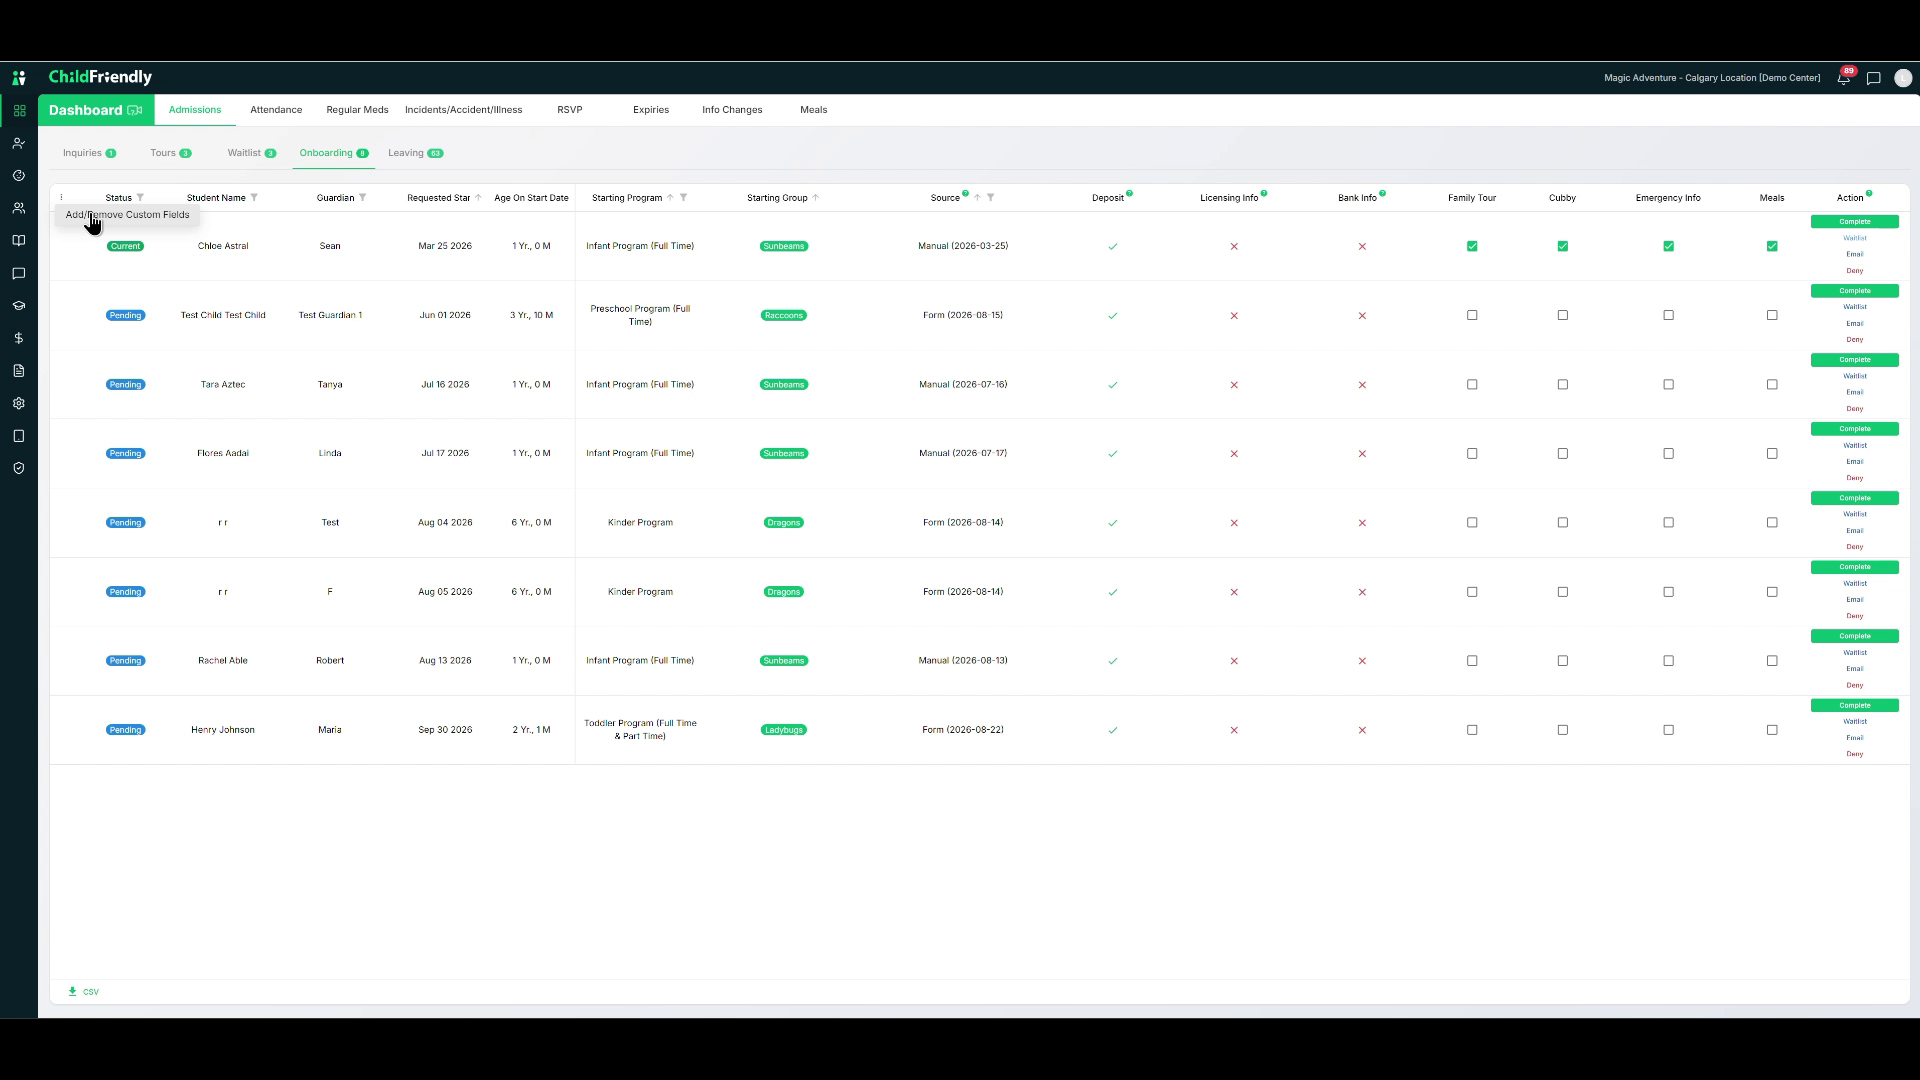
Adjust existing fields or create new ones as needed.
Once all checklist items are complete and all requirements are met, you are ready to move on to registration and then mark the child as Complete in Onboarding.
Step 6: Finalize the Child’s Registration and Future Program Progression
While the child is in Pending state, click into their record to finalize registration.
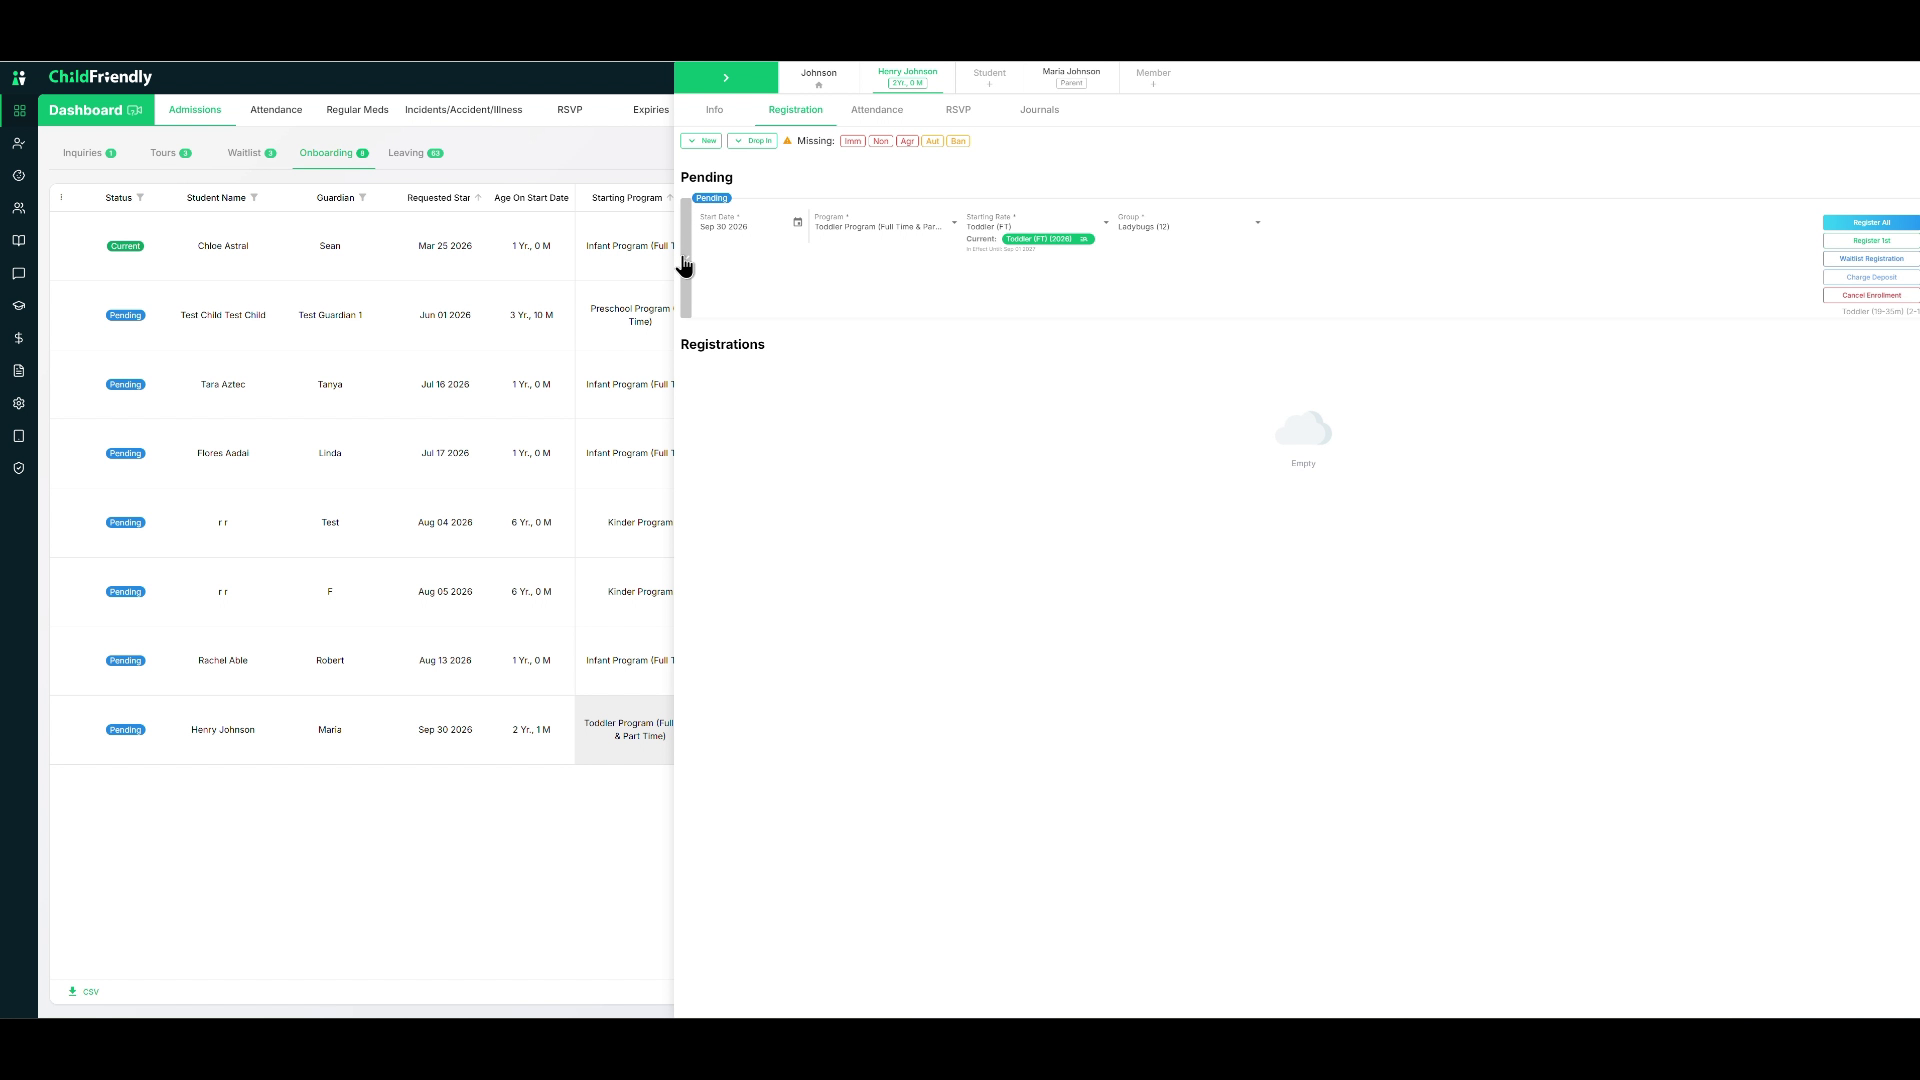
Go to the Registration tab.
You will see a pending registration. Review it to confirm:
Program choice
Start date and rate
Group assignment
All of these are initially based on your center’s settings but can be adjusted.
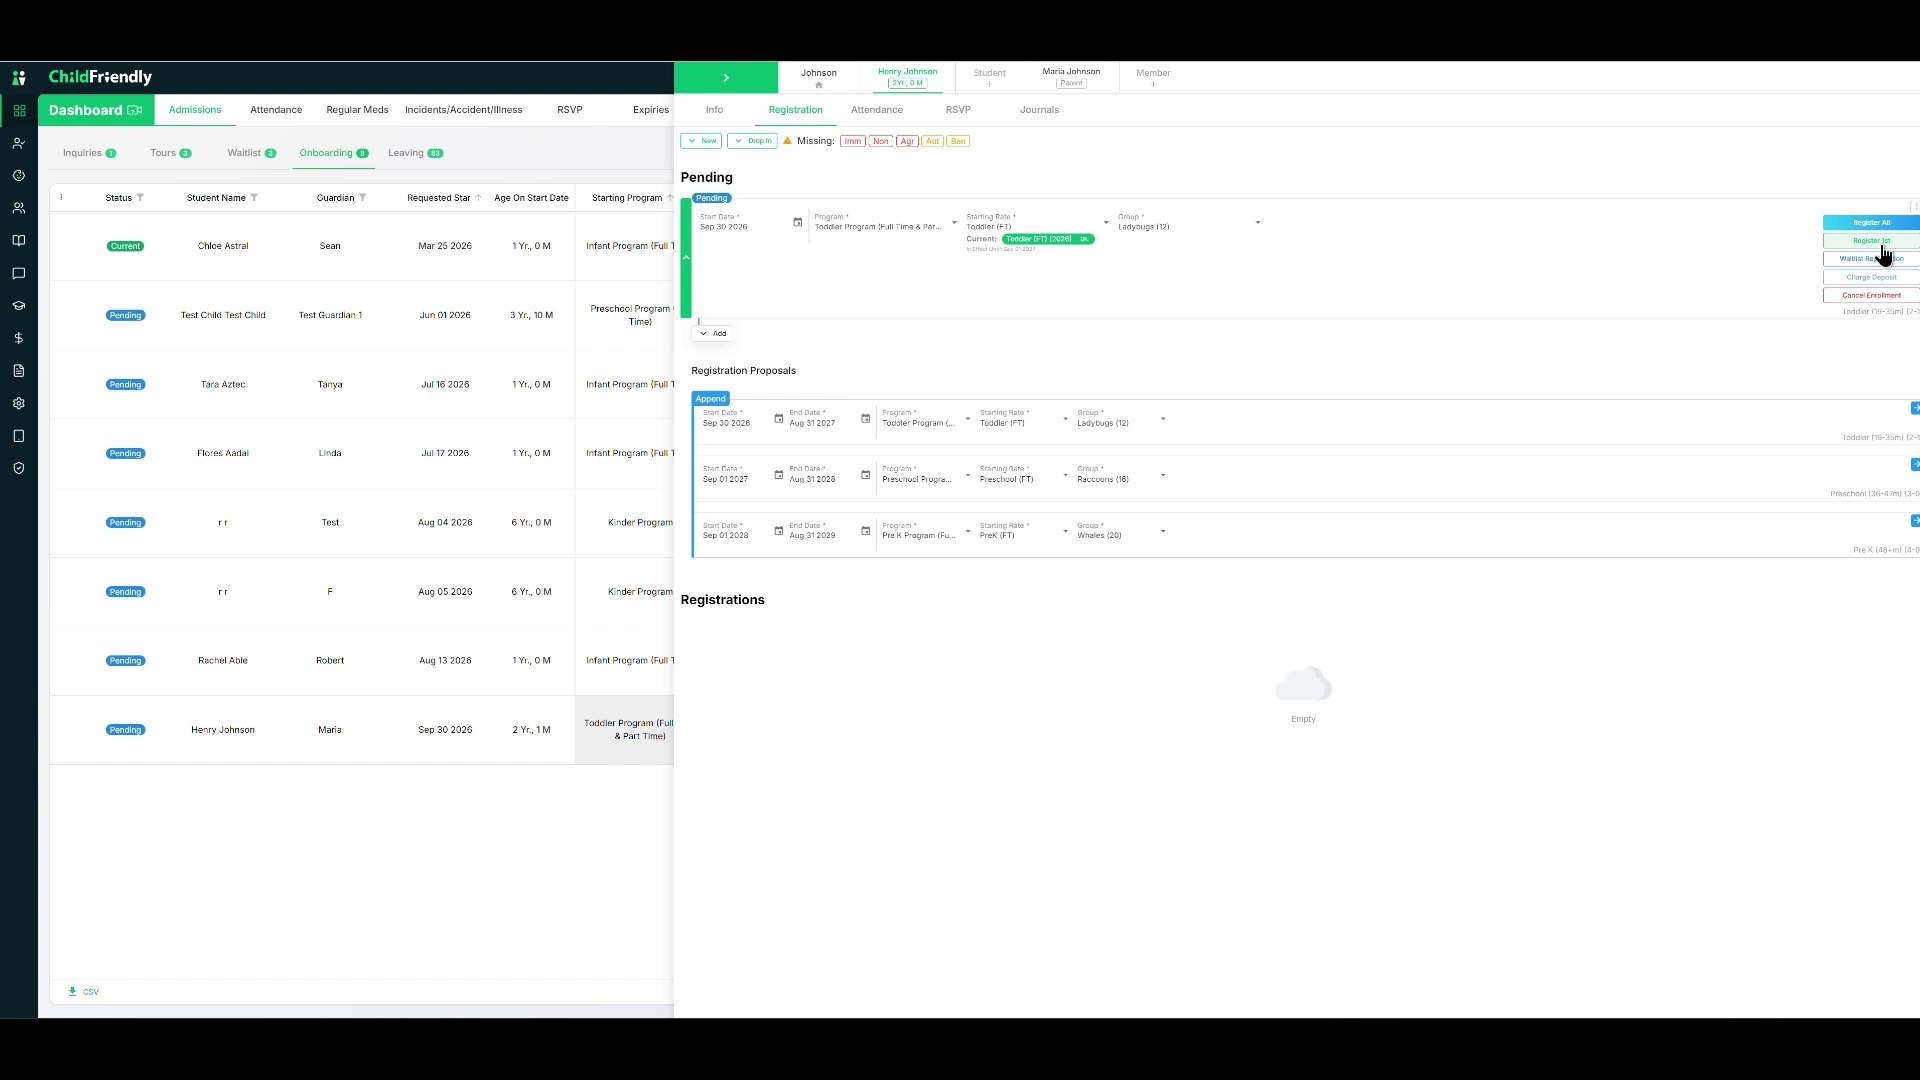
To see the full registration plan, click the arrow to expand it.
The system may propose a progression of registrations based on the child’s age, for example:
Initial toddler program ending when the child ages out (e.g., August 31, 2027)
A follow‑up preschool program starting in September 2027
A pre‑K program starting in September 2028 and ending when they age out of the center
You can:
Register only the first pending registration by clicking Register First
Or register the entire proposed progression through to aging out by clicking Register All
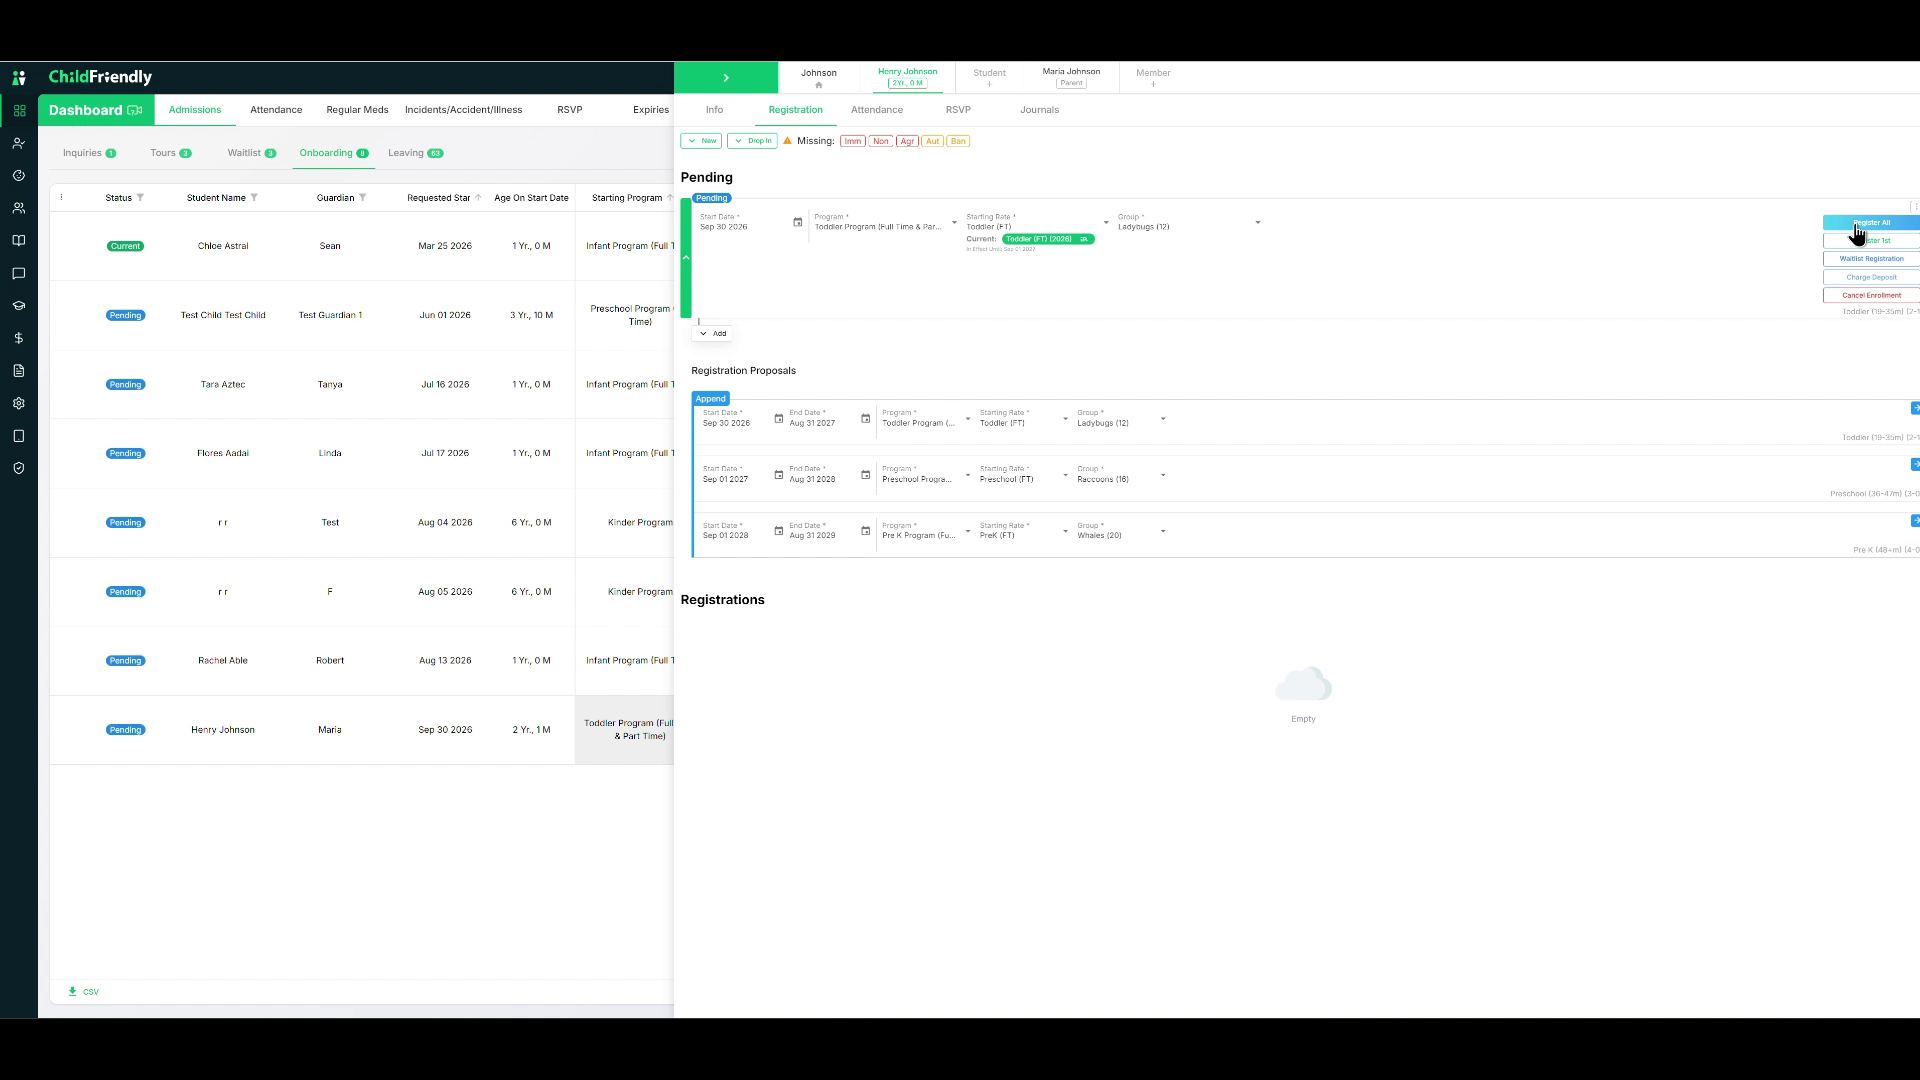
Registering all is recommended so the system can:
Accurately forecast enrollment and occupancy into the future
Prevent accidental overbooking when children move up through programs
After clicking Register All, the system shows:
The overall registration period (e.g., from September 26 until the child ages out in 2029)
All underlying program registrations
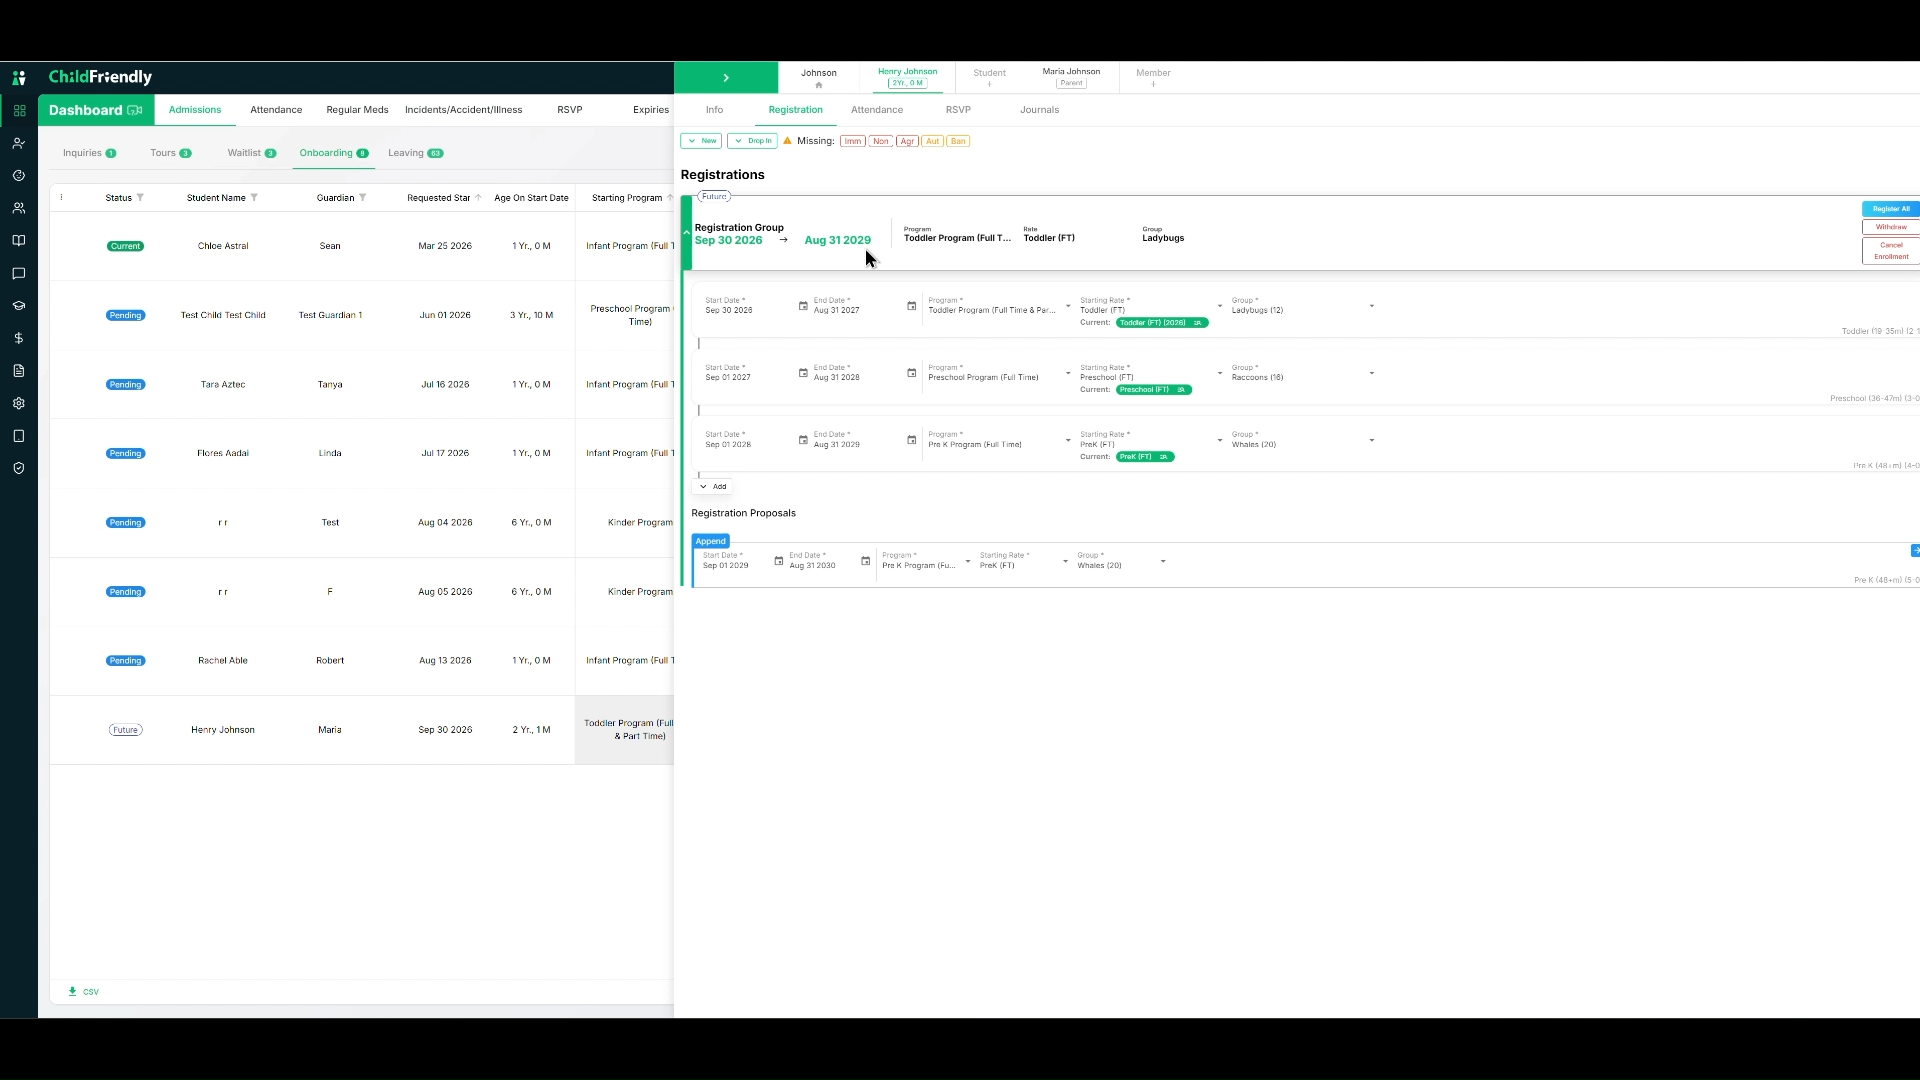
You will now see that the child’s status has changed from Pending to Future, based on the start date.
When all onboarding checklist items are complete, click Complete to remove the child from the Onboarding tab—they are now fully registered and ready for their first day.
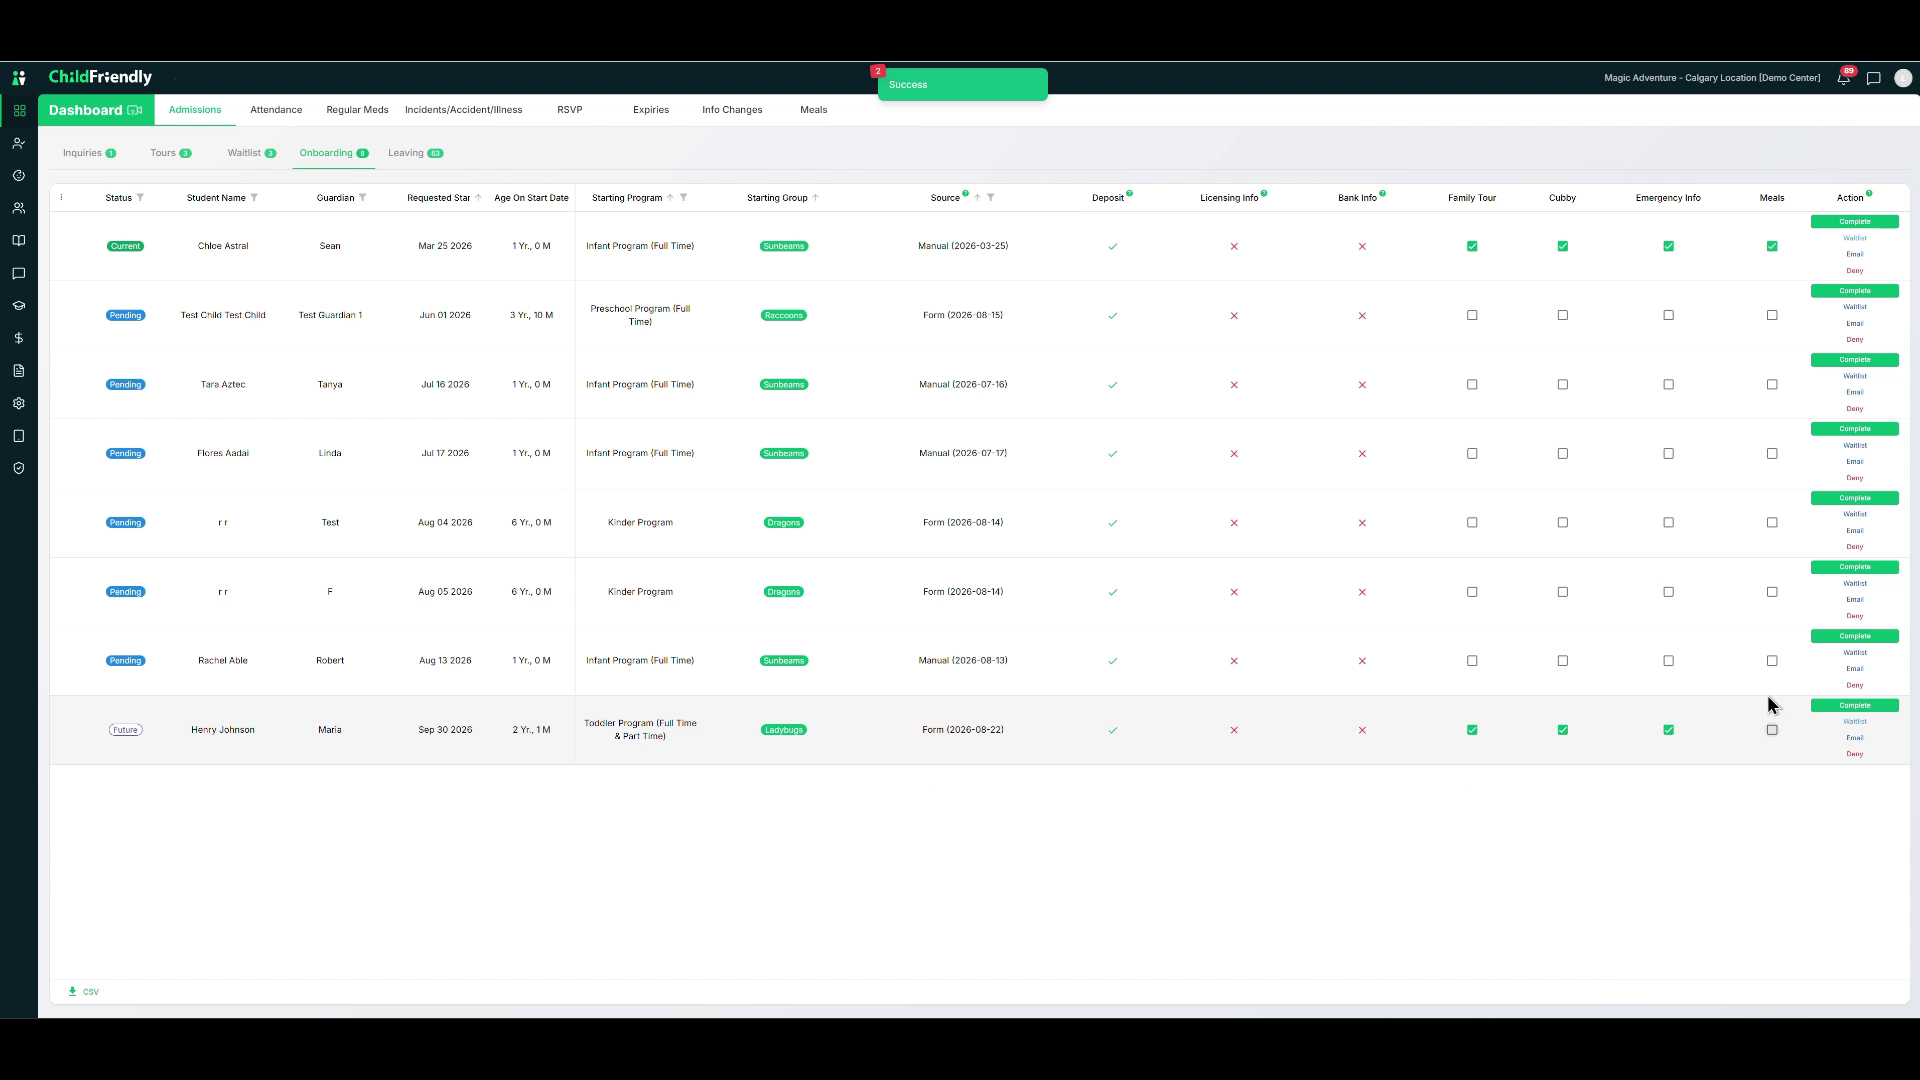
When a child moves from Pending to a registered status (Future or Current), the automated Pending to Registered email (which you can customize in your center settings) is automatically sent.
Step 7: Manage Children in the Waitlist Stage
When a child applies online and there is no availability in the requested program, the system offers a Waitlist option for that program.
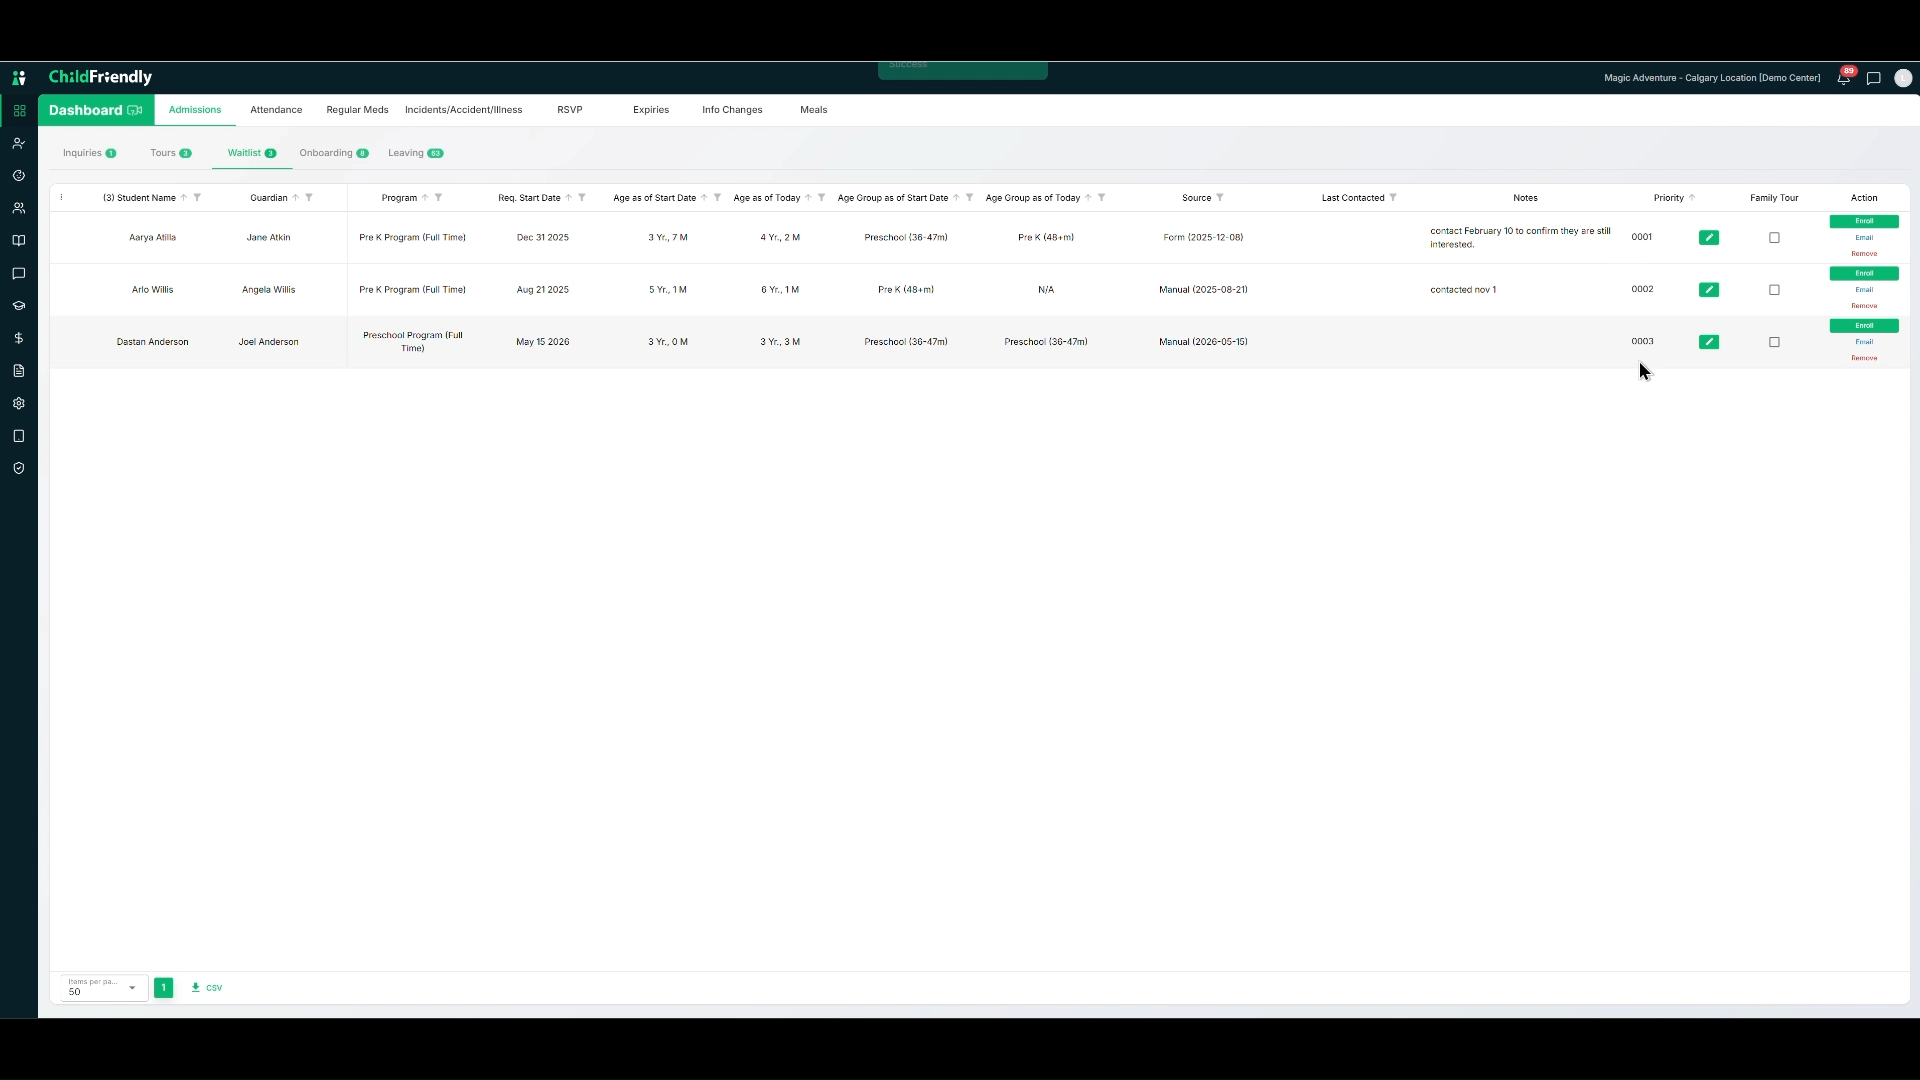
Children can appear in the Waitlist stage in two ways:
They apply online and are placed on the waitlist due to lack of space.
You manually move them from Inquiries, Tours, or Onboarding into the Waitlist.
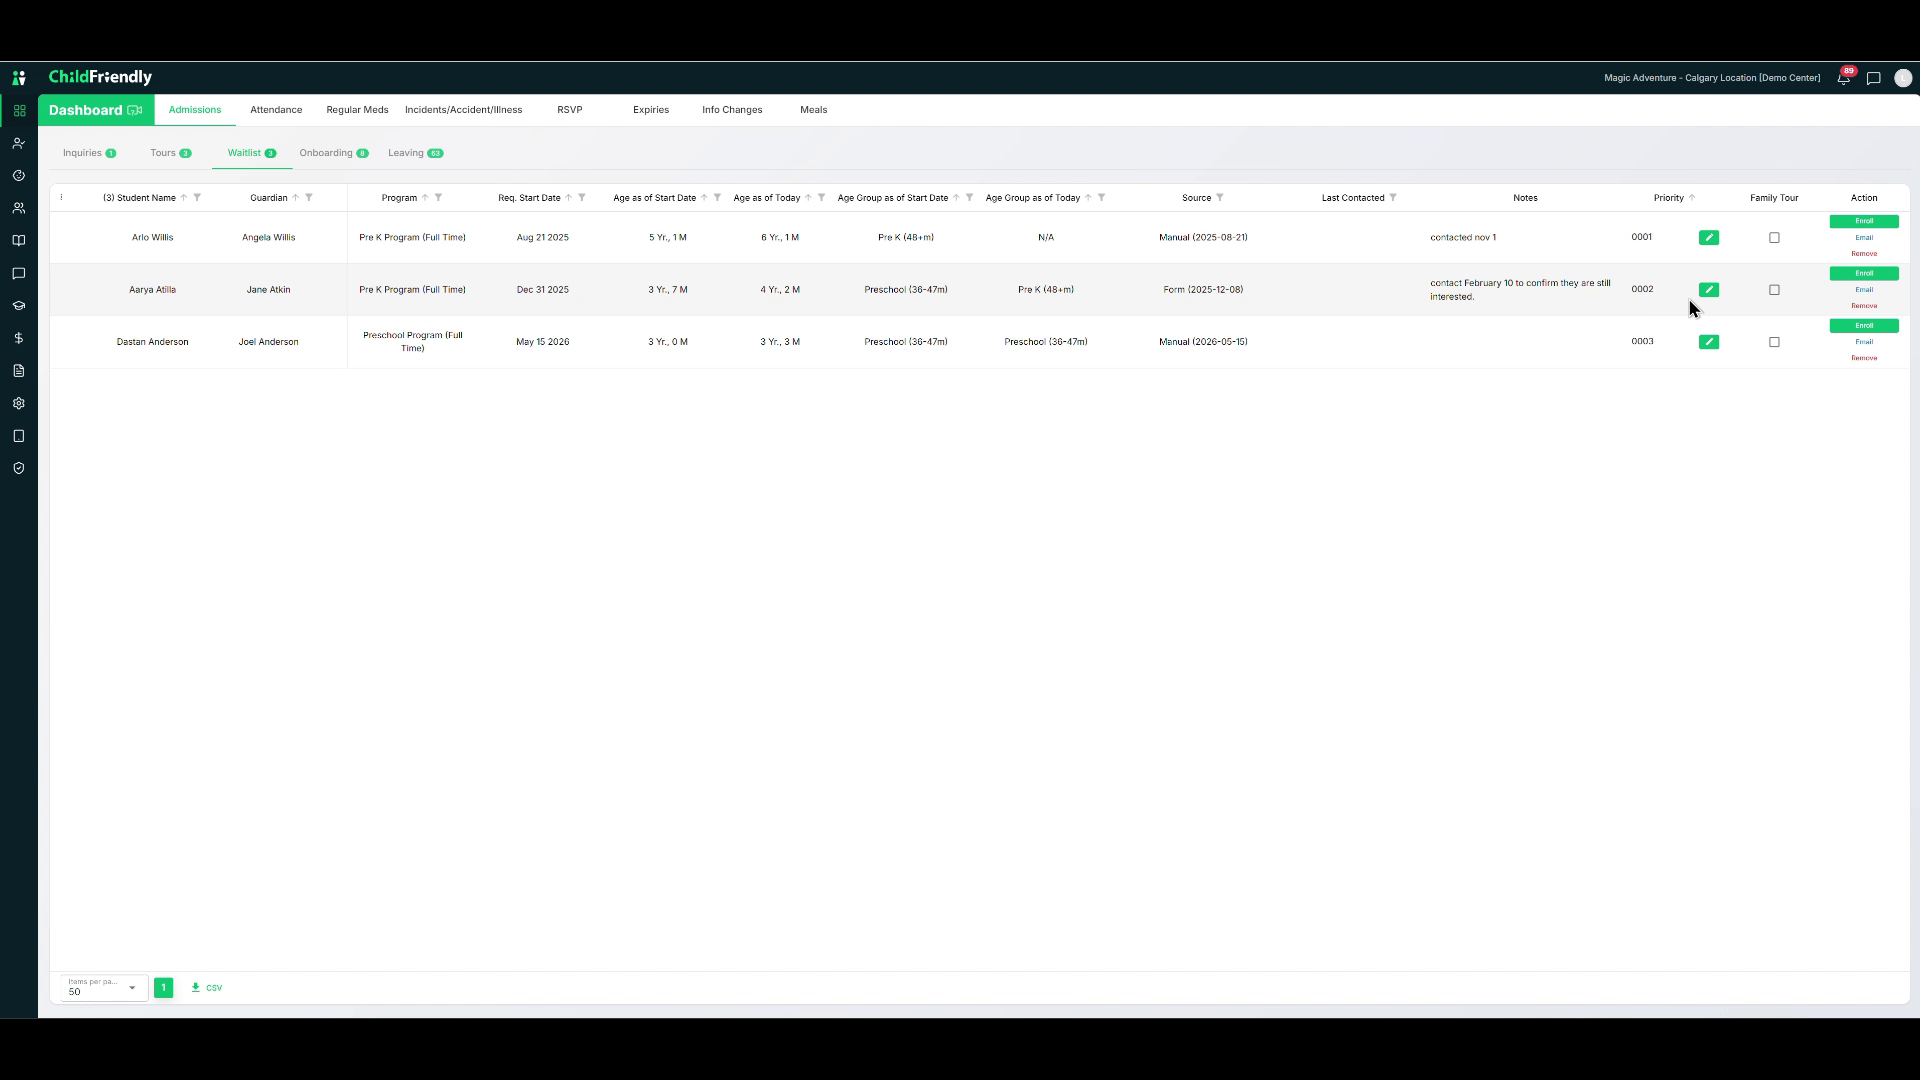
In the Waitlist tab, you can:
Create custom columns for your waitlist processes using the triple-dot menu.
View and filter basic information along the top.
Add private notes.
Email families directly using the email shortcut.
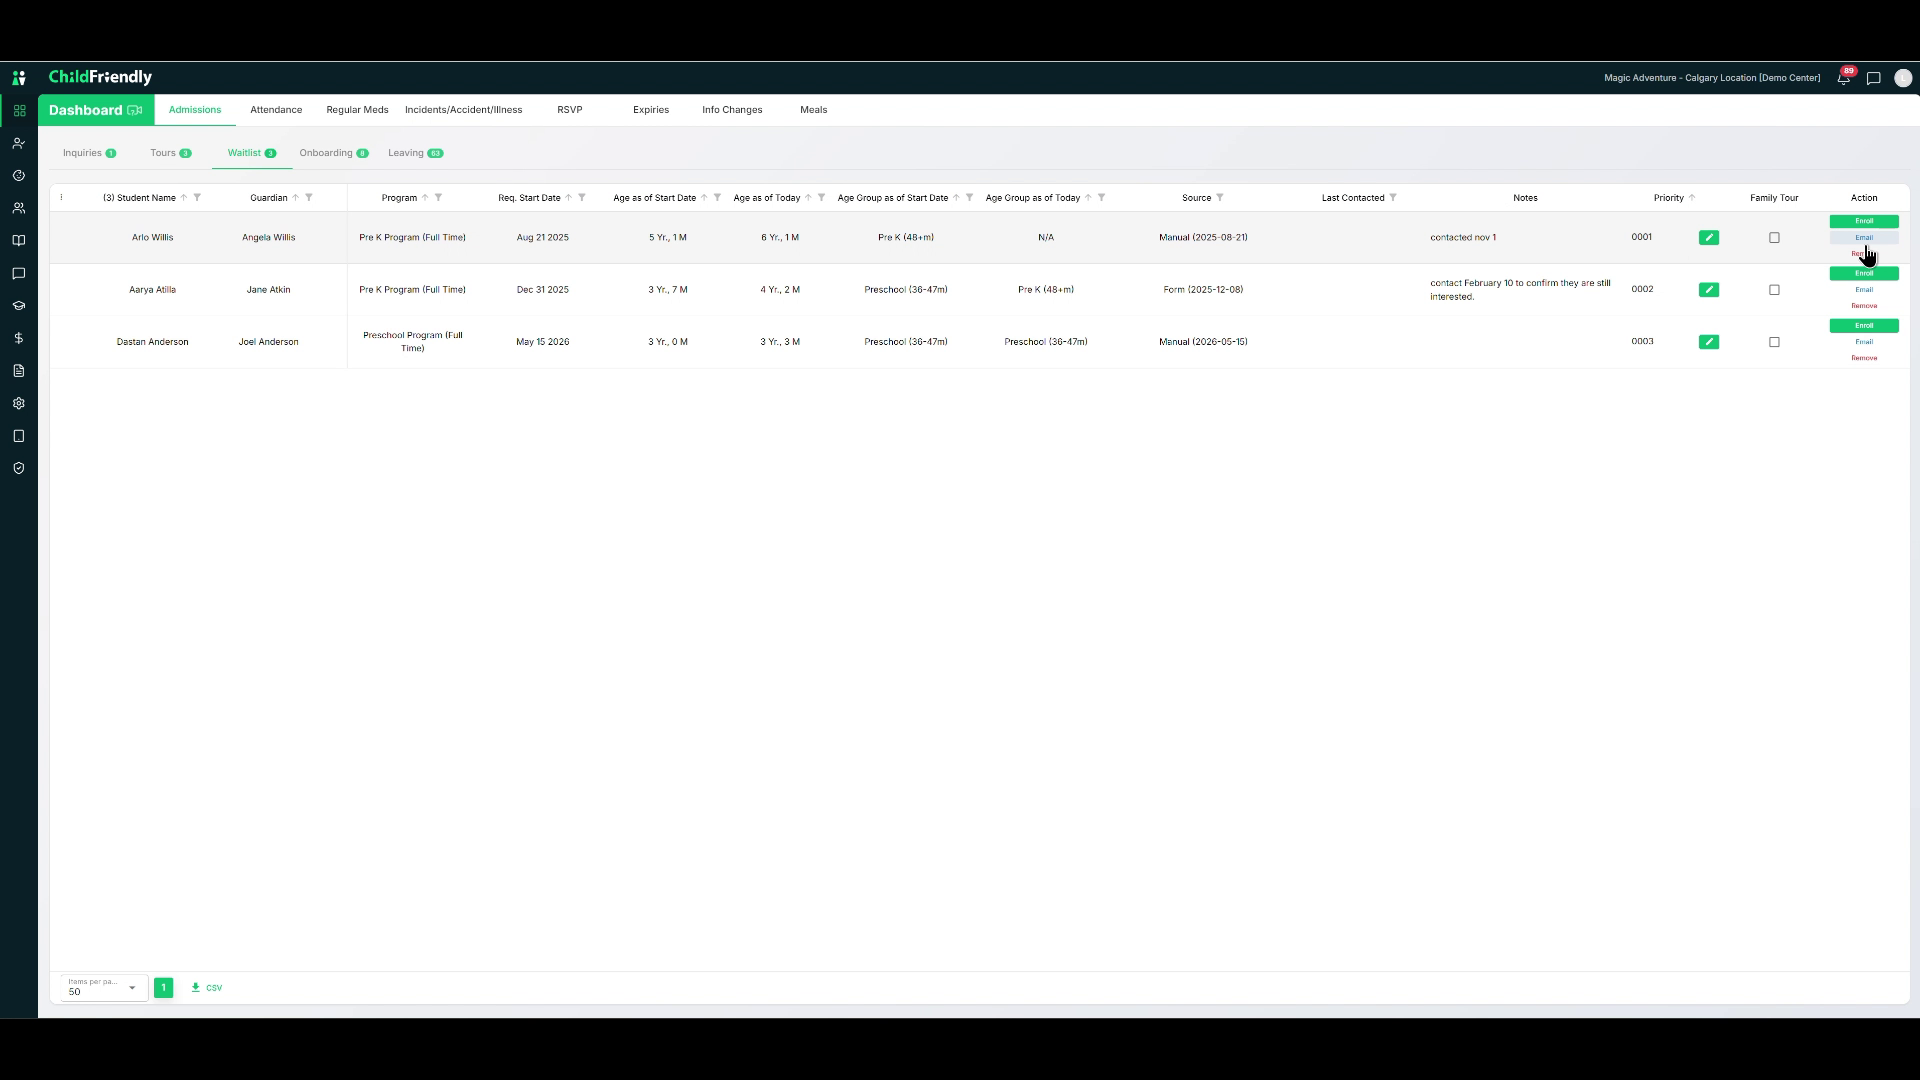
You can also:
Remove a child from the waitlist and record a private note explaining why.
Enroll a child directly from the waitlist, which moves them into the Onboarding stage.
Additionally, you can change a child’s priority on the waitlist:
Set a new priority (e.g., make a child third on the waitlist).
The system automatically adjusts the priority of other children accordingly.
Step 8: Handle the Leaving Stage and Offboarding Checklist
The Leaving stage is triggered when a child’s registration record ends.
As soon as a registration end date is reached, the child appears in the Leaving tab. This allows you to offboard them professionally and complete any final checklist items.
For example, open Maria’s registration:
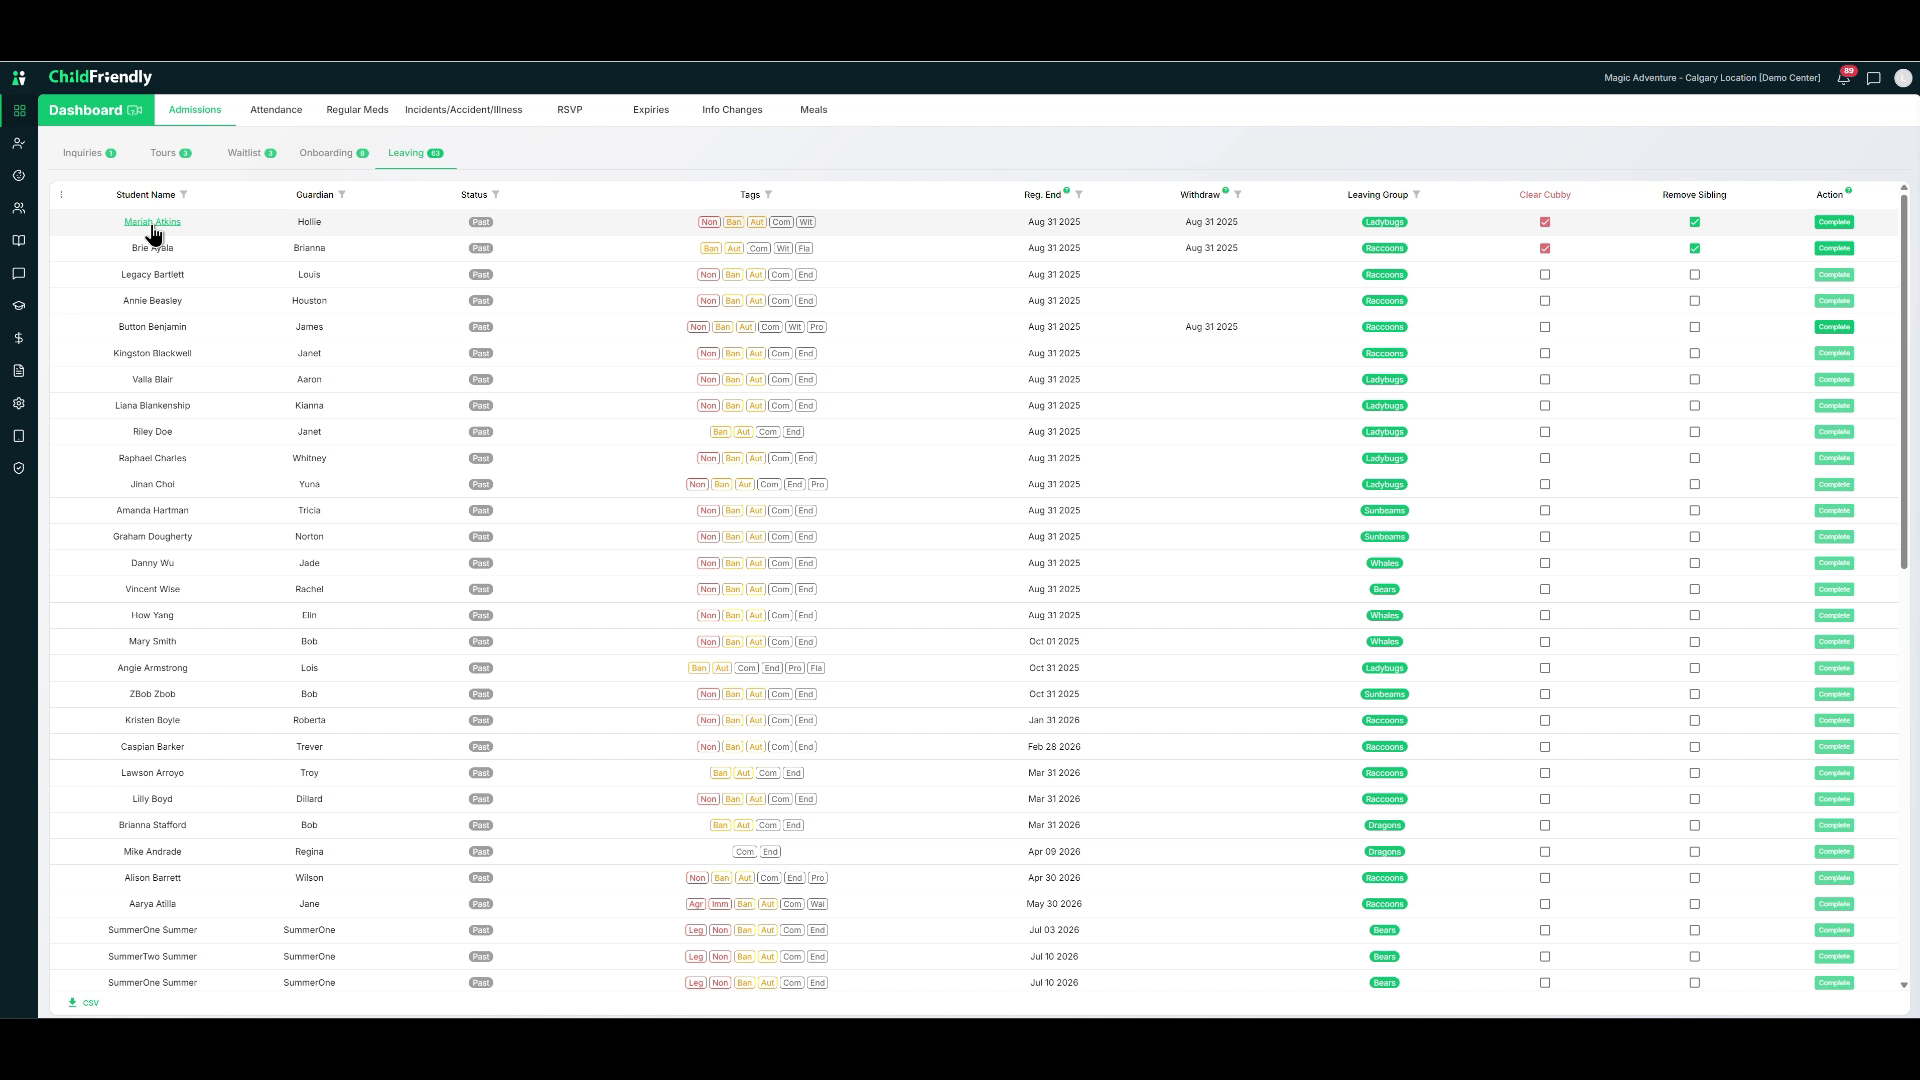
You can see:
Her registration ended on August 31, 2025.
A withdraw date has been entered.
You can configure custom offboarding checklist items such as:
Clearing the cubby
Updating or removing siblings from internal lists
Any other center-specific offboarding tasks
When all checklist items are complete and the child has a withdraw date, click Complete and they will be removed from the Leaving tab.
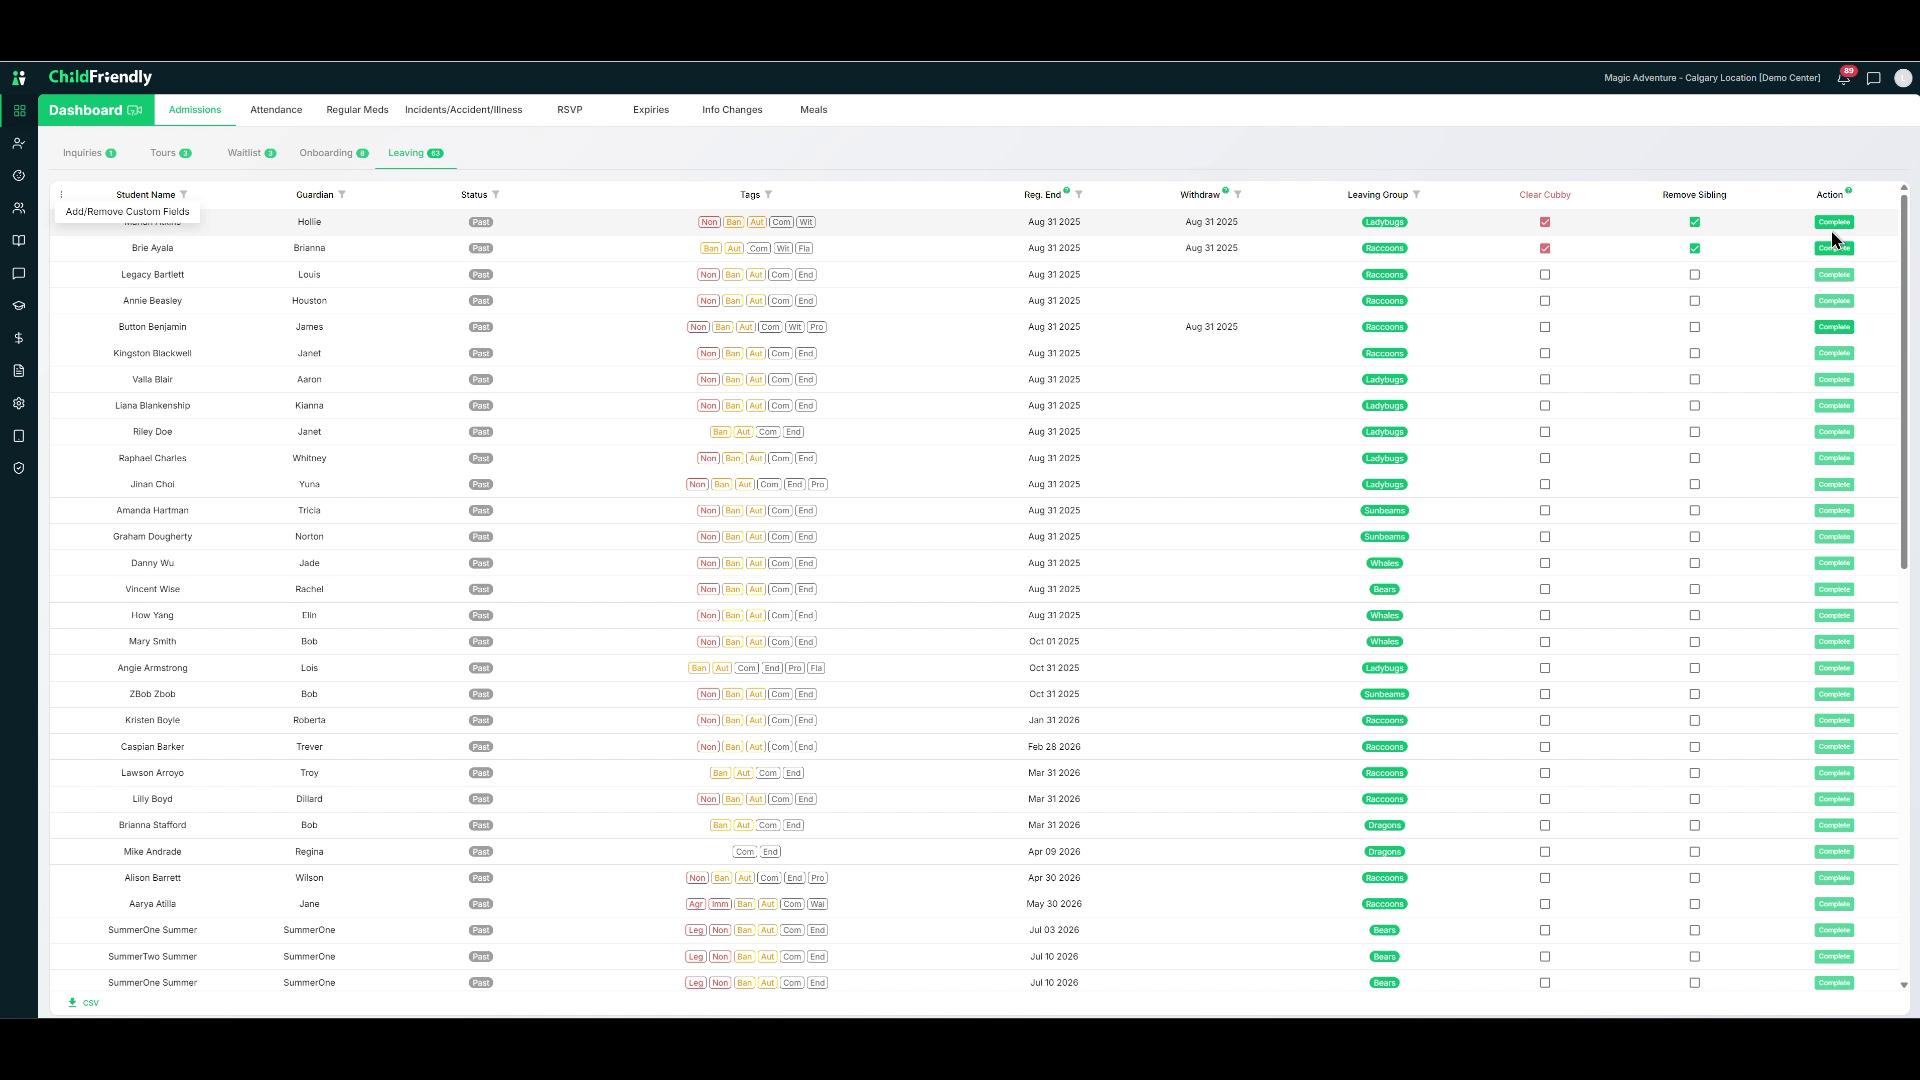
The Leaving tab shows:
Children who have not yet been removed from this tab, and/or
Children who are scheduled to leave within the next 30 days.
You will see both a Registration End column and a Withdraw Date column. Some children may have only a registration end date and no withdraw date. For example, a legacy child might show only an end date.
To distinguish between a simple end of schedule (where a new registration might be needed) and an actual withdrawal, always enter a withdraw date when a child is truly leaving.
When you receive official notice from the parent:
Enter the withdraw date in the child’s record.
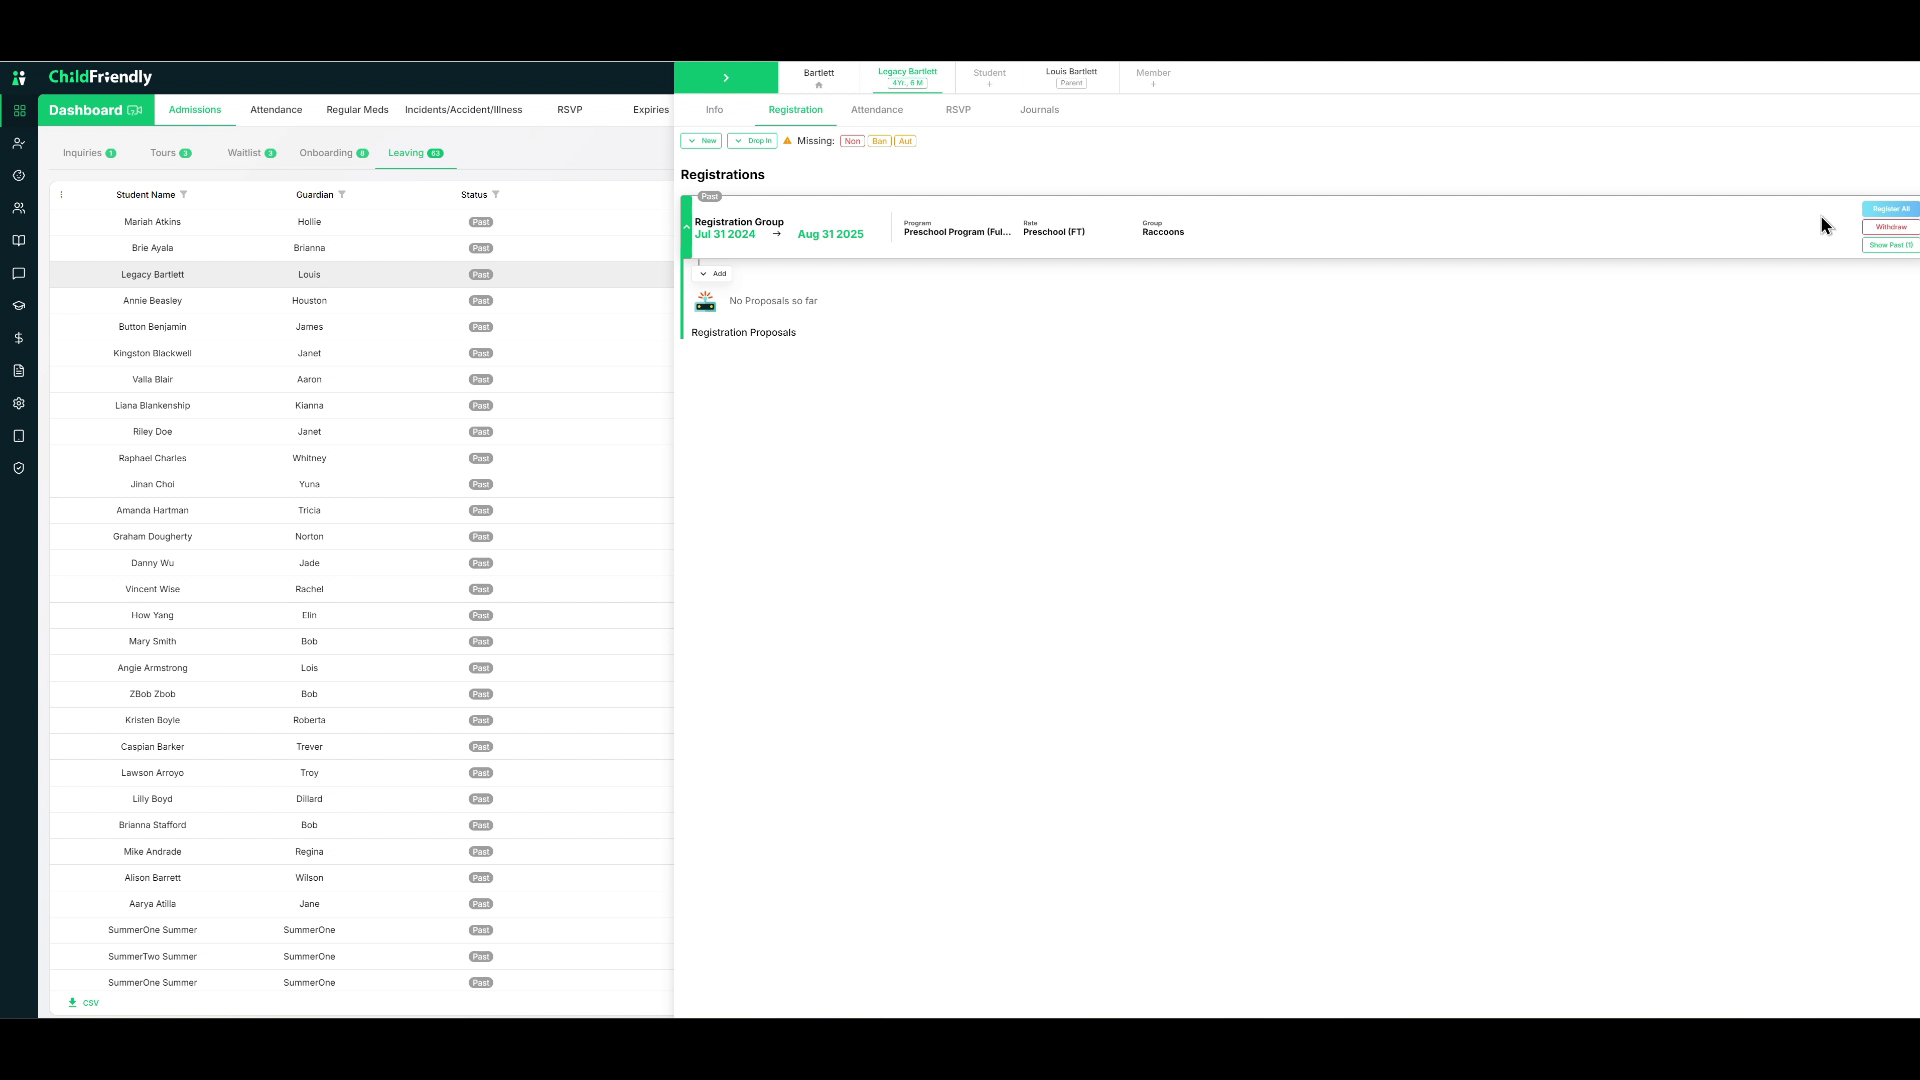
Confirm the date and click Submit.
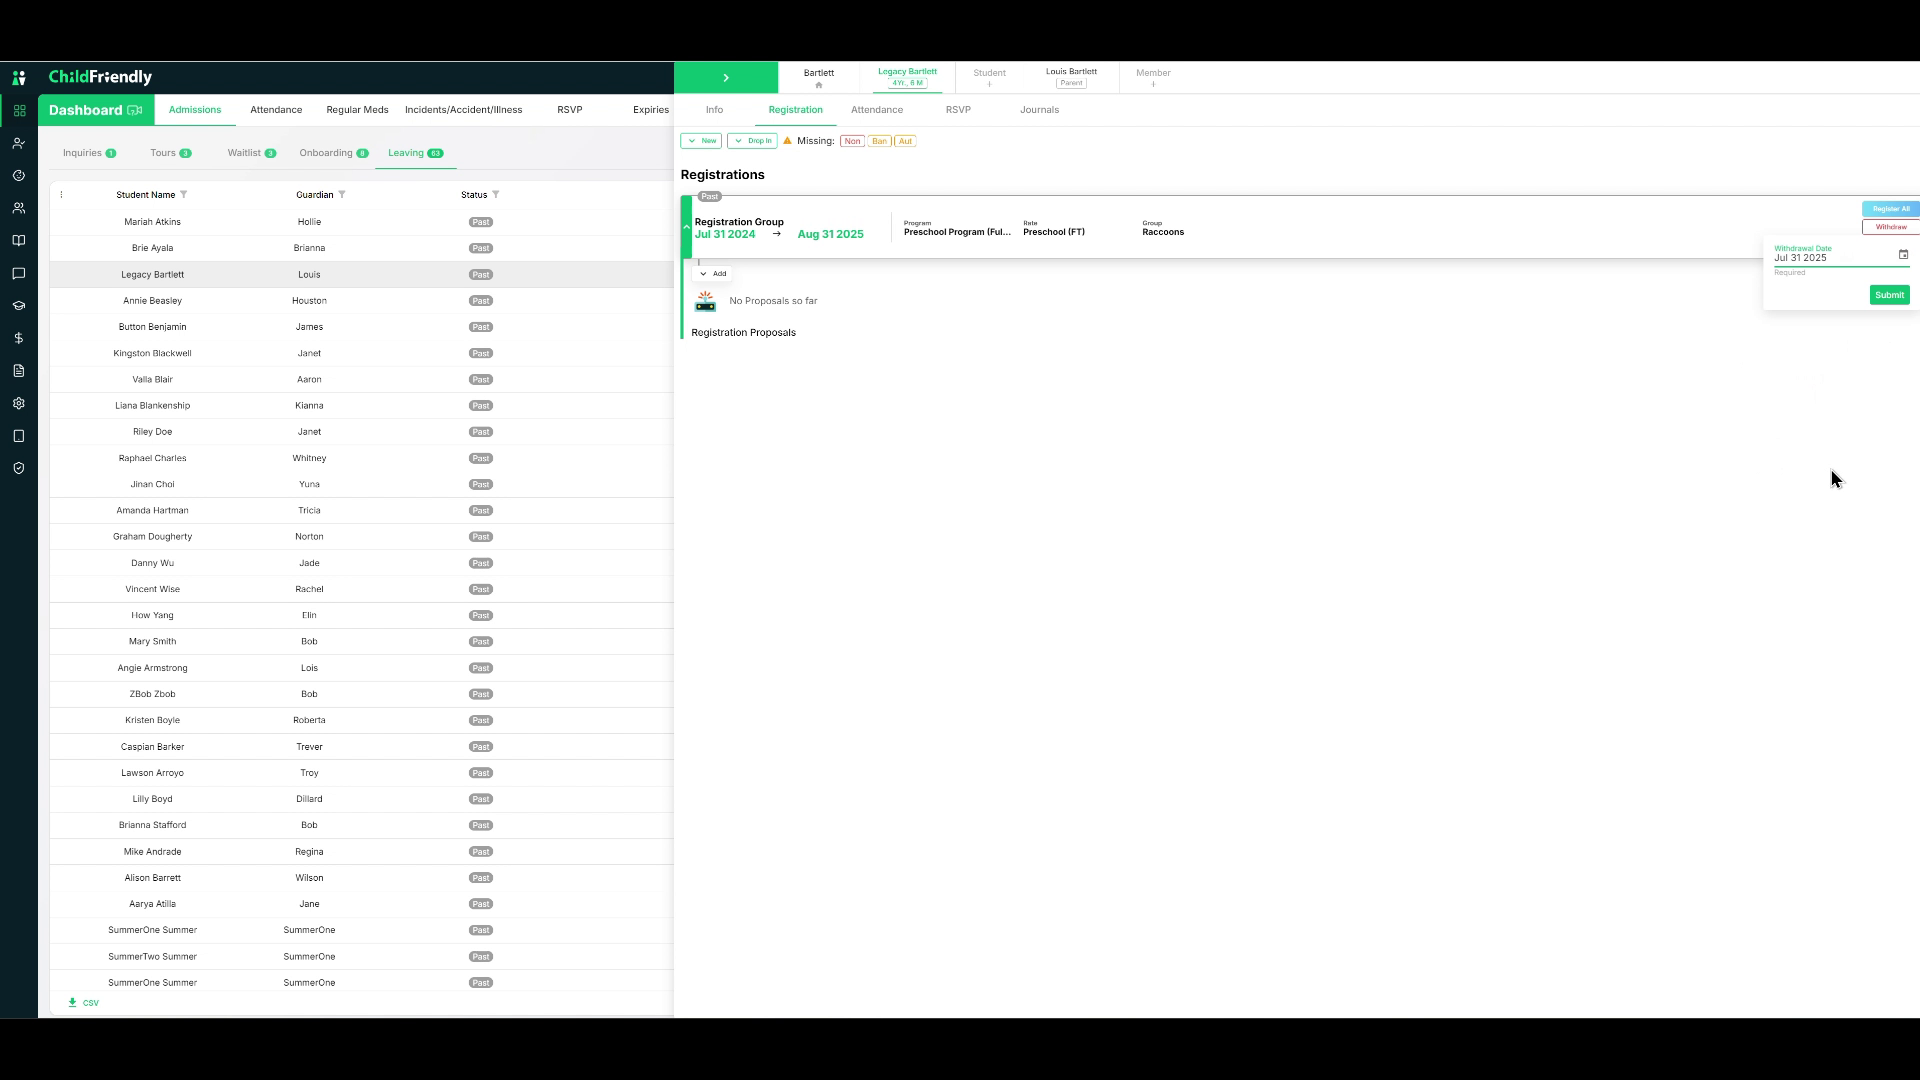
Once a withdraw date is set and all offboarding tasks are complete, you can mark the child Complete in the Leaving tab to finalize their departure.