How to Set Up & Manage Fee Rates
This article explains how to configure and manage billing rates for your center in ChildFriendly, including full-time, part-time, and drop‑in rates, as well as automated graduation, future fee changes and increases, parents rate caps and archiving.
Last updated About 2 months ago
Step 1: Confirm Prerequisites and Open the Rates Section
Before adding rates, ensure:
Your organization details are completed in the Setup module.
For the specific center you are configuring, the General, Spaces, and Groups settings are already set up.
Once these are done, navigate to the Rates area for your center to begin configuring rates.
Step 2: Add, Delete, and Archive Rates
To manage your list of rates:
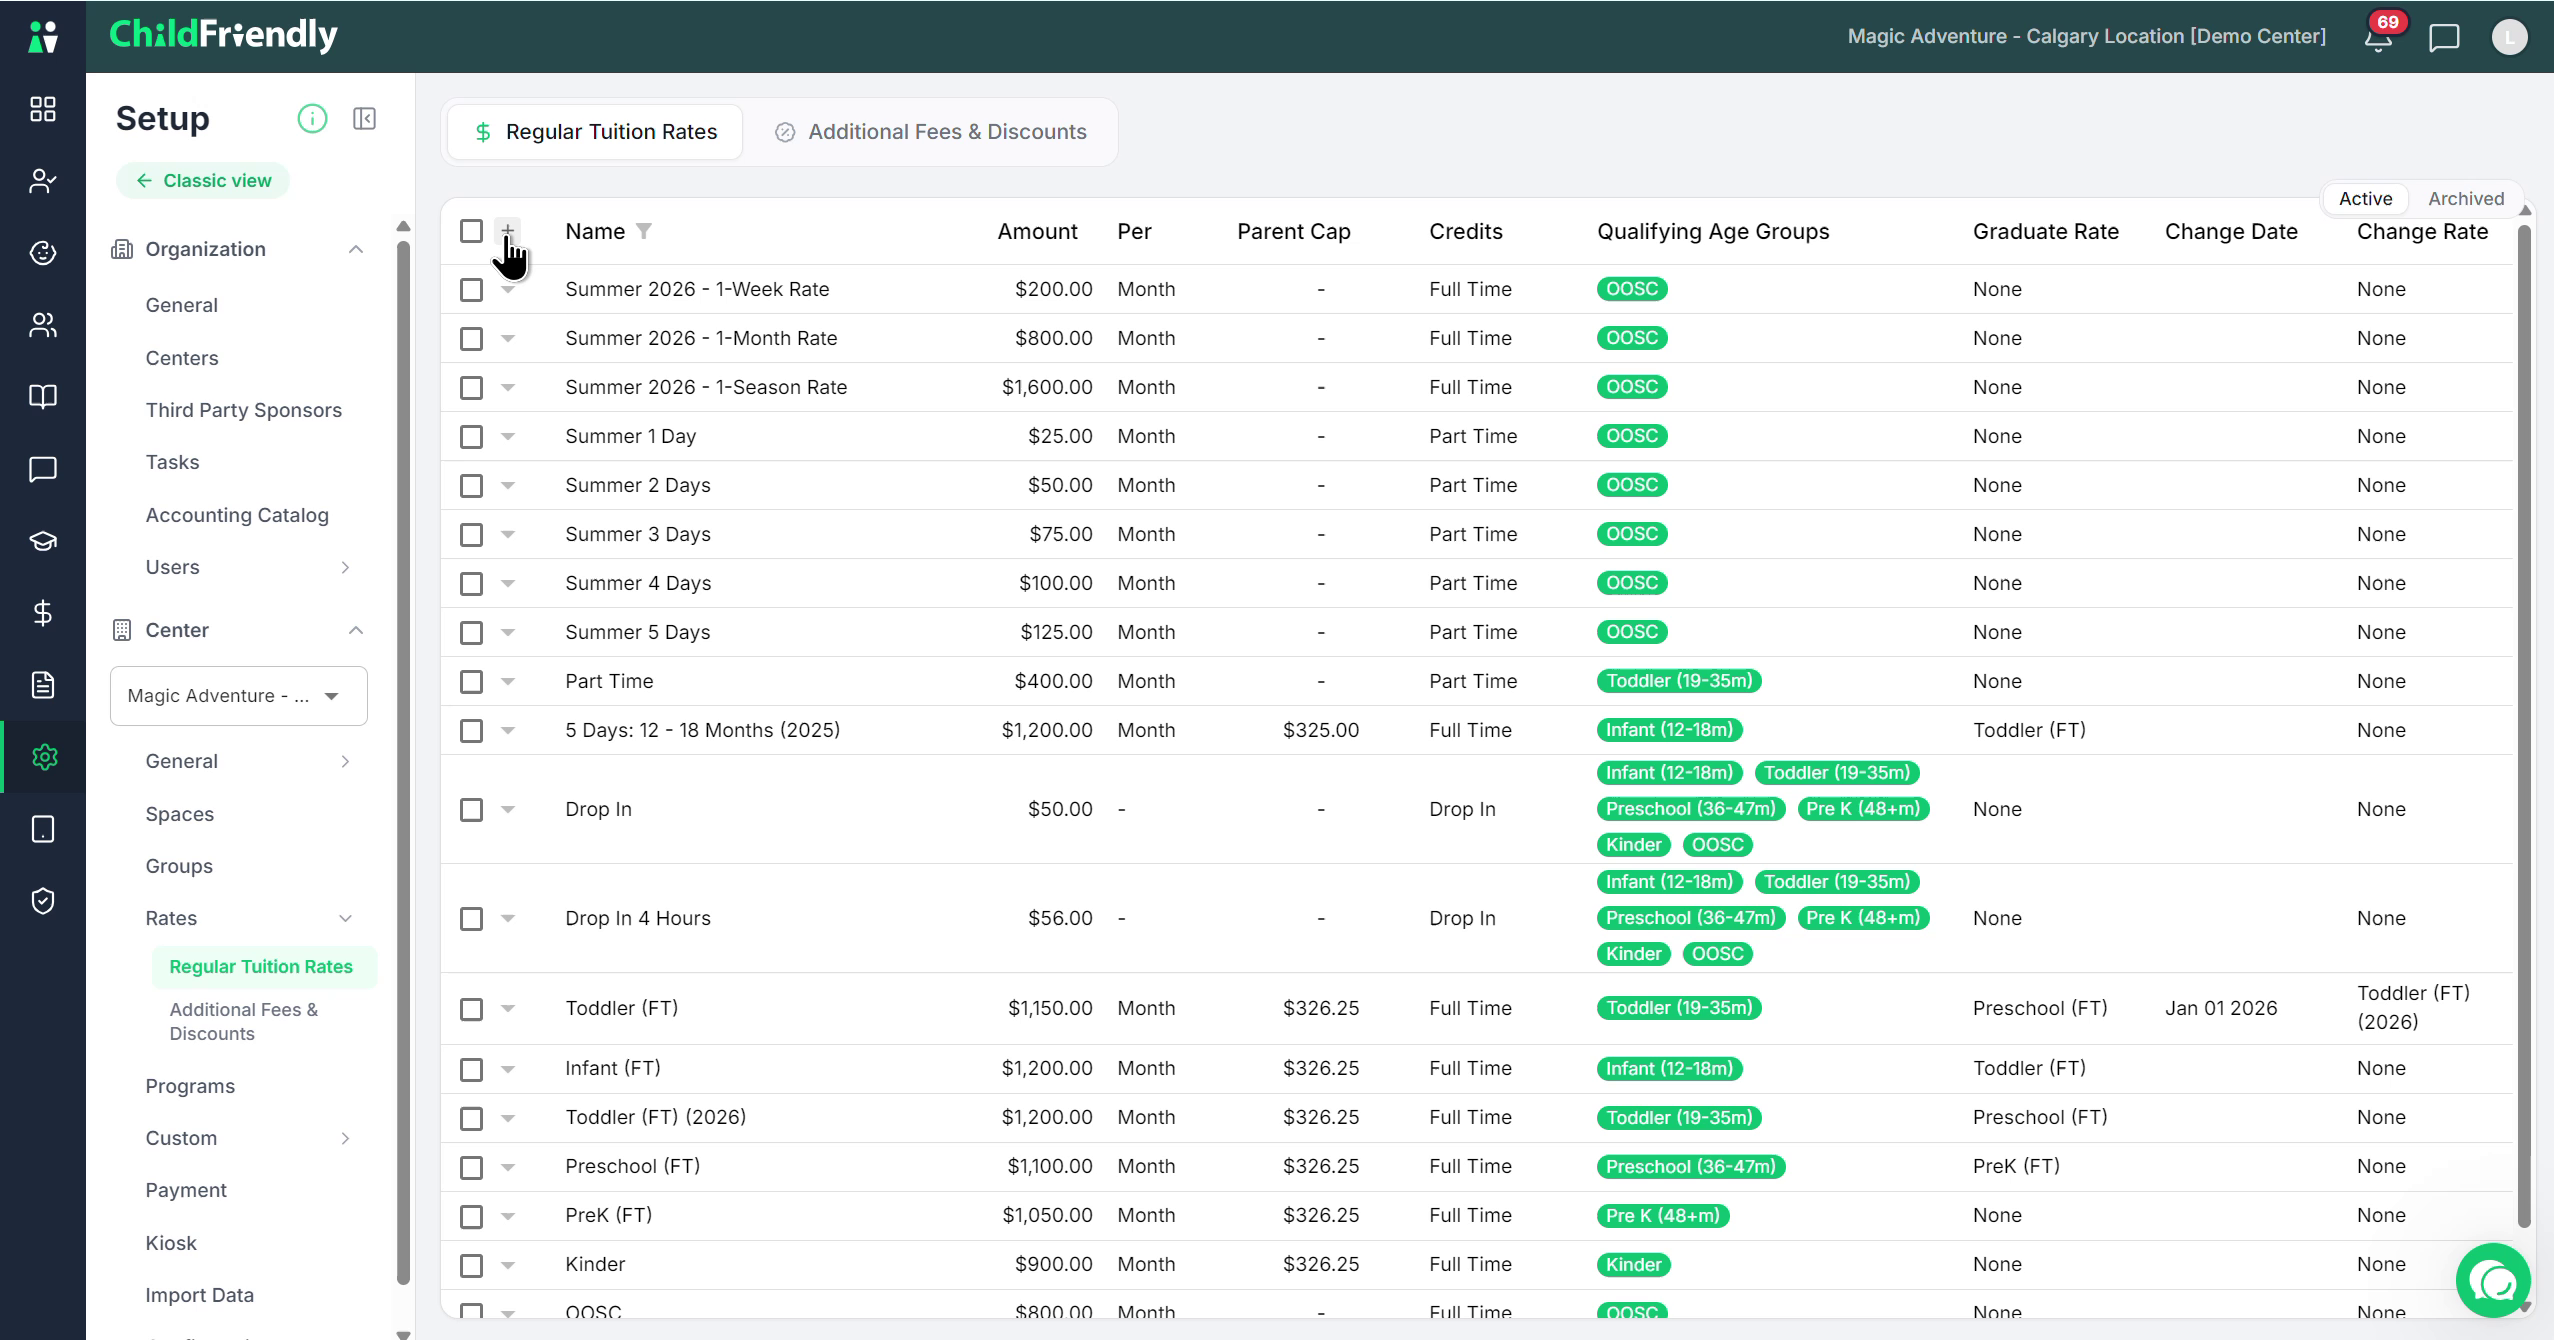
To add a new rate, click the plus sign.
To delete a rate, first select the rate, then delete via the triple‑dot (more options) menu on a rate.
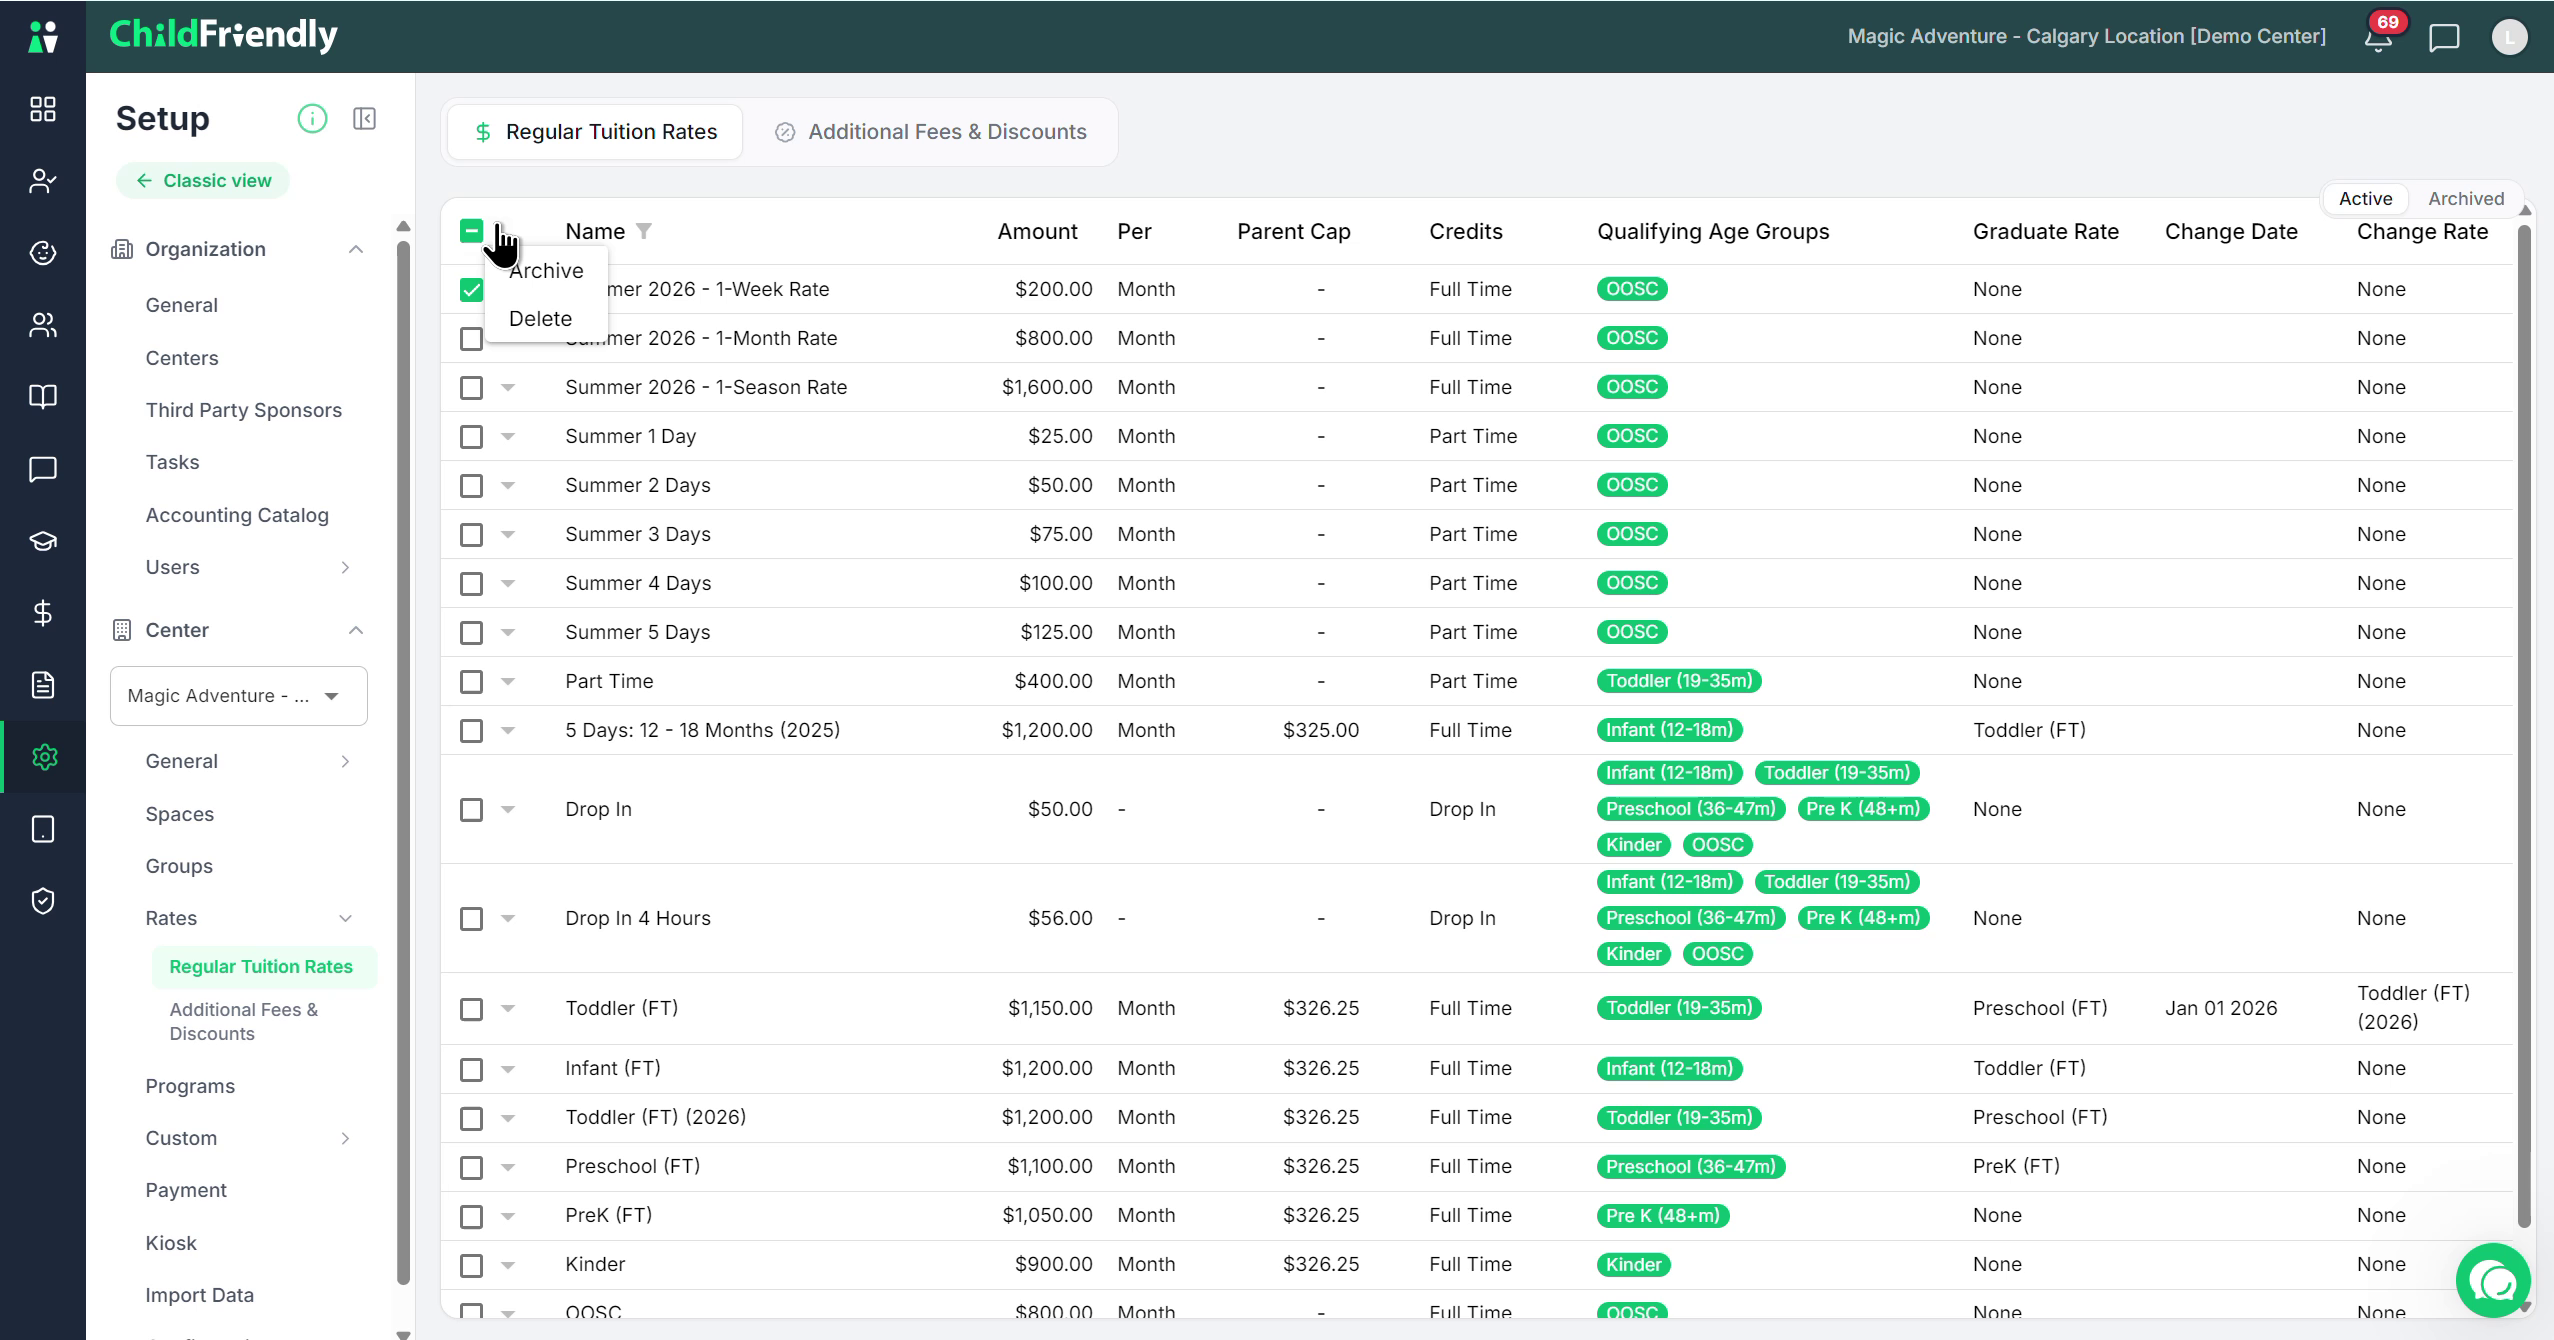
To archive a rate you no longer want active in the main view, use the archive option on that rate.
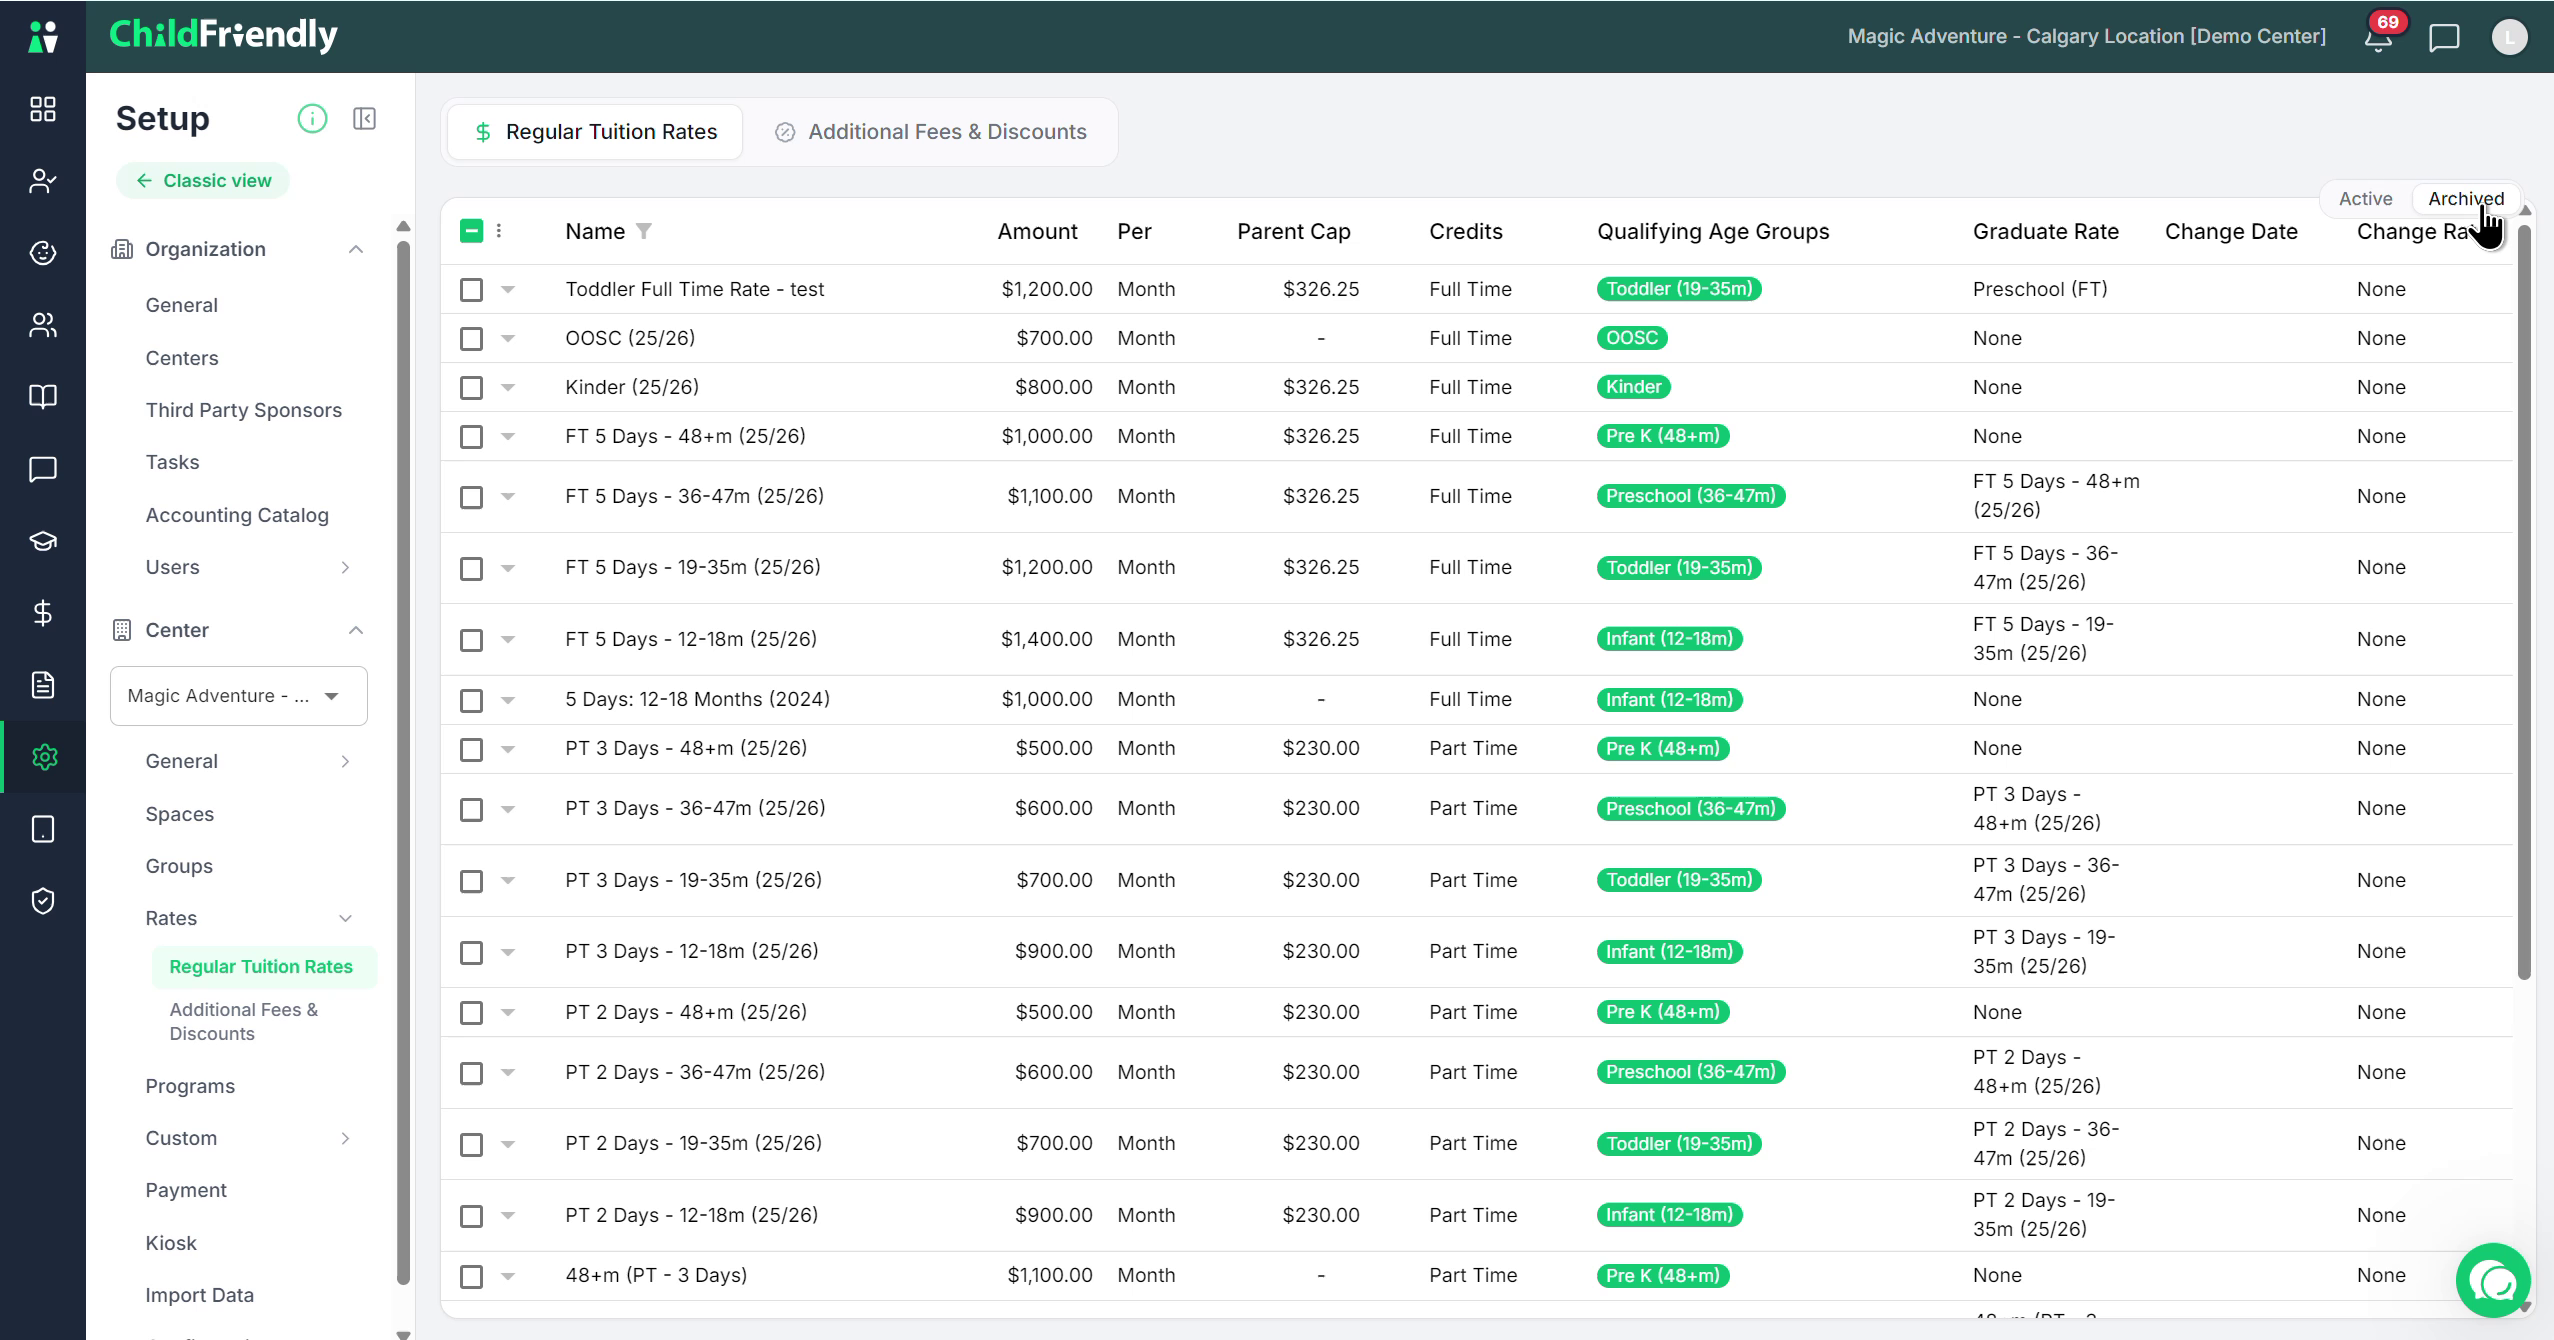
Archived rates:
Are removed from the active list and cannot be selected when assigning rates to a child.
Remain available for history and reference under the Archived section at the top right of the screen.
Step 3: Open and Review an Existing Full-Time Rate
There are three main rate types:
Full‑time
Part‑time
Drop‑in
We will review each from the rates set up in the demo. To review a full‑time example:
Select the toddler full‑time rate from the list.
Expand the rate details by clicking the expansion icon.
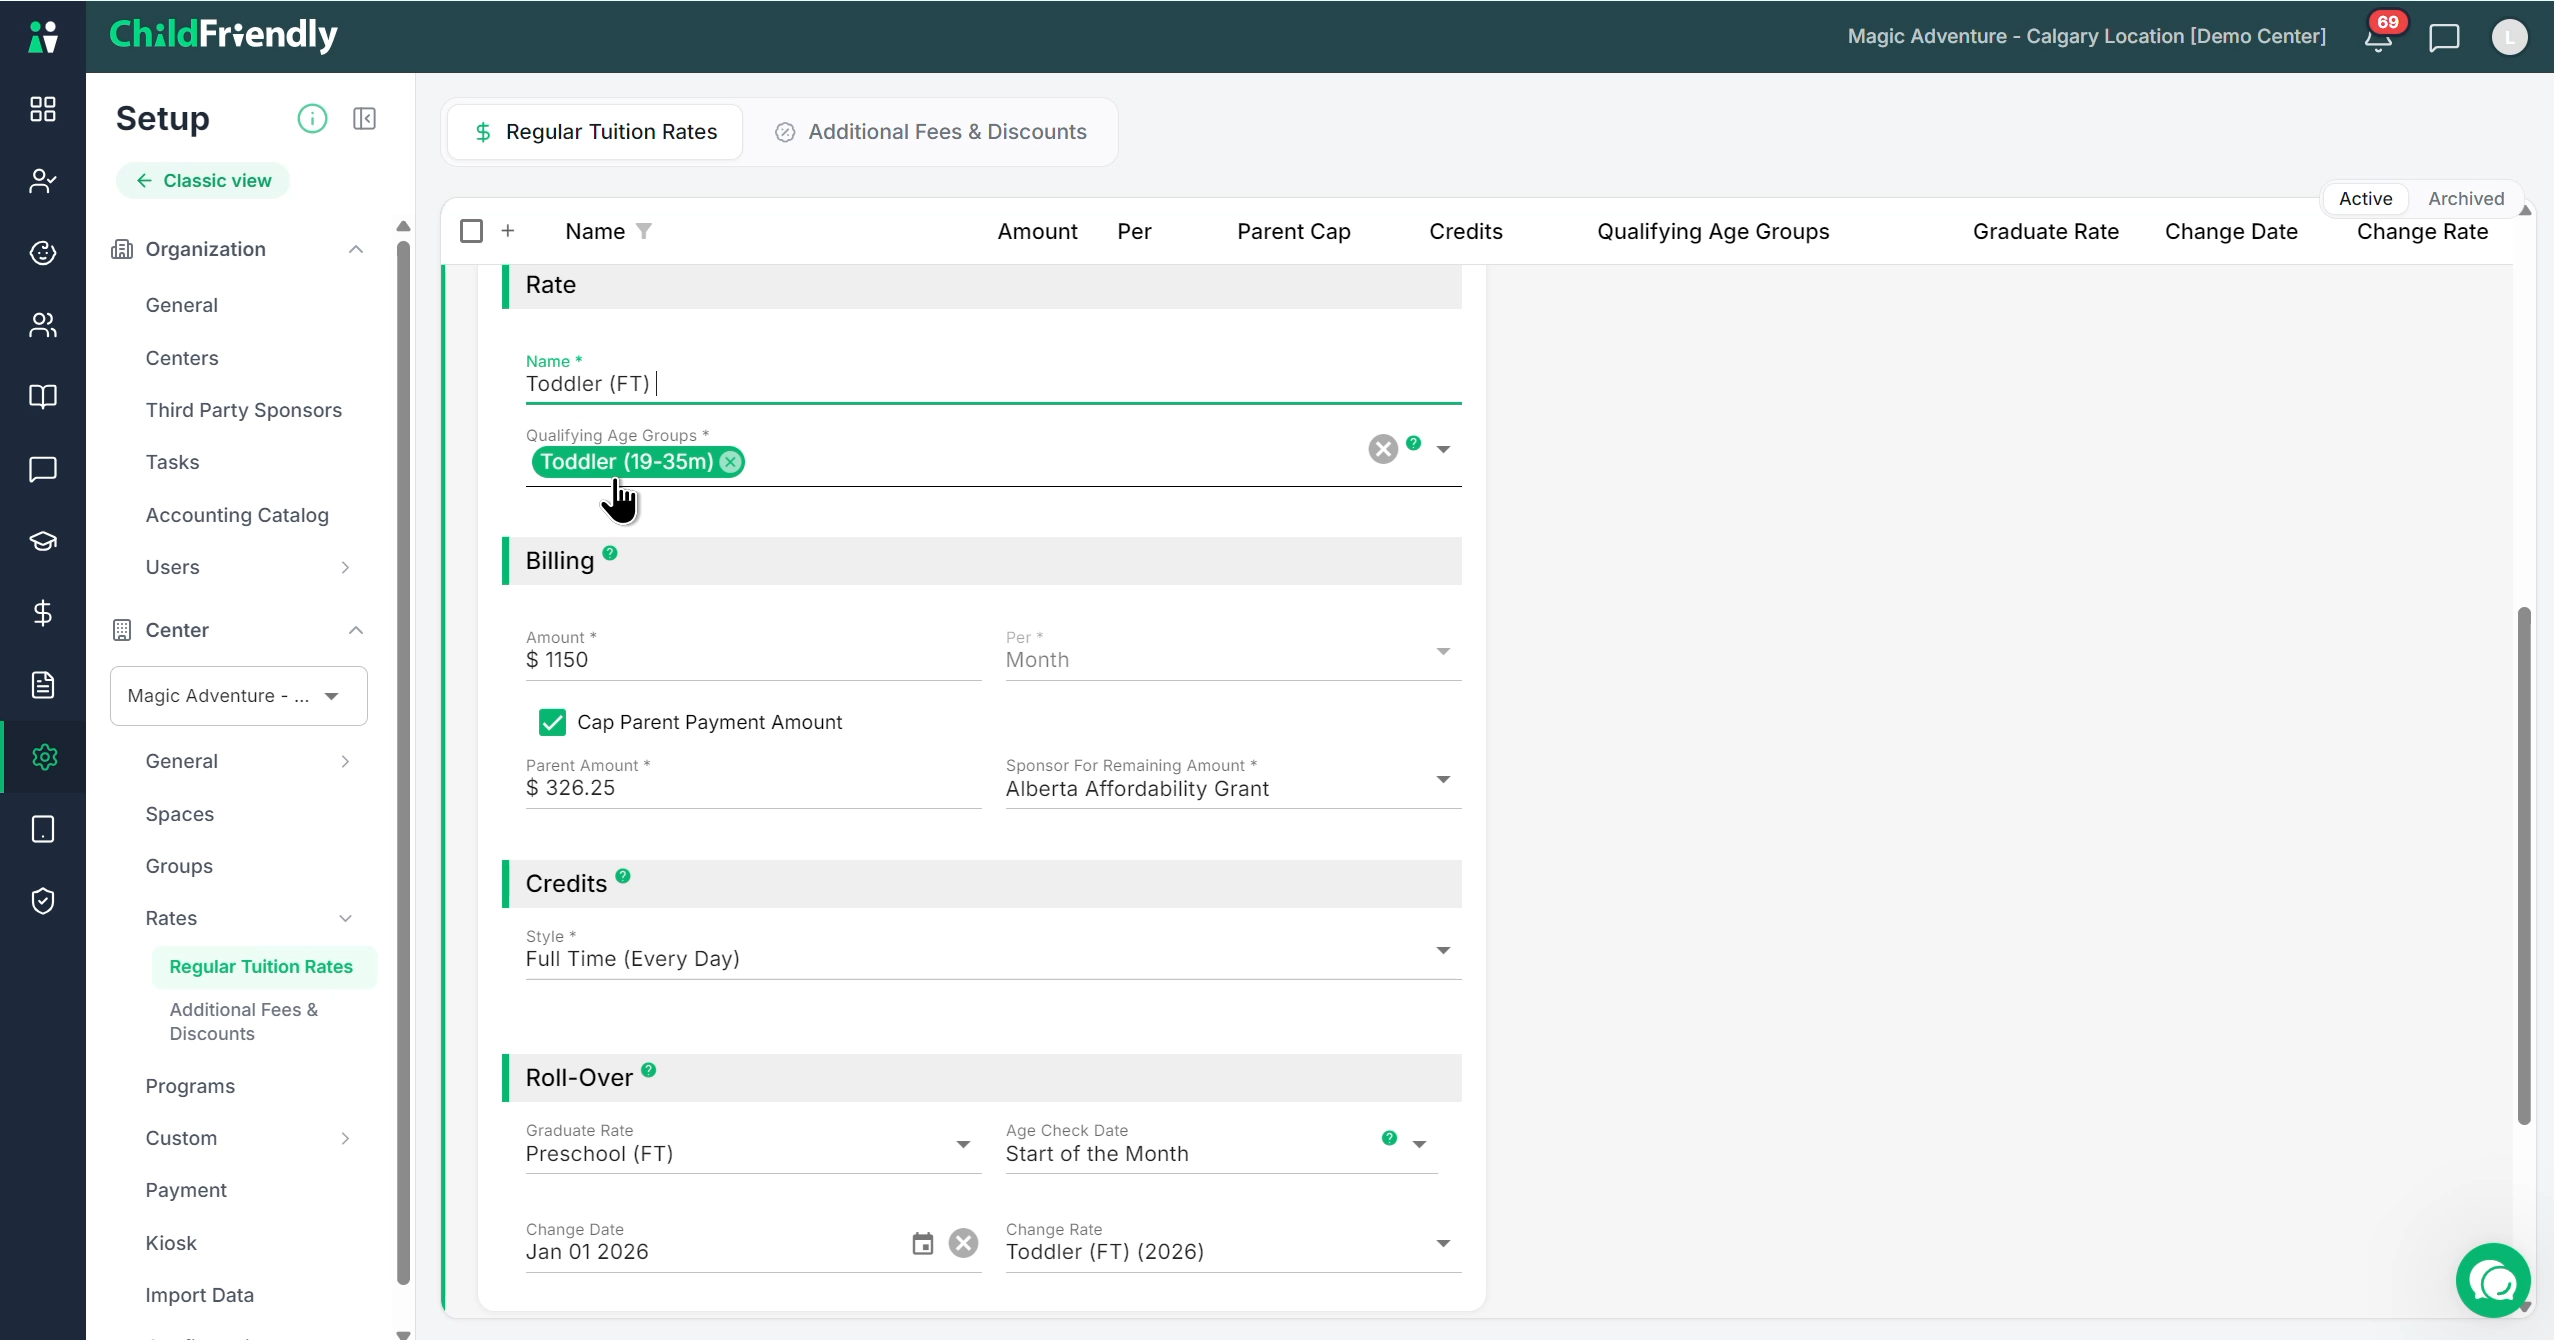
This opens the configuration panel for that rate.
Step 4: Set the Rate Name and Eligible Age Groups
Within the expanded rate:
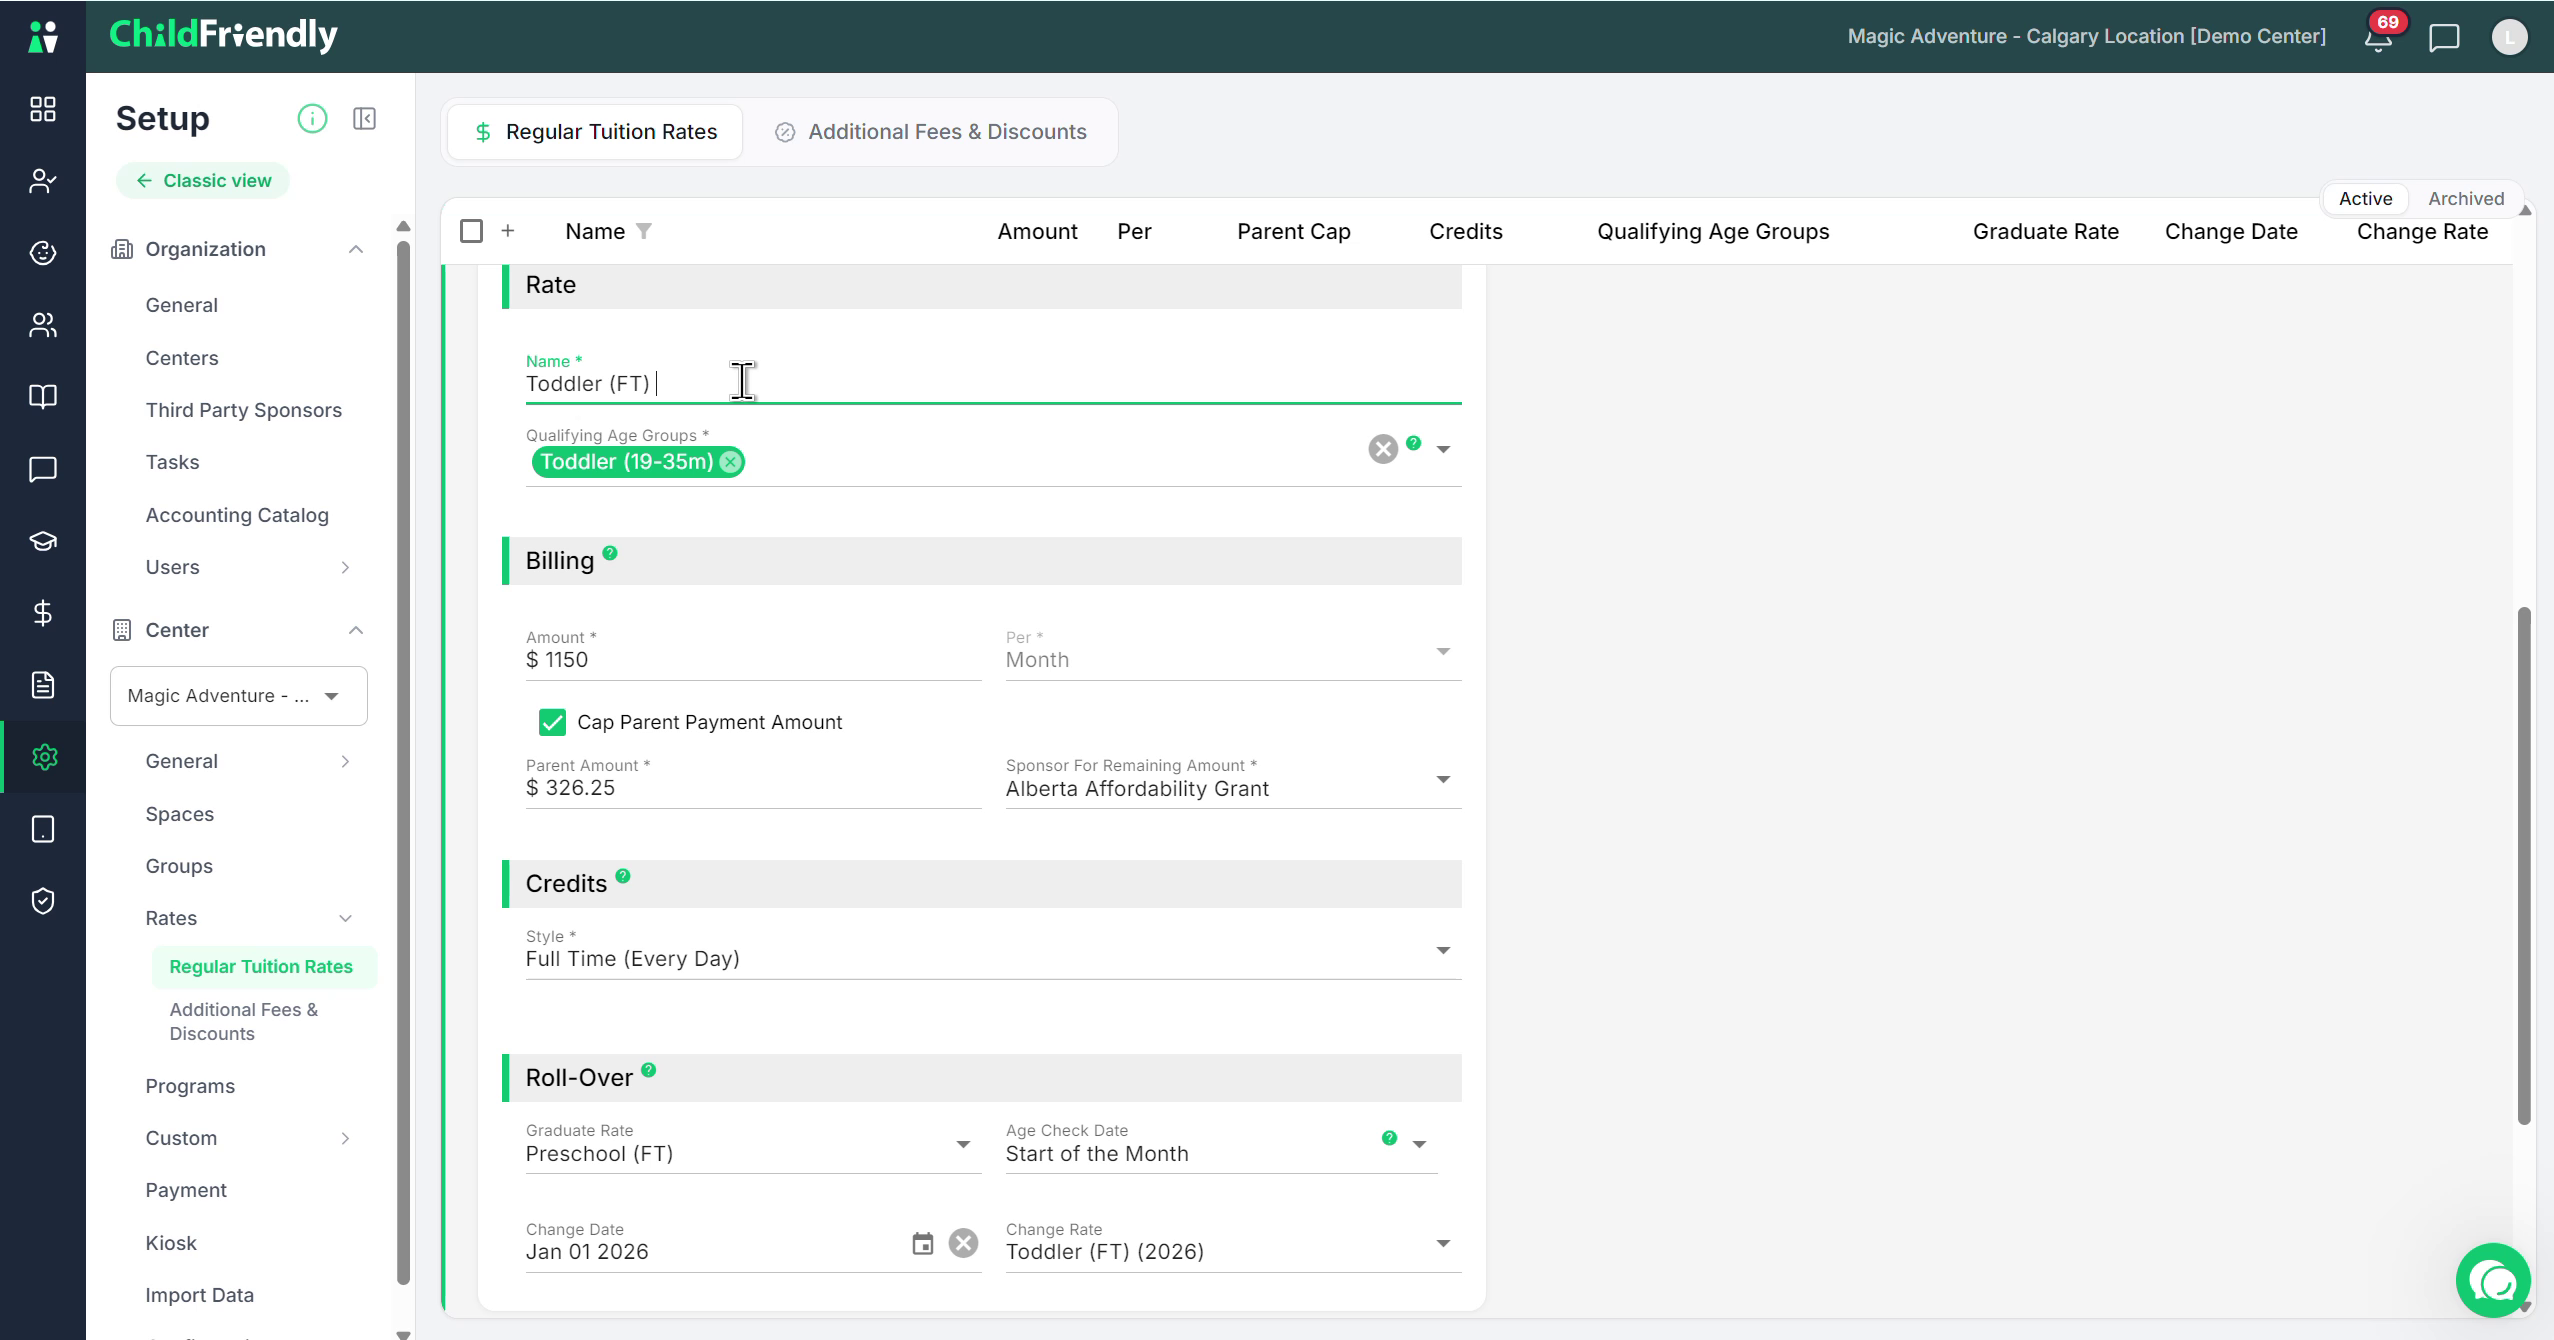
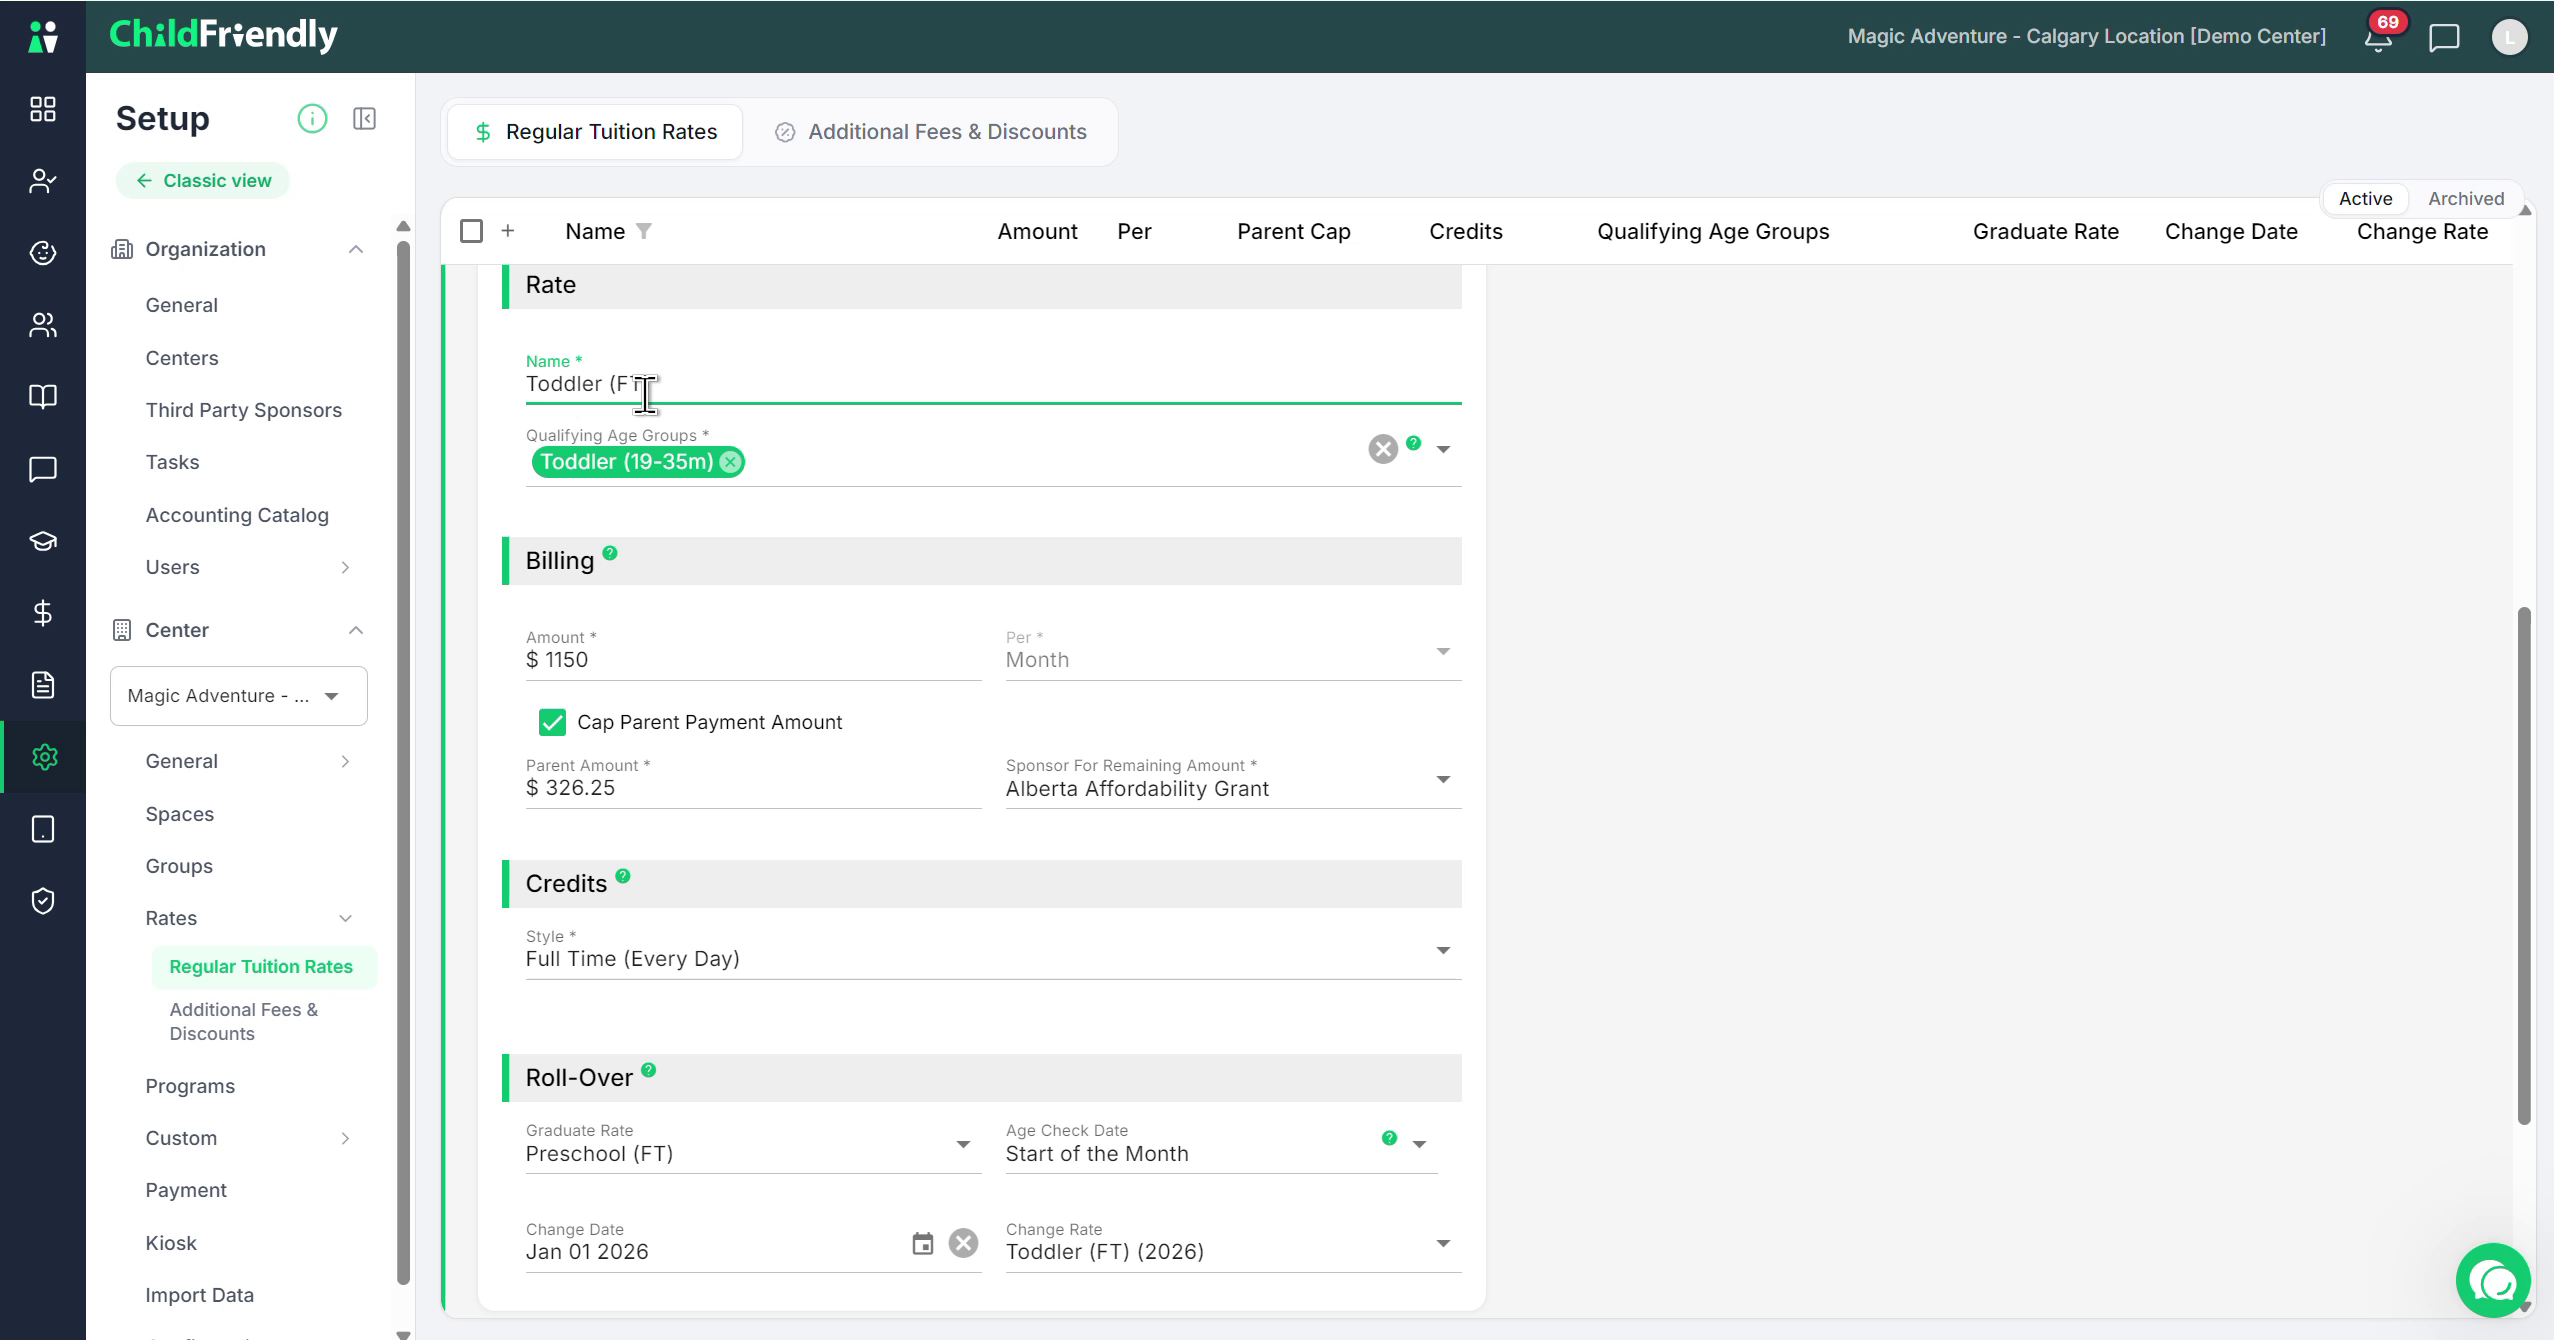
Enter a clear Name for the rate (e.g., “Toddler Full‑Time”).
Select the age group(s) that are allowed to be charged this rate (e.g., Toddler).
In this example:
The rate is the toddler full‑time rate.
The eligible age group is toddler.
Step 5: Enter the Monthly Amount and Optional Parent Cap
Next, configure the billing amount:
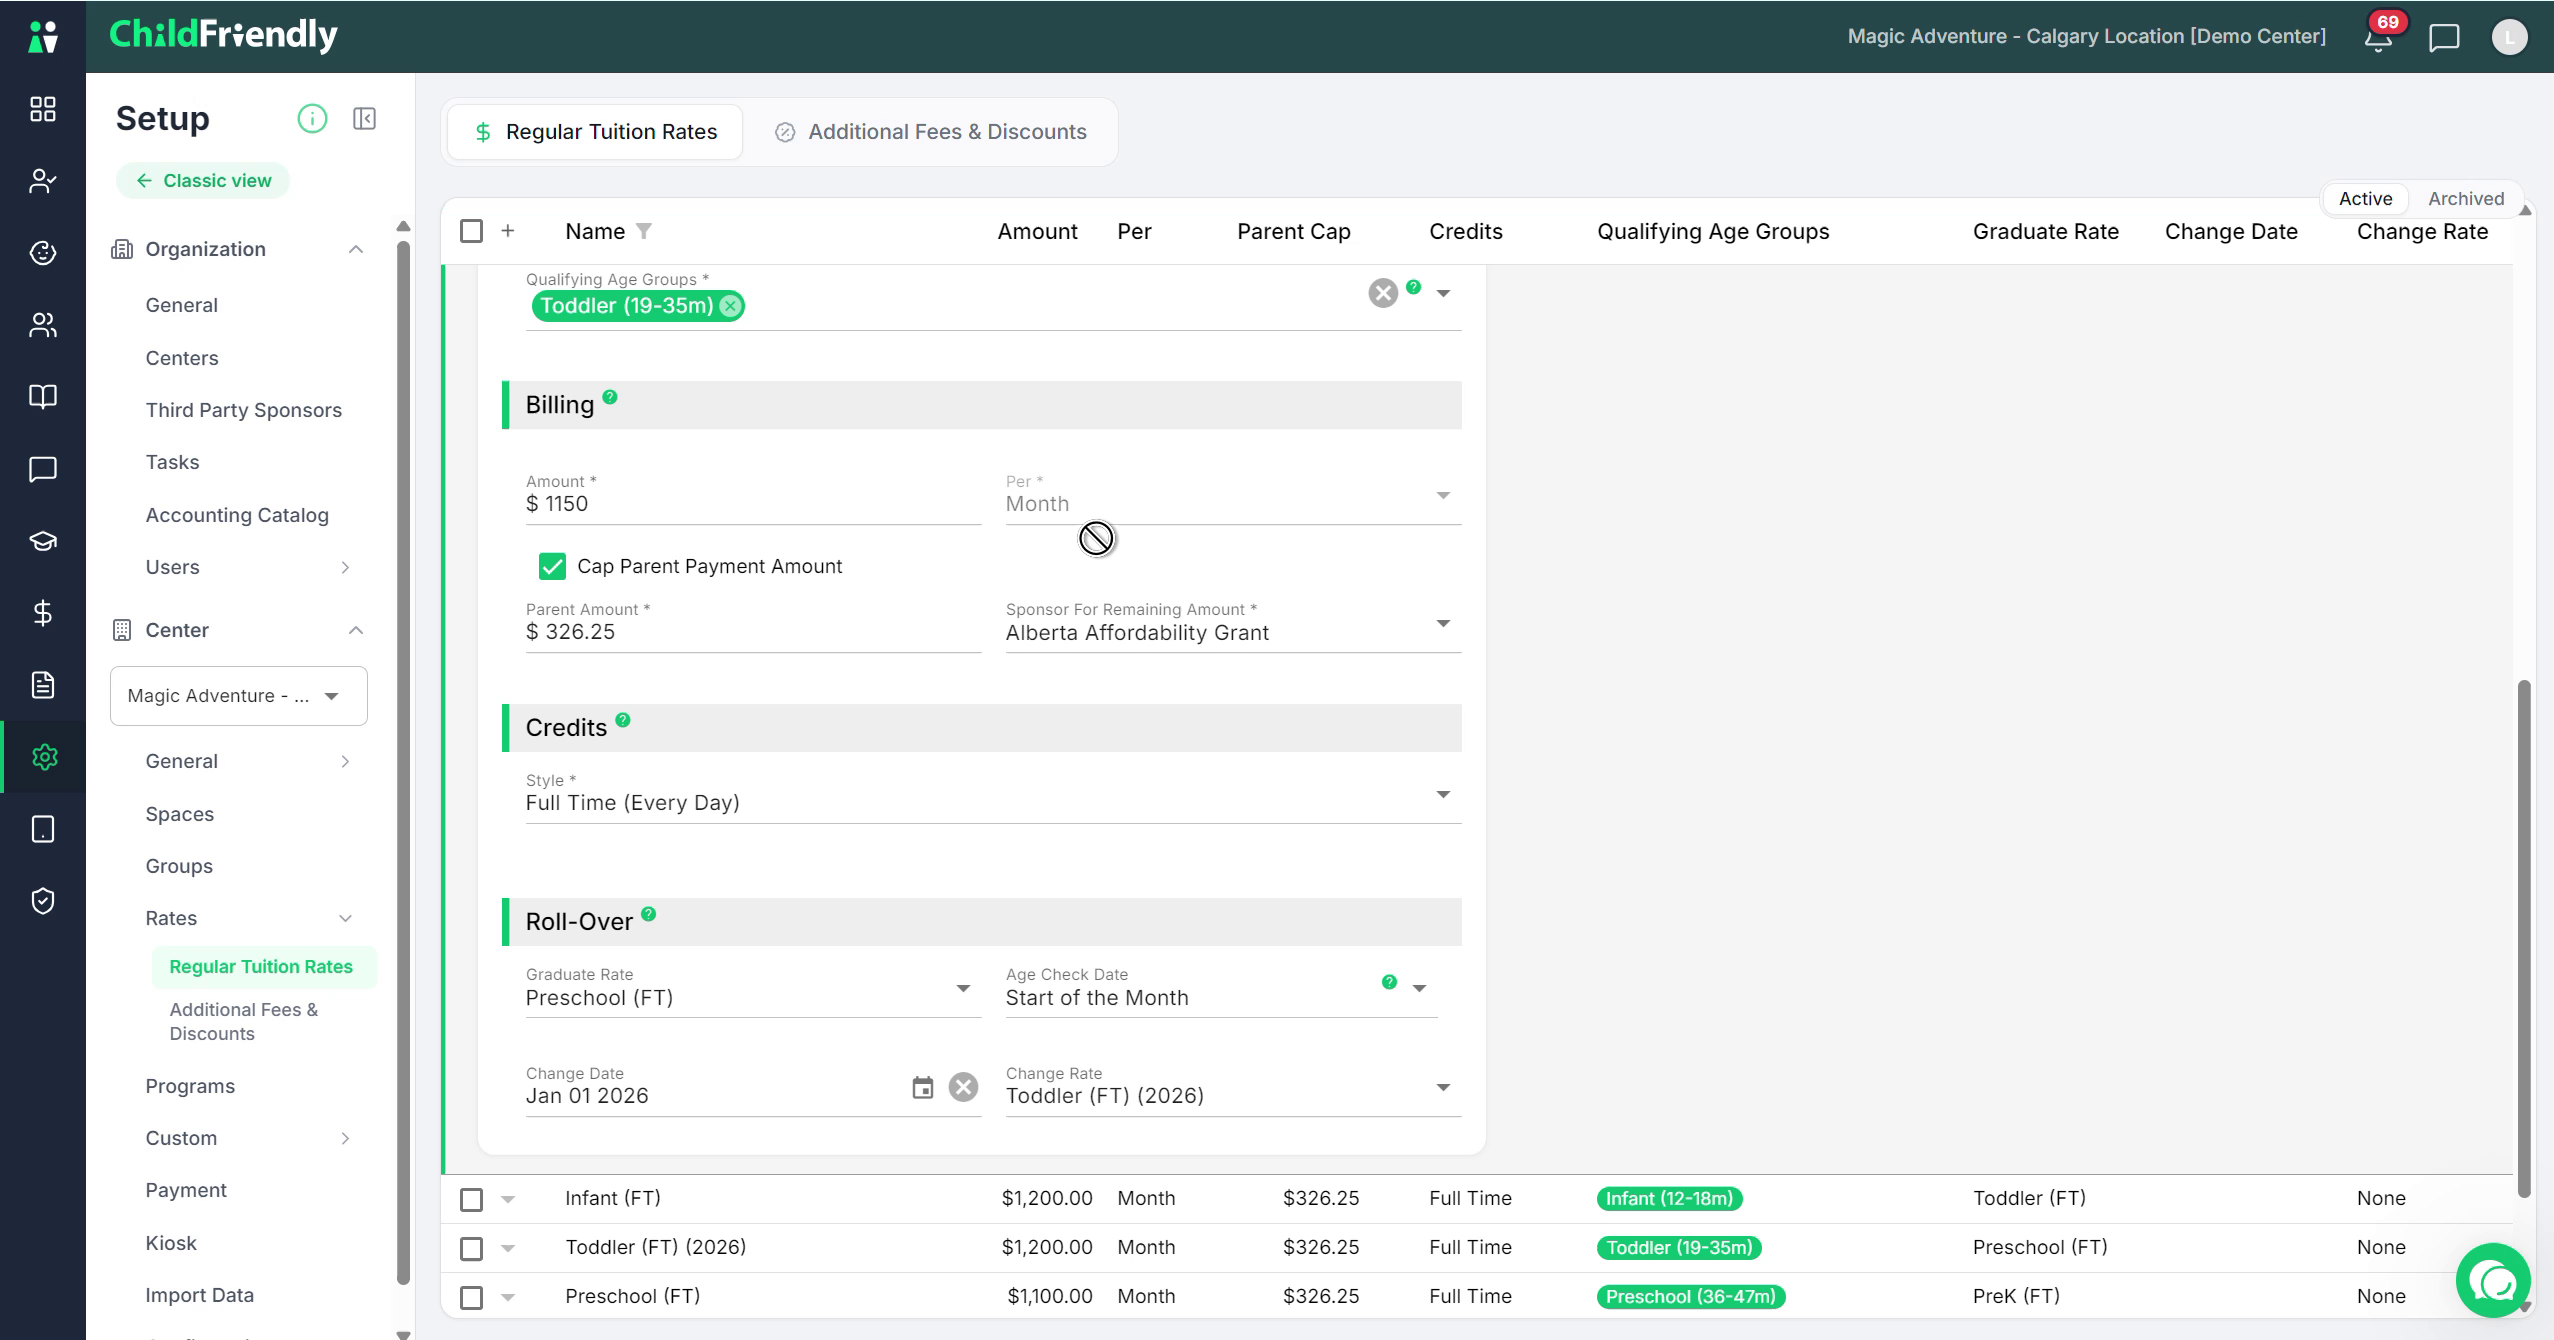
Enter the rate amount. Currently, the system supports monthly billing only.
Example:
$1,150per month for the toddler full‑time rate.
If you use a parent payment cap:
Enable Cap parent payment amount.

Enter:
The maximum amount the parent will pay.
The third party (e.g., grant provider) responsible for the remaining balance.
Important notes about the parent cap:
If the funding arrangement differs from family to family (e.g., one child receives $200/month in subsidy and another $250/month), do not configure that here.
Instead, configure unique third‑party payers on each family’s ledger (e.g., per‑family subsidies).
The parent cap is universal for that rate: every parent paying the toddler rate would have the same capped amount.
If you do not wish to use the parent cap:
Simply unselect this setting.
Step 6: Choose the Credit Style (Full-Time, Part-Time, or Drop-In)
Now configure how attendance is credited:
For a full‑time rate (as in this example), select Full‑Time as the credit style. This means the child may attend every day the center is open.
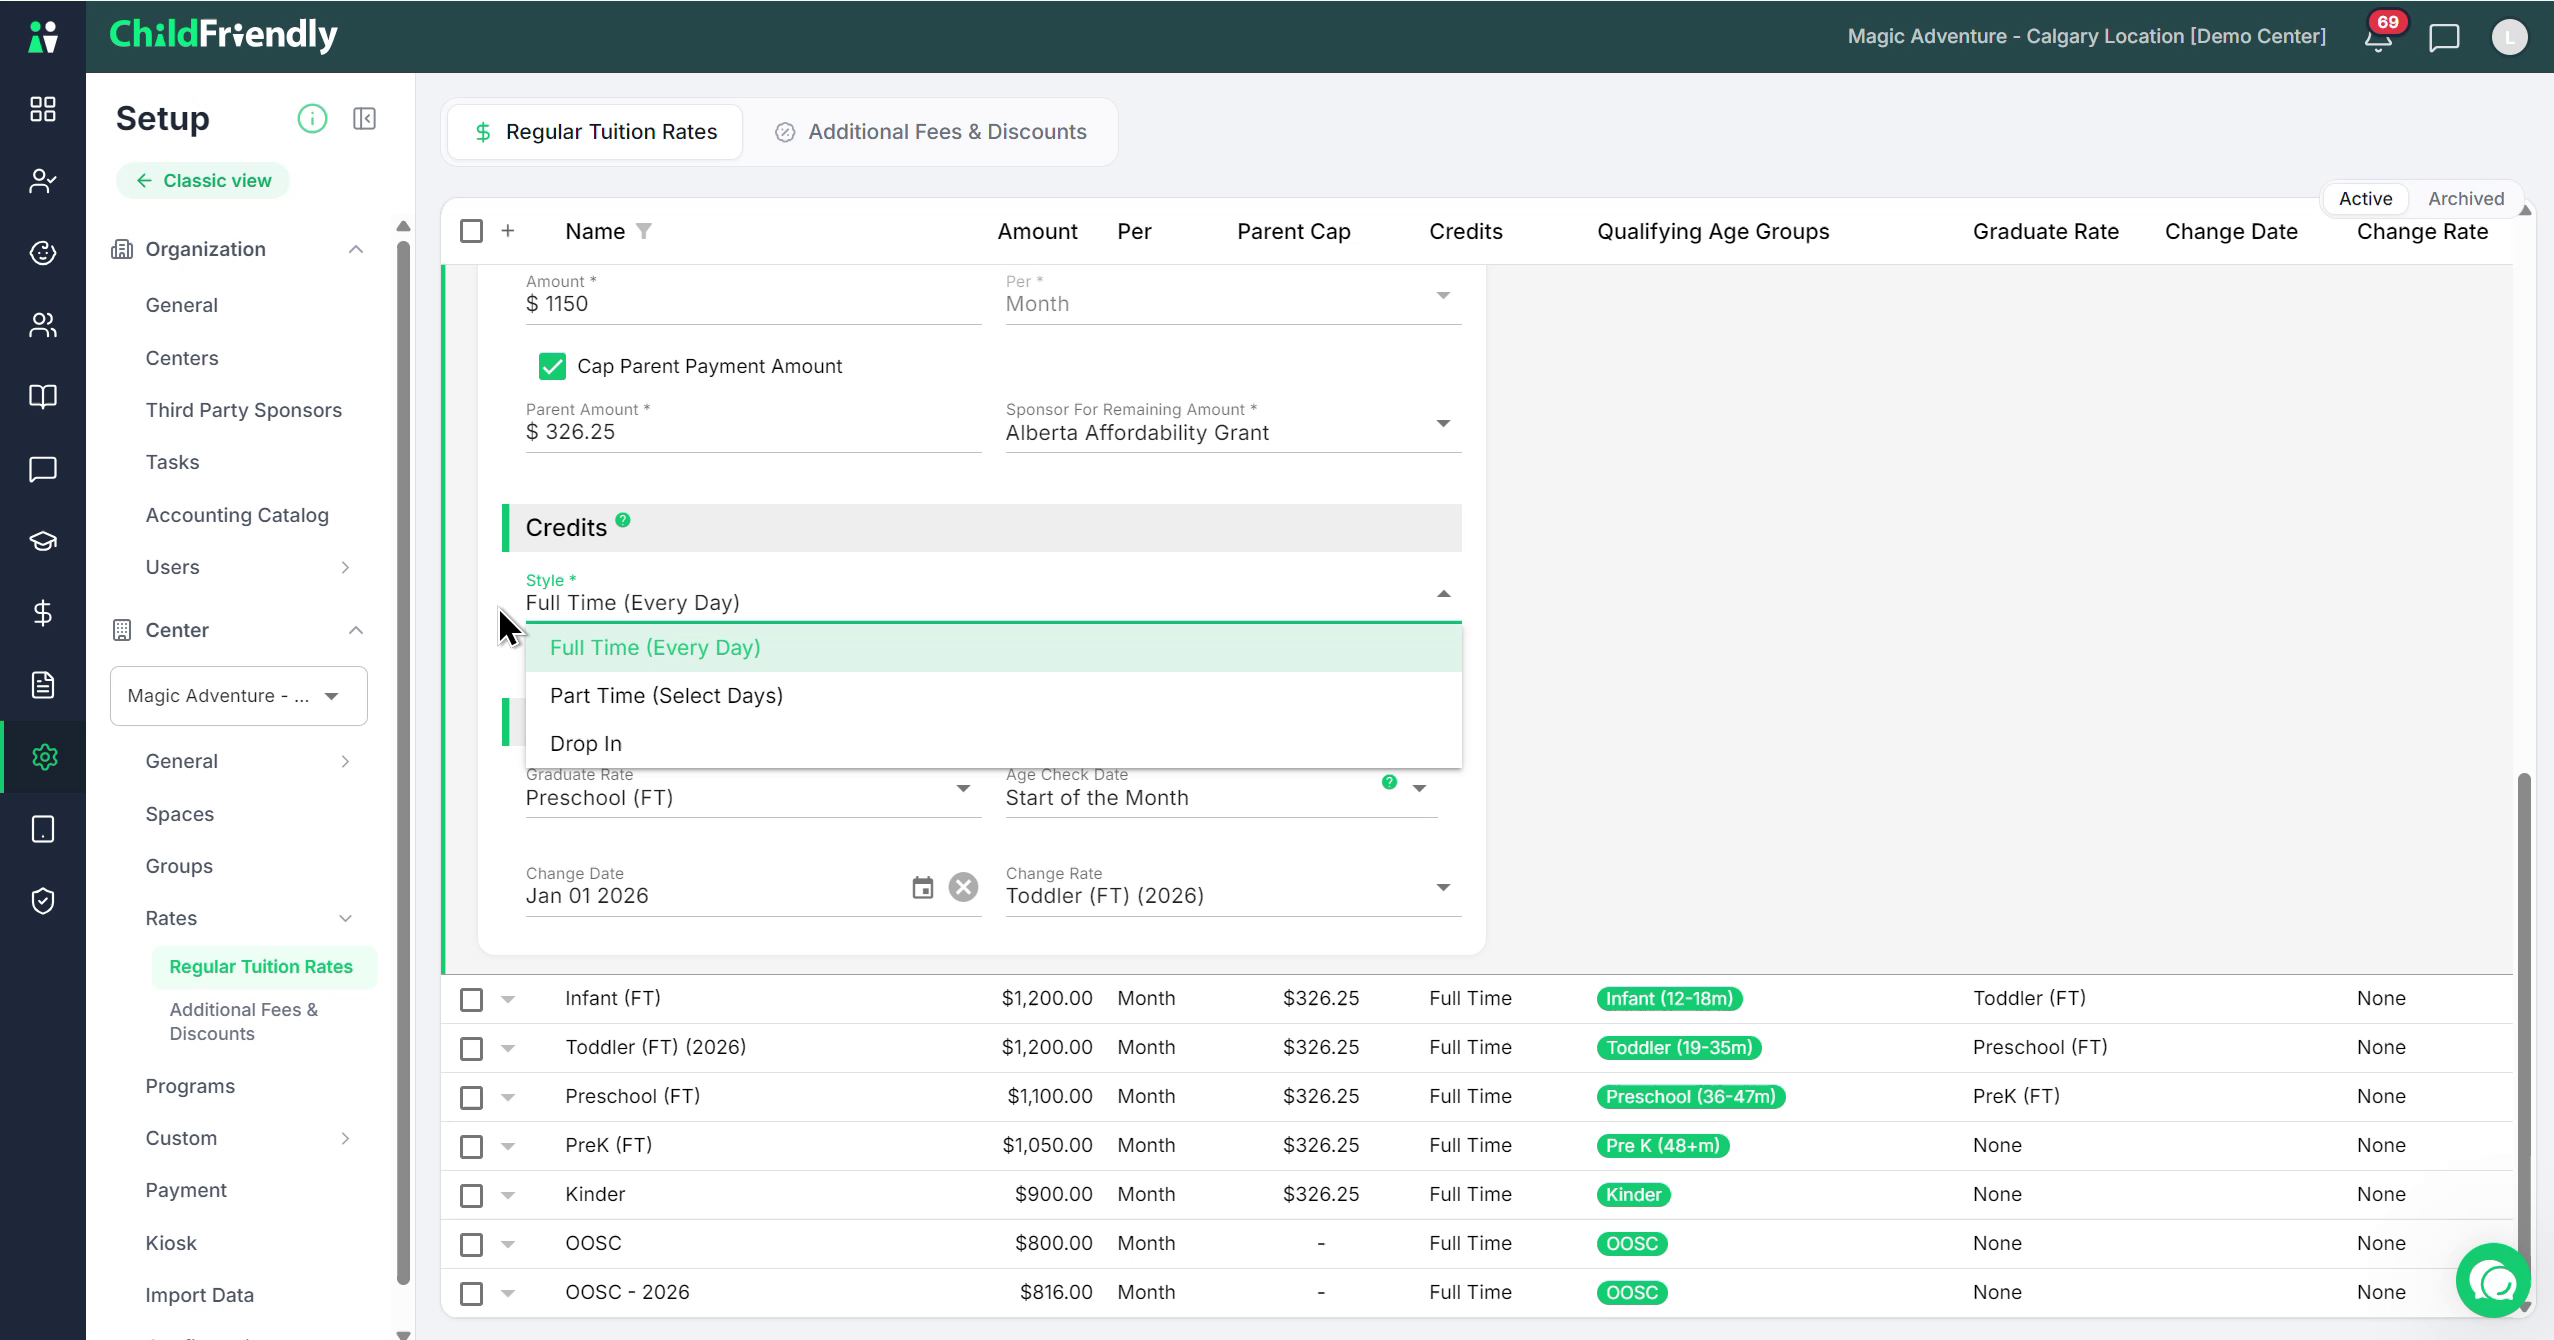
Other available credit styles (covered in later steps):
Part‑time
Drop‑in
Step 7: Configure Rollover (Graduate Rate) and Age Check Timing
The rollover fields automate how children move from one rate to another as they age or when rates increase or change.
You can hover over the question mark icons to see detailed explanations in the system.

Configure the Graduate Rate:
The graduate rate defines which rate a child moves to when they no longer qualify for the current age group (e.g., aging out of Toddler into Preschool).
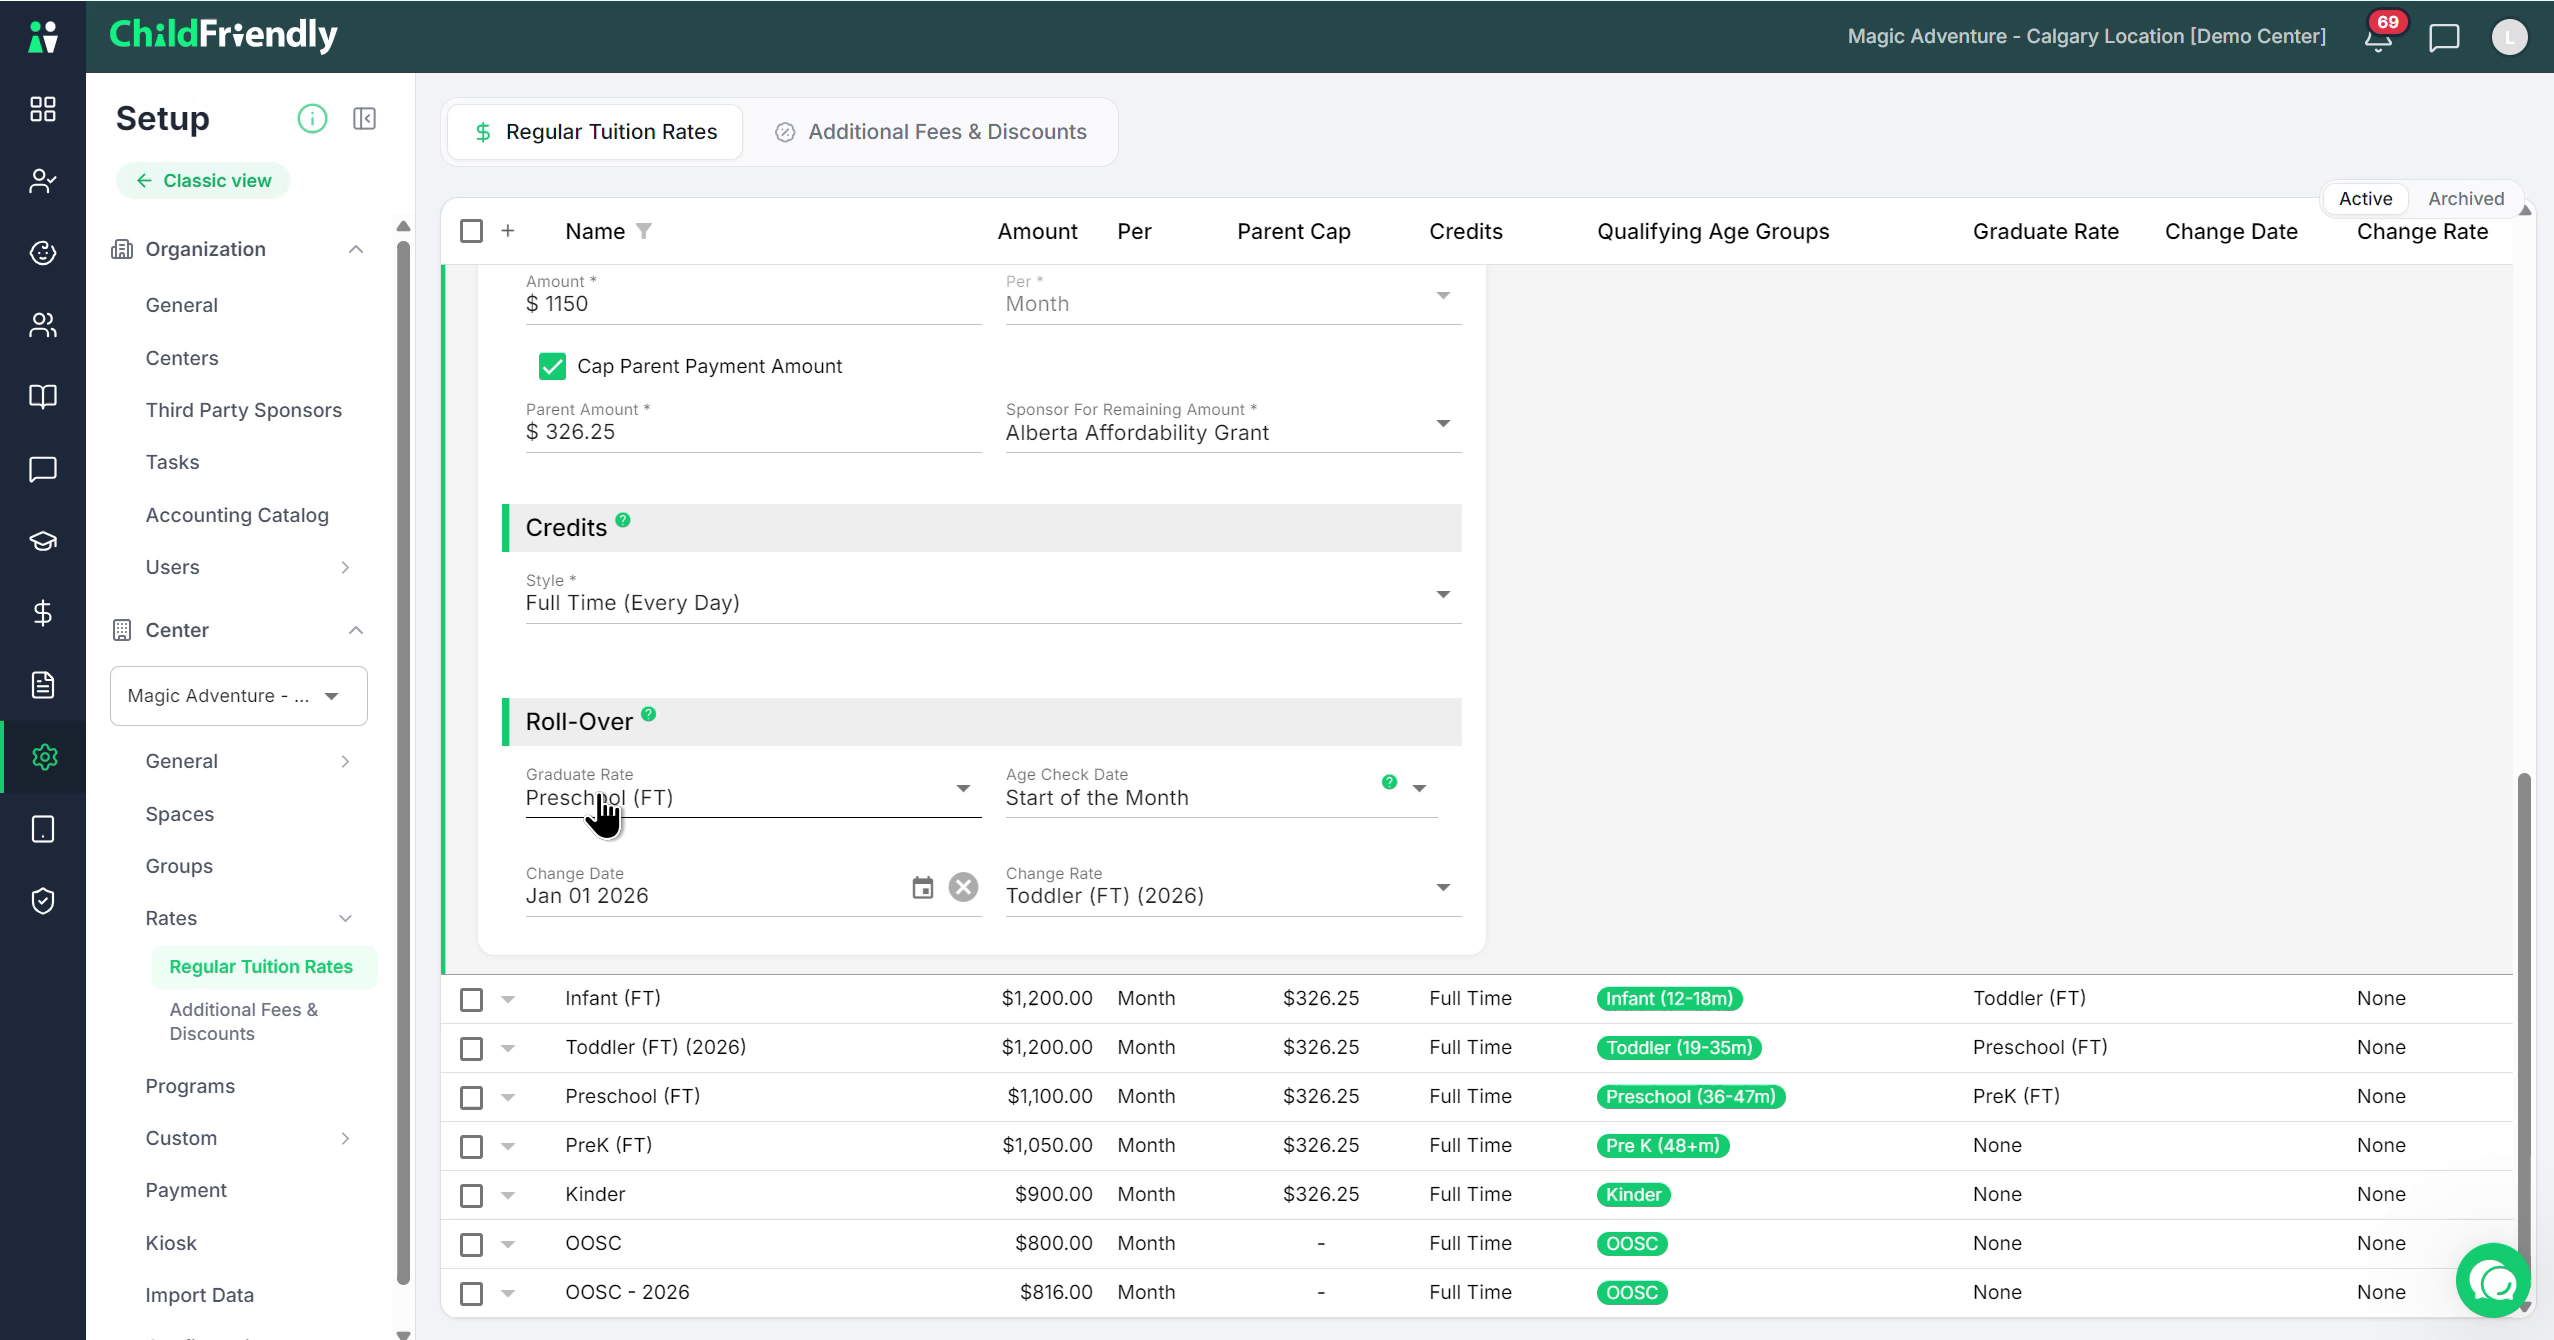
Choose the next appropriate rate (e.g., Preschool Full‑Time) that the system should assign automatically when a child ages out of the toddler full‑time rate.

Example:
When a toddler turns 36 months and is no longer eligible for the toddler rate,
The system will:
Confirm they qualify for the preschool full‑time rate.
Automatically update them to that rate.
Next, let's look at the Change Date field, which controls exactly when the new rate kicks in. For example, if a child transitions to a new age bracket mid-month and you select Start of the Month, they will be billed at the new graduate rate for that entire month. If you choose End of the Month, they will remain at their original rate, and the system won't switch them over until the following month. You can also select a Custom Date to trigger the transition on a specific day.

Step 8: Set Up Future Fee Changes with Change Date
Use the Change Date section when you plan a fee change or rate increase (commonly done annually):
Create the new rate first
For example, set up a new rate called Toddler Full‑Time 2026 with the updated amount.
Return to the current (old) rate and configure the change:
In the Change Date section, specify the effective date for the fee change (e.g., January 2026).
Set the system to change this current toddler full‑time rate
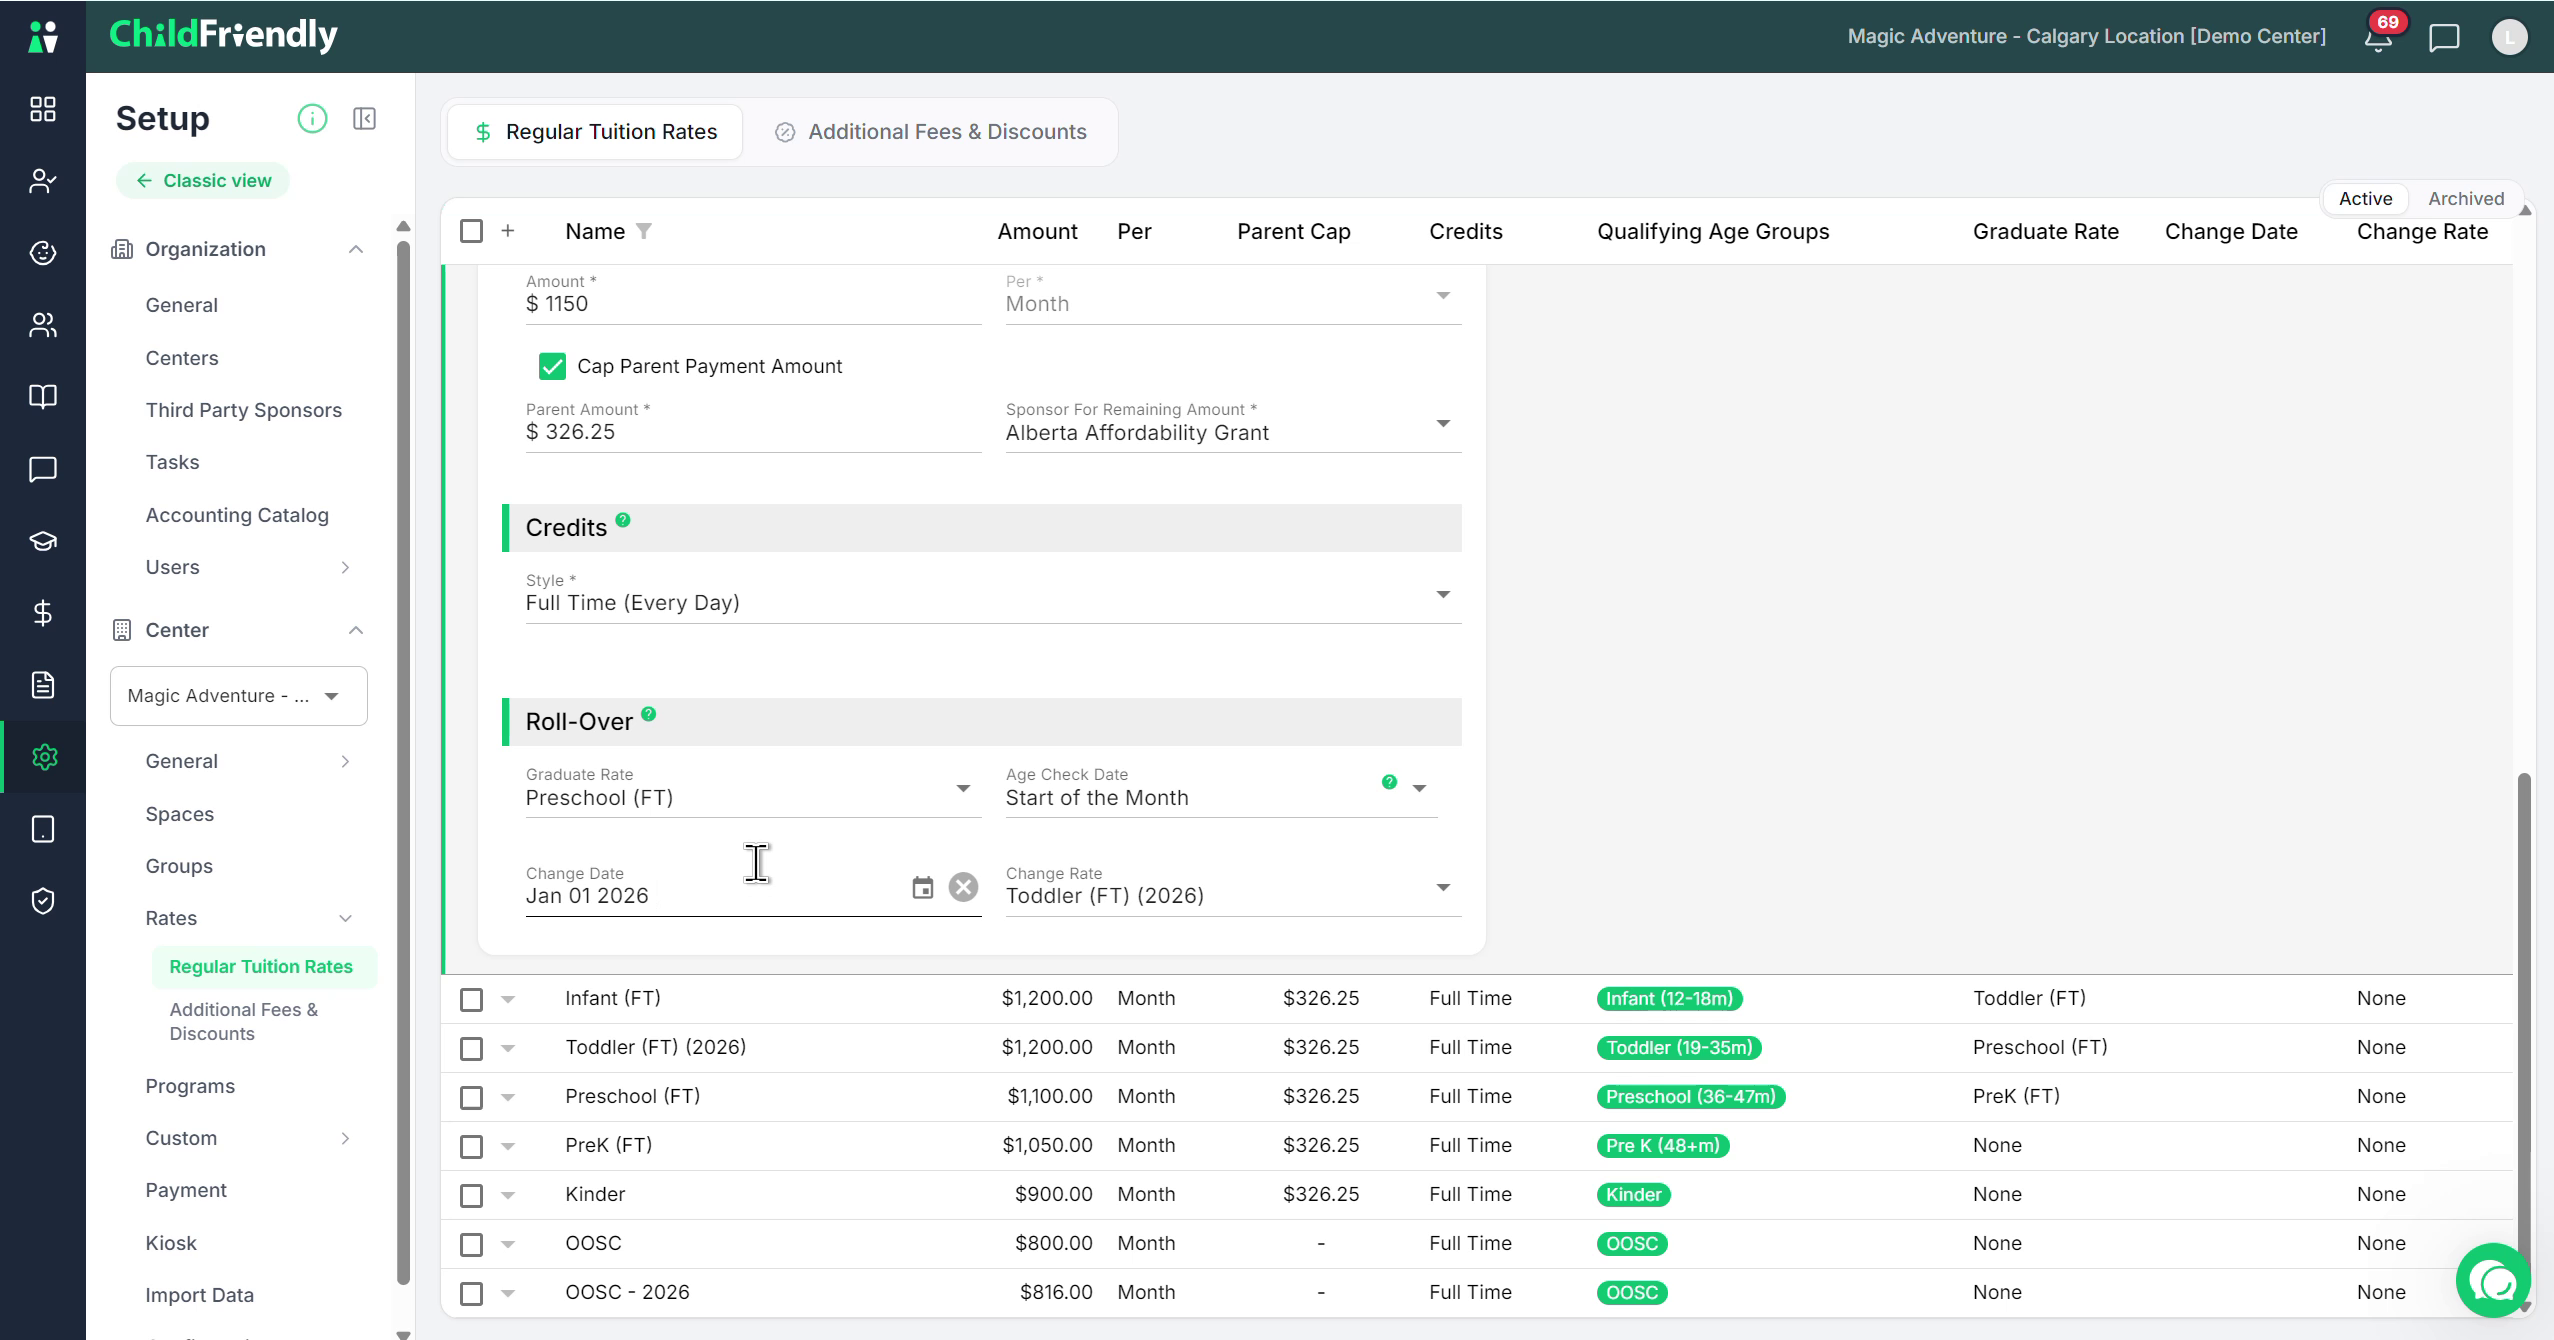
Into the new toddler 2026 rate as of that date.
On the change date, the system will:
Automatically update any child who currently has this toddler full‑time rate

To the new Toddler Full‑Time 2026 rate.
After the change date the system will automatically archive all the old rates that no longer apply.
Step 9: Configure a Part-Time Rate
Now that the full‑time rate configuration is clear, set up or review a part‑time example.
Select a part‑time rate, such as Summer Three Day Part‑Time Program, and expand it.
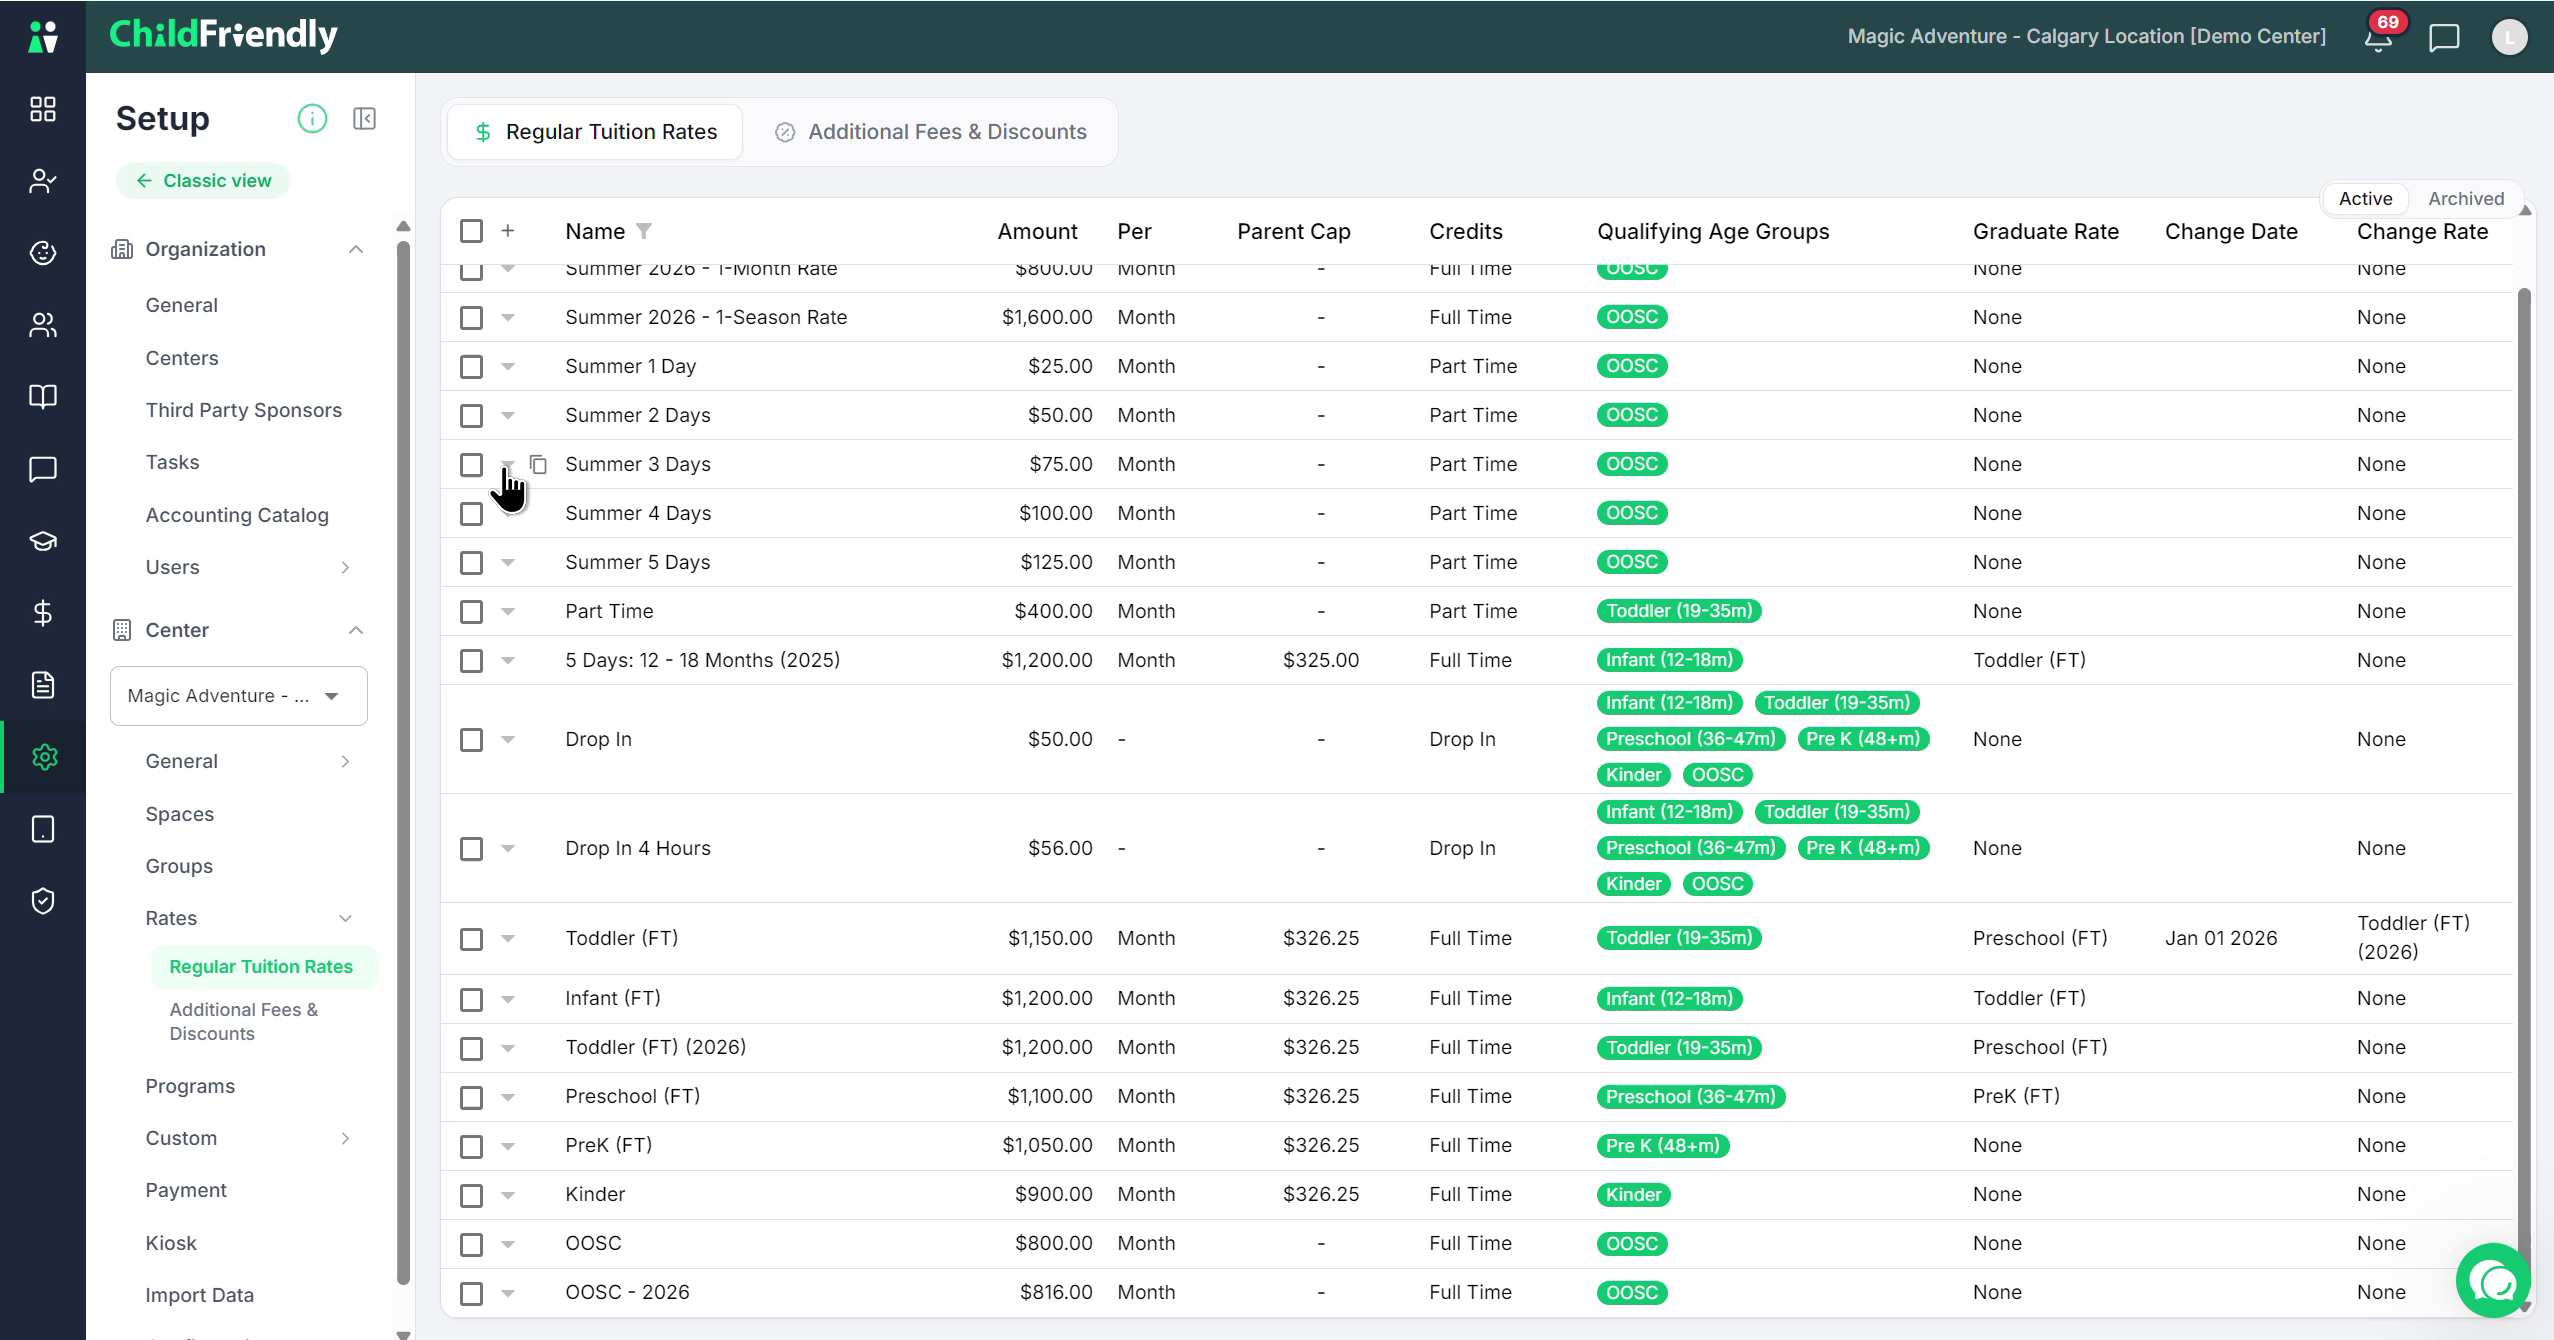
All fields are identical to the full‑time rate configuration except the section defining the part‑time style:
Instead of Full‑Time, select Part‑Time.
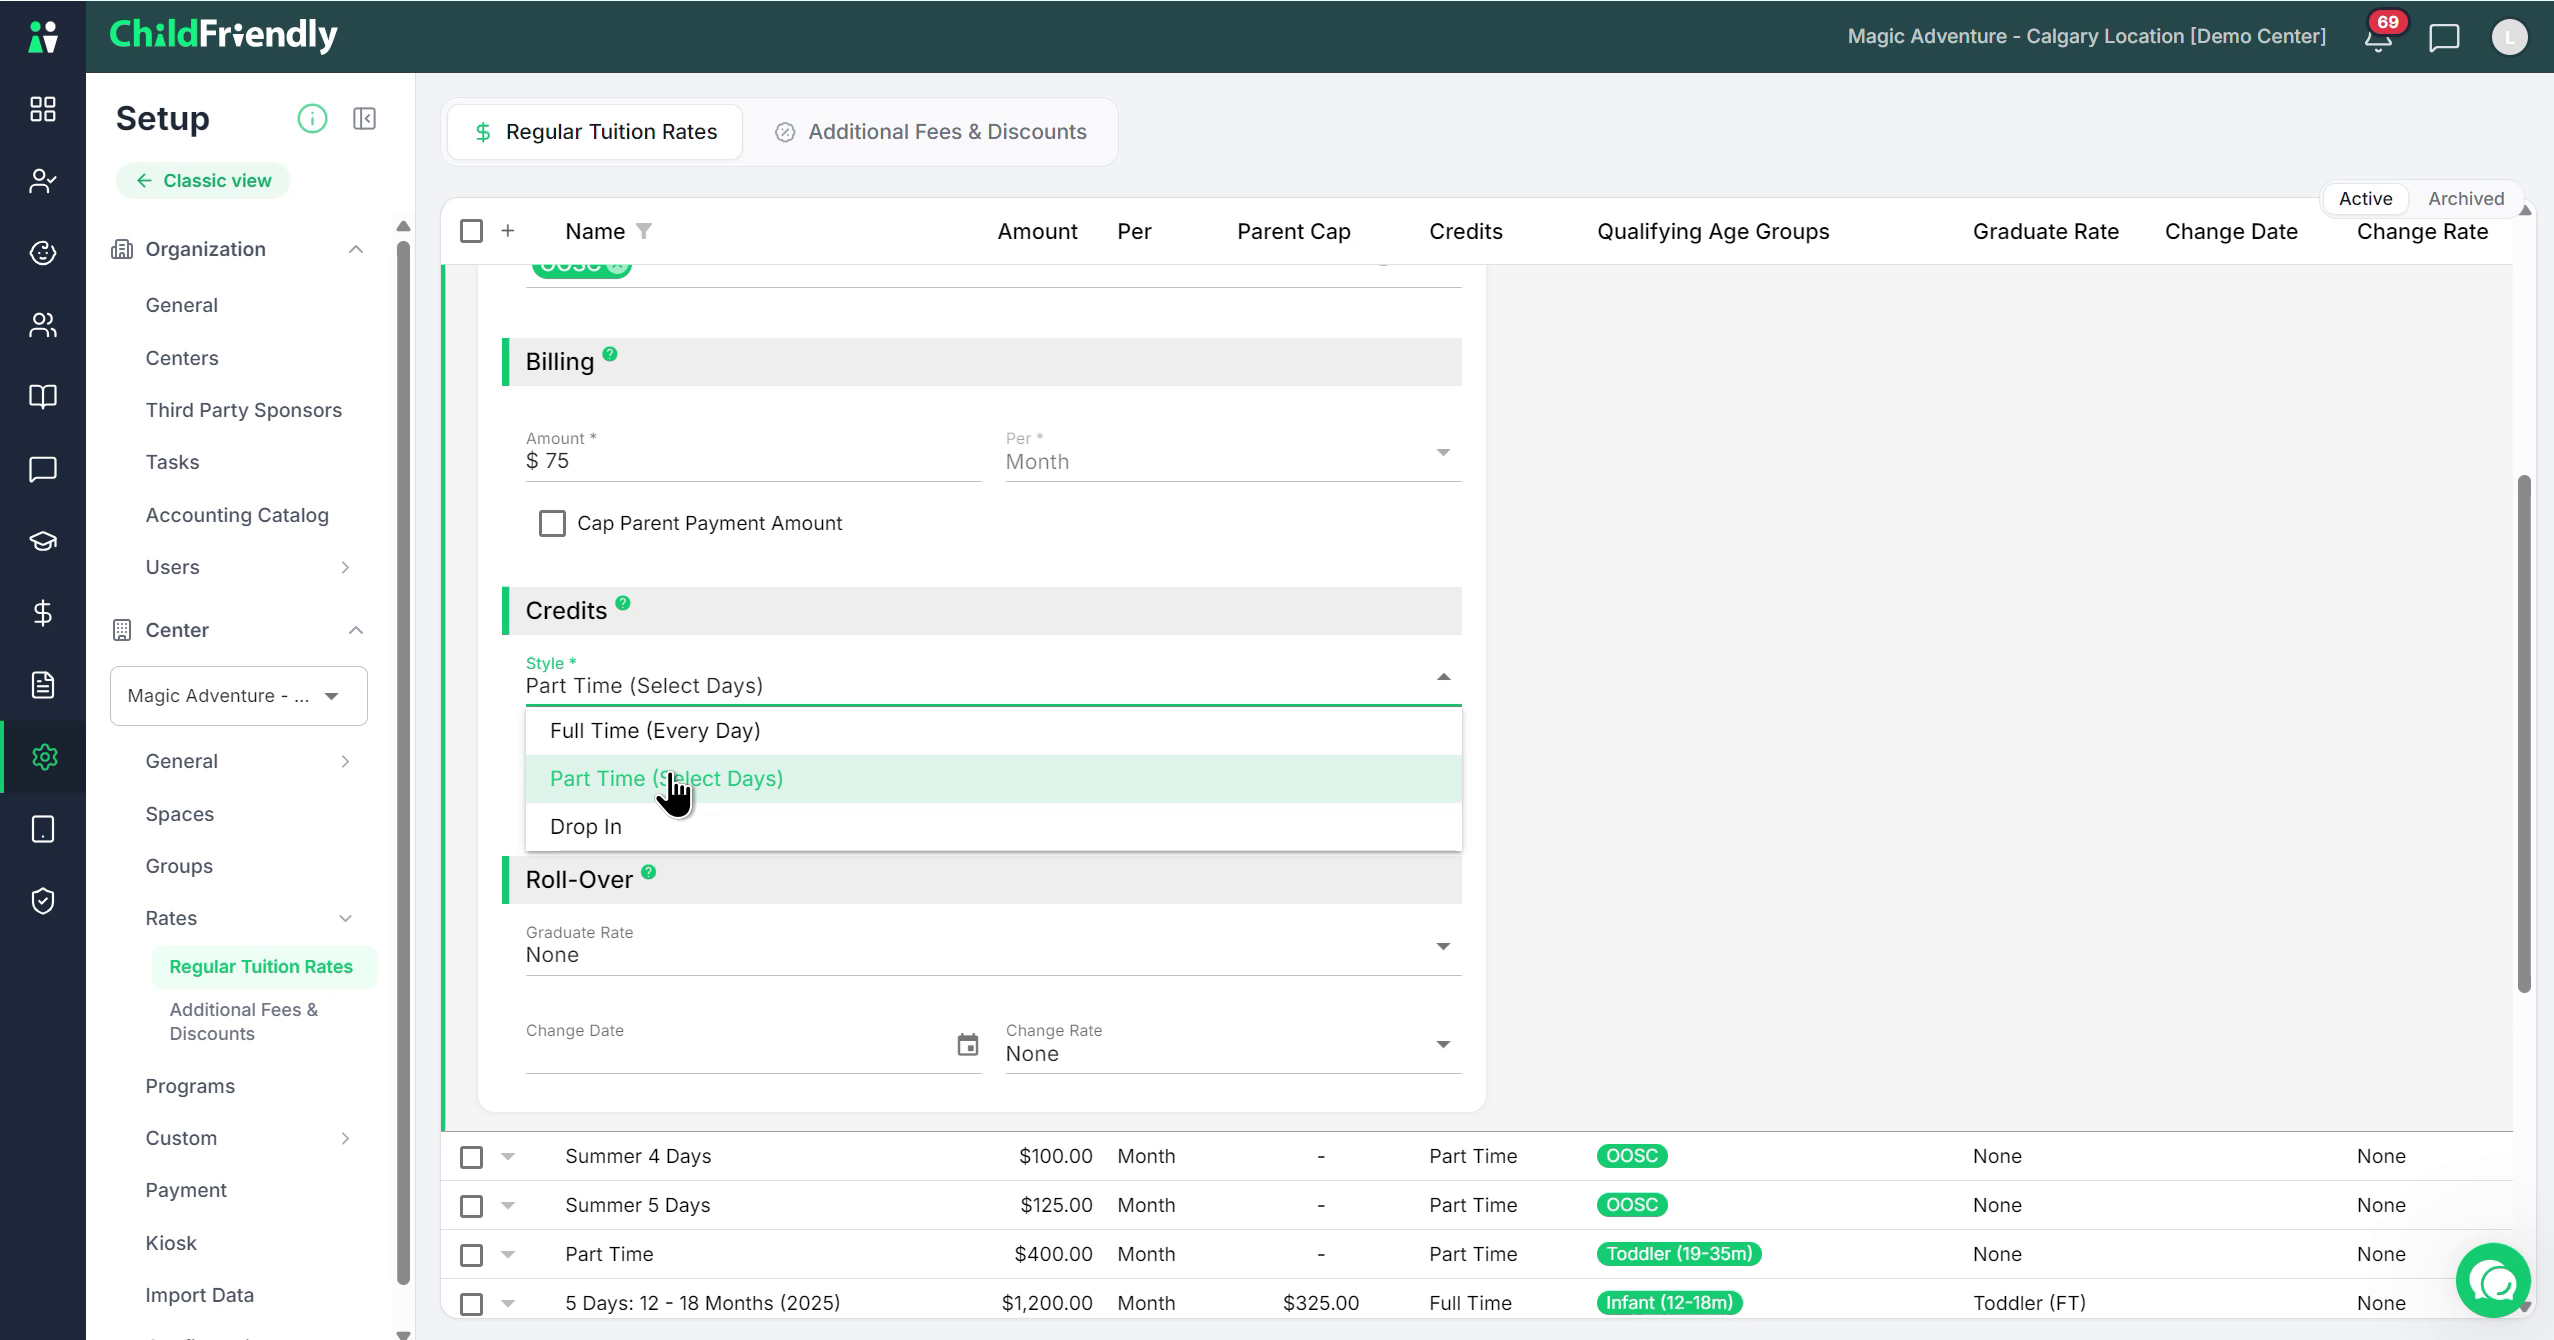
Currently, the only part‑time option in ChildFriendly is:
Days per Week Recurring
Define how many recurring days per week this rate allows (e.g., 3 days per week)
How this works in online registration:
When families register online, they can select the exact days they need—such as Mondays, Thursdays, or Fridays. The system instantly checks your real-time capacity and current schedules starting from their requested date, only displaying the days that actually have openings. This is a massive win for your center because the system automatically pieces together complementary part-time schedules to fill up full-time spots. By maximizing your room capacity this way, it effortlessly boosts your enrollment and financial efficiency."
Step 10: Configure a Drop-In Rate
Finally, set up or review a drop‑in rate.
Open a drop‑in rate example.

In this example:
The qualifying age group is all ages in the center, because the drop‑in fee is the same regardless of age.
Other centers may configure different drop‑in rates per age group.
The only configuration difference for this rate is the Credits style:
Set the style to Drop‑In.
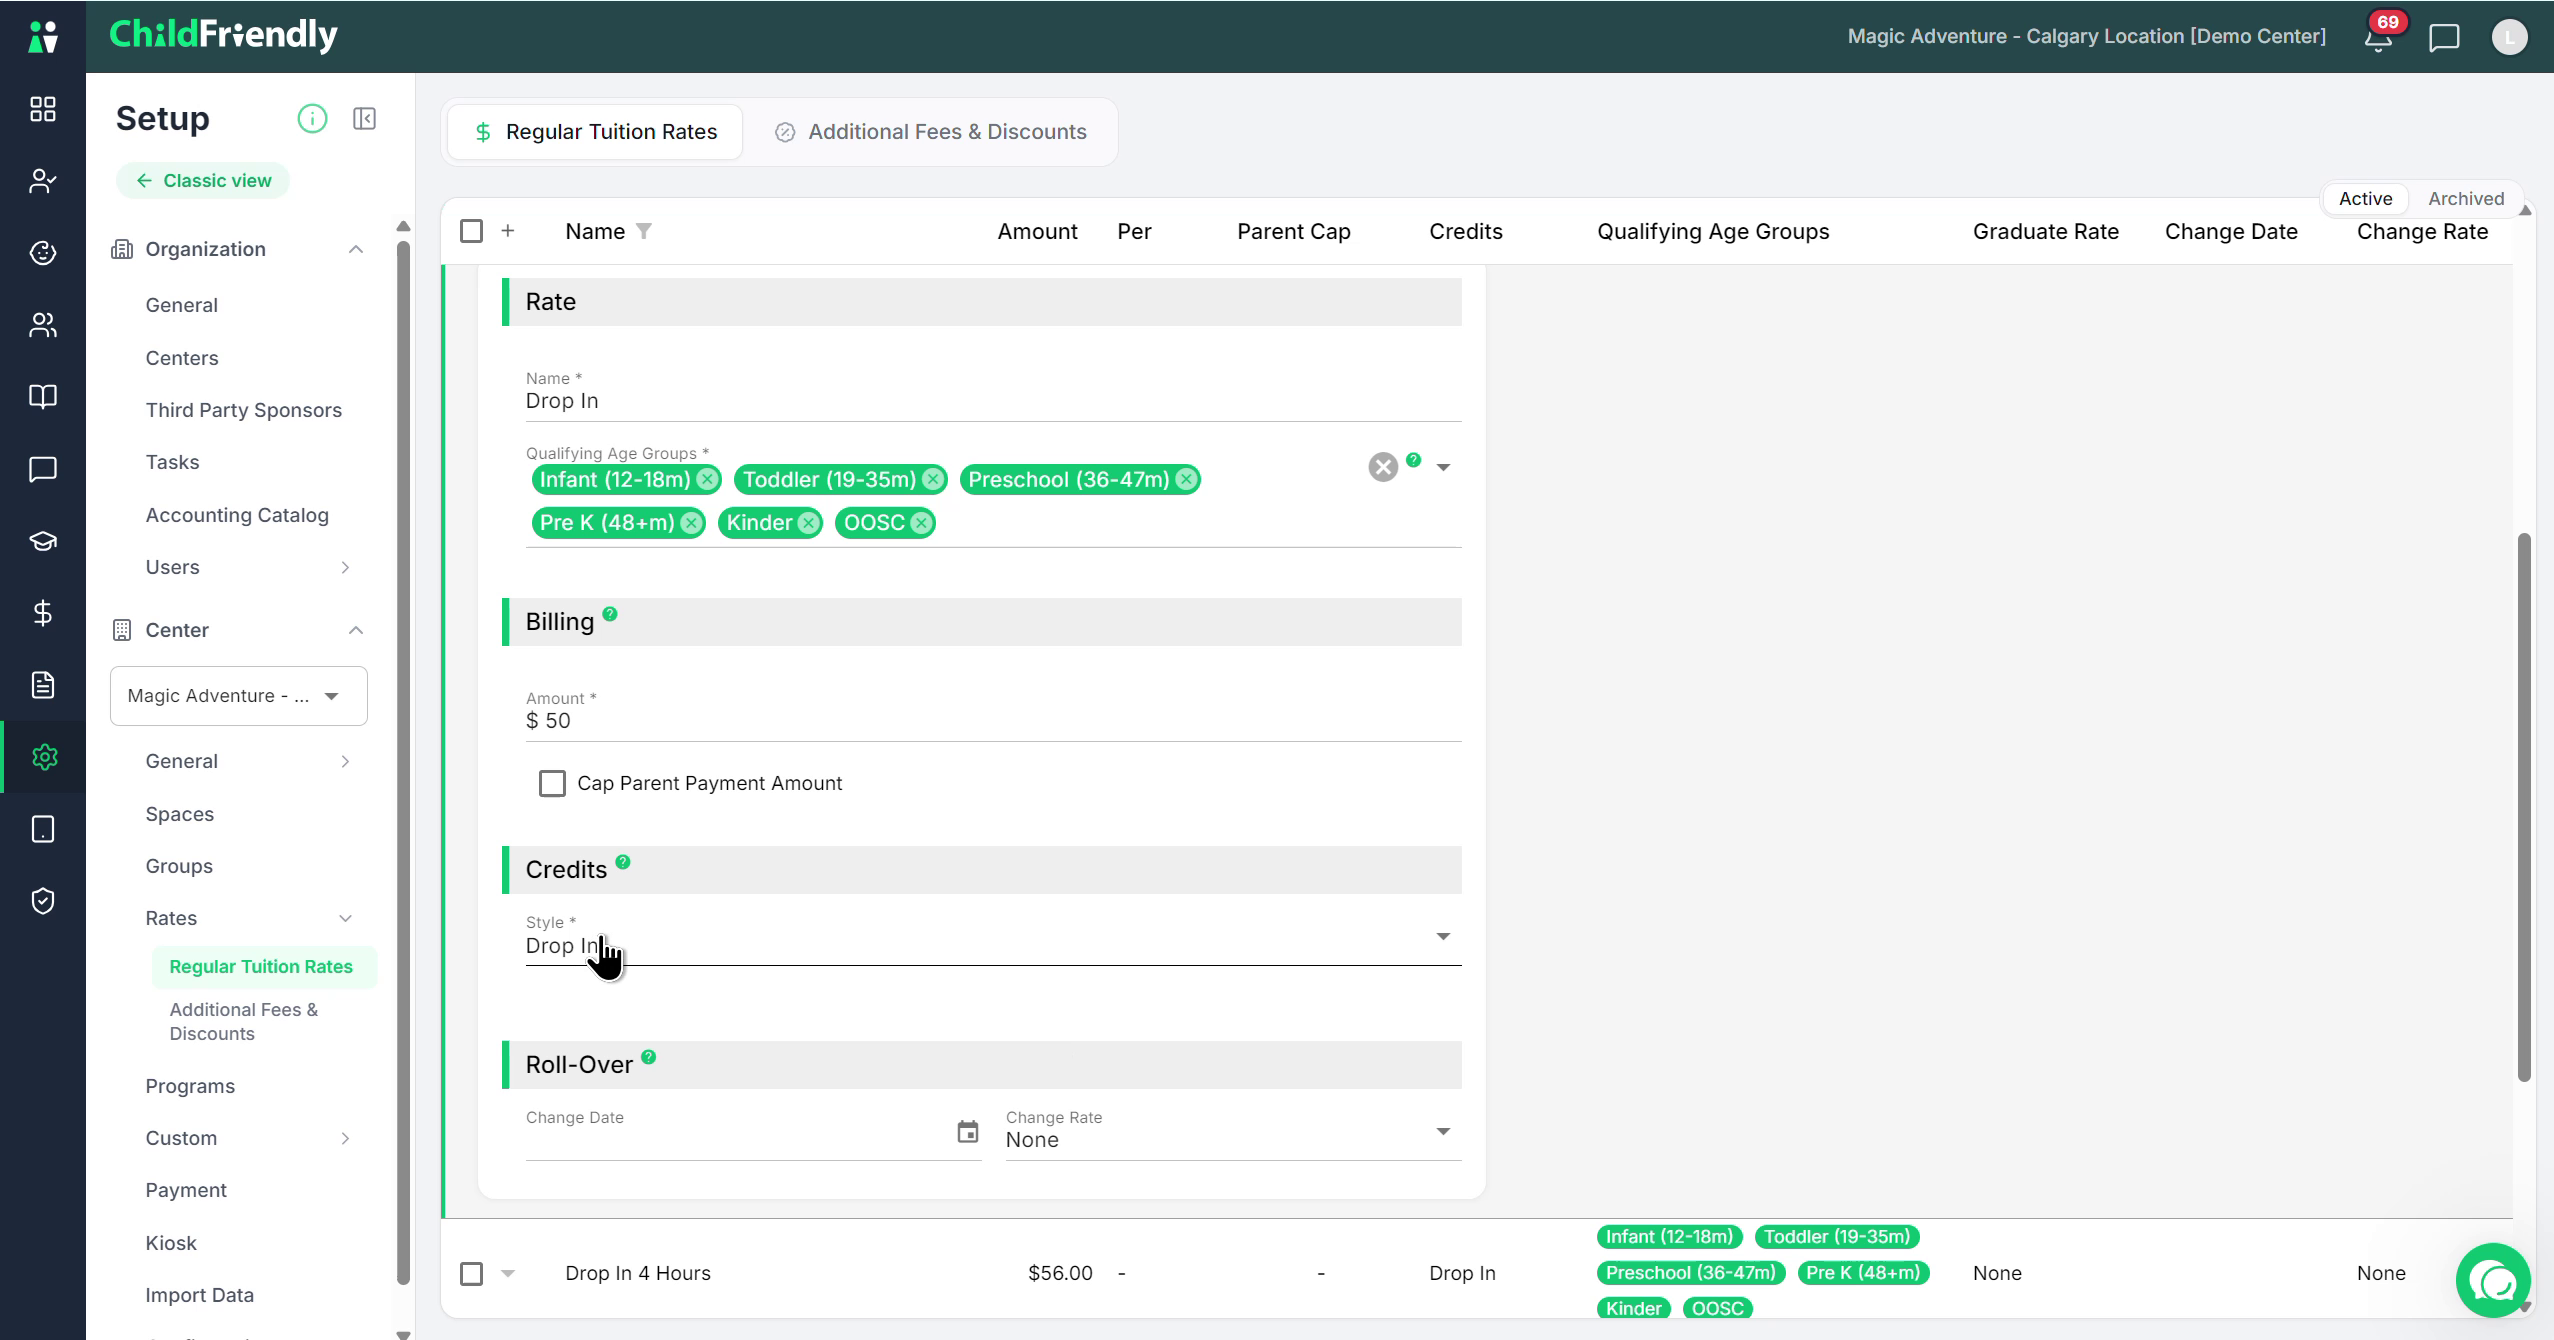
All other fields (amount, age groups, rollover, change date, etc.) are configured the same way as other rate types.
You have now completed setting up your regular rates (full‑time, part‑time, and drop‑in).