How to Set Up Payroll Preferences & Tax
This article explains how to configure payroll and tax settings for your center, including payroll rounding, overtime rules, holiday pay calculations, holiday lists, and tax receipt signatures. Follow the steps in order within the Setup module for the selected center.
Last updated About 2 months ago
Step 1: Open the Payroll & Tax Customization Page
Ensure you are in the Setup module.
Confirm you have selected the correct center you are configuring.
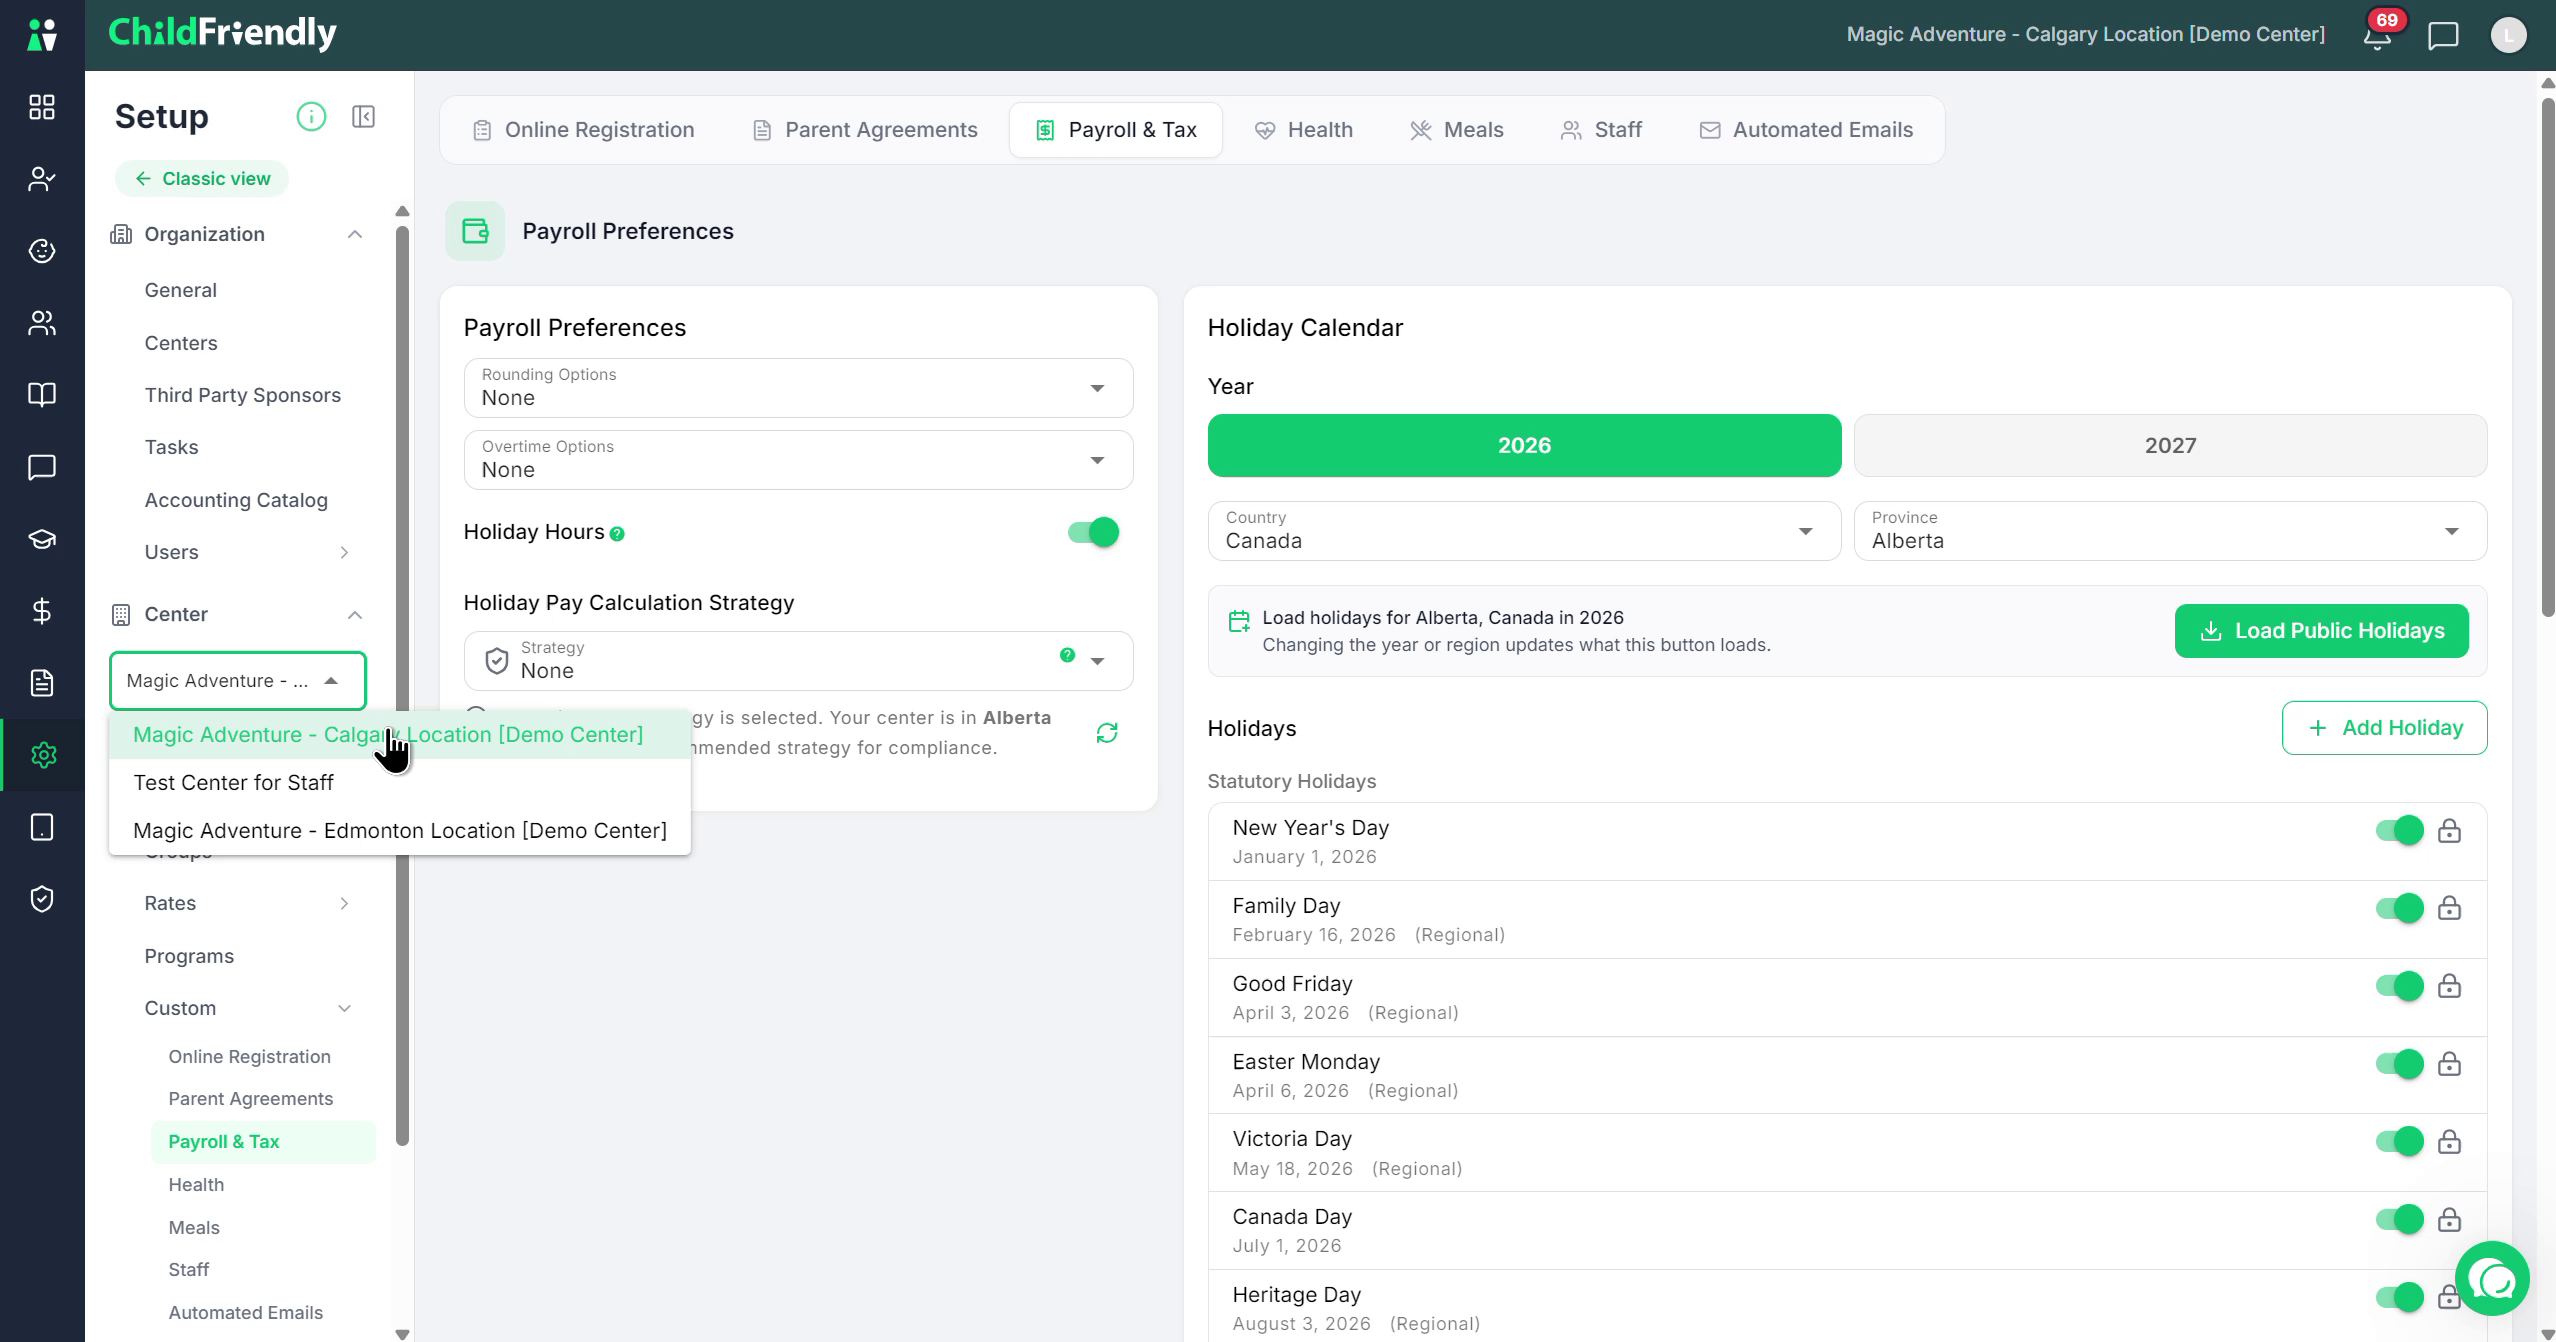
Under the Custom section, click Payroll & Tax.
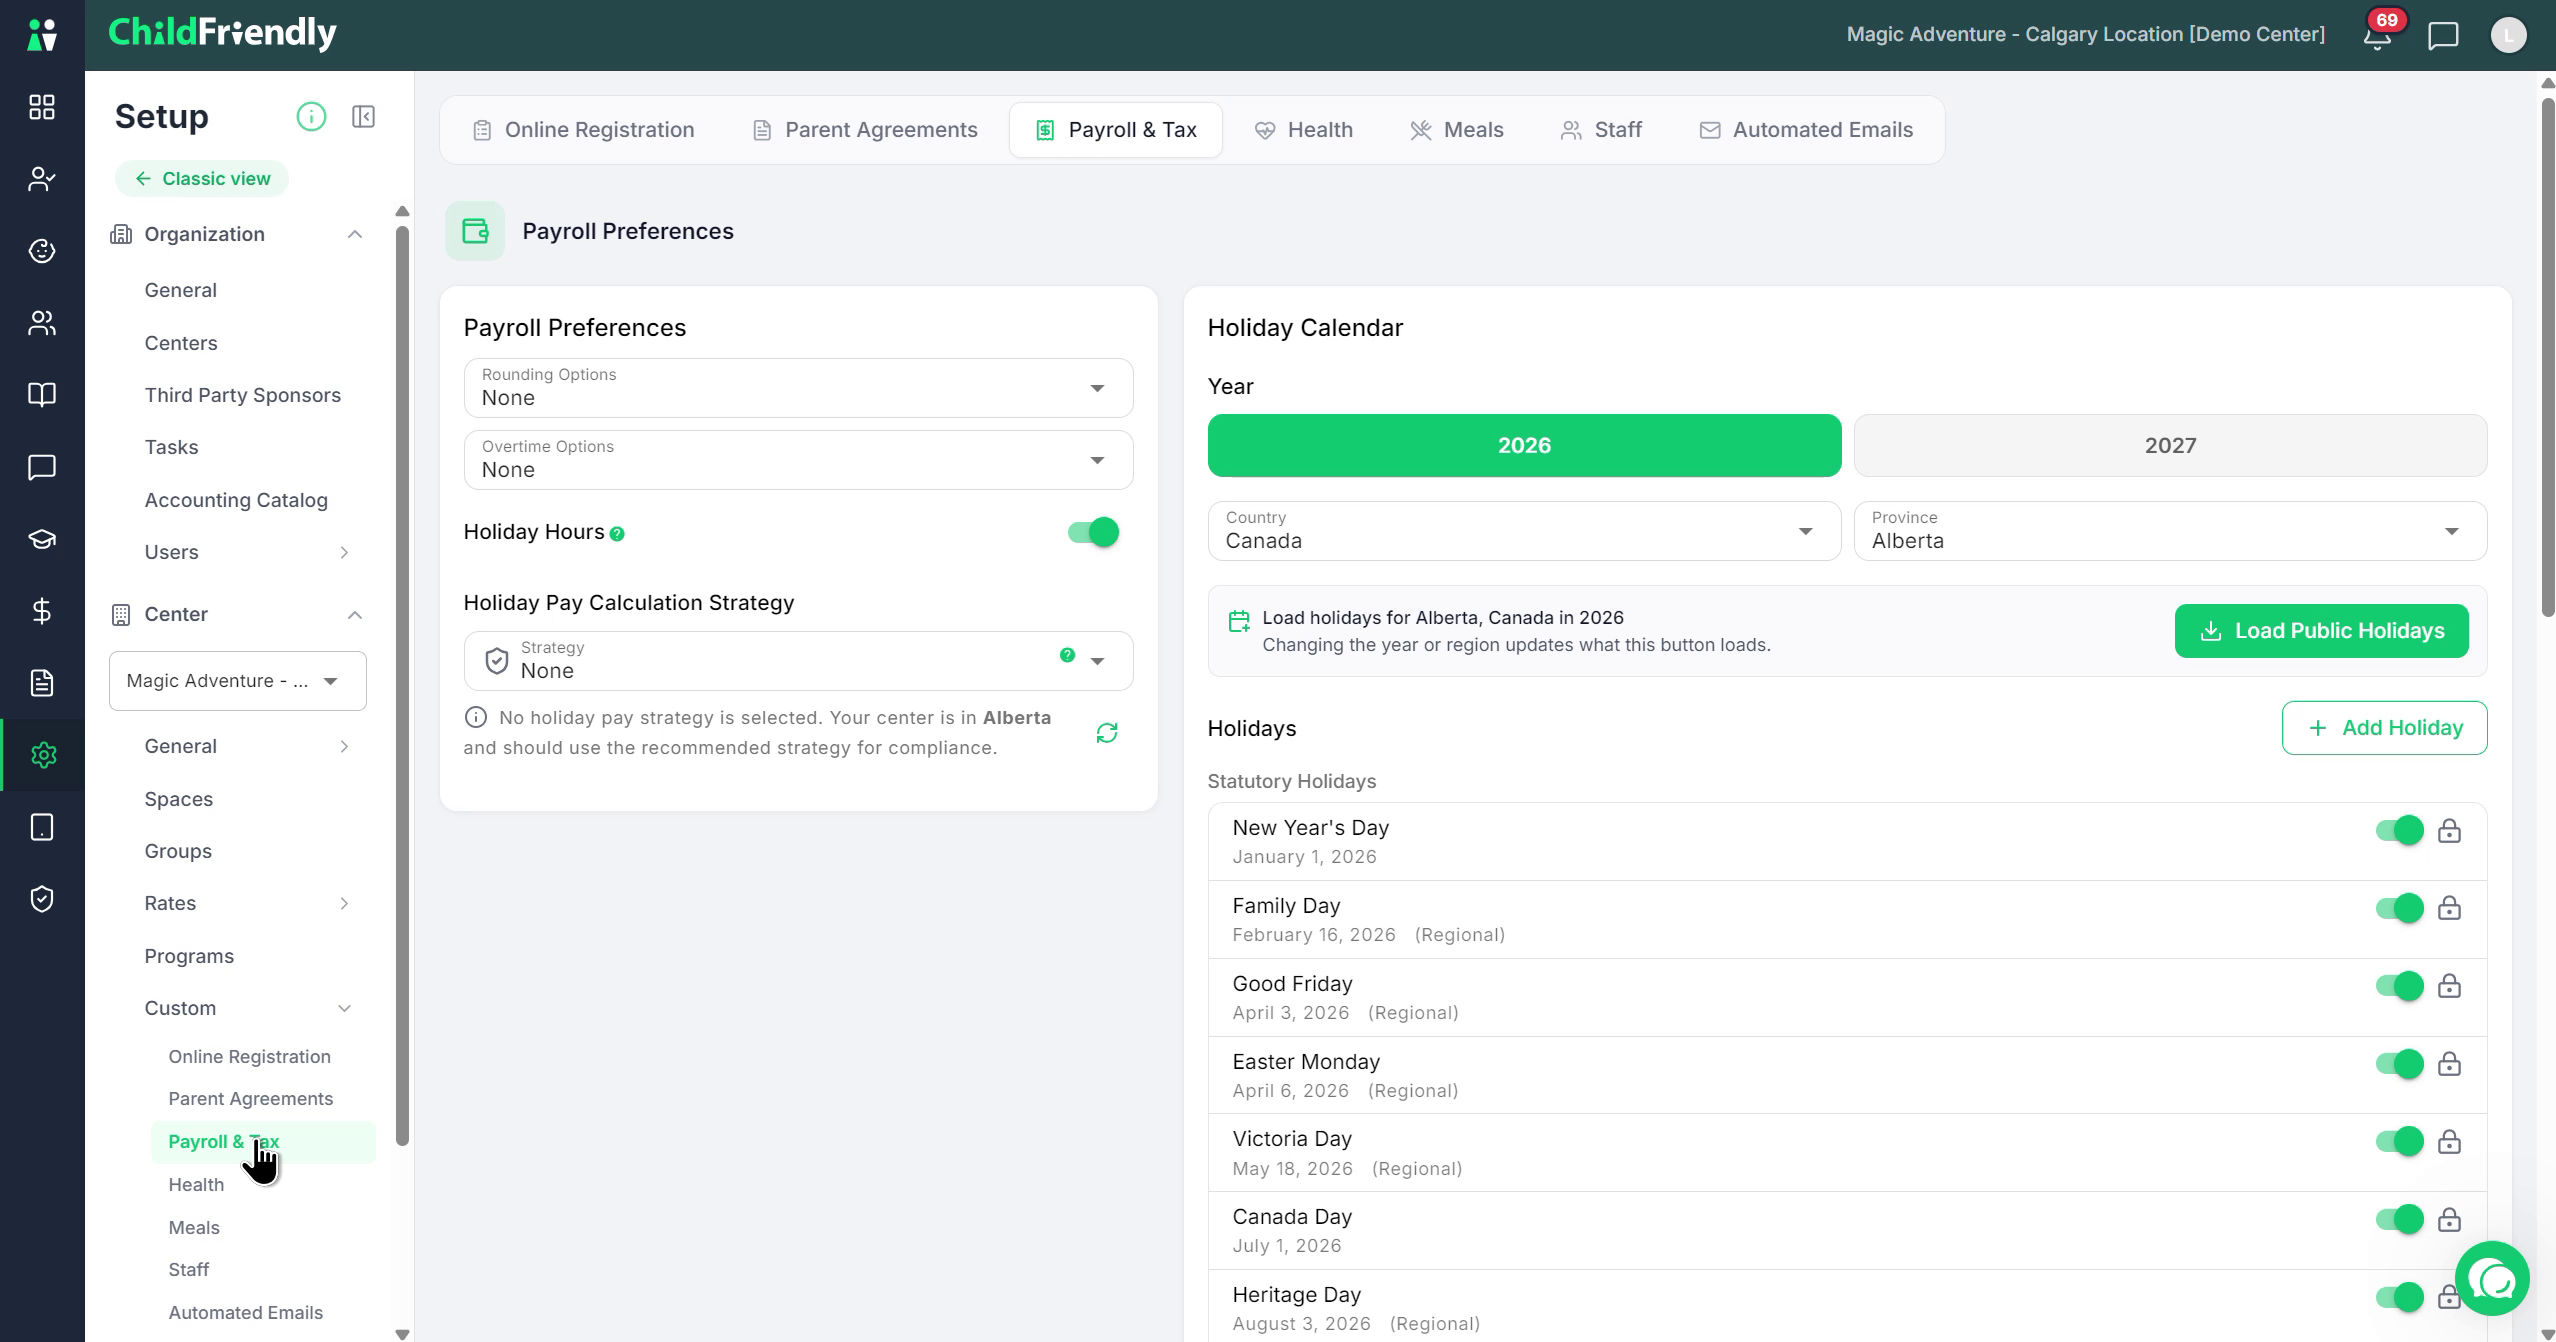
Step 2: Configure Payroll Preferences and Rounding
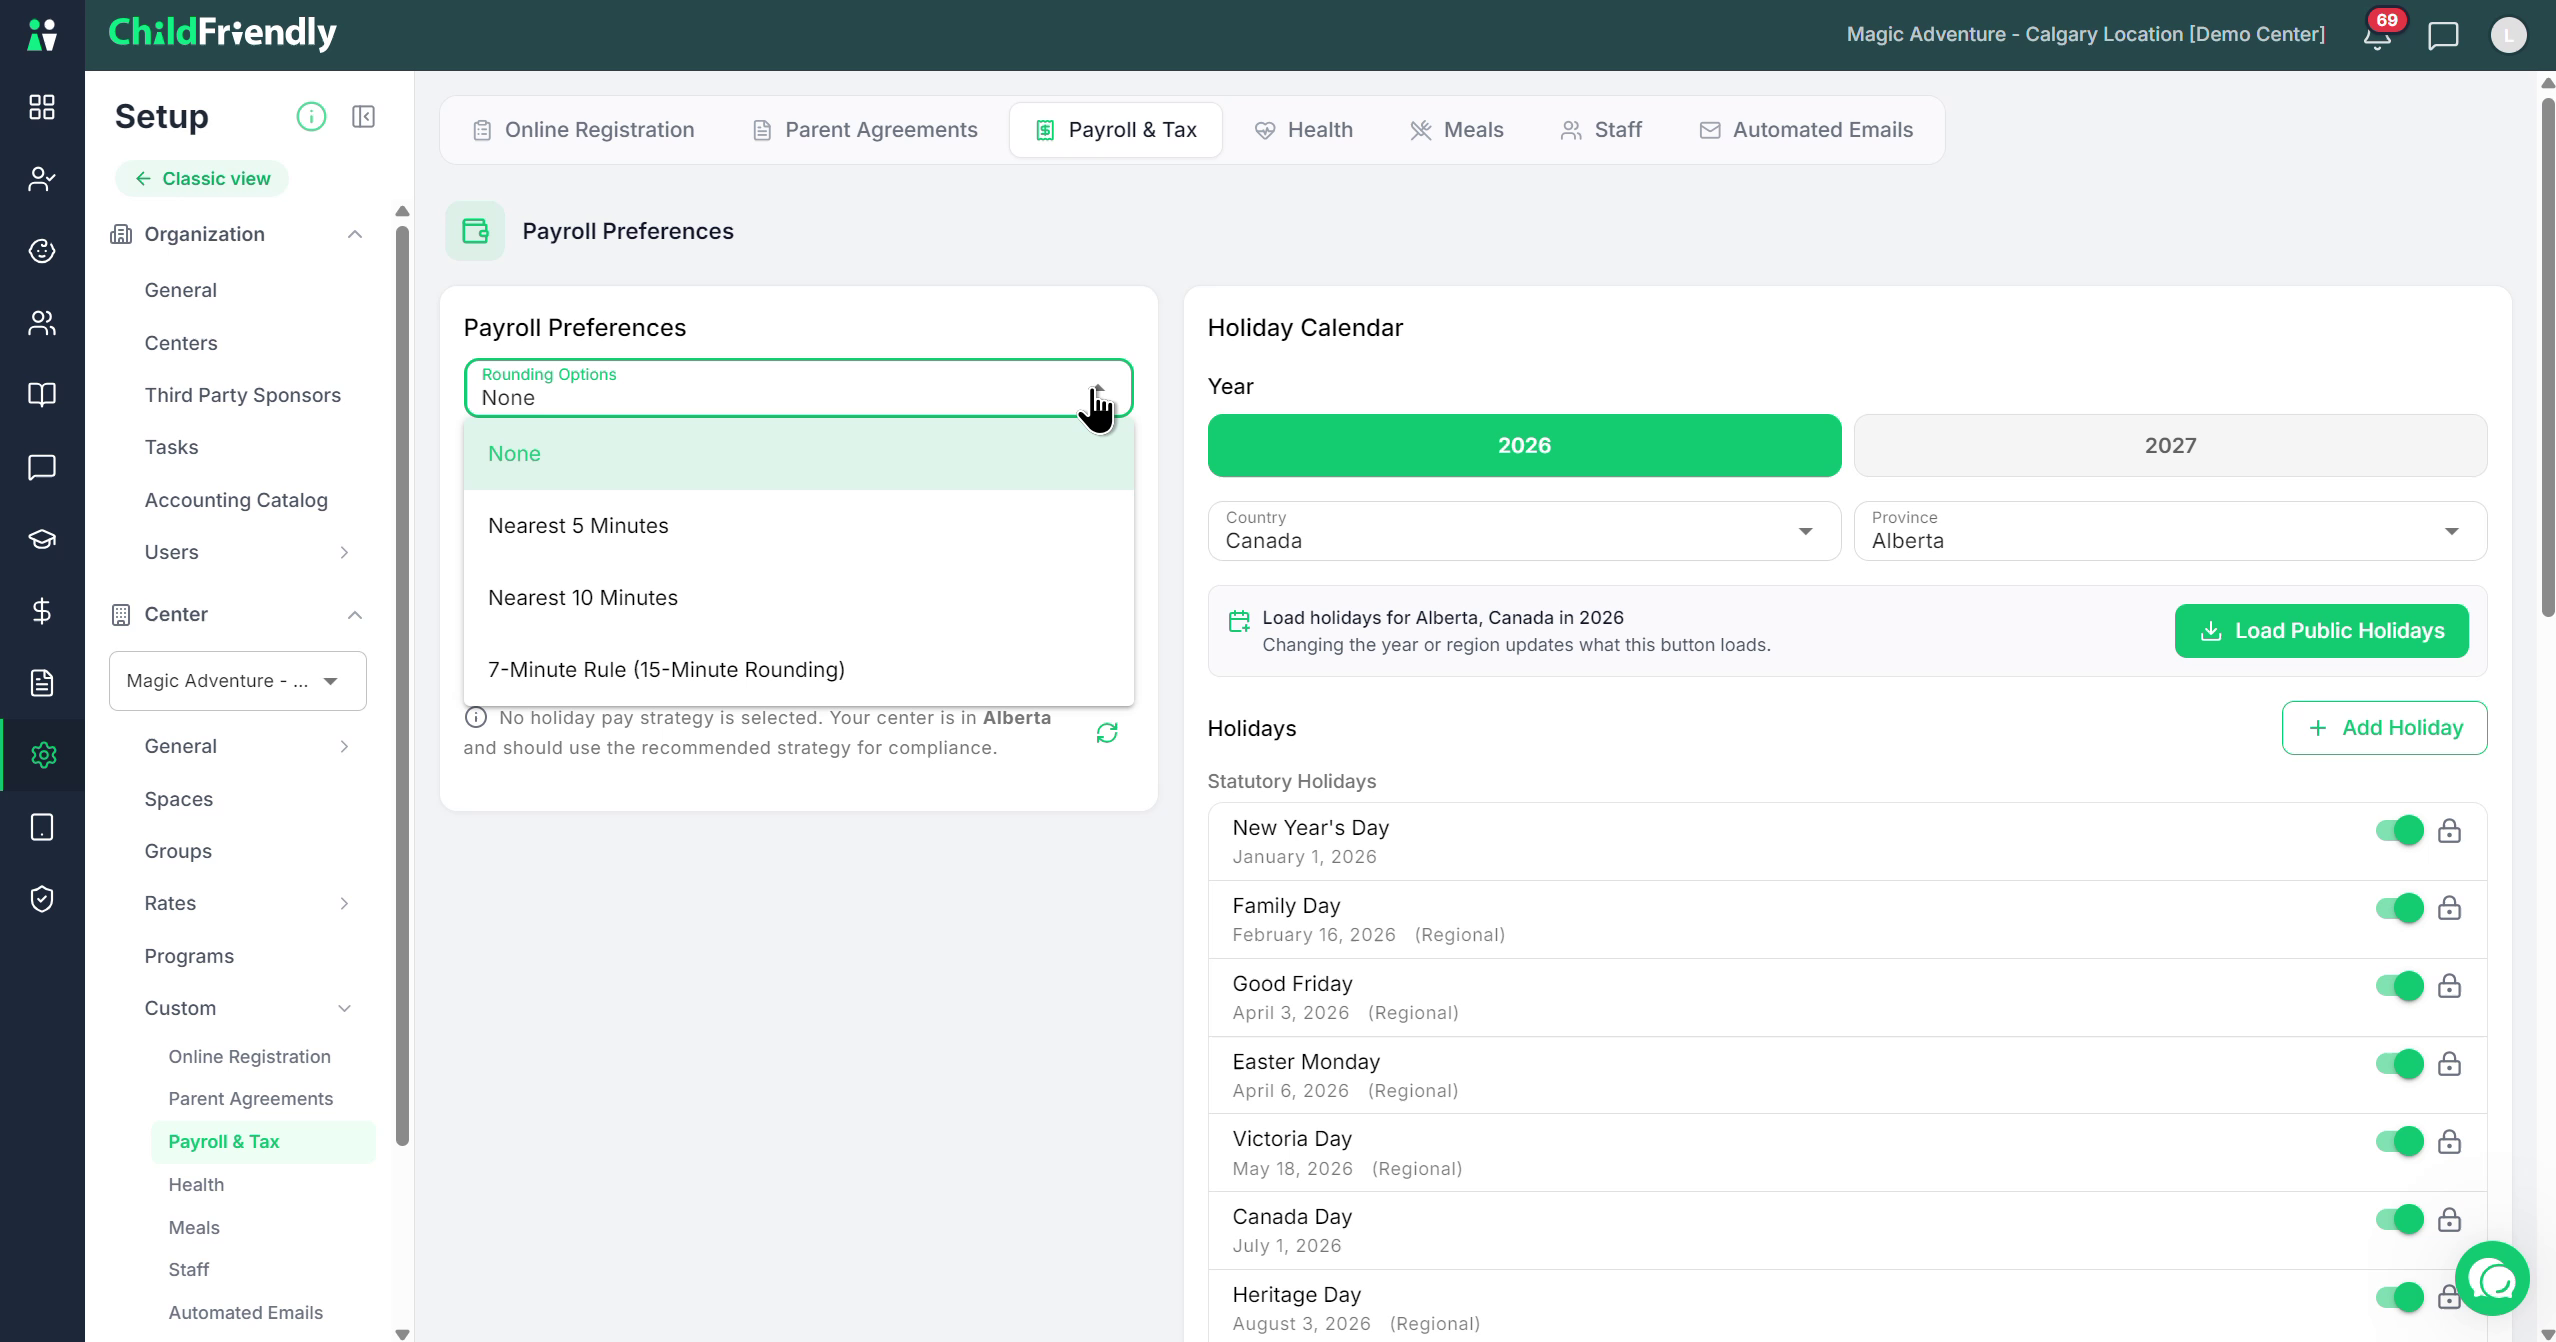
In the Payroll Preferences section, locate the Rounding Option.

Choose how payroll hours should be rounded:
Nearest 5 minutes
Nearest 10 minutes
Seven-minute rule (effectively 15-minute rounding)
Select the option that matches your organization’s policy and local requirements.
Click Save after updating this (and every other) setting.
Step 3: Set Overtime Options and Averaging Period
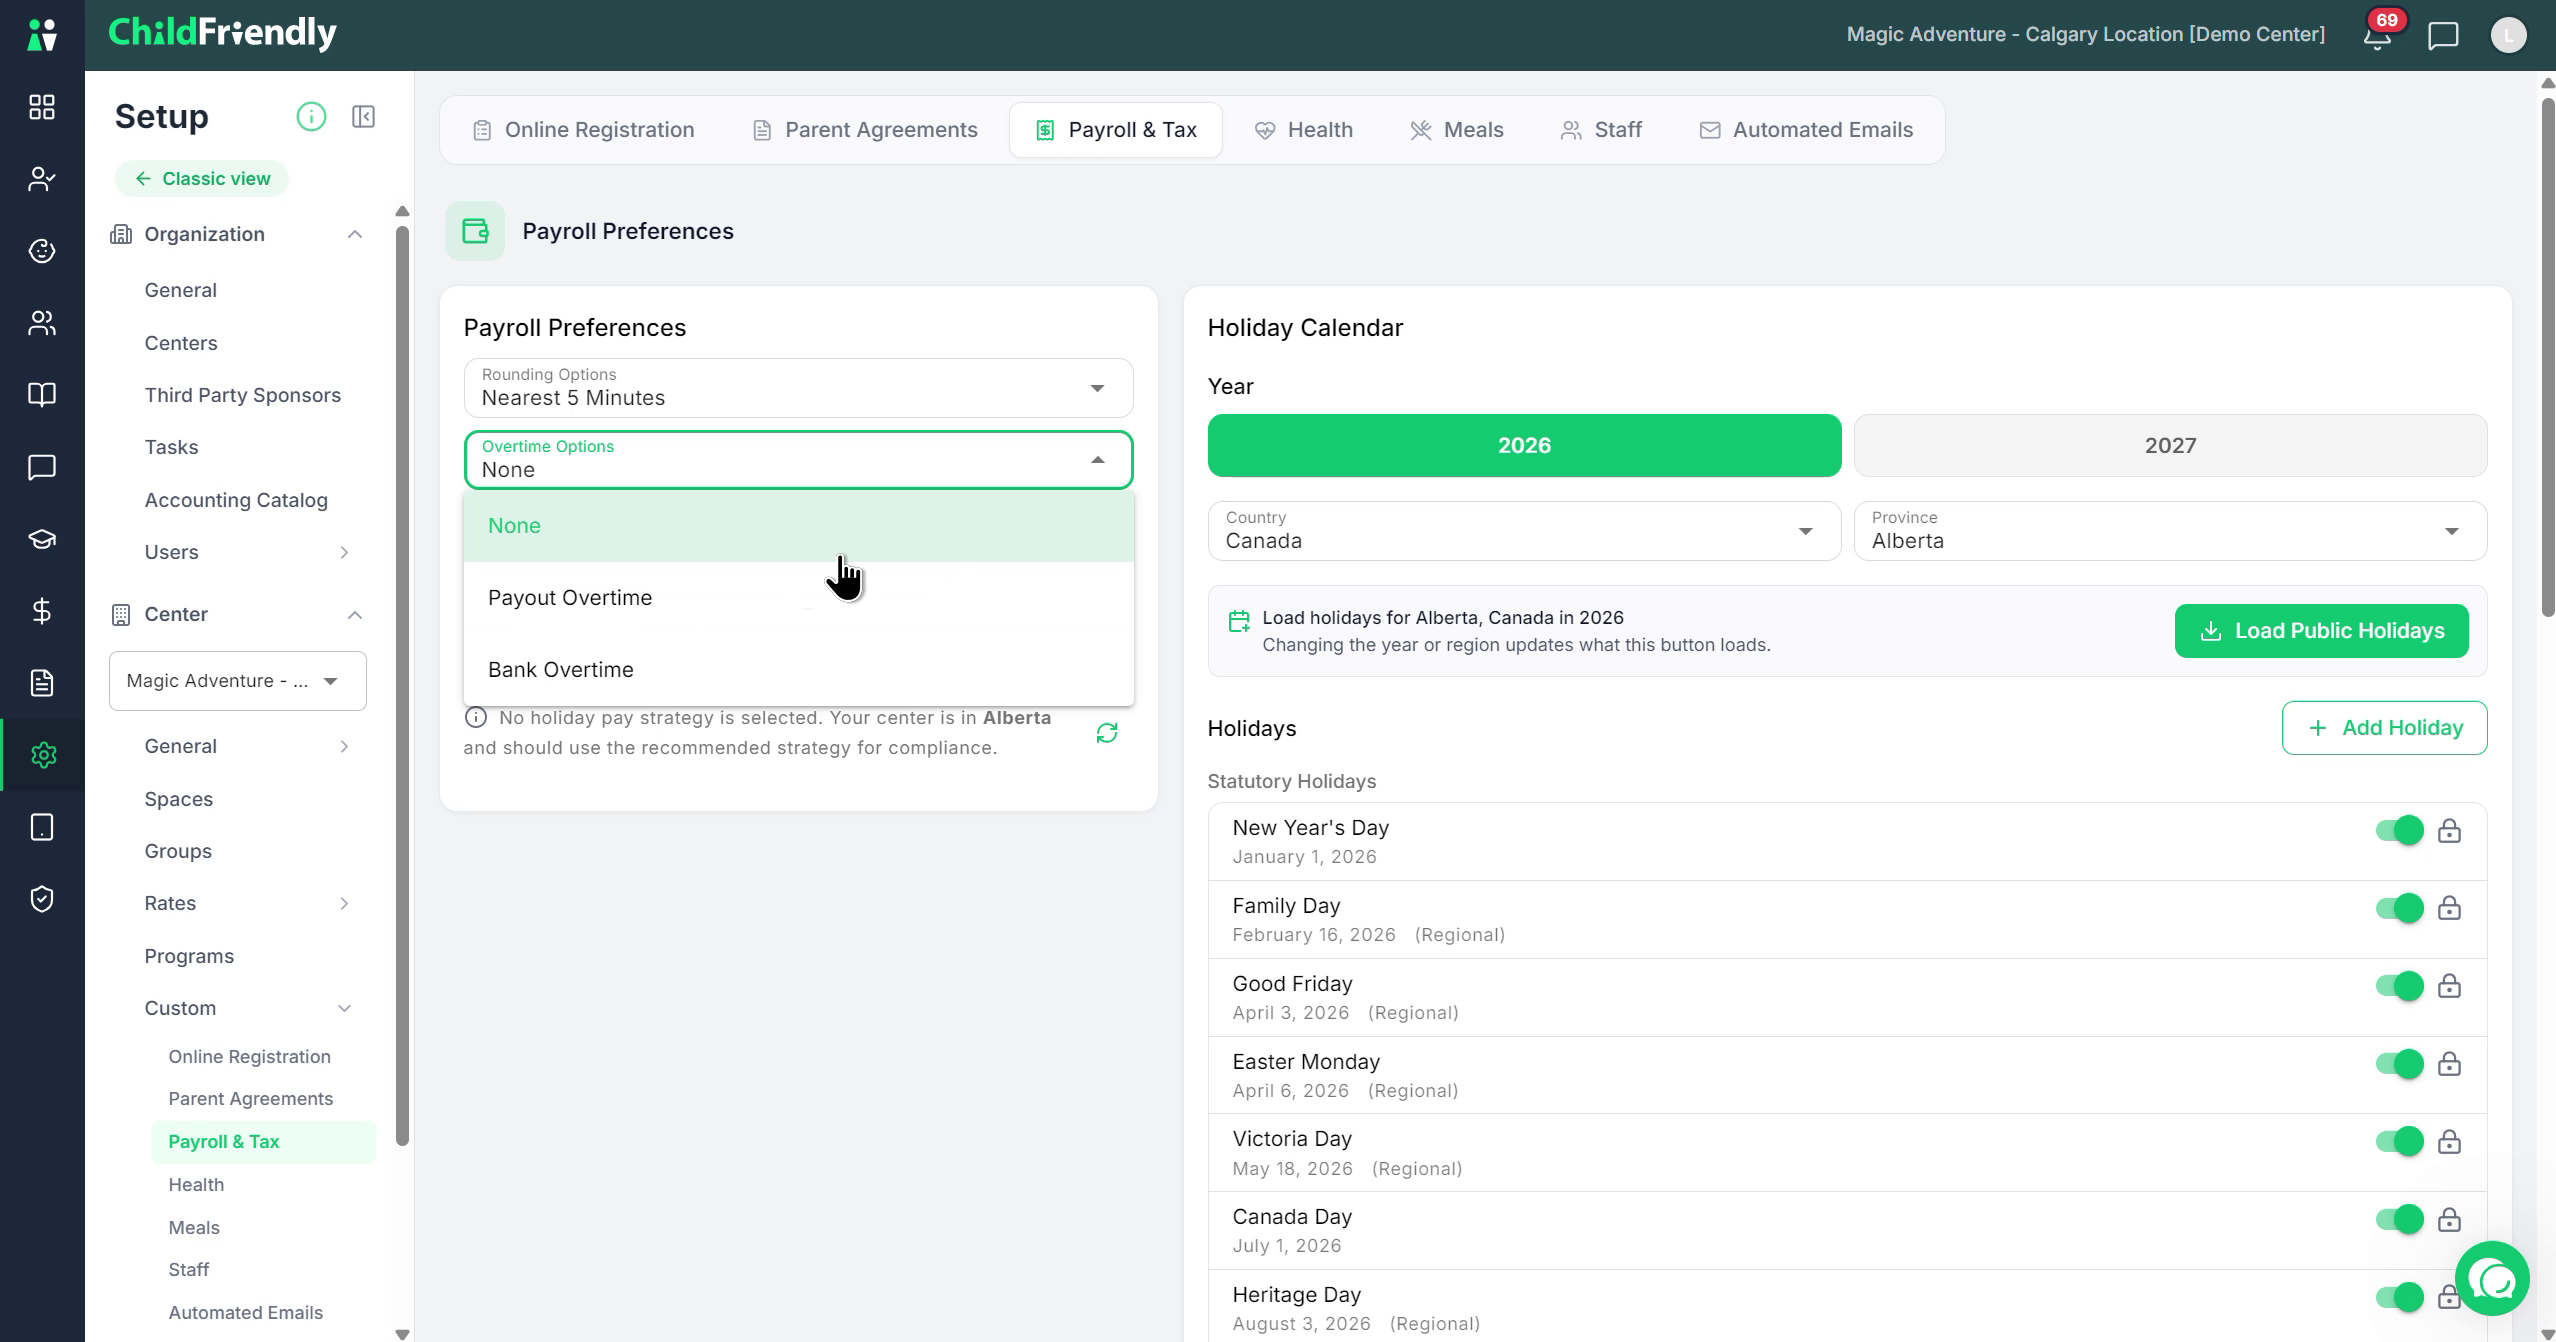
In the Overtime section, choose how overtime will be handled:
Bank Overtime (accrue overtime hours)
Pay Out Overtime (pay overtime on payroll)
Understand that this choice will affect your payroll reports and how overtime is displayed and broken down.
For example, select Pay Out if you want overtime to be paid directly.
If Pay Out is selected, choose an Averaging Period:
Enter the number of weeks over which overtime is averaged (e.g.,
4for a four‑week period).If left blank, overtime is calculated on a weekly basis by default.
Refer to the question mark help icons throughout the page for explanations of each setting.

Remember: with an averaging period, overtime is based on total hours exceeding the threshold over the full period, not per week.
Step 4: Select Province/State and Overtime Strategy
Choose the Province or State in which your center operates to determine the default overtime calculation strategy.
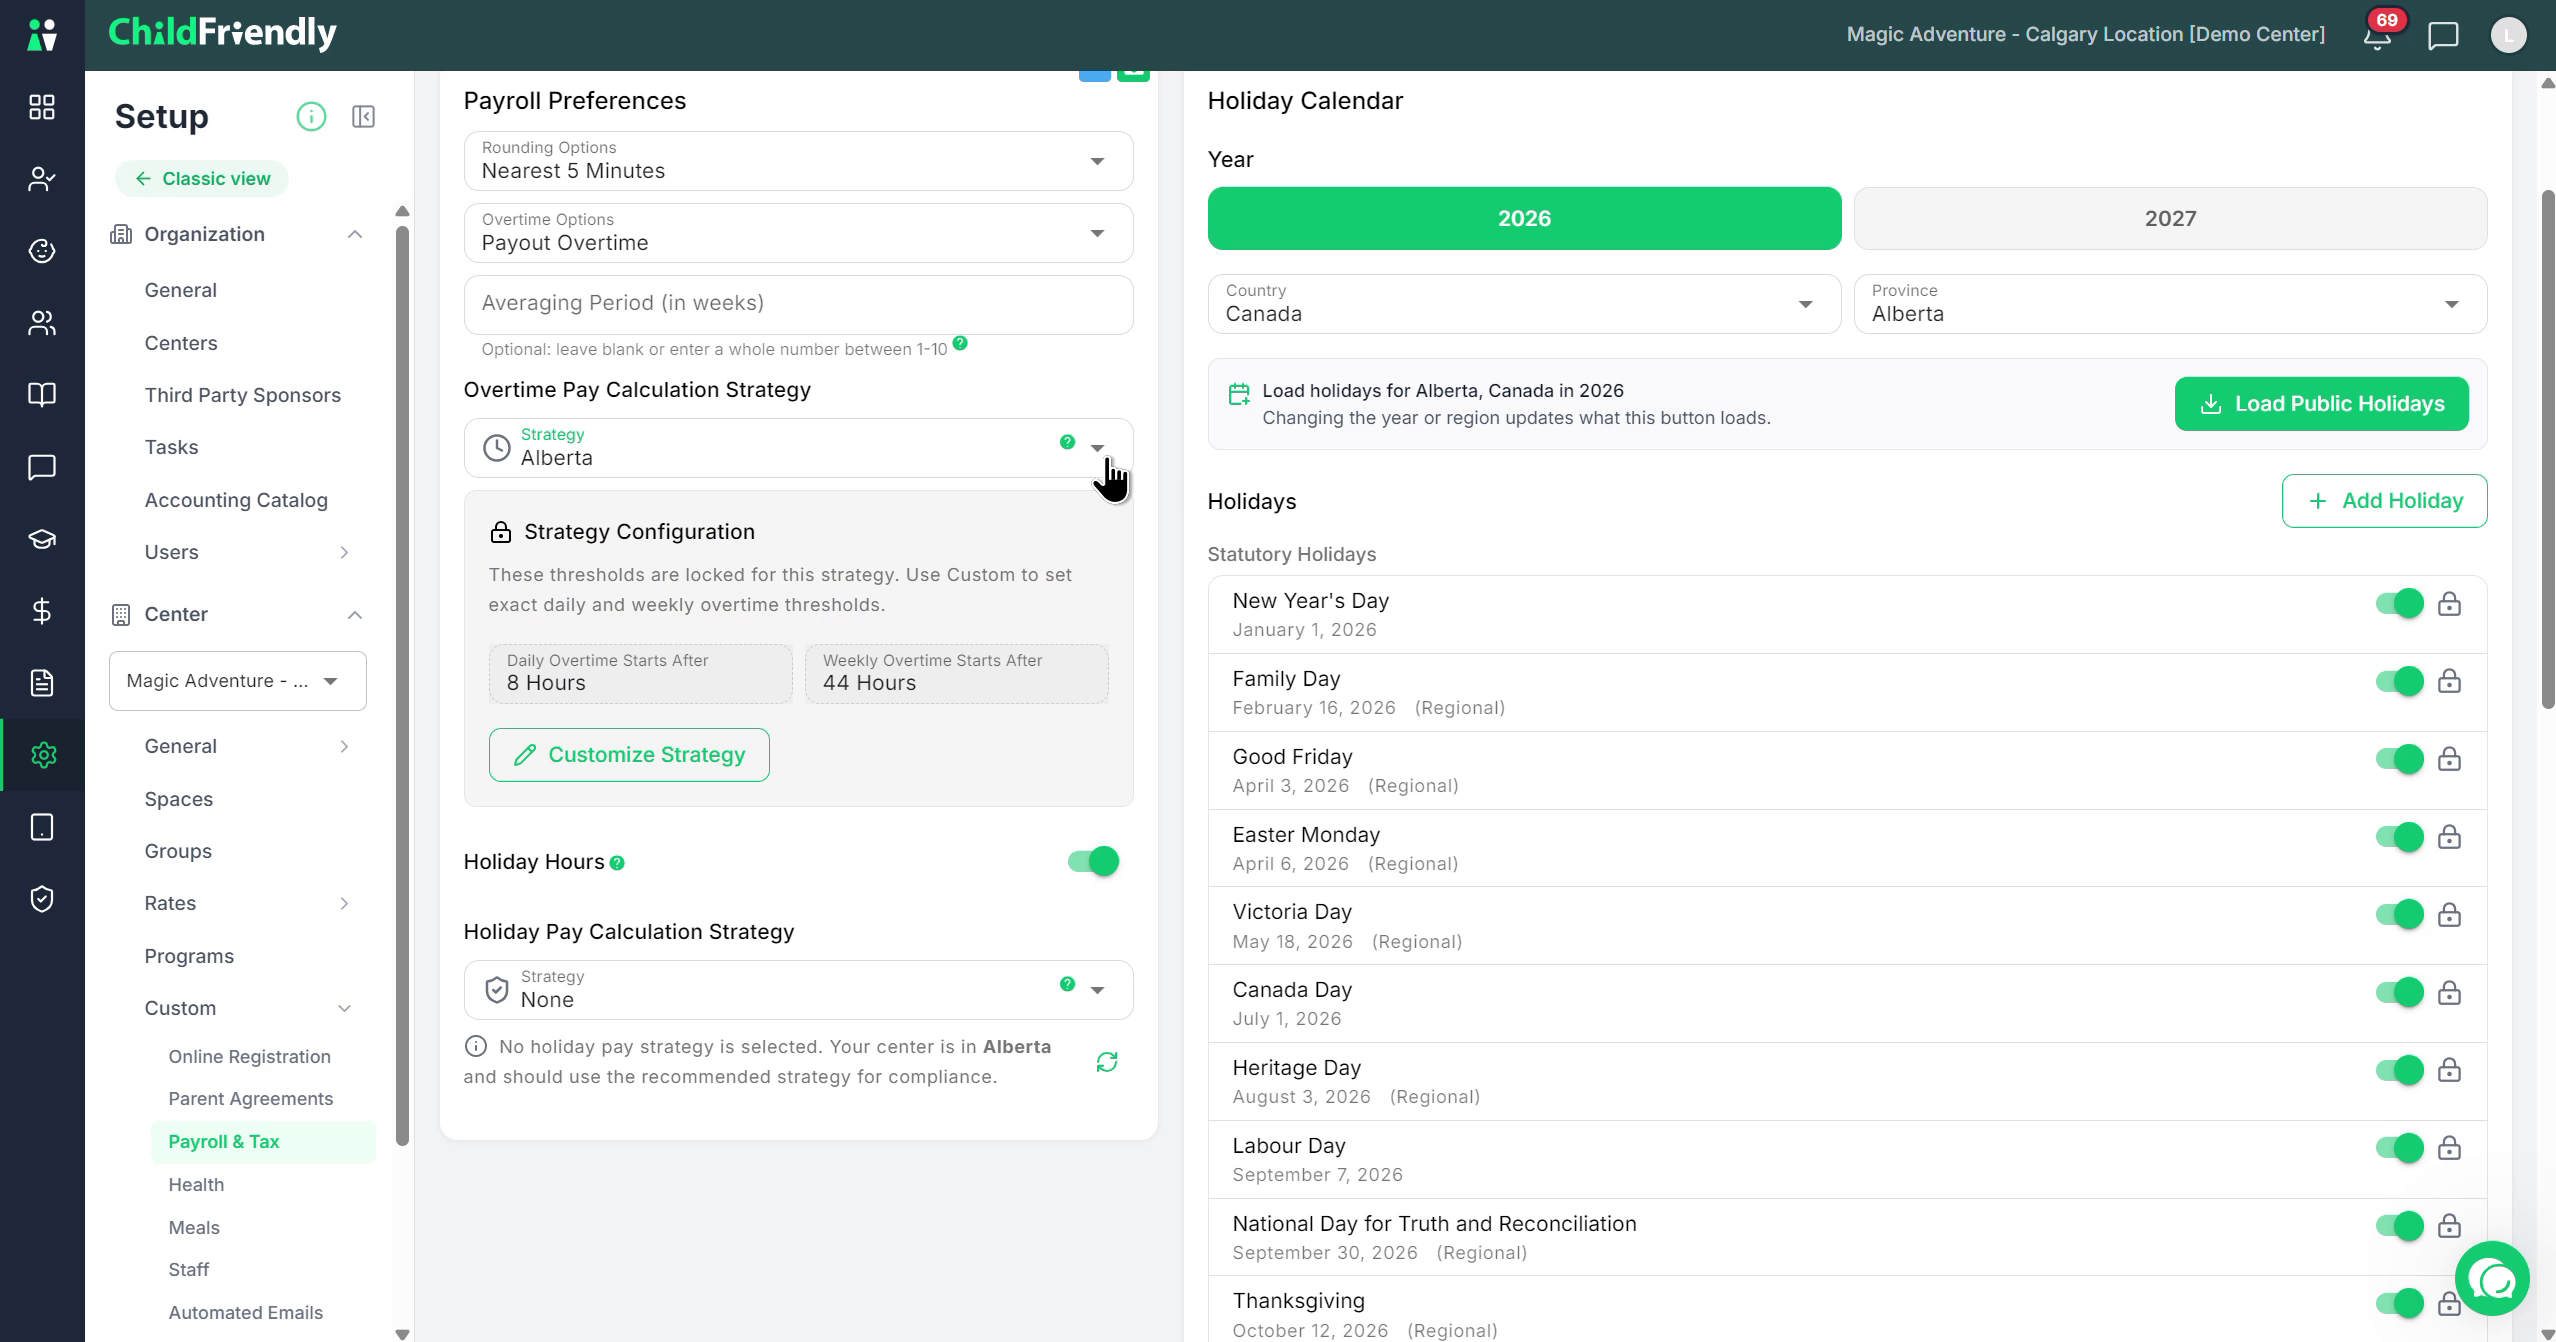
In this example, click Alberta.

You may alternatively choose to Customize the overtime rules yourself.
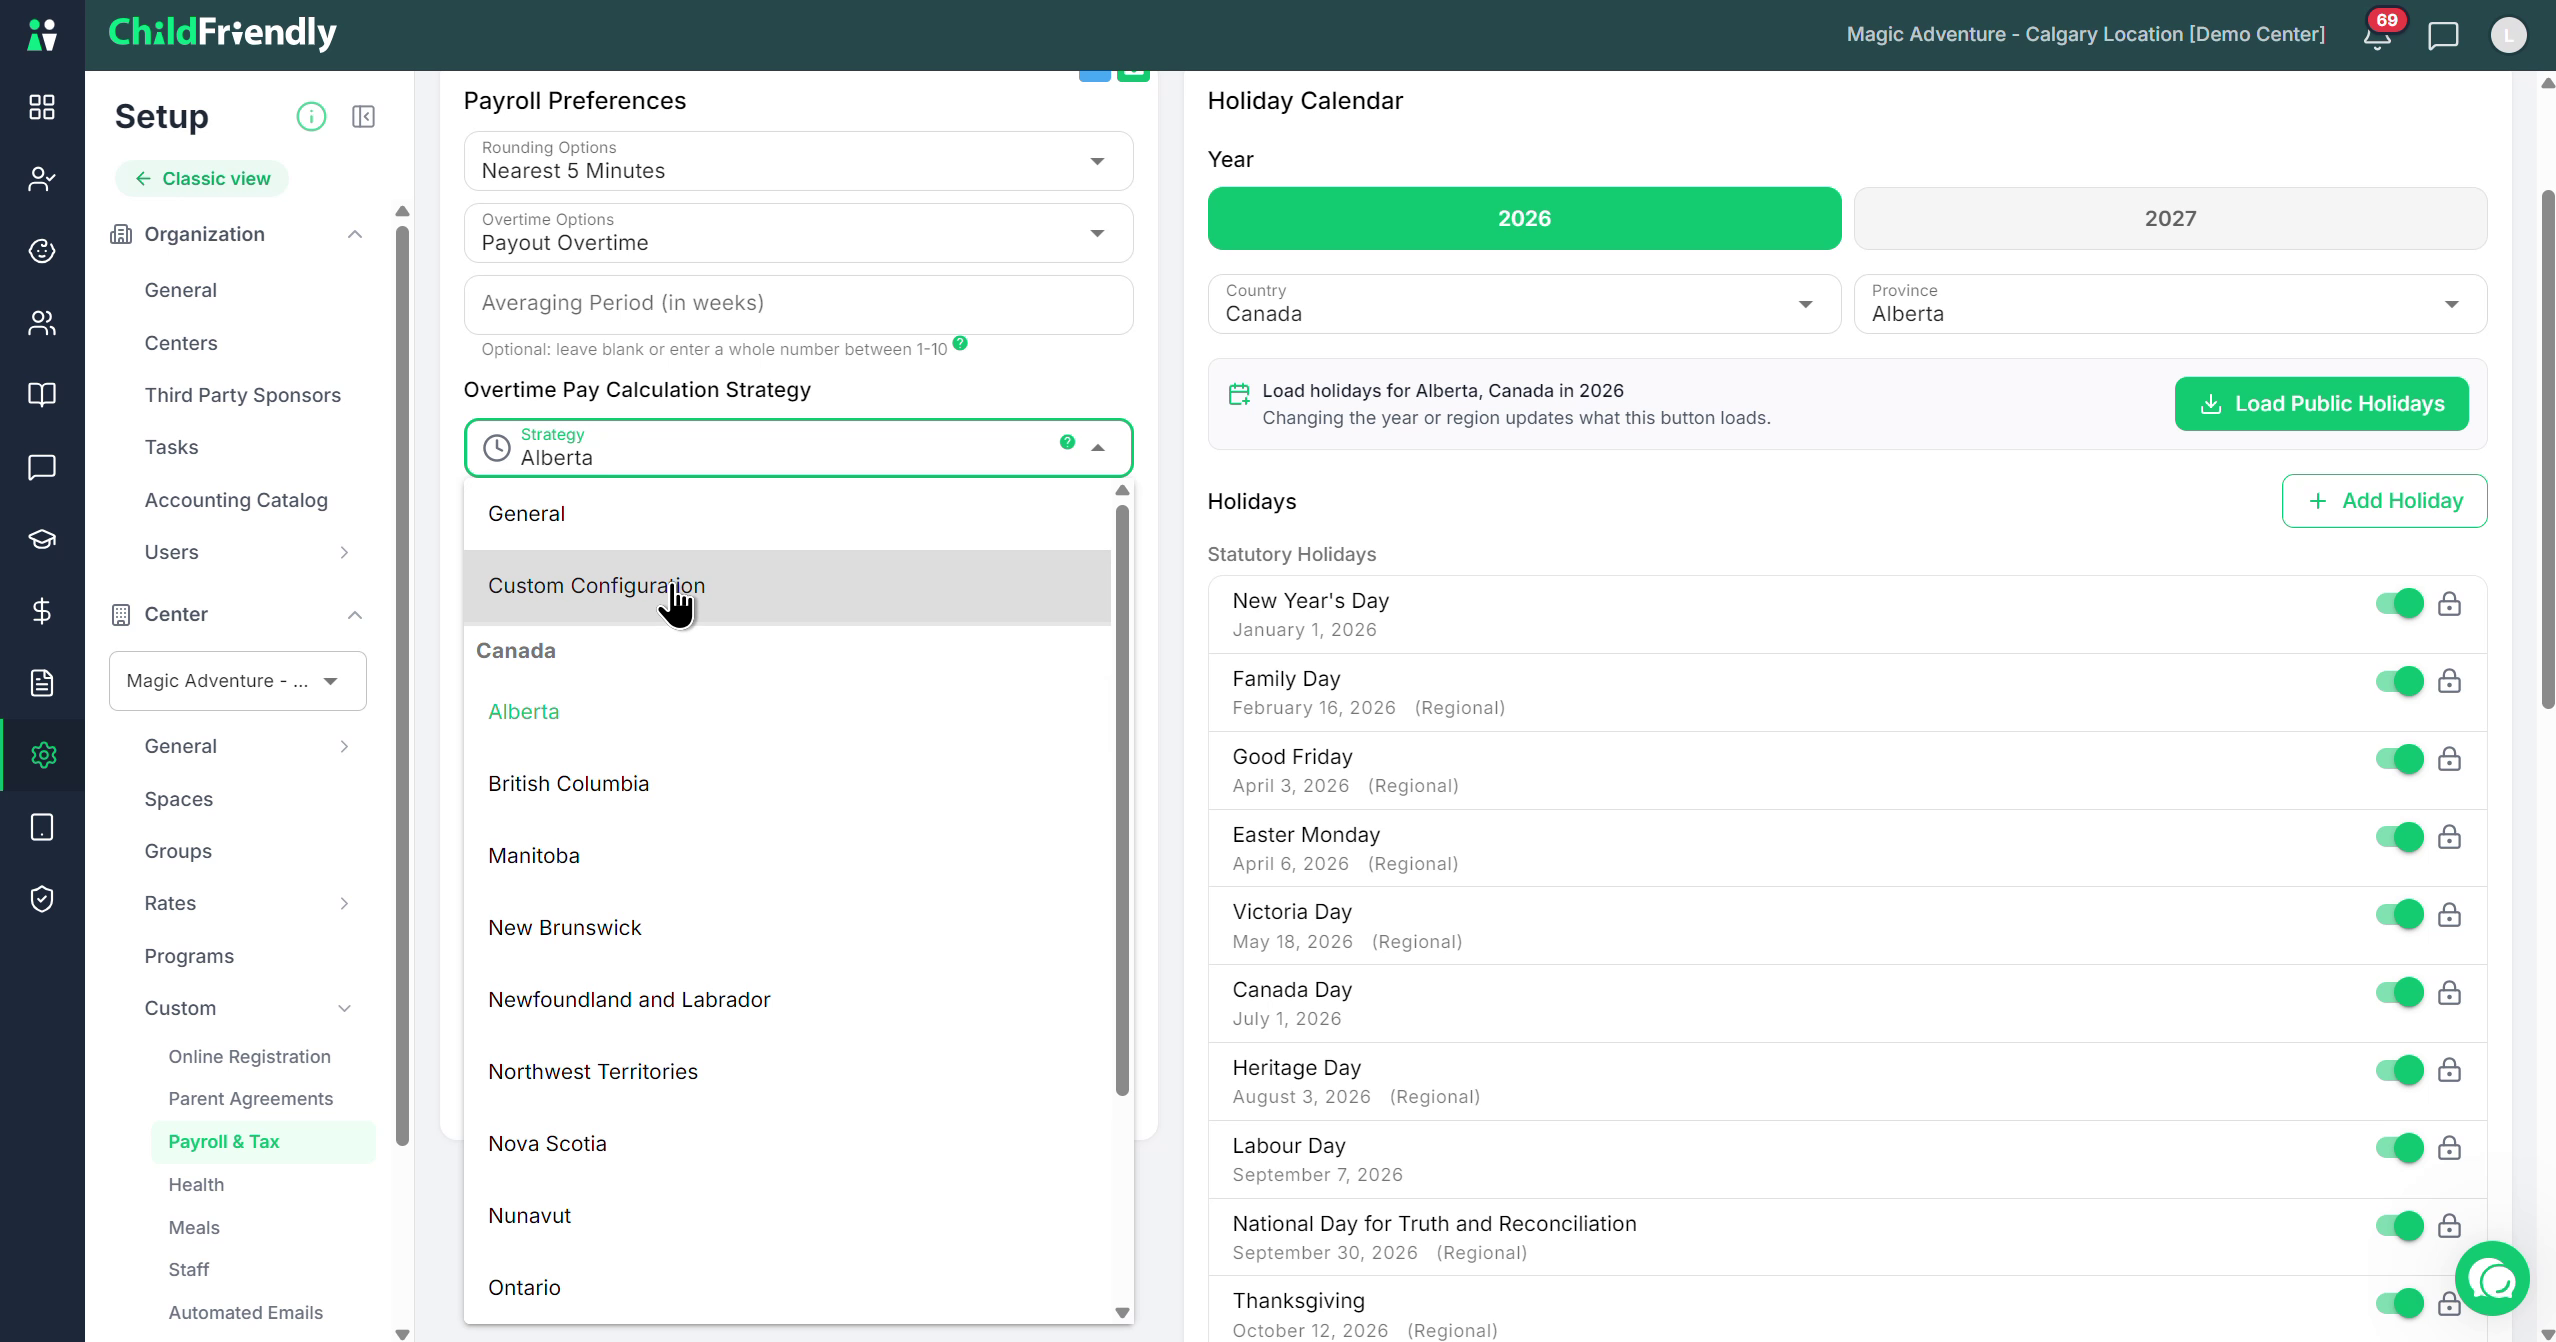
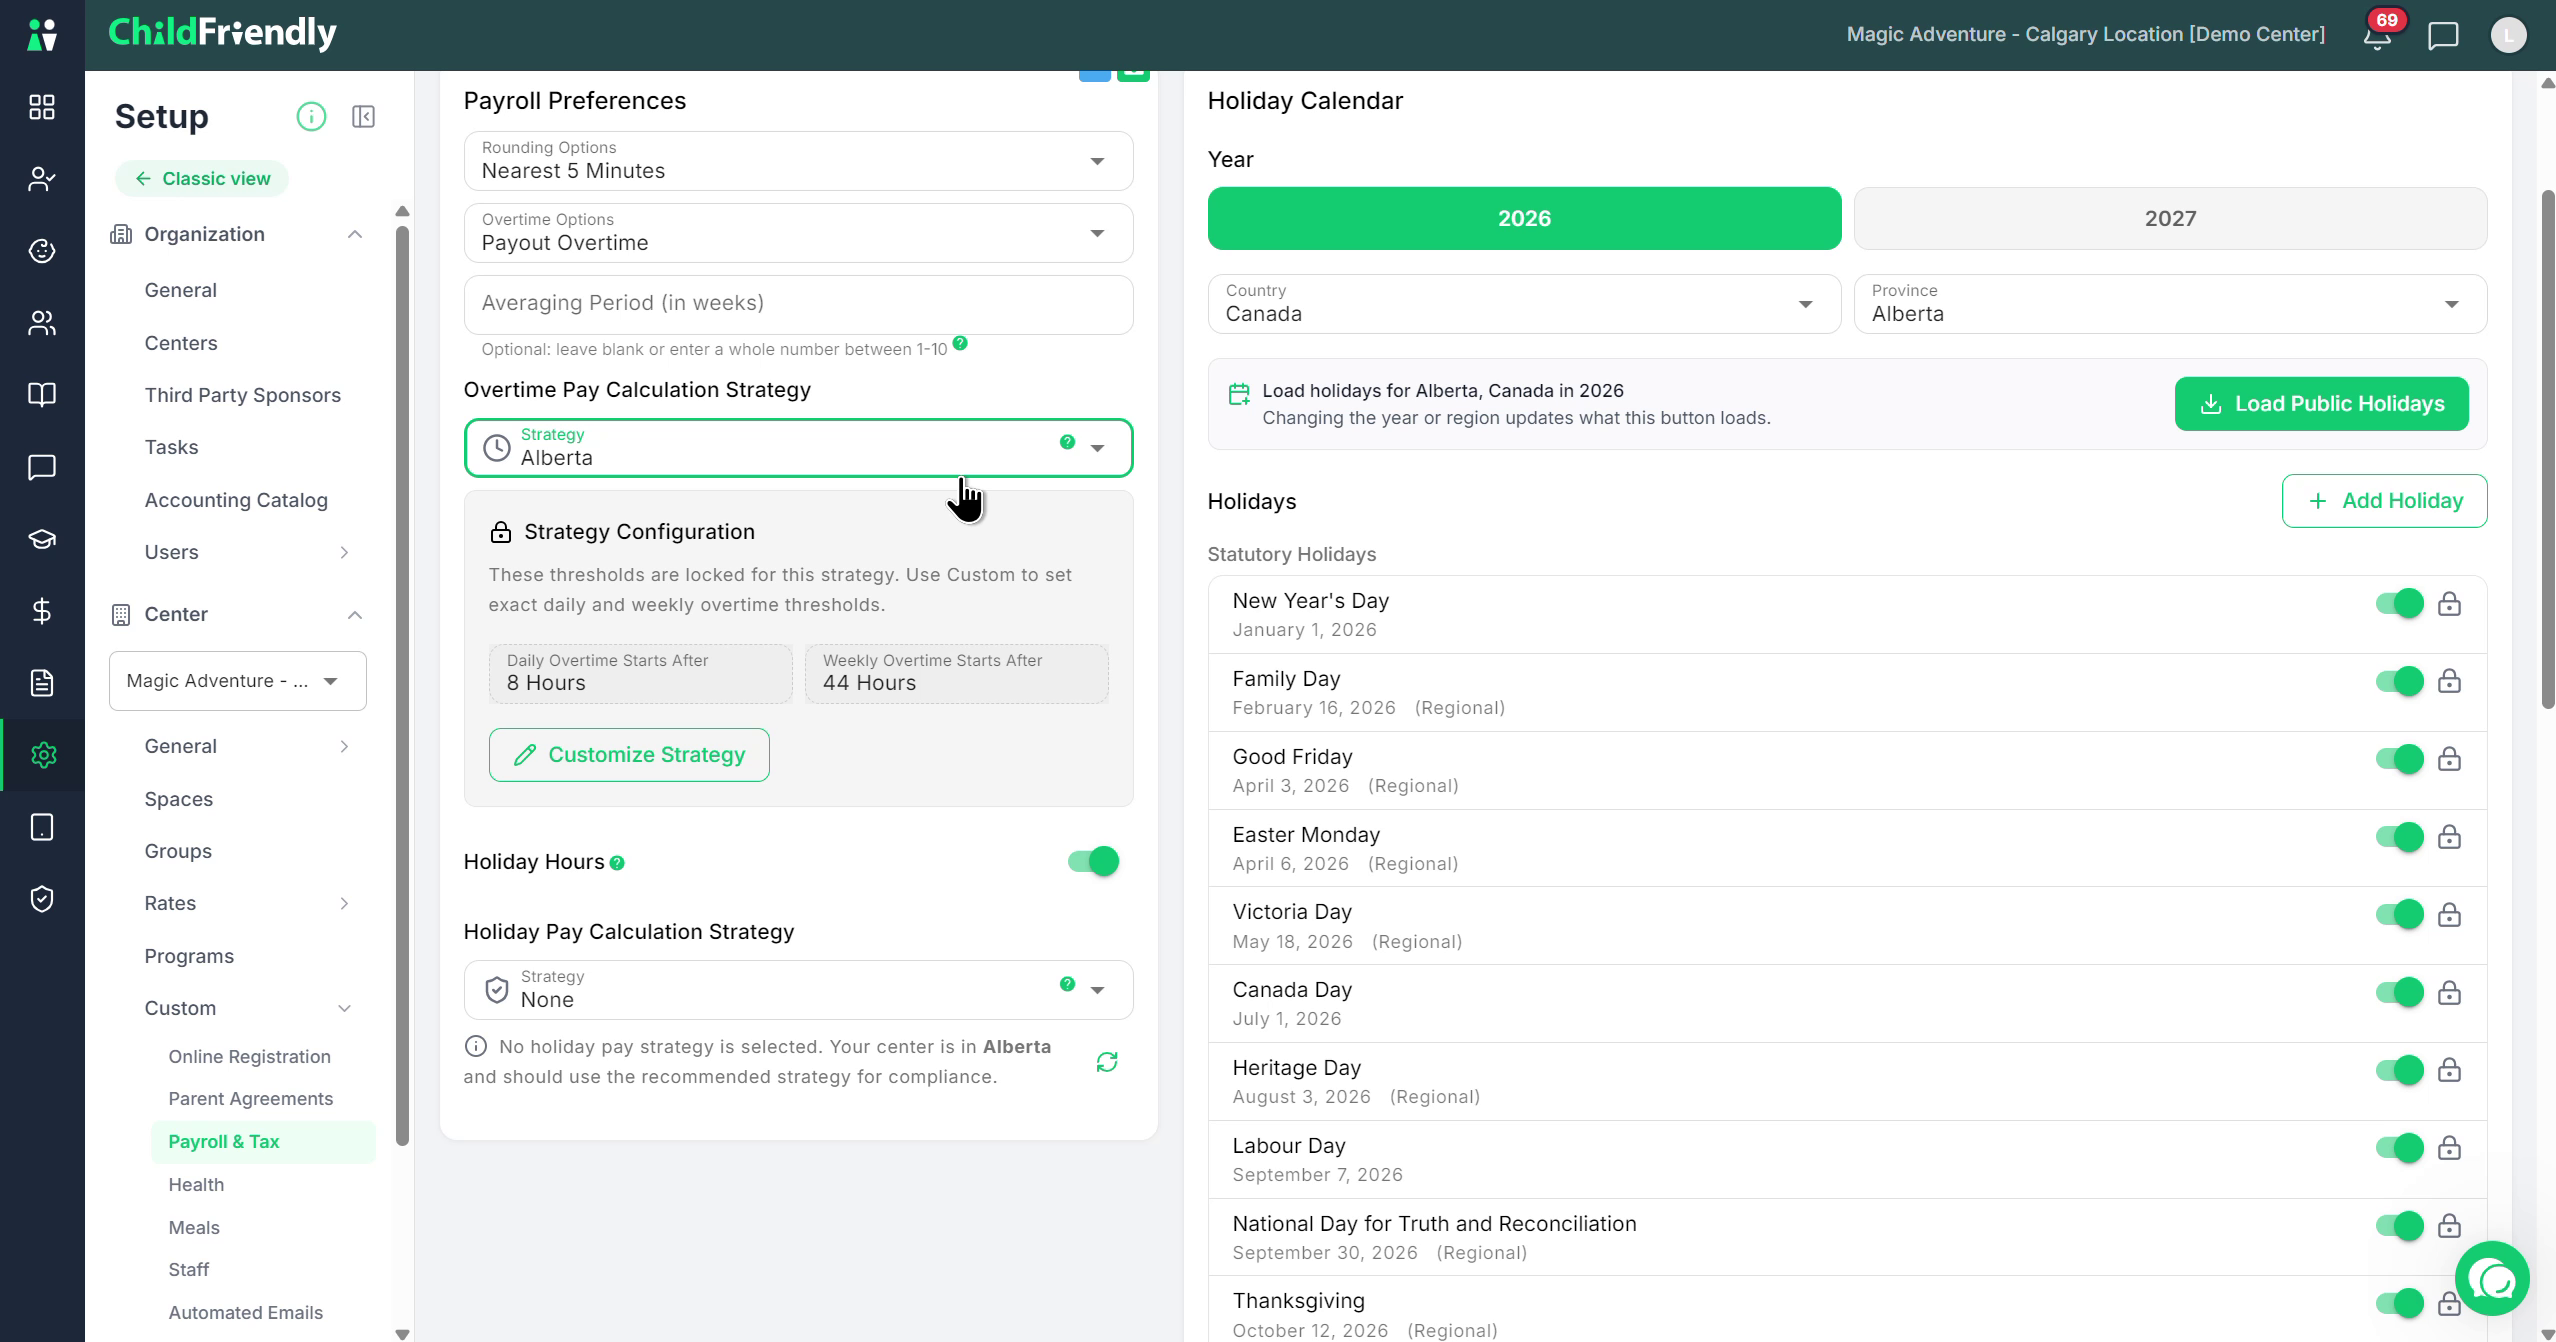
When a province or state is selected, the system applies the default rules for that jurisdiction. For example, in Alberta:
Daily overtime starts after 8 hours.
Weekly overtime starts after 44 hours.
If you have set an averaging period (e.g., 4 weeks), the 44-hour weekly threshold is applied over that total averaging period as described.
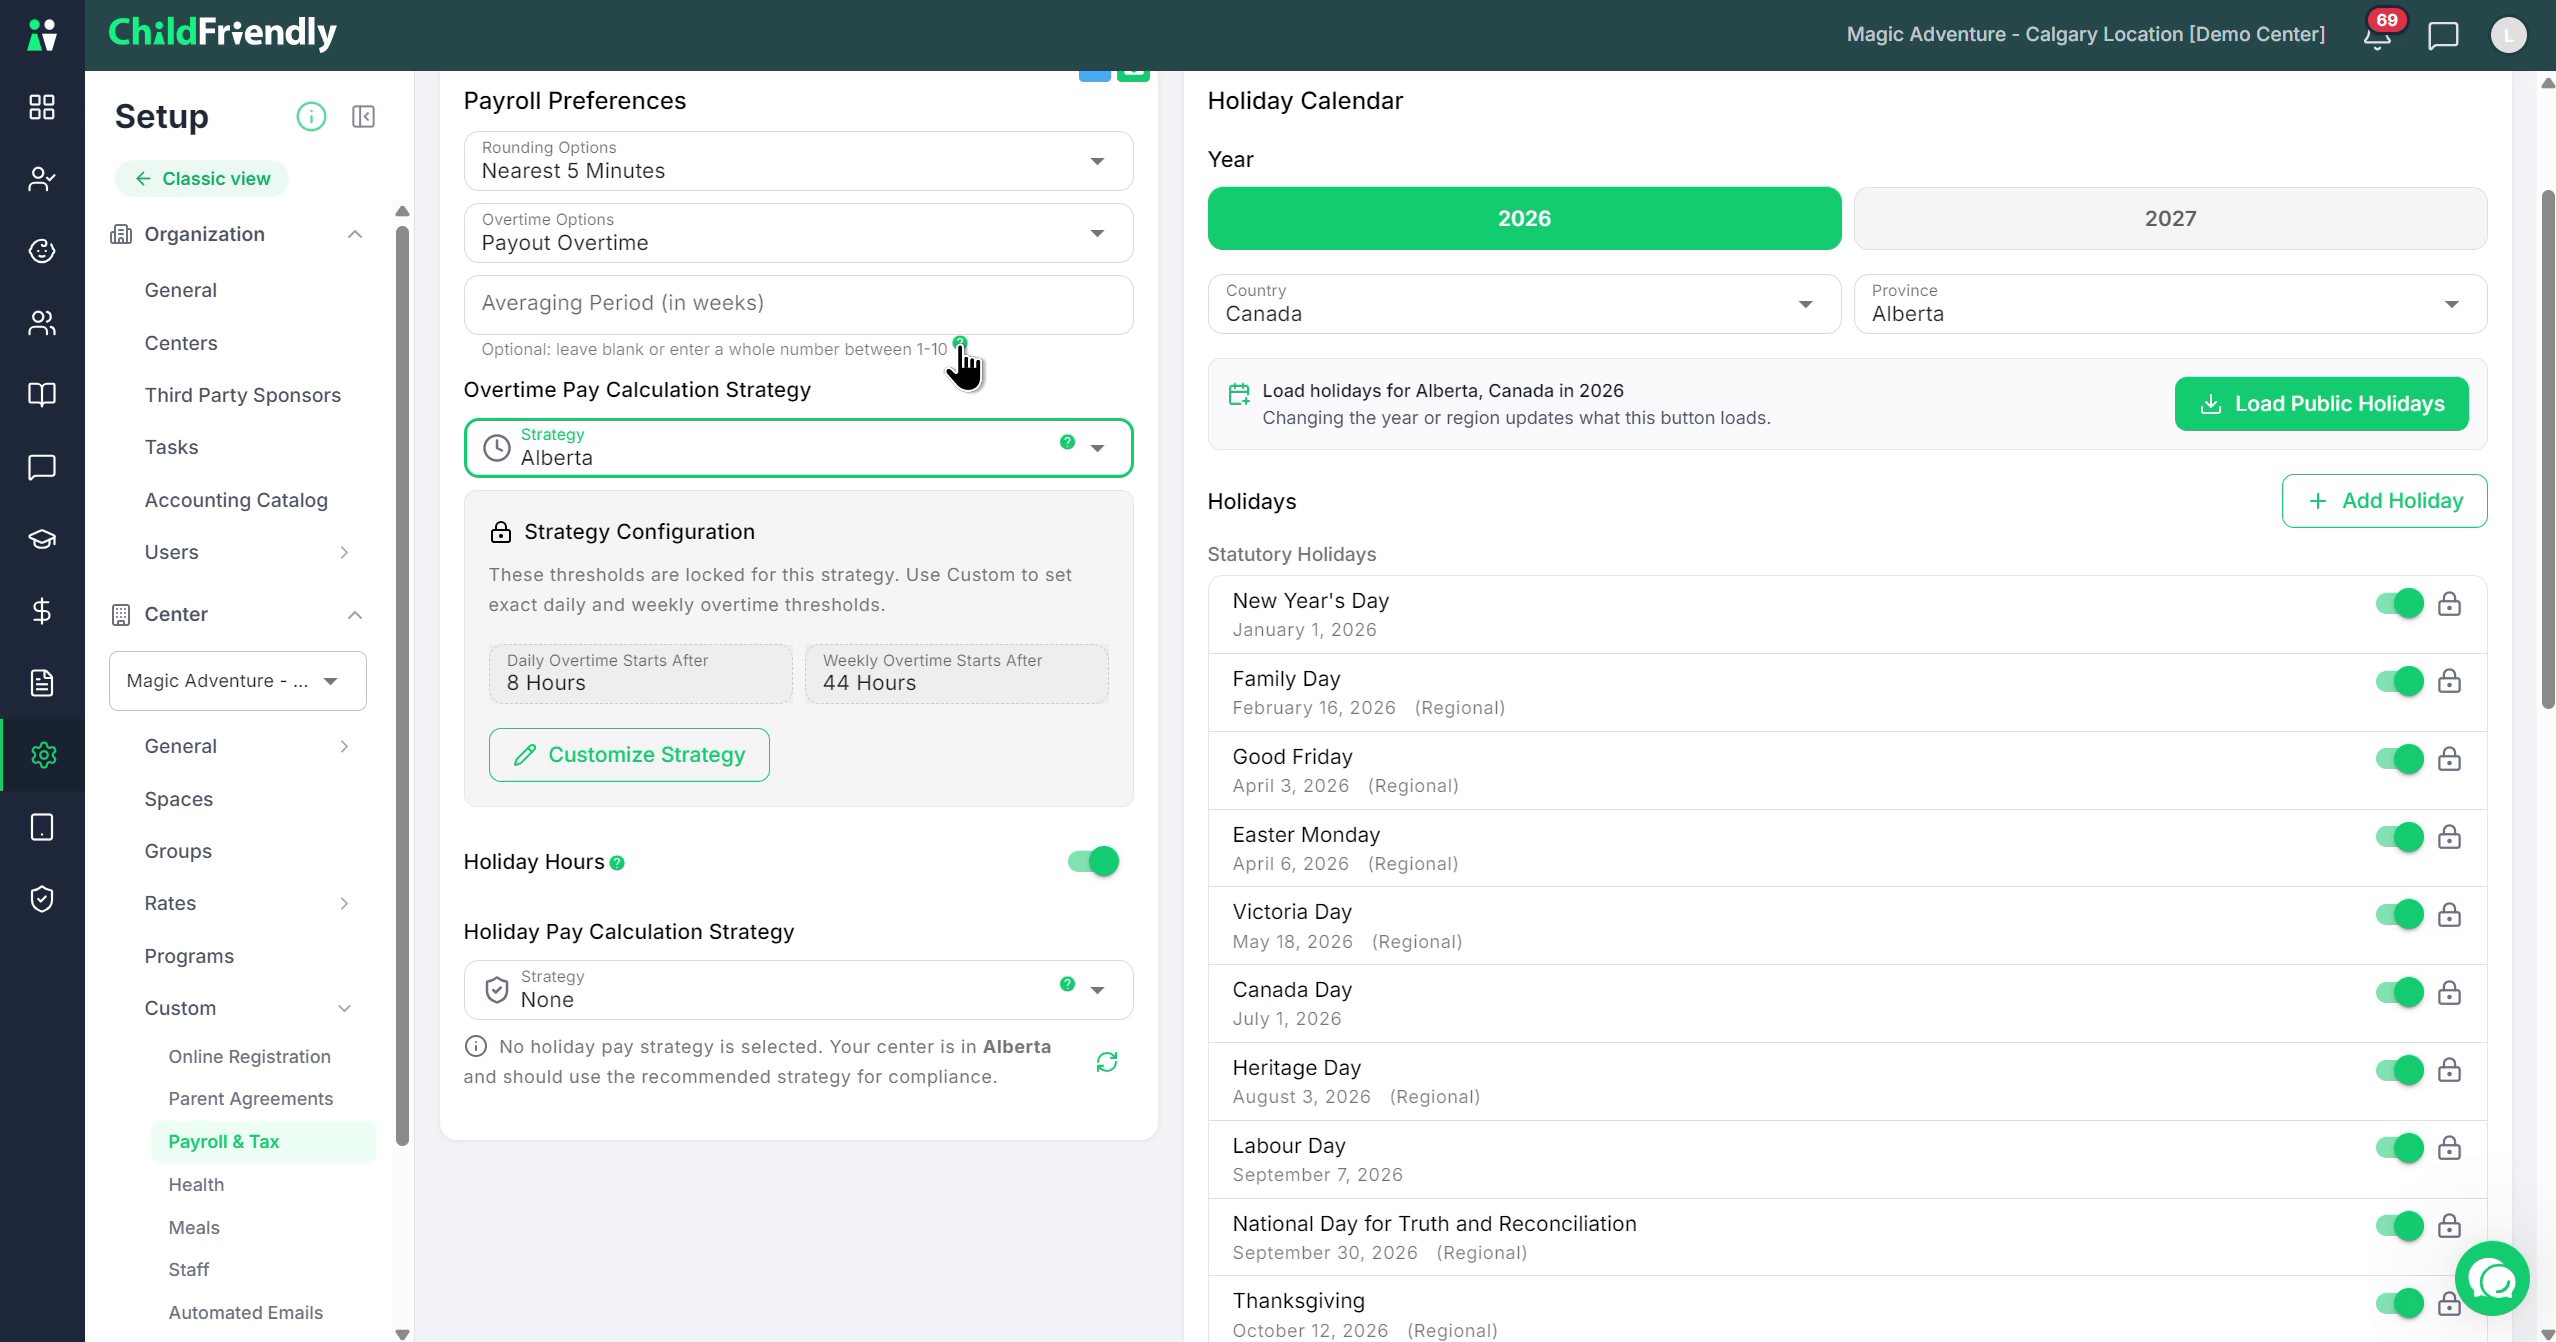
If you prefer a custom configuration, click Customize and define your own thresholds and rules.
Step 5: Enable and Configure Holiday Hours (Stat Pay)
Locate the Holiday Hours section.
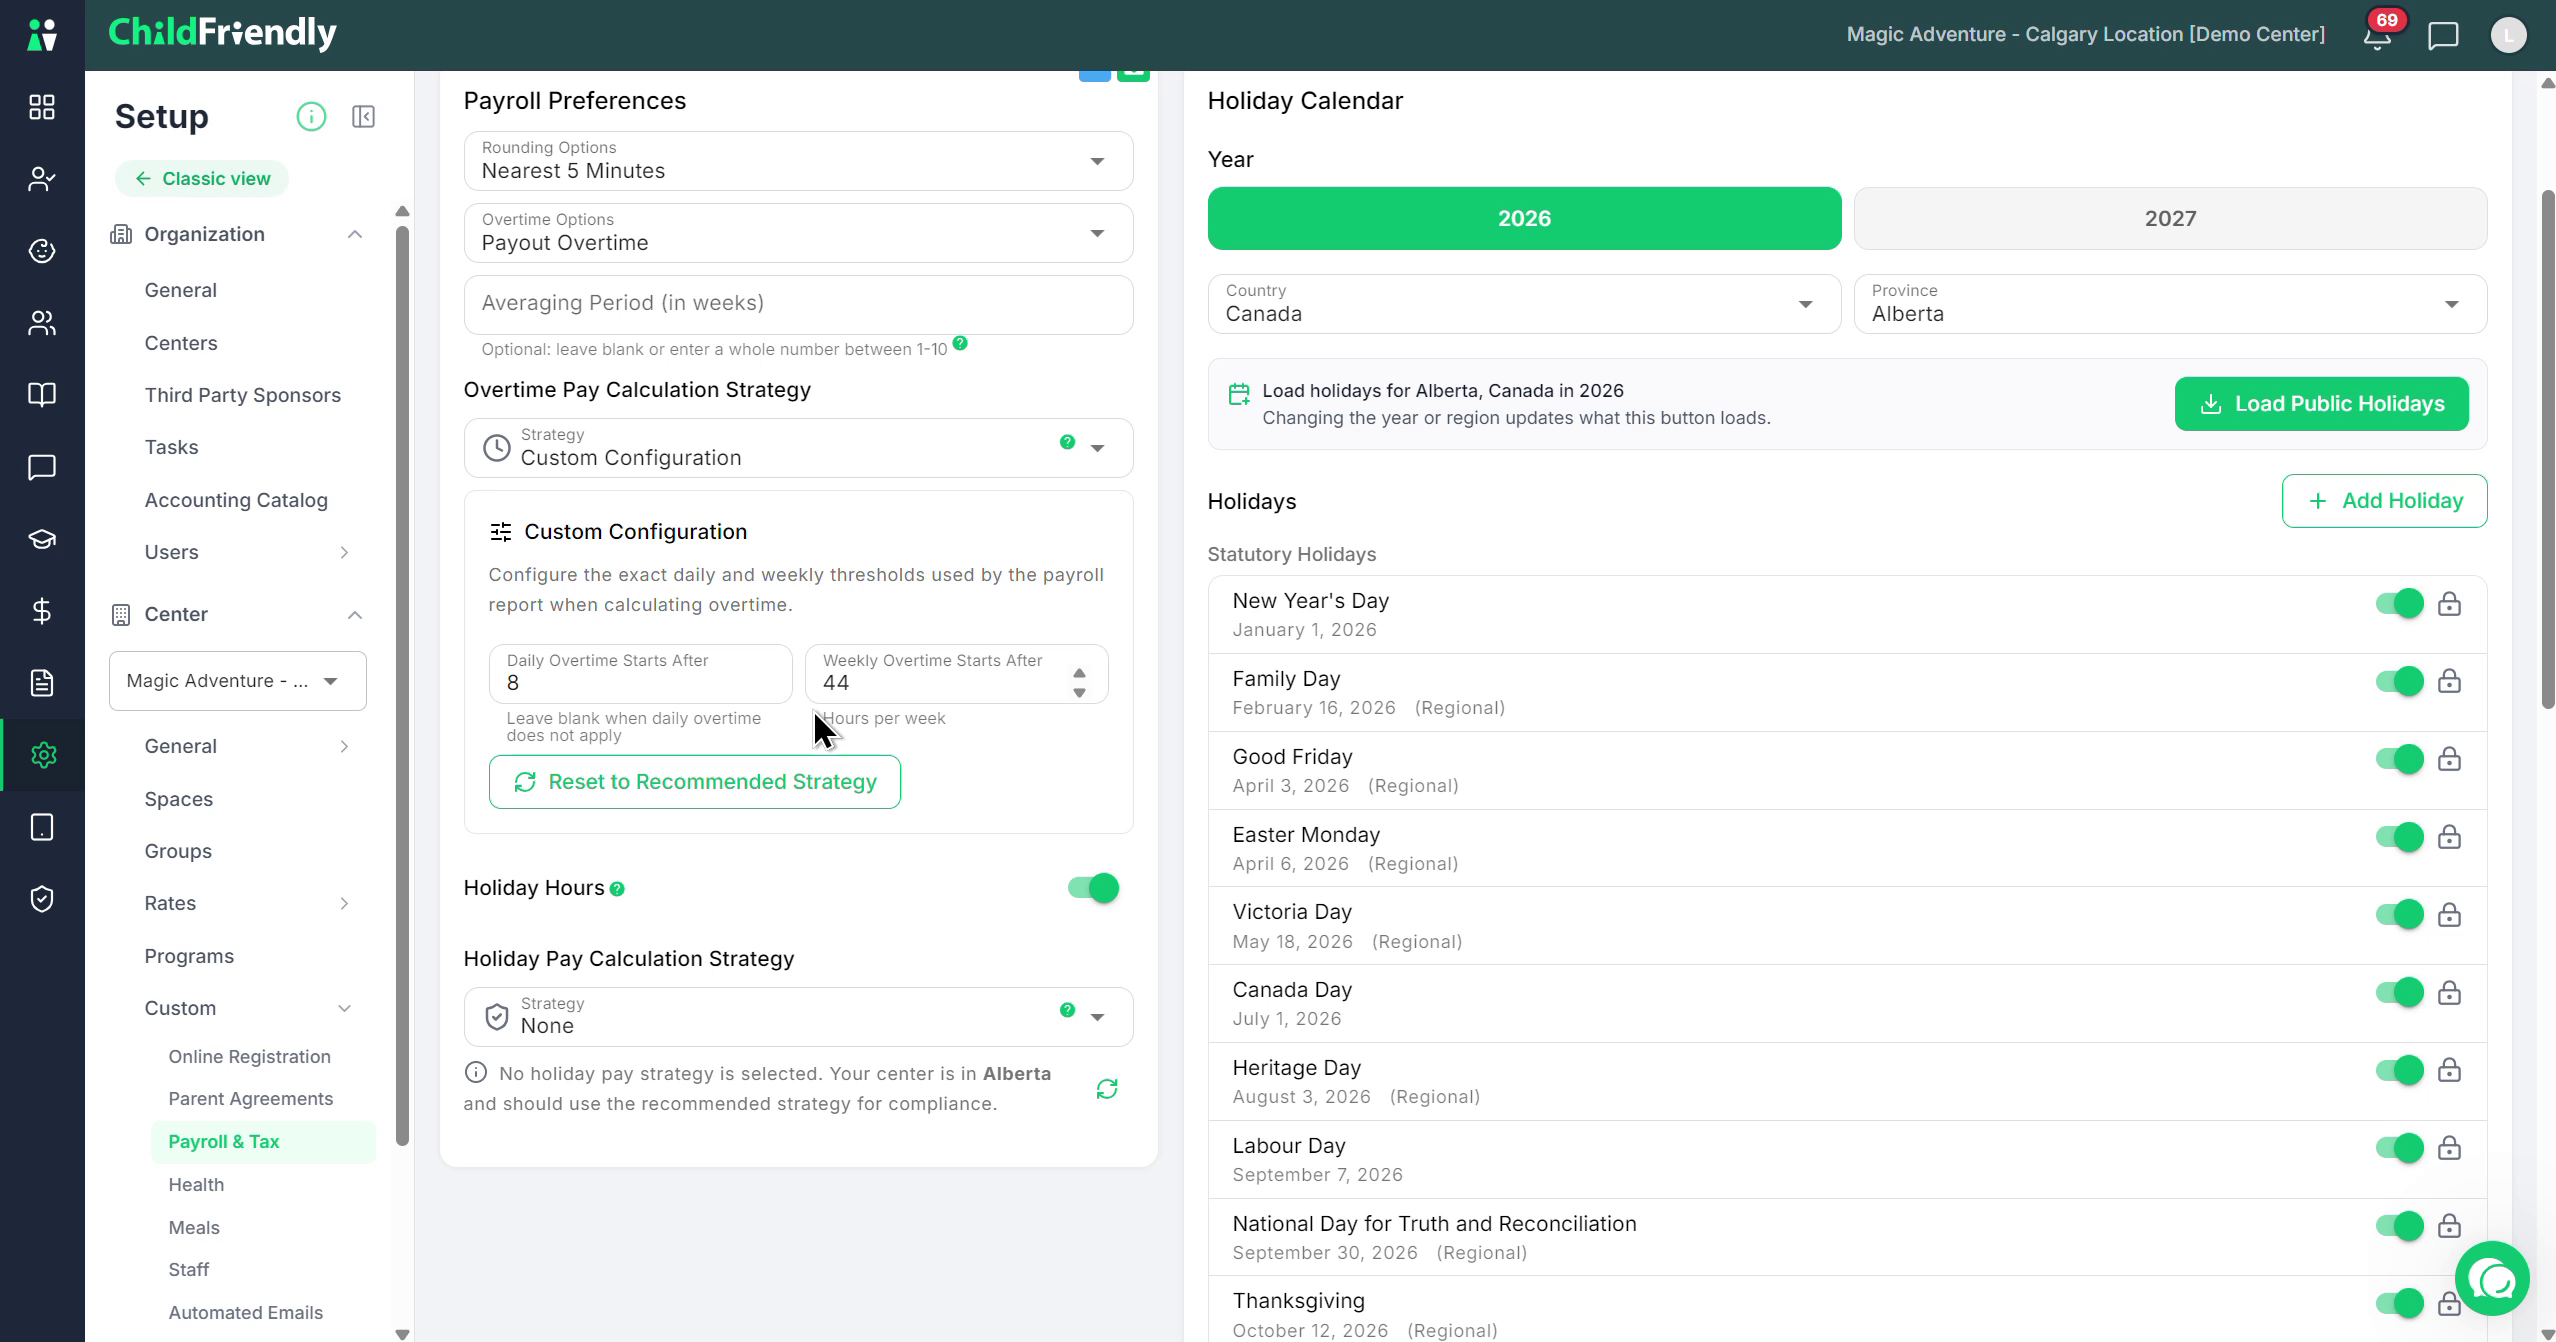
Decide whether you want the system to calculate holiday (stat) hours automatically, which is common in Canada:
If yes, toggle Holiday Hours / Stat Calculation On.
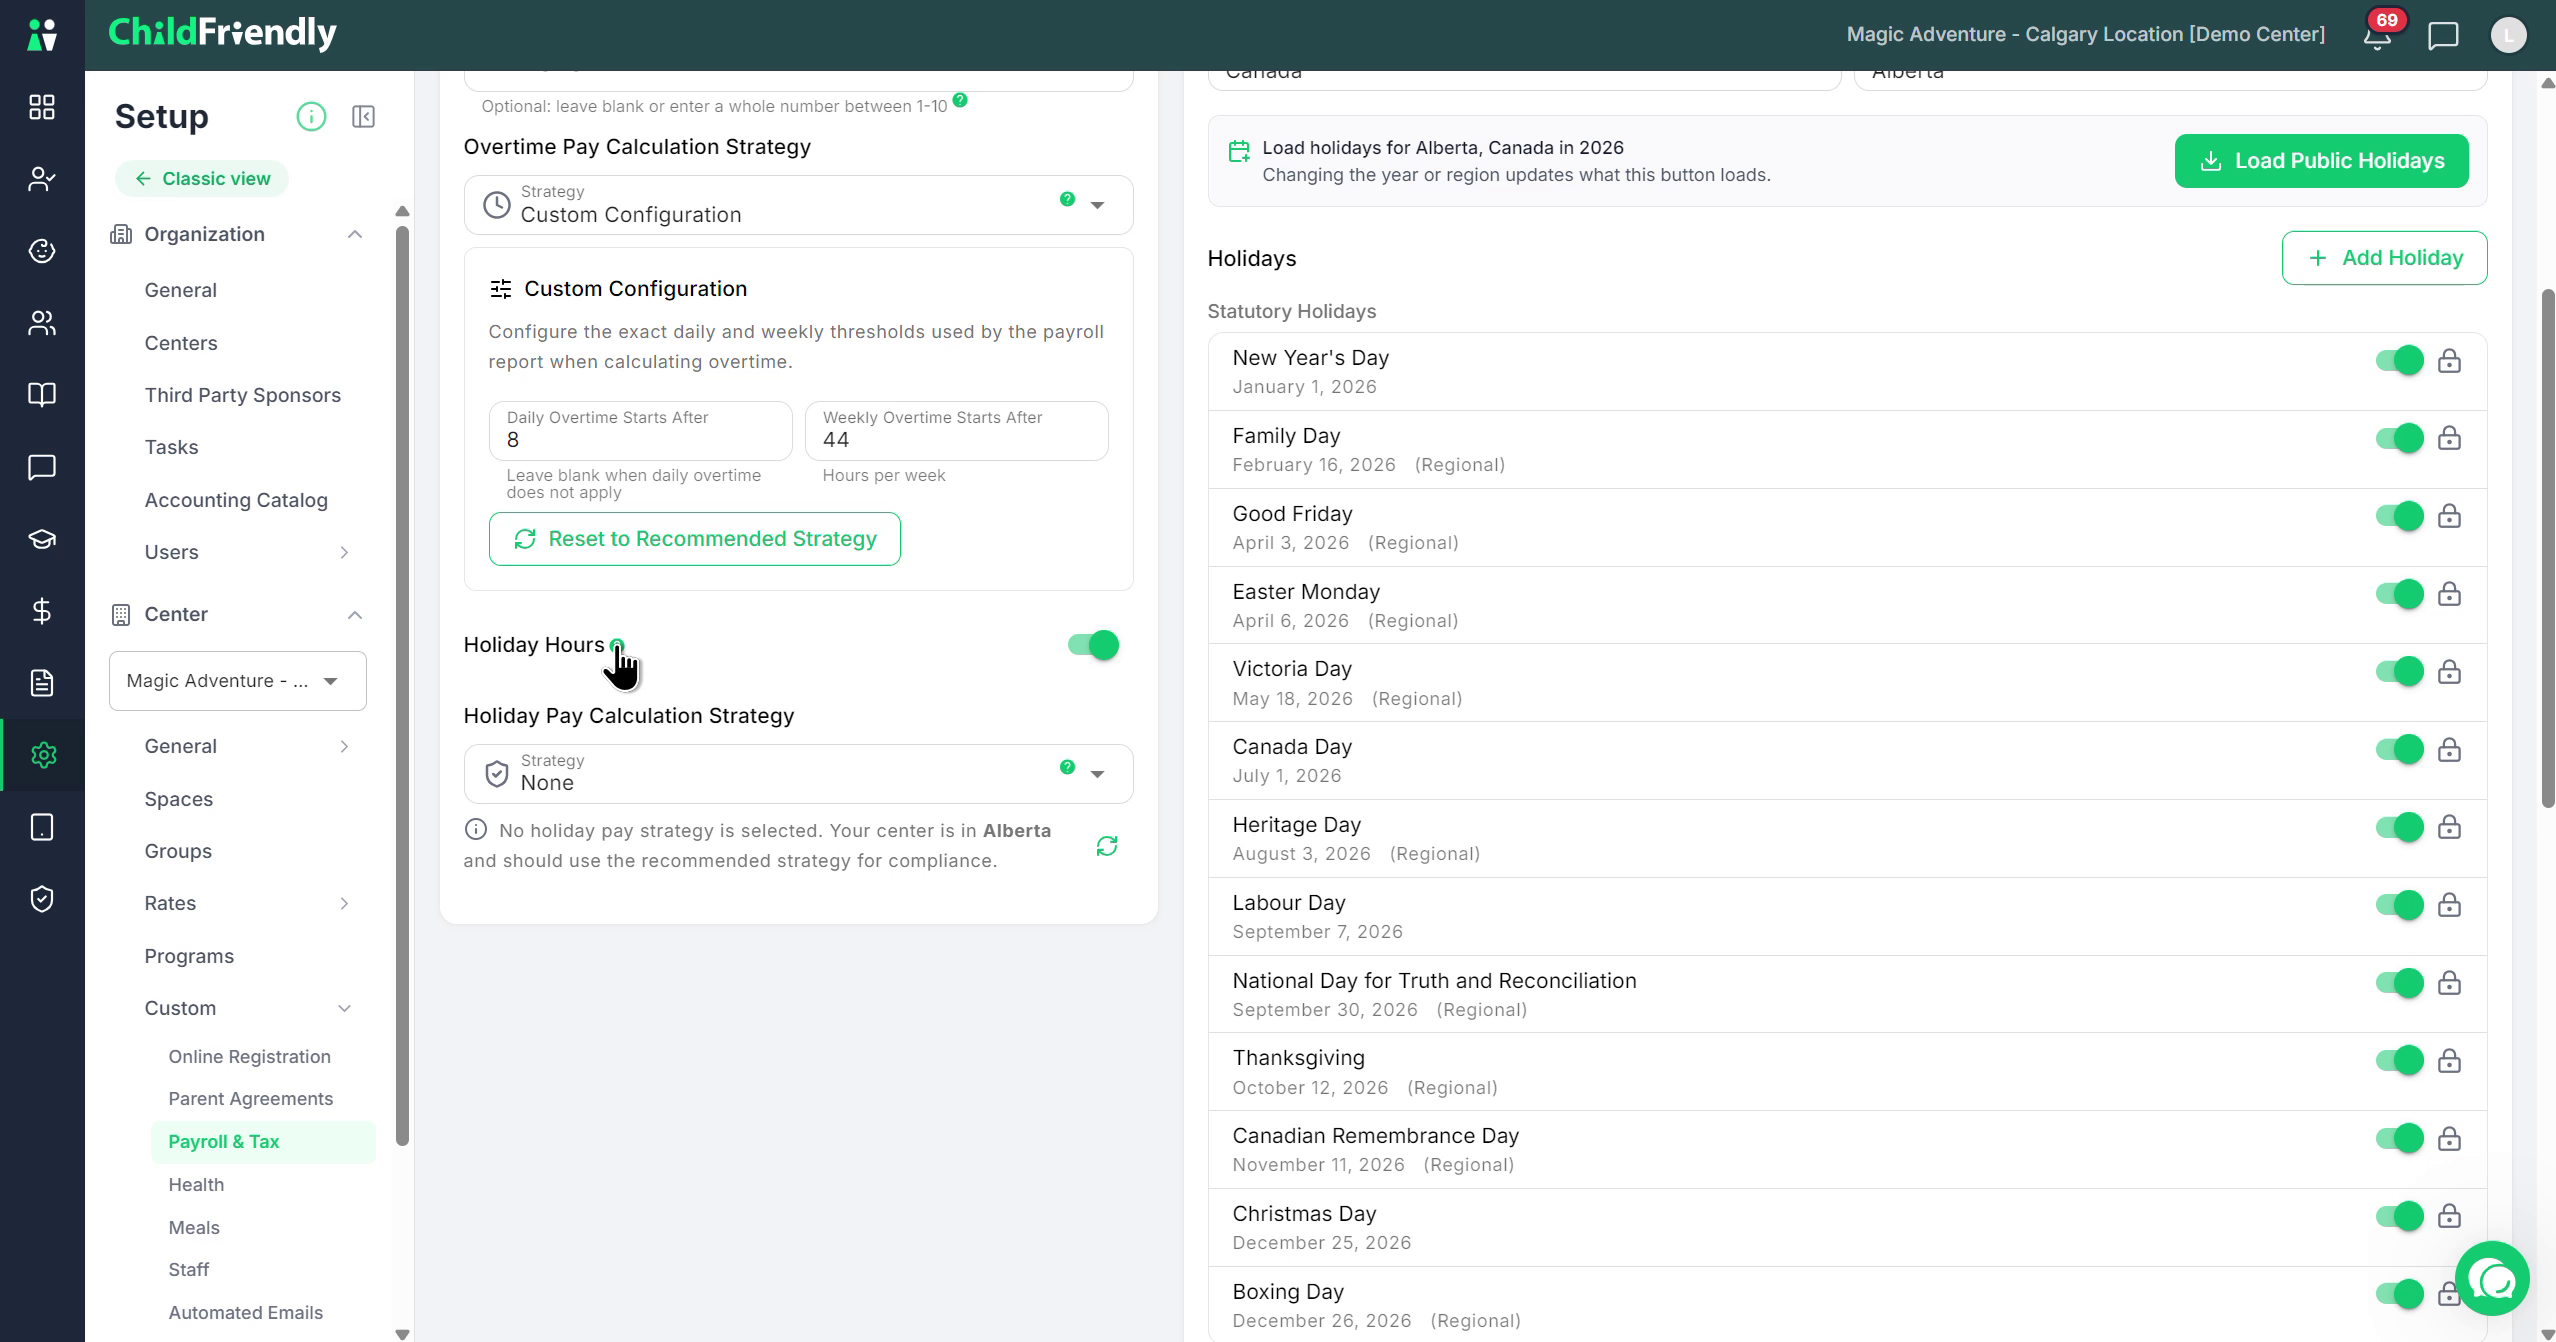
When enabled, additional configuration options will appear.
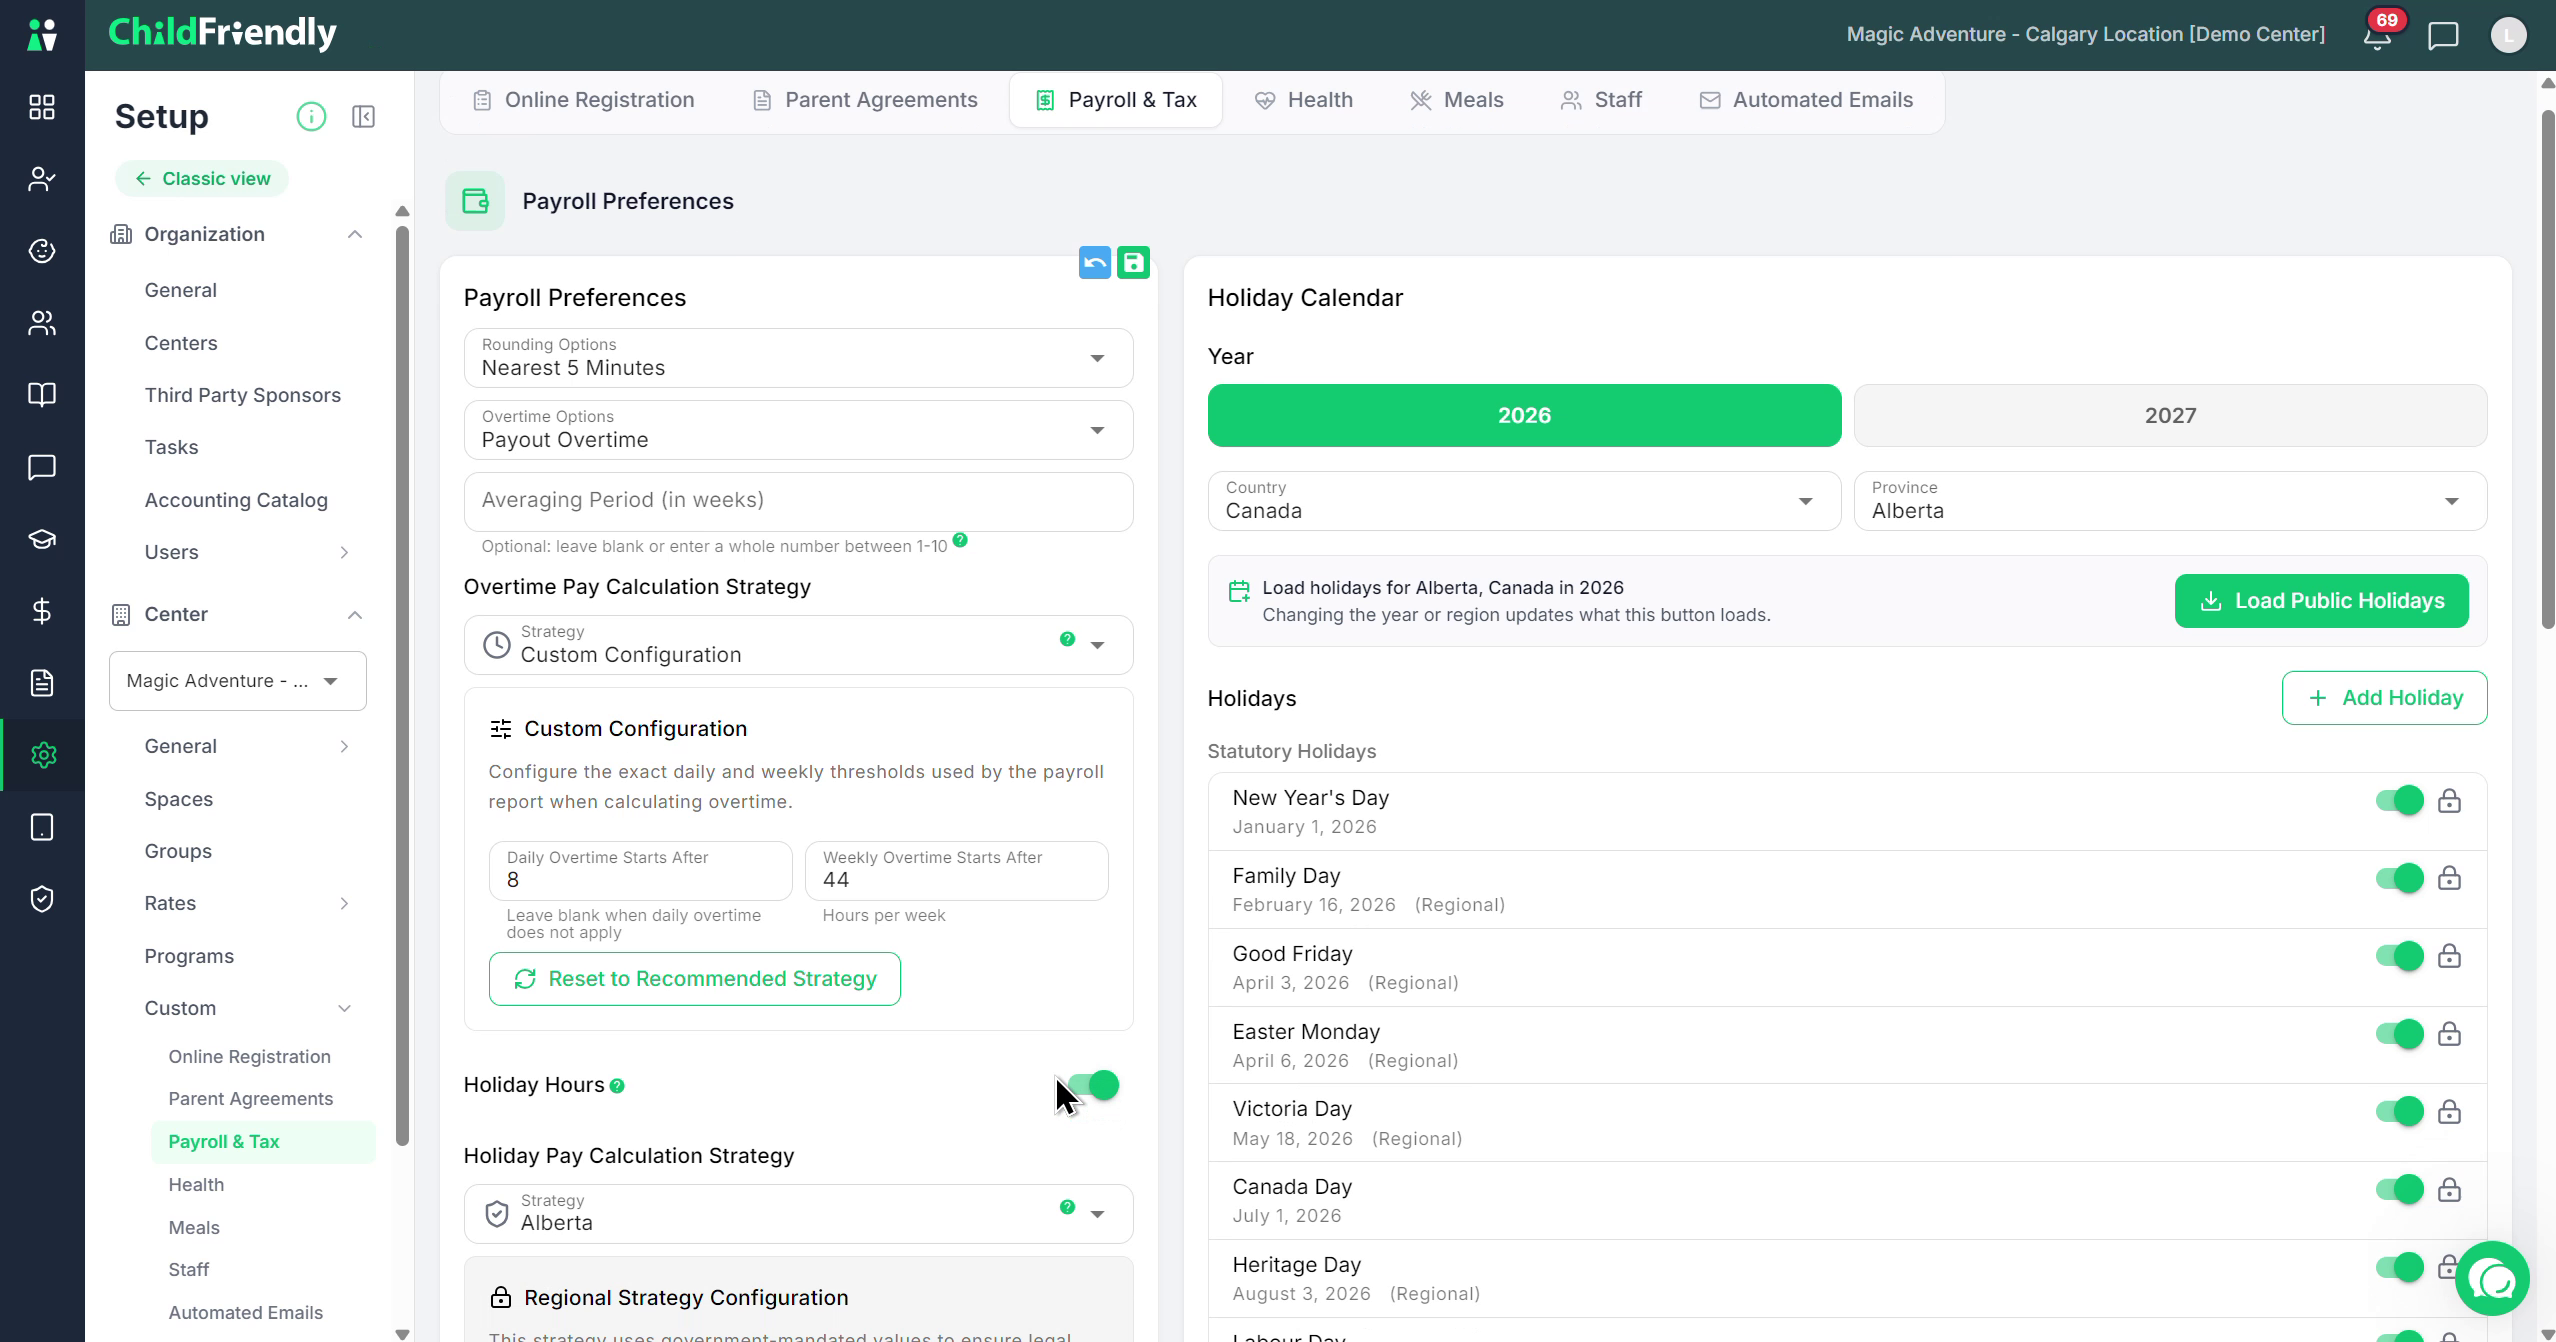
Choose a Holiday Pay Calculation Strategy:
To simplify setup, select the Province in which your center operates.
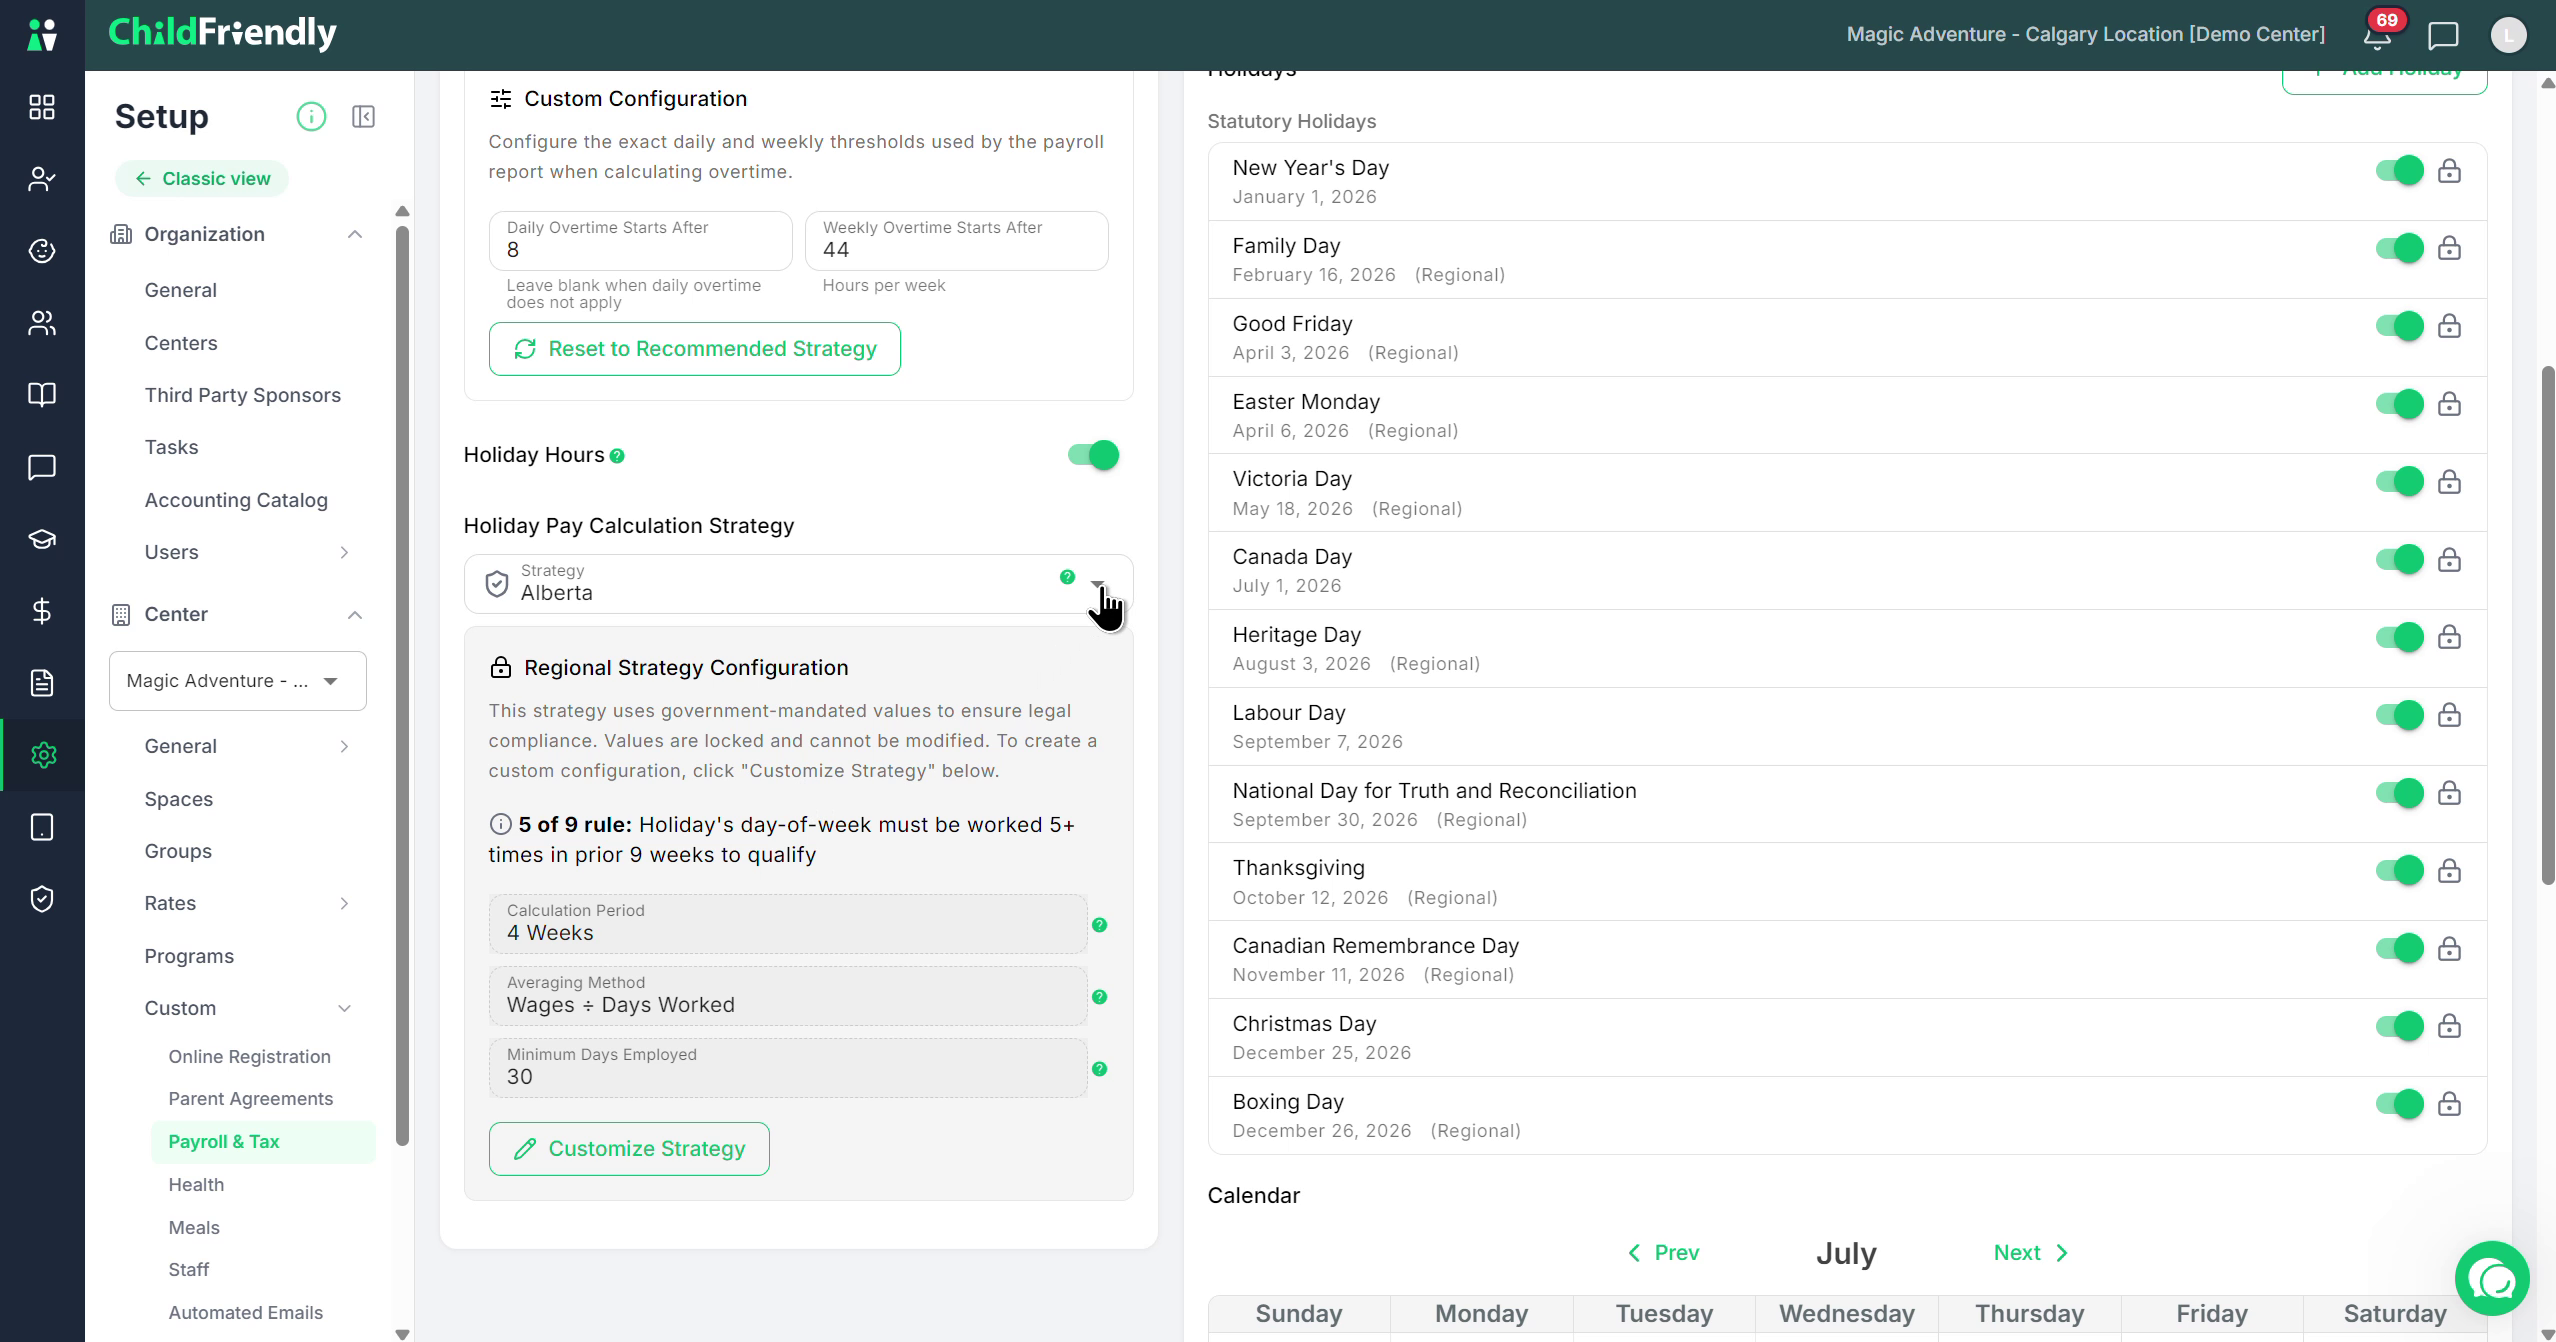
Alternatively, choose to Customize the calculation rules yourself.
If you select Alberta as the strategy, the system displays the specific rules and calculations used.
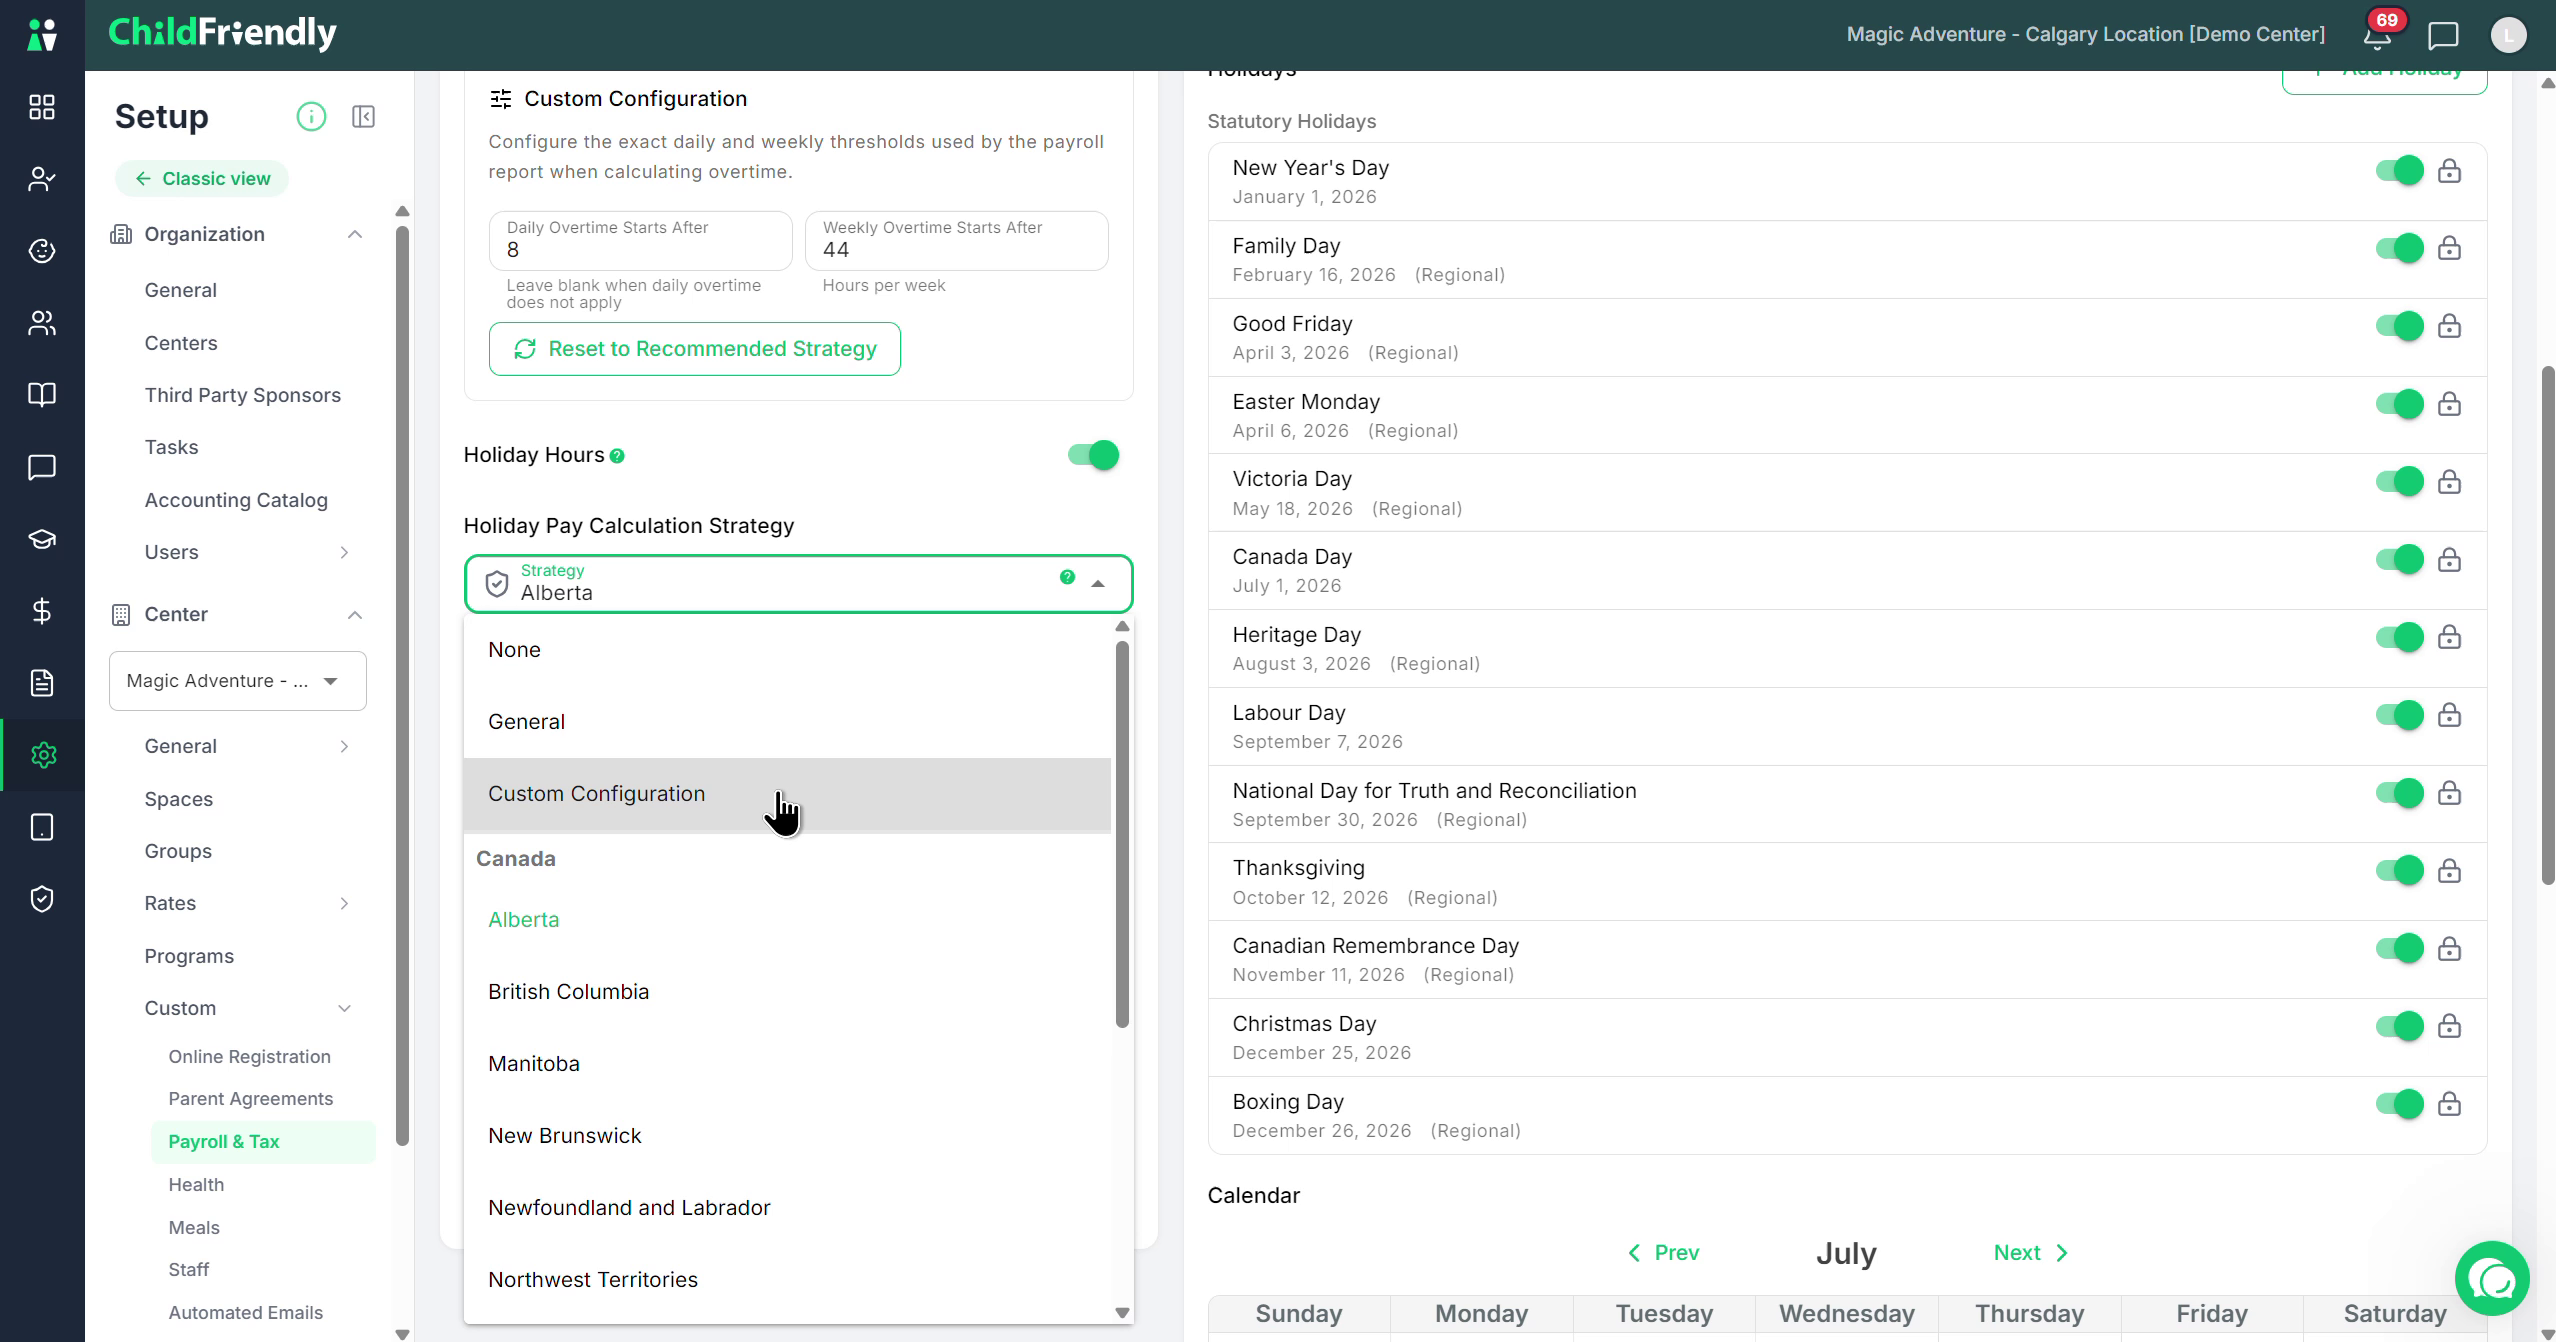
Each rule includes a question mark icon explaining how it works.
For example, Alberta uses the “5 of 9” rule under Alberta Labour Standards:
The employee must have worked at least 5 days in the last 9 weeks.
The employee must have been employed for at least 30 days.
Holiday pay is typically calculated as total wages divided by days worked to determine the stat holiday amount.
Step 6: Manage the List of Stat Holidays
Open the Holidays section to review and manage the holidays counted as stat holidays for your center.
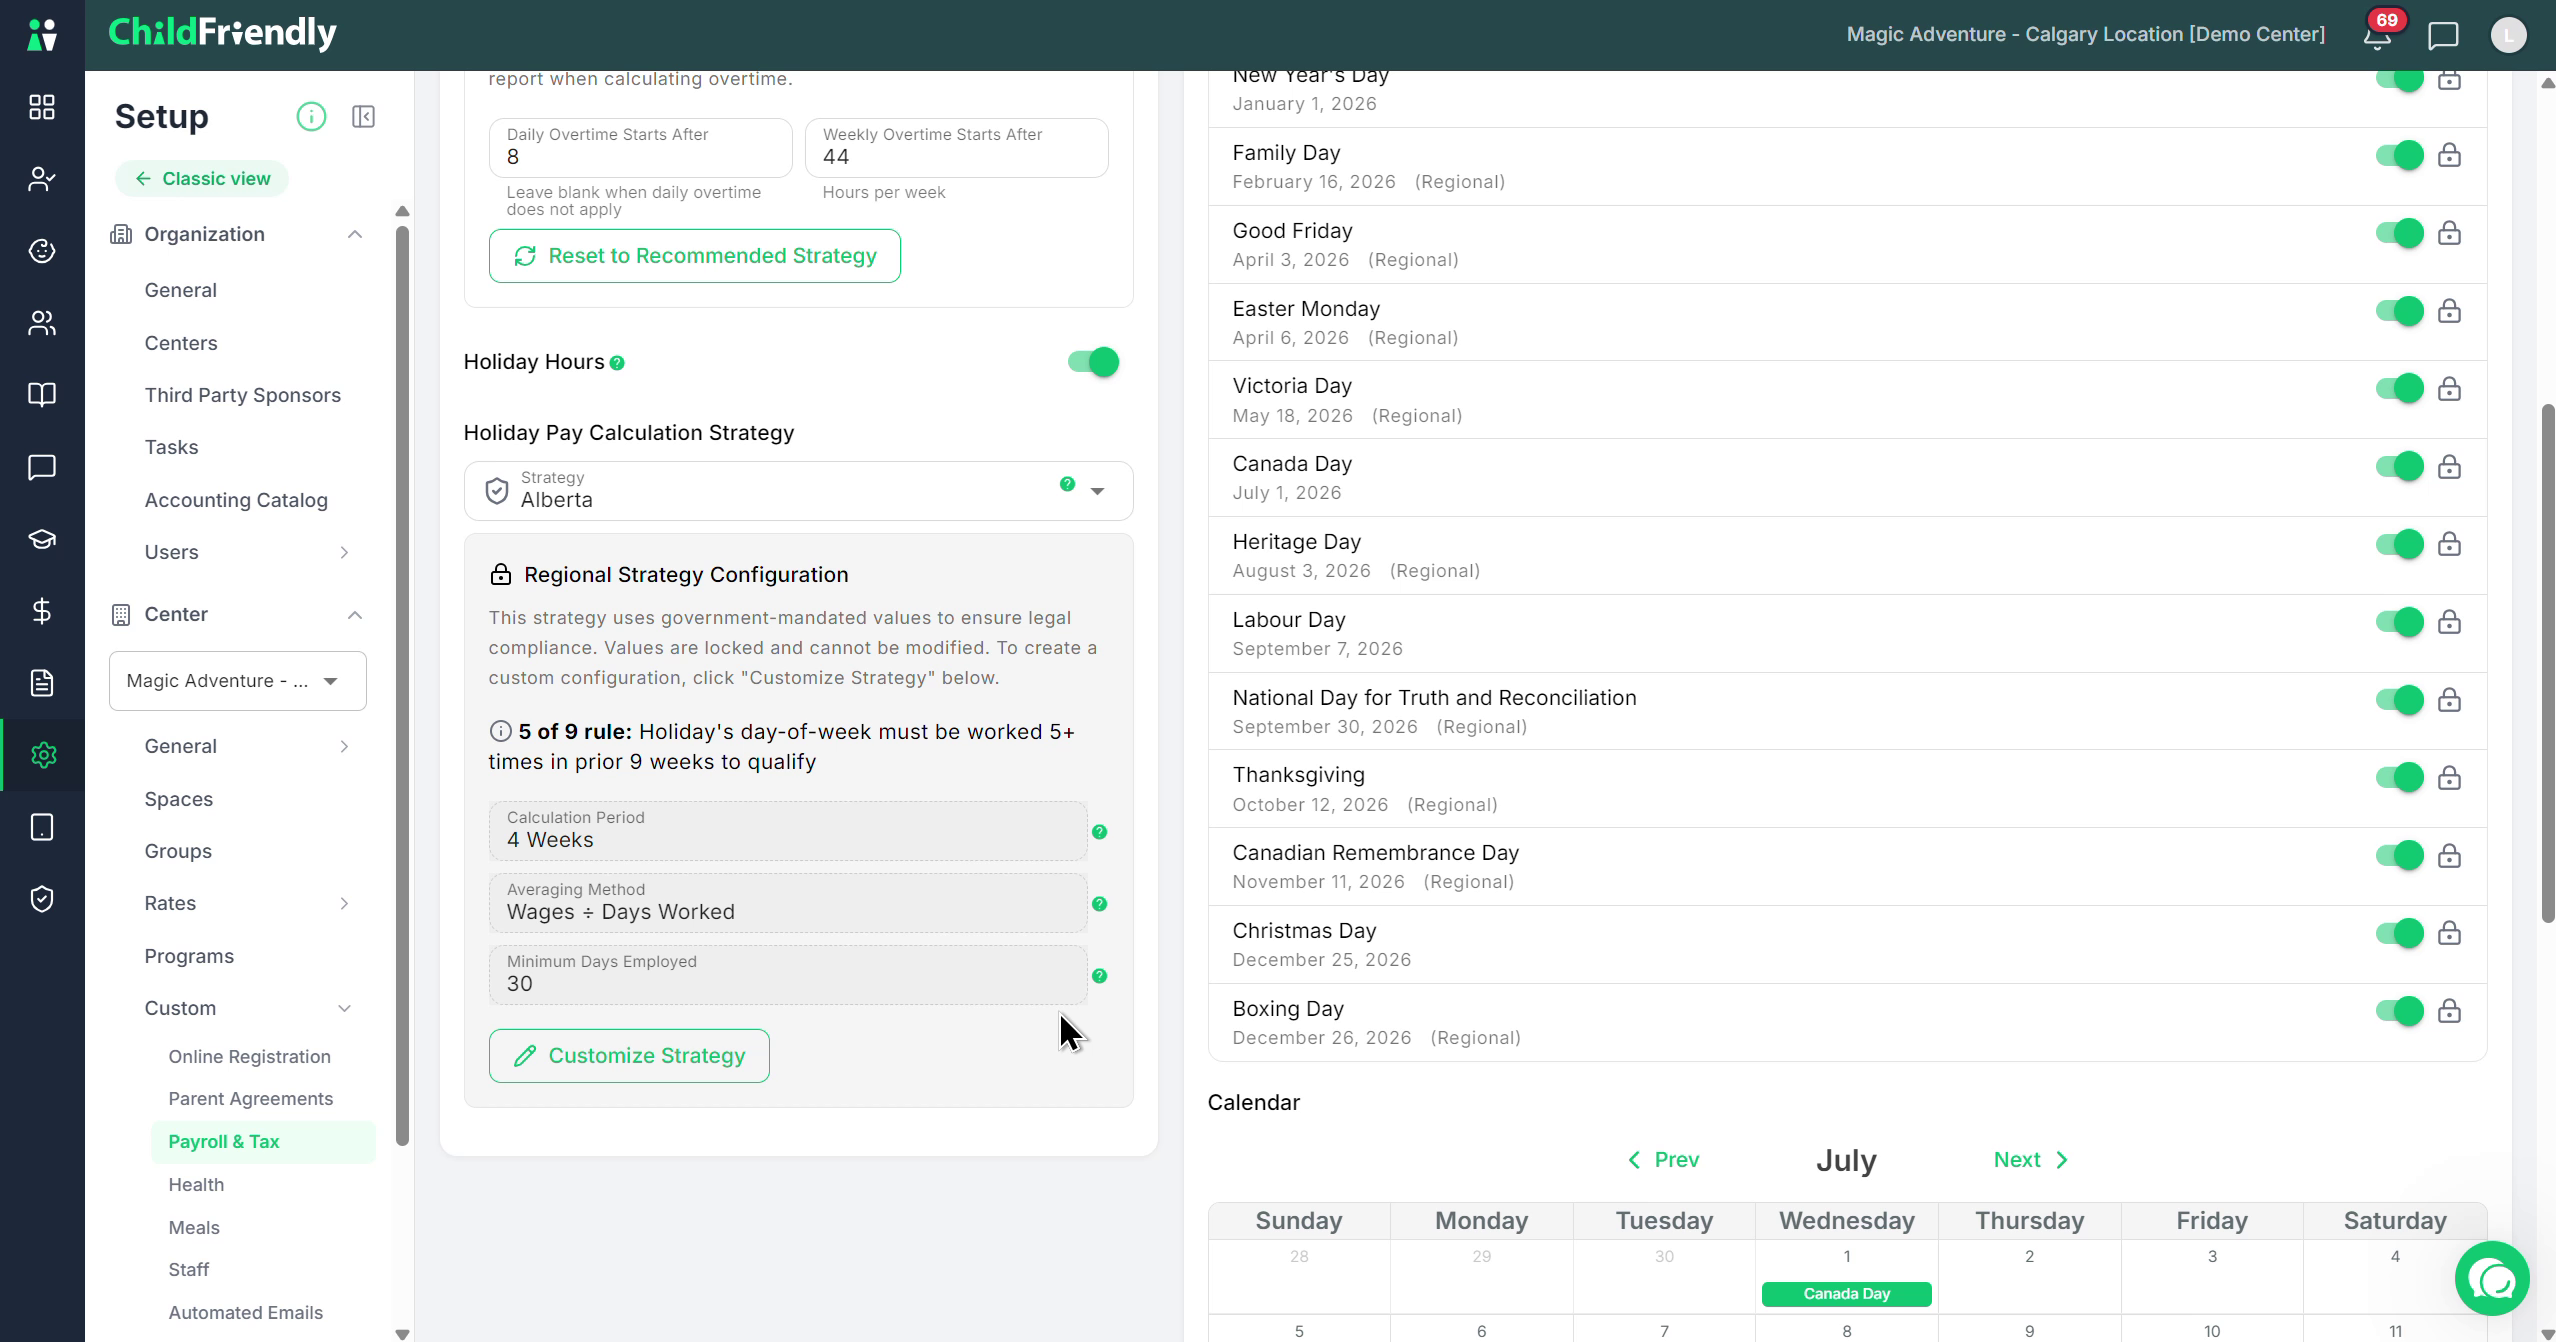
By default, all applicable public holidays are pre-loaded by the system.
At least once per year, review this list and ensure the next year’s holidays are loaded and correct.
If you wish toggle off a holiday (e.g., not observing Boxing Day):
Step 7: Add Custom Holidays
To add an additional holiday (for example, treating New Year’s Eve as a paid stat-like day), click Add Holiday.
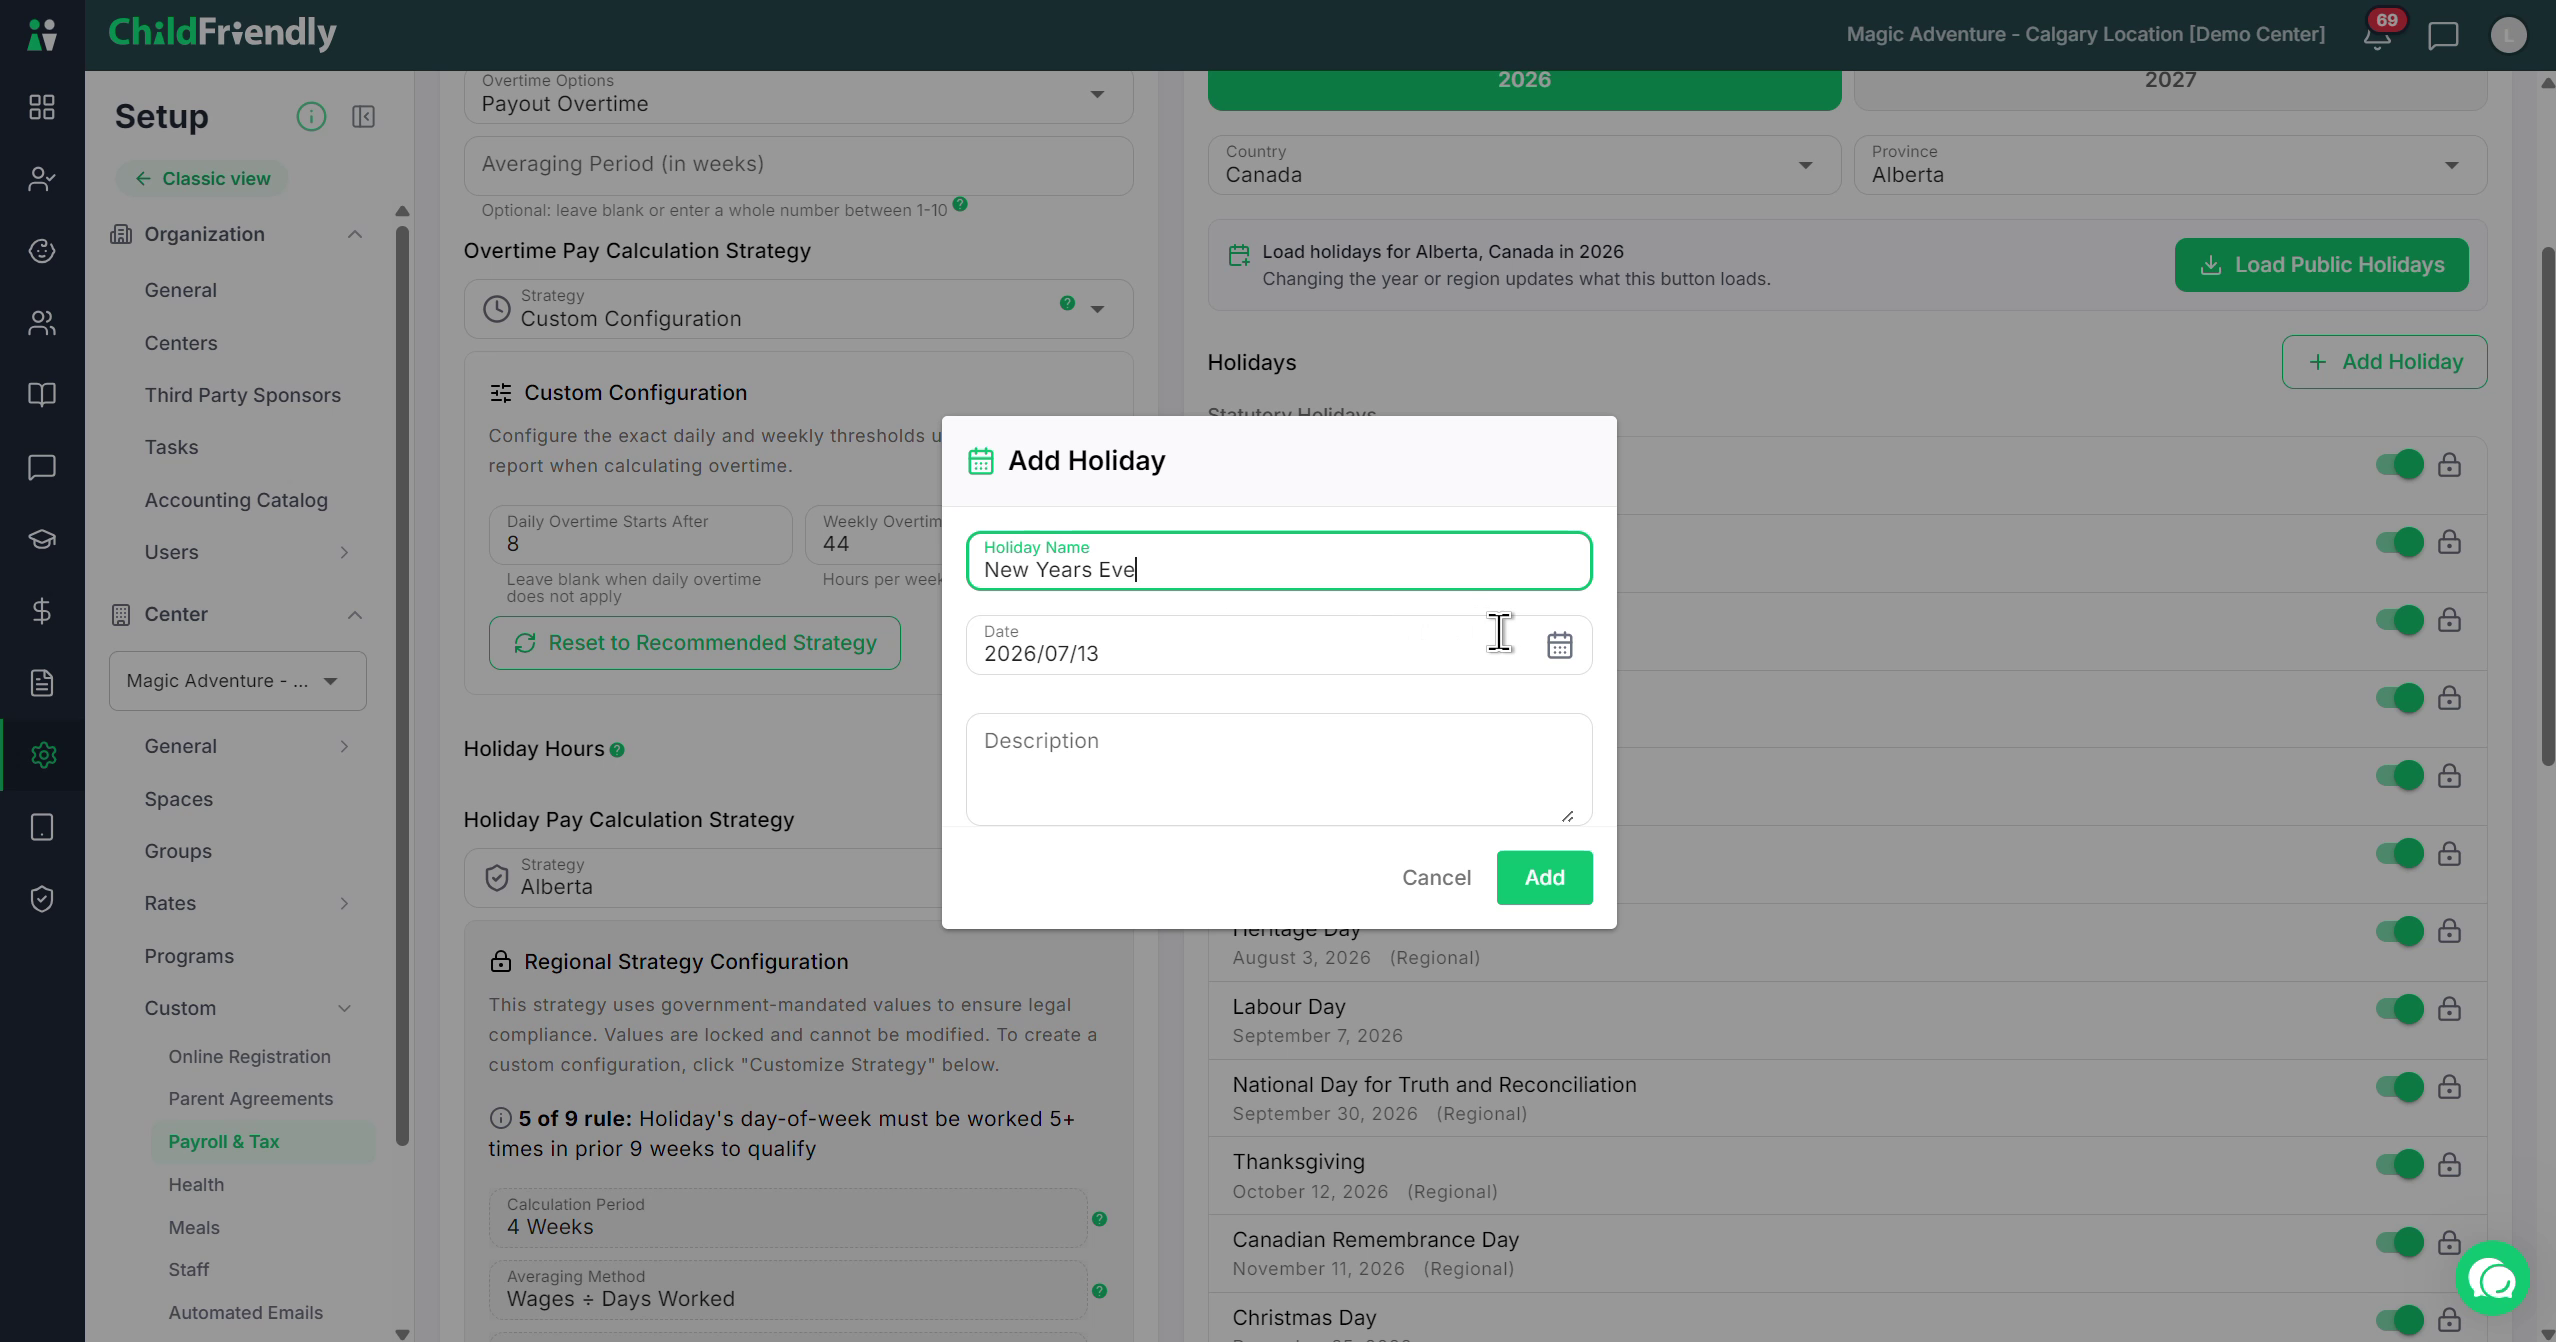
Select the date of the custom holiday from the date picker.
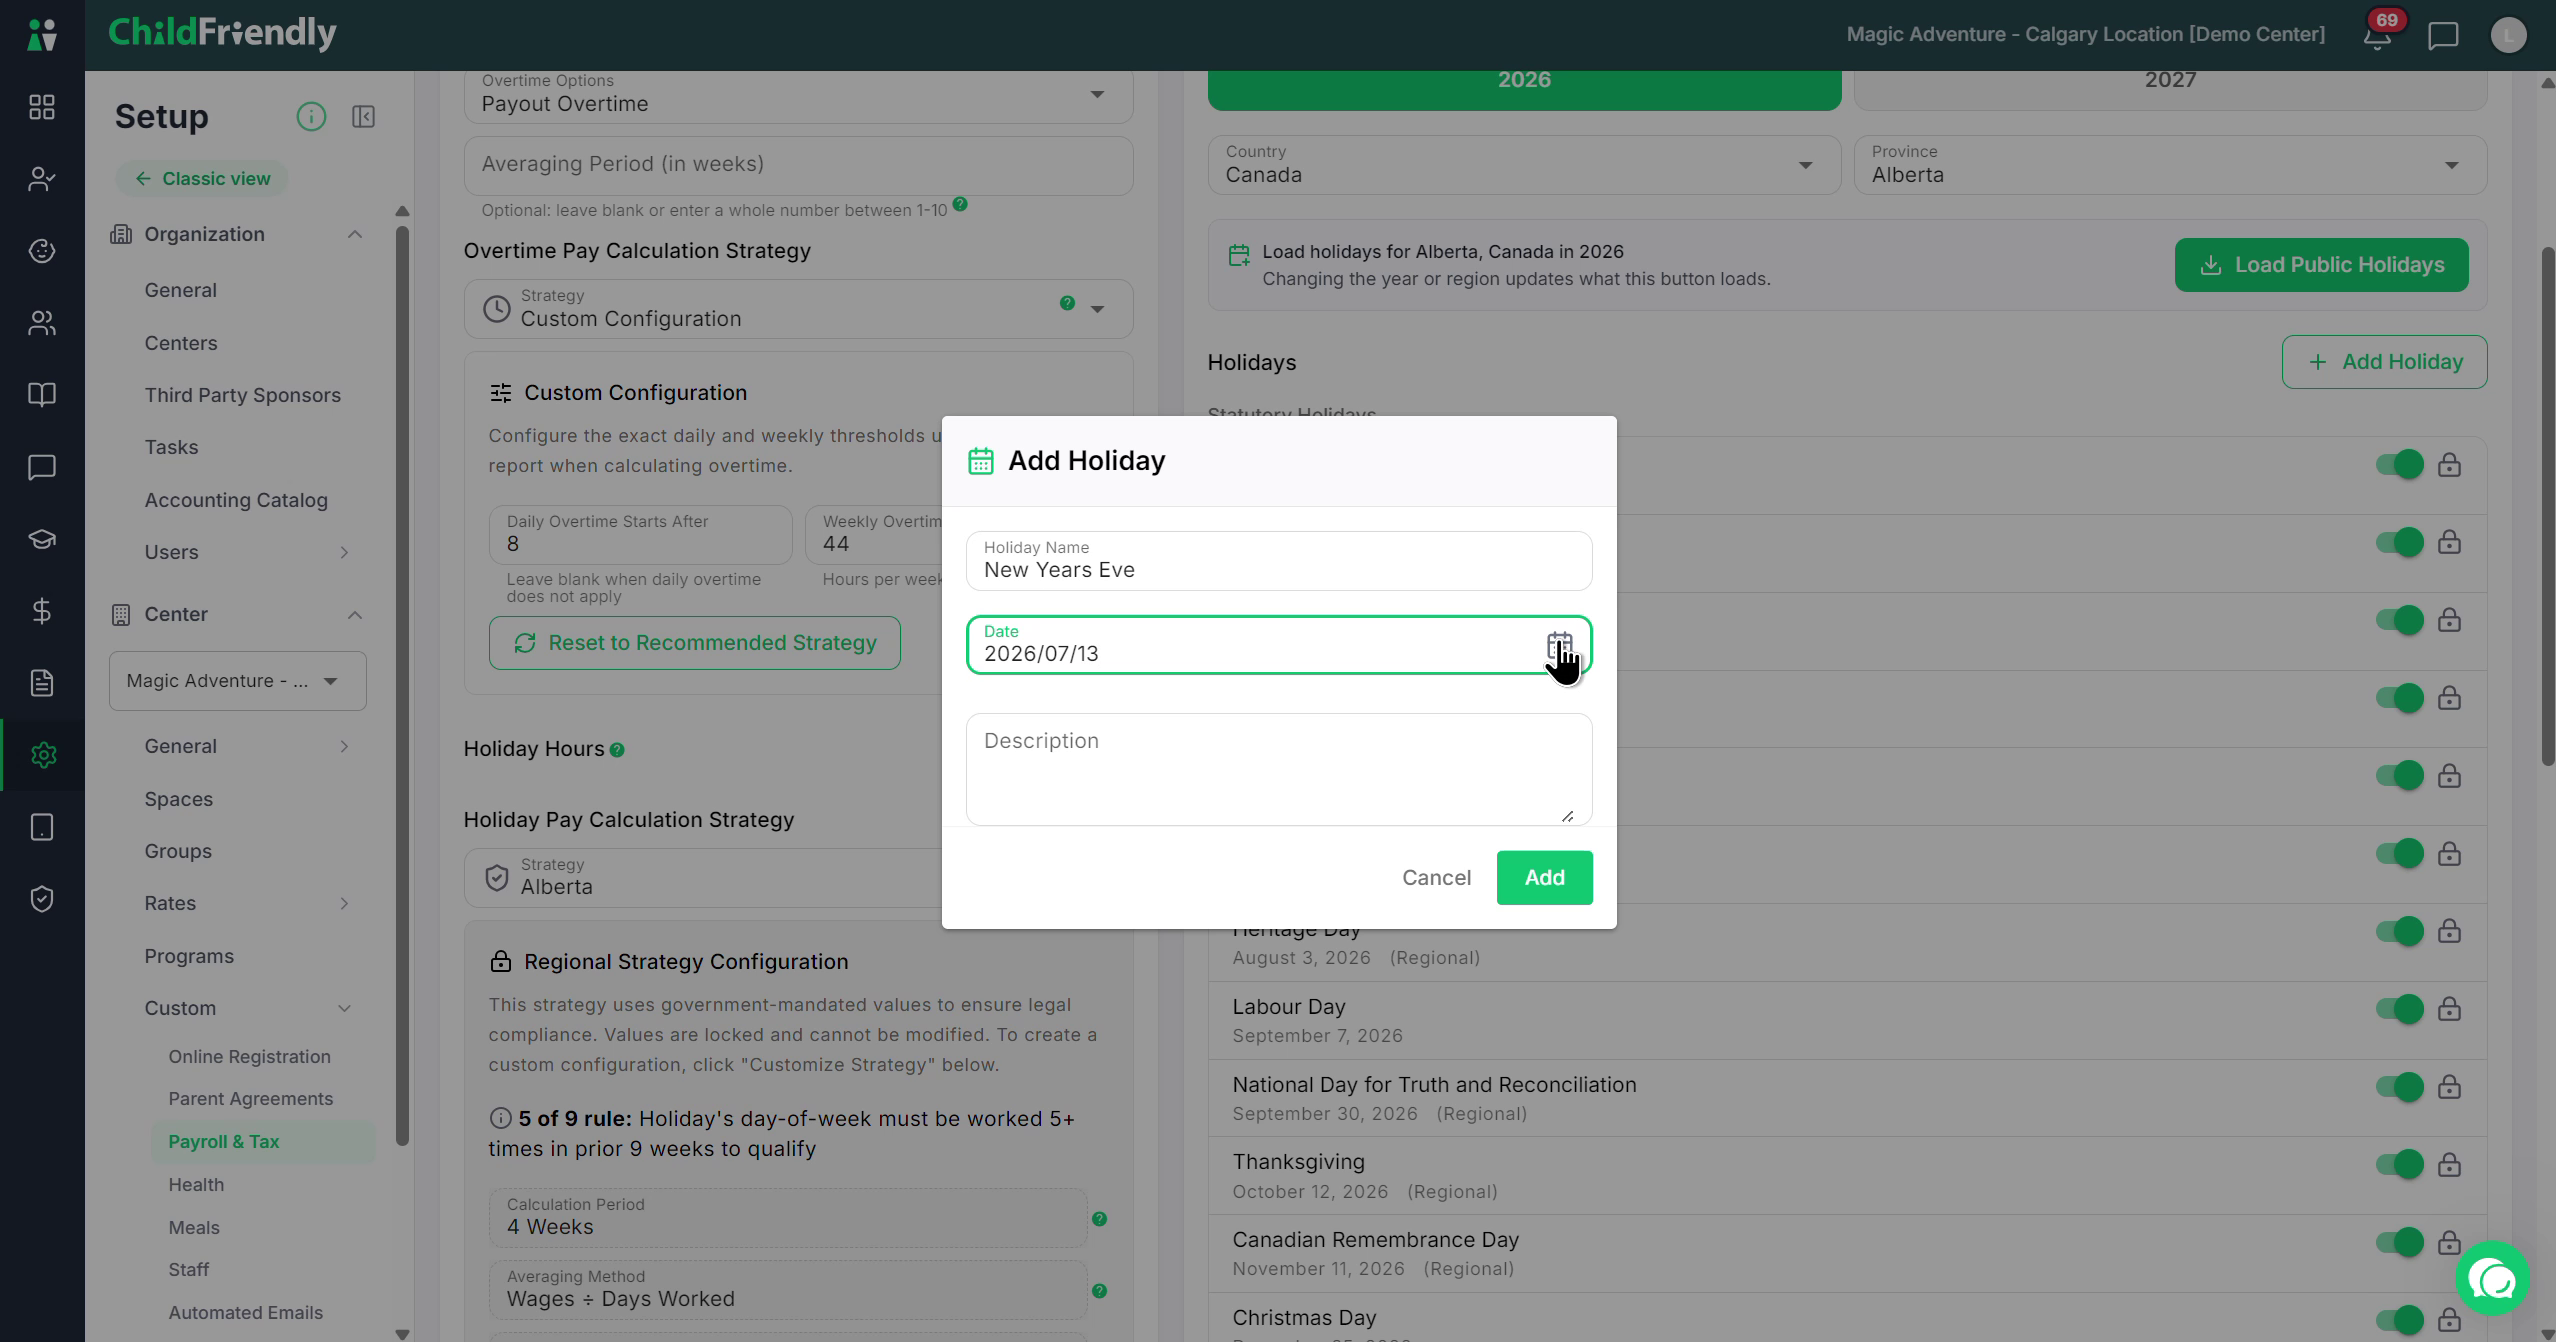
Enter a description for the holiday (e.g., “New Year’s Eve – Paid Holiday”).
Confirm the custom holiday is now listed.
Use the calendar preview to review all holidays currently configured for your center.
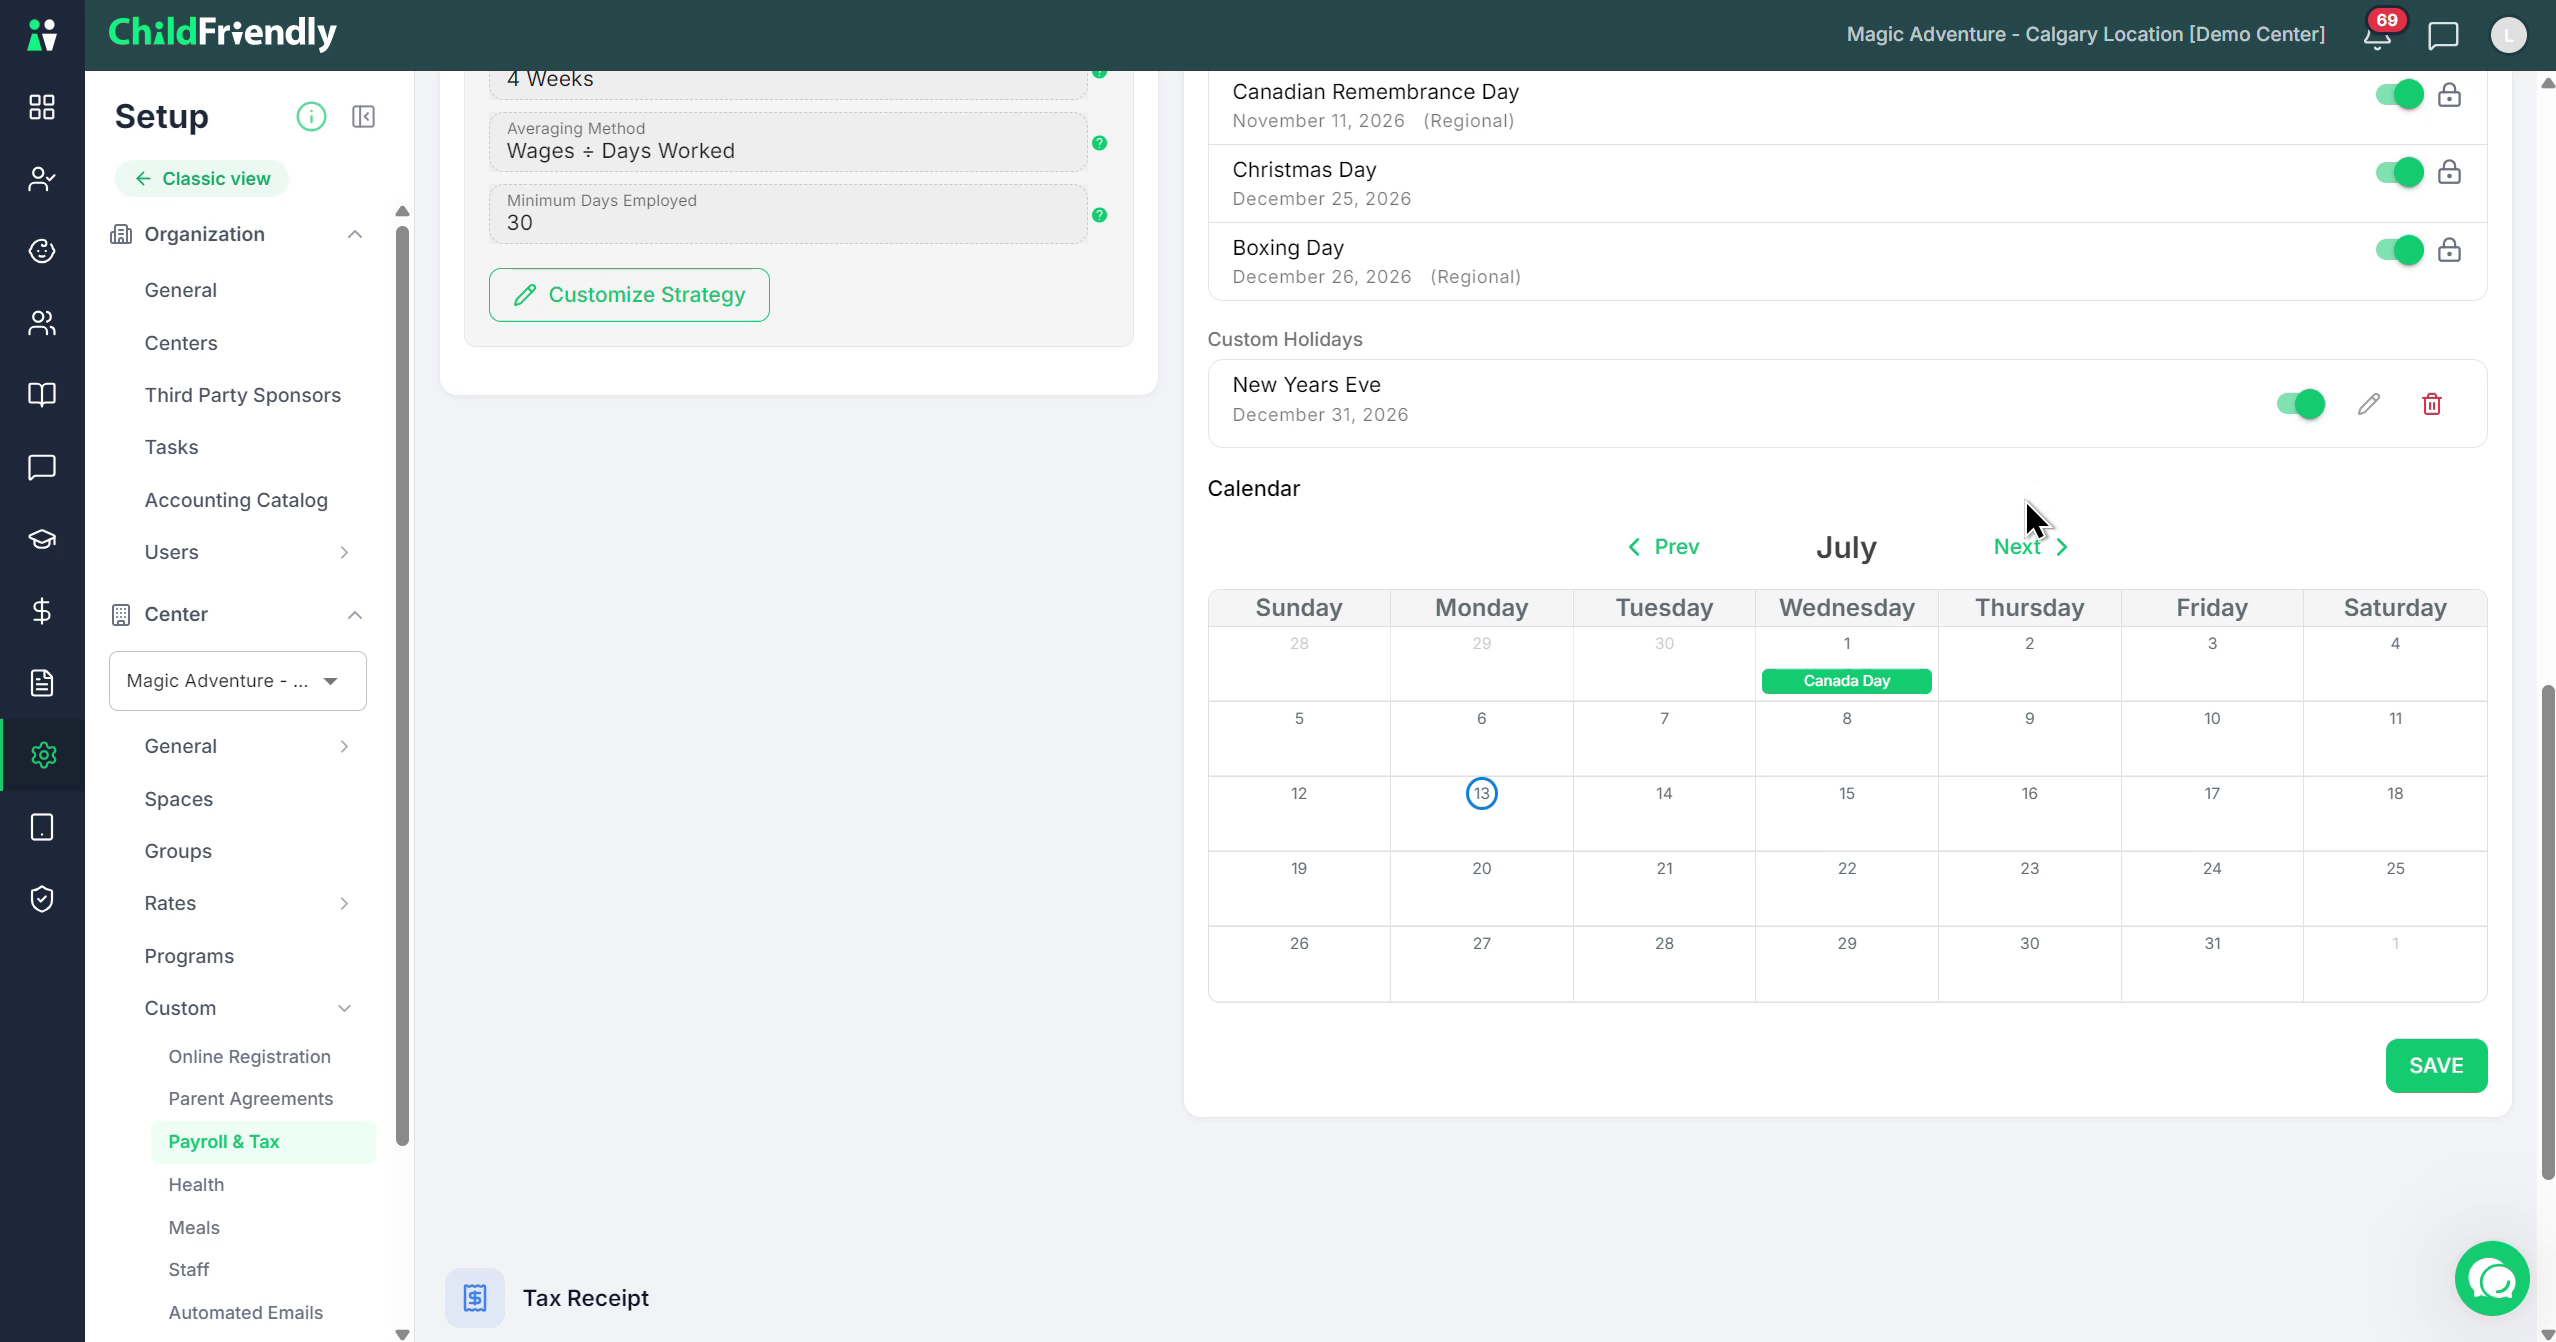
Click Save to apply your changes.
Step 8: Load Future Year Public Holidays and Adjust
For each new year, navigate to that year in the Holidays section.
Click the appicable year and then click Load Public Holidays to automatically import all public holidays for that year (e.g., all 2027 holidays).

Add any custom holidays needed for that year, following the same process as in Step 7.
Toggle off any optional holidays you do not plan to observe for that year.

Click Save to finalize the holiday configuration for the year.
Step 9: Upload Tax Receipt Signature
In the Tax Receipt section of the Payroll & Tax tab, upload a clear image of the authorized signer’s signature:
Use a white or transparent background for best results.
Once uploaded, this signature will automatically appear on tax receipts downloaded by parents from their portal.
This ensures tax receipts are properly signed and compliant with IRS or CRA requirements.
