How to Set Up Accounting Catalog Items
The accounting catalog under the Organization section of the setup module defines how all family billing transactions are categorized and tracked. Think of this catalog as your master list of invoice line items. By categorizing these items—like tuition, registration fees, or field trips—you can easily organize all family billing transactions and track your different revenue streams for cleaner accounting.
Last updated About 2 months ago
Step 1: Access the Accounting Catalog in the Setup Module
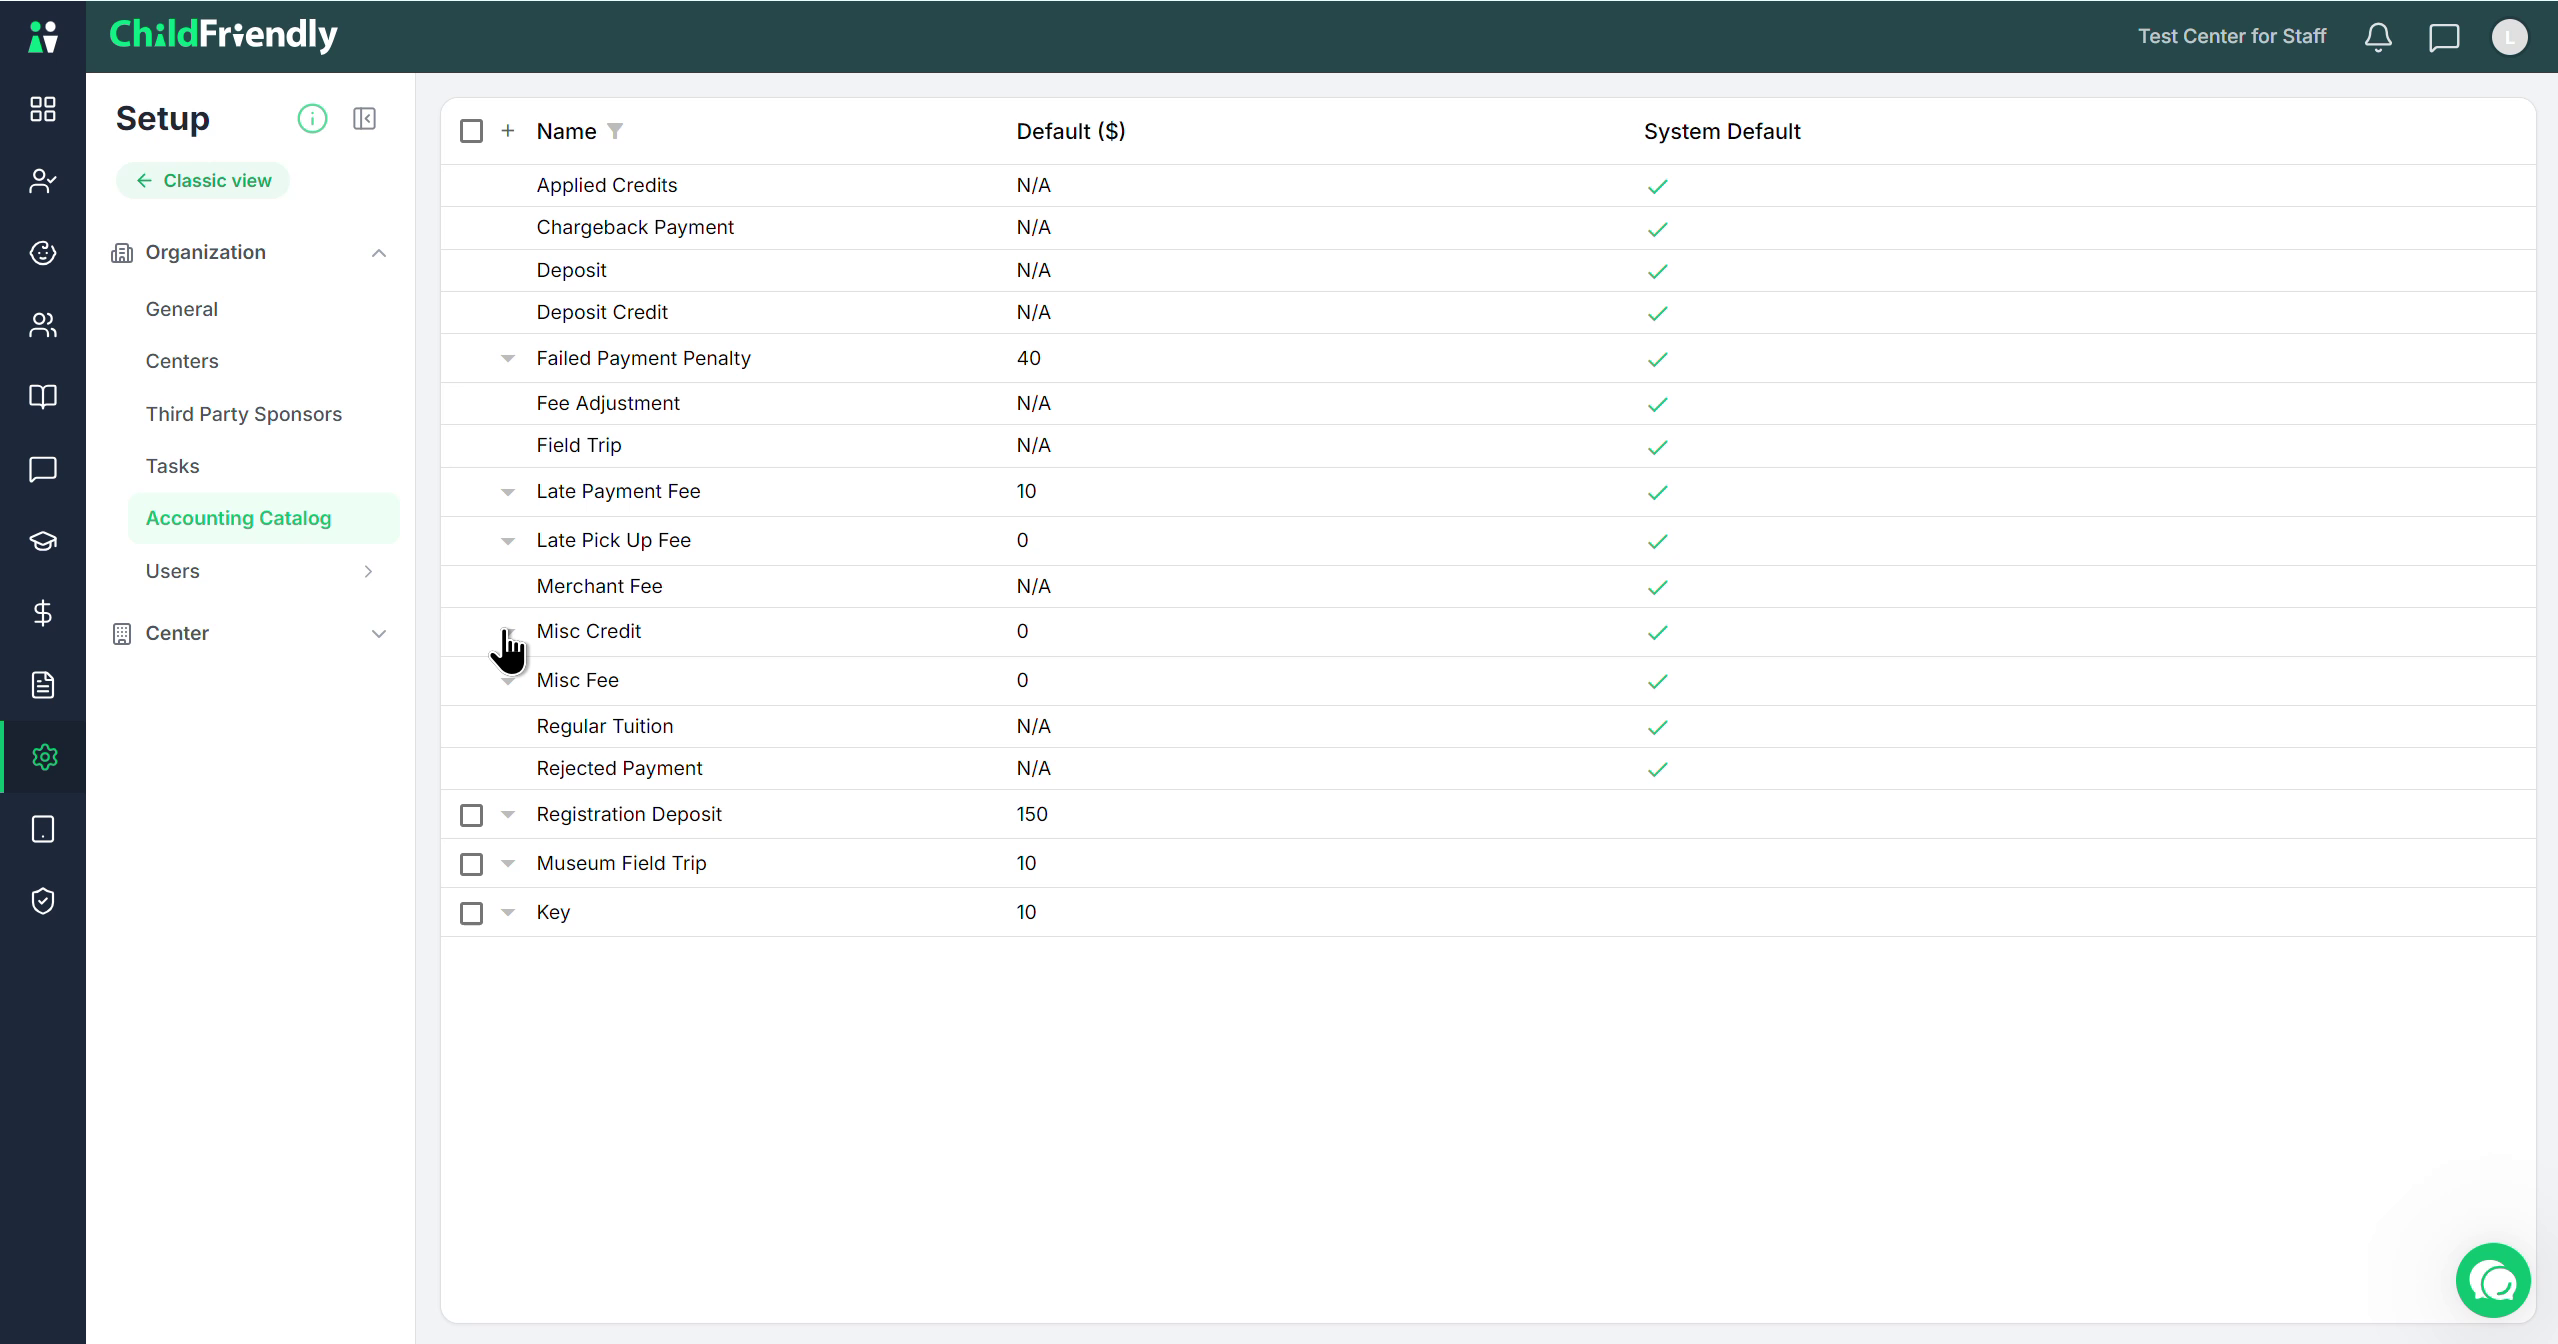
Navigate to the Organization section within your Setup module and open the Accounting Catalog. This is where all transaction categories used for billing families are listed and managed.
Step 2: Understand Default Categories and Their Role
Review the list of default categories that come preconfigured in the accounting catalog, such as Regular Tuition, Miscellaneous Fees, and Miscellaneous Credit.
These default categories:
Preconfigured items cannot have their names edited.
Are used when syncing to your accounting software, which will recognize and track them by these specific names.
Ensure that your external accounting software’s item catalog matches these default category names so that transactions map correctly.
Step 3: Configure Default Amounts for System Fees
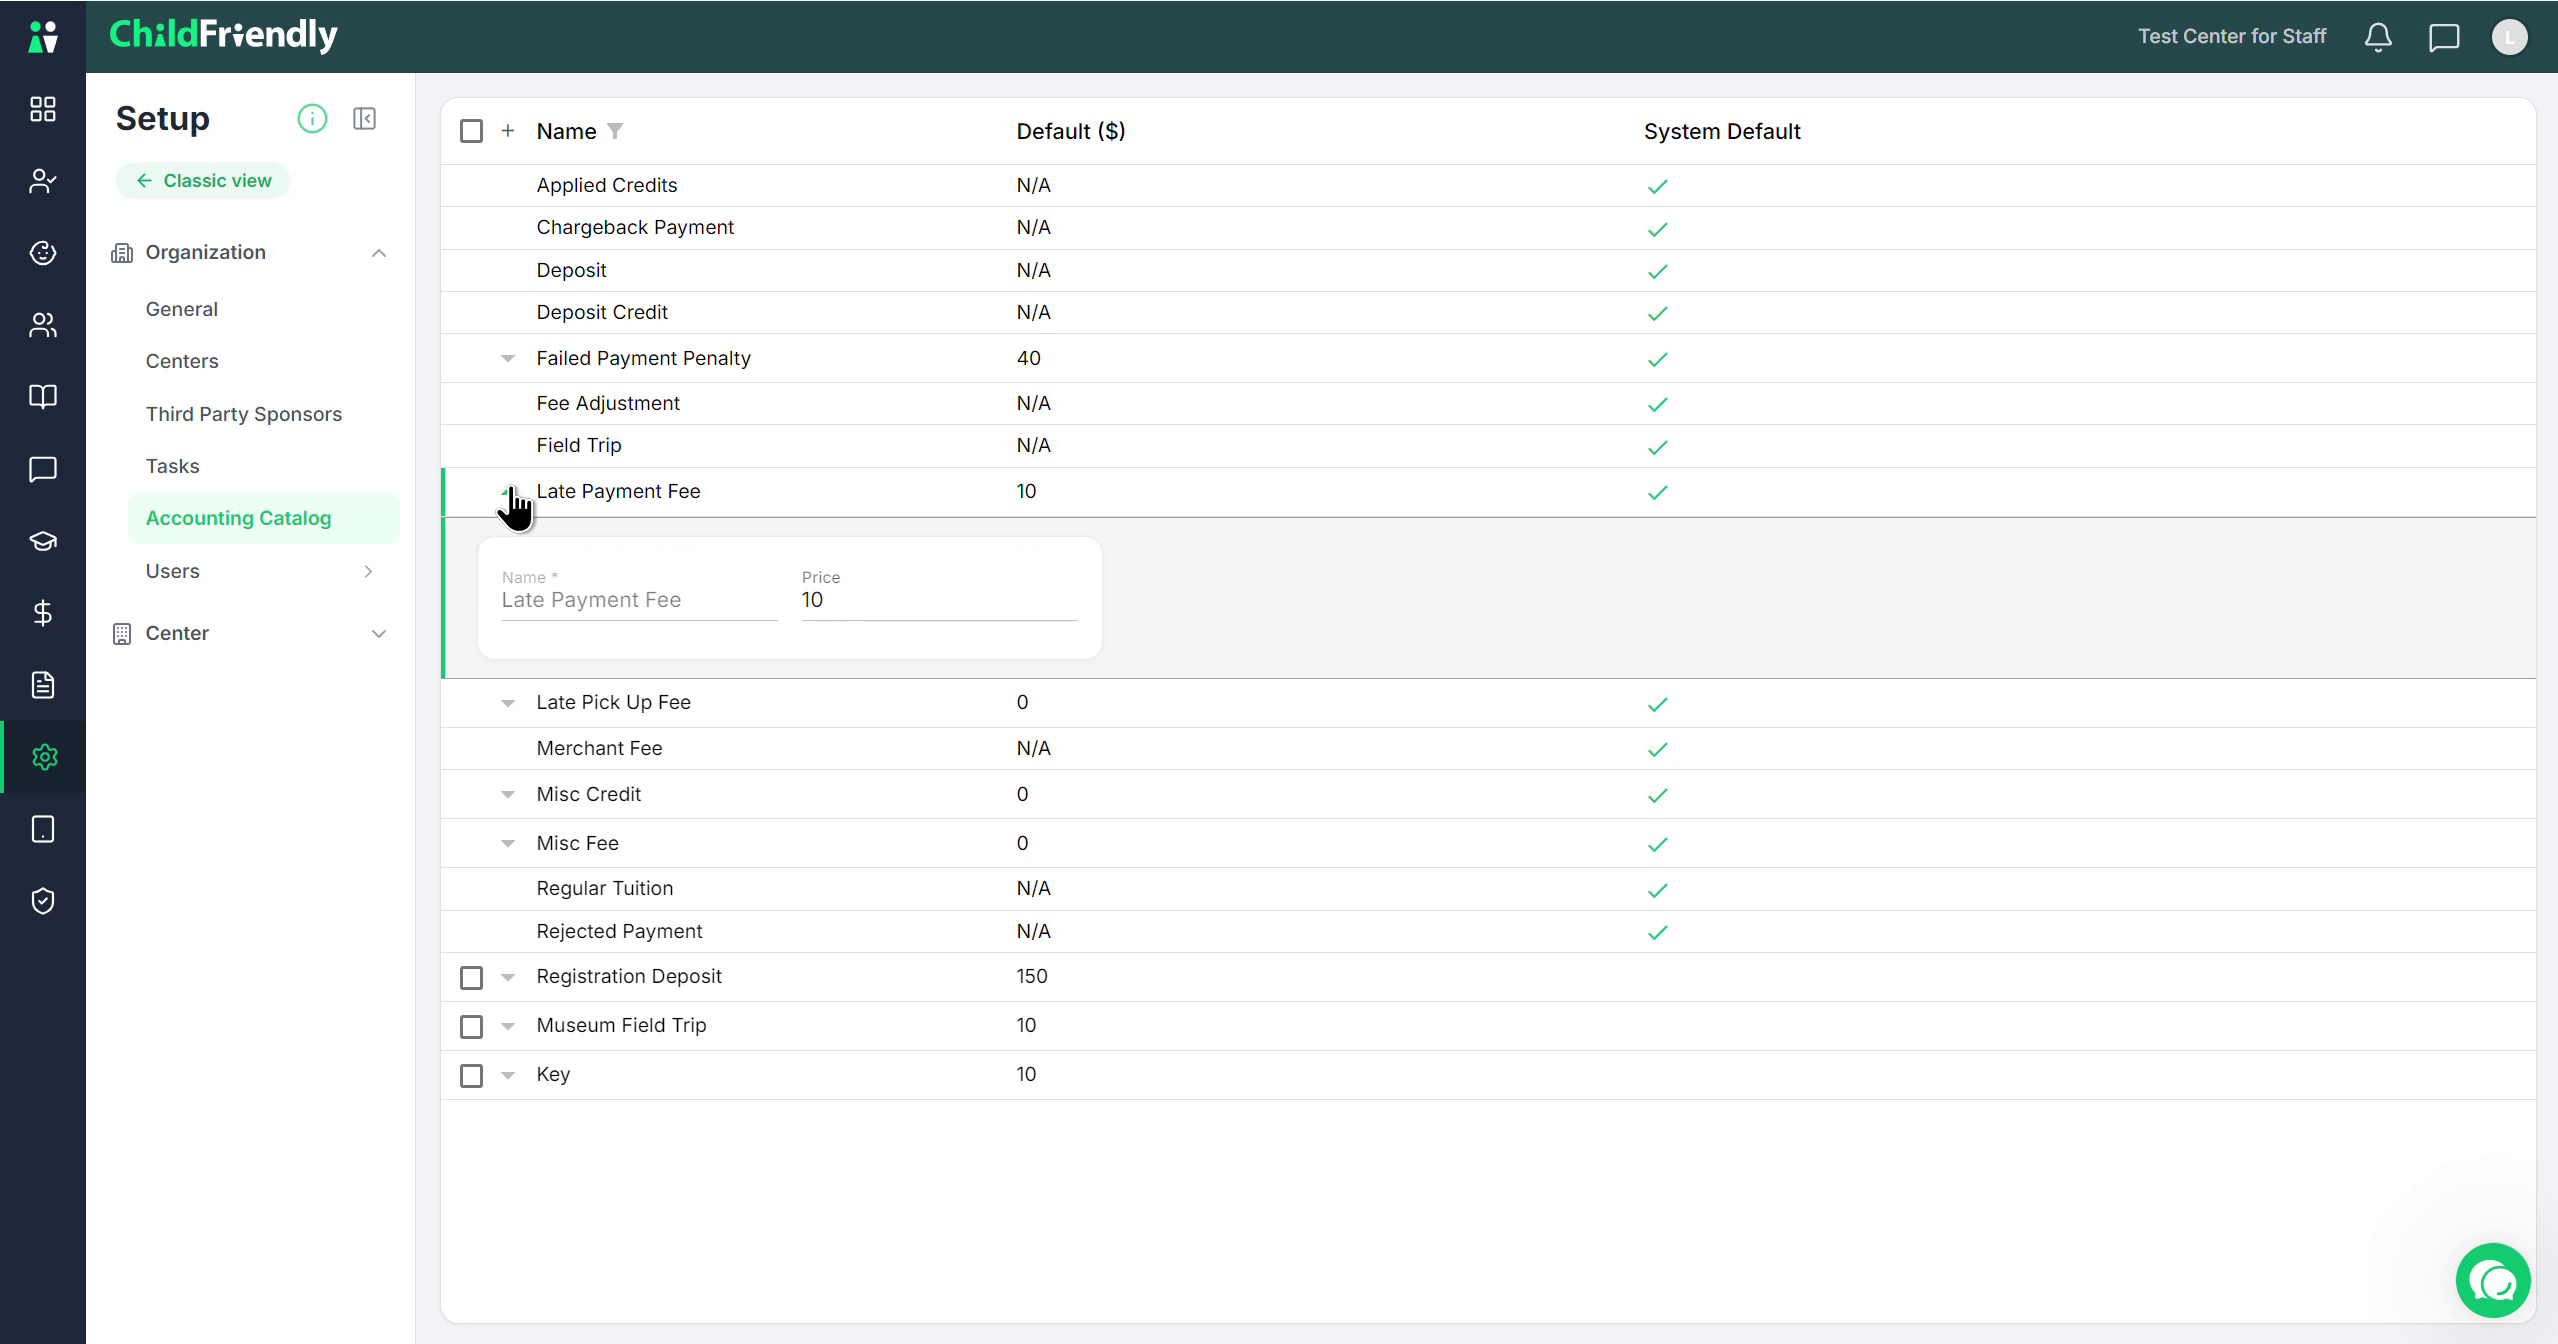
For system-defined fees (where the name cannot be changed), you can still set or modify the default amount:
Example: Late Payment Fee – If you charge families a specific amount per day or per occurrence when a payment is late, enter that amount as the default here.
This default amount will automatically populate when billing a family but can always be overridden at the time of billing.
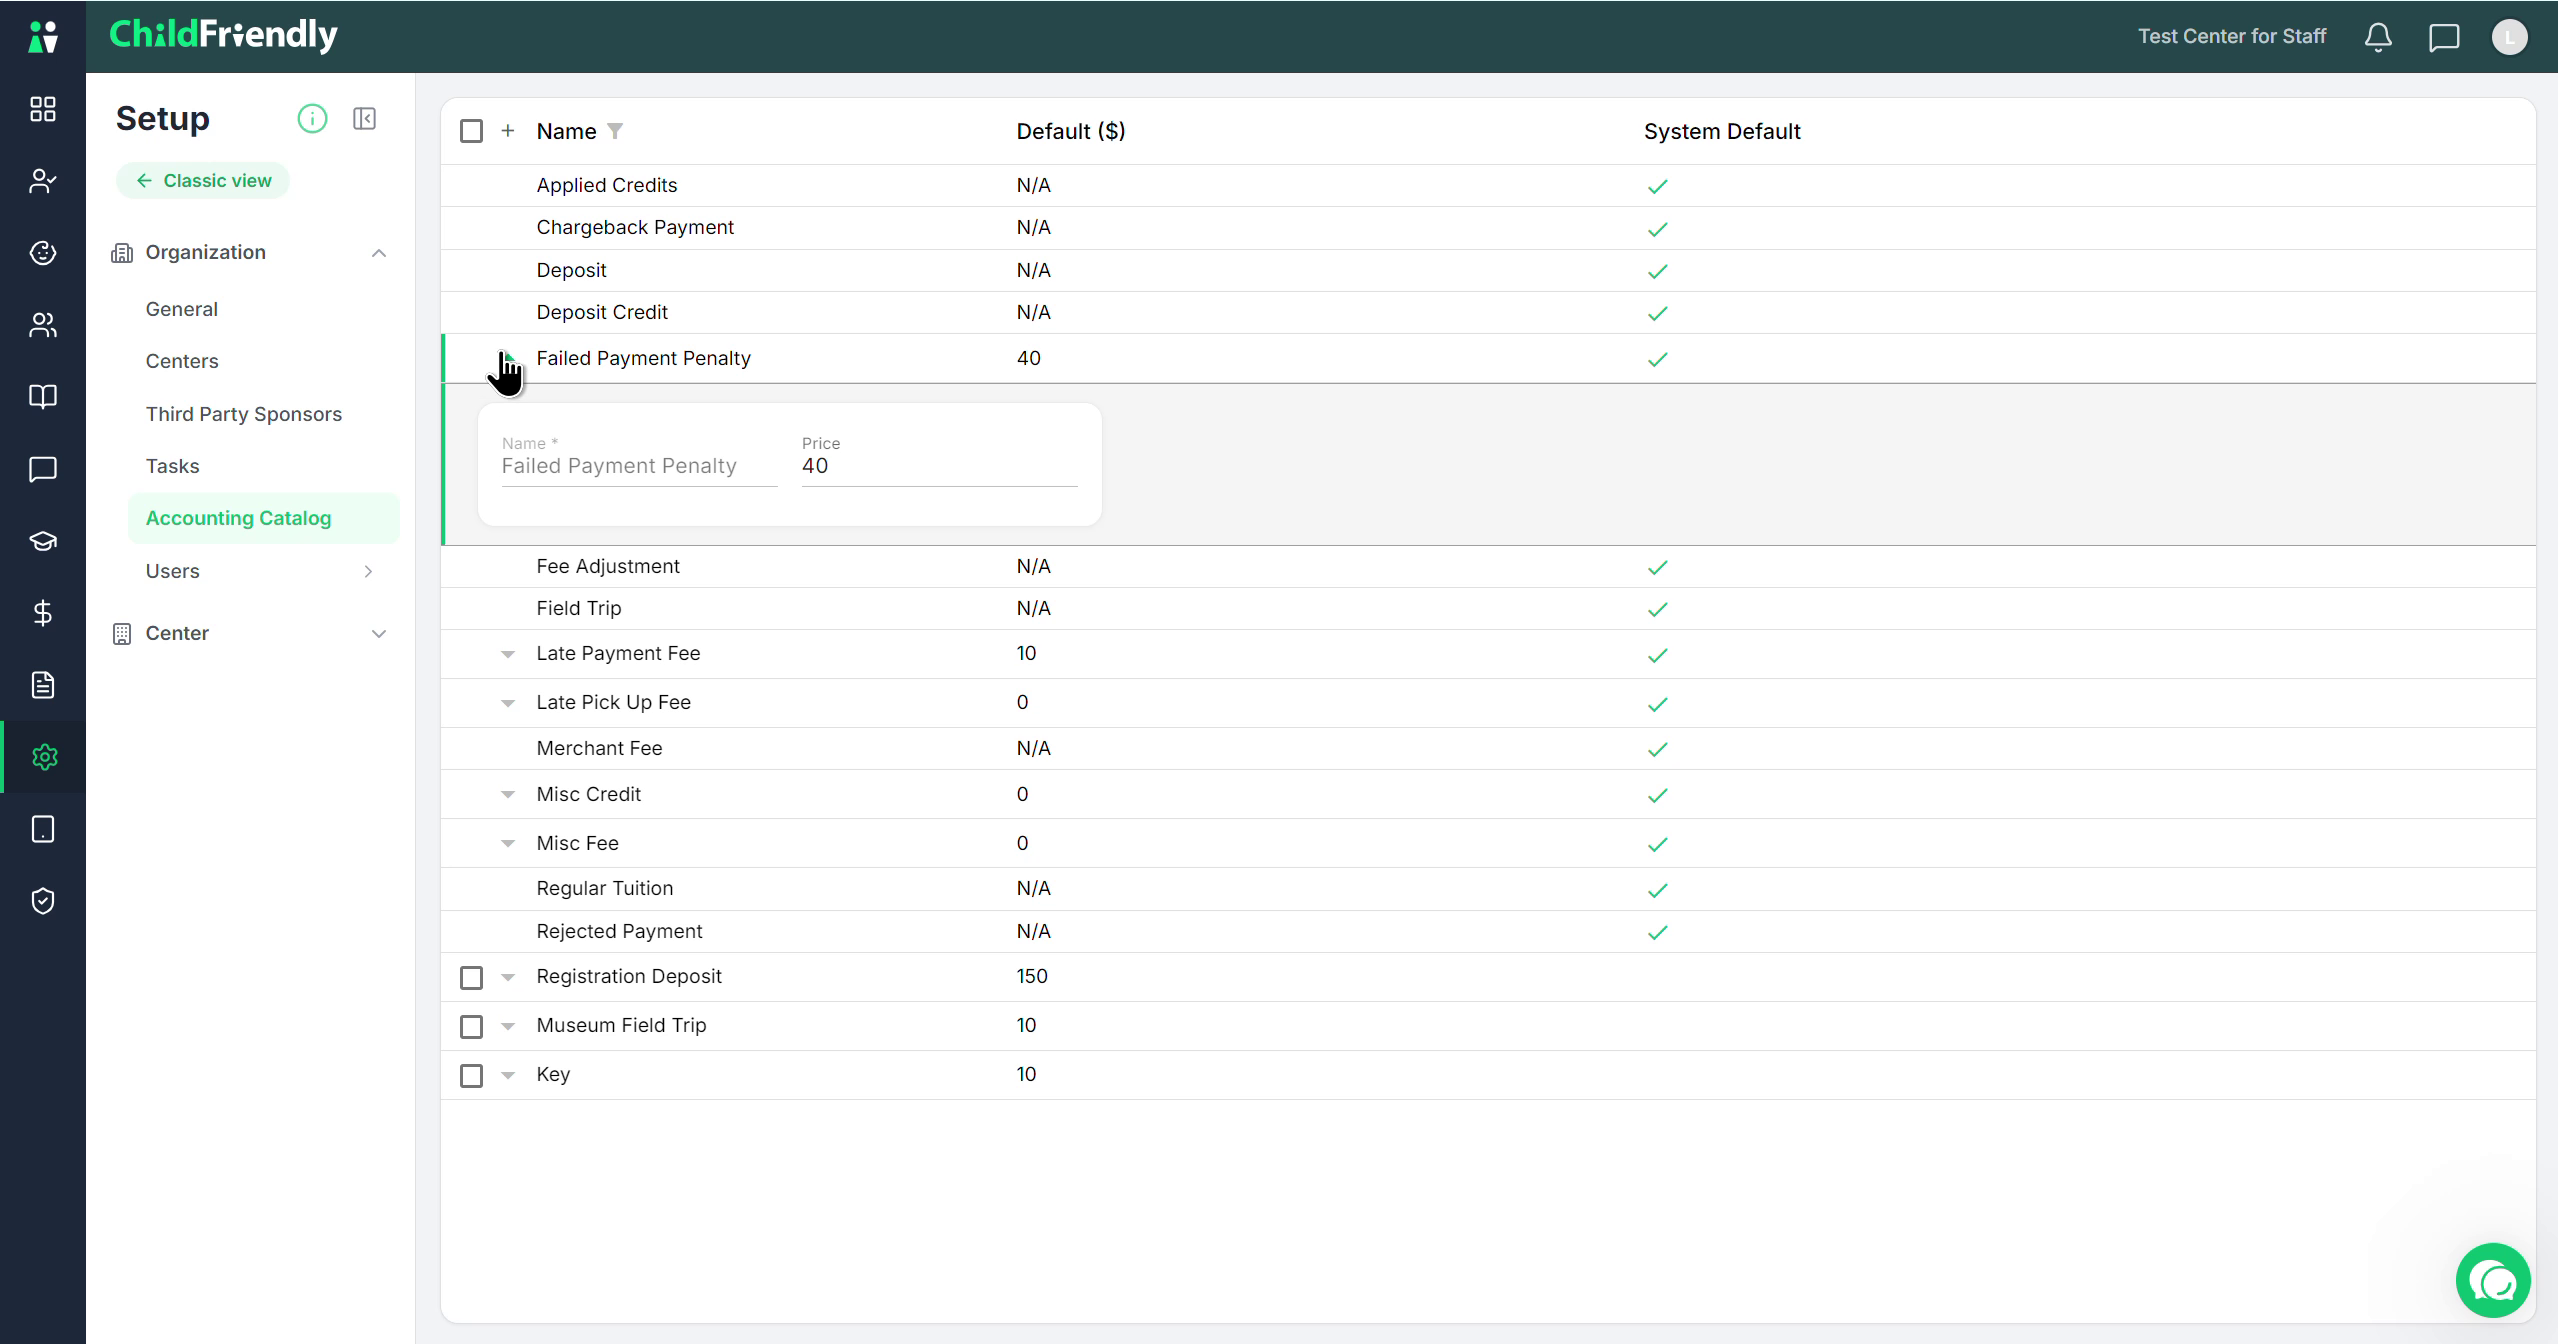
Similarly, review and configure the Failed Payment Penalty:
Example: Set a default NSF fee (e.g., $40) to be charged whenever a payment fails.
If you are using PAD, ACH or credit card payments, this penalty will automatically be added to the family’s invoice when a payment fails.
As with other fees, the default amount can be adjusted manually in the finance module during billing if needed.
Step 4: Add or Edit Custom Accounting Categories
To tailor the catalog to your organization’s needs:
Click the plus (+) sign at the top of the catalog to add a new custom category.
Or select an existing custom category to edit its name and default amount.
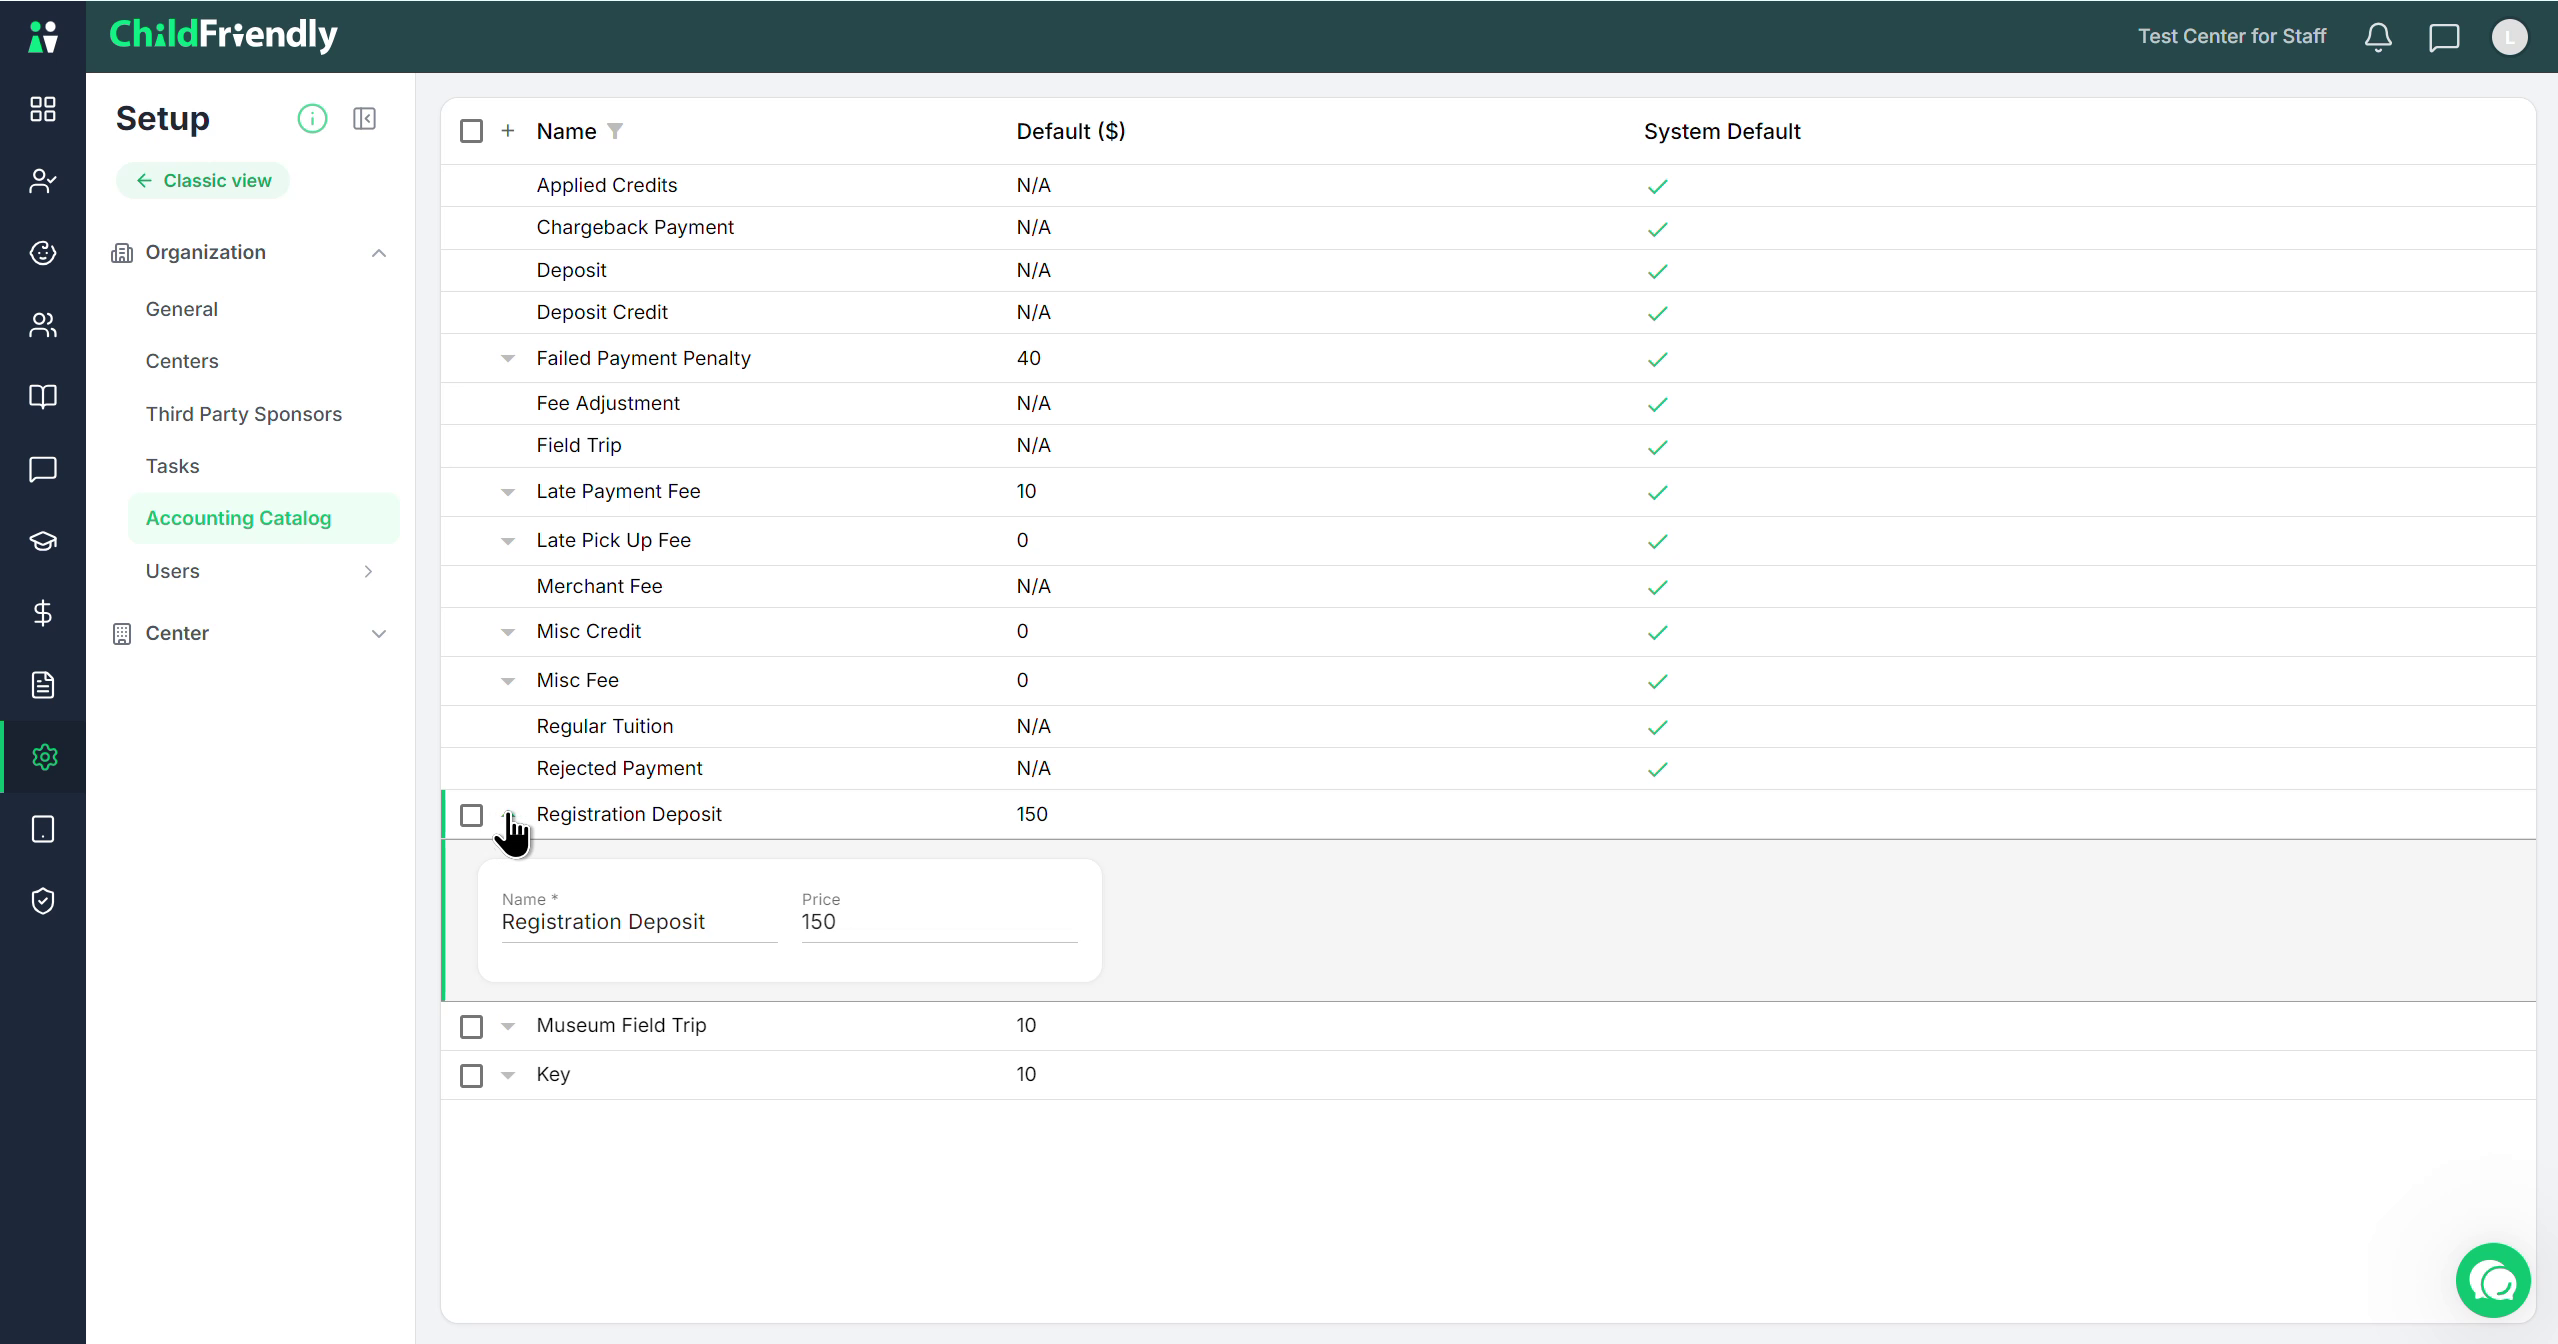
Use custom categories for any specific charges you want to track, that are different from the default categories, such as:
Key fob fees for parents.
Specific field trip charges.
Any other unique fees that are not covered by the default categories.
Step 5: Review and Confirm All Categories
Once you have configured default categories and added or updated custom ones, review the full accounting catalog to ensure:
Category names align with your accounting software.
Default amounts reflect your policies.
All needed custom categories are present and correctly labeled.
