How to Add Centers to your Organization
This article explains how to create, configure, and manage centers within the Child Friendly platform at the organization level. You will learn how to add, edit, clone, and delete centers, configure payout and merchant fee settings, set up public registration redirects, and access key portal links.
Last updated About 2 months ago
Step 1: Navigate to the Centers Subsection
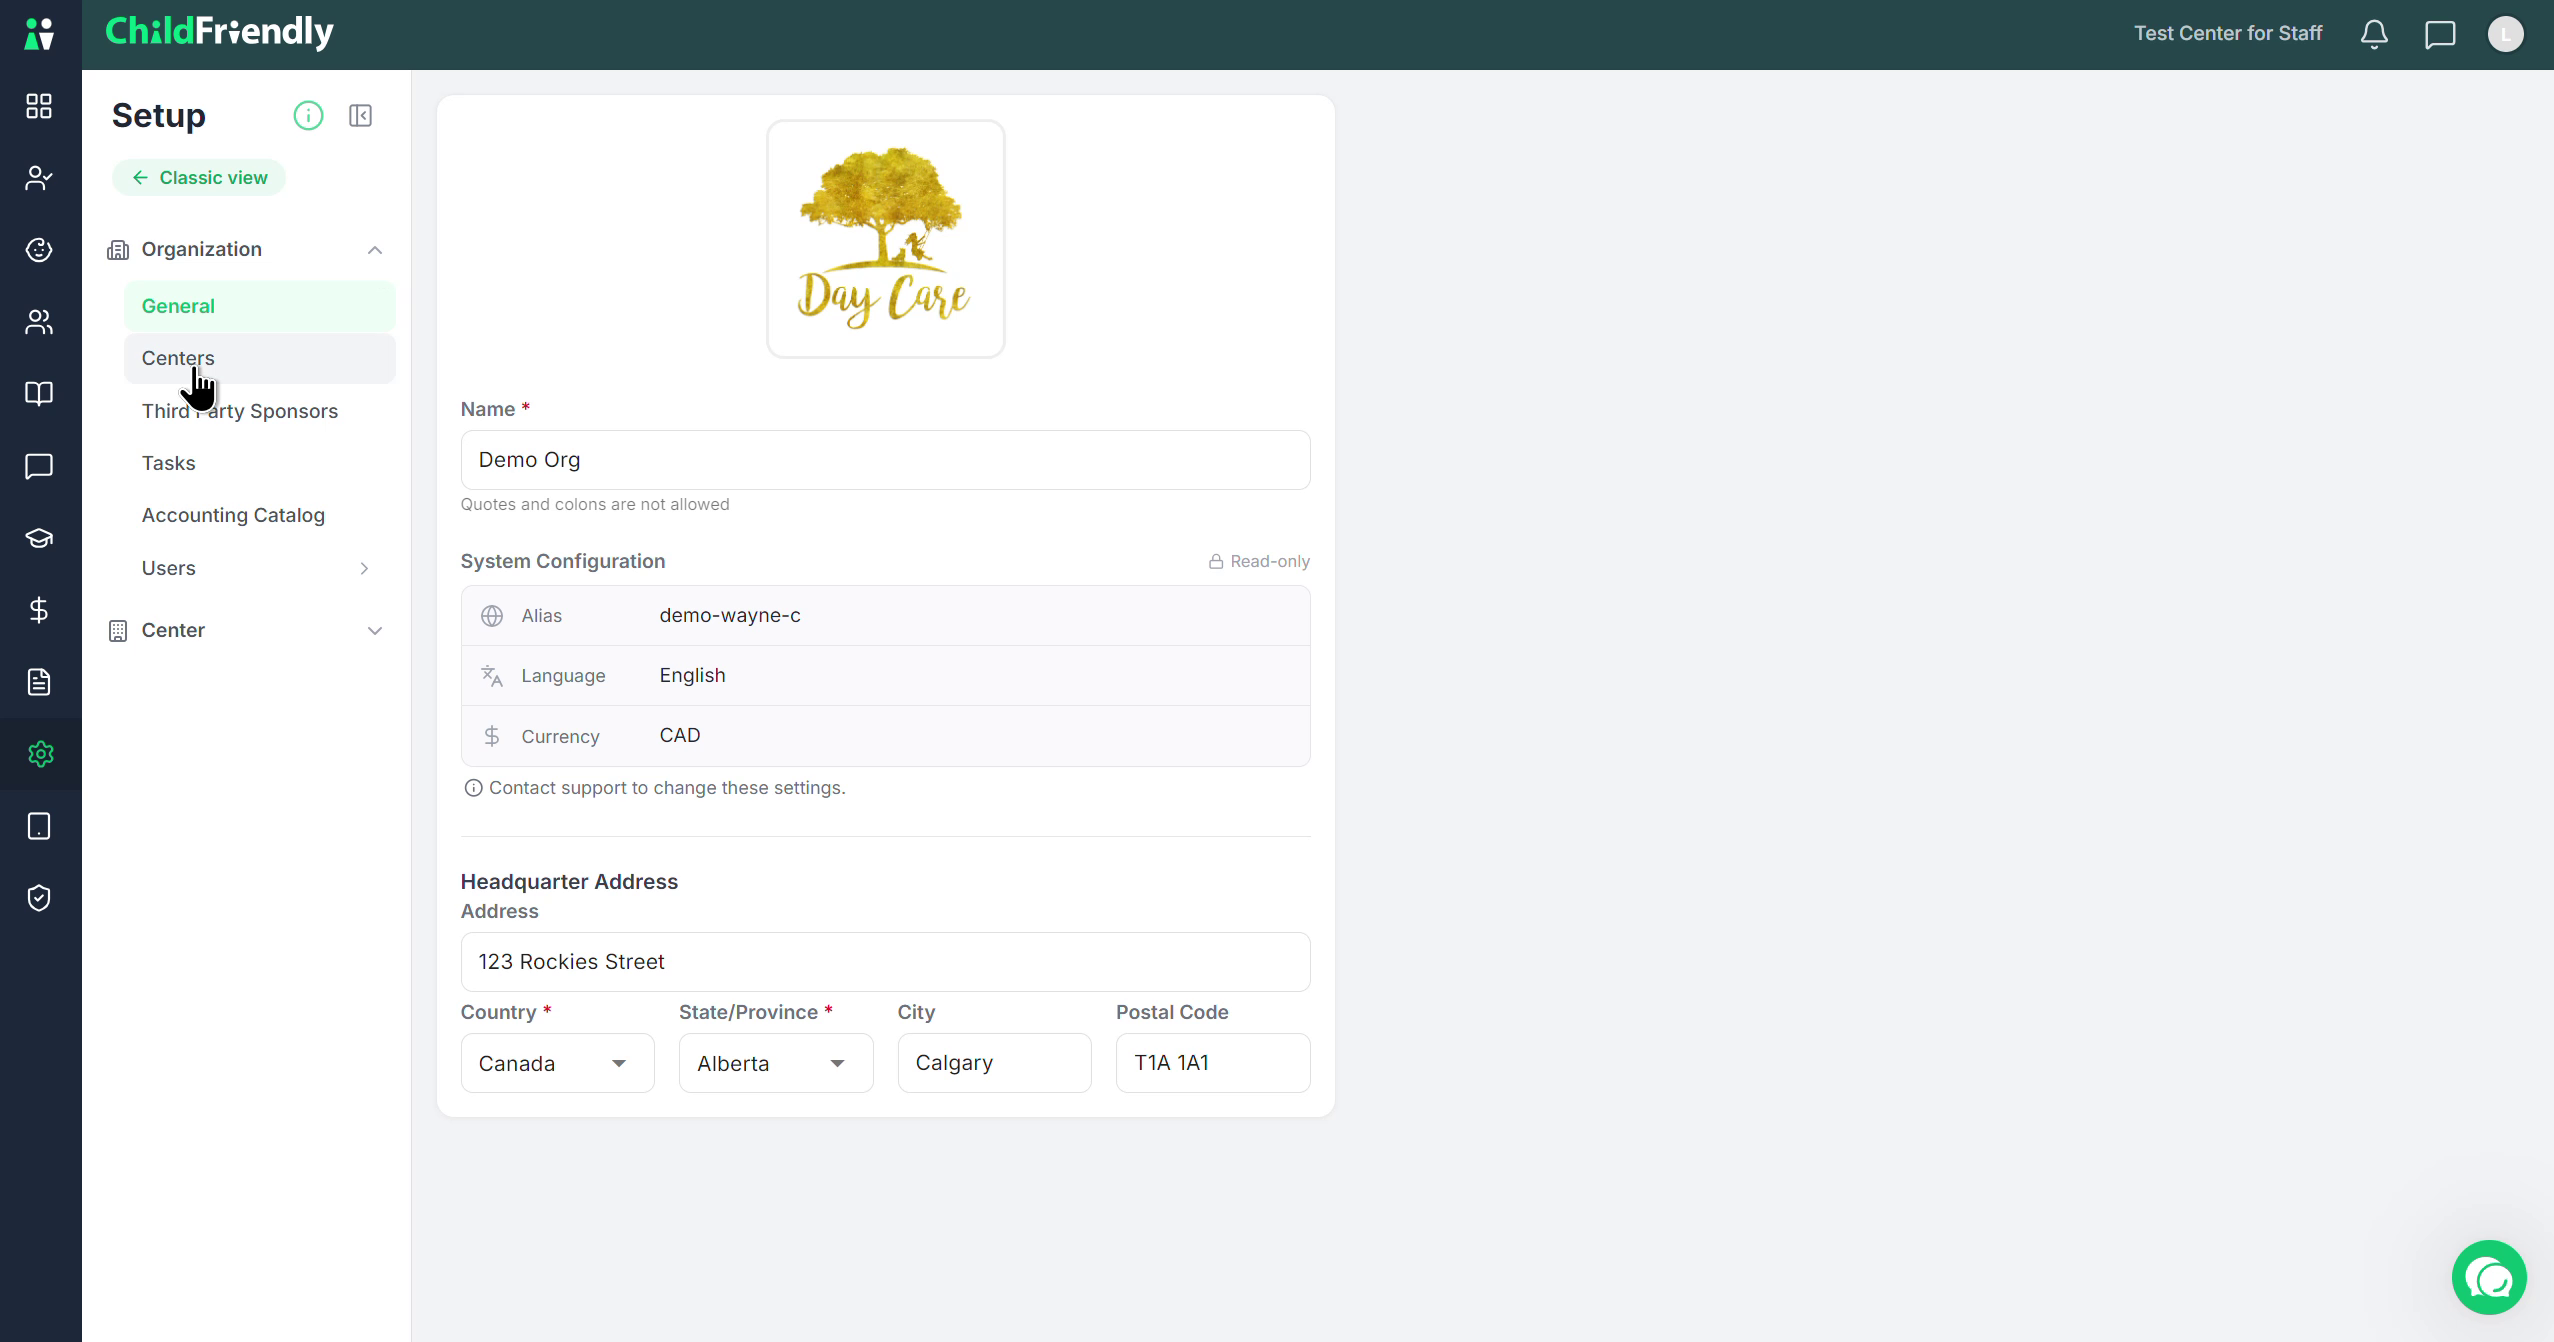
To add or manage a center in Child Friendly, first ensure you are in the Centers subsection under your Organization. In this area, you will see any existing centers already added to your account.
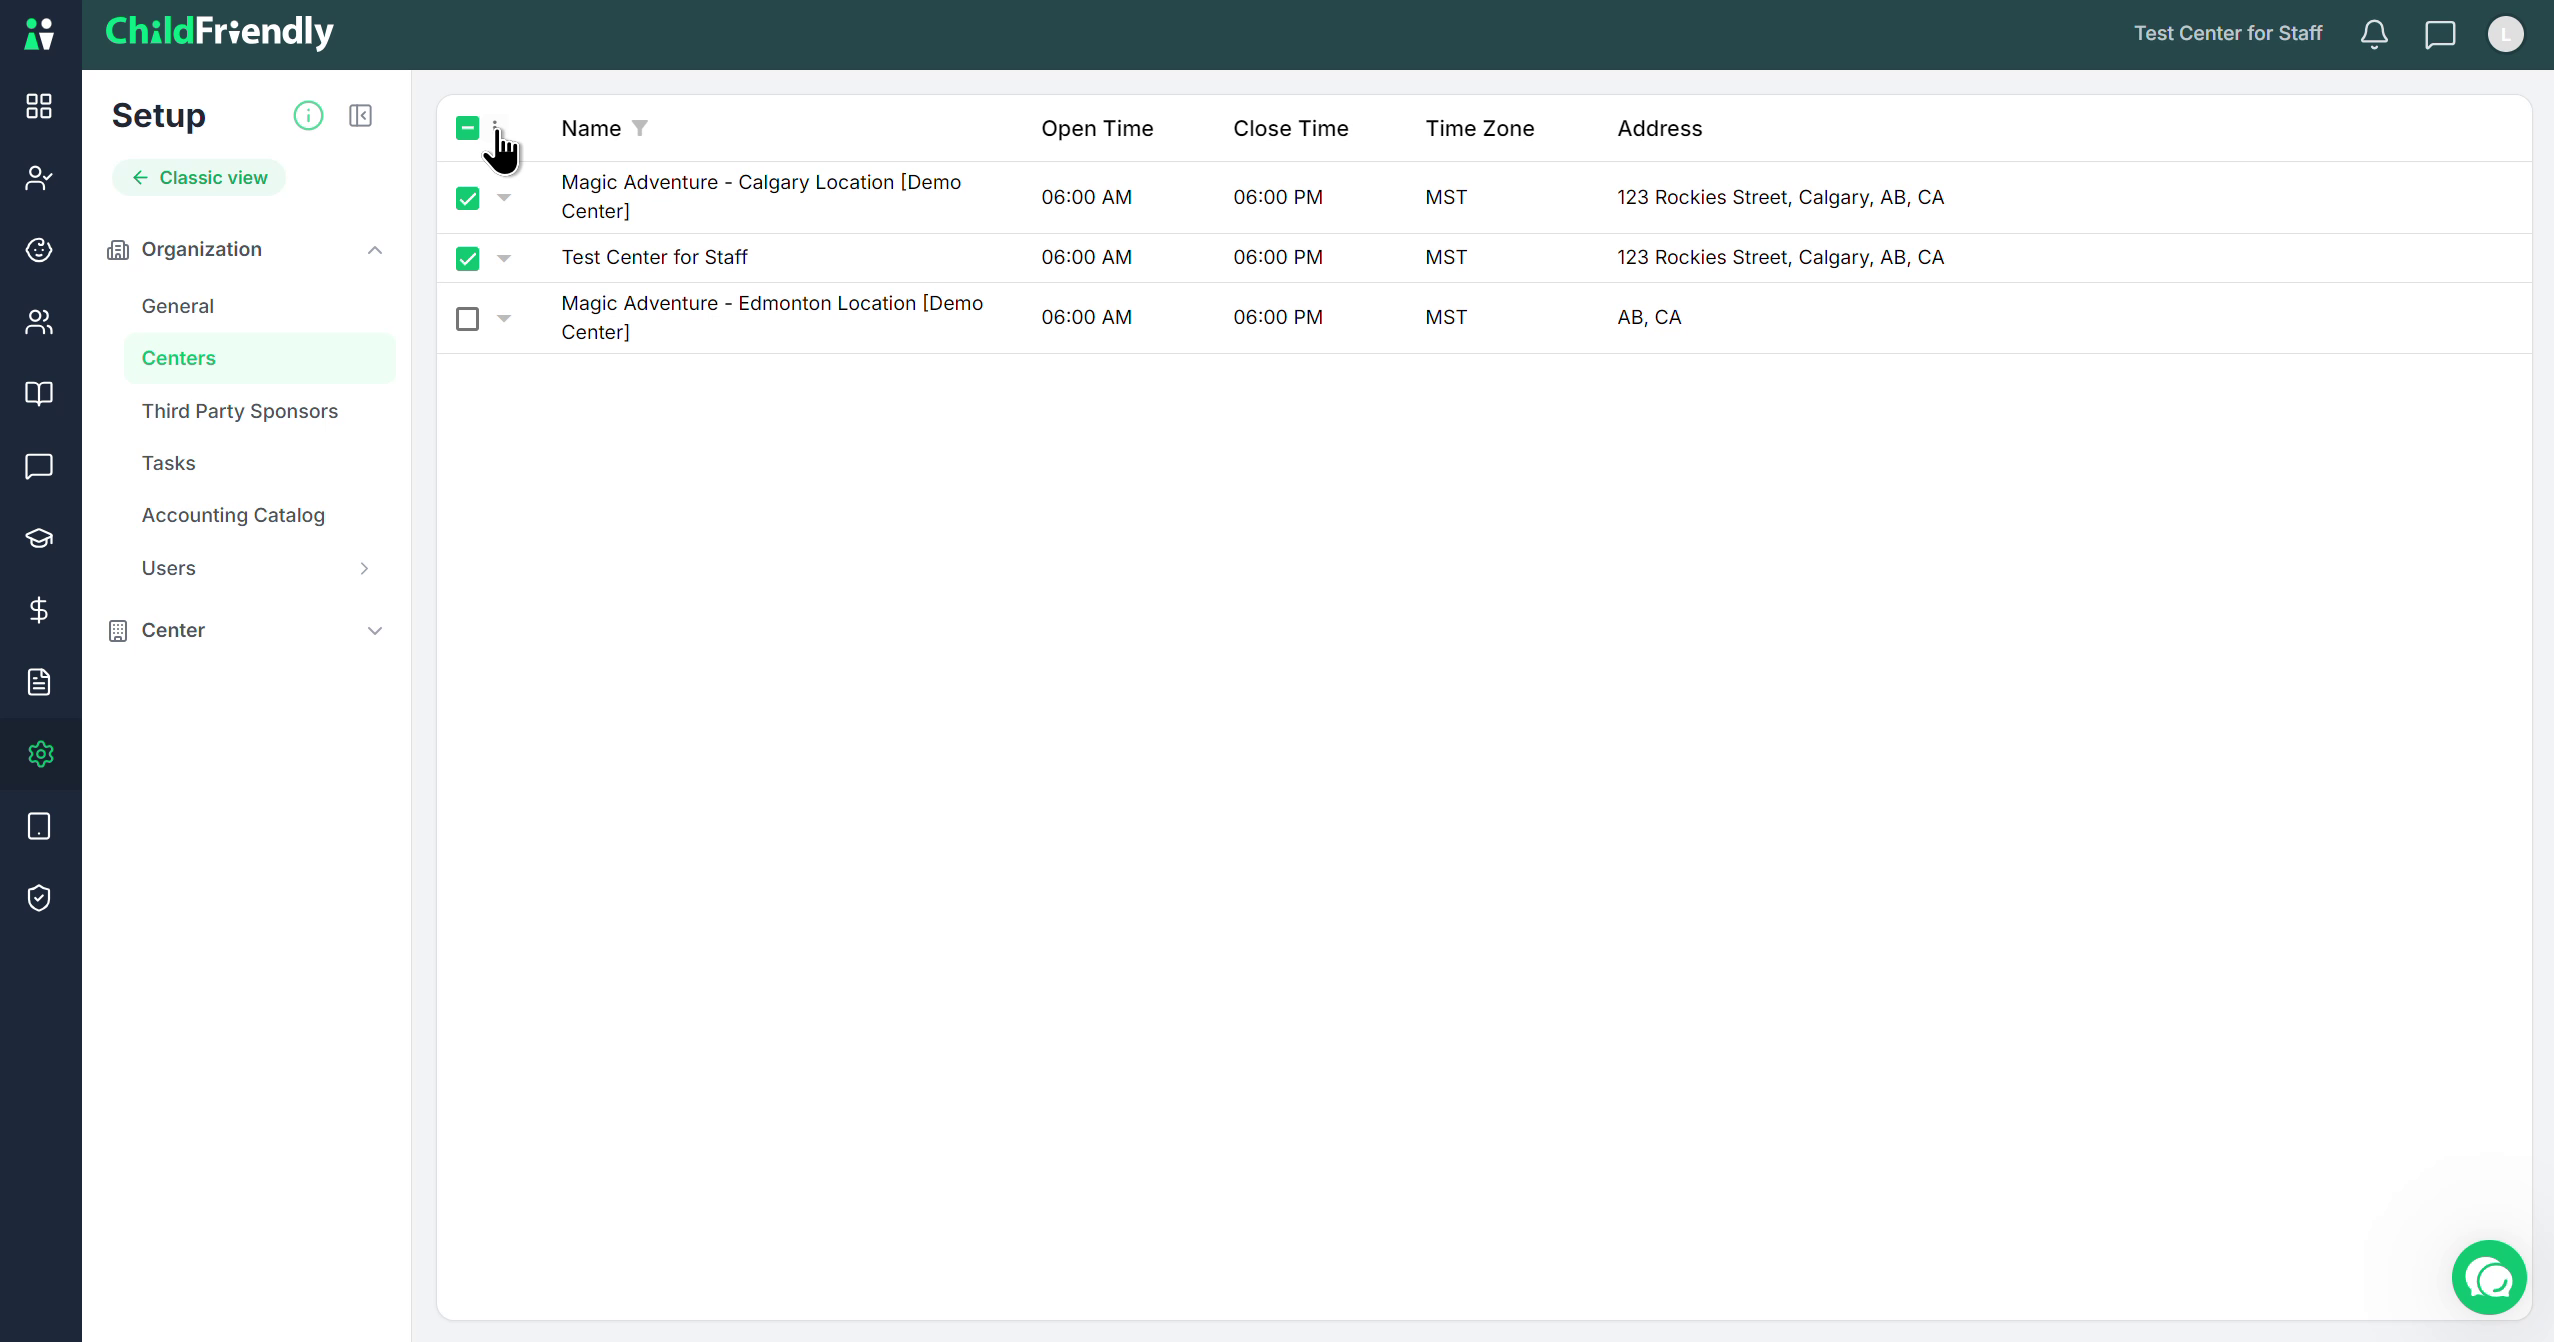
Step 2: Add, Edit, Clone, or Delete a Center
To add a new center, click the plus (+) icon. You will then be prompted to fill in the required details for the new center.
To edit an existing center, click the dropdown arrow beside the center name and update the details displayed.
You can also clone an existing center and then modify the cloned record as needed.
By selecting the icons, the checkboxes, and using the three dots menu, you can remove and permanently delete a center.
Step 3: Open and Review Center Details
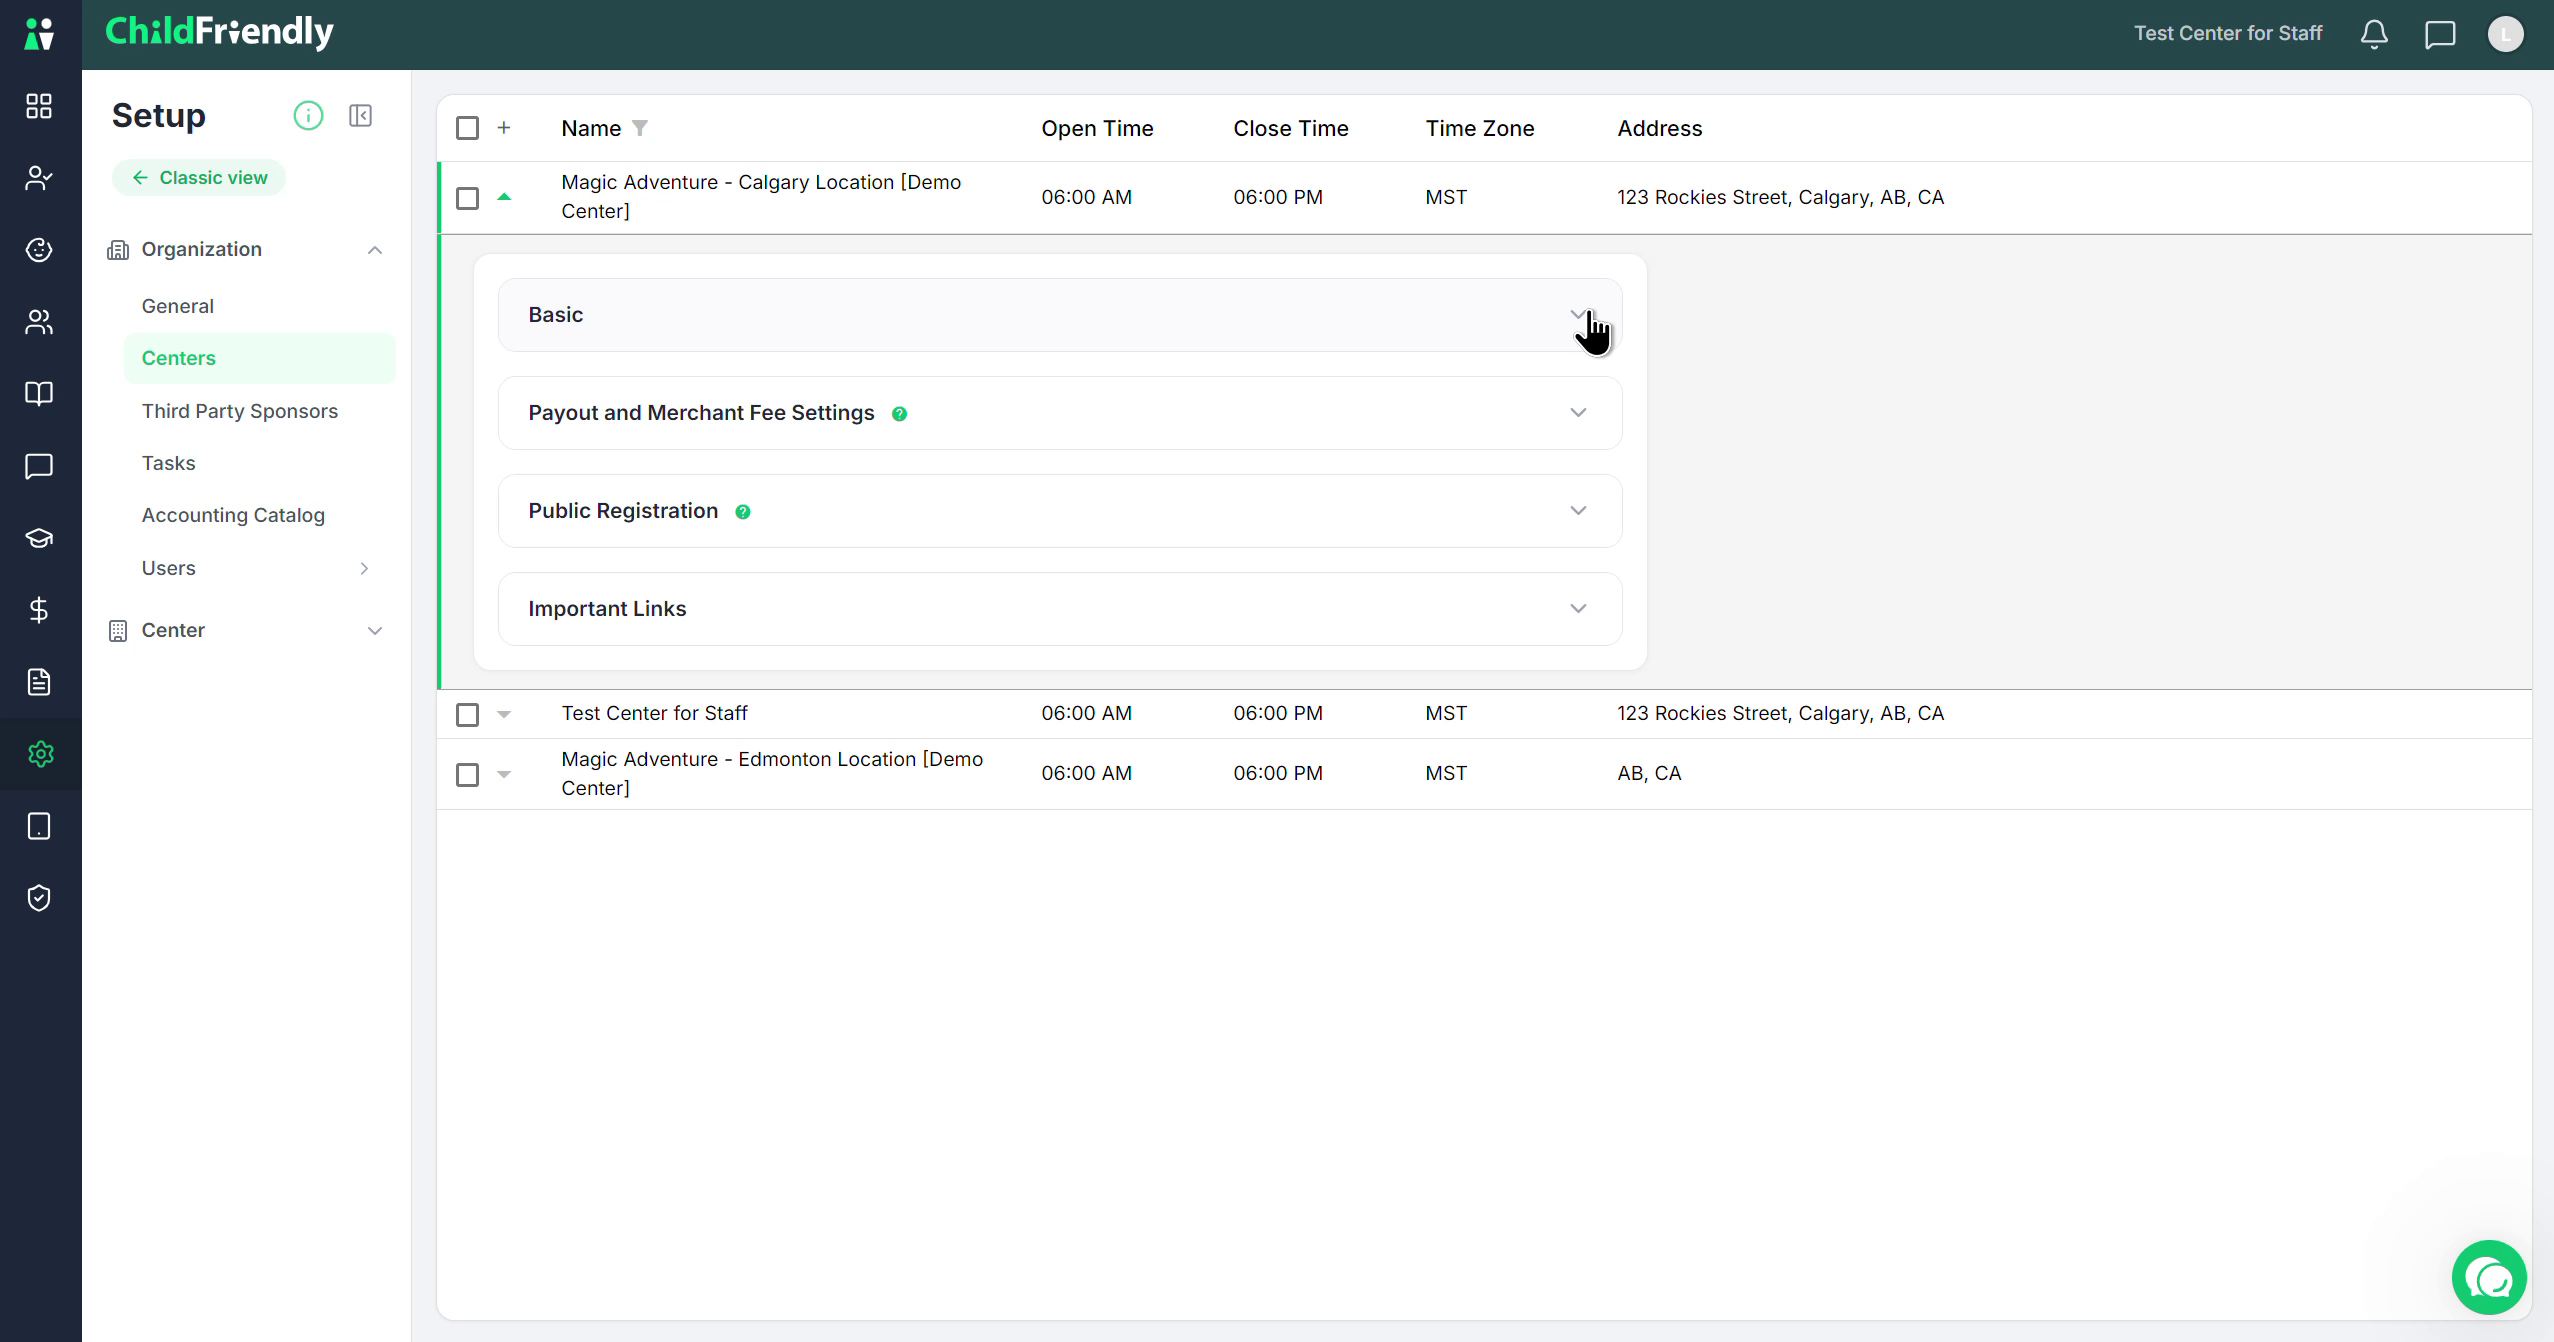
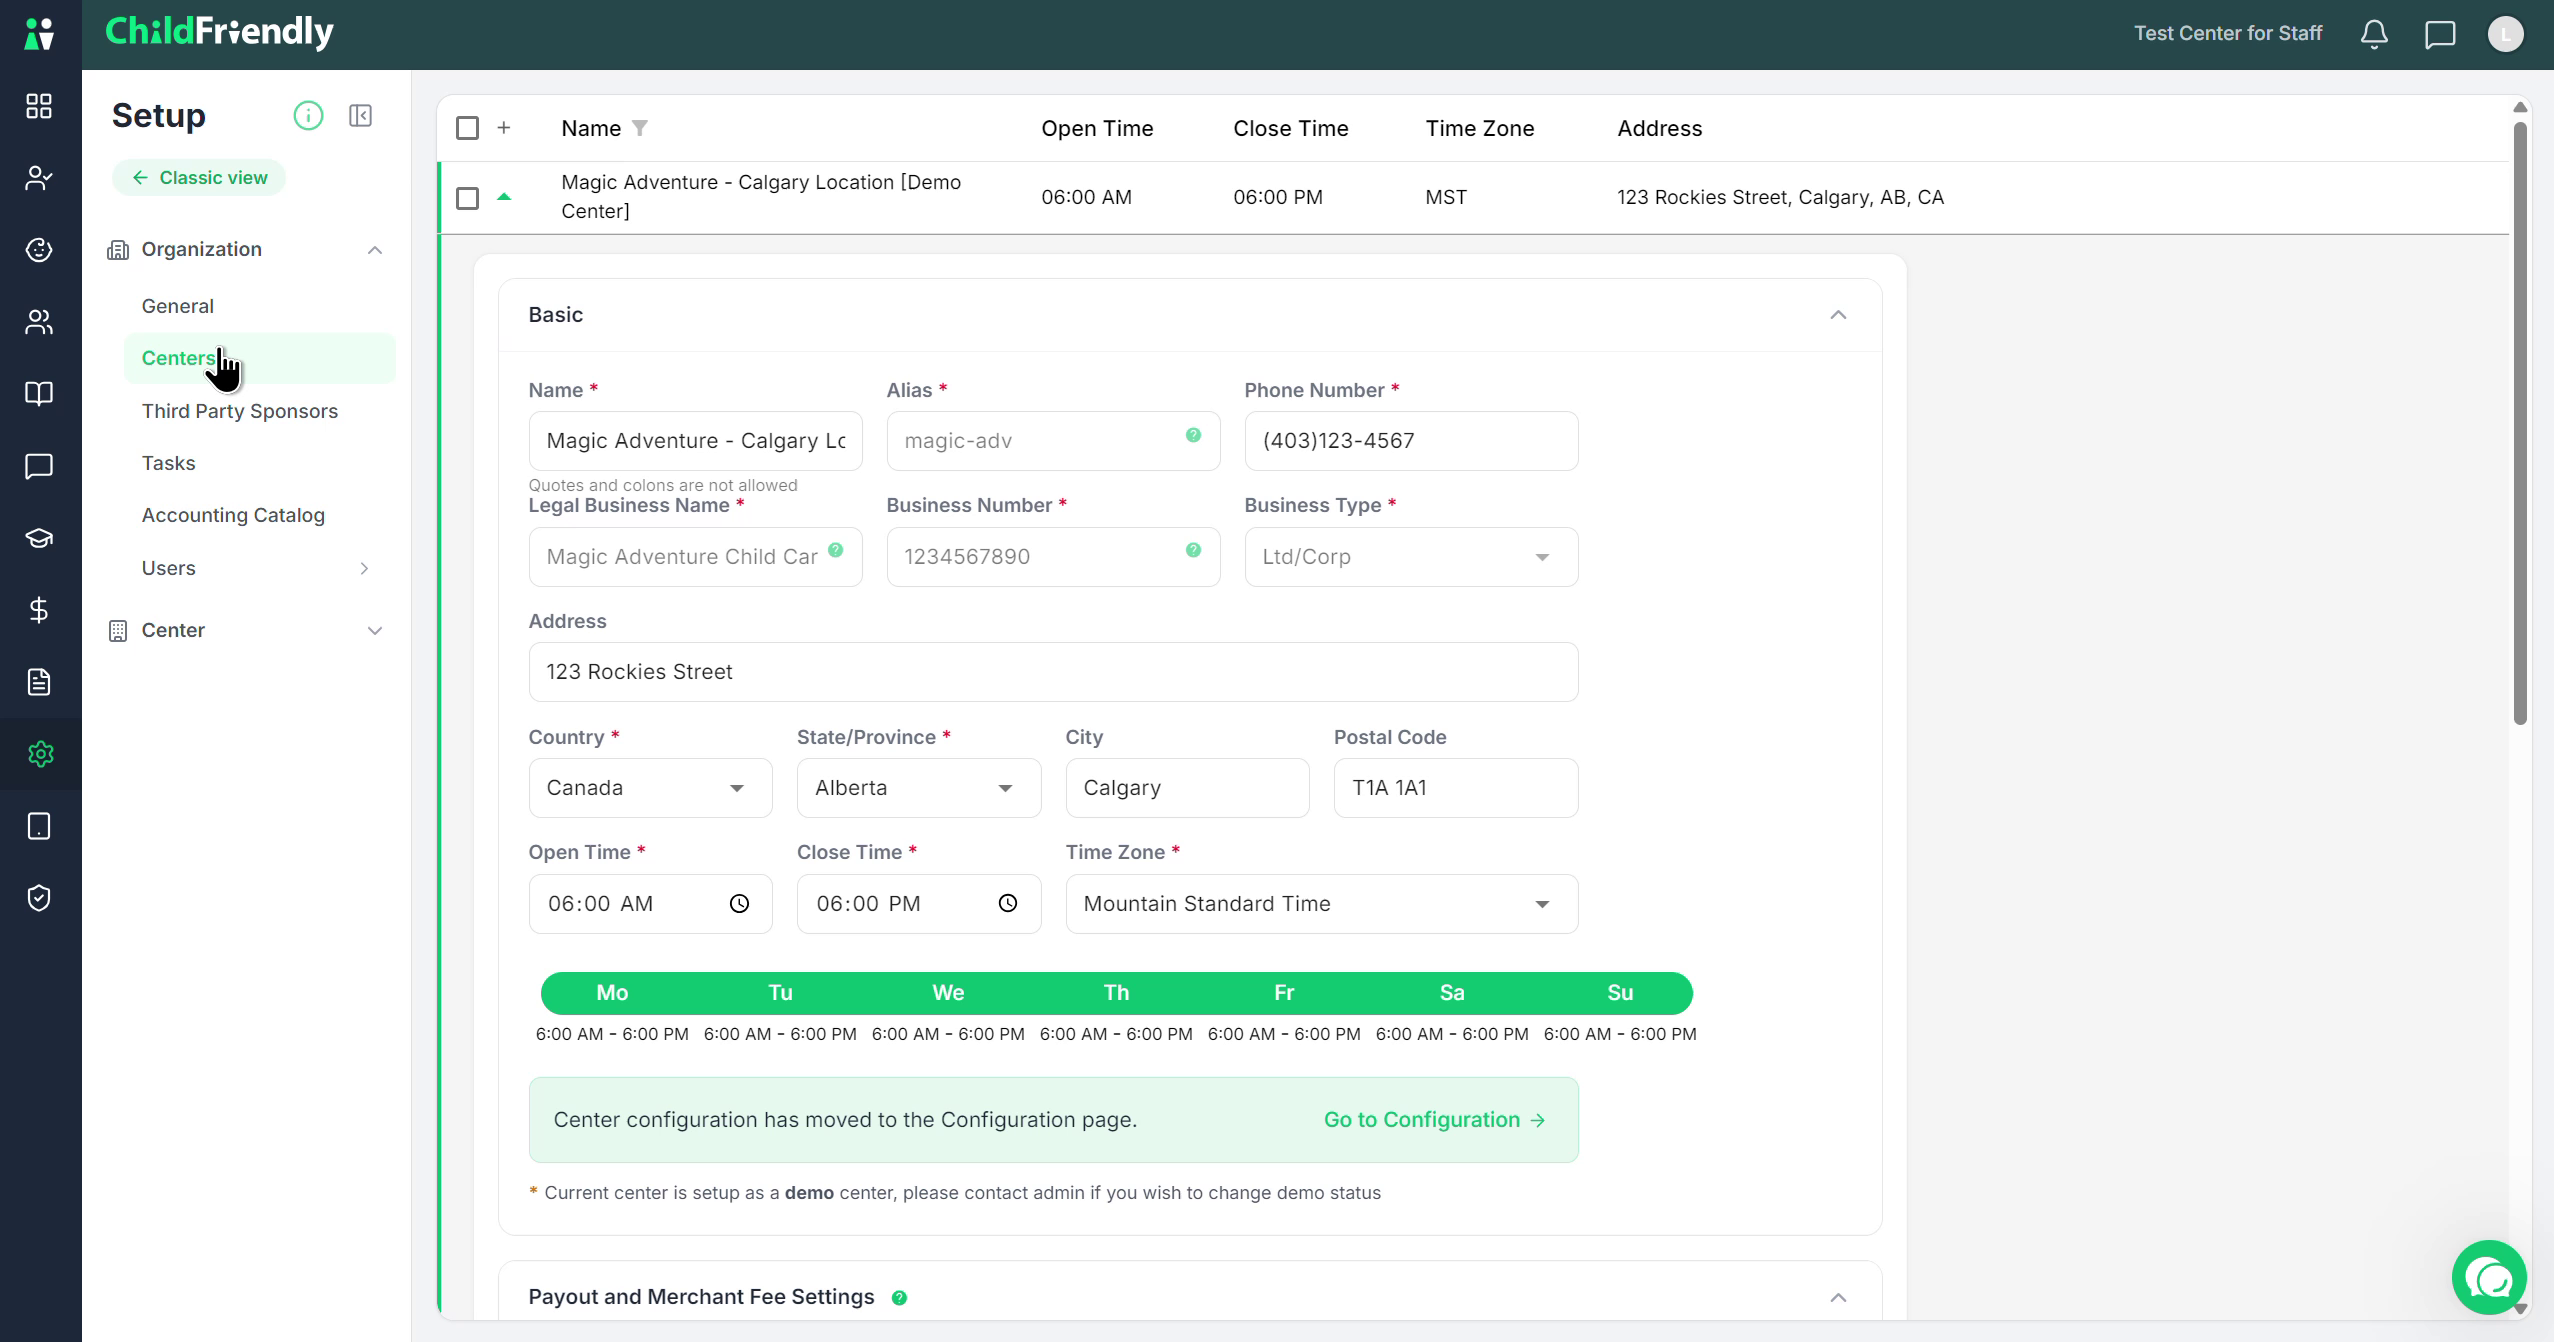
Open a center’s details to review the available configuration fields. As you expand the center view, or if you add a new center, you will see four main sections within the center configuration.
You can expand each section to add or edit the details.
Step 4: Complete Basic Information and Alias Settings
The first section contains basic information for the center, including:
Center name
Phone number
Legal business name
Business number
Business type
You will see small question mark icons beside certain fields; you can hover over and click these icons to see an explanation of what is required for each field.
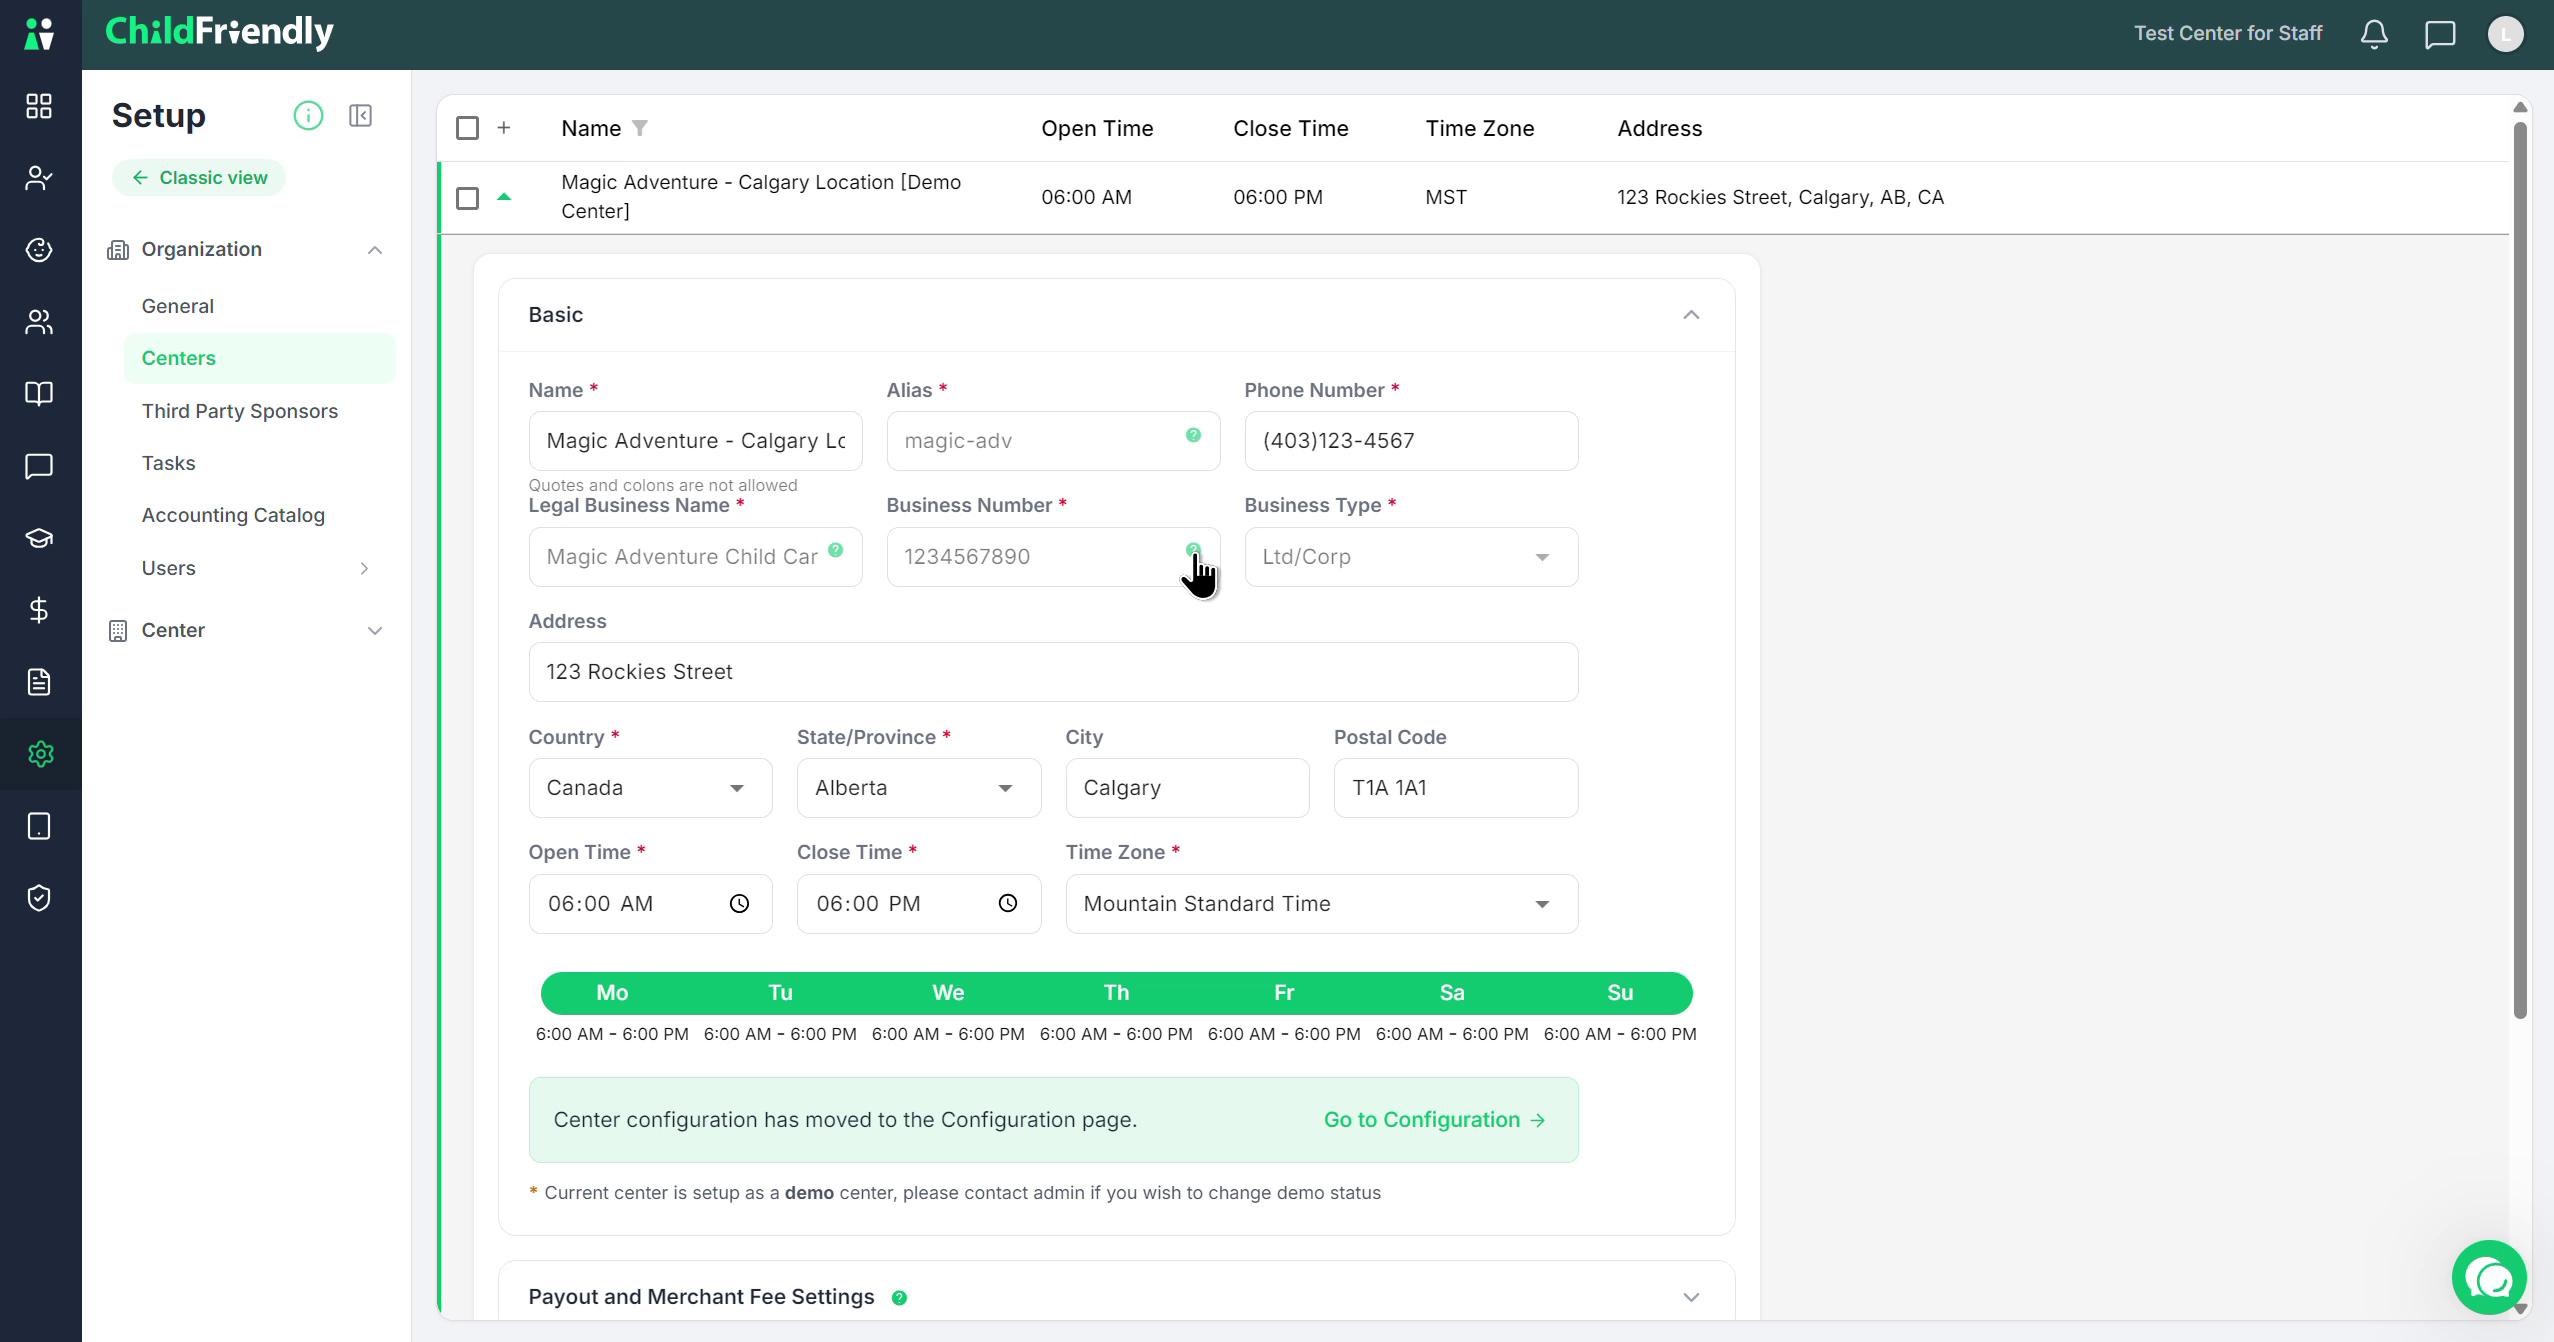
The Alias field controls what is included in the URL that parents use to log in. A full explanation
is provided by clicking the question mark icon. The alias is a shortened name for your center, used in:
The URL parents use to access their portal
Syncing to your accounting software
If you need to change your alias after setup, please contact Child Friendly Support to request the change.
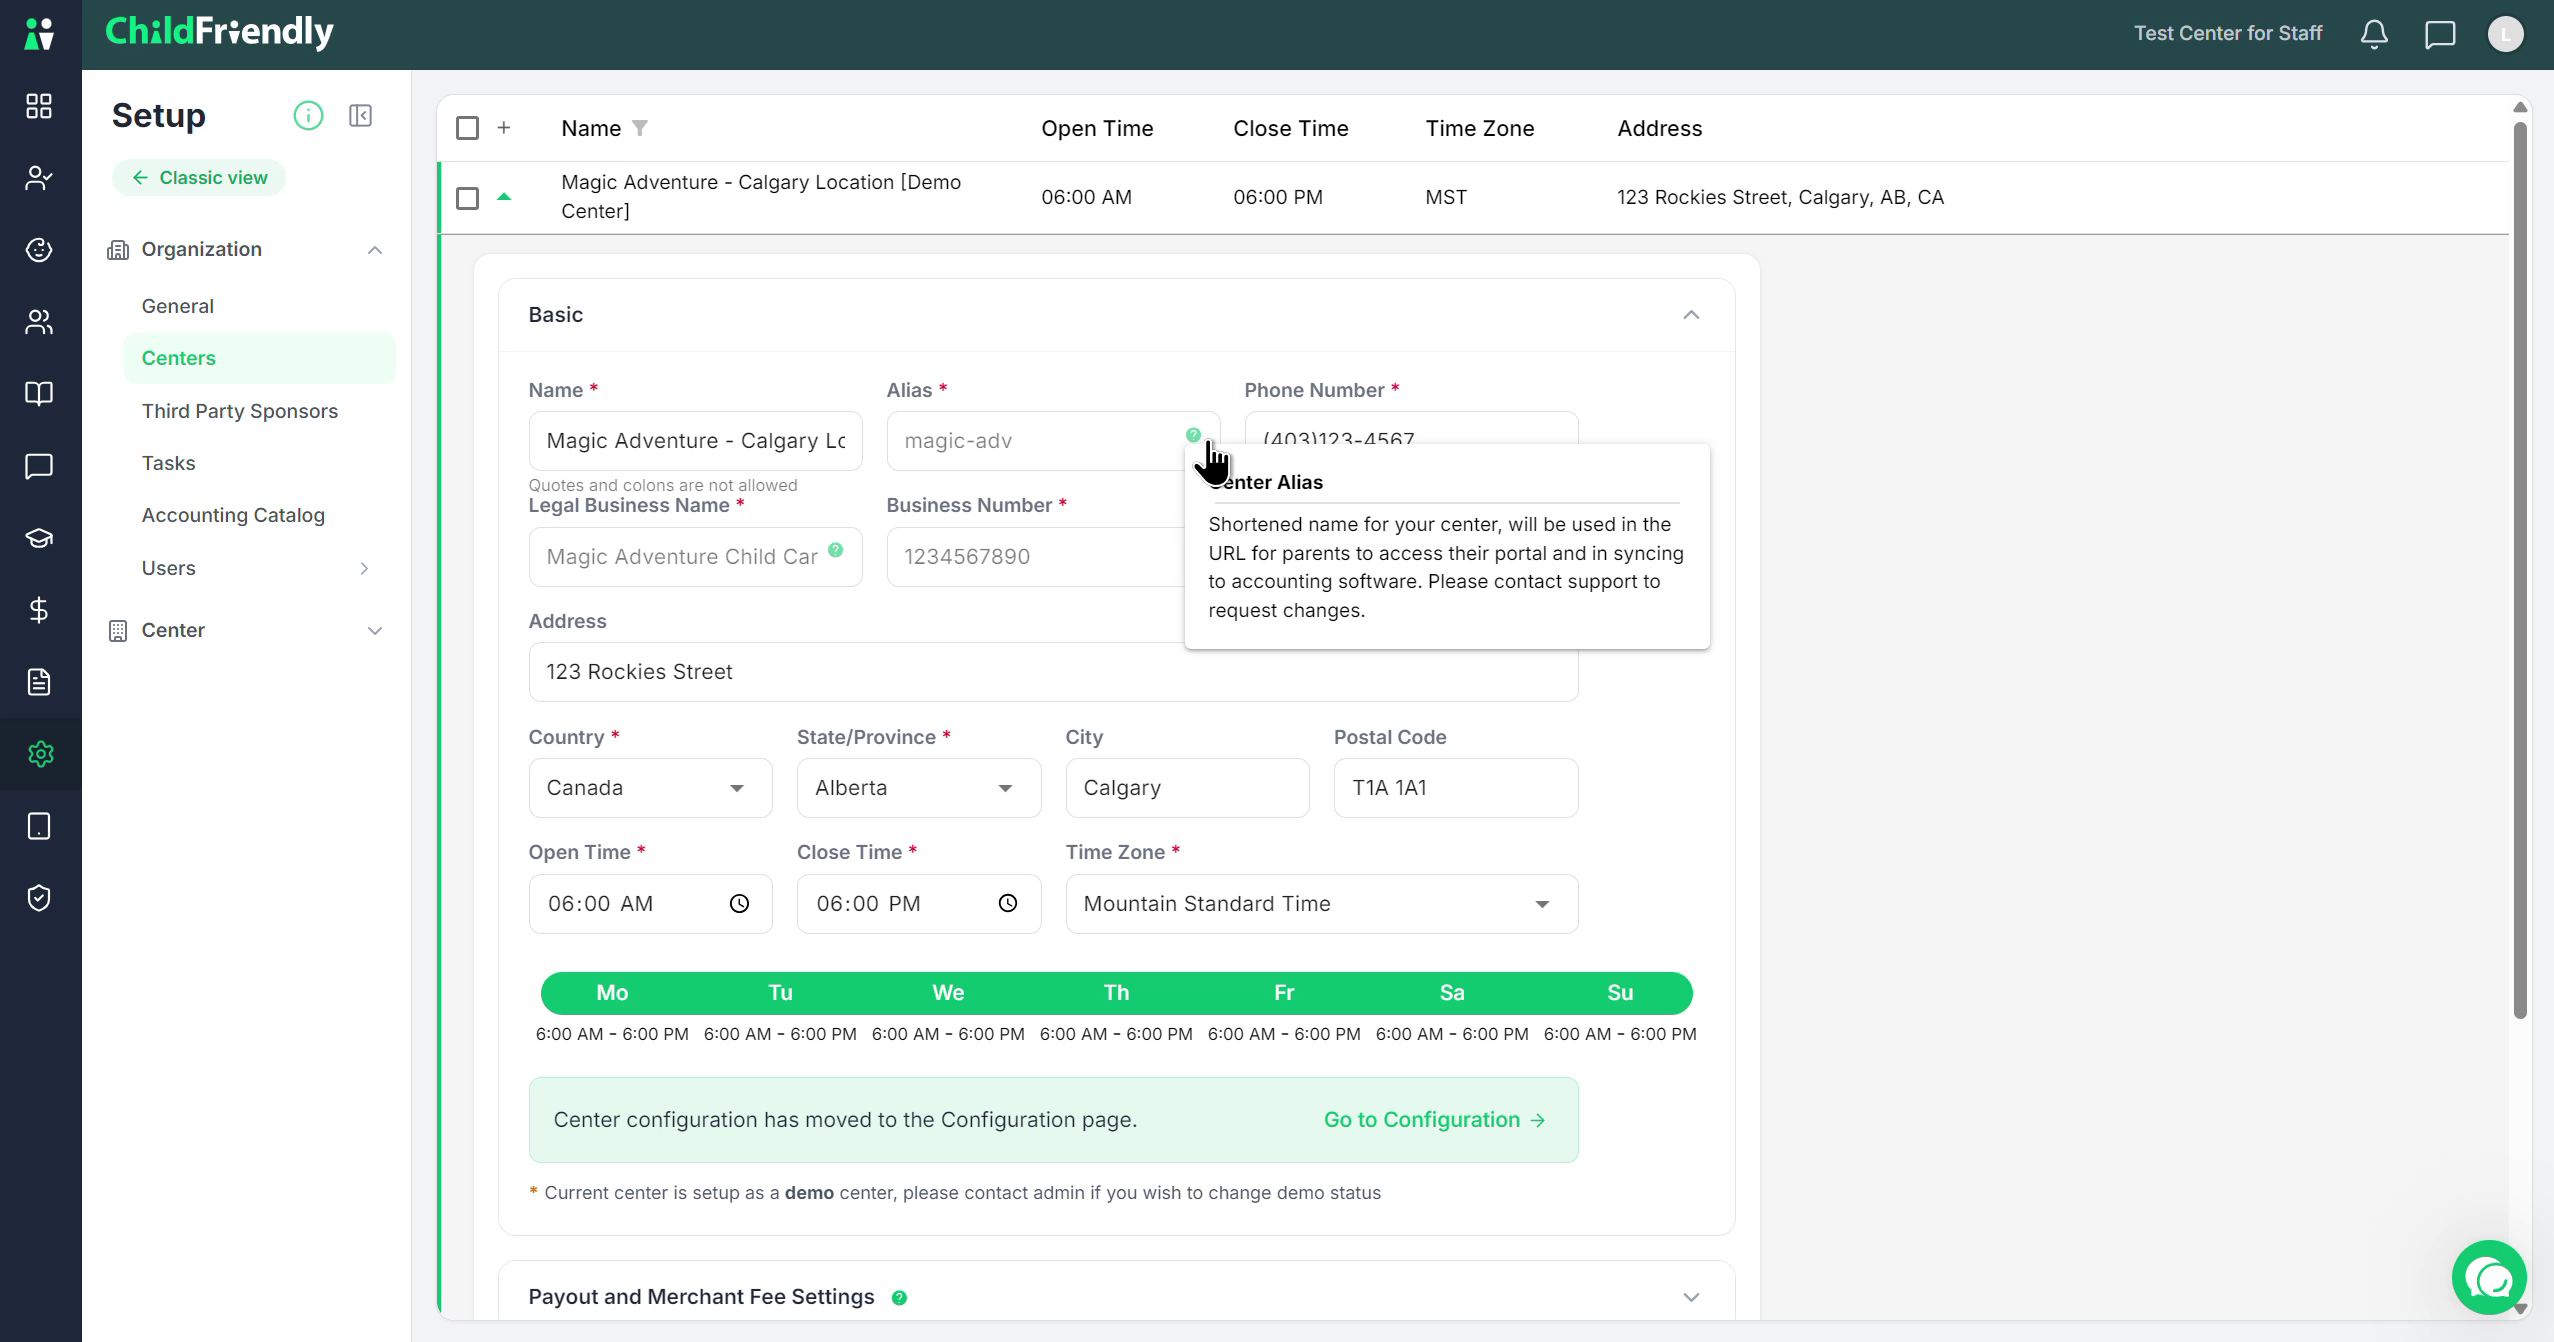
Next, add:
The center’s address details
General open and close times
Time zone
Specific daily open and close times (if they differ from the general hours)
Step 5: Configure Payout and Merchant Fee Settings
After completing the basic information, go to the Payout and Merchant Fee Settings section.
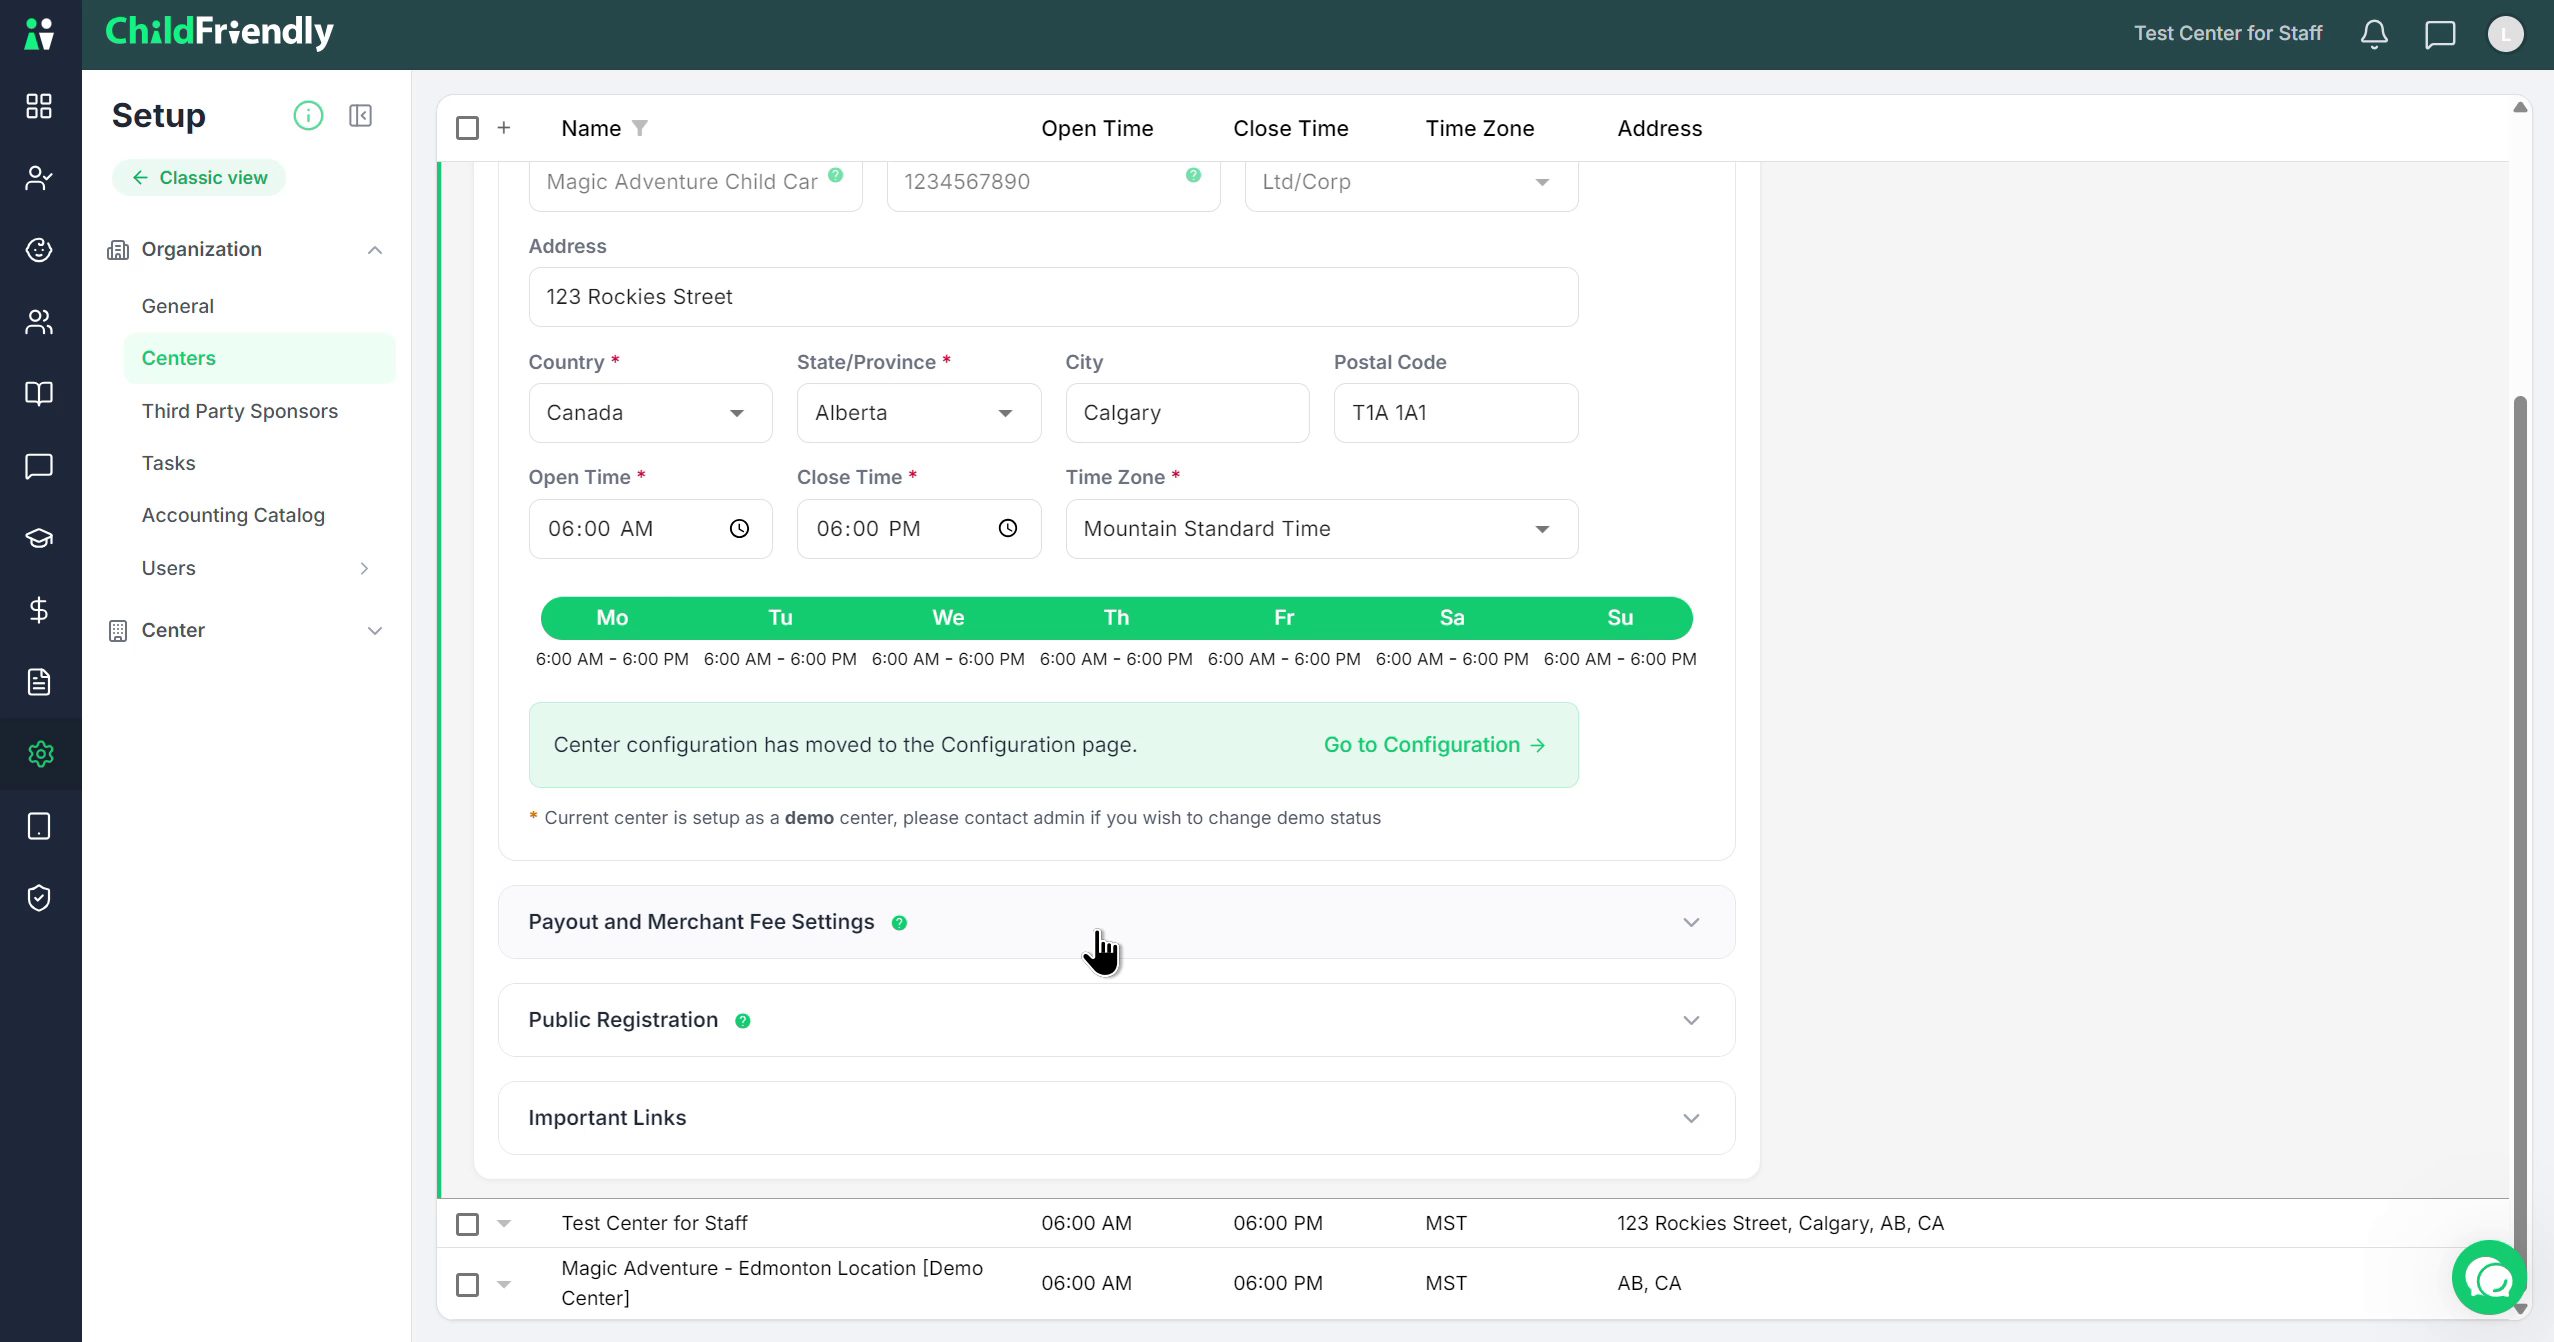
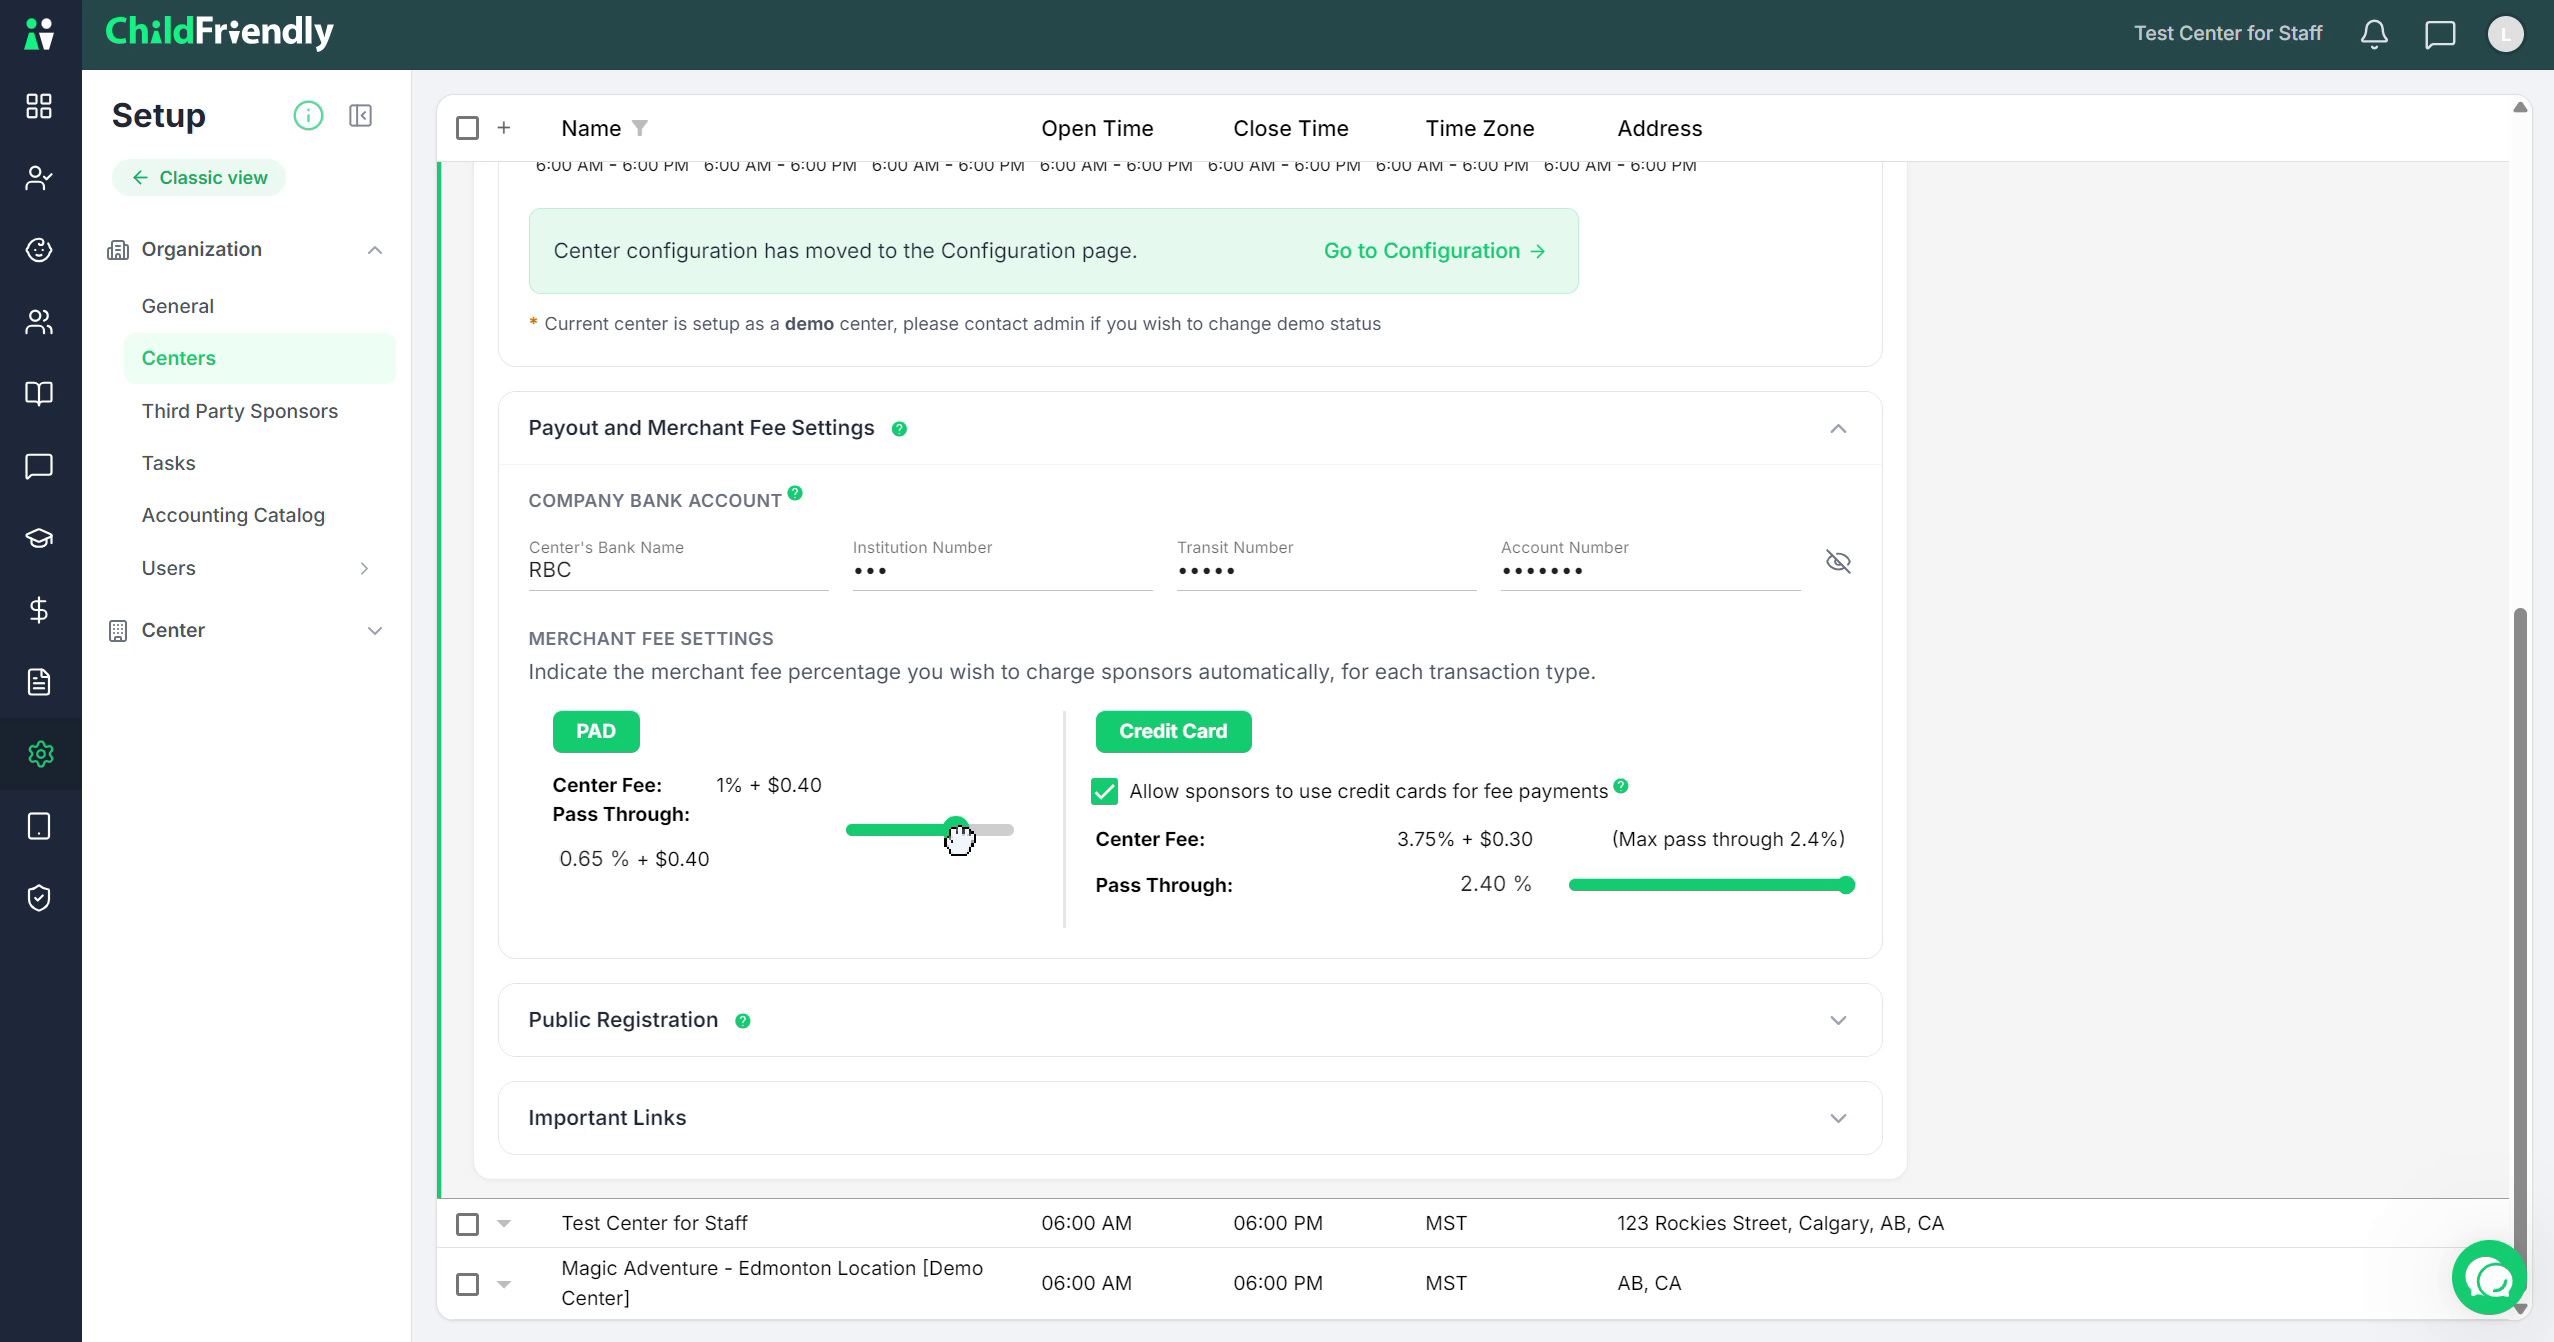
In this section:
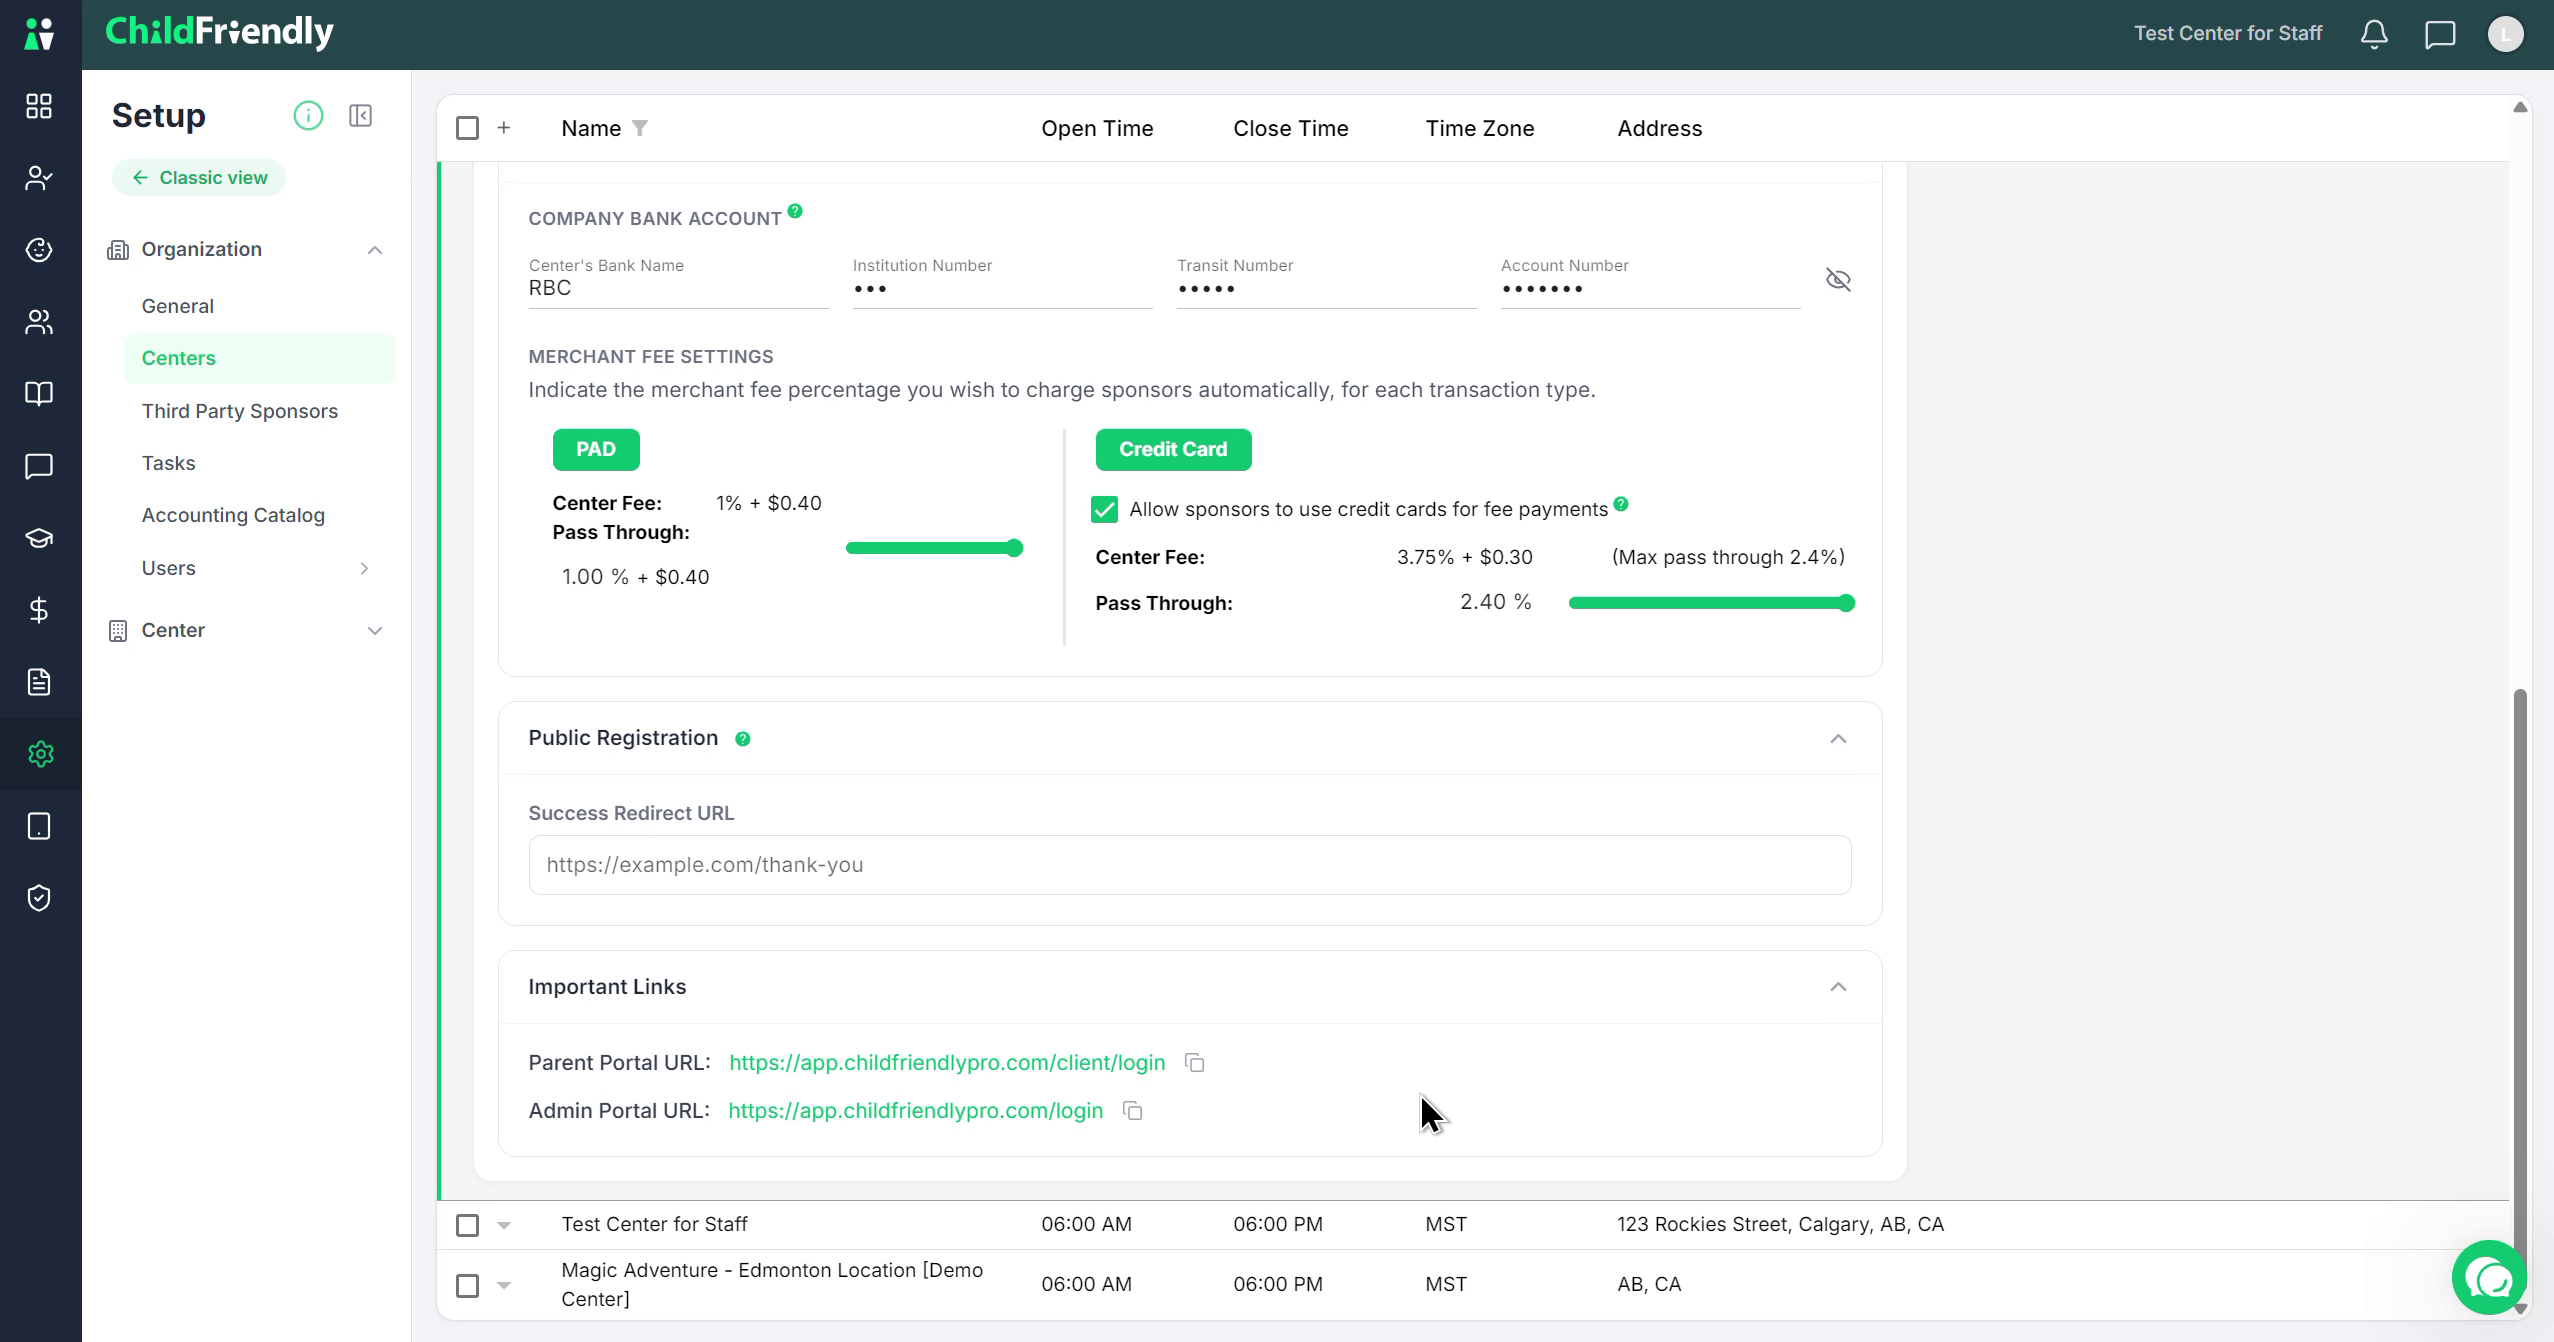
Enter the bank account information for the center. This is where Child Friendly will deposit funds collected from families for their monthly childcare fees.
Configure the merchant fee settings, which determine how transaction fees are handled for online payments.
As with all software that supports online payments, there is a merchant fee for each transaction. In Child Friendly, the fee amount is displayed here and may vary depending on whether the payment is via pre-authorized debit/ACH or credit card.
The merchant fee varies depending on the payment method, such as pre-authorized debit or credit cards. You can choose to pass this fee on to families as a convenience fee, which is automatically added to their invoices. We highly recommend taking advantage of this! Today’s generation of parents expects the ease of quick, automatic online payments, and they are more than willing to pay a small convenience fee for that hassle-free experience.
By passing this fee along, you offer a modern payment process while keeping ChildFriendly virtually free for your center. Plus, because payments are processed directly through the platform, every transaction is automatically recorded, updated, and reconciled to your bank in real-time. You won't have to juggle multiple systems or manually log payments anymore, saving you hours of admin work every single month.
To set the how much of the merchant fee you wish to pass onto parents automatically, simply use the toggle to set the percentage.
Step 6: Set Up Public Registration Redirect
The next section is Public Registration. Again, there is a question mark icon for more information.
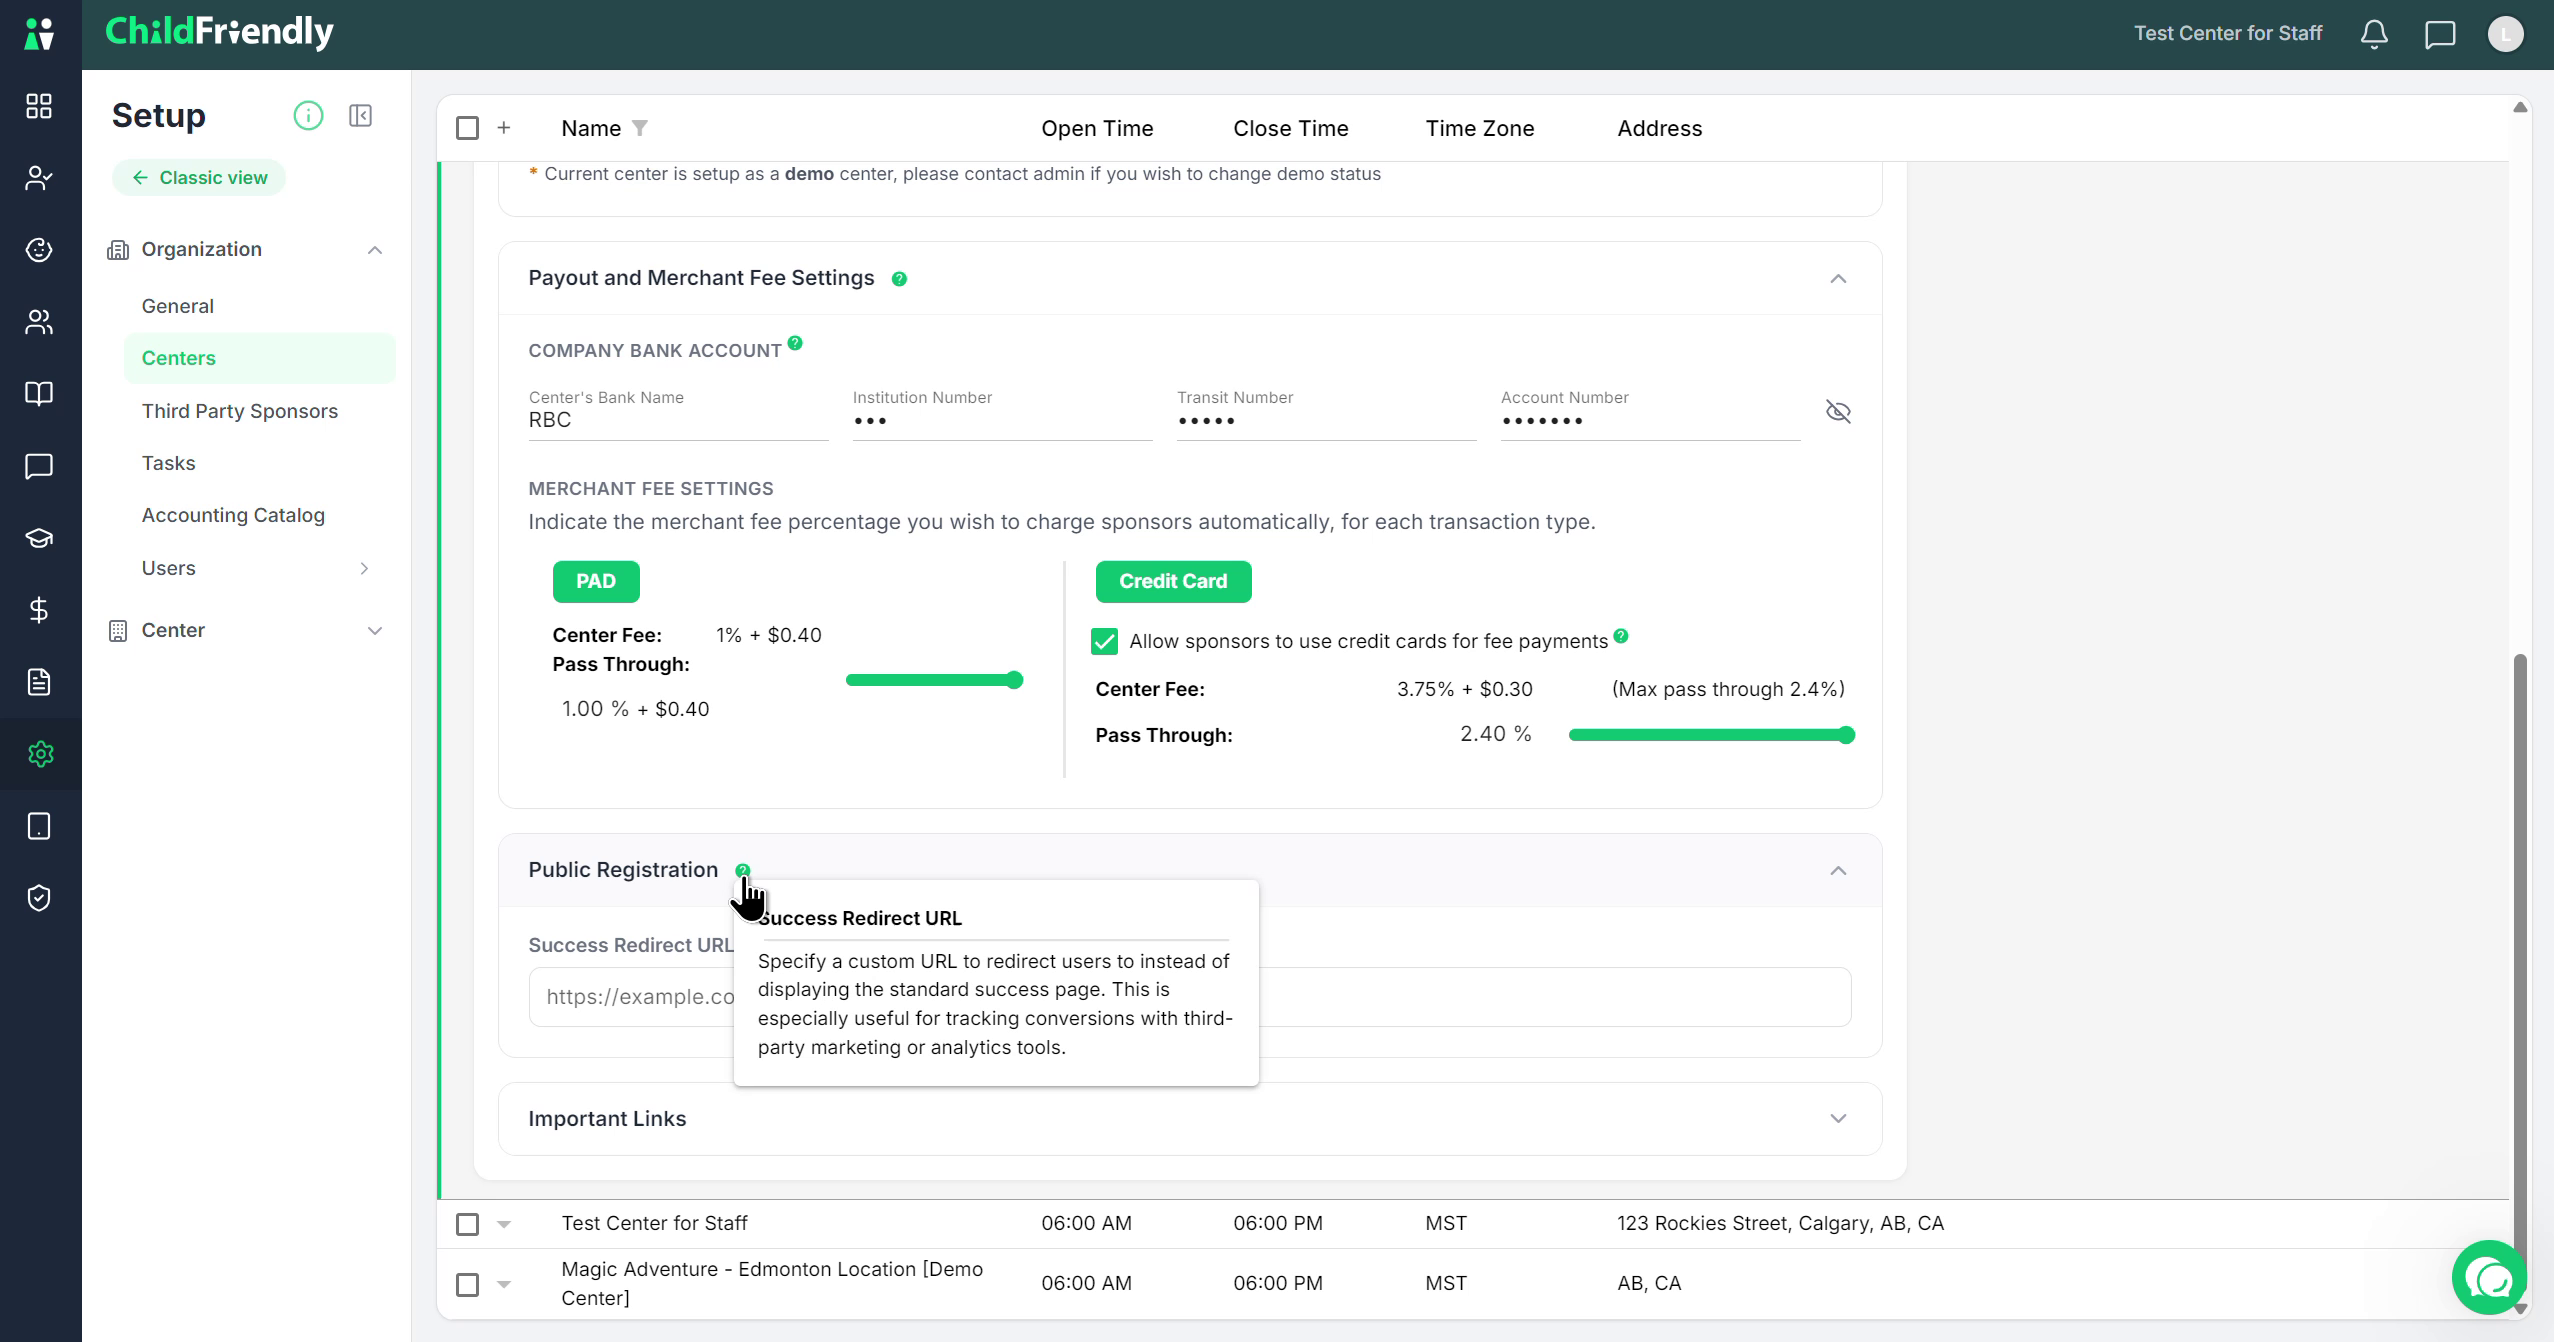
This section allows you to specify a custom URL to redirect users to after they complete online registration, instead of showing the standard success/thank-you page.
This is especially useful for:
Tracking conversions with third-party marketing tools
Tracking registrations with analytics tools
Step 7: Access and Use Center Portal Links
The last section contains simple links for:
The Parent Portal
The Admin Portal
You can copy these links and use them wherever needed (e.g., website, emails, marketing materials).
Parents can use the Parent Portal link in a browser, or they can download and use the mobile app.
Admin users on a computer will use the Admin Portal link to access their admin portal.
And that completes the setup of individual centers at the organization level.
Step 8: Review Centers at the Center Level and Proceed
Later, there will be additional details to configure for each center at the center level, which you will manage in the next section of the platform.
Here, as you expand the menu, you will see where you can select each center that you added under your organization. These centers will match exactly to the ones configured in the Organization > Centers subsection.
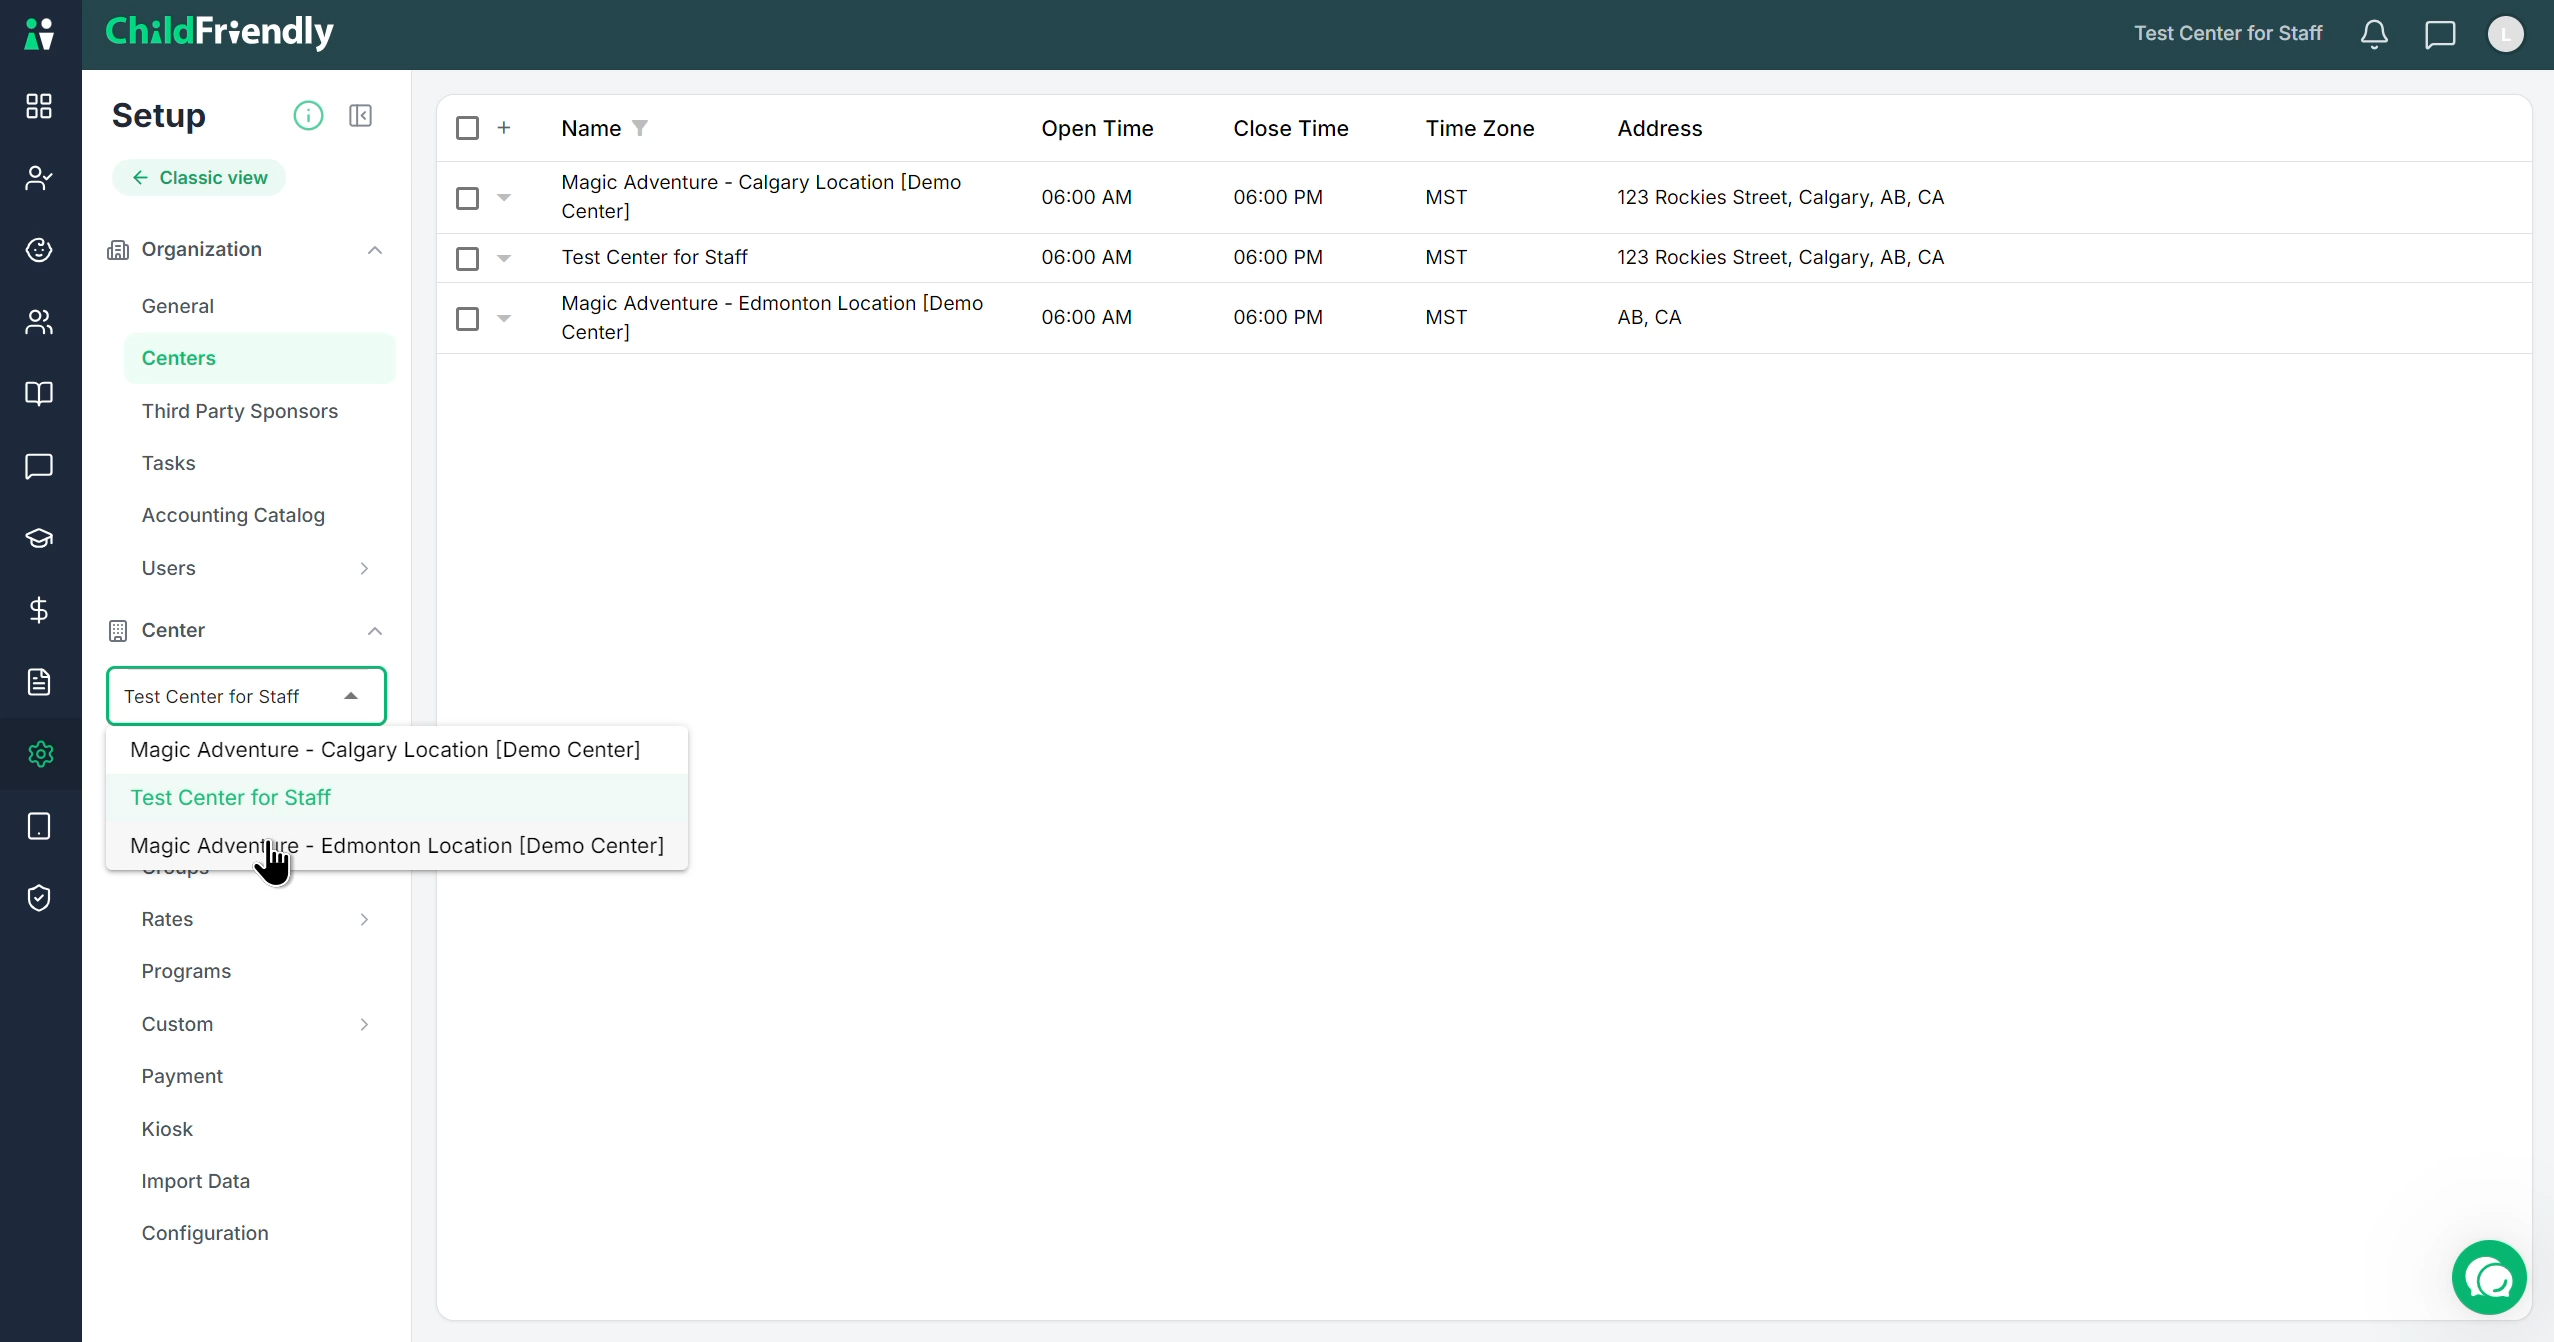
While you can select your center and set it up now, we highly recommend finishing your broader organization settings first. To do that, head over to the next onboarding video, which focuses on our next category: third-party sponsors.