How Educators Administer Regular Meds
This guide provides instructions for room educators to effectively use the ChildFriendly dashboard to manage scheduled medications.
Last updated 3 months ago
Step 1: Access the Dashboard
Begin by selecting the Dashboard icon, located at the top of the left sidebar, to access the main dashboard.

The dashboard displays three main tabs for room educators:
Regular Meds
School RSVP
Meals
(The remaining tabs are only accessible by Administration)
Step 2: Navigate to the Regular Meds Tab
Select the Regular Meds tab.

This tab lists children who have medications scheduled for staff administration at specific times (such as a course of antibiotics).
Key points:
Emergency medications (like EpiPens or inhalers) are managed in the child’s journal, not in this Regular Meds tab.
Only admins or parents (via the parent portal) can add or update medication permission records.
Step 3: View Medications Scheduled Today
Within the Regular Meds section, open the Upcoming tab to review all medications that are scheduled for the current day.
Each entry displays:
Child’s name
Medication name
The child’s group within the center
Scheduled administration time
Review this list each morning to ensure you’re aware of children needing medication that day.
Step 4: Filter Medications by Group
To view only children in your own group:
Select the Group Filter icon.

Click the drop-down arrow.

Choose your group.

This will show only those children in your group with regular medications (e.g., only “Ladybugs” group members).

Step 5: Review Medications Due at the Current Time
To check medications currently due:
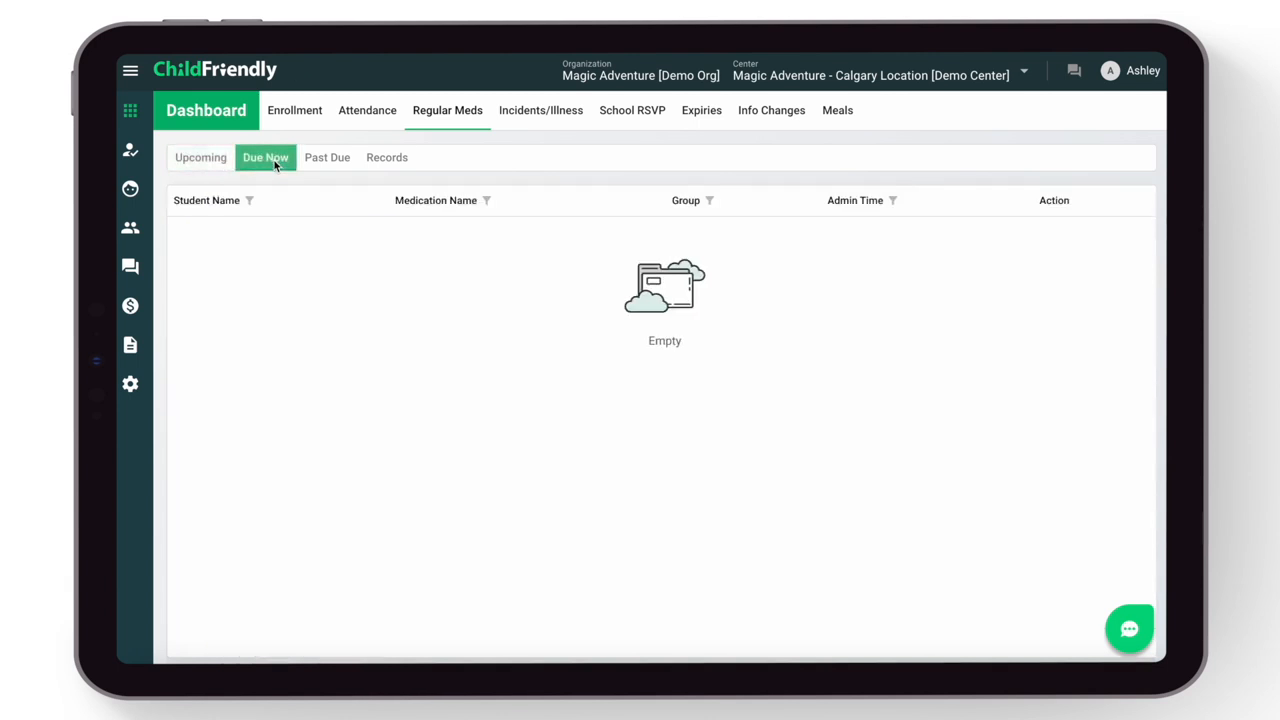
Open the Due Now tab.
Confirm whether any child is scheduled for medication at the present time.
Step 6: View a Child’s Medication Details
To see full details for a specific child:
In the medication list, click the child’s name.
In the child profile, scroll down to the Health section.

Find the Medication header.
Here, you can review:
All medications assigned to the child
Scheduled times for each
Detailed administration instructions
End dates for courses, if applicable
For example, if Angie’s medication ends on October 15, it won’t appear in the dashboard after that date.
To return, close the child’s file with the side arrow.
Step 7: Record Administered Medication
After giving a medication, log it as completed:
In the Regular Meds list, find and select the medication entry.
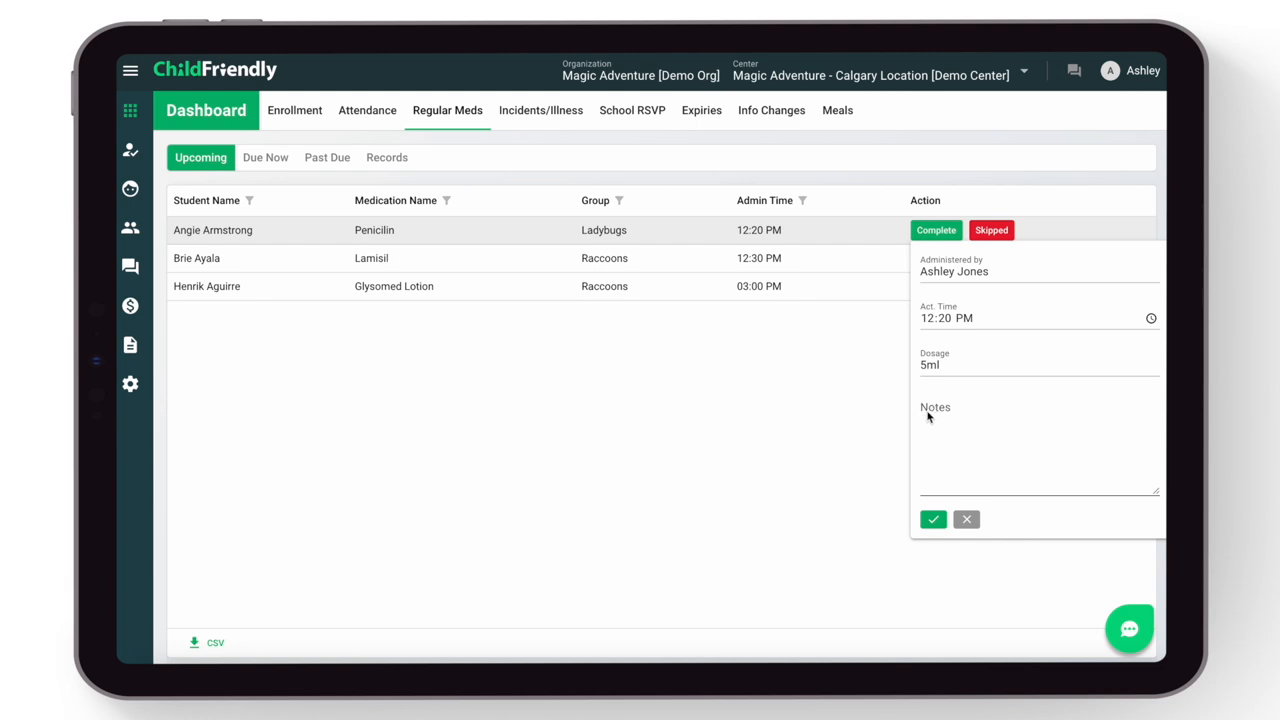
Click Complete.
Next:
Enter the following:
Your name in Administered By
The actual administration time
Dosage given
Any relevant notes
Click the green check mark to confirm completion.
Step 8: Mark a Medication as Skipped (If Not Given)
If a medication wasn’t administered, it must be marked Skipped with a reason (e.g., early pick-up):
Locate the entry and select Skip beside the child’s name.
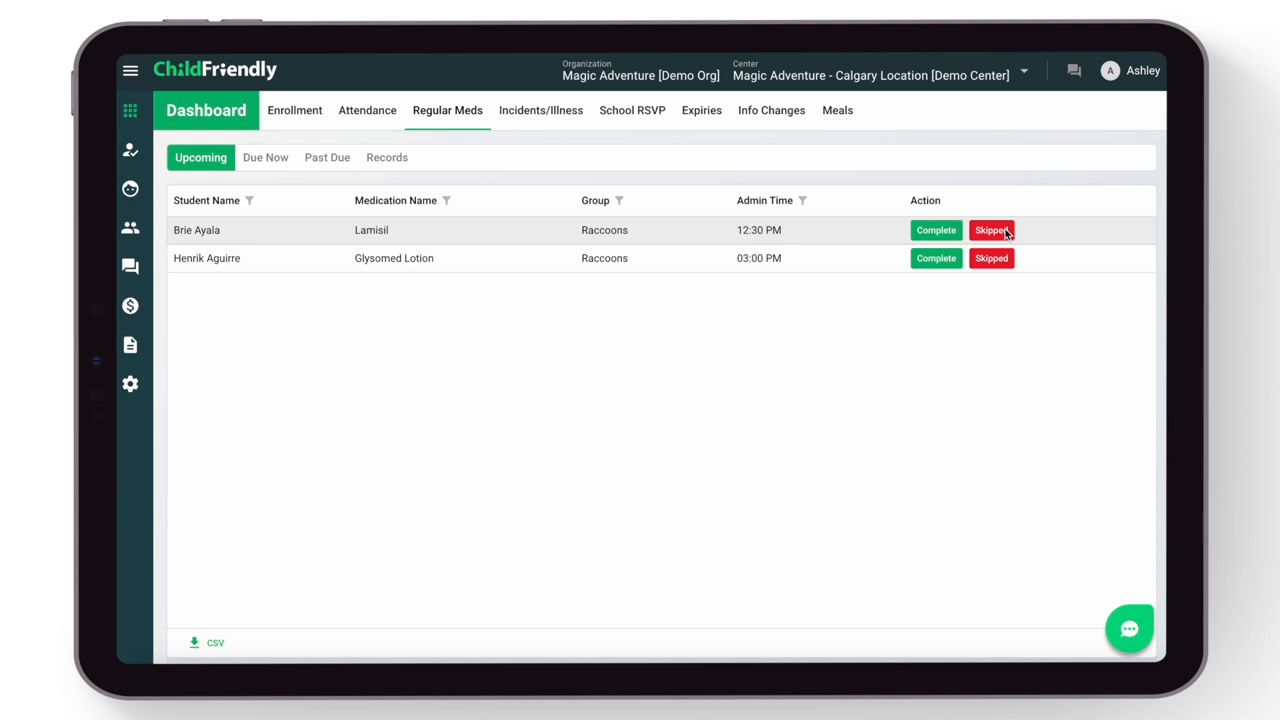
Enter the reason in Notes (this field is required).

Click the green check mark to save.
All completed or skipped medications are recorded in the Record section and a medication journal is automatically added to the child's journal.
Step 9: Review Past Medication Records
To check medication logs:
Go to the Record section.
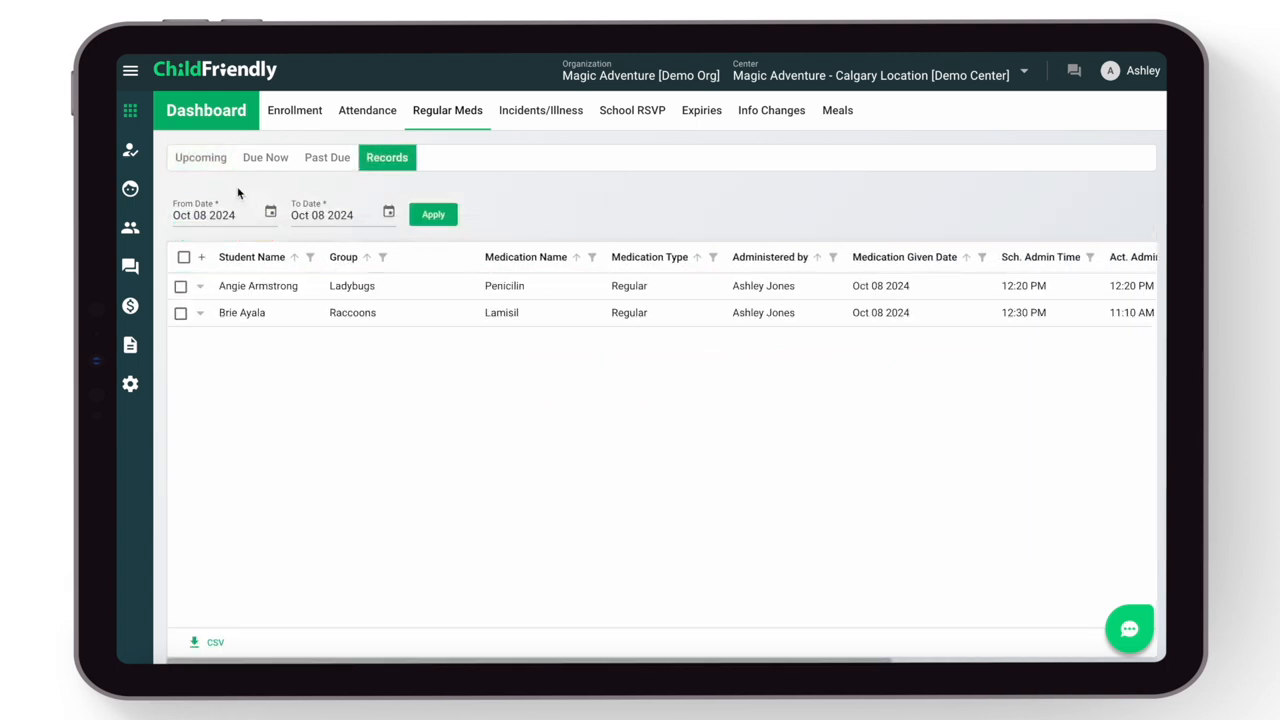
Adjust the time frame filter (e.g., to review the past month).
Note: You can use the Past Due tab to see any medications that are overdue by an hour or more that date.
Was this helpful?
Still need help? Ask the team