How to Use the Meals Tab
This document explains how users can access and use the Meals tab to review children’s food restrictions and meal services, and how to filter this information by group, meal type, and meal adjustments.
Last updated 3 months ago
Step 1: Open the Dashboard
Click the dashboard icon to access the main admin dashboard.
On the dashboard, click the Meals tab to open the Meals section.

Note: It's important to distinguish Prohibited Meals from standard allergies; prohibited meals are specifically used when a child requires a full meal alternative, like a vegetarian option. Once configured in your Center Customizations, these prohibited meal type categories, allow your cook to filter by type to determine exactly how many alternative portions to prep and deliver. This streamlines grocery shopping, reduces waste, and ensures teachers know exactly which children receive a alternative meal that day. You can even filter by enrollment to adjust portions for children not signed up for your meal service.
Note: Prohibited meals must first be configured in the Setup module under the Center > Customizations tab. Meal service must be configured in the Adjustments tab.
Step 2: Review Prohibited Meals and Meal Services
Within the Meals tab, review each child’s prohibited meals. For example, a child with both pork and seafood listed as prohibited cannot receive meals containing either pork or seafood and will instead receive an alternative meal whenever those foods are served.
In the Adjustments column, you can view which children have an active meal service or other meal-related adjustments.
Step 3: Filter Children by Group
To view prohibited meals or meal services for a specific group only, use the group filter.
Select the group drop-down arrow.
From the list of groups, choose your preferred group. In this example, select Whales.

The list now displays only children in the selected group.
Step 4: Filter Children by Prohibited Meal Type
You can further narrow the list by filtering on specific prohibited meal types.
Click the drop-down arrow beside Prohibited Meal Types.
Select the meal type you want to filter by. For this example, choose pork.

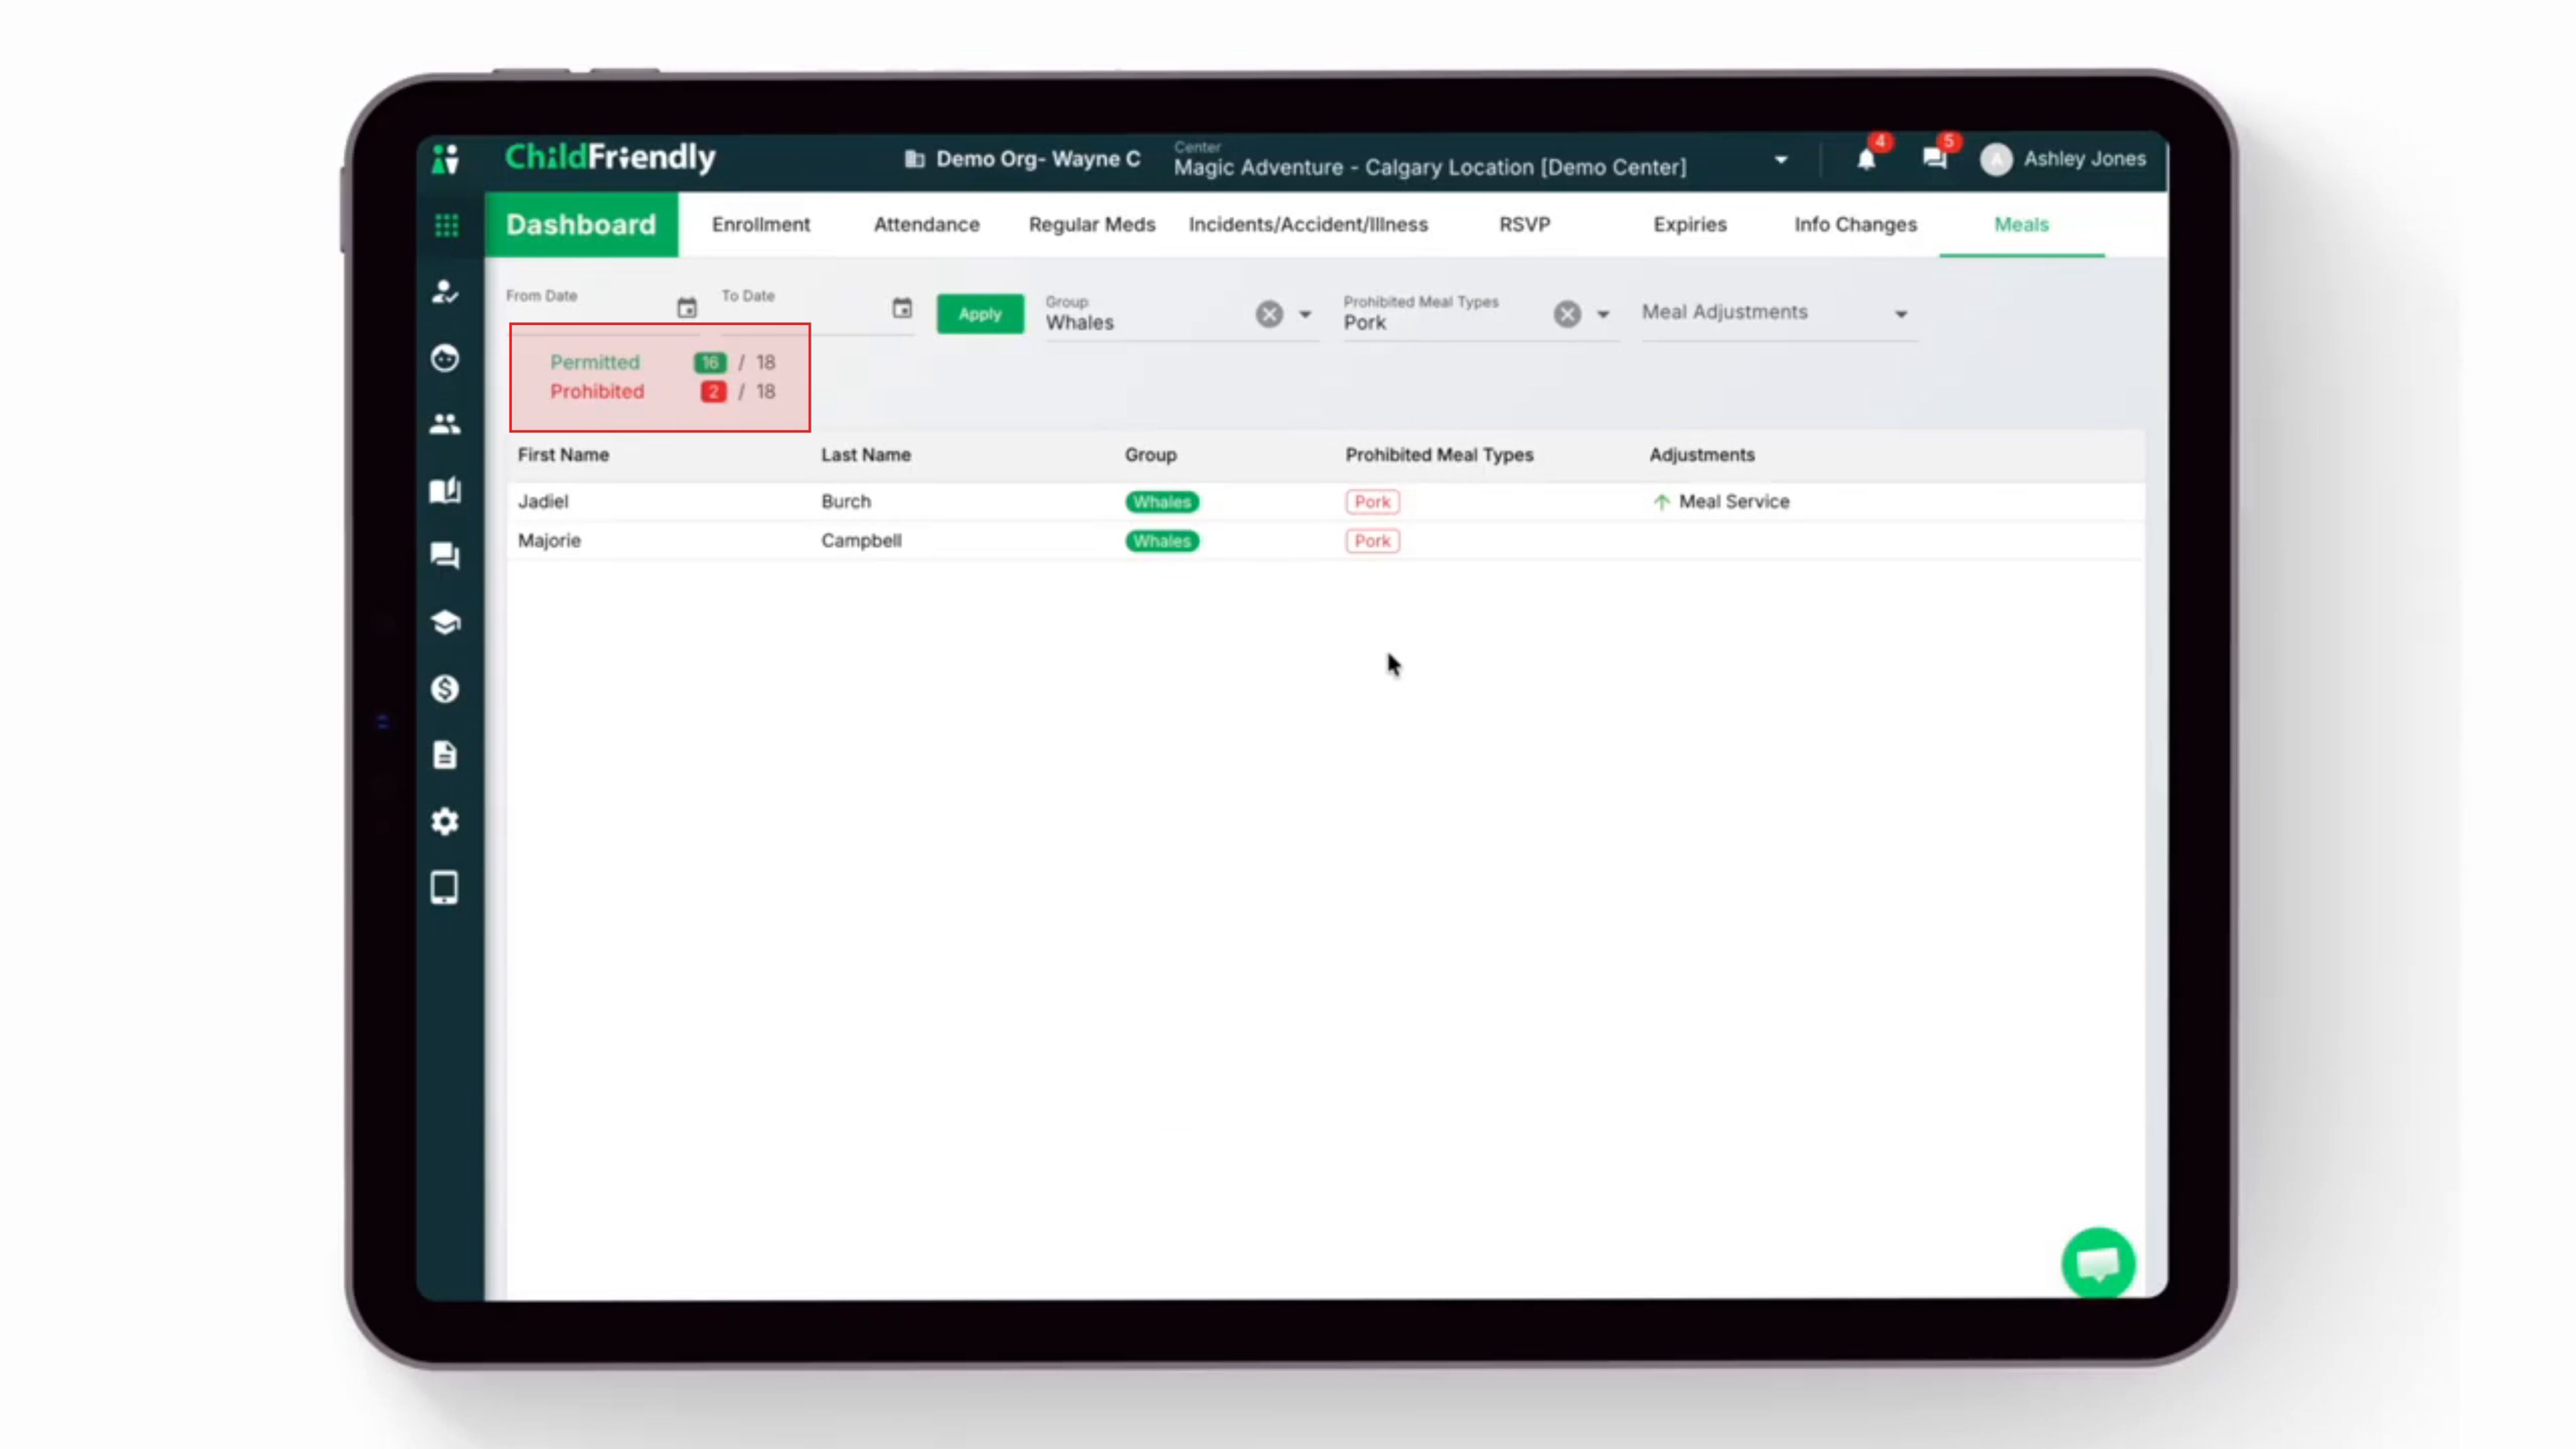
The list now shows only children who are not permitted to have pork. The numbers in the top-left of the screen display the total number of children allowed to have pork and the number prohibited from having pork.
Step 5: Filter by Meal Service and Other Adjustments
To view children that are signed up to receive a meal service or any other meal adjustments, use the Meal Adjustments filter.
Select the Meal Adjustments drop-down menu and choose your filter preferences.
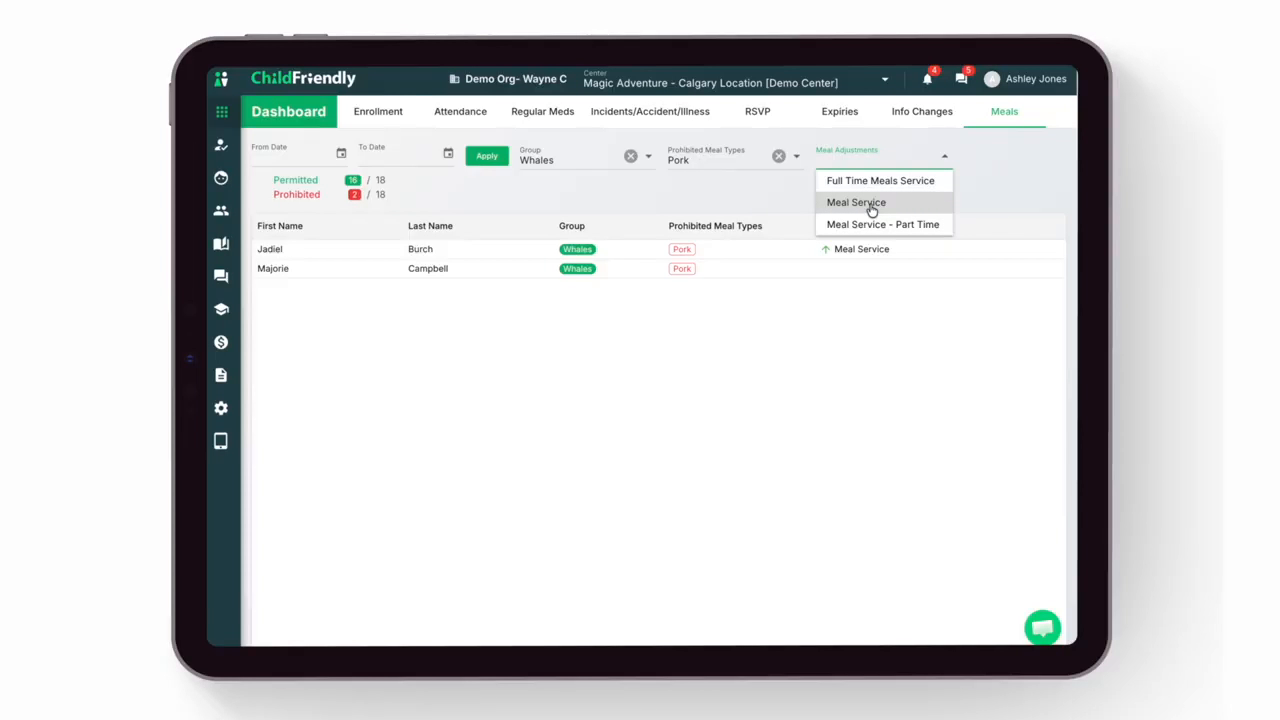
This will display only those children matching your selected meal service or adjustment criteria.
Was this helpful?
Still need help? Ask the team