How to Complete Child Progress Reports
This document explains how teachers, administrators, and parents can access, complete, review, certify, and view student progress reports within the learning module. It covers both group and individual (student-level) progress report views, including how assessments are added, approved, rejected, and displayed to parents.
Last updated 3 months ago
Step 1: Access the Progress Reports Section
From the main menu, navigate to the learning module on the left-hand side. Open the Reports section, then select Progress Reports.
In the Progress Reports screen, you will see two options:
Student Progress Report (individual student view)
Group Progress Report (group/class view)
Teachers and administrators will generally use the Group Progress Report view to see all students by group and assign grades accordingly. The Student Progress Report is useful to see what a parent will see in the parent portal (for one child at a time).
To begin, select Group Progress Report.

Step 2: Select the Group to View
In the Group Progress Report view, you have two ways to select a group:
Use the search bar to search by group name, or
Click directly on the group name you want to view.
For example, click on the Raccoons group.

At the top of the screen, you will see all active children in the selected group. Along the left-hand side, you will see the curriculum framework you are reporting on.
Most centers only set up one curriculum, but some may have multiple. If you have multiple curriculums, you can filter them using the curriculum filter in the top-right corner. Click the curriculum filter.
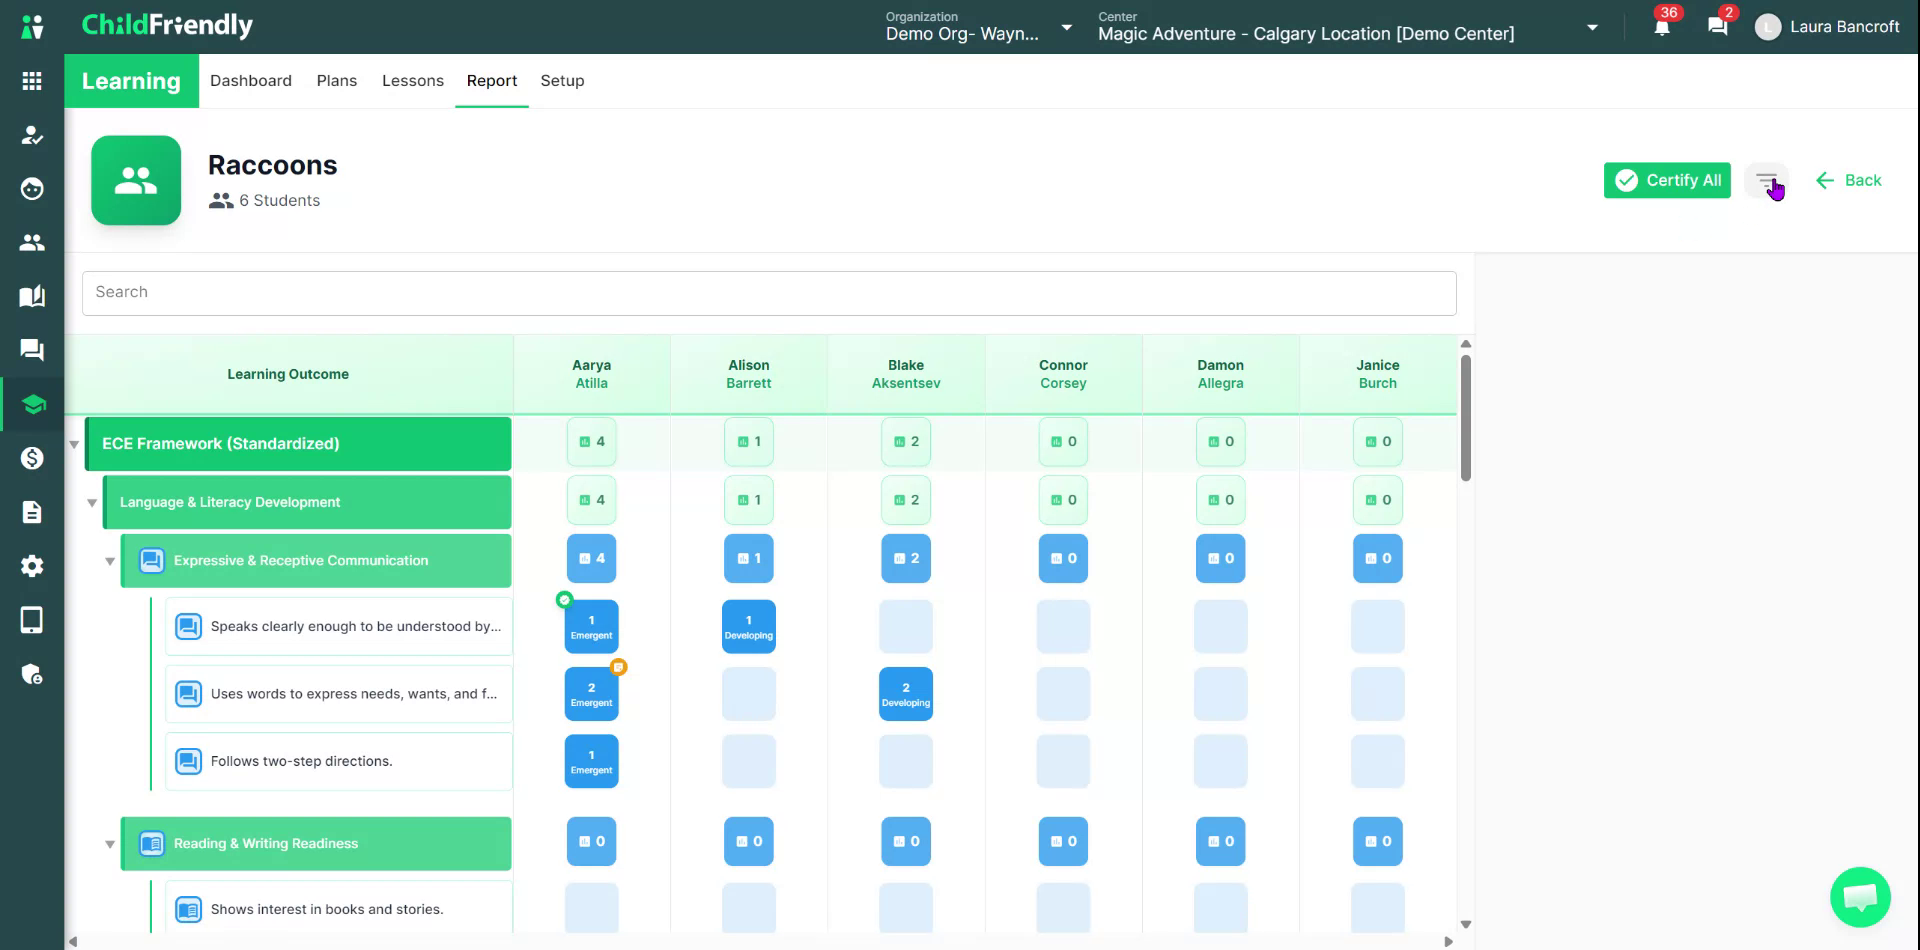
If multiple curriculums have been configured via the Setup tab, select the curriculum you wish to report on. For now, select the ECE Framework.

You can also set start and end dates to view assessments only for a specific period.

Step 3: Understand the Curriculum Structure and Outcomes
Now, review the curriculum structure shown along the left-hand side.

The structure is typically:
Curriculum name
Domain
Focus area
Outcome (individual outcome items)
Assessments are recorded at the outcome level. Each outcome is what will receive a grade or growth indicator.
As a teacher, click on an outcome to begin assessing students.
Step 4: Add an Assessment for a Student
To give each child an assessment for a specific outcome:
Find the outcome row and click in the box under the child’s name.
Click the plus (+) sign to add a new assessment.
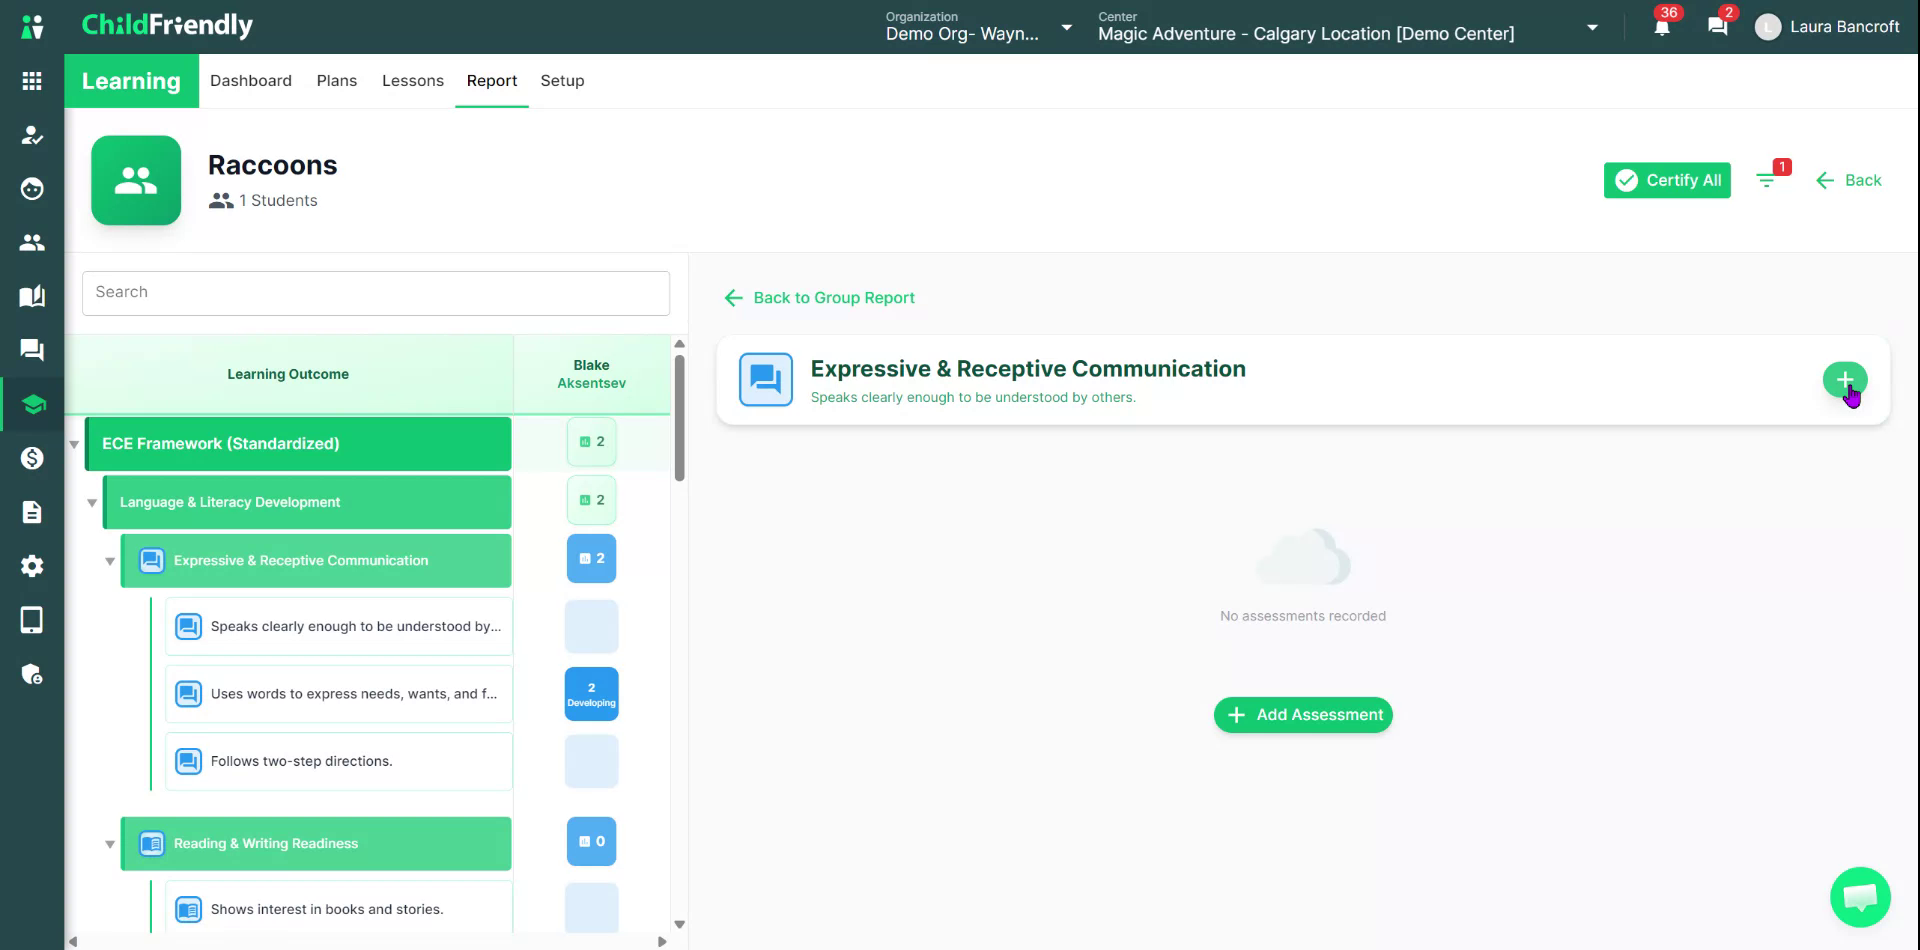
Select the growth indicator (e.g., Emerging, Developing, Proficient). Growth indicators are customizable in Setup. In this example, select Developing.

Select the date of the assessment. By default, this is set to today’s date, but you can change it if the assessment was done earlier.

If the assessment was completed in March, for example, choose the appropriate March date.
Enter any notes related to the assessment.

Click Submit to save the assessment.

Now, this child has an assessment recorded.
Note: The assessment is not yet visible to parents until it has been certified by an administrator.
If you want to add another assessment for the same outcome later in the year:
Click the plus (+) sign again.

Update the date and select the appropriate growth indicator/assessment.
Click Submit.
You can repeat this process for all children in your class.
Step 5: Interpret Assessment Icons and Parent Visibility
On the group progress screen, you will see several icons and indicators:
The most recent assessment for each child and outcome appears below the number in the cell (e.g., “Developing” for Blake on a given outcome).
The number above the growth indicator (e.g., “2”) shows how many assessments have been recorded for that child on that outcome over time.
An orange note icon indicates that there is a note attached to that assessment.
A green check mark indicates that an administrator has certified the assessment.
Parents can only see certified assessments. Until certification, individual assessments are hidden from the parent portal.
In Setup, there are permission settings that can change this behavior:
You can allow staff to approve/certify their own assessments, or
You can toggle a setting so that assessments are visible to parents immediately after staff complete them (without admin certification).
From a staff perspective, the main task is to complete and submit assessments; certification is typically handled by administrators.
Step 6: Certify Assessments as an Administrator
From an administrator’s perspective, when it is time to review assessments (e.g., at the end of a term), go to the same Group Progress Report screen for the relevant group and curriculum.
To review and certify individual assessments:
Click into the outcome/assessment you want to review.
If the assessment is accurate, click Certify.
Once certified, that assessment (e.g., from April 3rd) becomes viewable by parents.
You can certify assessments in two ways:
Individually, by clicking into each assessment and selecting Certify, or
All at once, by clicking Certify All when you are satisfied with every assessment on the page.
You can also reject assessments if you determine that any are inaccurate:
Click into the assessment you want to reject.
Click Reject.

Select or type the reason for rejection.
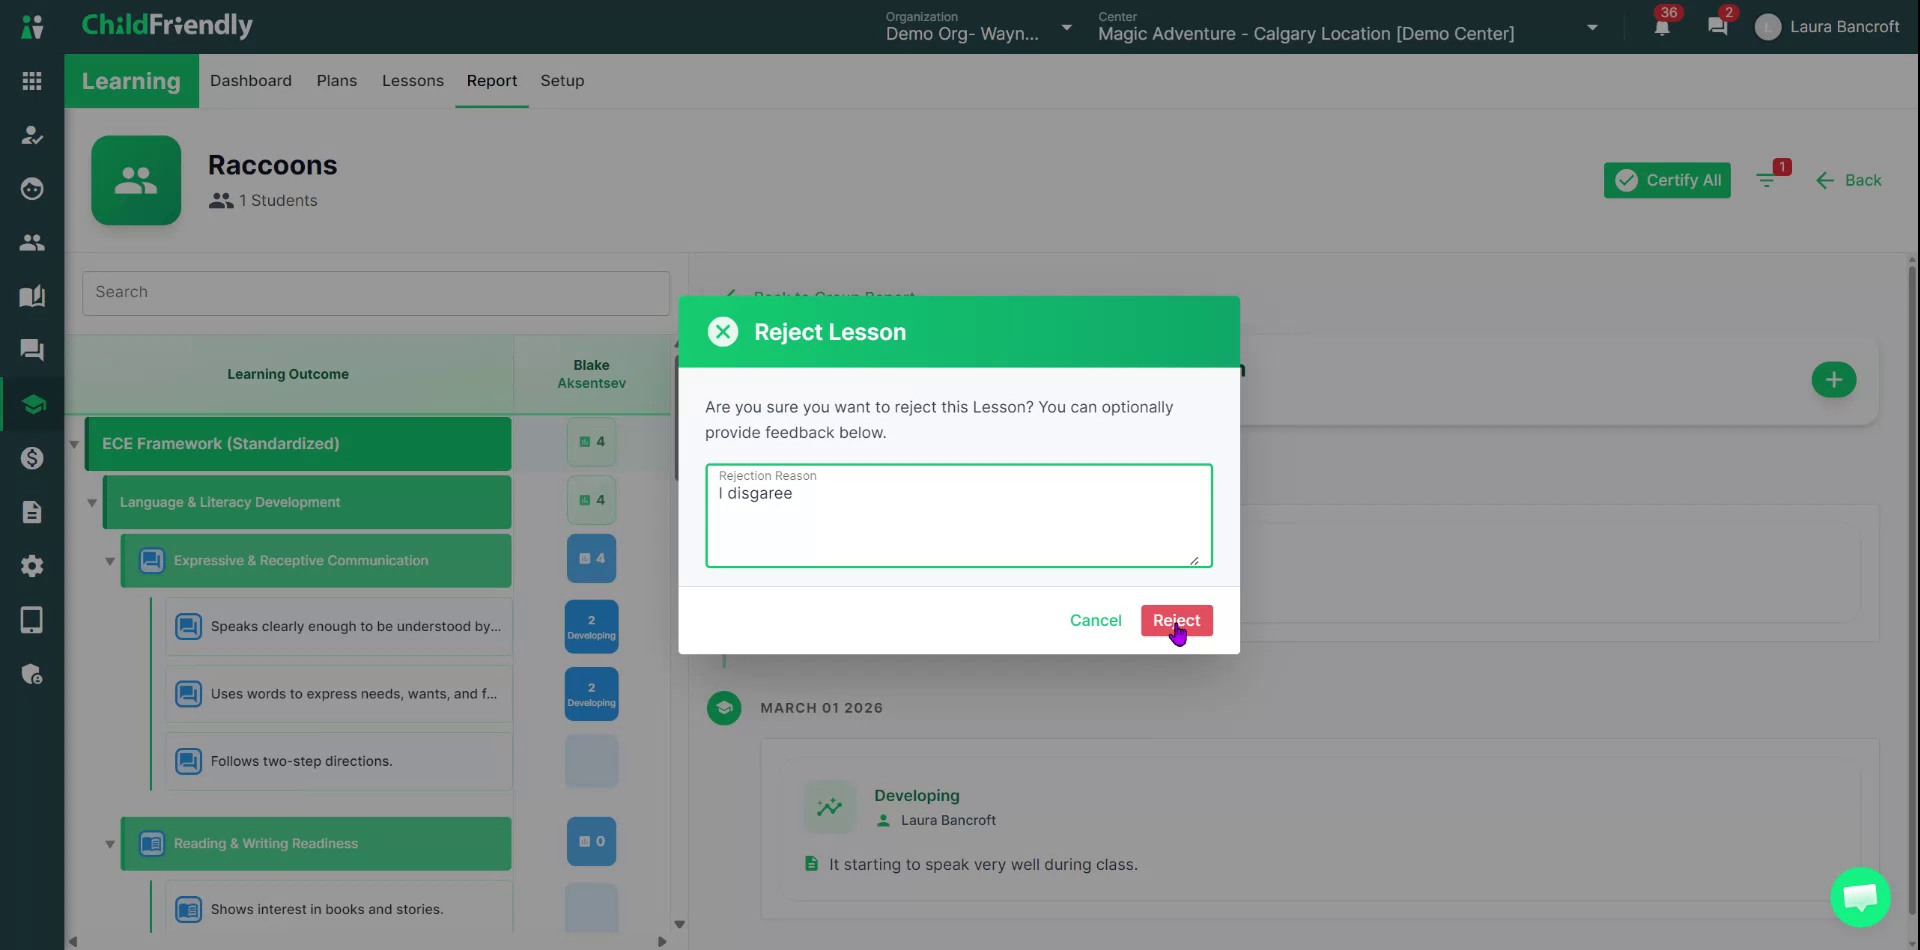
Click Reject to confirm.
Rejected assessments will display an X mark. Staff will see your note, adjust their assessment, and resubmit it for approval.

When staff return to their view:
They click back into the assessment.
They can remove or edit the assessment.
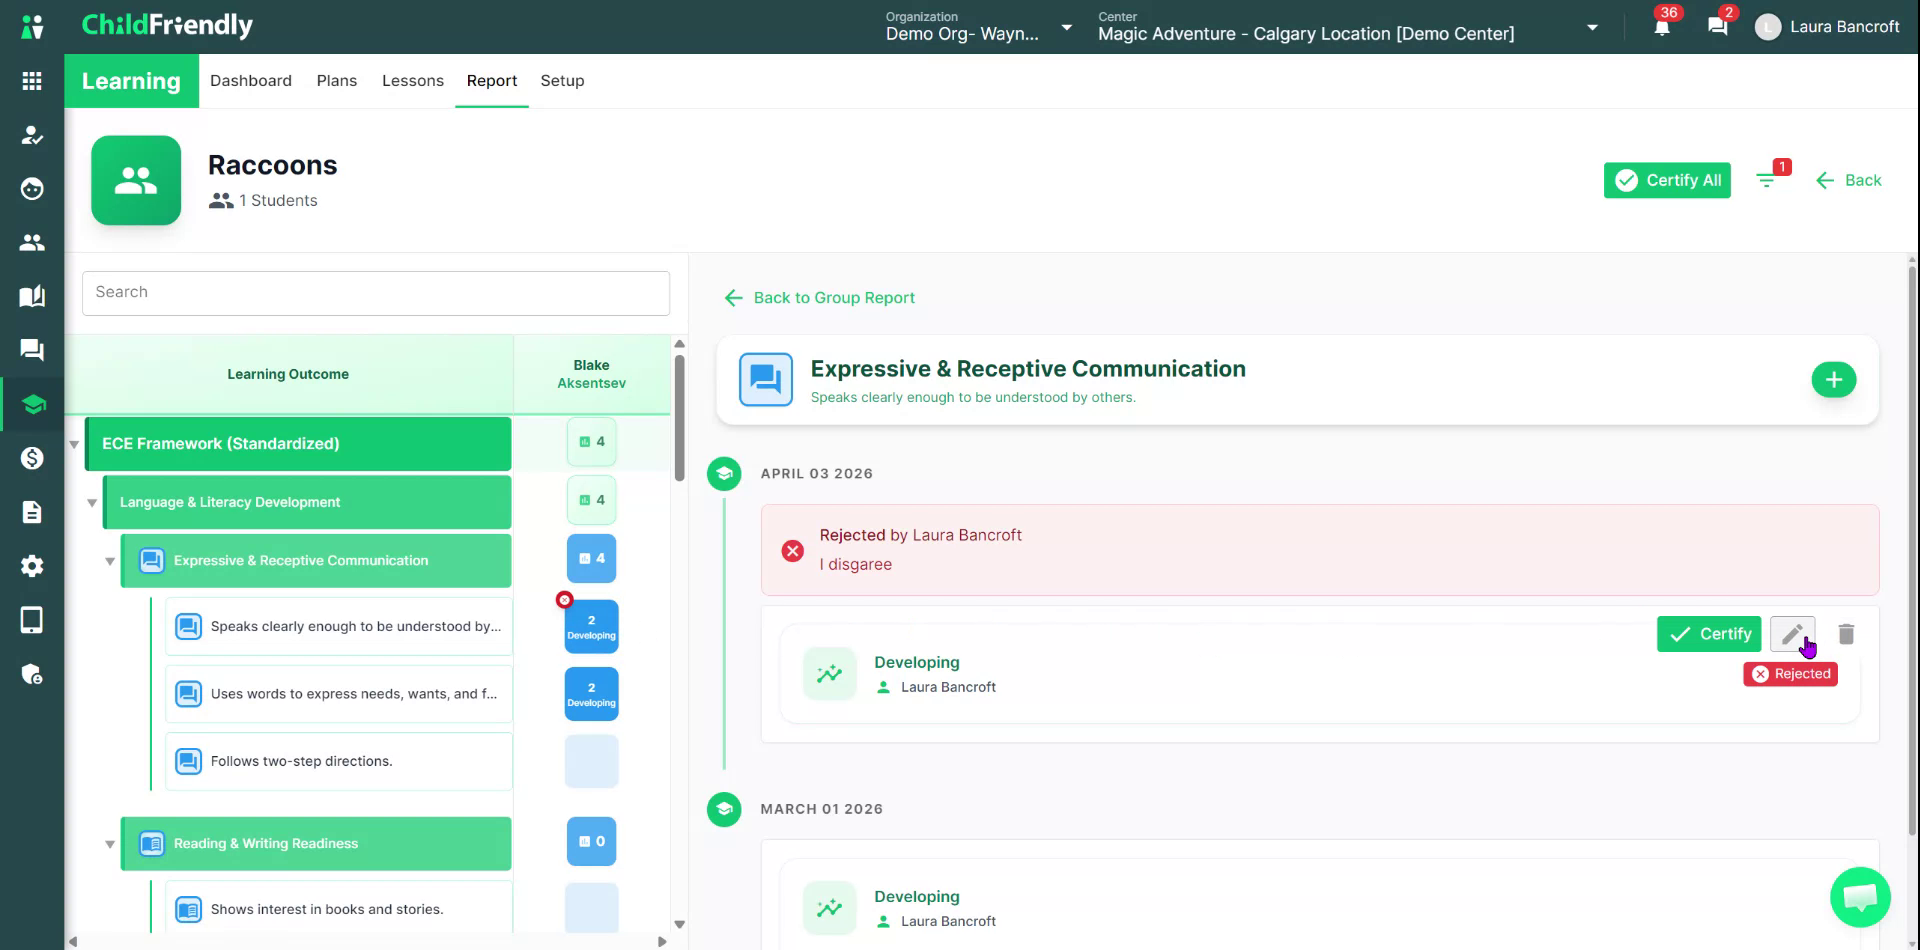
They then resubmit it for approval.

After resubmission, administrators can review and certify the updated assessment.
Note: The current screen described here is the administrative view. In the staff view, the layout is almost identical, but staff do not have options to Reject or Certify assessments.
Step 7: View Individual Student Progress (Parent View Simulation)
To see the progress report as a parent would:
Return to the Reports section.
Click Student Progress Report.

In this screen, you can:
Filter by group to narrow down to specific children, or
Search directly by student name.
Click on a specific child to open their individual progress report.

This is essentially the same view that parents see in their parent portal, except that parents do not have any certification controls.
As a parent (or when simulating the parent view), you can:
See the curriculum at the top.
Scroll down to view where the child stands for each outcome in terms of their assessment level.
Only certified grades appear here:
If an outcome has no tag or grade, it means nothing has been certified yet.
Once an assessment is certified, the grade appears in that outcome cell.
If you click into an outcome:

You will see all grades associated with that outcome for the child, across the full history.
You can filter by period if desired, but the most recent grade will always show in the main corner view for that outcome.
This completes the overview of how progress reporting works for staff, administrators, and parents.
Was this helpful?
Still need help? Ask the team