How to Create and Edit Lessons- Part 2
This document explains how to find, create, edit, and submit lessons for certification using the My Lessons tab. You will learn how to use filters (including certification status), update existing lessons, create new lessons from scratch, add learning outcomes, images, and materials, and request administrative approval.
Last updated 3 months ago
Step 1: Access and Filter Lessons in the My Lessons Tab
The My Lessons tab is where you edit lessons you previously copied from the Marketplace or Organization Library, or where you create your own lessons from scratch. To locate a specific lesson, open the My Lessons tab and use the filter icon you are already familiar with.
In addition to the standard filters, there is an important extra field: Certification Status.


Use the Certification Status filter to narrow down your lessons:
All – Shows every lesson regardless of status.
Certified – Lessons you submitted that your admin has reviewed and approved. Once certified, these lessons appear in the Organization Library and can be used in a weekly plan.
Pending – Lessons you have submitted to your admin for certification that have not yet been approved.
Rejected – Lessons you submitted for certification but your admin rejected.
No Status – Lessons that have not yet been submitted for certification.
To learn how certified lessons are used in planning, see the How to Create Weekly Plans video.
Step 2: Open and Edit an Existing Lesson
Once you find the lesson you want to edit using the filters and search tools, click on that lesson to open it.
Inside the lesson, select the Edit (pencil) icon at the top.

Update any necessary fields in the lesson.
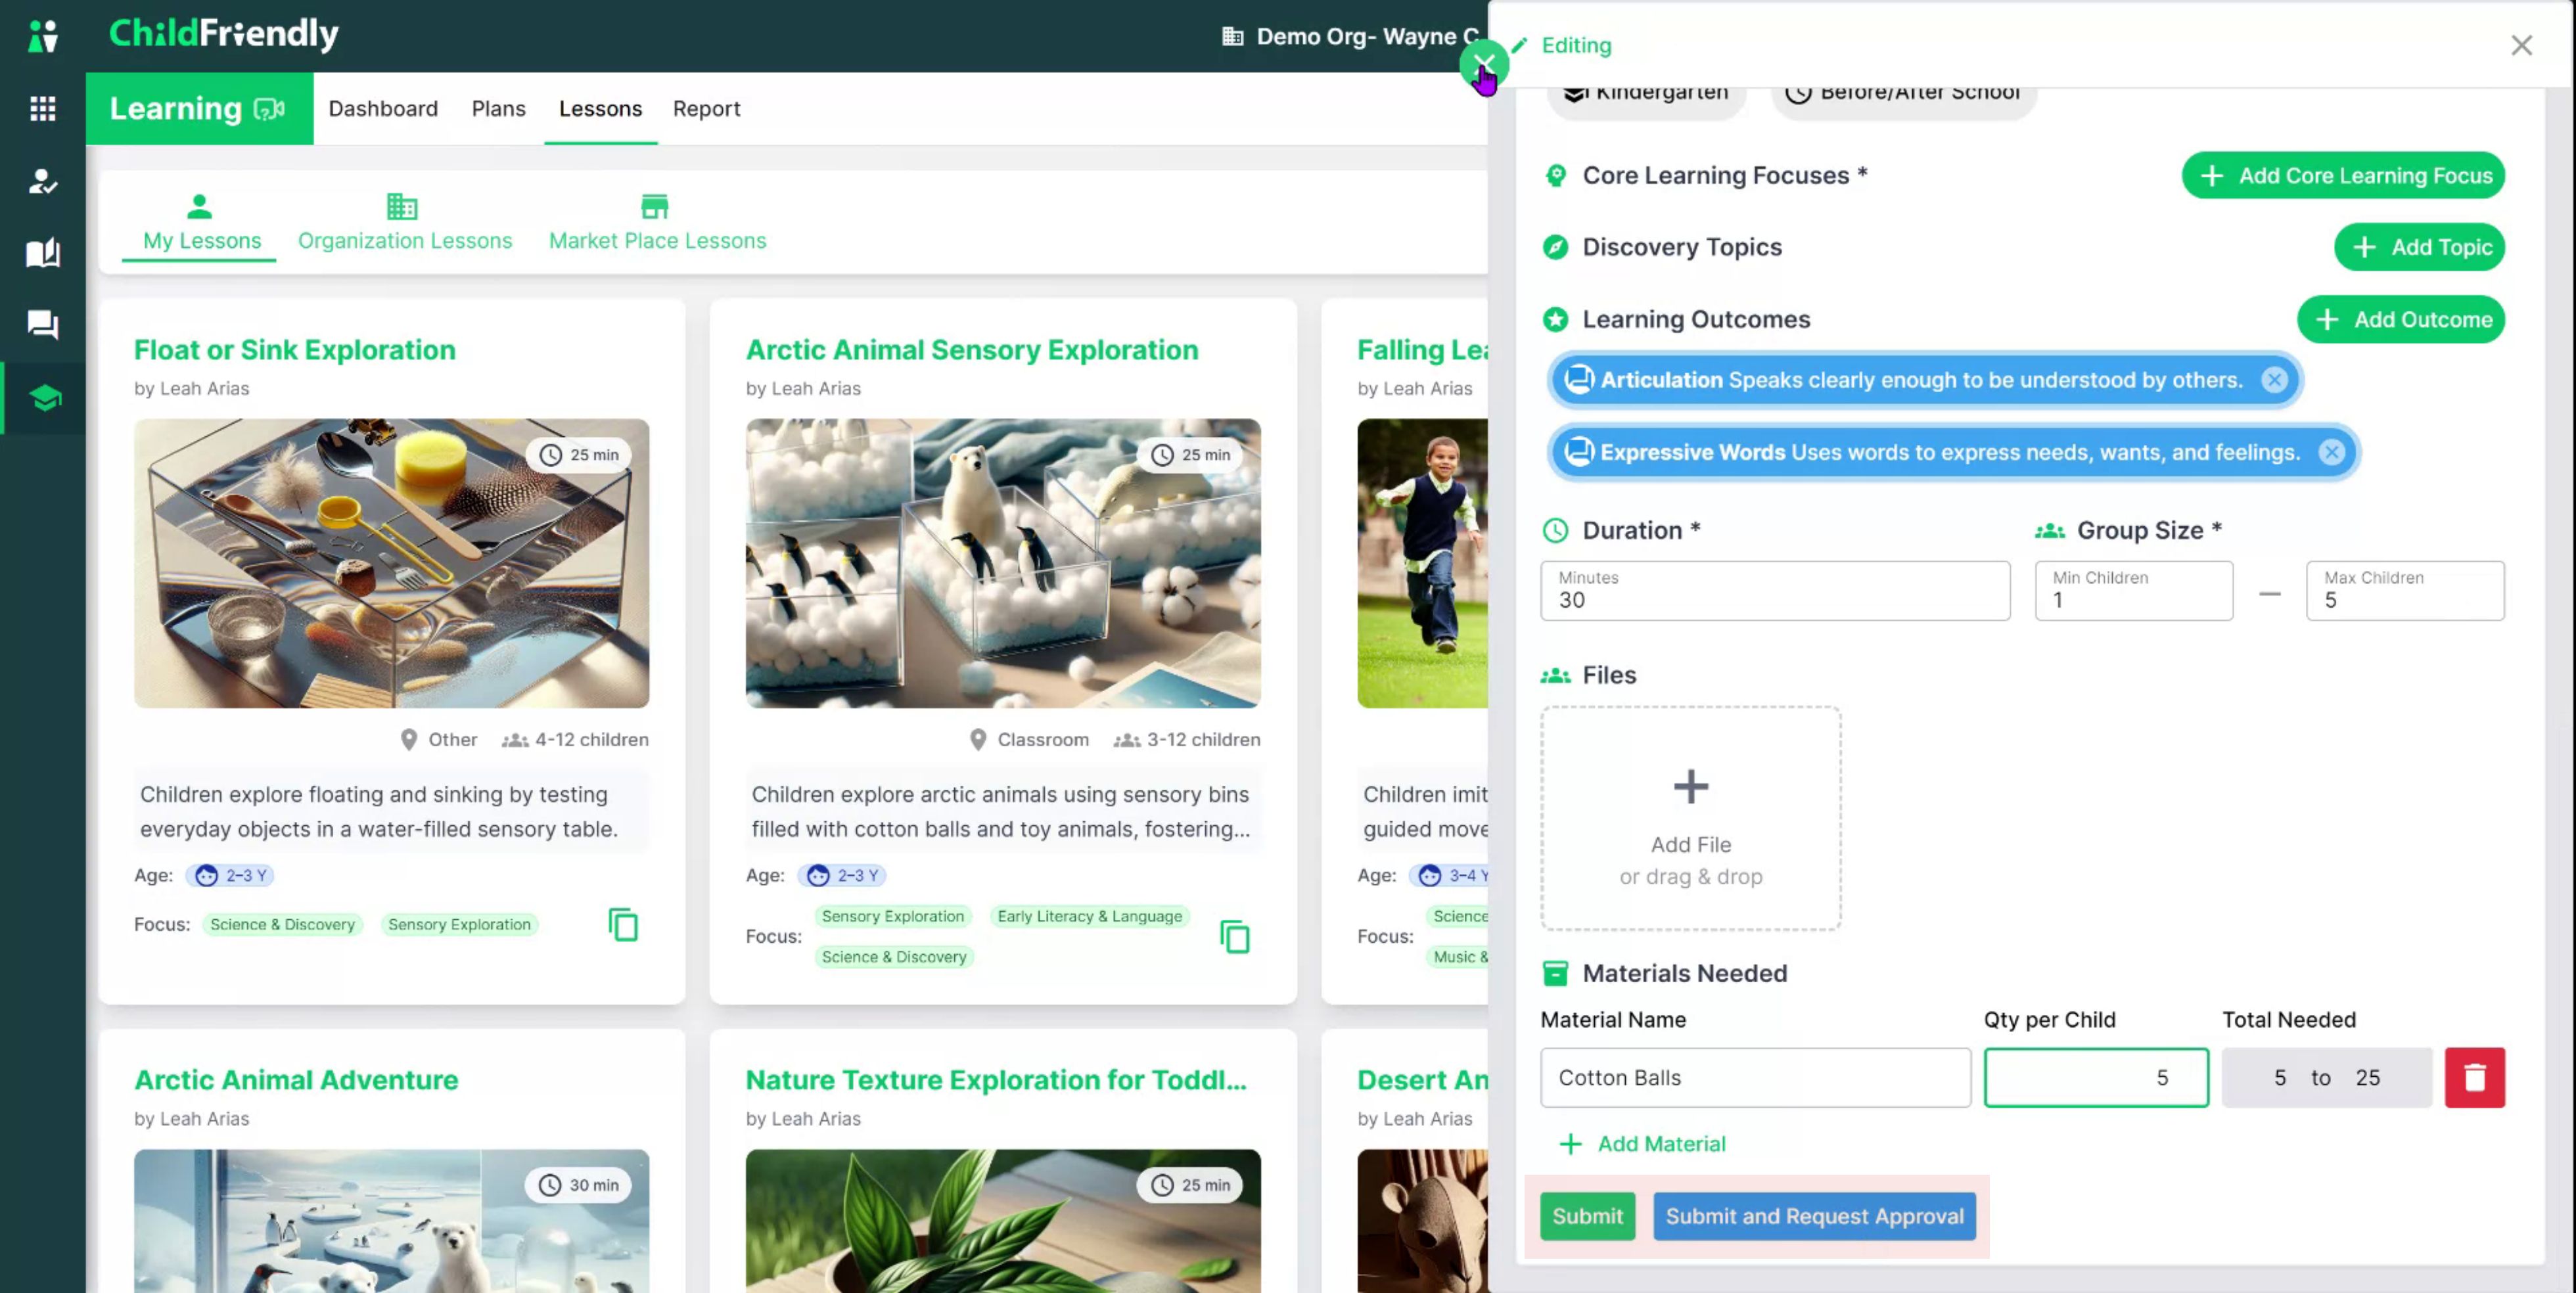
When you finish editing, scroll to the bottom of the page and choose one of the following:
Submit – Saves the edits you have made and keeps the lesson as a draft (no certification request).
Submit and Request Approval – Saves your changes and sends the lesson to your admin for certification review.

Step 3: Request Approval Without Editing
If you do not need to change any fields and only want to submit an existing lesson for certification, you can request approval directly from the lesson view. Instead of entering edit mode, simply click Request Approval at the top of the lesson.

This will submit the lesson to your admin for review and certification.
Step 4: Create a New Lesson from Scratch
To create a brand-new lesson, click the Add Lesson icon at the top right of your screen.
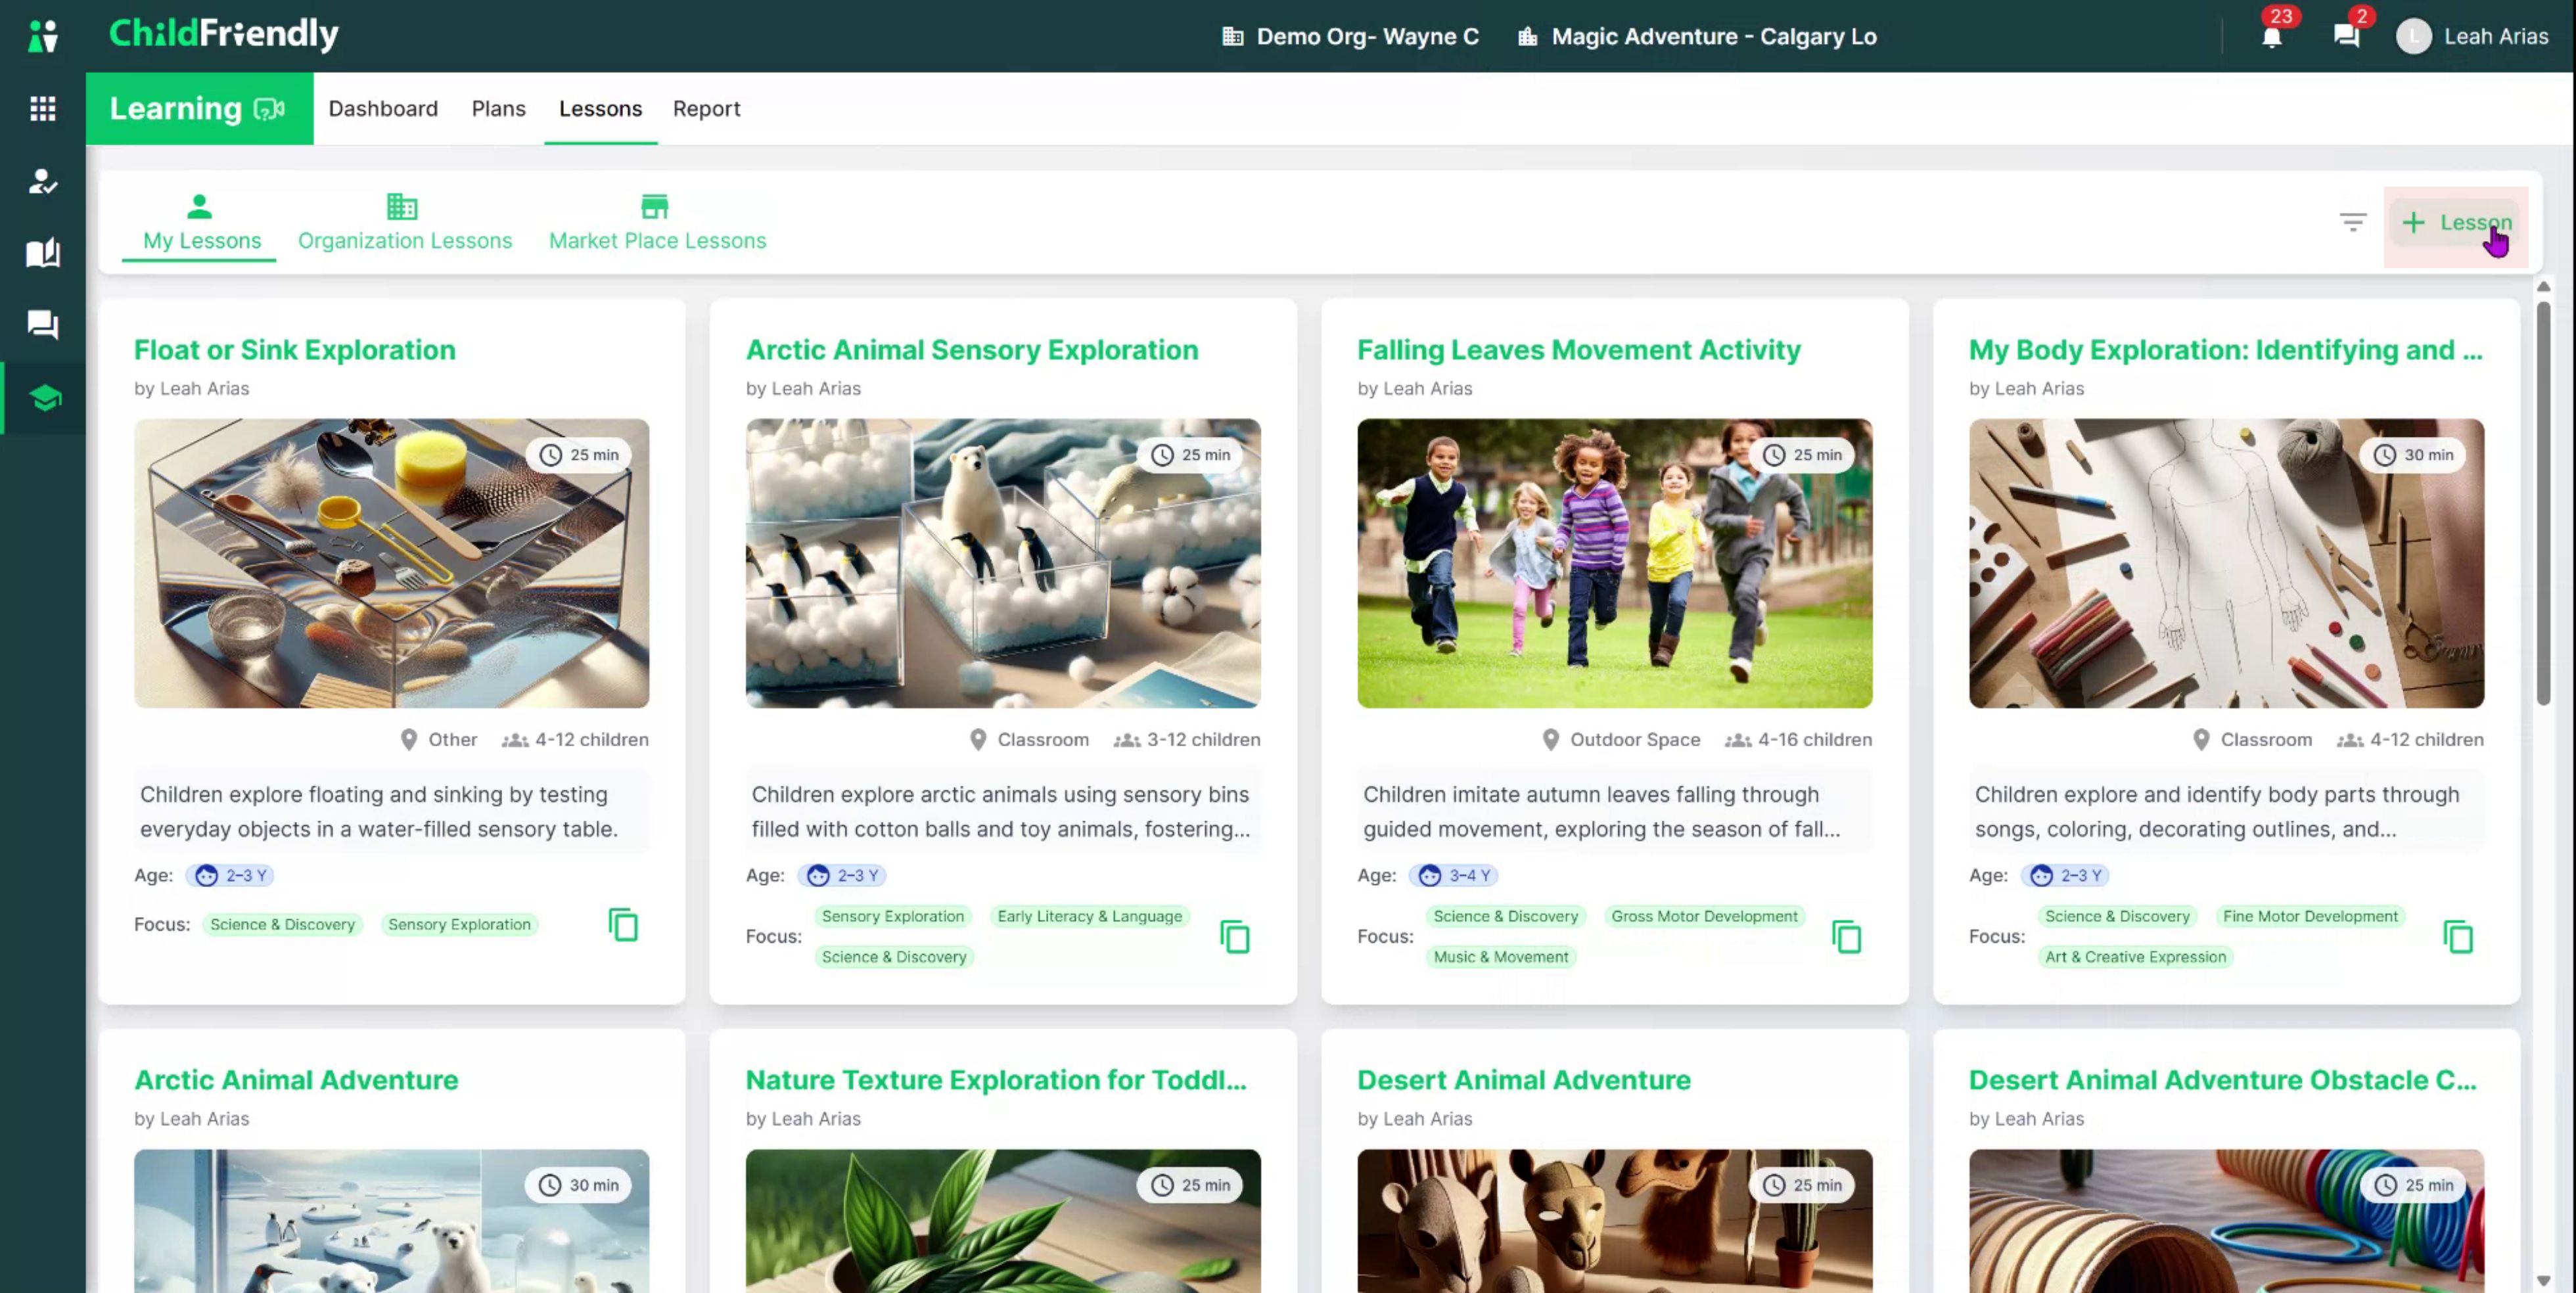
In the new lesson form, fill out all applicable information for your lesson, including:
Lesson title and description
Relevant age group or class details
Optional learning outcomes
Images
Materials

Step 5: Add and Filter Learning Outcomes
To add learning outcomes to your lesson, open the learning outcomes section and choose an outcome from the list.

If needed, expand the filter menu at the top to select a specific curriculum and its associated outcomes.
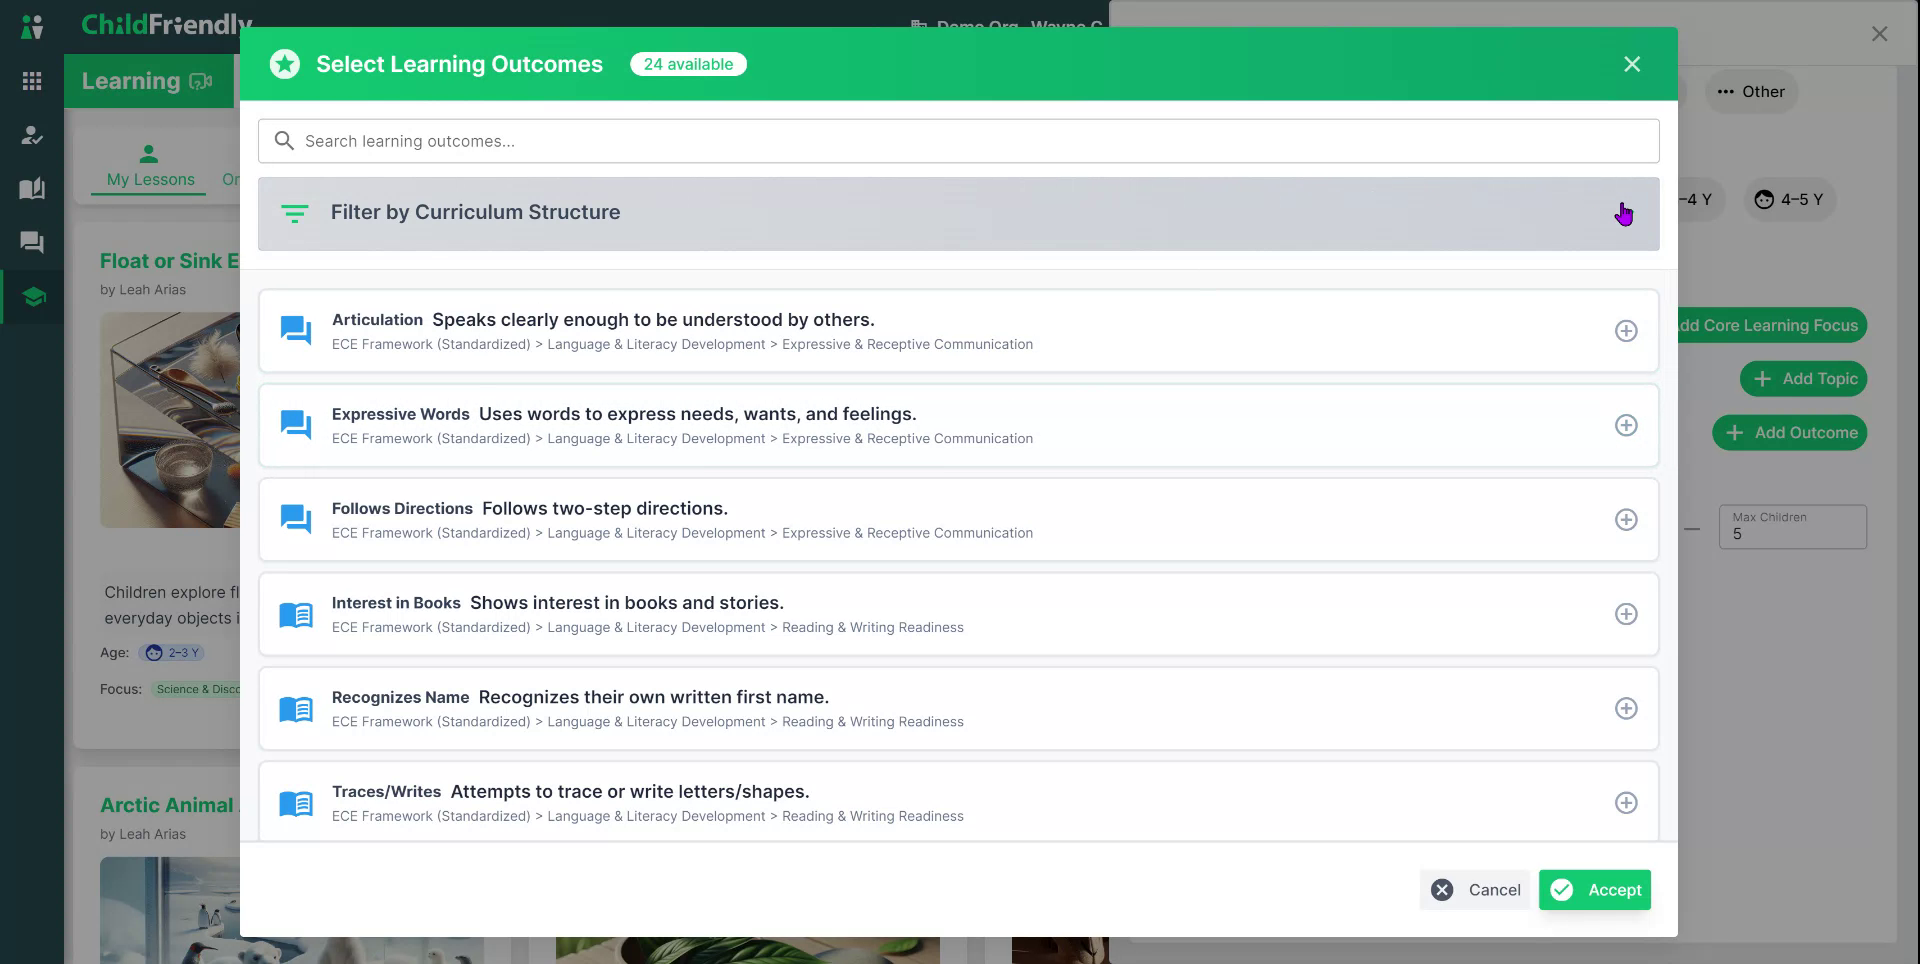
Some centers use more than one curriculum. Use the filters to:
Select the desired Curriculum
Choose the appropriate Domain
Choose the relevant Focus Area

Next, minimize the filter menu.

Select the outcome(s) you want to tag to your lesson.
You can select more than one outcome. Once you have chosen all applicable outcomes, click Accept.

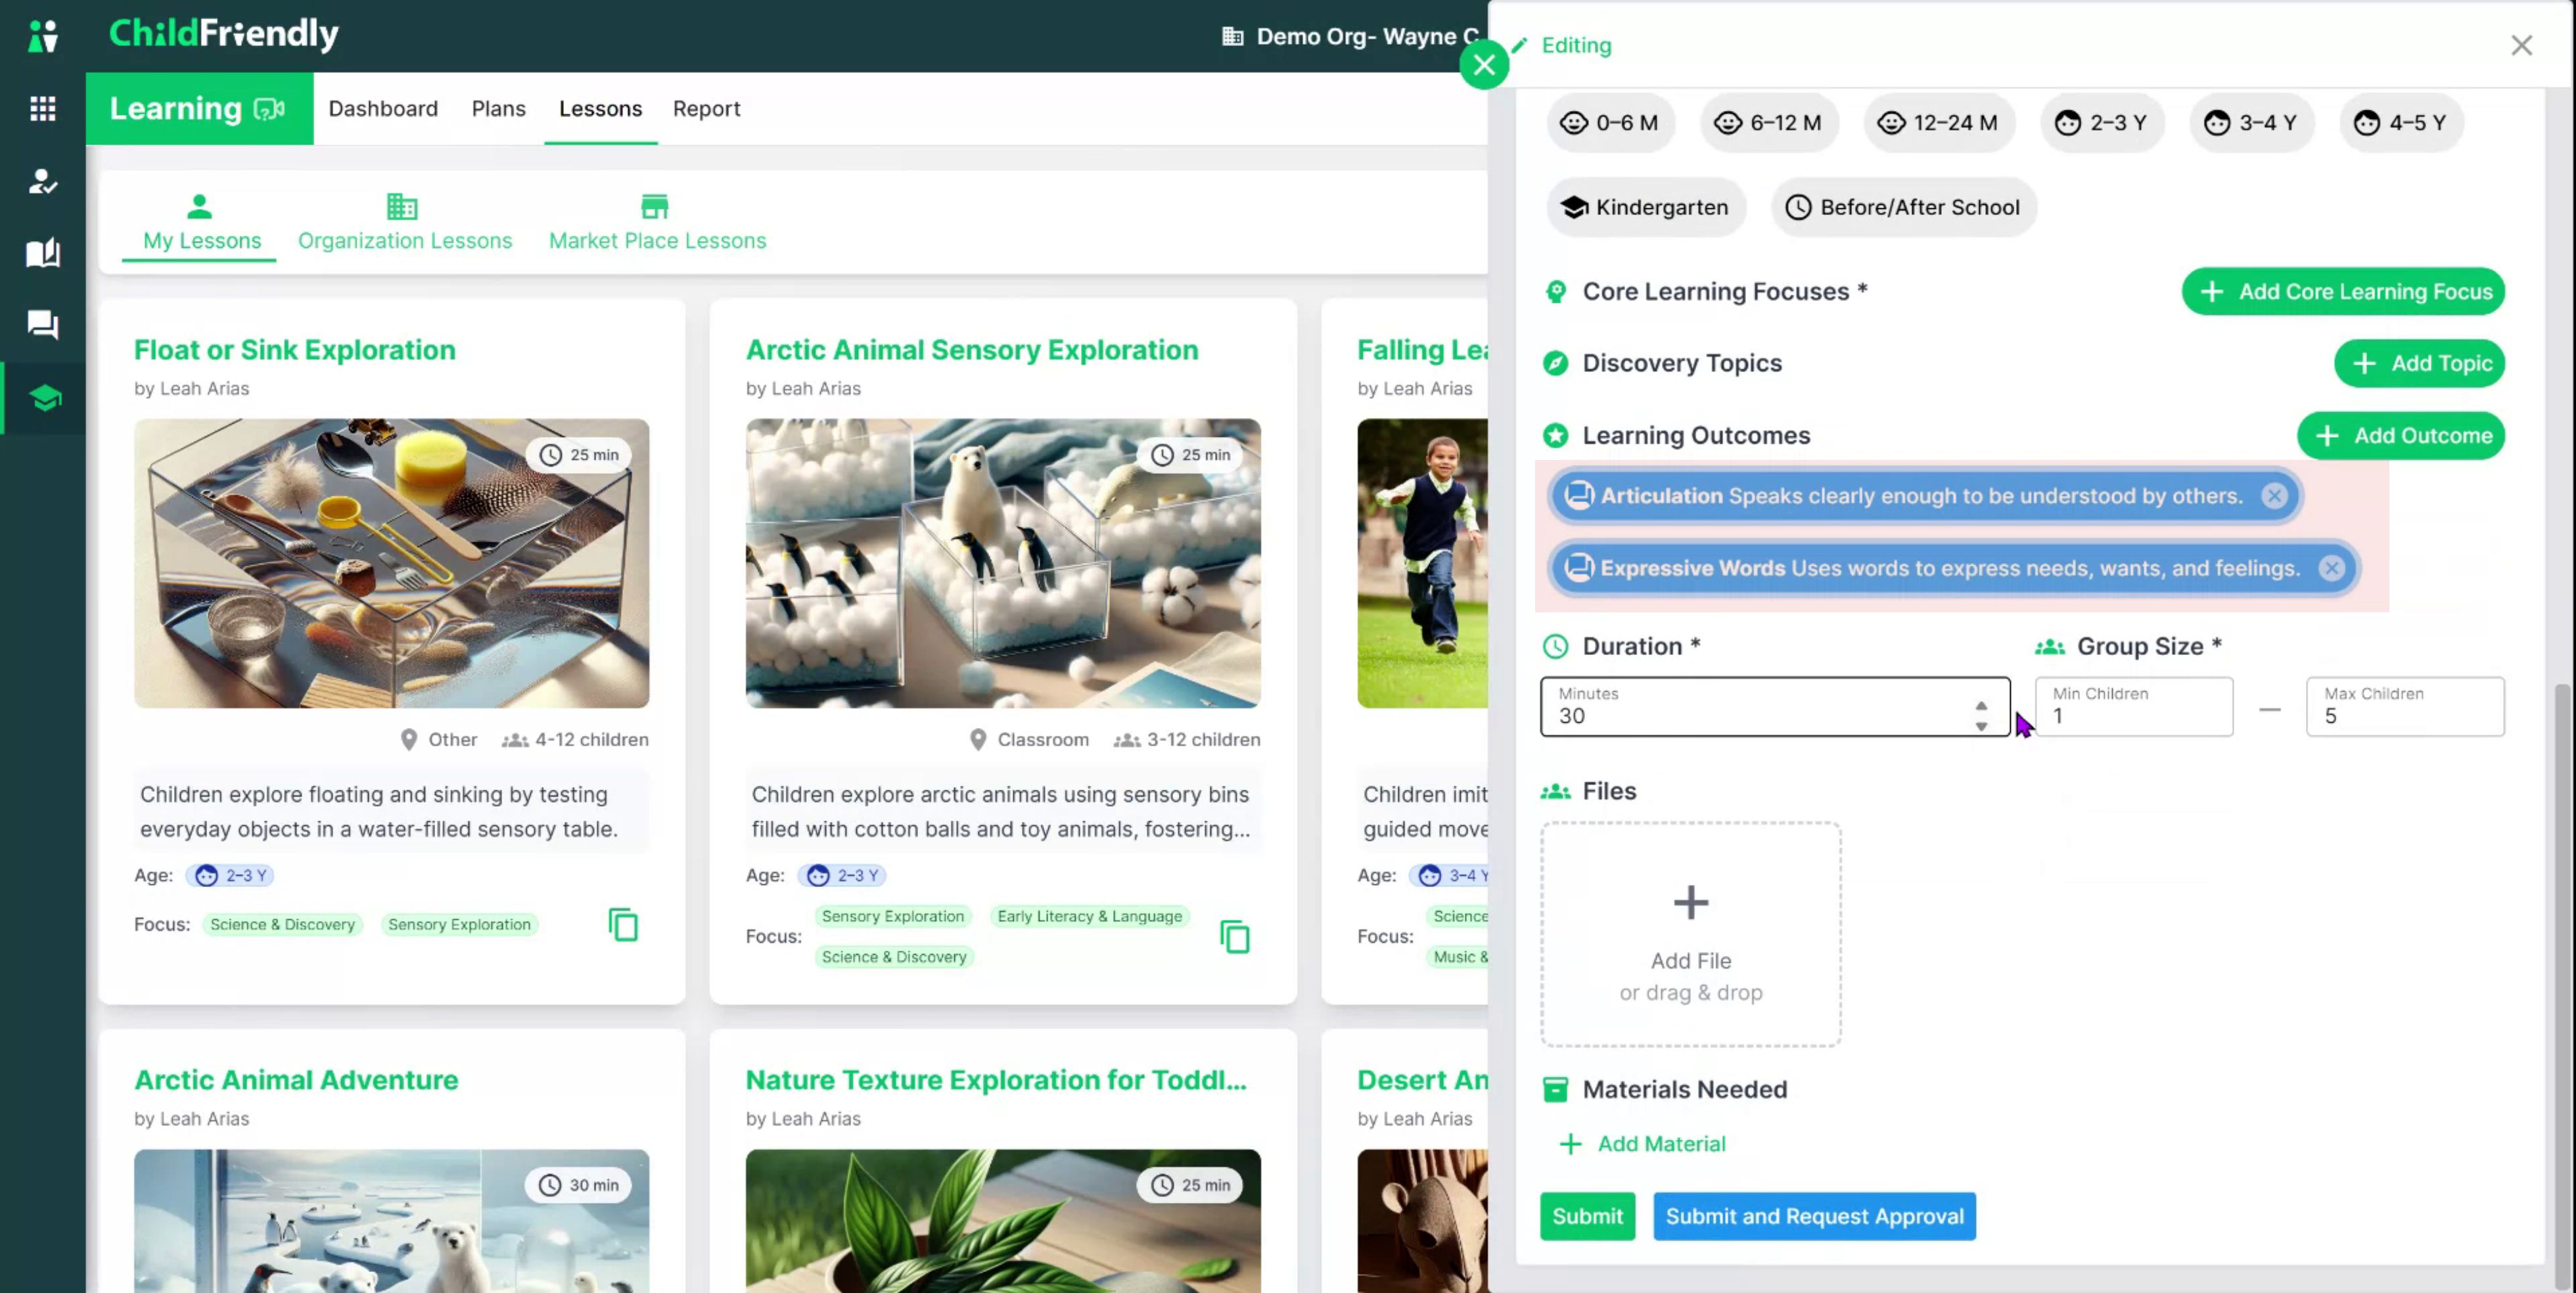
You will see the selected outcome tags displayed in the lesson.
Step 6: Add Images and Attachments
You can attach images, PDFs, and other files to your lesson. The first image file you add will be used as the default thumbnail image display for the lesson, but you may attach as many files as you like.
You can upload your own images or select from the image library.
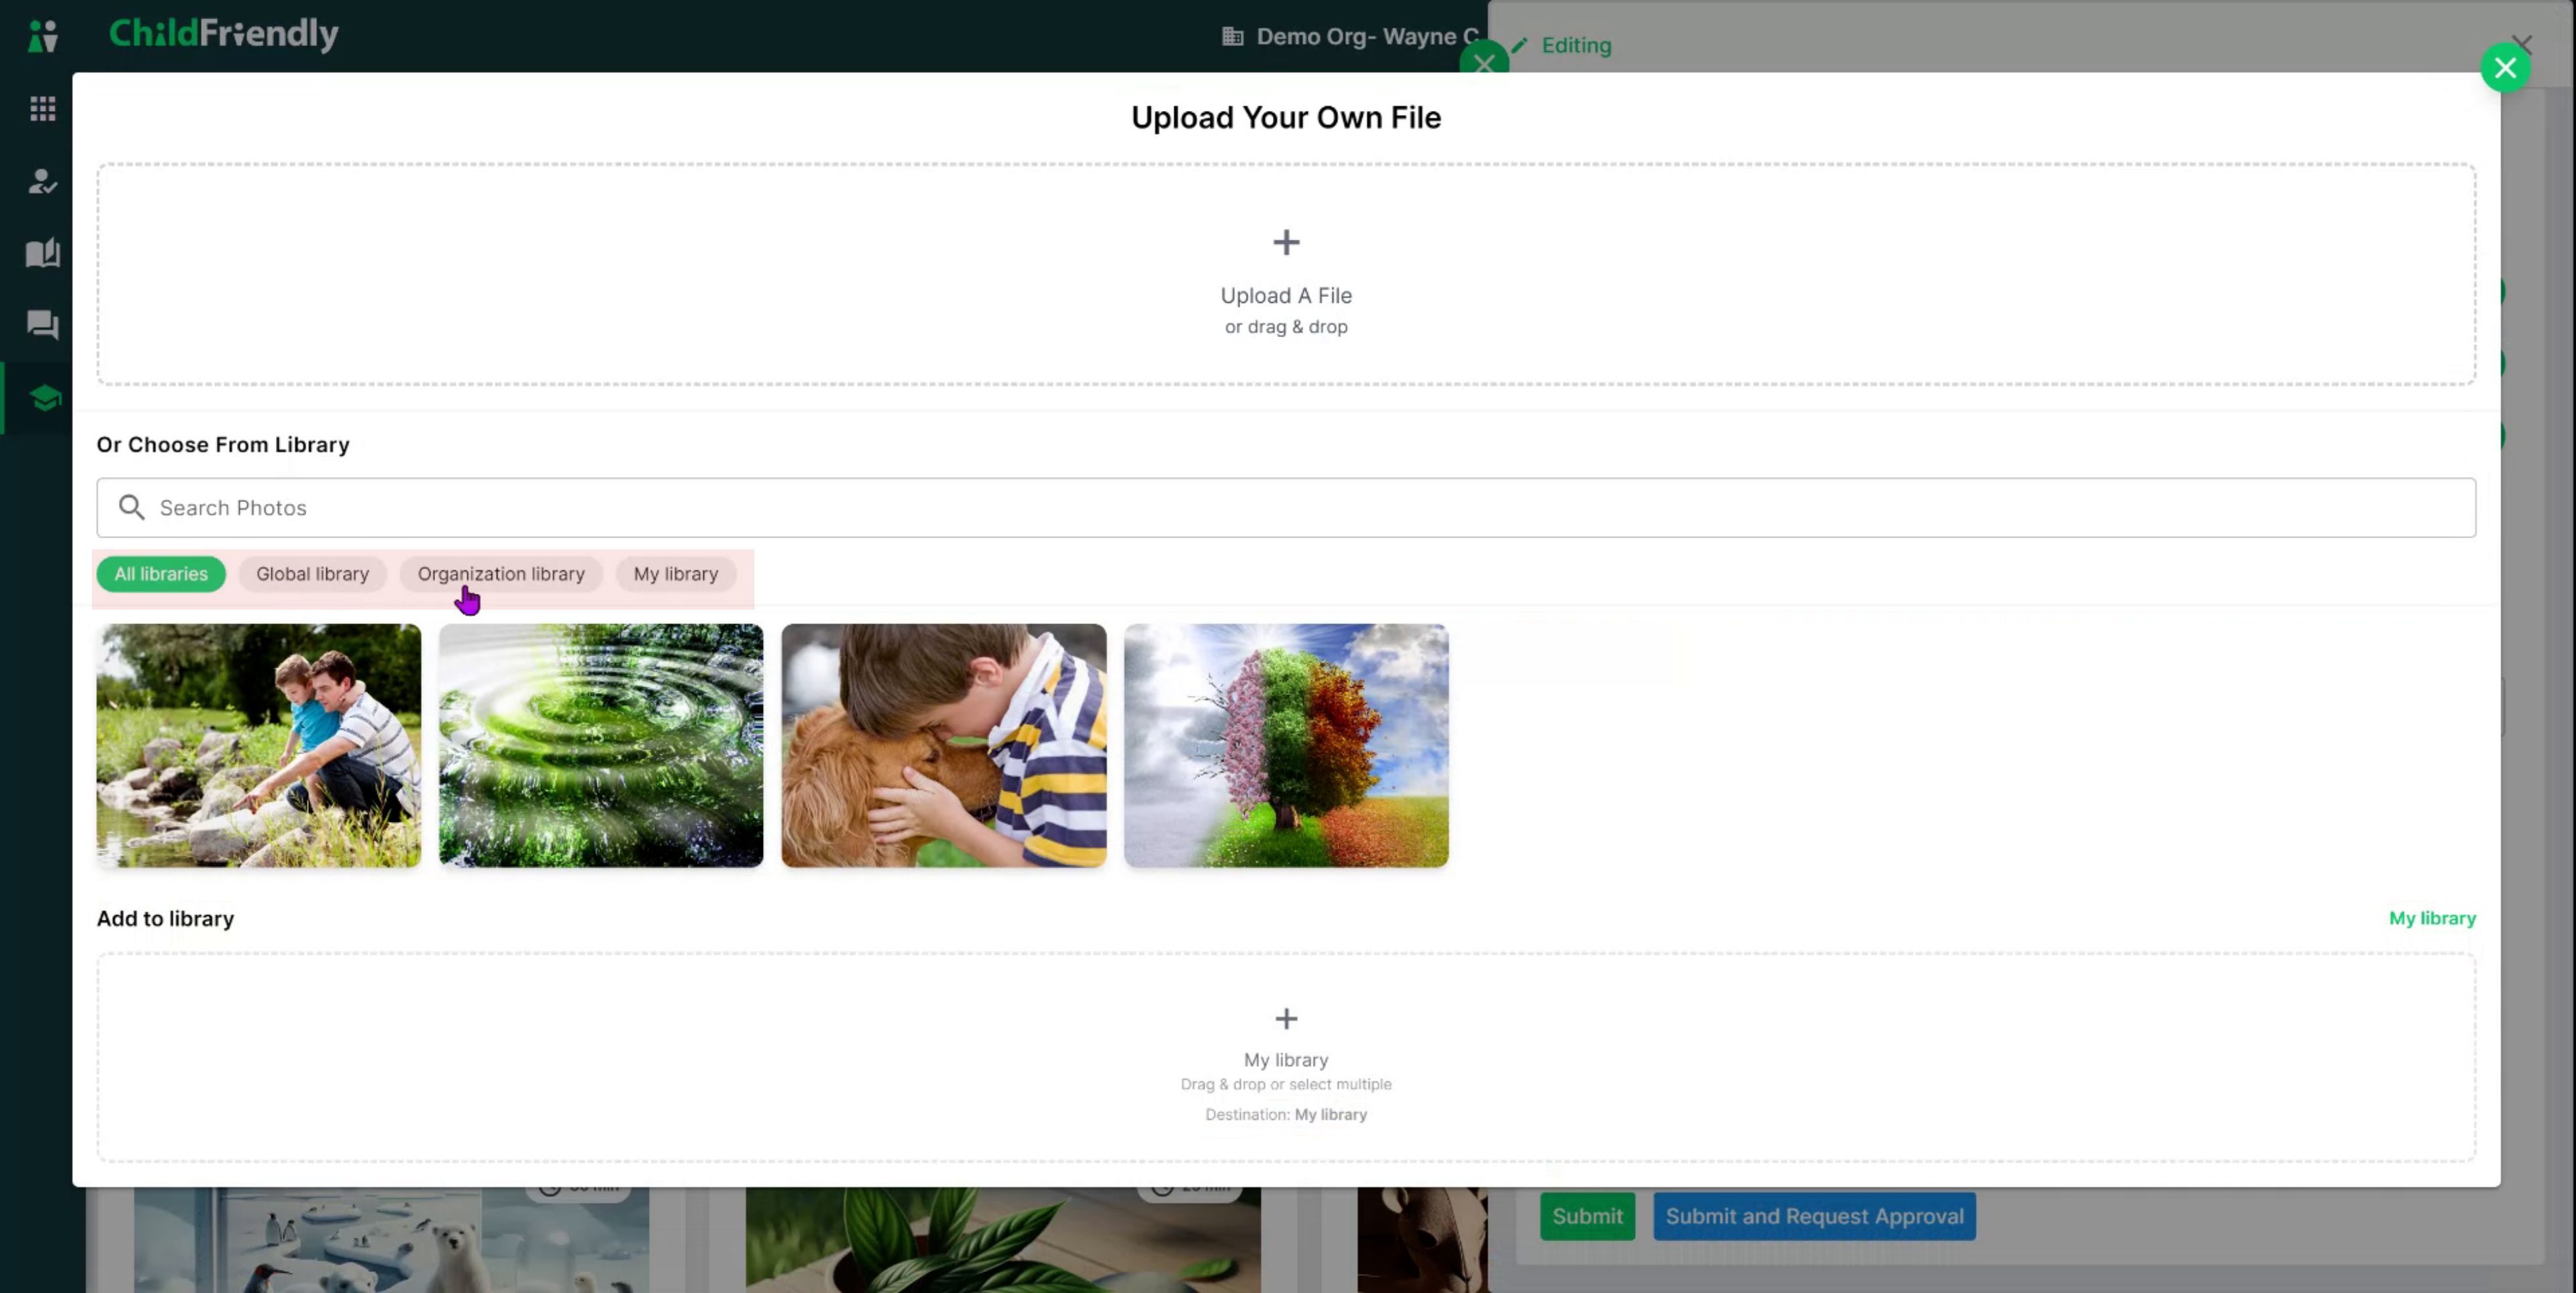
The library includes:
A Global Library with images preloaded by ChildFriendly
Your Organization Library, where your admin has provided photos for your use

Your Personal Library, containing images you have added yourself
You can also upload a file directly from your computer for one-time use.
Step 7: Add Materials for the Lesson
When adding materials, enter each material and specify the quantity needed.

Use “per child” quantities for items each child needs individually, and enter NA for items not required per child, such as:
A shared book you read to the whole class
Pre-stocked supplies like classroom paint
Materials listed here are used to generate shopping lists when the lesson is included in a group weekly learning plan. To understand this feature in more detail, review the video on how to generate shopping lists.
Step 8: Save, Submit, and Next Steps
When you are finished adding all lesson details—content, outcomes, images, and materials—you have two options:
Submit – Saves the lesson as a draft without sending it for certification.
Submit and Request Approval – Sends the lesson to administration for review and certification so that it can be used in weekly plans and shared to your organization's lesson library.
As a next step, you should review the How to Create Weekly Learning Plans video series to see how your lessons are incorporated into weekly plans.
Was this helpful?
Still need help? Ask the team