How to Navigate the Families Module
This document provides a concise orientation to the Families module, explaining each column, how to use filters, and how to quickly check registration, onboarding, and financial compliance for children and their families.
Last updated 3 months ago
Step 1: Navigate to the Families Module
Open your system and go to the Families module from the main navigation.
Confirm you are on the Families list screen, where each row represents a family.
Step 2: Review Family and Guardian Information
Look at the Last Name column to see the family’s last name.
In the Guardians column, review all listed guardians; multiple guardians will appear if applicable.
To email a guardian directly from this screen, click the email icon in the Guardians column.

A side panel will open with the guardian’s email pre-populated. Enter your message content and send the email, without needing to switch to the Communication module.
Step 3: Review Children in Each Family
In the next column, review the Children listed under each family.
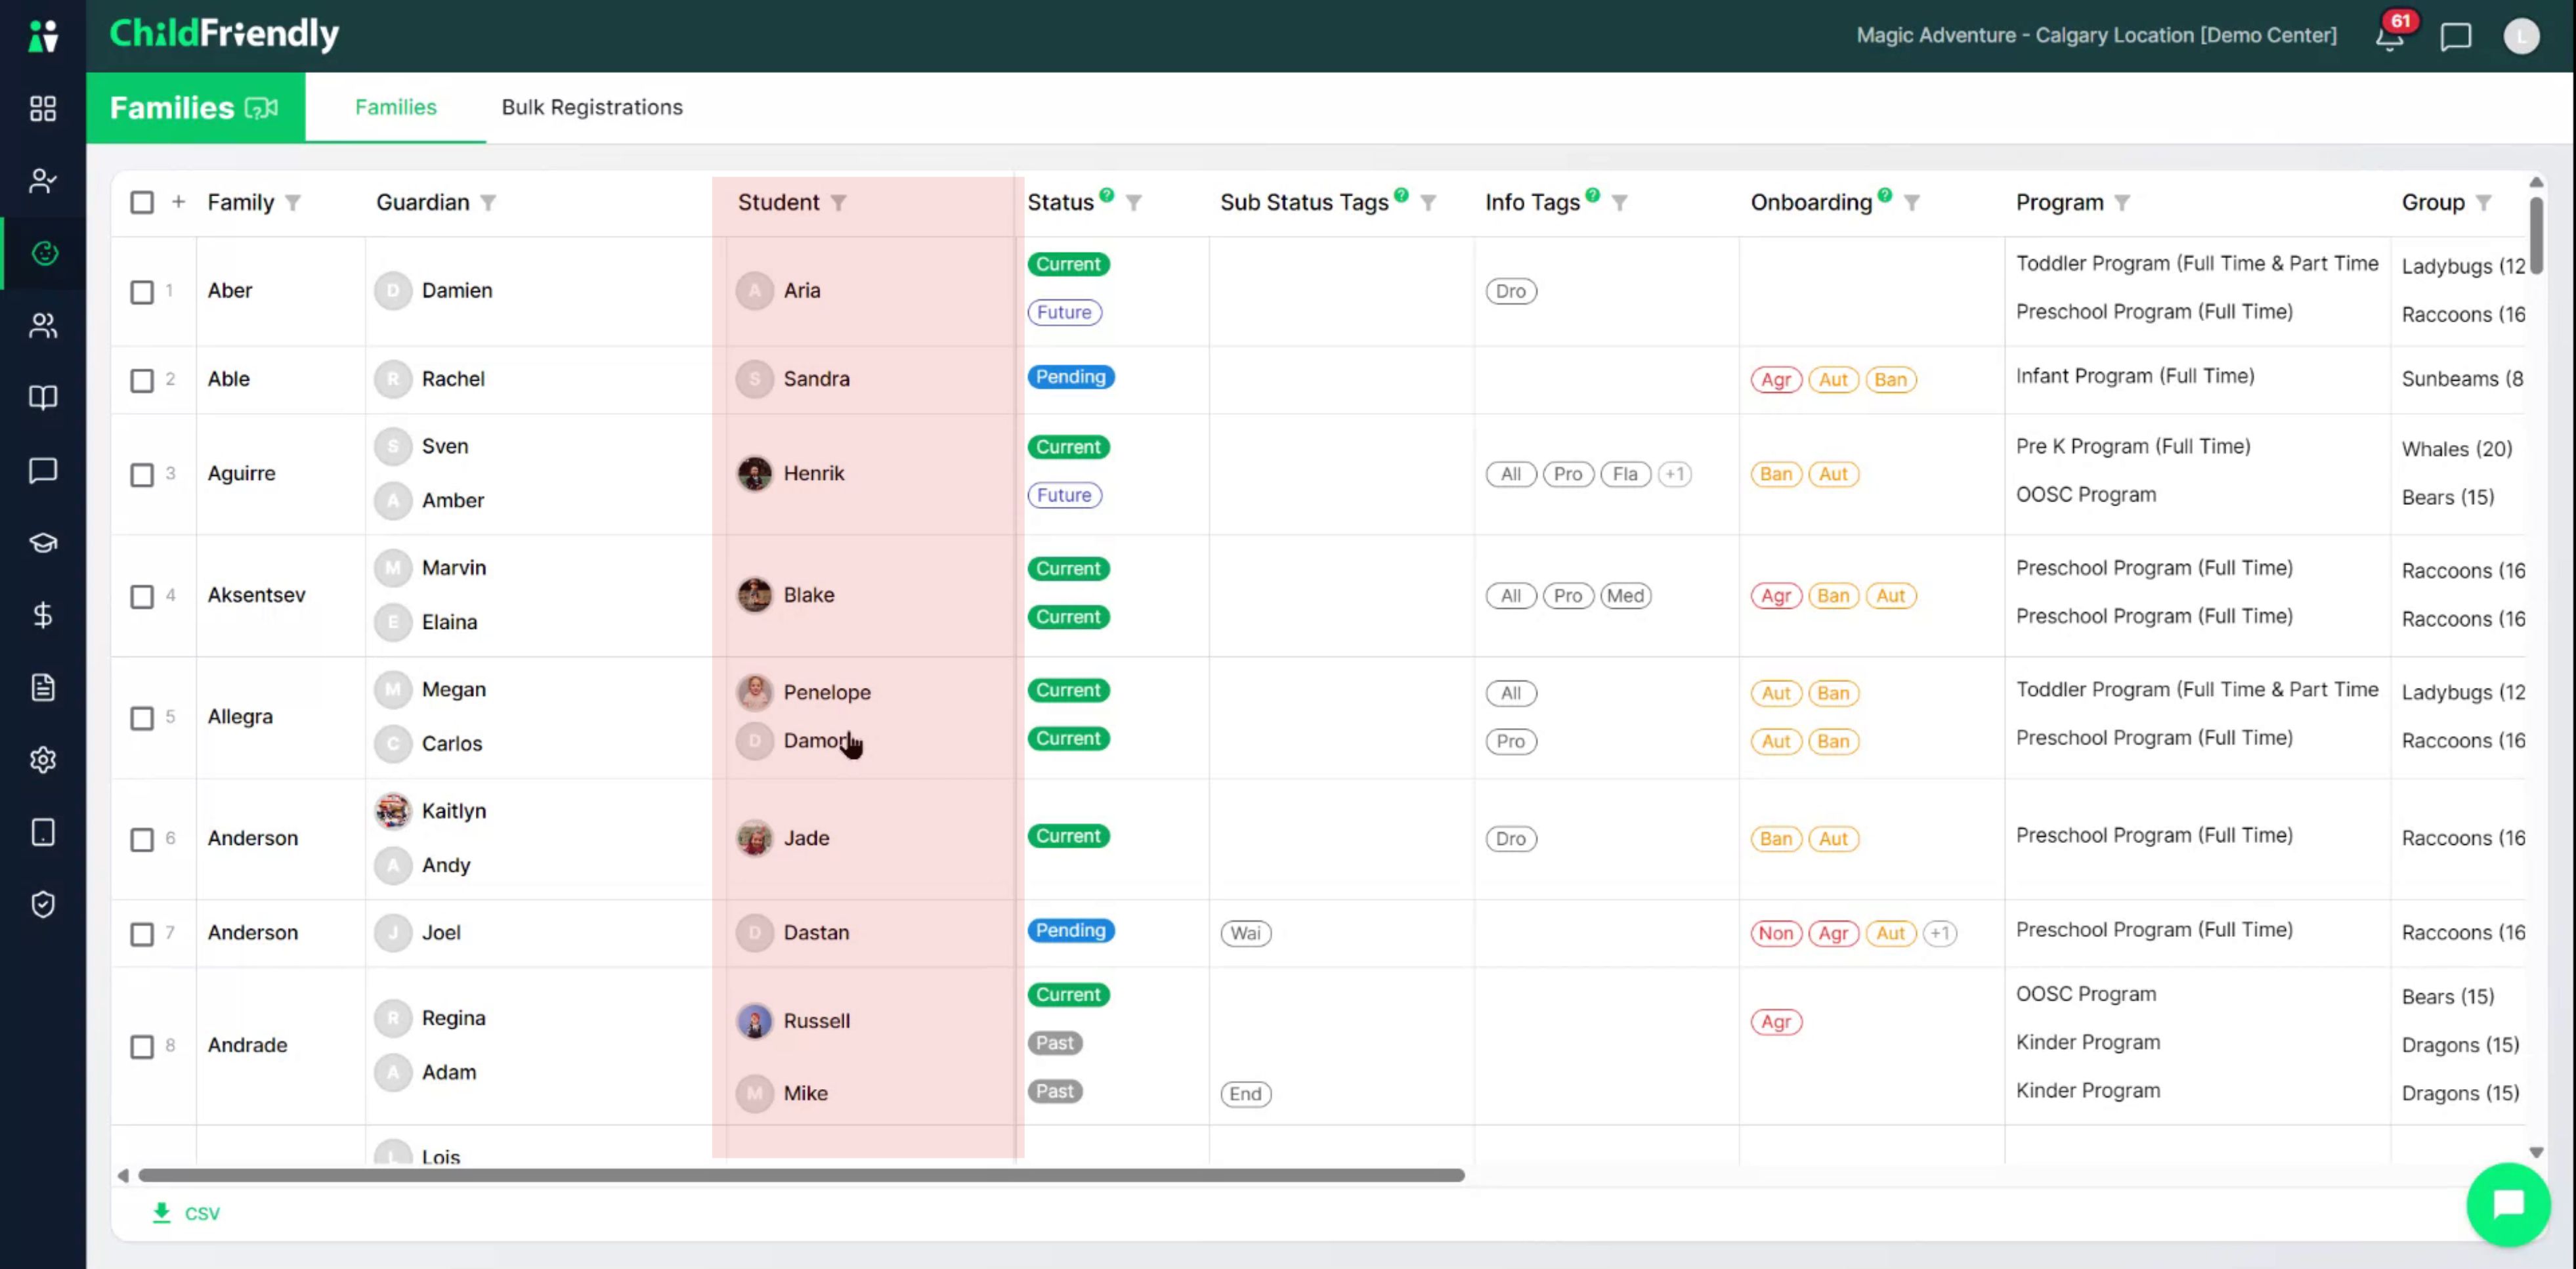
All children associated with the family will appear here.
Step 4: Understand and Filter by Registration Status
Locate the Status column, which shows each child’s registration status.
To see or filter by specific statuses, click the Status filter at the top of the column.
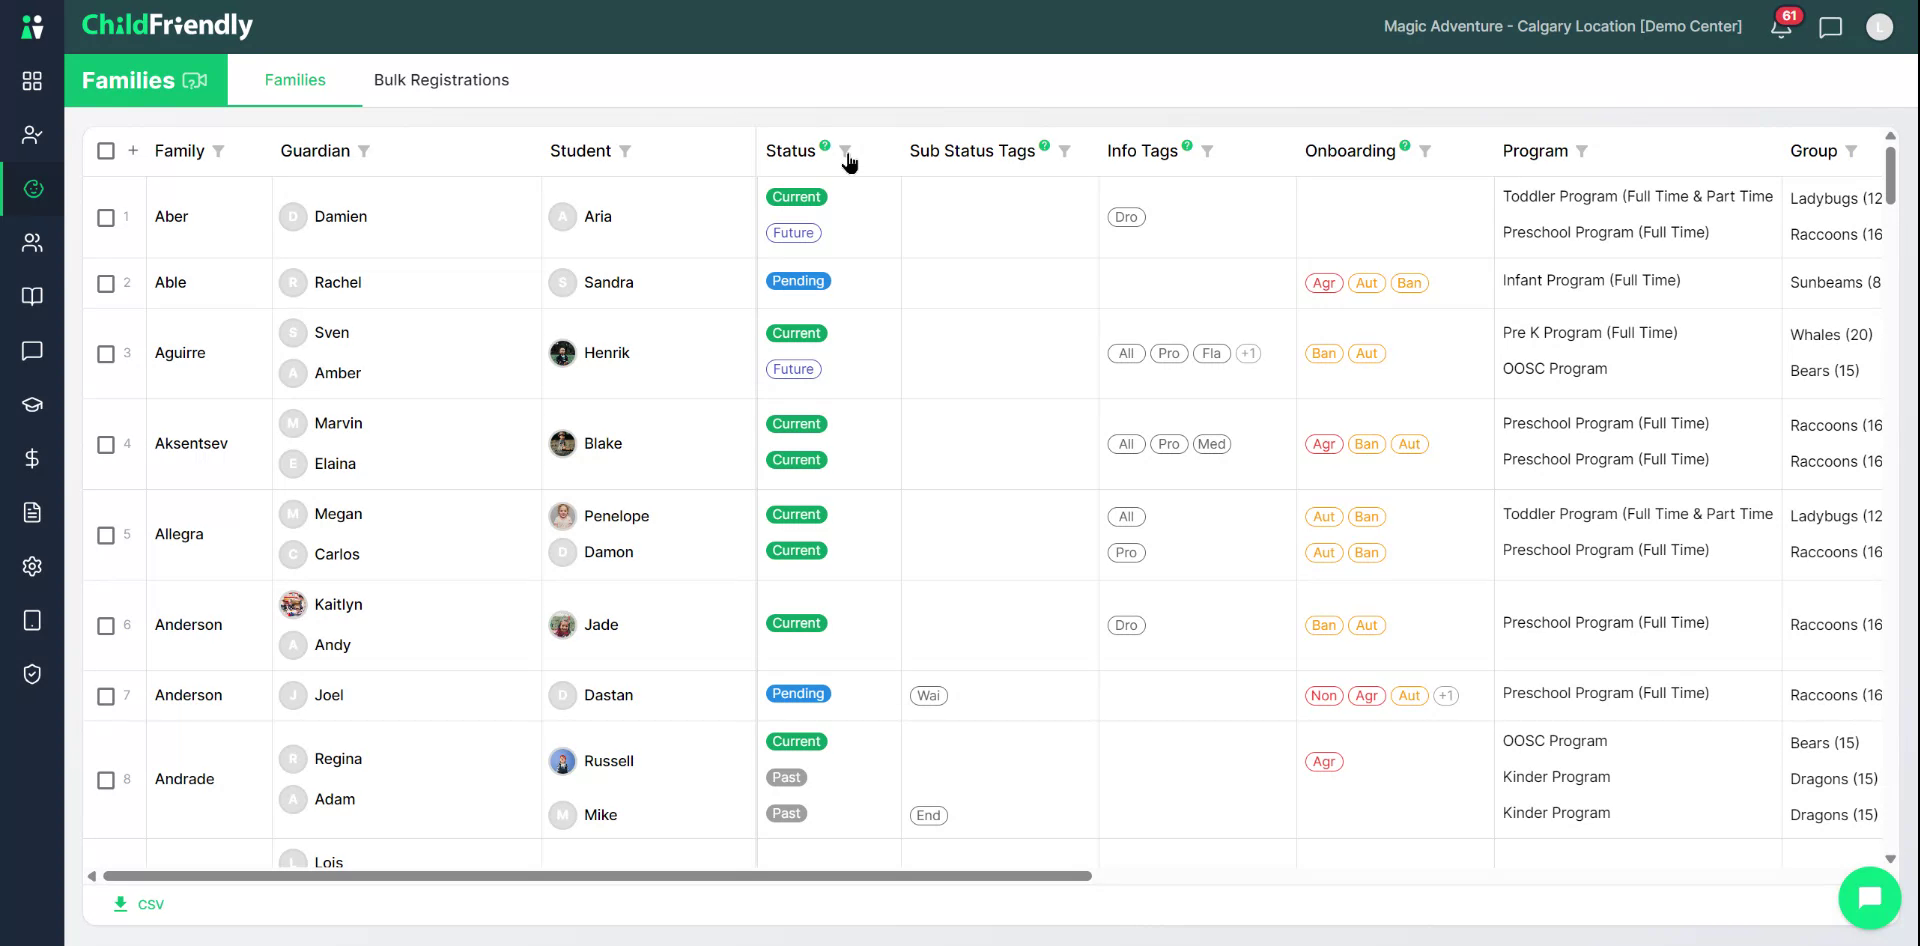
The status options will appear.

Use the following definitions when reviewing or filtering:
Pending: Child has registered online or was added manually but is not yet confirmed as registered. Wait-listed children are also shown as Pending.
Current: Child has an active registration record as of today.
Future: Child has a registration record that starts in the future.
Inactive: Child has no registration record on their profile.
Past: Child has a registration record that ended in the past with no current record active.
If you want to review these definitions at any time, click the question mark icon in the Status column.
Step 5: Review Sub-statuses and Info Tags
Move to the Sub-statuses column to see additional status details for each child.
Click the question mark icon in this column to review definitions of each sub-status.

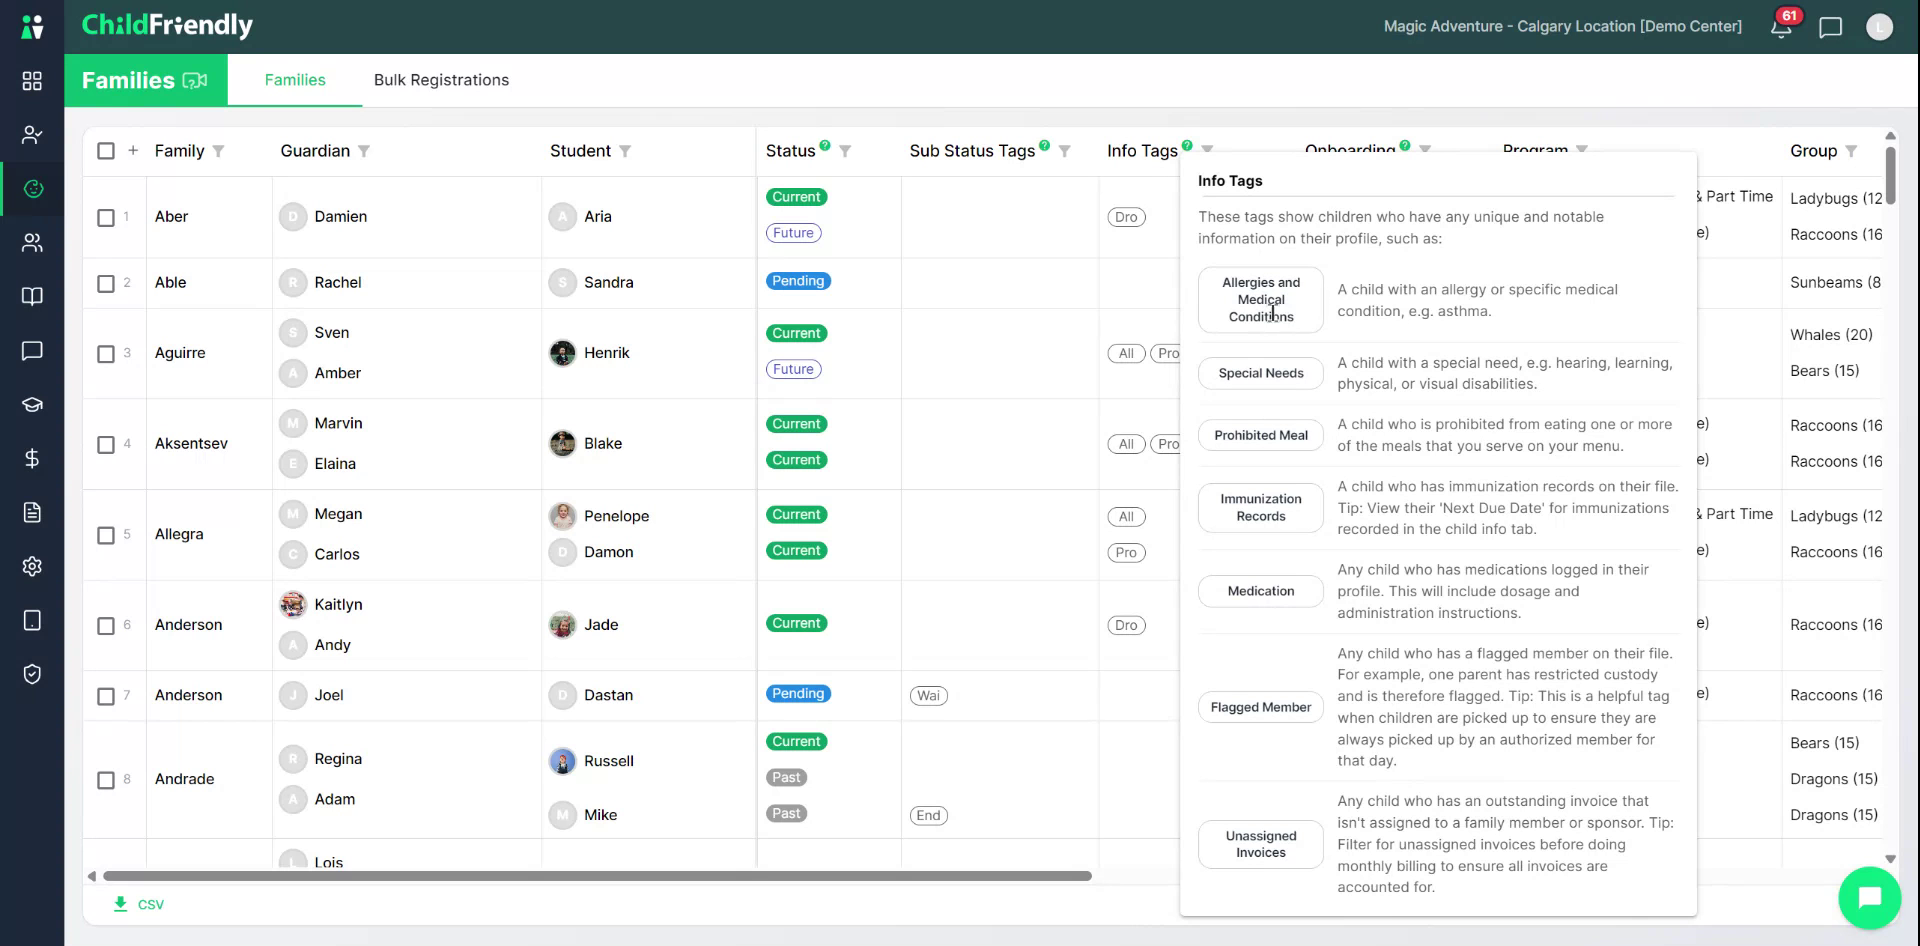
Next, review the Info Tags column, which highlights important flags and conditions.
Click the Info Tags icon to see definitions for each tag.

Typical Info Tags may include ifo such as:
Allergies or medical conditions on file.
Medications on file.
Special Needs
Prohibited Meals
A child's contact flagged for pickup.
Use these tags to quickly identify children with important health or pickup-related information.
Step 6: Monitor Onboarding Compliance
Locate the Onboarding column, which indicates missing or incomplete information required for compliance.
Review common onboarding tags:
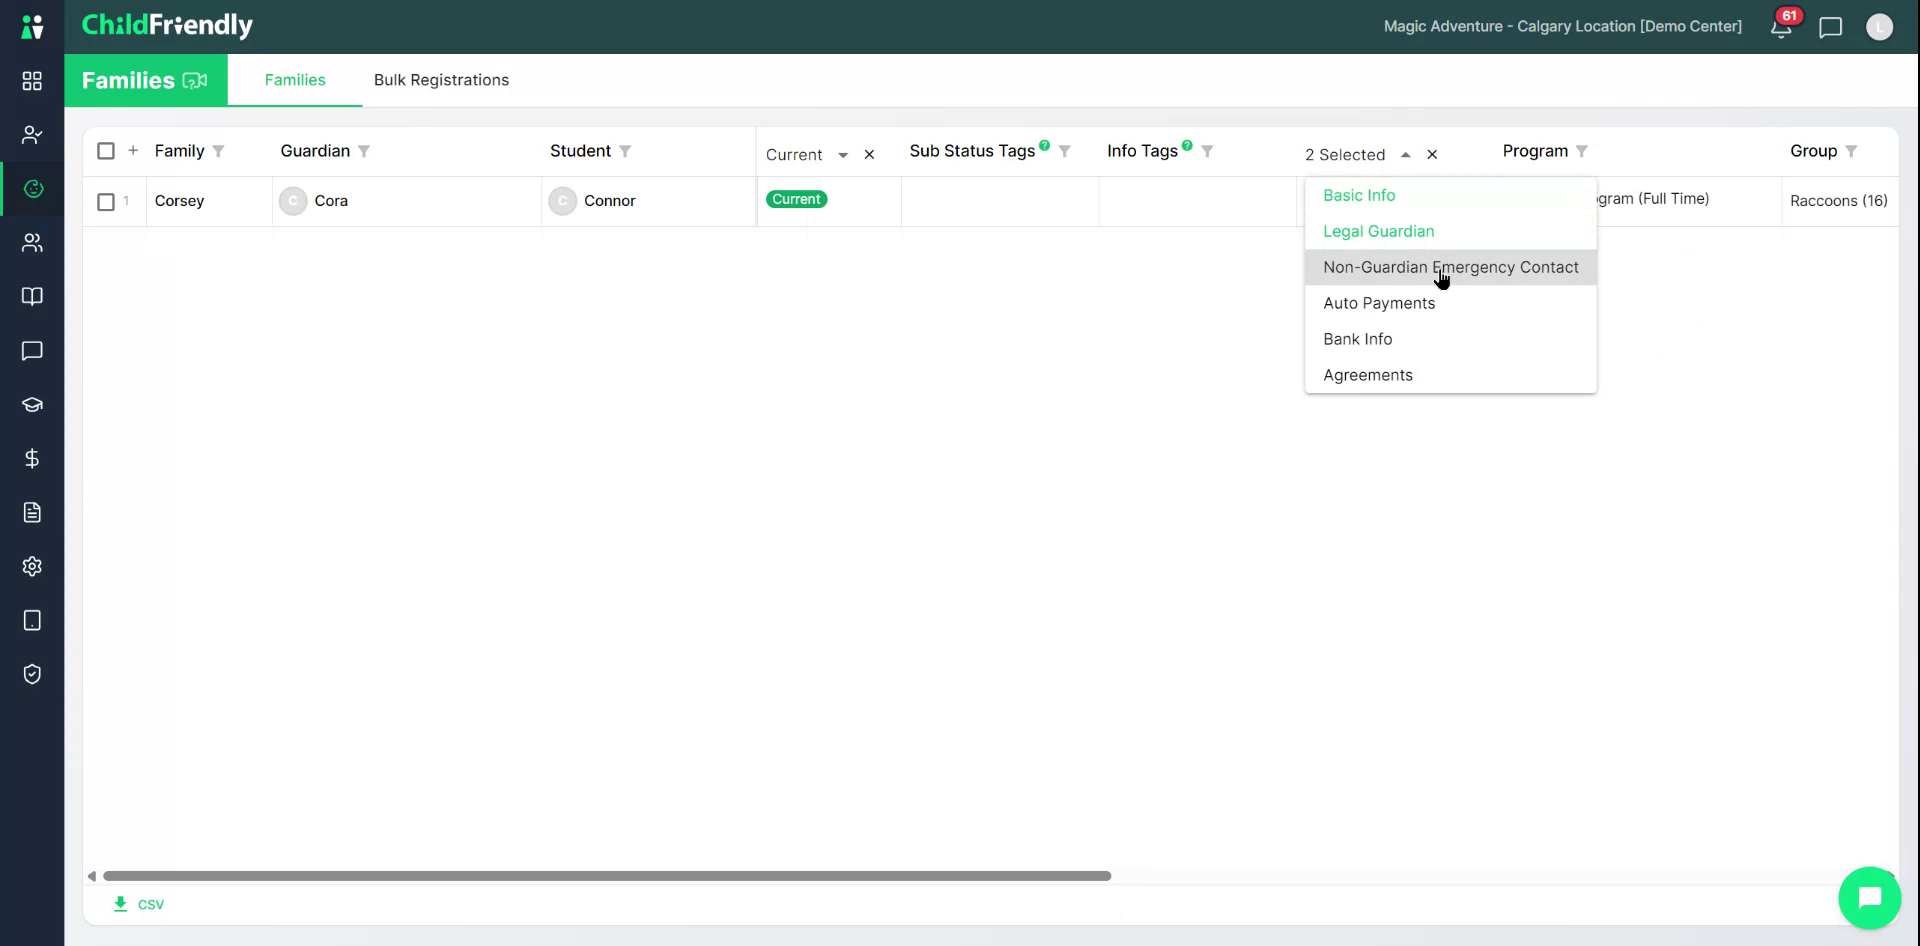
Basic Info: Indicates that essential information (e.g., child’s name or guardian’s name) is missing. This should be rare.
Legal Guardian: Indicates that required legal guardian information is missing. The required number of legal guardians varies by region; missing data here will appear as a red tag and signals non-compliance with licensing requirements.
Non-Guardian Emergency Contacts: Indicates missing non-guardian emergency contacts. Some regions require one, others two, along with complete contact details.
Agreements: Indicates their are center agreements such as a parent handbook that have not yet been signed
Bank Info: Indicates banking info for the families has not yet been entered.
Auto Payments: indicates that the families has not yet enabled automatic payment form their account each period.

Step 7: Filter to Verify Compliance for Current Children
To confirm you are compliant for all active children, start by filtering the list to Current children:
Open the Status filter.
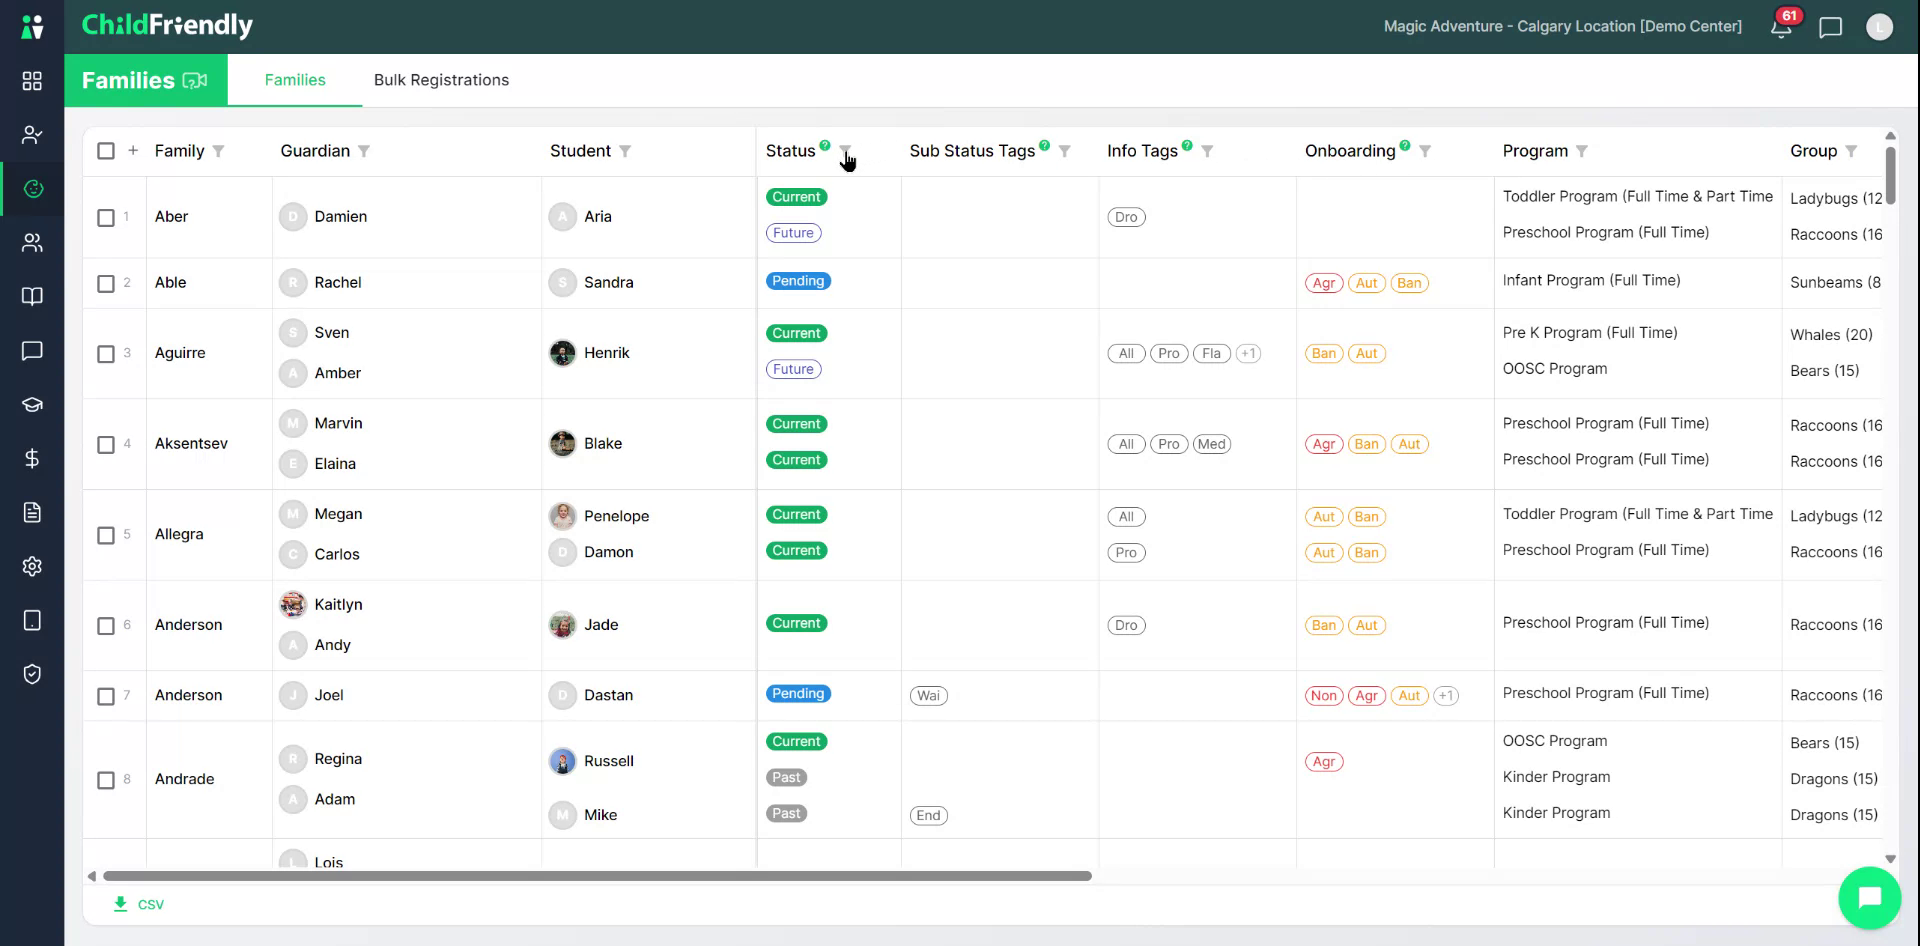
Choose Current.

Next, filter the Onboarding column to show any children with critical missing items:
Filter for tags such as Basic Info, Legal Guardian, or Non-Guardian Emergency Contact.
Step 8: Review Programs, Adjustments, and Financial Balances
Continue across the grid to review:
Program: The program the child is currently registered in, or was registered in previously.
Group: The specific group or class the child is assigned to.
Adjustments: Any adjustments such as meal services or other add-ons on the child’s profile.
Examine the financial columns:
Personal Balance: Total outstanding balance owed by personal family sponsors (guardians or family members), excluding any third-party sponsors.
Third-Party Balance: Amount owed by third parties, such as government subsidies, paying on behalf of the child.
Unassigned Balance: Bills that exist but are not yet assigned to any payer. Use this to identify and correct unassigned invoices.
Additional tracking columns:
Last Status Change: The date the child’s status last changed (e.g., from Pending to Current).
Last Billed: The last date billing was generated for the child.
Attendance: The last date the child was signed into the center.
Step 9: Filter and Review Overdue Balances
To quickly identify overdue balances, use the filter on the balance columns.
Set the filter to show balances that are, for example, two months past due.
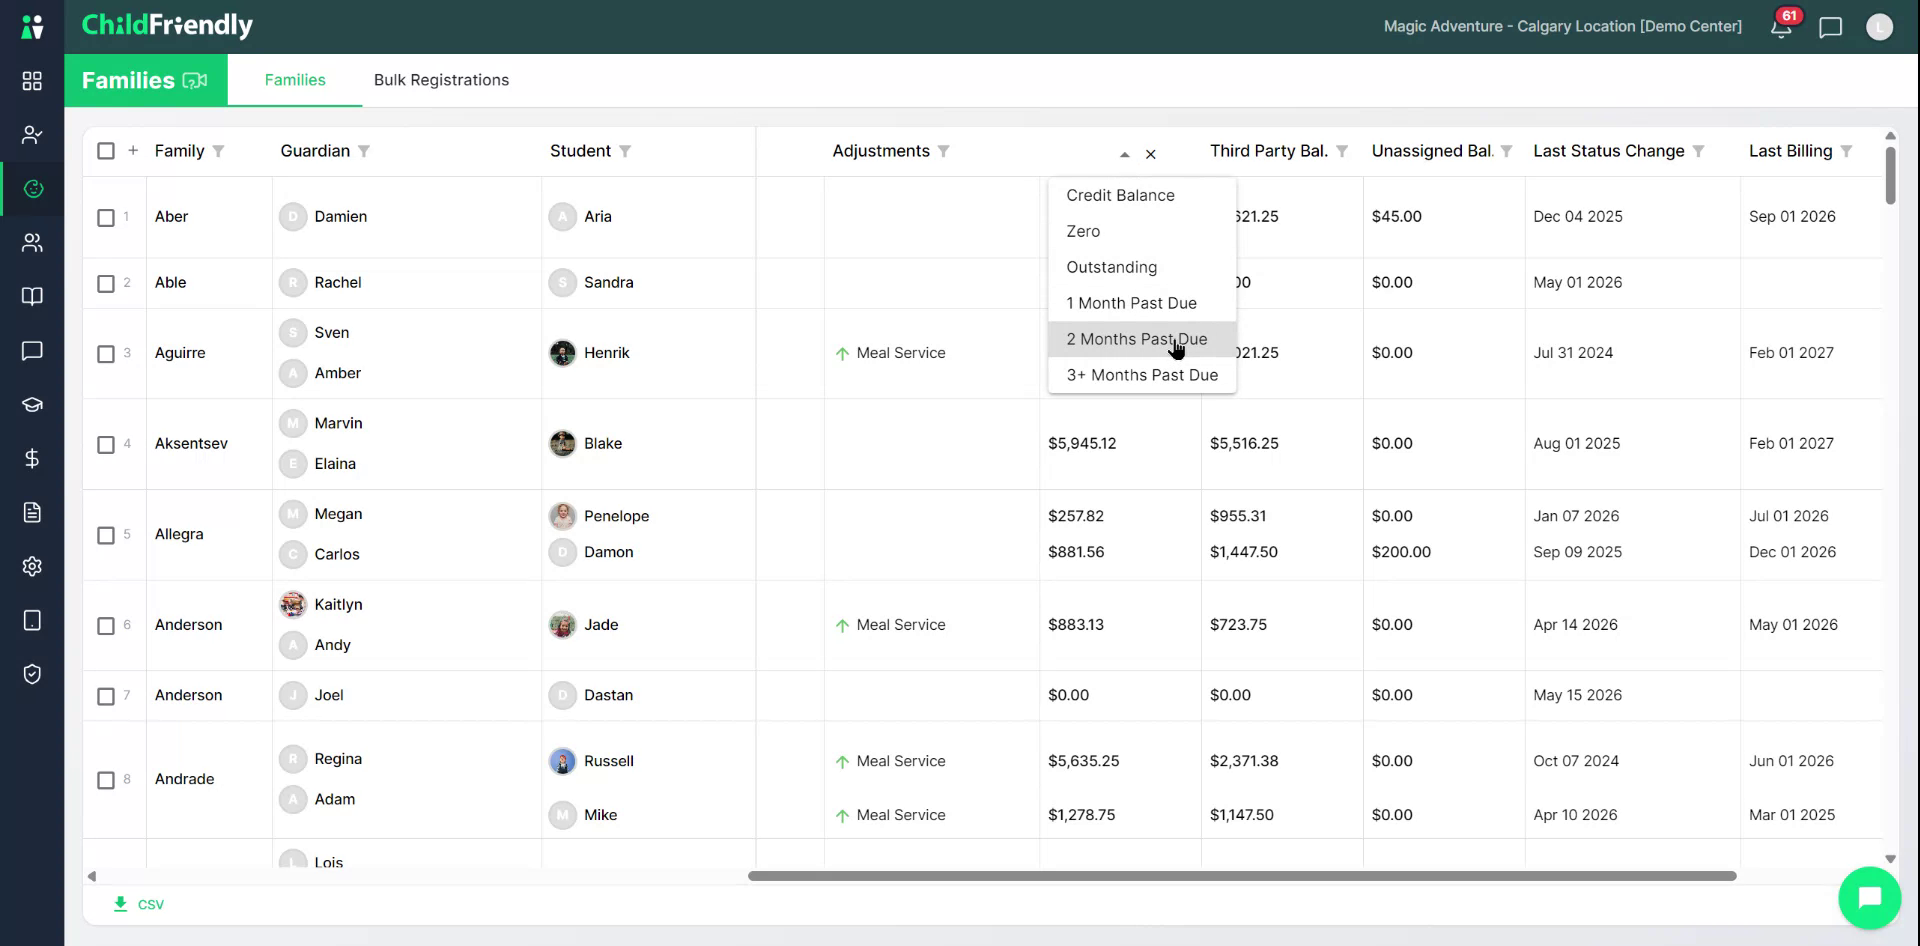
Review the filtered results to see which families have invoices that are two months past due.
Use this list to follow up on collections and ensure invoices are being paid in a timely manner.
Remember that while the Families module provides an at-a-glance view of financial information, most detailed finance-related activities should be completed in the Finance module.
Was this helpful?
Still need help? Ask the team