How to Add and Edit a Registration Record
In this guide, you’ll learn how to review a child’s pending registration, confirm their spot, handle deposits or waitlists, and see how their future program moves and rates are planned. This will help you quickly move families from “applied” to “ready for their first day,” even when you’ve got little ones keeping you busy.
Last updated 3 months ago
Let’s Get Started: Step-by-Step
Open the onboarding enrollment screen in the admin view
Switch to the admin view of your system.
Go to the onboarding enrollment screen where new family registration applications appear.
Think of this as your command center for reviewing applications and managing the onboarding checklist.
From here, you can see and track all tasks that must be completed before a child’s first day.
Confirm that you’re ready to register a child

Find the child whose registration you’re ready to accept.
Before they can be fully accepted and assigned to a group, you first need to confirm their registration.
Open the child’s profile from onboarding
On the onboarding enrollment screen, click the child’s name to open their profile.

(You can also reach this same profile from the Families module if you prefer.)
Go to the Registration tab on the child’s profile
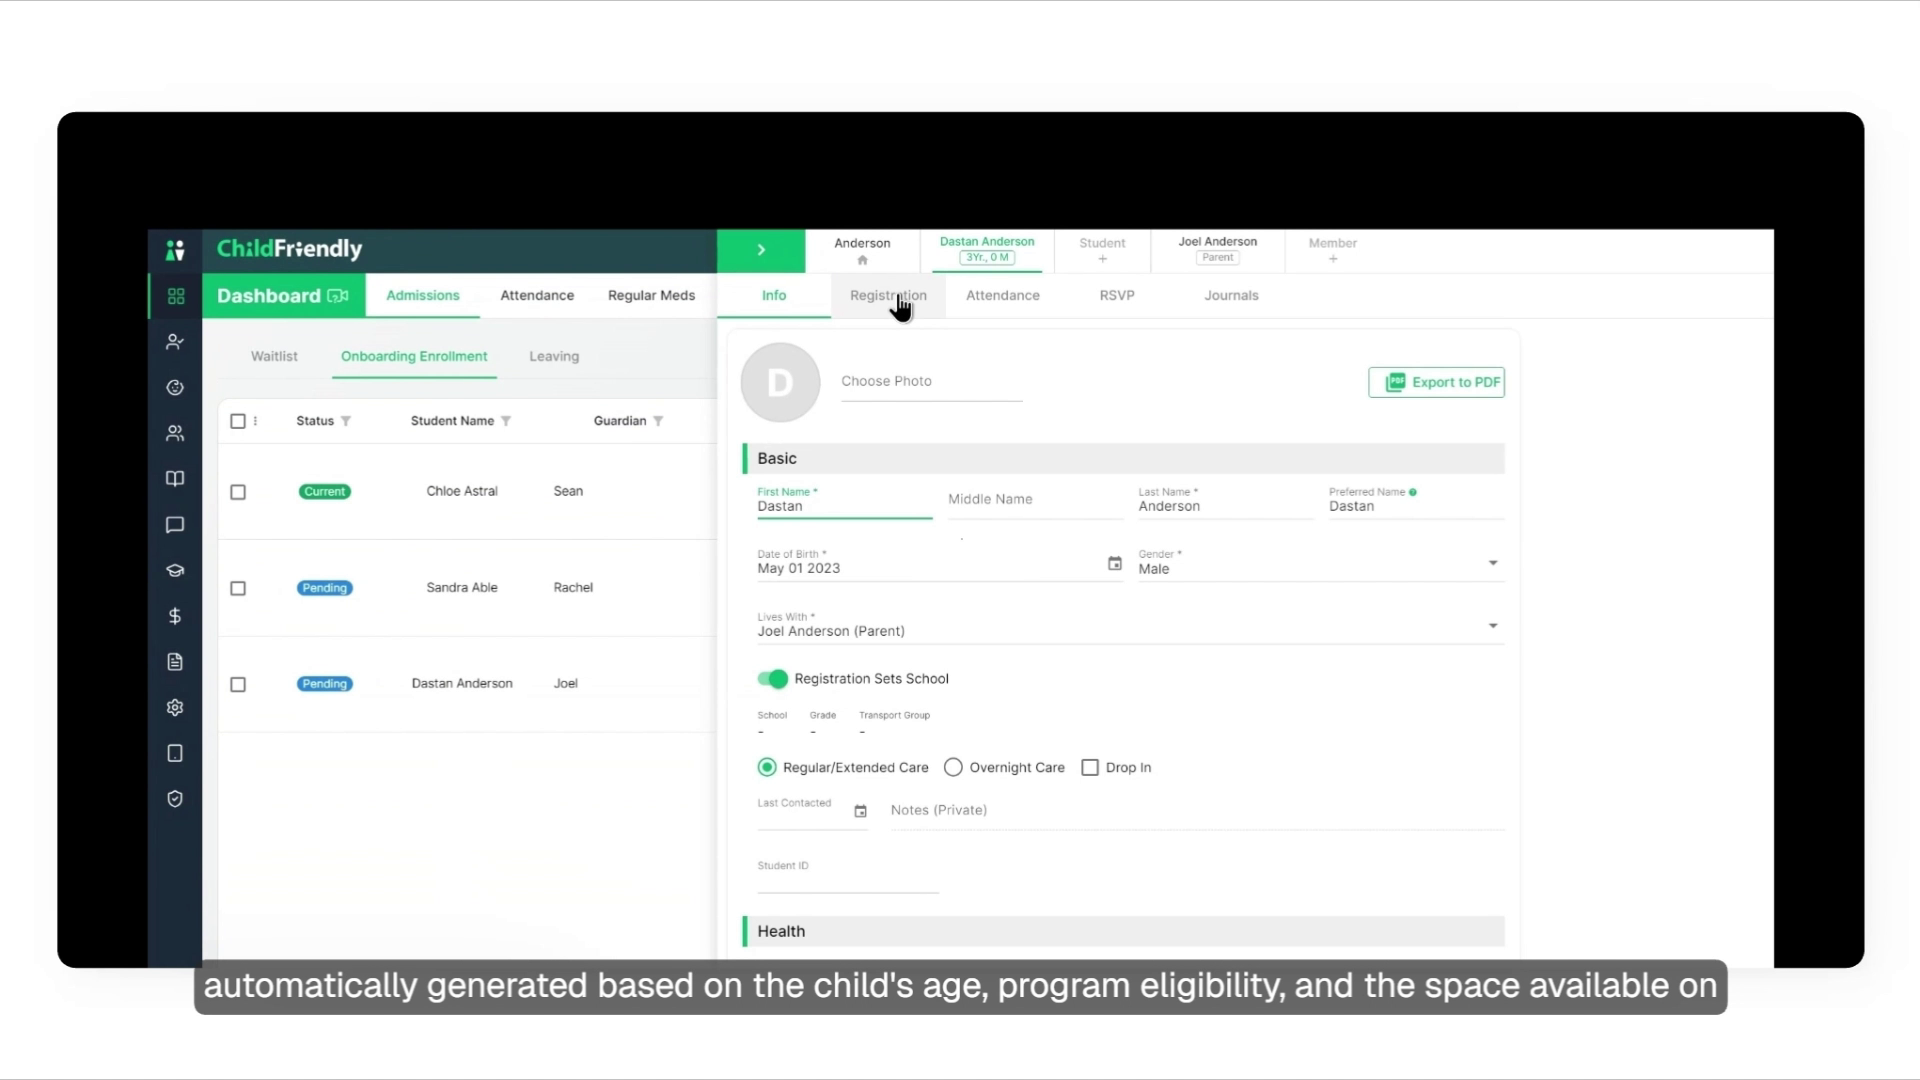
Once you are on the child’s profile, look for the Registration tab.
Click the Registration tab to see their registration records.
Review an online registration that is already pending
If the parents completed registration online, you will see a pending registration record here.
This pending registration is based on the information the parents entered.
Create a new registration if the child was added manually
If you added the child manually and there is no registration record yet, you can create one from this screen.
Click the New button to start a new registration.
Fill in the required information for the child’s registration.
Click Create to save the new registration record. After this, you will see a pending registration ready for you to review.

Adjust fields on the pending registration if needed
On the pending registration, you can change details if something needs updating.

Use the dropdown menus to override any field that needs to be different.
You’ll notice options are grouped as “recommended” versus “others.”
The recommended options are suggested automatically based on:
the child’s age,
program eligibility, and
space available on the chosen start date.
In most cases, you will want to choose one of the recommended options.
If needed, you can still choose a non‑recommended option by overriding the selection.
Use the action items on the right side of the registration
On the right-hand side of the pending registration, look for the list of actions you can take.
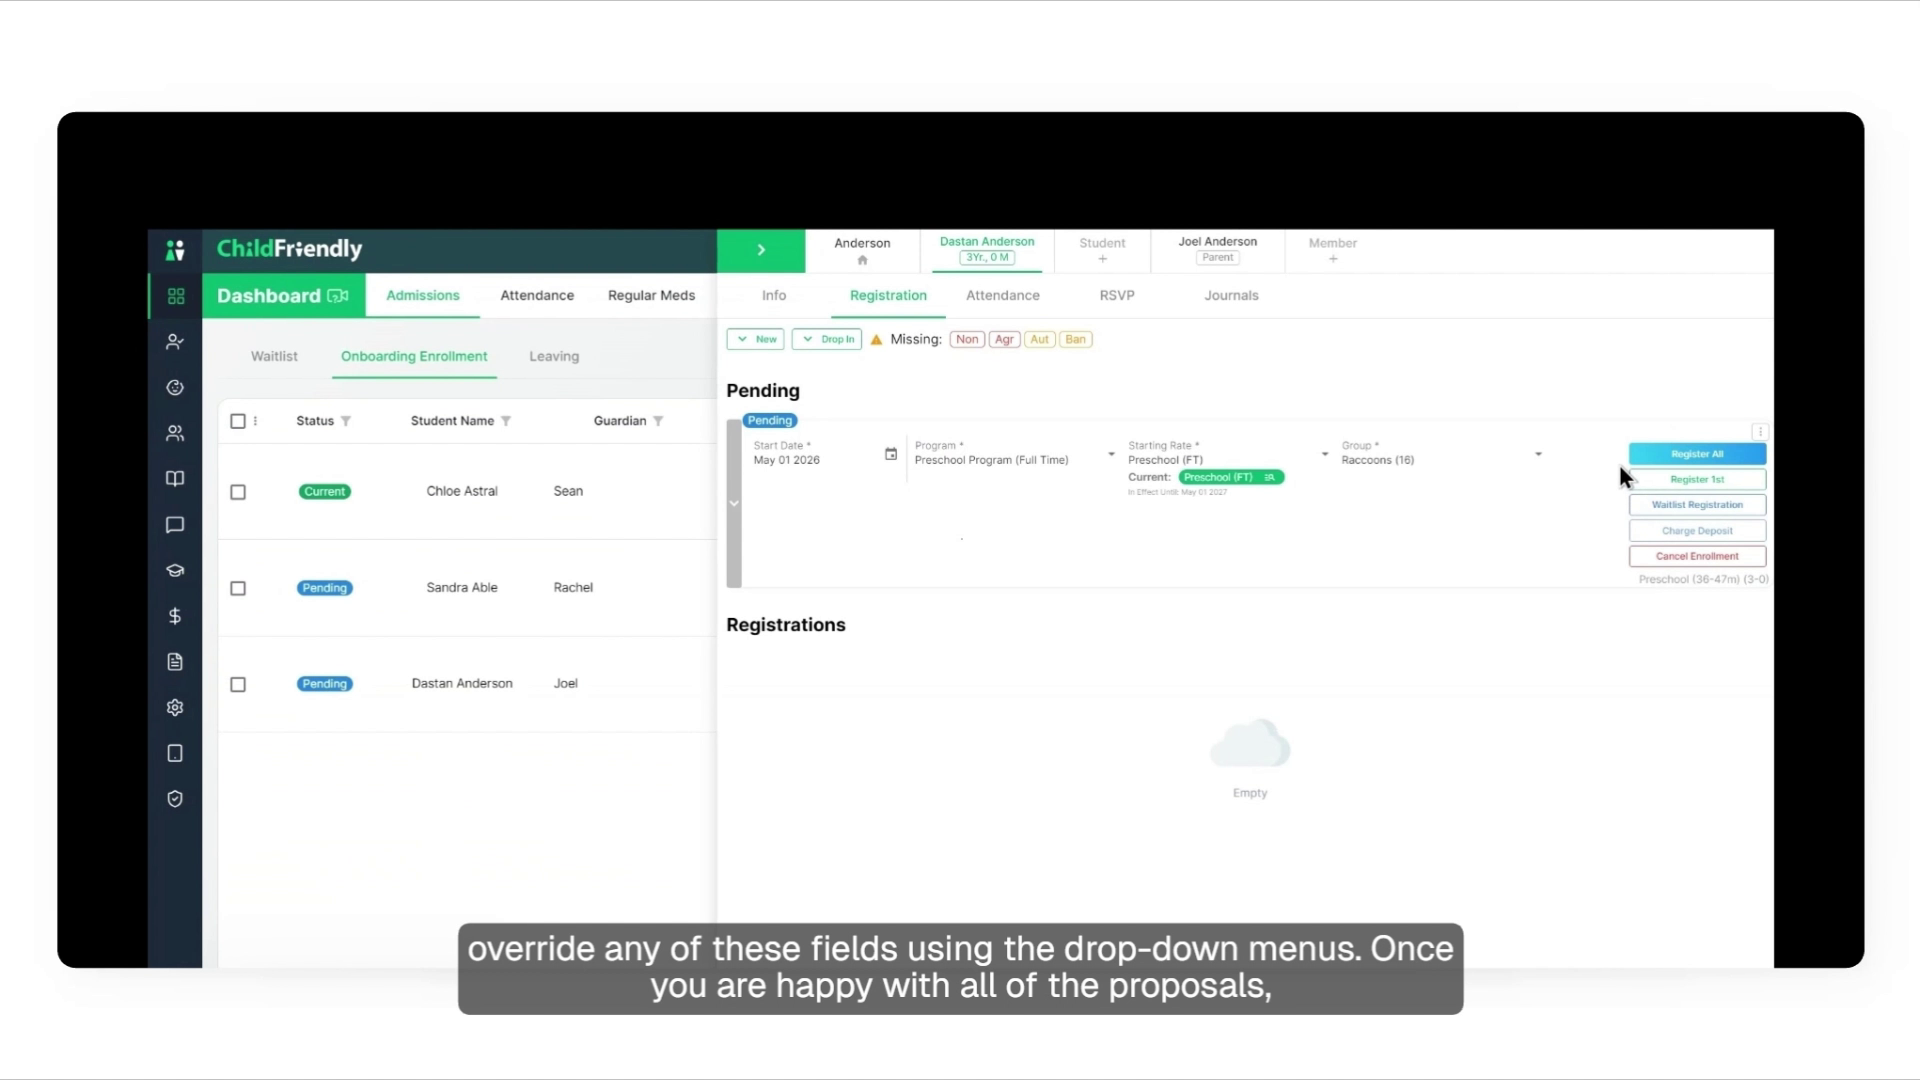
Cancel a registration when a family is not proceeding
If the registration was created by mistake, or if the family decides not to continue, you can cancel it. Use the Cancel option to cancel the registration when needed.
Charge a deposit when required
If parents applied online and a deposit was required, they will already have paid that deposit as part of the online application.
If you created the registration manually using the New button, no deposit has been charged yet.
In that case, click Charge Deposit.
This will send the parent an email with a secure payment link so they can pay the deposit.
Waitlist the registration if there is no immediate space
If you do not have space available right now, you can move the child to the waitlist instead of registering them.
Click the option to waitlist the registration.
The child will automatically move from the onboarding tab to the waitlist tab on your dashboard.
Understand the Register First and Register All options
When space is available and you’re ready to confirm, you’ll see two options:
Register First and Register All
These are used to confirm the registration proposals that the smart registration system has suggested.
Before choosing, you should review the details of the proposals.
Expand the pending registration to view all proposals: On the pending registration, expand the record to see more details.

When expanded, you will see all the proposals the system has created for this child (for example, different date ranges and program moves over time).
Carefully review each proposal so you can decide whether to accept just the first one or all of them.
Register for all proposals at once if that fits your plan
If you agree with all the proposals shown, you can choose to register for all of them.
To do this, click Register All.
This confirms every proposal that has been suggested.

If you only want to accept some of the proposals (not all), you can pick and choose.
For each proposal you want to accept, click the blue arrow append icon beside that proposal.
This lets you register the child for specific proposals individually.
View rate history using the magnifying glass icon:
On the registration screen, you can also review how the child’s tuition rate changes over time.

Because rates are tied to age, a child’s rate may need to change even before their program changes.
Click the magnifying glass icon next to the rate field to open the full rate history.
This shows past, current, and future rates for this registration, including exactly when each rate will change (for example, on the child’s birthday).
In the example, the child starts at the preschool rate, and on May 1st, 2027 (their fourth birthday), the system has already scheduled an automatic switch to the pre‑K rate.
This helps you see the schedule so you know the correct amount will be charged, even if the program itself hasn’t changed yet.
Minimize the child’s profile and return to onboarding
Once the registration has been set up, you can minimize or close the child’s profile. You will return to the onboarding enrollment screen.
Check the child’s updated status on the onboarding screen
Back on the onboarding enrollment screen, find the child again:
Their status will now show as Current if their start date is today or in the past.
If the start date is in the future, their status will show as Future instead.
This tells you they are fully registered and ready to begin on the date you set.

Complete the onboarding checklist and remove the child from the dashboard
Work through all the checklist items for this child on the onboarding screen.
Once every checklist item is complete, click the Complete button for that child.
The child will be removed from the onboarding dashboard because they are now fully ready for their first day of care.
You can still access their profile and all details at any time under the Families module.
You’re all set! You now know how to take a child from a submitted application all the way to a confirmed registration, with clear visibility into their future programs and rates.
Was this helpful?
Still need help? Ask the team