How to Complete the Registration Process
In this guide, you’ll see exactly what parents experience when they register a child online, and how you then confirm and manage that registration in your system. This helps you keep enrollments organized, payments set up, and children smoothly moved into the right rooms and programs without extra manual work.
Last updated 3 months ago
Let’s Get Started: Step-by-Step
Understand what parents see when registering online
When parents open your online registration form, the first section asks for the legal guardian’s name and details.
Next, the form asks for the child or children they are registering. Parents can add more than one child to the same registration.
After adding children, the form asks parents to choose a preferred start date for care.

If your center requires a deposit for that specific program, the form clearly shows the required amount before parents submit.
When parents are done filling in the form, they press the Submit button to send the registration.
If a deposit is required, the next screen is where parents make their payment for that deposit.
If no deposit is required for that program, parents simply press the Complete button to finish the registration and see a success message confirming it went through.
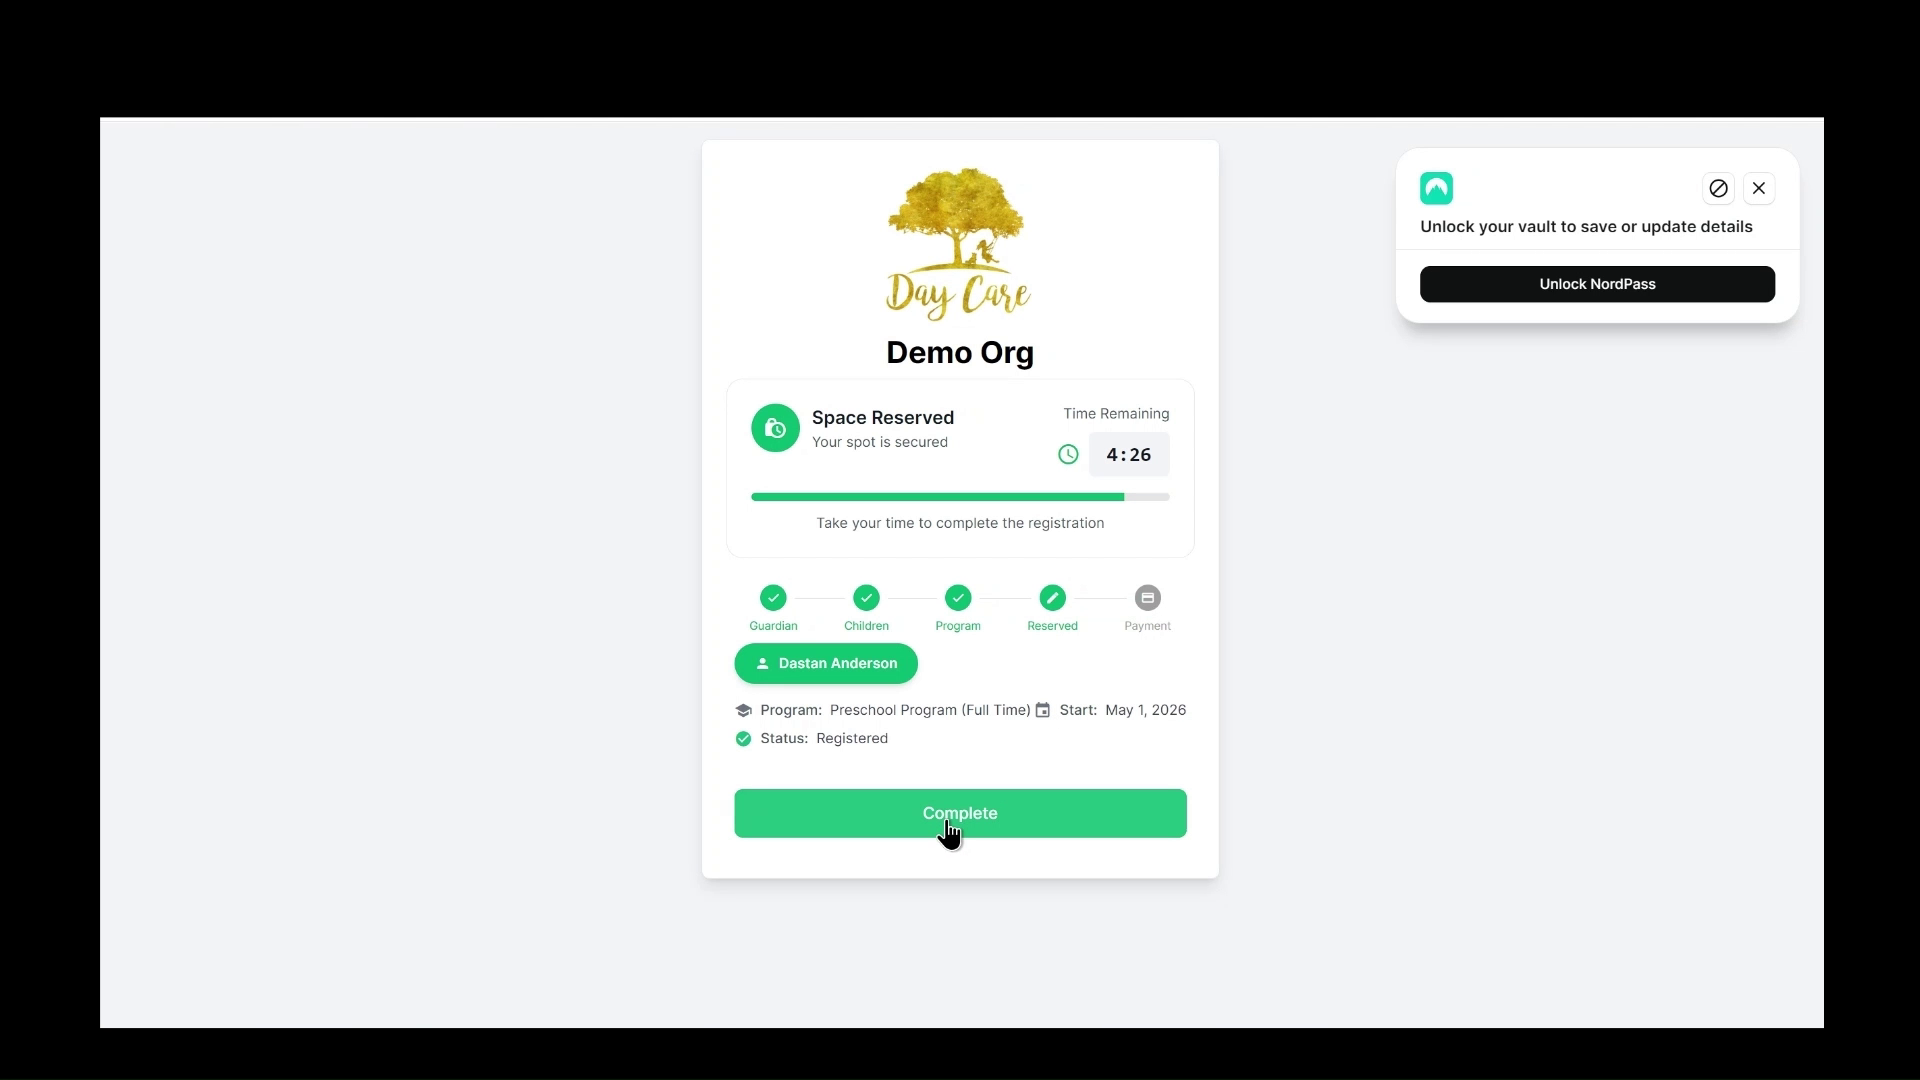
How parents access and set up their ChildFriendly portal
Parents receive an invitation email from your center with a link to the ChildFriendly portal. The email guides them to set up a password and login.

After they log in, either from the app or a computer, they arrive on a welcome screen where they press Next to begin the onboarding steps.

What parents complete in the guardian and child forms
First, the system prompts parents to complete any missing guardian information, such as address and other required details. They enter the information and press Next to continue.

Next, the system asks for additional child (student) information, such as healthcare numbers or immunization status.
Some fields are required and must be filled in.
Others are optional and can be skipped if not relevant.
Parents can also add:
Permissions for medications
Allergies
Medical conditions
Special needs When they are finished with this section, they press Next.

How parents review and sign agreements
Parents are then shown any agreements your center has set up (for example, policies or consent forms). Some will be required, and others may be optional.
Parents use the eye icon to open and review each agreement before signing.

Once they have read the agreements, they select the ones they wish to sign and press Next to continue.

The system will not allow them to move forward until all mandatory agreements have been accepted and signed.

How parents add payment information and choose auto-withdraw
On the payment screen, parents add either their banking details or credit card details, depending on what they prefer and what your center accepts.
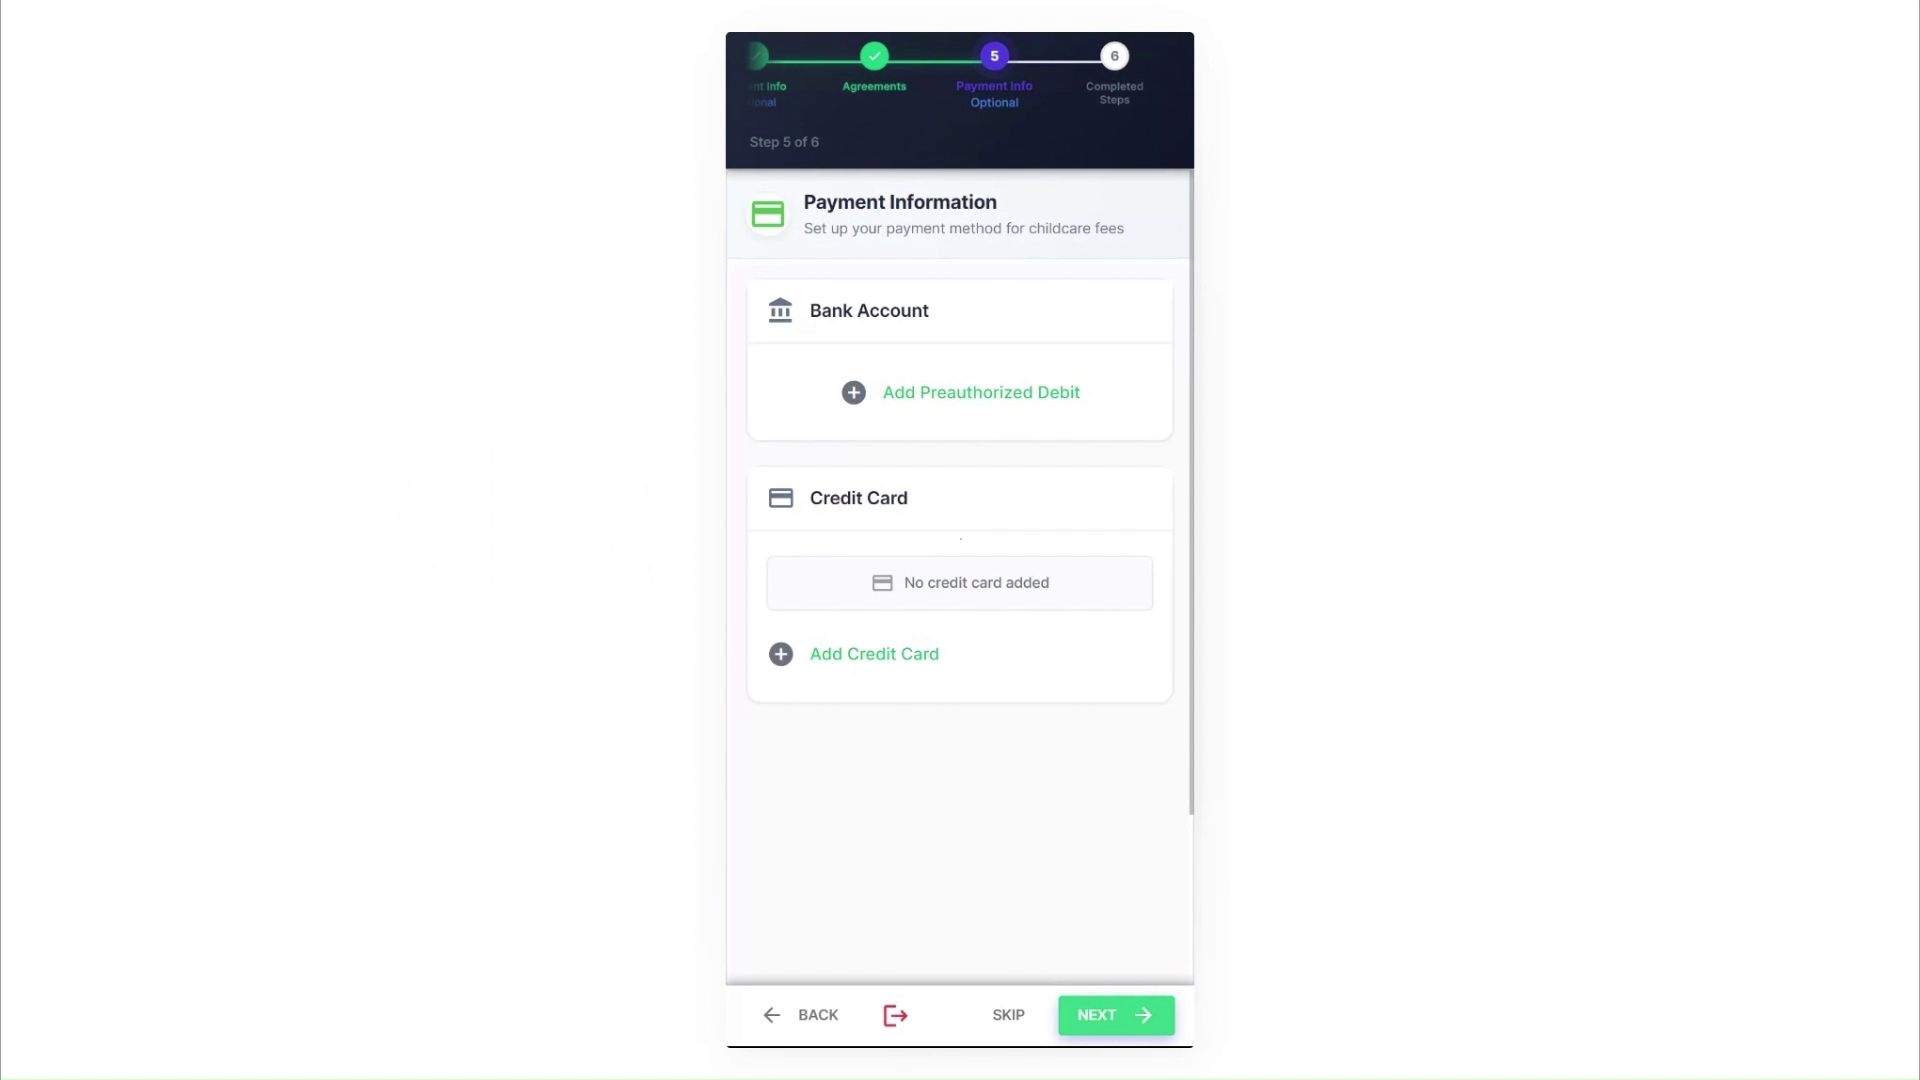
If they want automatic fee processing, they select the Auto Withdraw option.
If they prefer to pay manually each month, they leave Auto Withdraw unchecked and press Save. Their payment method is stored so they can pay through the app when needed.

After adding and saving payment details, they press Next to continue.

How parents finish their one-time online registration
Once all sections are complete (guardian info, child info, agreements, and payment), the system confirms that the one-time online registration is done.
Parents then press Complete to enter their main portal home screen.

On the home screen, parents may see important notifications pinned at the top. They can dismiss these if they prefer once they have read them.
Open the child’s profile and go to the Registration tab
In your admin portal, go to the child’s profile from your Families or onboarding area.
Click the child’s name to open their profile.

At the top of the child’s profile, click the Registration tab to see their registration records.

Review an online registration or create one manually
If the parents have completed online registration, you will see a pending registration record already listed in the Registration tab.
If the child was added manually and there is no registration record yet, you can create one:
Click the New button to add a new registration record.

Fill in the registration details (such as program, start date, rate, and group).
Press Create to save the new pending registration.
Adjust program, start date, rate, and group if needed
In the pending registration, you can change key details such as:
Program
Start date
Starting rate
Group or room
To adjust one of these, click the drop-down menu beside the field you want to change and choose the correct option.

You will see that some options are marked as “recommended.” These are based on:
The child’s age and what they qualify for the program’s standard rates and group availability
The system automatically selects a recommended option, but you can override it with another choice if needed.
Use the action options on the right-hand side
On the right-hand side of the registration record, you will see several actions you can take:
Cancel: Use this if the registration was entered by mistake or the family has decided not to enroll.
Charge Deposit:
-If the registration was done online and a deposit requirement was set for that program, the parents will already have paid the deposit.
-If you created the registration manually (using New), no deposit has been charged yet. In this case, click Charge Deposit to email the parent a deposit payment link.
Waitlist: If there is no space in the program, choose to waitlist this registration. The child will move from the Onboarding tab to the Waitlist tab in your dashboard.
Register First: Registers the child only for the first proposal in the list (for example, the first program period).
Register All: Registers the child for all proposals in the smart registration list (for example, the full path from preschool to pre-K to kindergarten).
Review the smart registration proposals
Expand the registration view to see all of the smart registration proposals for that child.
The system looks at the pending registration and automatically suggests:
When to start the child in the requested program
Which rate to use based on the program
Which group to place the child in, based on available space
You will also see proposed end dates for each program. These are based on your center’s setup for age eligibility and how often the system checks whether a child still qualifies for that program (for example, every August 31).
The system then suggests the next program the child should move into (for example, from preschool to pre-K, then to kindergarten) with matching rates and groups.
If needed, you can override any field in these proposals by using the drop-down menus to choose different programs, rates, dates, or groups.

Confirm the registration (Register First vs. Register All)
After reviewing the smart proposals, decide how far ahead you want to confirm enrollment:
Use Register First if you only want to register the child for the first proposal (for example, just their first program period).
Use Register All if you agree with the full set of proposals and want to register the child for the entire planned path.
In the example from the recording, Register All is selected to confirm every proposed step in one go.

Once you do this, the child is now fully registered.
The overall registration might span several years, ending when the child no longer qualifies for any programs in your setup.
Within that overall period, you can see how the child moves from one program to the next (for example, preschool to pre-K to kindergarten) with specific date ranges.
Check and understand the rate changes over time
In the expanded registration view, look for the area that shows the rates being charged for each program period.
You will see a “starting rate” for when the child first begins a program.
To understand how the rate changes over time, click into a rate line.
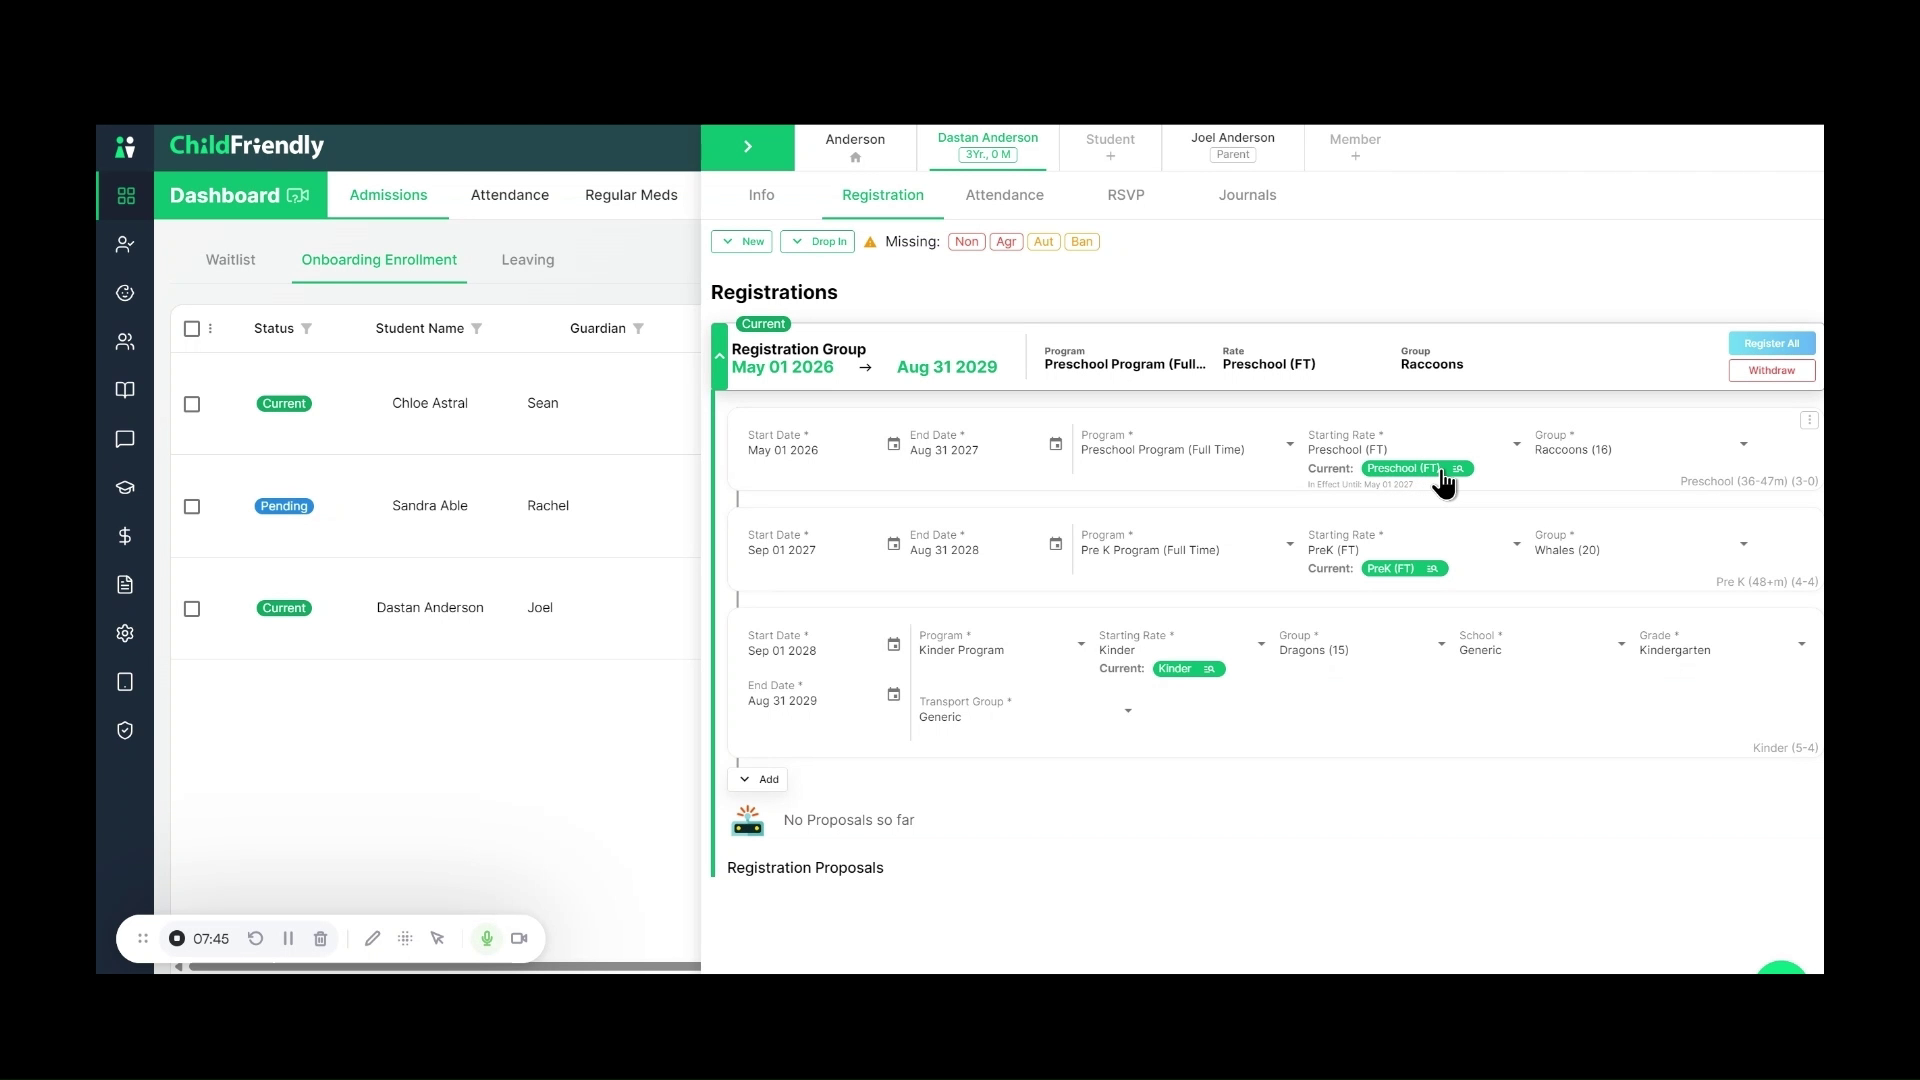
A detailed view shows how the system will automatically update the rate based on the child’s age, even if the child has not yet moved to the next program or room. For example:
A child may stay in the preschool program until the annual program-change date (such as September 1).
However, if they turn four earlier, the system can automatically switch them to the pre-K rate from their birthday month onward, even though they are still in the preschool room.
This automatic rate update means you do not have to manually track birthdays each month to adjust fees—the system handles it according to your center’s setup.
Collapse the registration view and confirm the child’s status
When you are satisfied with the registration details and rates, collapse the expanded registration menu to return to a simpler view.

You can now minimize or close the child’s profile.

In your list of children, check the child’s status:
If the start date is today or in the past, the status shows as Current.
If the start date is in the future, the status shows as Future.
The previous Pending status is removed once registration is confirmed.
Complete onboarding and know where to find the child later
In your onboarding dashboard, finish any remaining checklist items for the child (for example, missing forms or documents).
Once all checklist items are done, press Complete for that child. They will be removed from the onboarding dashboard because they are fully ready to start care on their first day.

You can always find the child again, along with all of their details and registration information, under the Families module in your system.
You’re all set! With these steps, you can confidently manage online registrations and smart enrollments while you focus on caring for the children in your center.
Was this helpful?
Still need help? Ask the team