How to Use Finance Module Filters
Use the Finance module’s filters to narrow down registrations, invoices, credits, and payments so you can quickly find exactly the billing and payment information you need.
Last updated 3 months ago
Step 1: Access the Finance Module and Locate the Filters
Navigate to the Finance module and open the main processing page. Along the top of this page, you will see a row with three filter icons.
The filters are:
Registrations column filter
Payments / Refunds / Credits column filter
Invoices and Credit Memos column filter

Step 2: Use the Registrations Column Filter
Open the Registrations filter to see all filtering options.

Within this filter, you can:
Registration with billings, filters for Registrations that already have Bills generated and attached for that period. (e.g., 78 registrations billed in this example).
Registration without billings, filters for Registrations without any Billings yet for the applicable period.
Custom Billings, shows custom billings for the period that are not actually tied to a child's regular billing for that period but are one off bills that were created.
You can also filter the Registrations column by specific attributes:
Filter by rate (e.g., “Toddler Full-Time” rate) to see all children with that rate.
Filter by program (e.g., only infant program registrations).
Filter by status (e.g., active, pending, etc.).
All these options (status, program, rate) are sourced directly from the Registrations column. When you want to clear all applied filters in this area, click Clear All.

Step 3: Filter by Invoices and Credit Memos
Open the Invoices and Credit Memos column filter to refine results related to invoices and credit memos. This filter applies only to that column and lets you filter by any visible invoice or credit memo attributes.

Within this filter, you can:
1. Filter by Sponsor
Start typing a sponsor’s name (parent or third-party sponsor) into the sponsor field to find and select them.
Pro Tip: typing a child's name will bring up their personal sponsors such as a guardian. You can also multi-select sponsors if desired.

To see only personal sponsors (no third parties), choose All Personal Sponsors.
To see sponsors that currently have available credits on their account, which can be applied to incoides, select the available credits available credits check box after filtering for the sponsor(s).
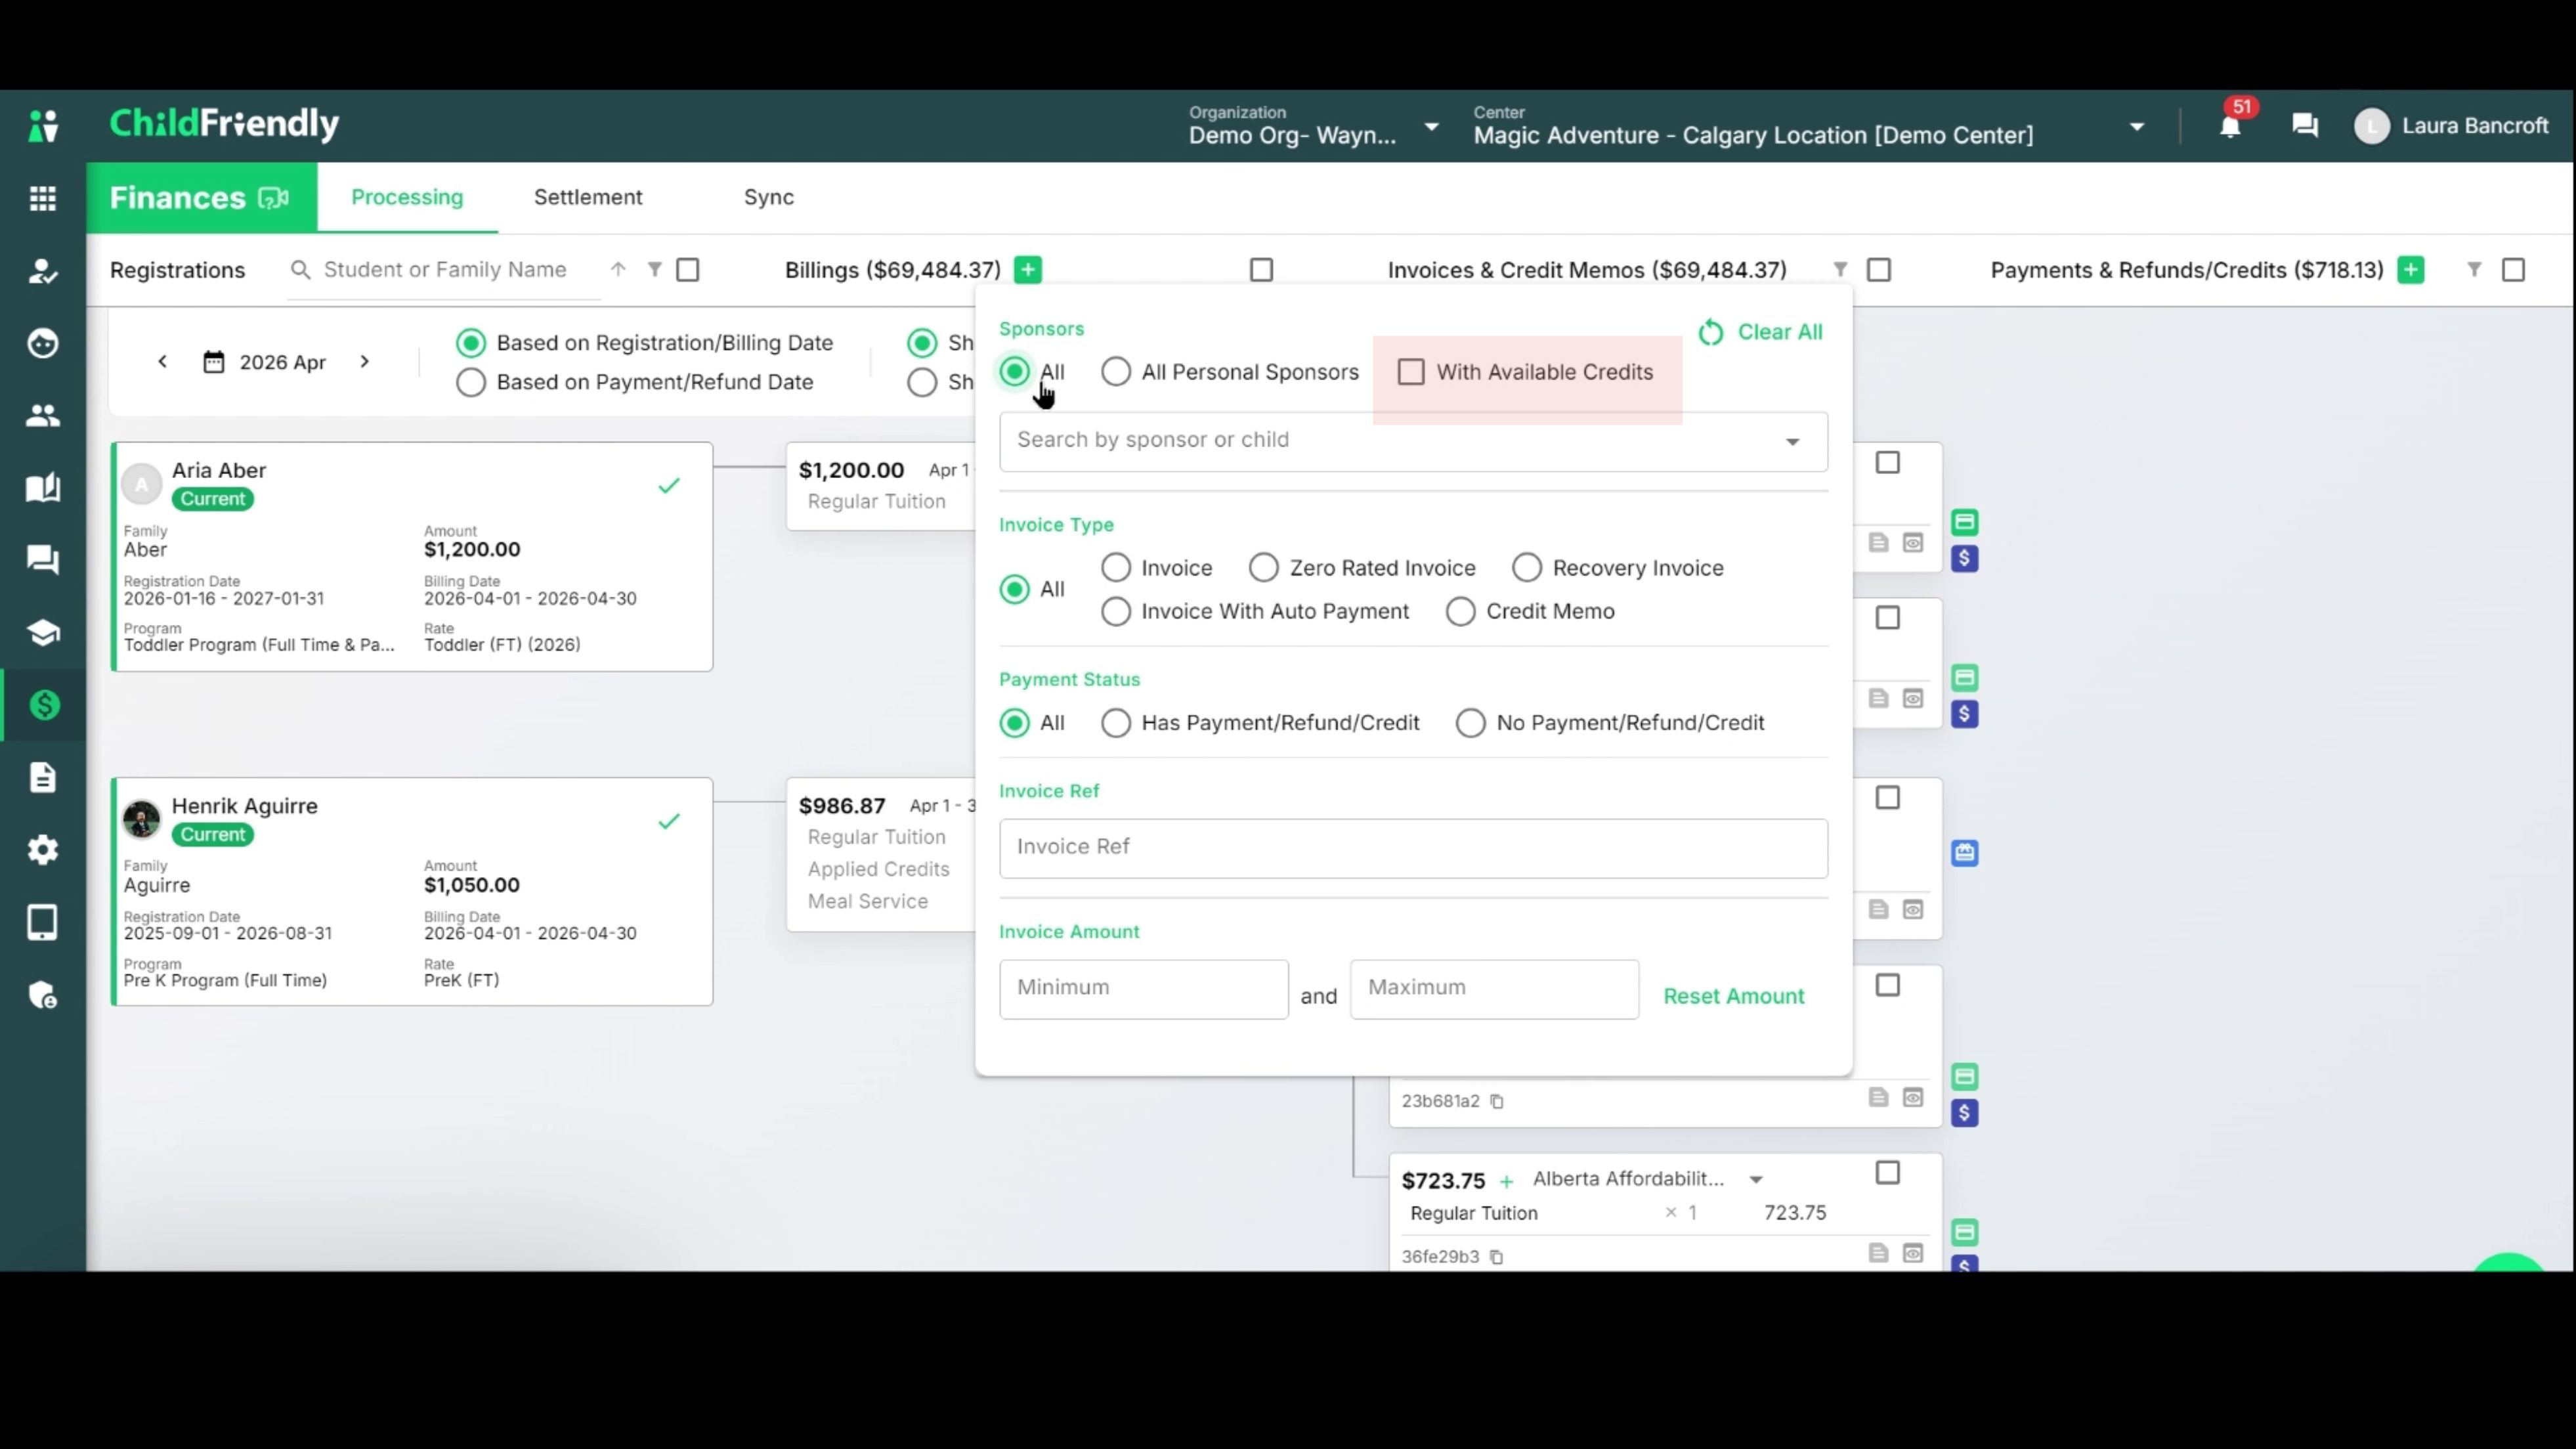
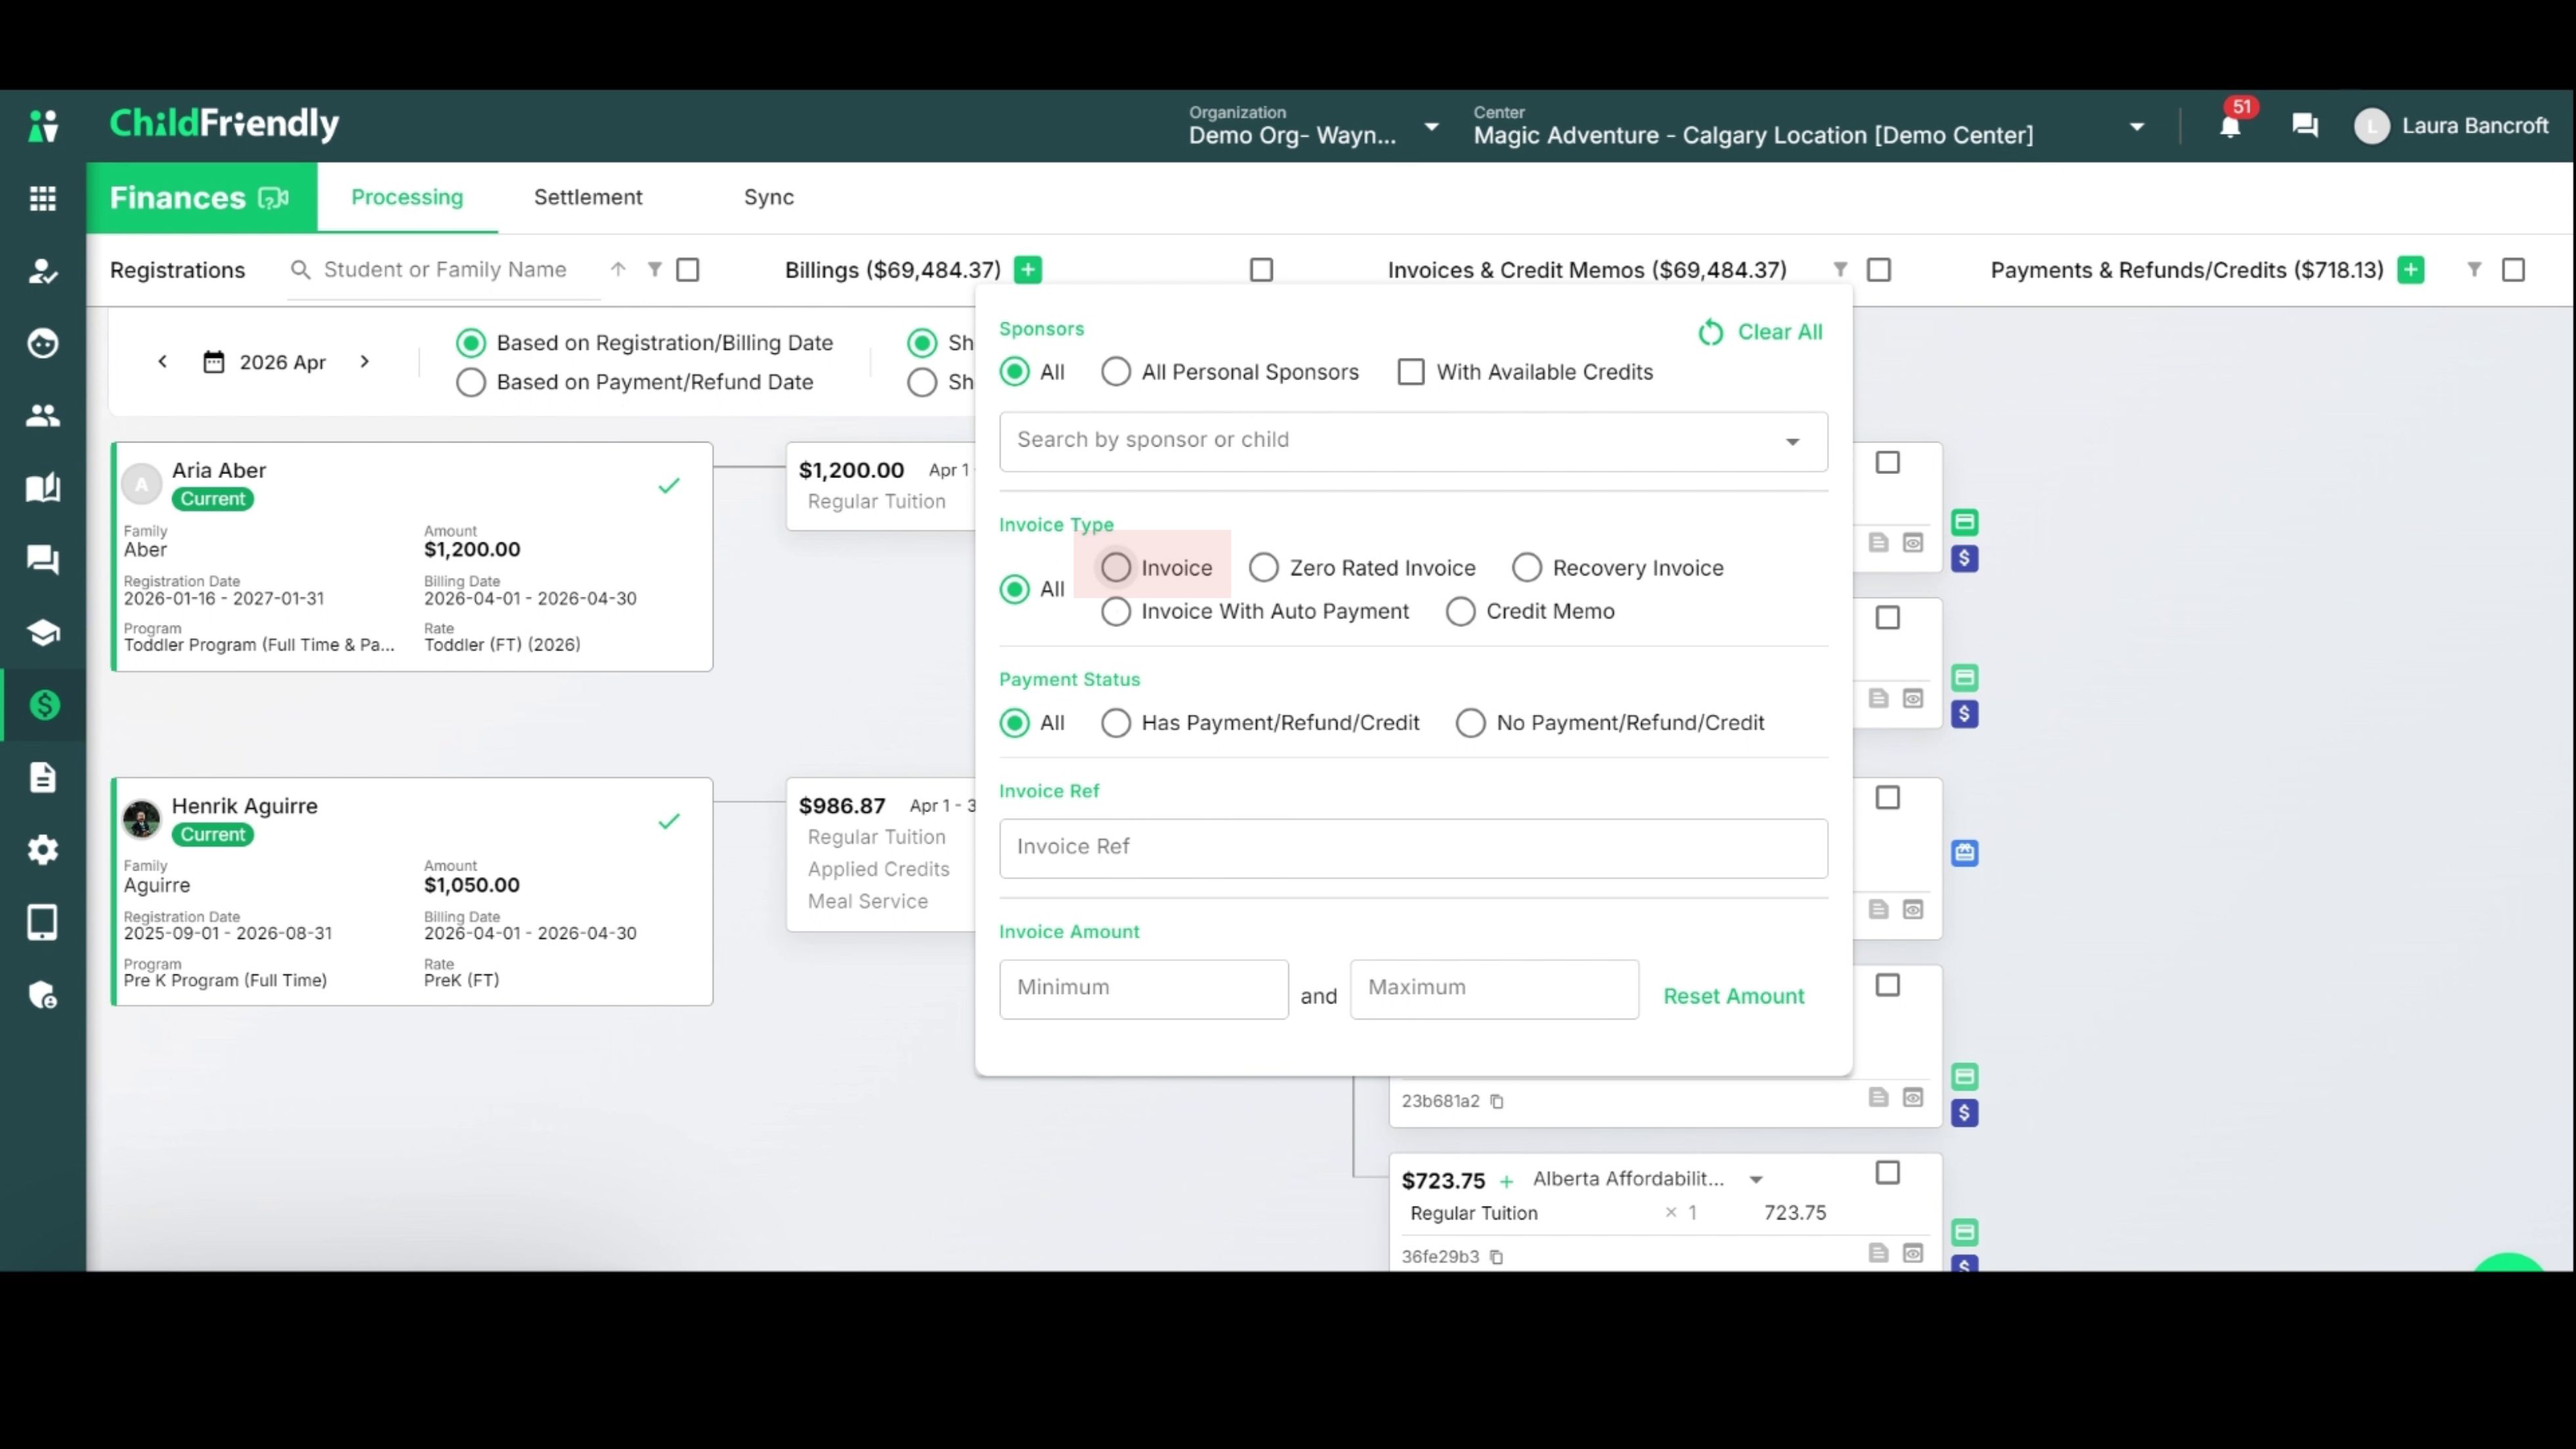
2. Filter by Invoice Type
Filter to show only standard invoices.
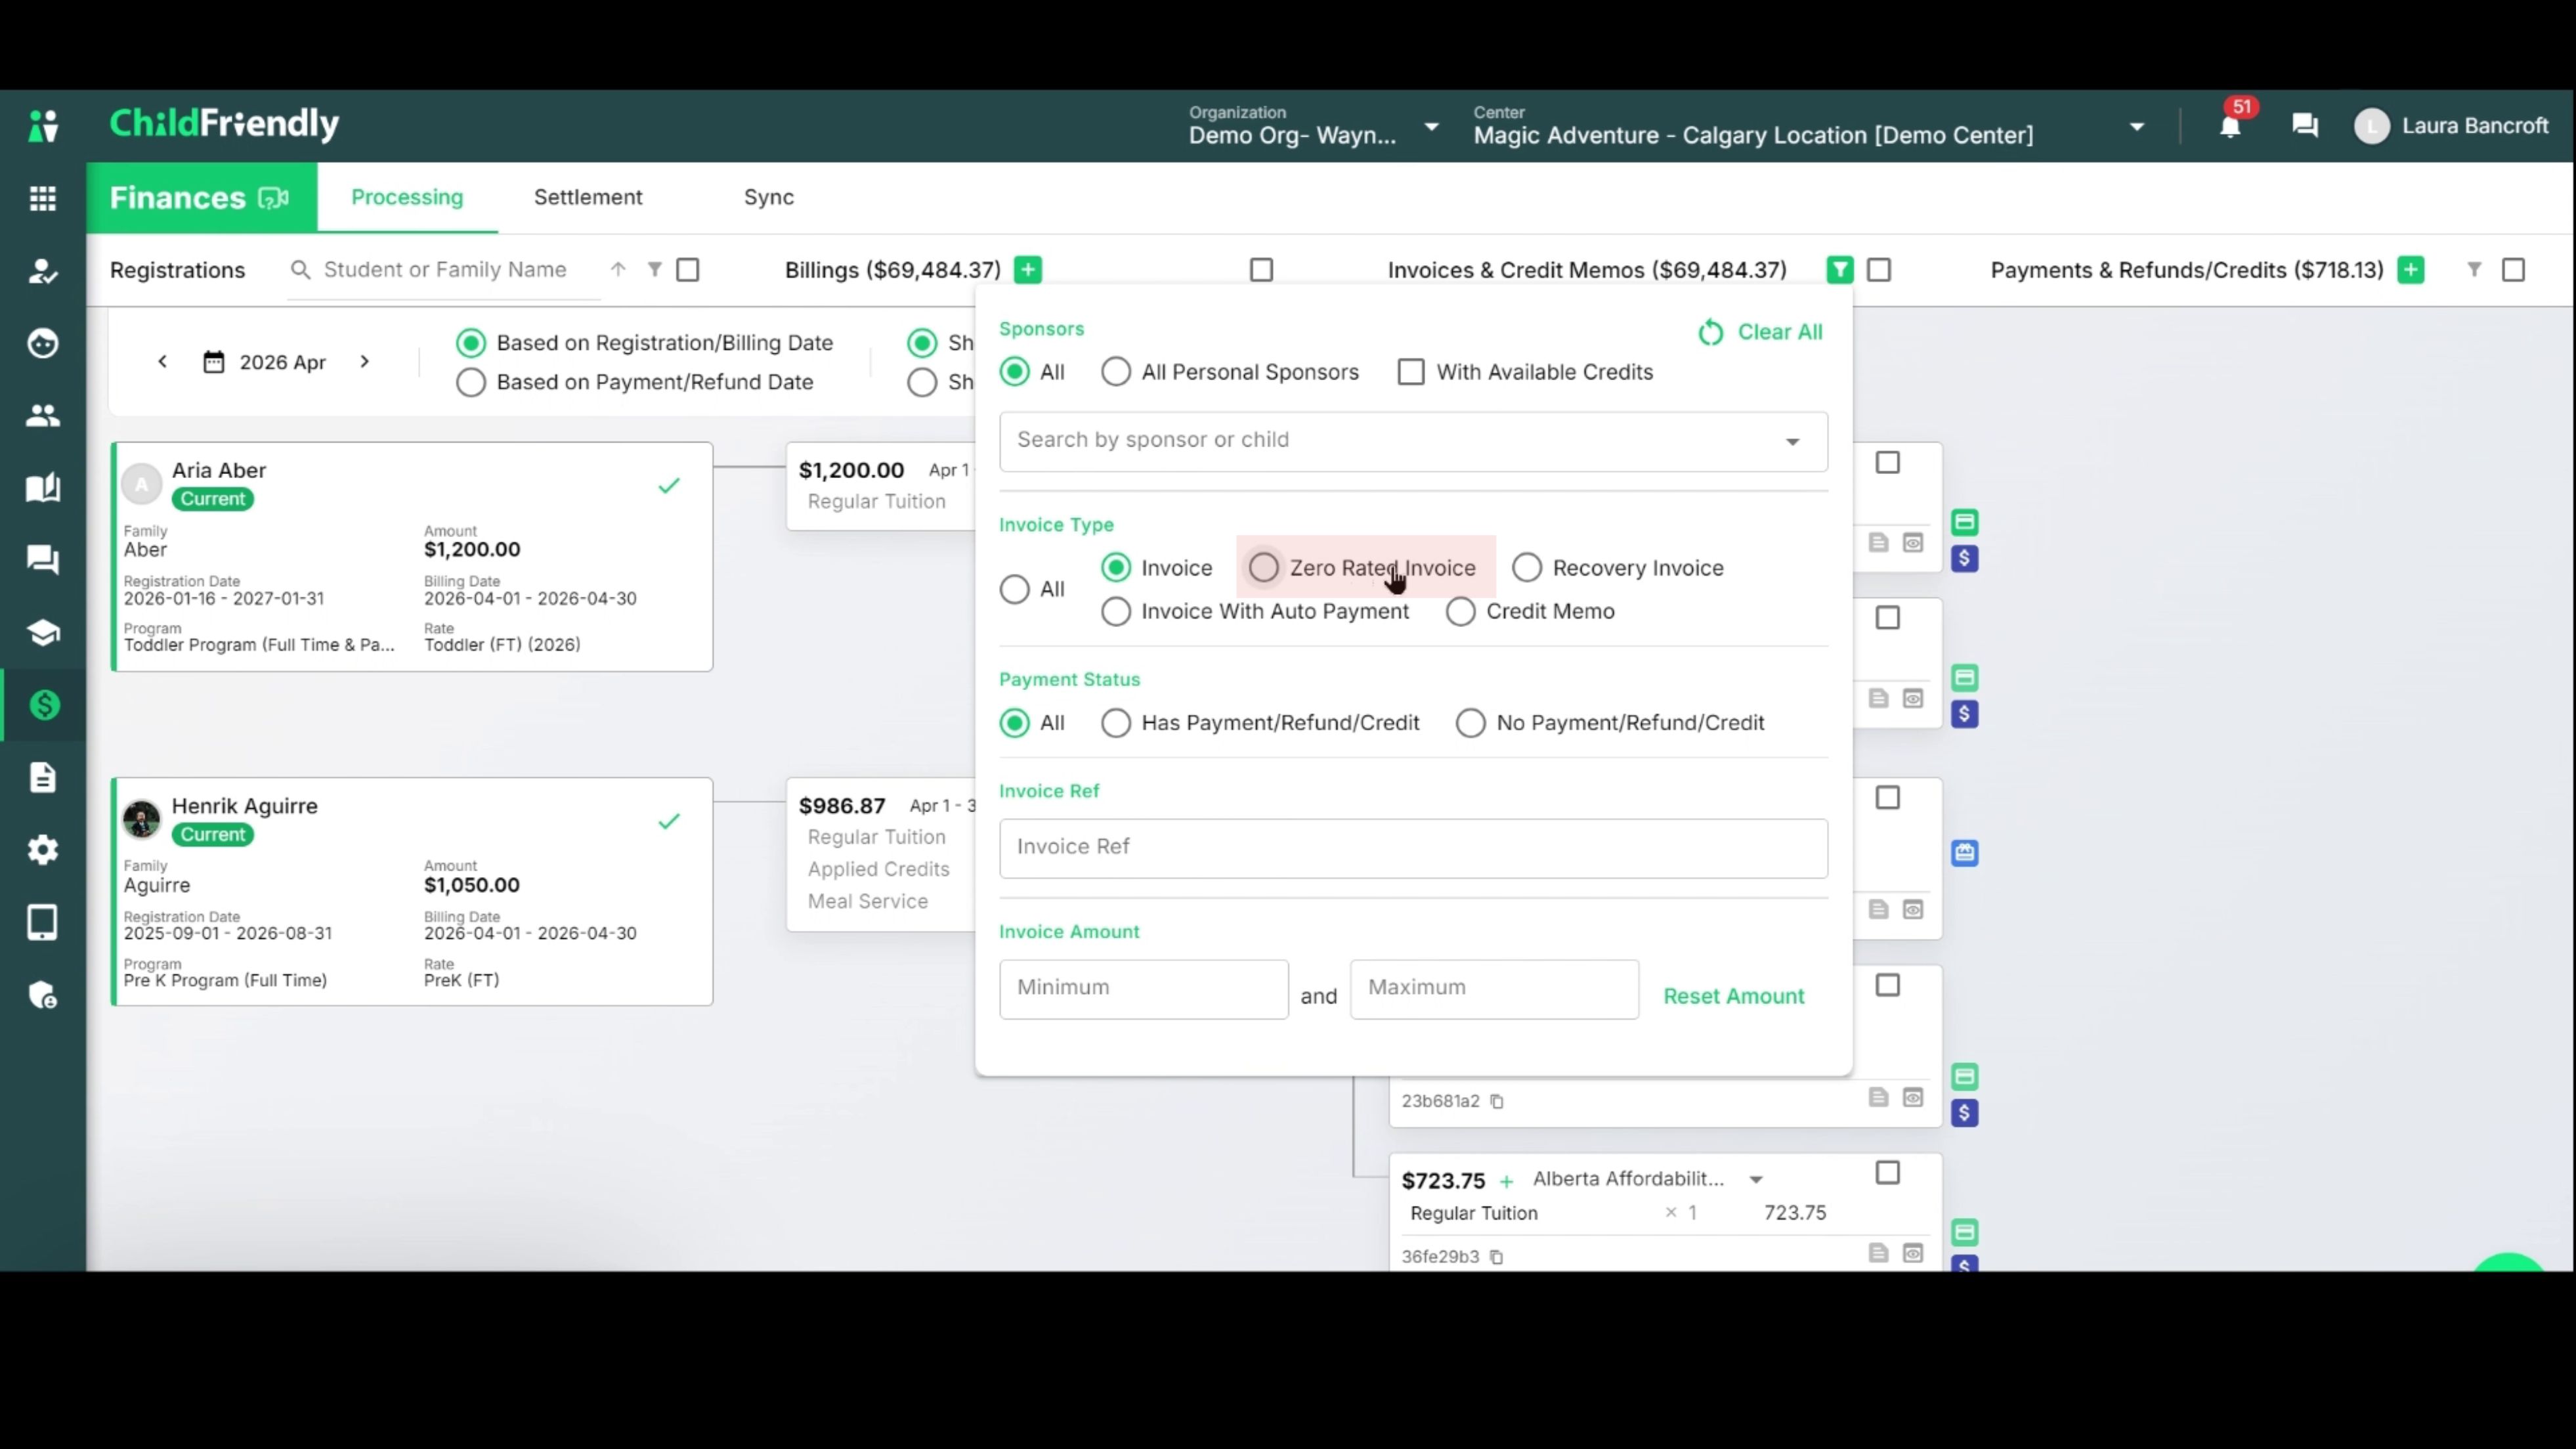
Filter for zero-rated invoices (invoices totaling $0, often with both positive and negative line items).
Filter for recovery invoices, which are created when an NSF charge occurs or a payment fails. Use this to quickly locate all recovery invoices.

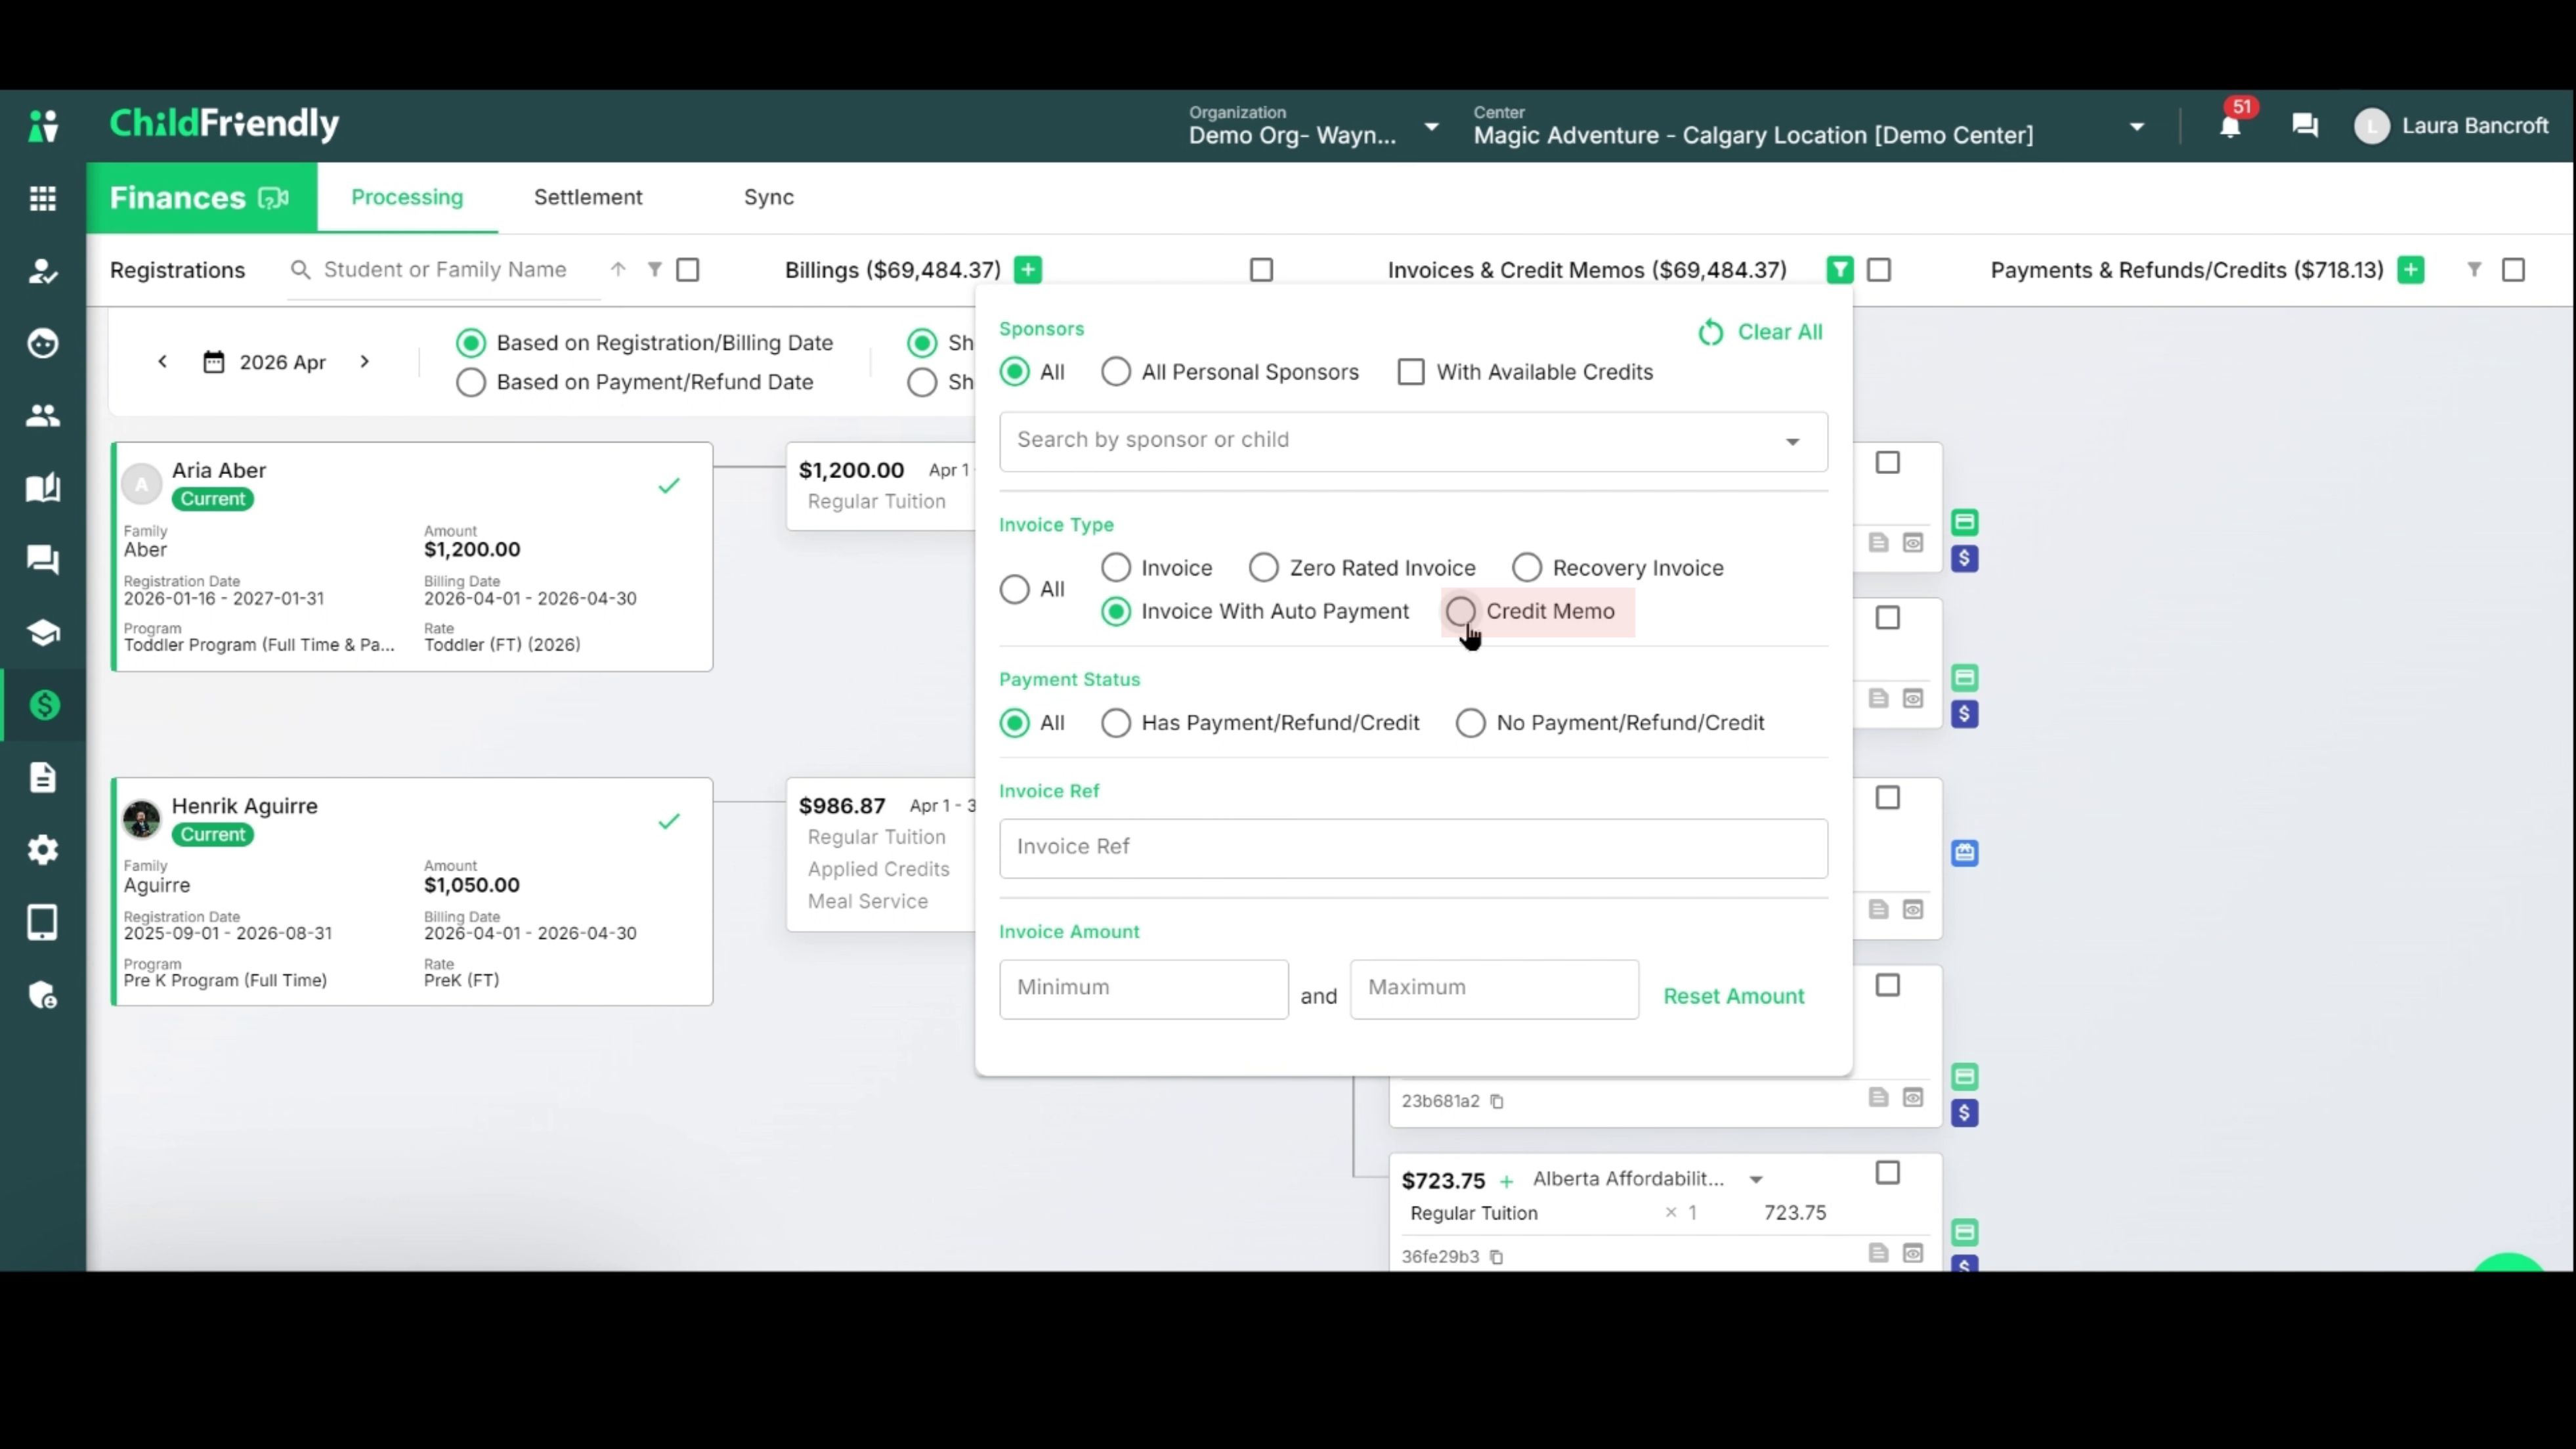
Filter for invoices that have auto payment enabled (families/sponsors set up with automatic payments).

Filter specifically for credit memos (negative invoices).
3. Filter by Payment Status
Payment status will filter for invoices for which there is either a payments, refunds, or credits attached to ther invoice/credit memo or not, depedning on your selection.
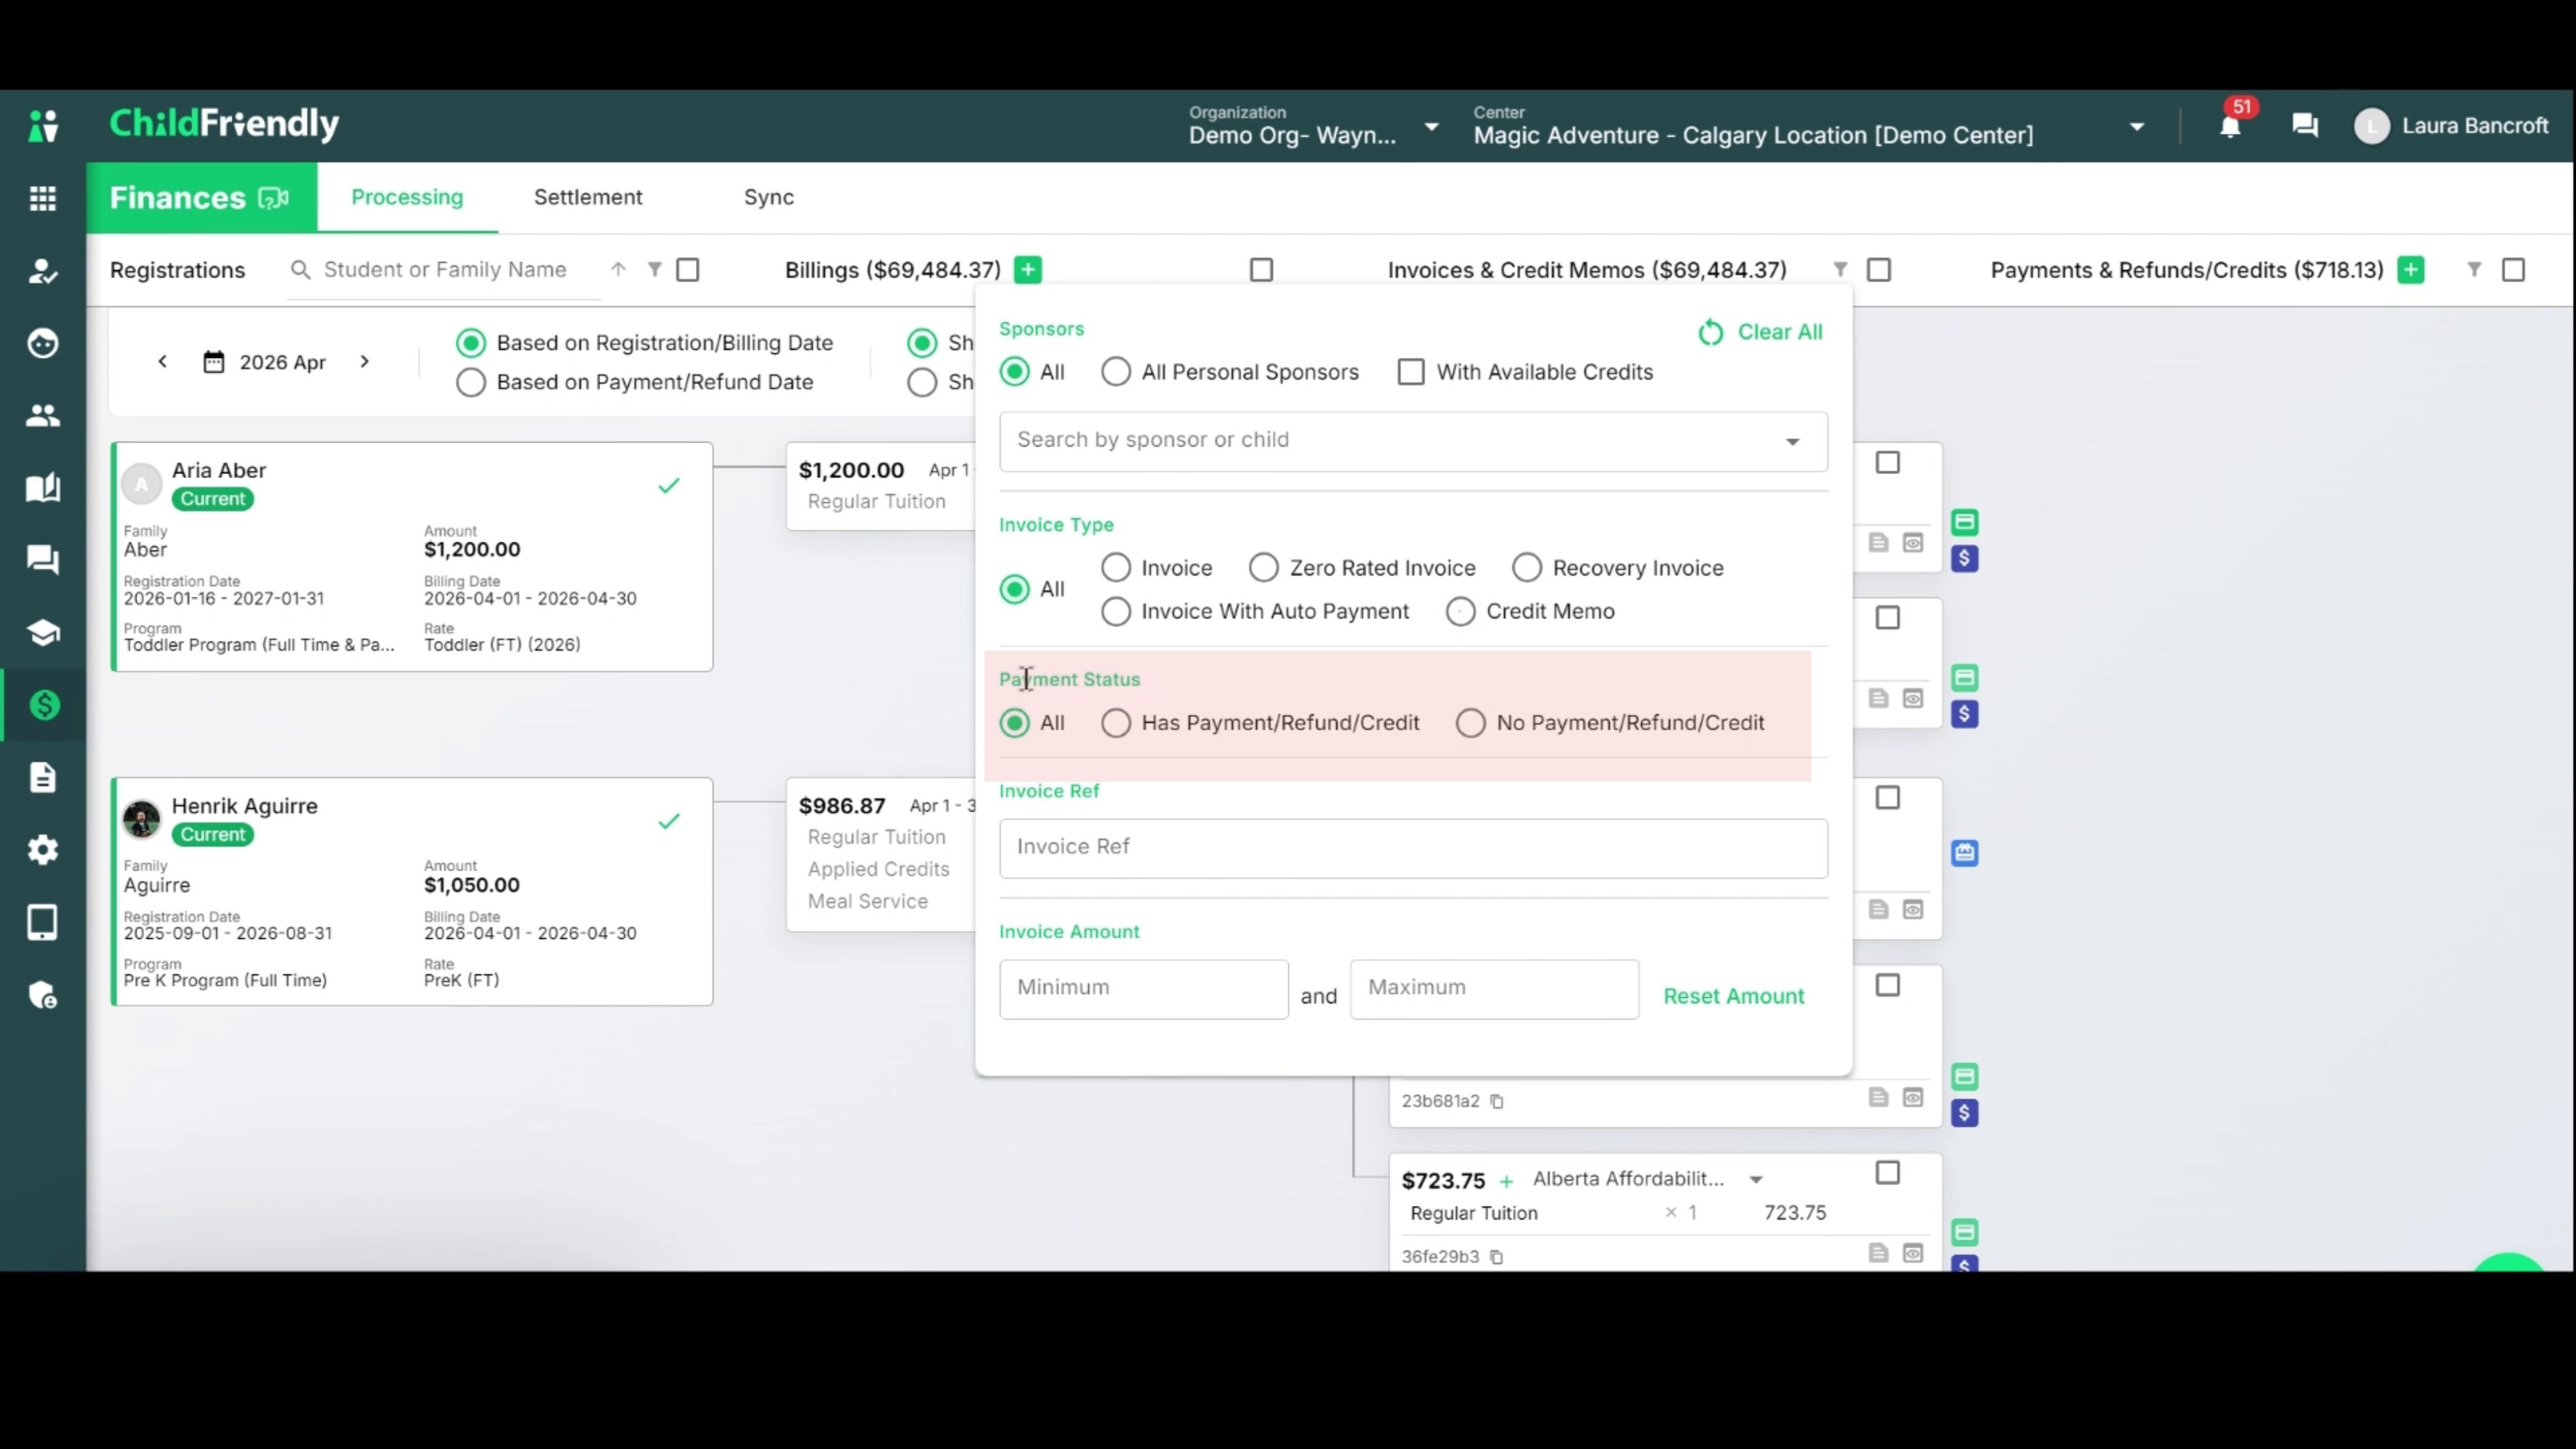
You can:
Show invoices/credits that have a payment, refund, or credit attached by selecting Has Payment/Refund/Credit Attached.

Show invoices/credits that do not have any payment attached (useful for finding unpaid invoices for the period) by selecting No Payment/Refund/Credit.

4. Search by Invoice Reference Number
Search for a specific invoice by entering its invoice reference number.

This number is found at the bottom of each invoice.

5. Filter by Invoice Amount or Range
Specify an exact amount or a range of amounts to find invoices or credit memos within that value range.

Step 4: Filter the Payments, Refunds, and Credits Column
Open the Payments column filter to work with payments, refunds, and credits.
Within this filter, you can:
Filter by payment status (e.g., settled, deposited, etc.).
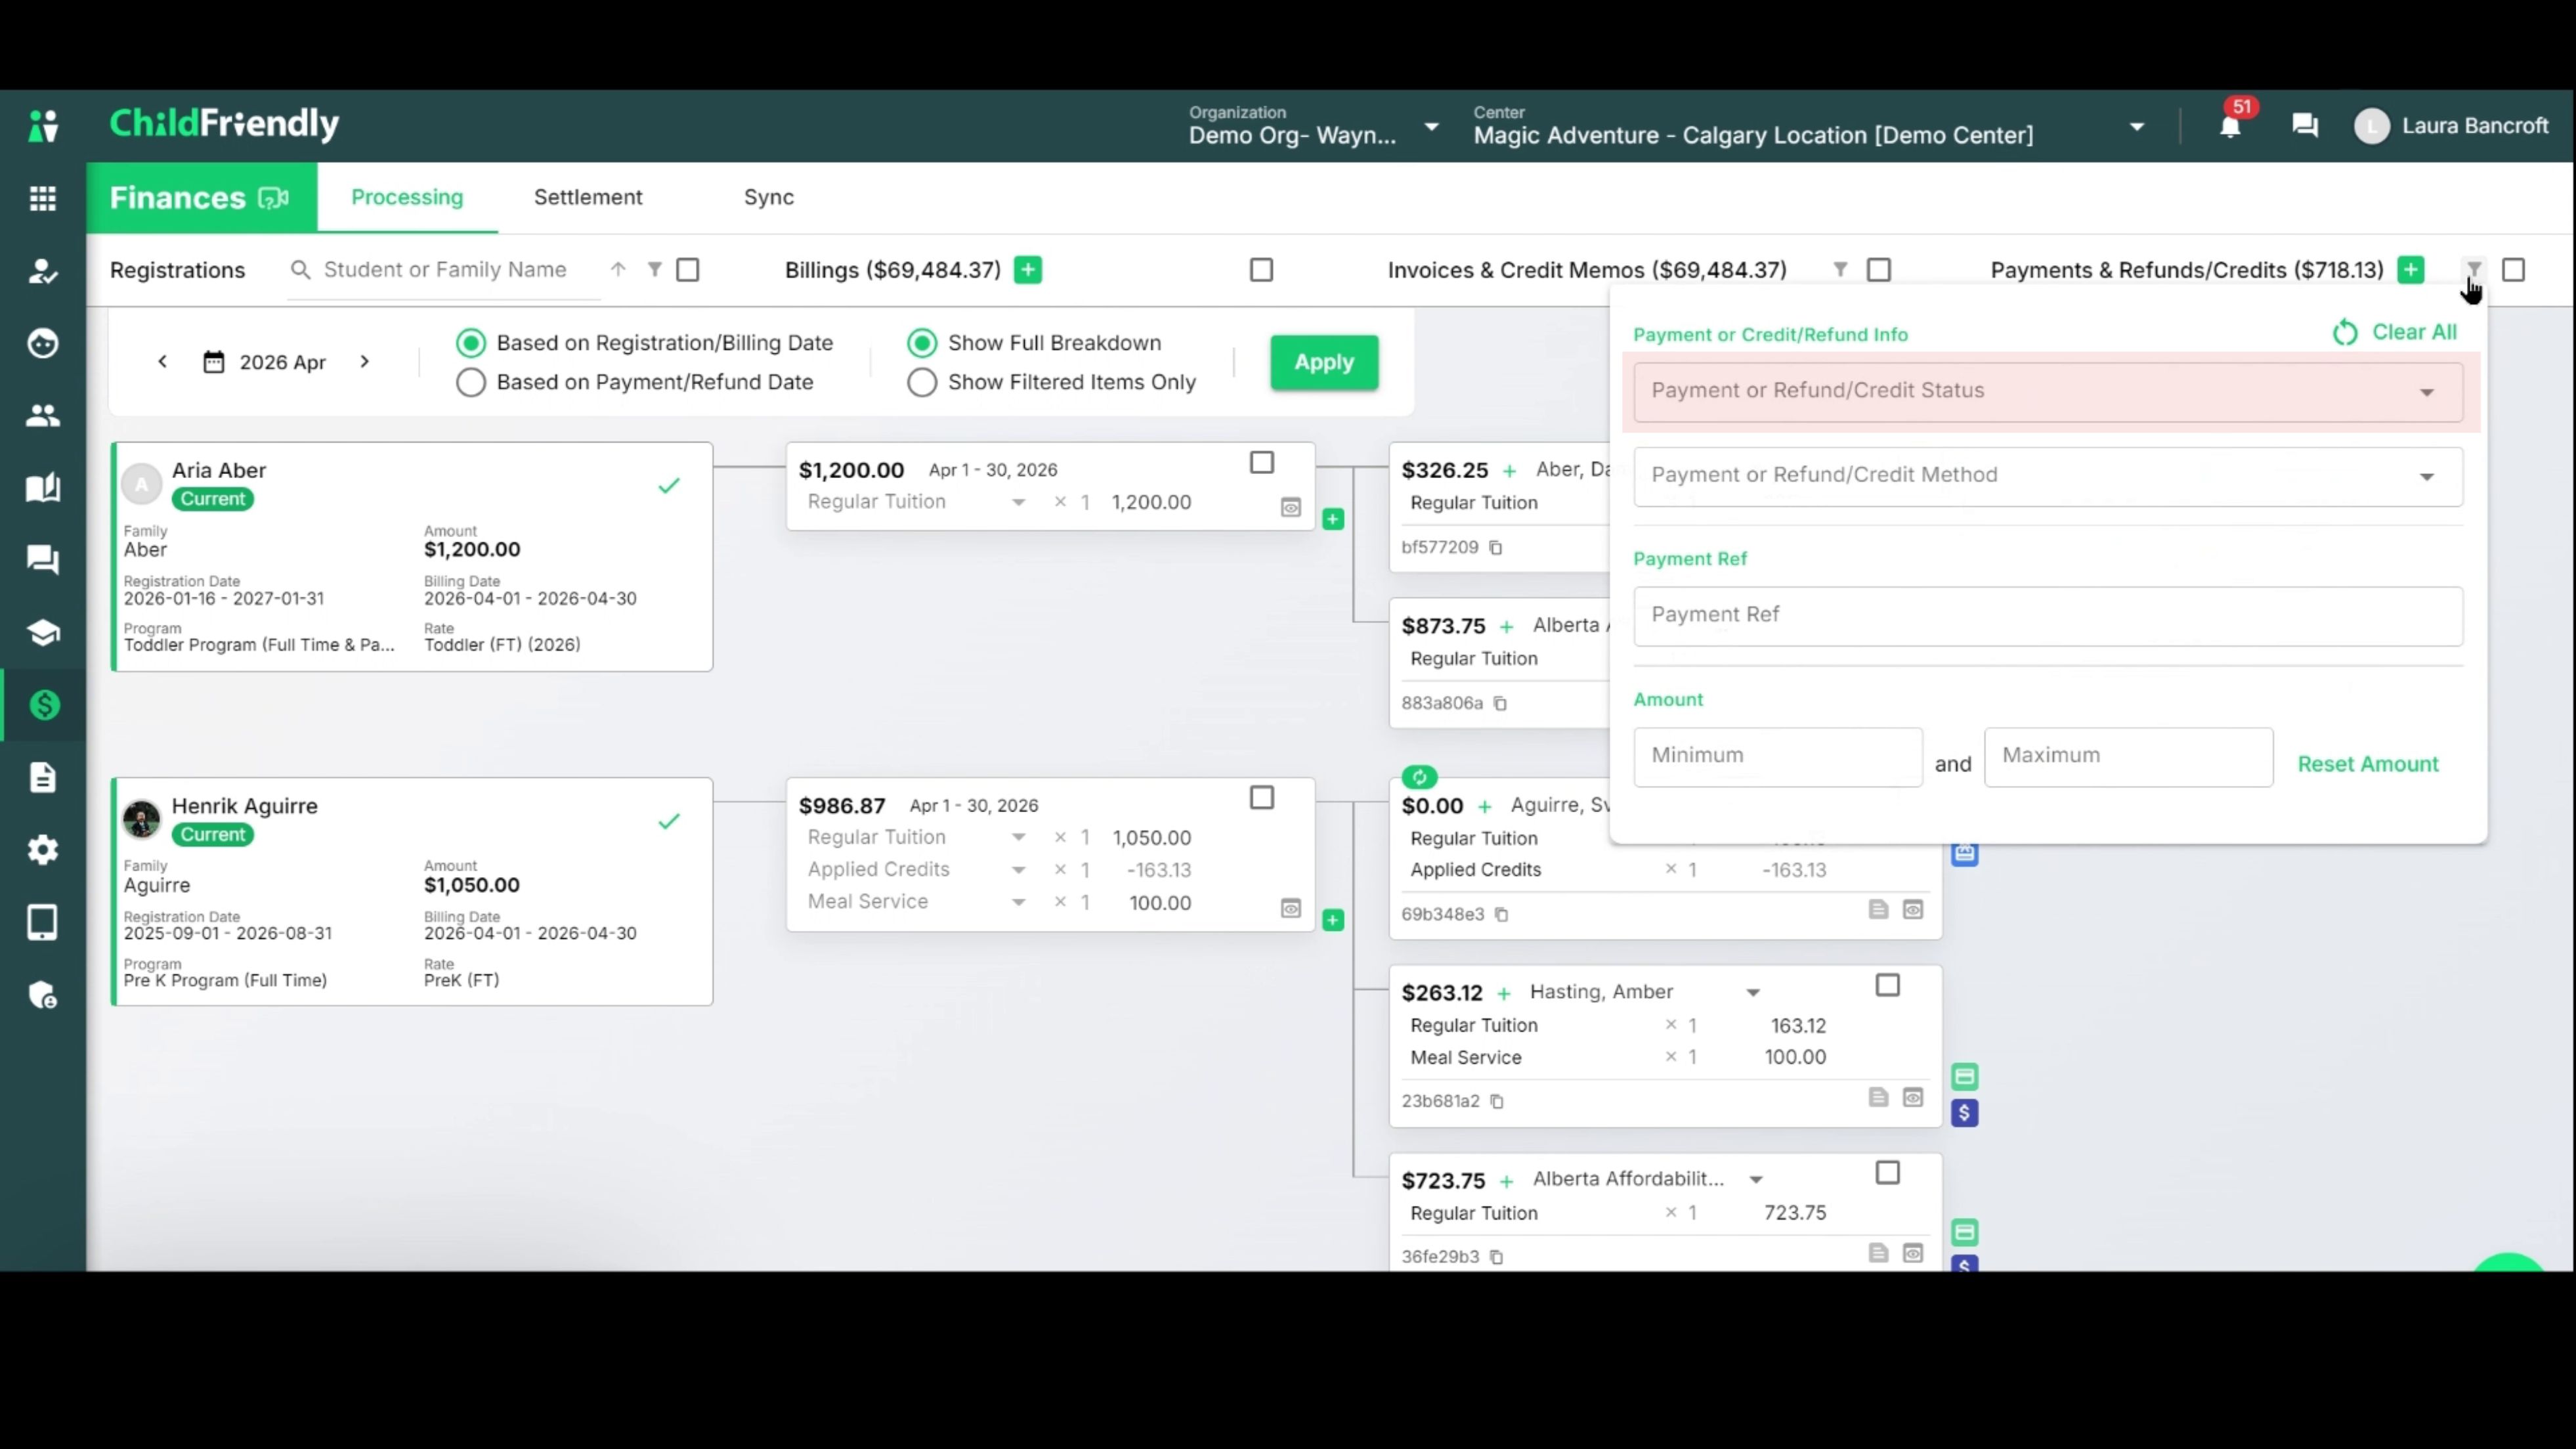
Note: Payment Status Definitions
Standard Payment Flow
Processing: Applied to Electronic Payments (PAD/CC) that have been sent to the bank but have not yet cleared. The money is currently "in flight" between the customer’s bank and yours.
Processed: The payment is successful and "in your hands" (like cash or a check), but it hasn’t been grouped for a bank deposit yet. These funds are received but not yet batched.
Deposited: The payment has been added to a Deposit Group. This represents funds that have been sent to the bank as a batch and are expected to appear on your bank statement as a single total.
Credit: This indicates the value from that associated credit memo has been successfully moved out of the "pending" state and added to the sponsor’s account balance. It is now available to be applied to future invoices.
Exceptions & Issues
Rejected: Used for Electronic Payments (PAD/CC) that failed before the money ever left the customer's bank. This is typically due to incorrect banking info or insufficient funds (NSF). The money never reached your account.
Chargeback: A payment that was successfully deposited but was later forced out of your account by the bank. This usually occurs due to a customer dispute, fraud claim, or stop payment.
---------------------------------
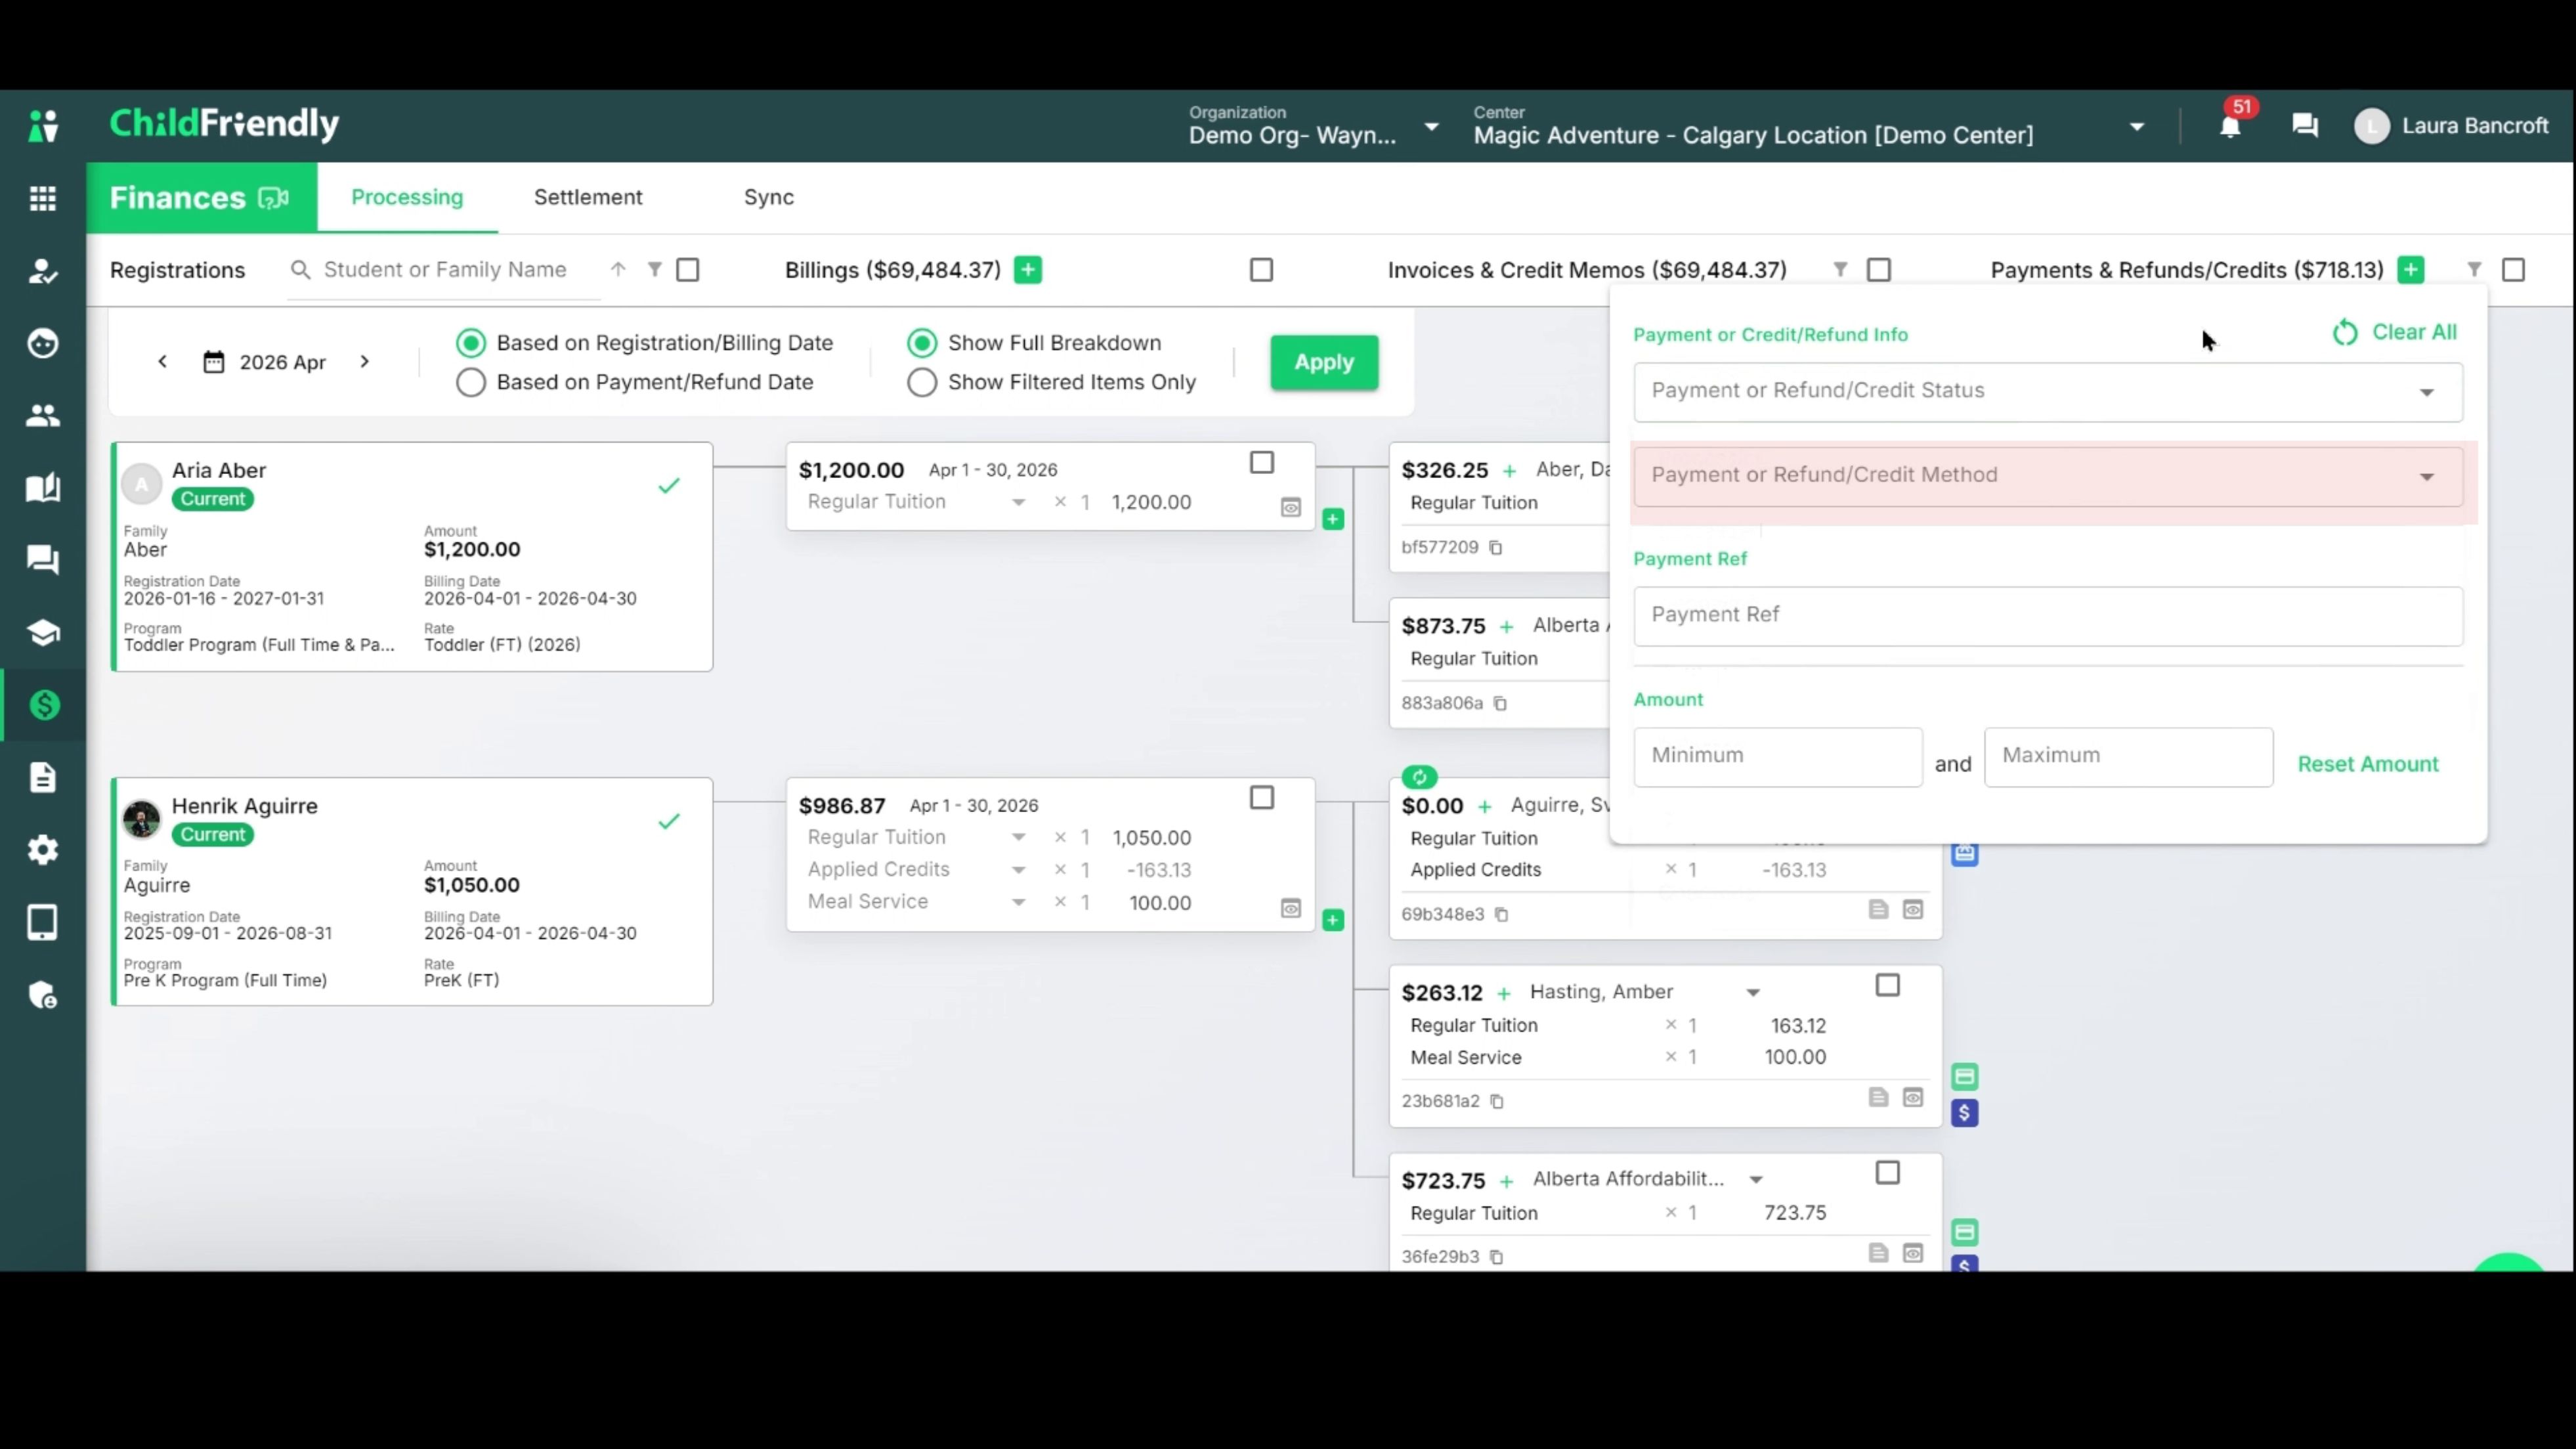
Filter by payment method (e.g., credit card, cash, debit, credit memo to account).
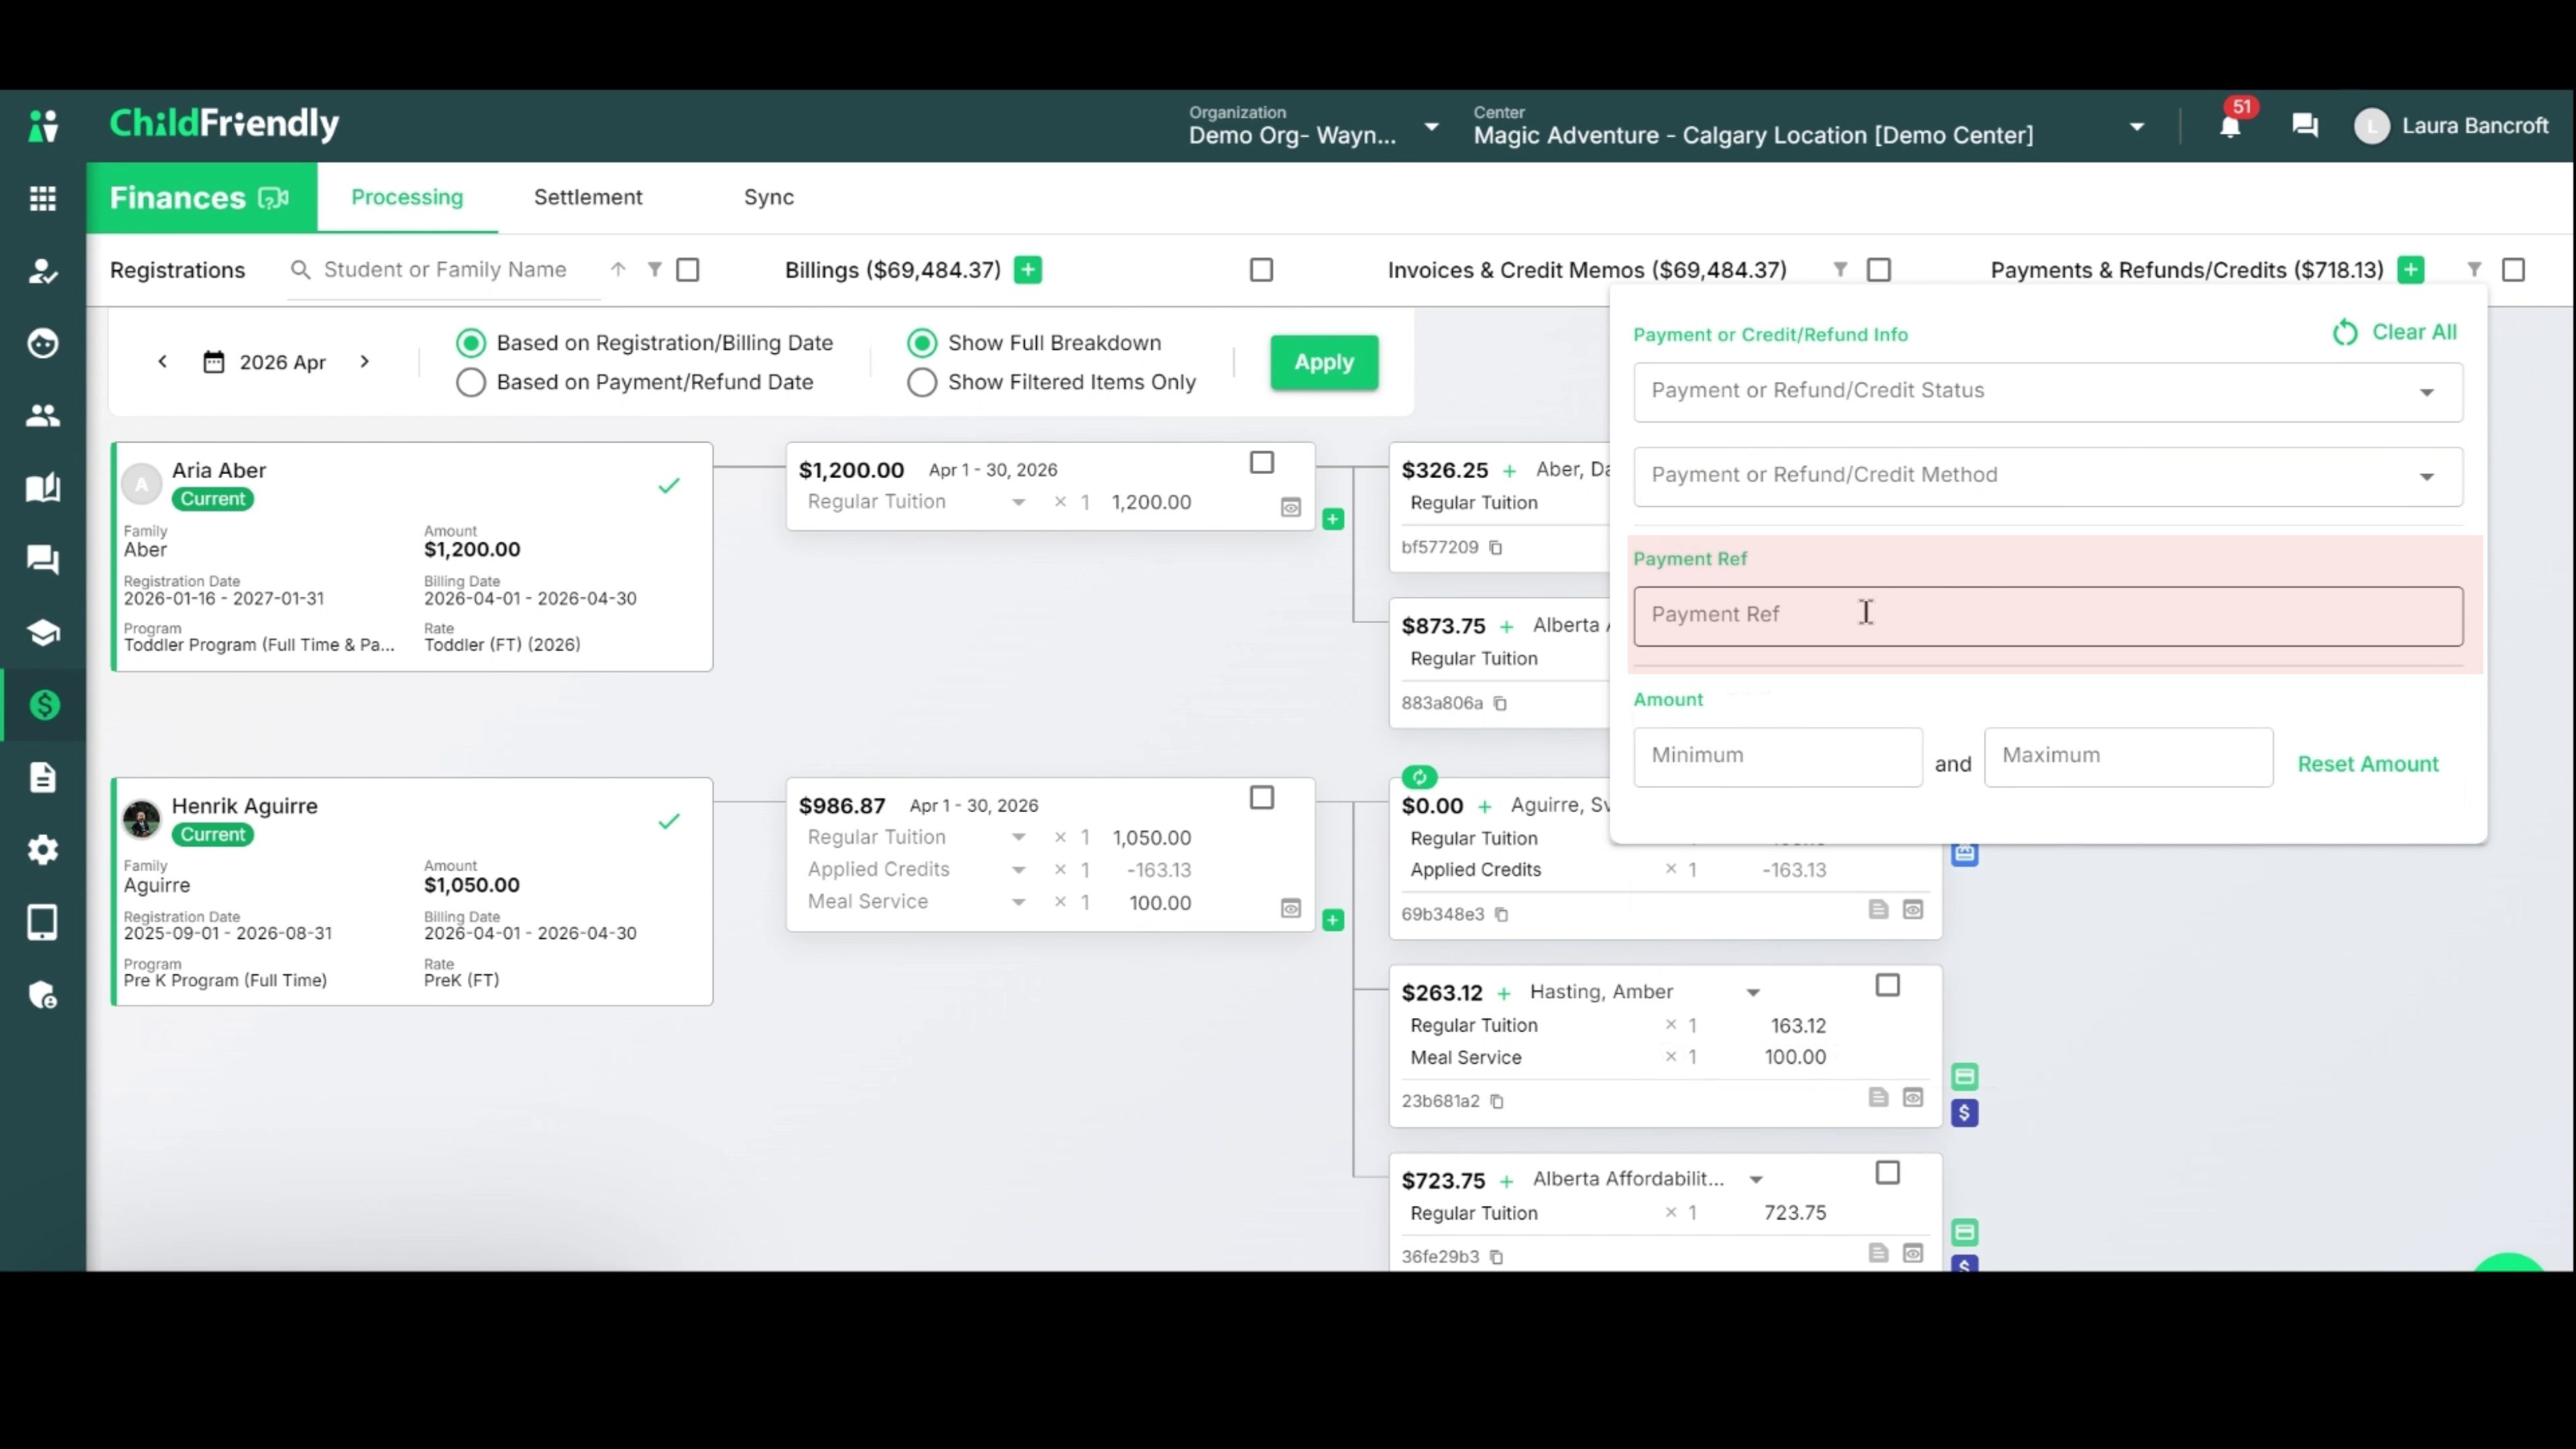
Filter by payment reference number, which appears in the bottom-left corner of each payment record.
Filter by payment amount or range. For example, to find all payments between $100 and $150, set that range in the filter.
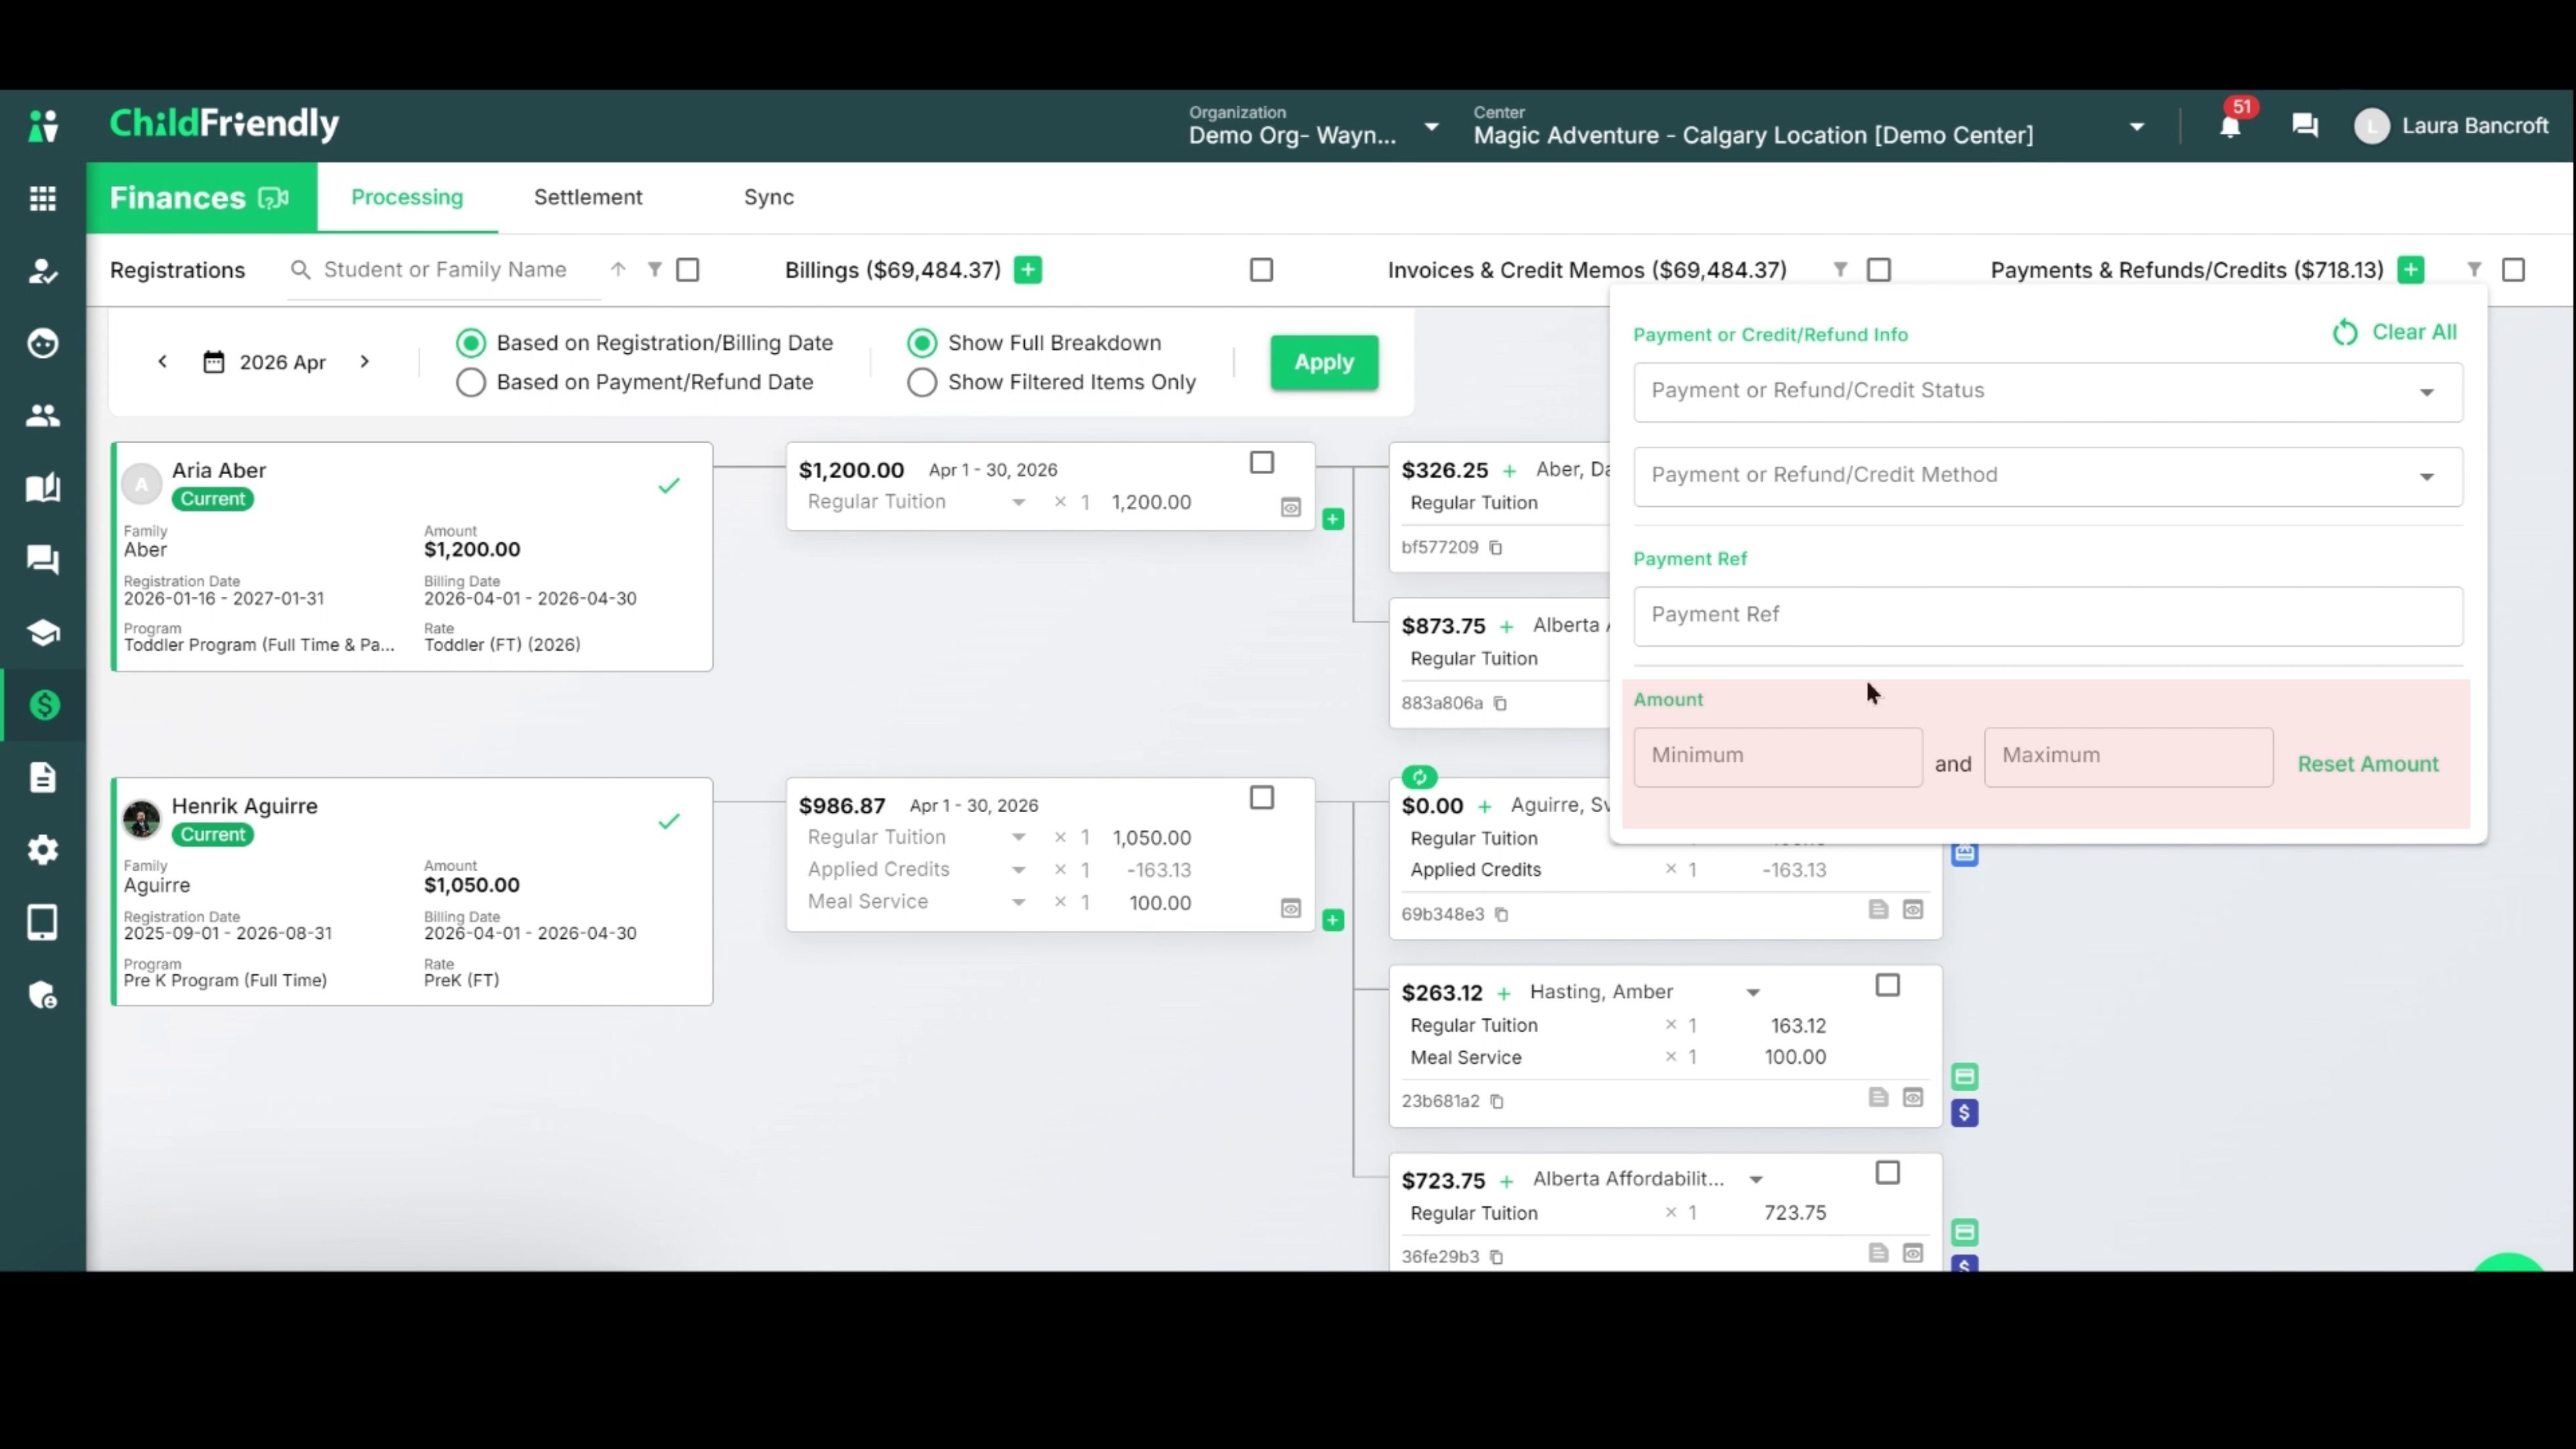
Important Note: If you want to keep your filters active, simply click out of the filter box. A filter icon will turn green when a filter is applied; if it is not green (just grey), no filter is currently active for that column.
Step 5: Apply Filters and Control Date Criteria
After setting your filters, they will not update the main view until you explicitly apply them. Once you are ready, go to the main controls section and click Apply to load the filtered results.
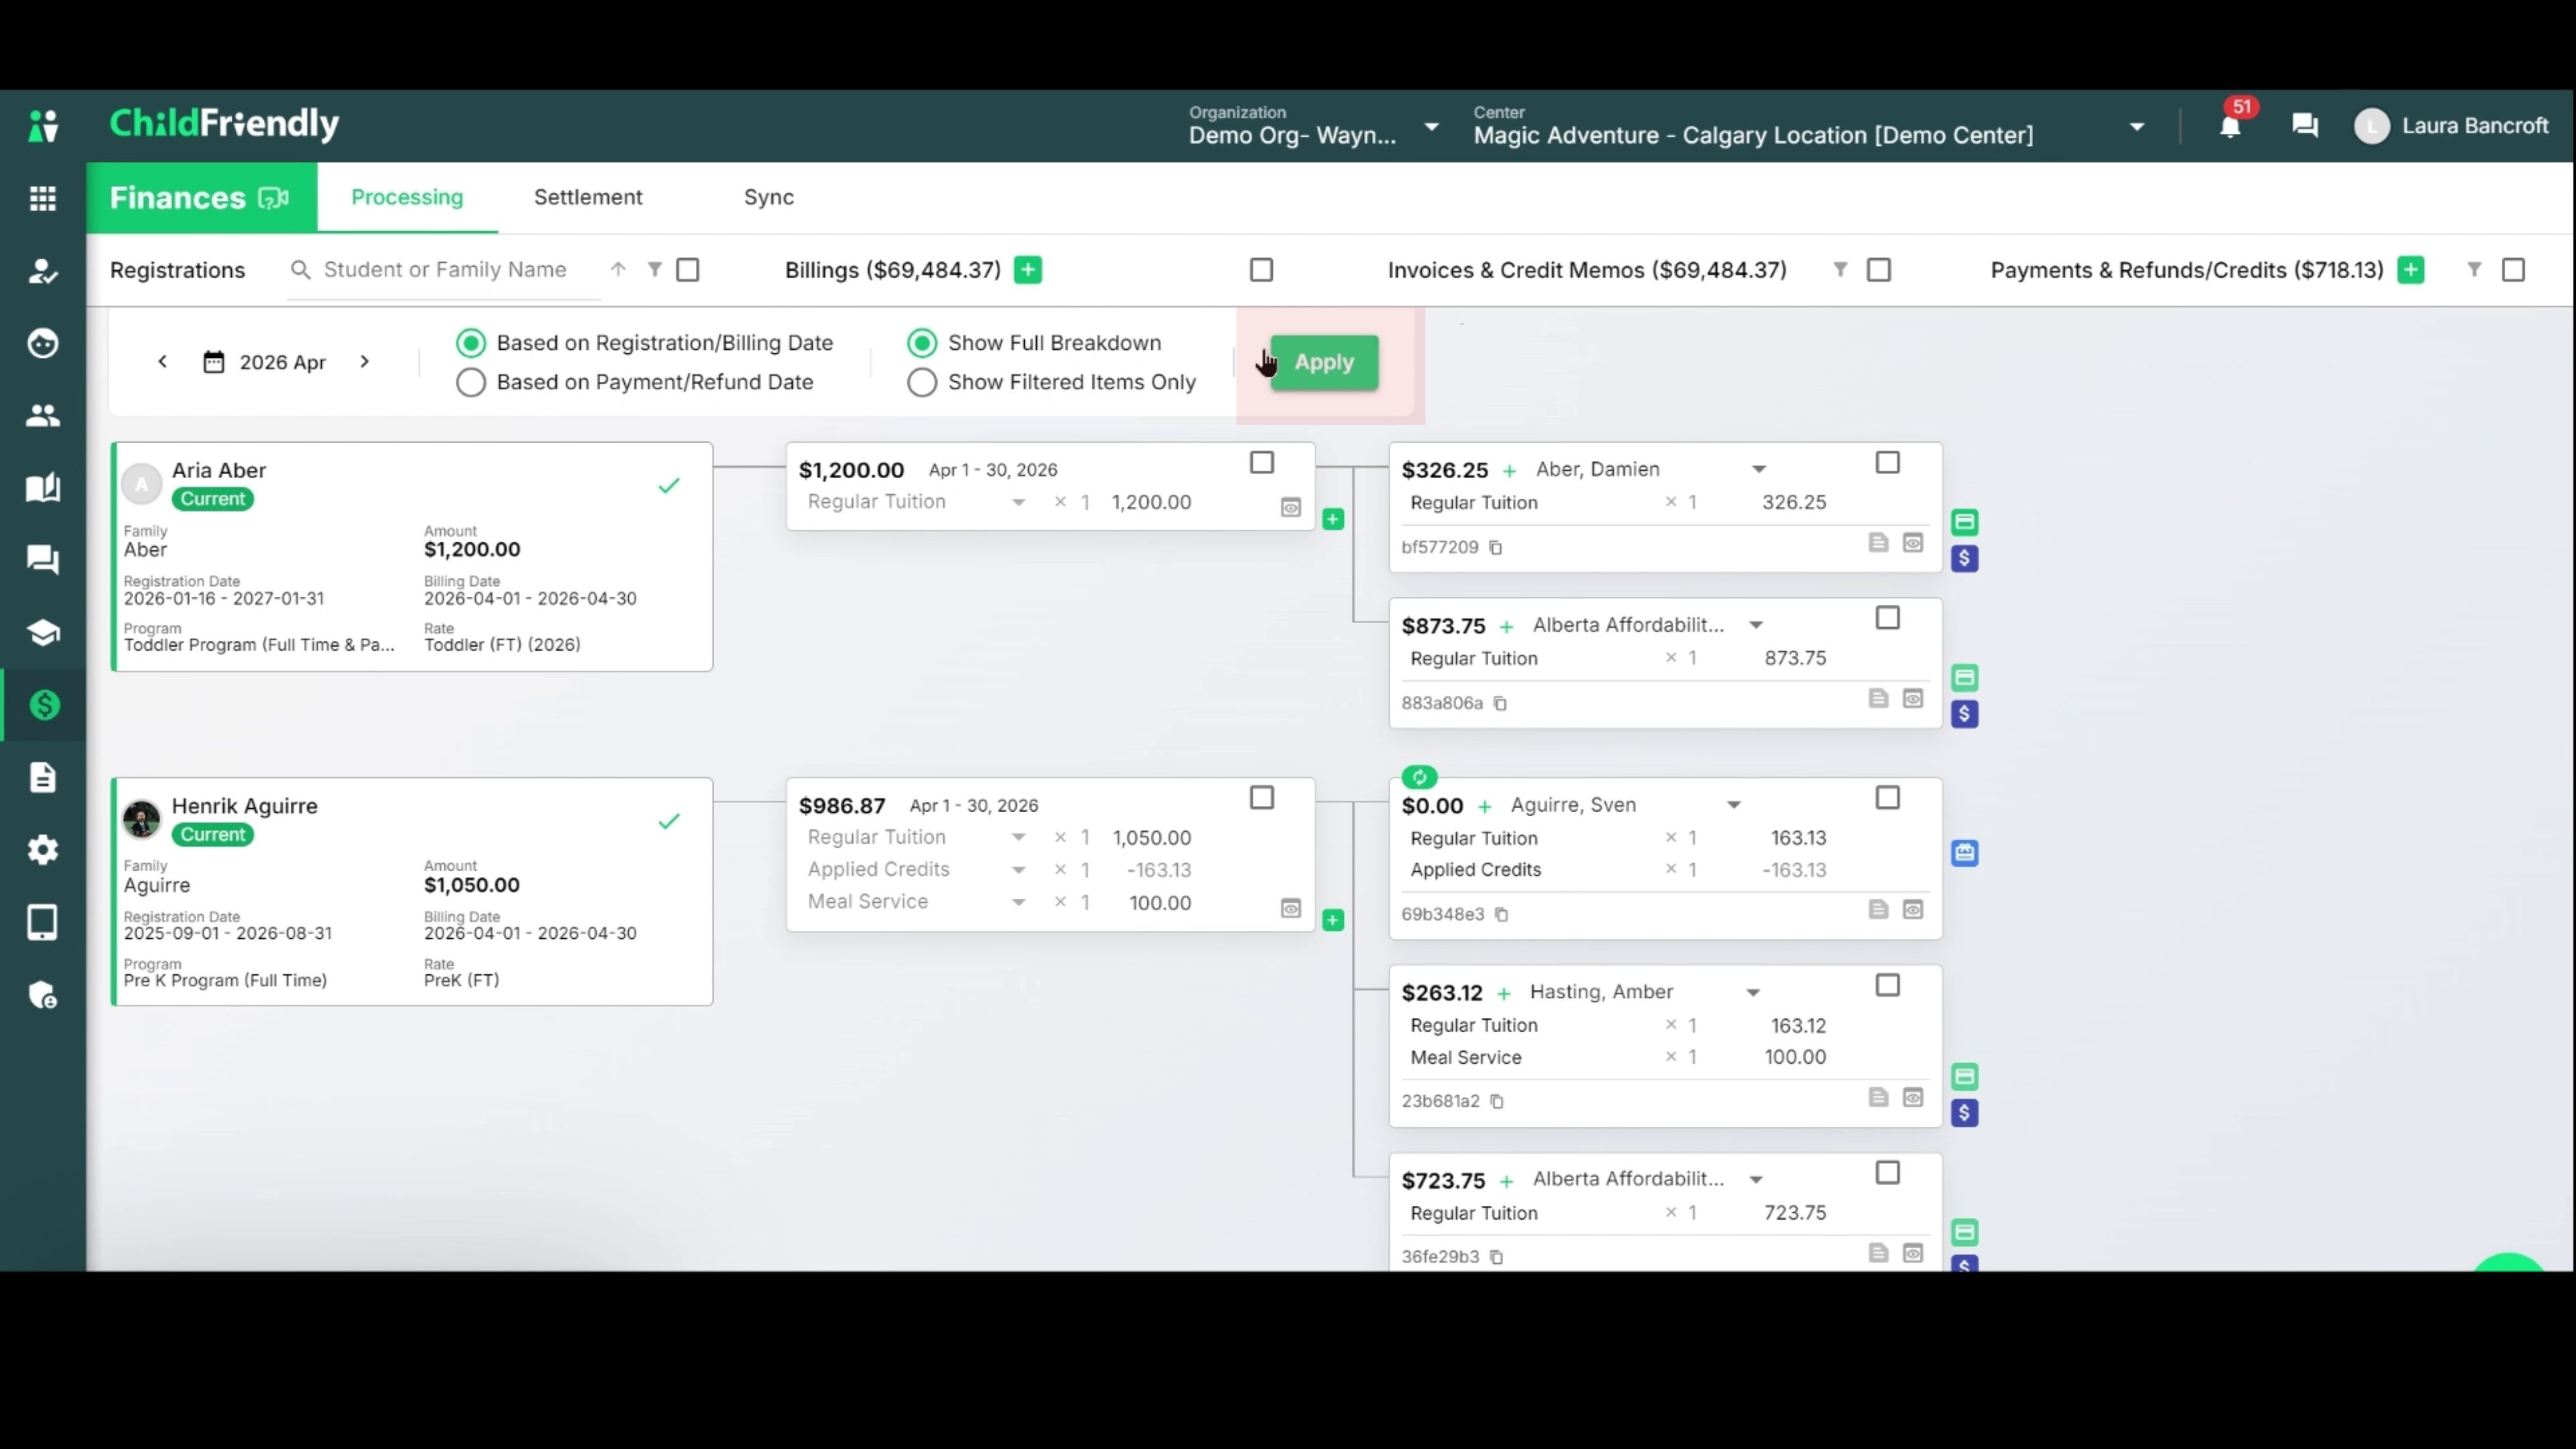
In this main section, you can also manage a few other options:
1. Choose Date or Date Range
Filter by date using a single month (it will default to the current month), or specify a custom range.
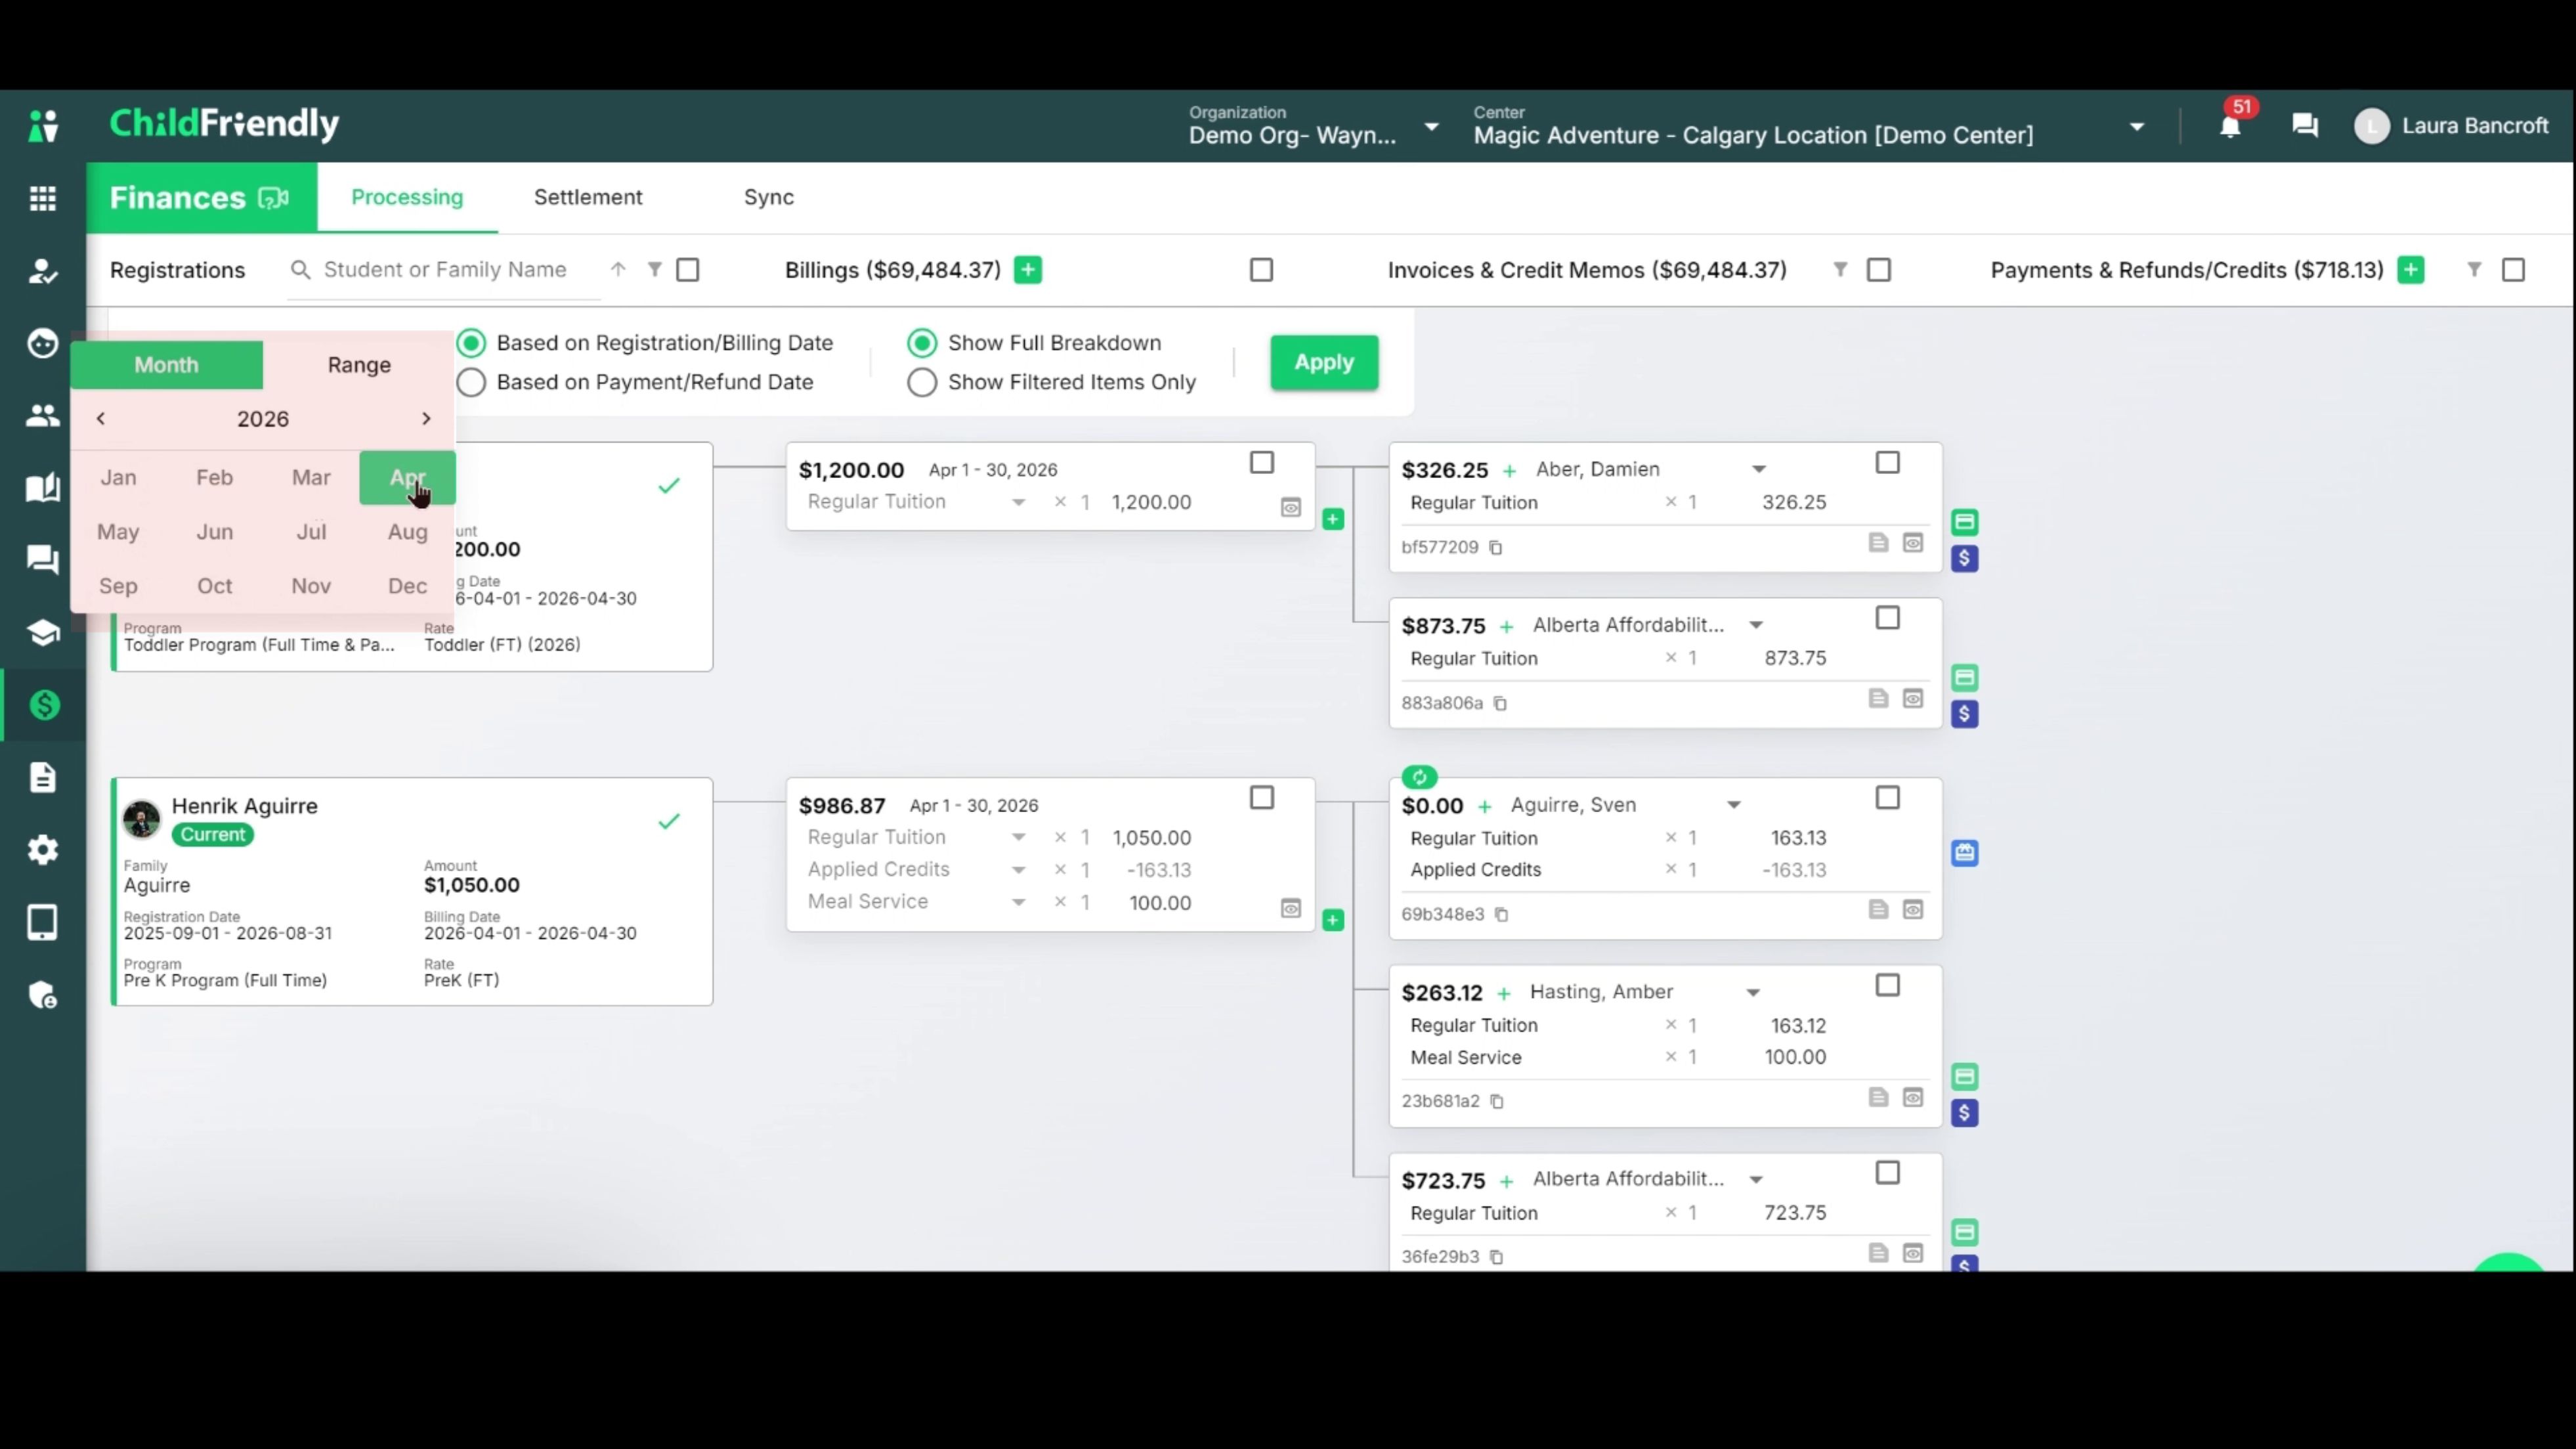
2. Decide How the Date Is Applied
Choose whether the date filter is based on:
The billing period on the registration (e.g., the period the charges are for), or
The payment received date (the date when payment was made), regardless of the billing period.

3. Choose Between Full Breakdown vs. Filtered Items Only
Use the main options to decide whether you want to see the full breakdown (all invoices/memos attached to the billing) or only the filtered items (invoices/credits) you specified.
Typically, you will leave Show Full Breakdown enabled so you can see all invoices related to each billing. However, in some cases, you may want to see only the items that match your filters.
For example, if you filter under Invoices and Credit Memos to see only third-party sponsors—such as the Alberta Affordability Grant:

With Show Full Breakdown enabled:
You will see every billing that has at least one invoice directed to the selected third-party sponsor.
You will also see other invoices attached to that same billing (e.g., the parent’s portion plus the third-party portion), and together they will total the full billing amount.
Billings with no Alberta Affordability Grant invoice attached will not appear, because you have filtered specifically for that sponsor.
If you do not want to see all other sponsors or invoices for those billings, change the setting to Show Filtered Items Only.
Then click Apply again.

Now:
You will still see the overall billing (e.g., a $1,200 billing), but only the portion invoiced to the Alberta Affordability Grant will be displayed.
Other sponsors or invoice portions that do not match your filter will not show.
Was this helpful?
Still need help? Ask the team