Part 2: Record & Reconcile Third Party Payments
This document explains how to reconcile third-party payments after they have been recorded, ensuring that the amounts in your system match the third-party statement and your bank deposit. You will learn how to locate the recorded payments, compare and adjust them against the statement, create any necessary balance invoices, and verify the final deposit in the Deposited screen.
Last updated 3 months ago
Step 1: Open the Settlement Tab and Select the Correct Month
Once you have recorded the payment in the Processing tab (from part one), move to the Settlement tab.
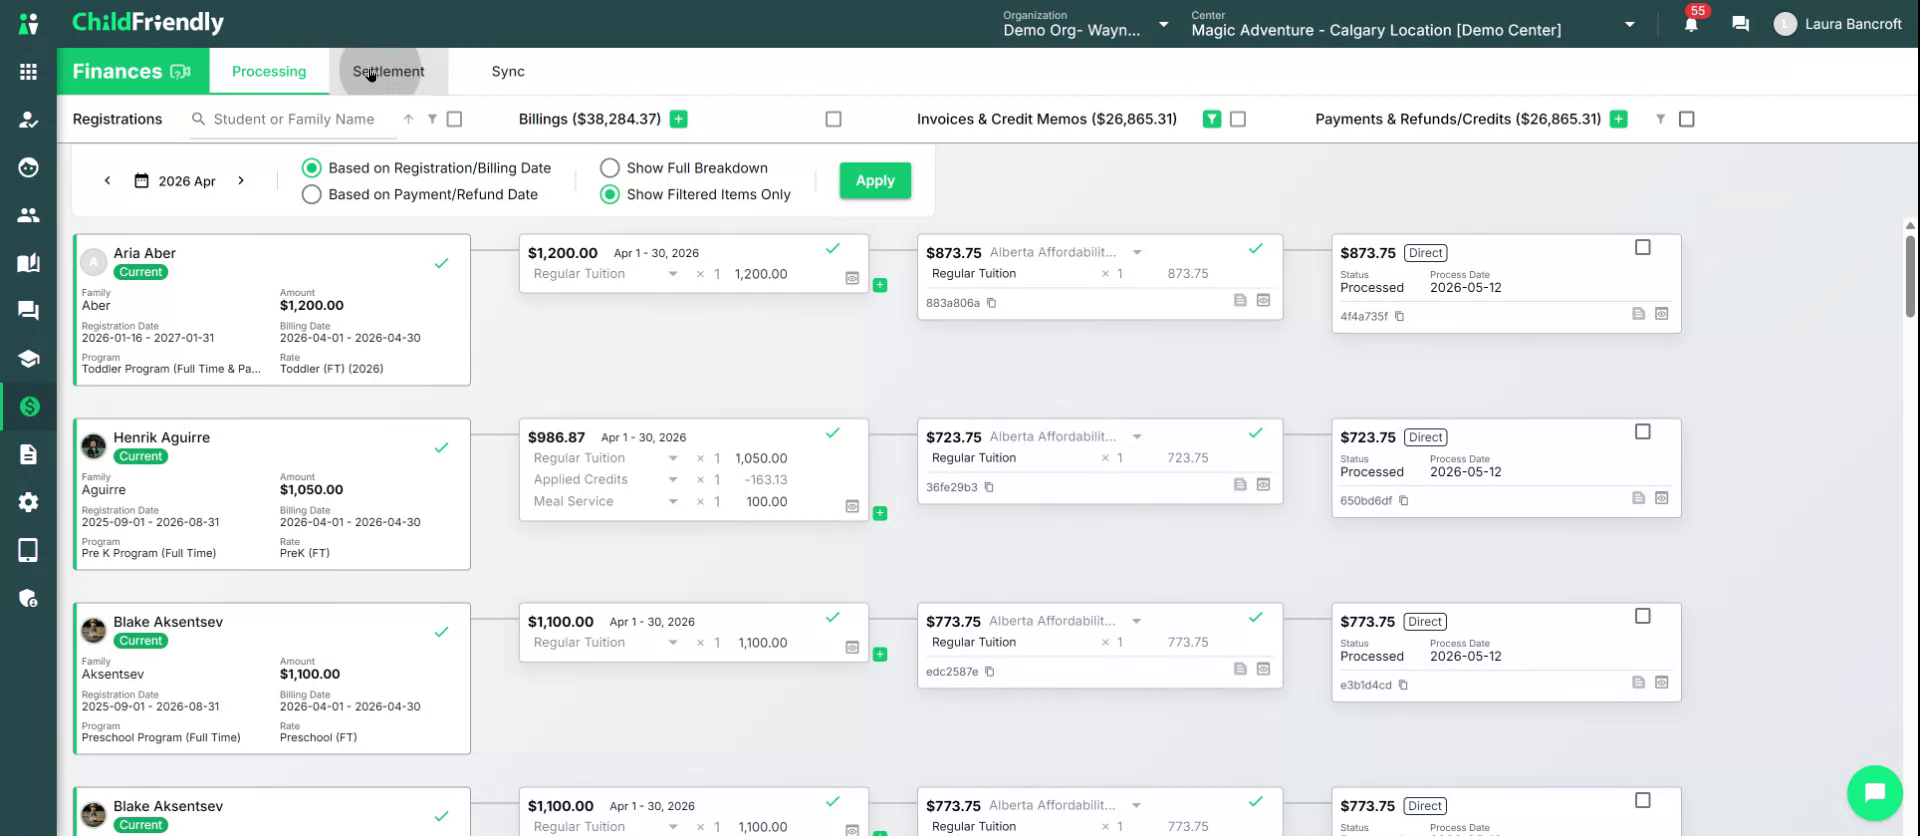
In the Settlement tab, locate the payments you just recorded by selecting the month in which the payment was made (based on the payment date, not the invoice date). In this example, the payment was made in May, so select May.
After selecting the month, click Apply to load all payments for that period.

Step 2: Filter by Third-Party Sponsor
Review the list of payments shown for that month. All payments for the example third party, Alberta Affordability Grant, should appear. If there are payments from other sponsors (e.g., parents or other third parties), use the filters at the top of the sponsor column to show only the relevant sponsor.

Step 3: Prepare and Align with the Third-Party Statement
Take out the payment statement you received from the third party. This statement shows the lump sum deposited to your bank account and the detailed breakdown of how much was applied to each child.
Compare the statement to what you see on the screen. If the statement lists children in a specific order (e.g., by last name or first name), match that sorting in the Settlement tab for easier reconciliation. For example, to sort by last name, click the sort icon on the Last Name column header.

Now your children are sorted alphabetically by last name, ready for direct comparison with the third-party statement.
Step 4: Review Processed Amounts and Confirm Actual Amounts
For each child, compare the actual amount on the screen to what appears on the third-party statement. As you confirm that the actual amount matches the statement for a child, select the checkbox on the left-hand side for that child.
By default, the Actual Amount Received will match the processed amount.
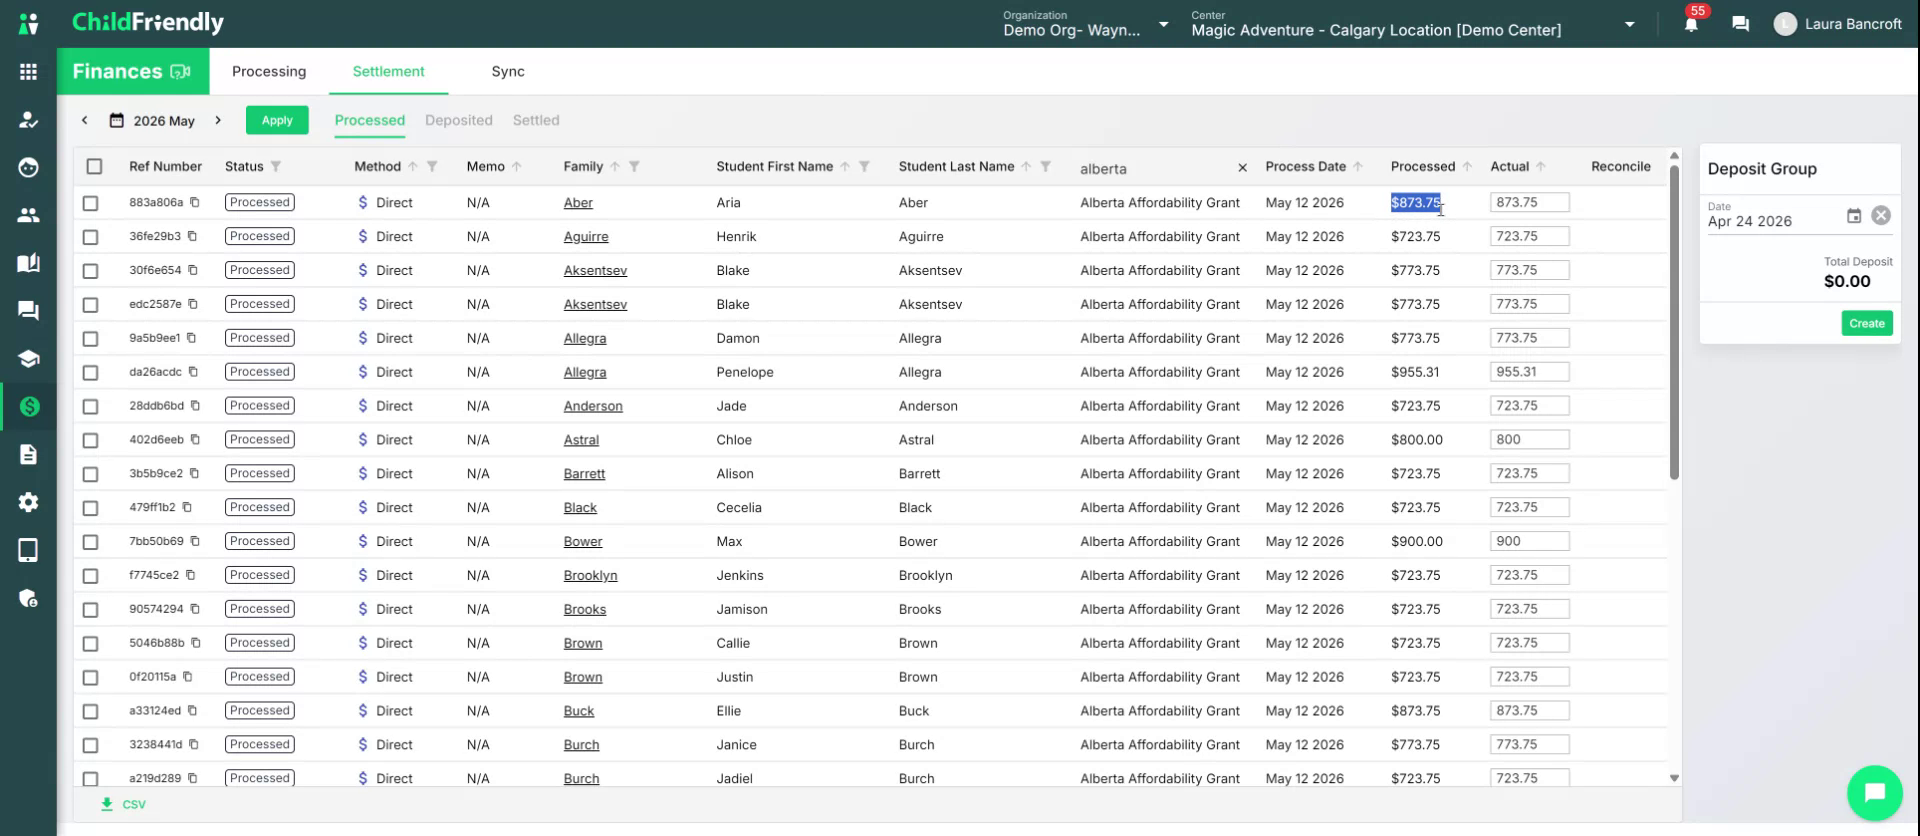
As you select each matching child, the Deposit Group Total on the right-hand side will automatically increase to reflect the total of all selected payments.
Step 5: Adjust a Child Whose Amount Does Not Match
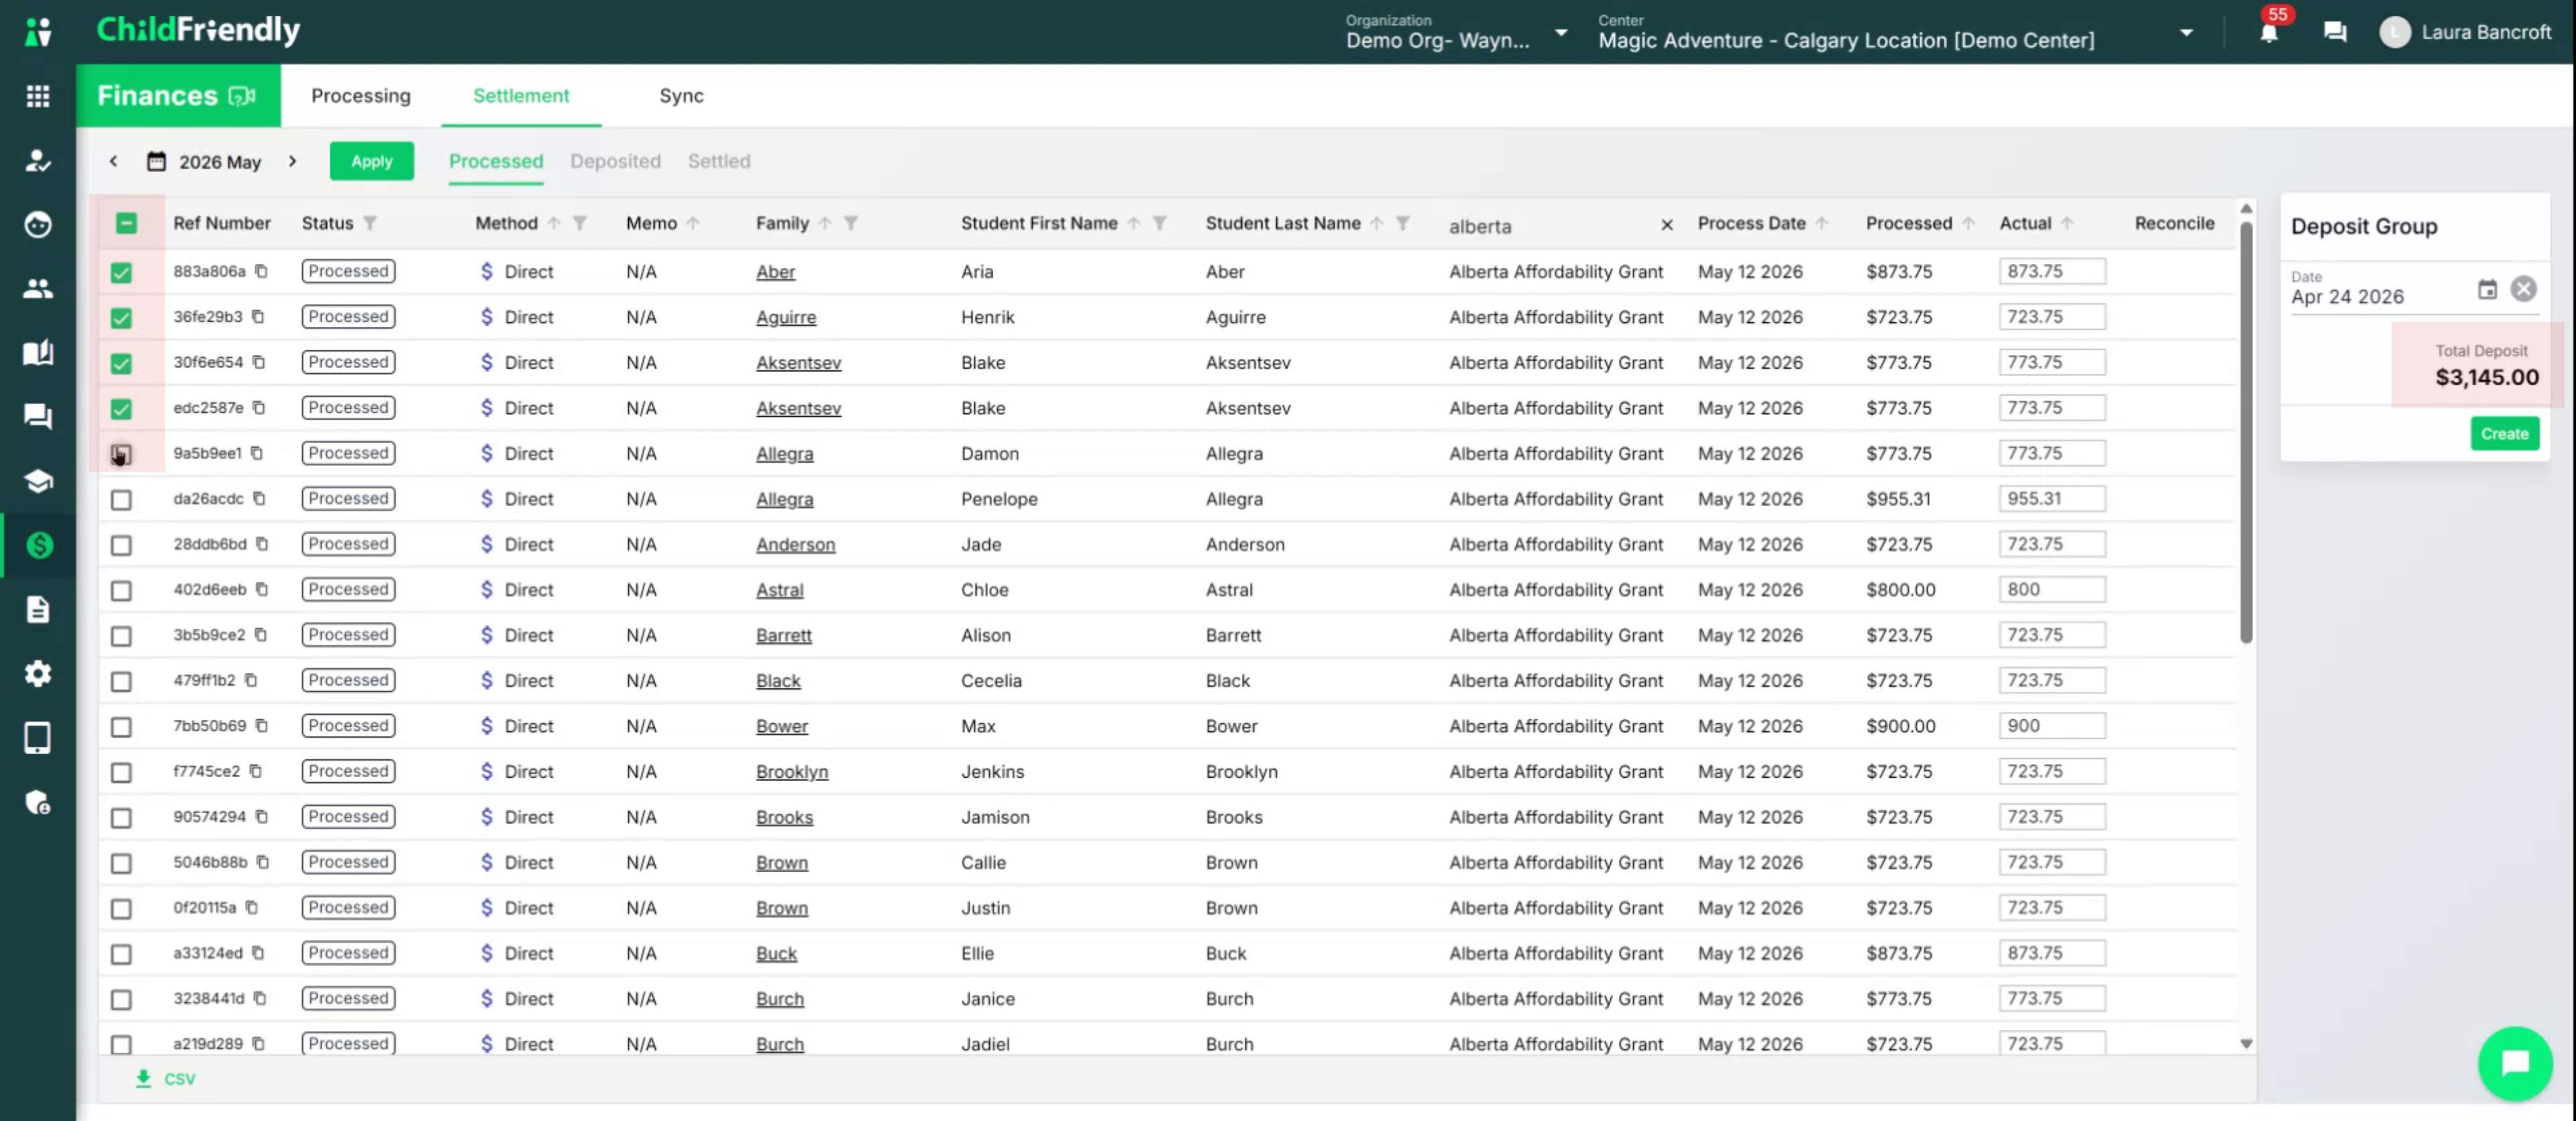
When you encounter a child where the Amount does not match the amount on the third-party statement, overwrite the Actual Amount Received with what was actually paid.
For example, for the child Jade, if the third-party statement shows that you actually received $700.00, enter 700.00 in the Actual Amount Received field for Jade.
Once you have entered the actual amount received, you must reconcile the difference. Click the Reconciliation button that appears for that child.

Step 6: Choose How to Handle the Remaining Balance
After clicking Reconciliation, the system will:
Update the original invoice and the processed amount to the actual amount received (e.g., $700.00).
Calculate any remaining balance owing (e.g., $23.75).
The system will now create a new invoice for the balance and then ask you to decide who will be responsible to pay for the remaining balance (e.g., still the Alberta Affordability Grant if they underpaid, or a family member/other sponsor).
Make your selection for who will be charged.
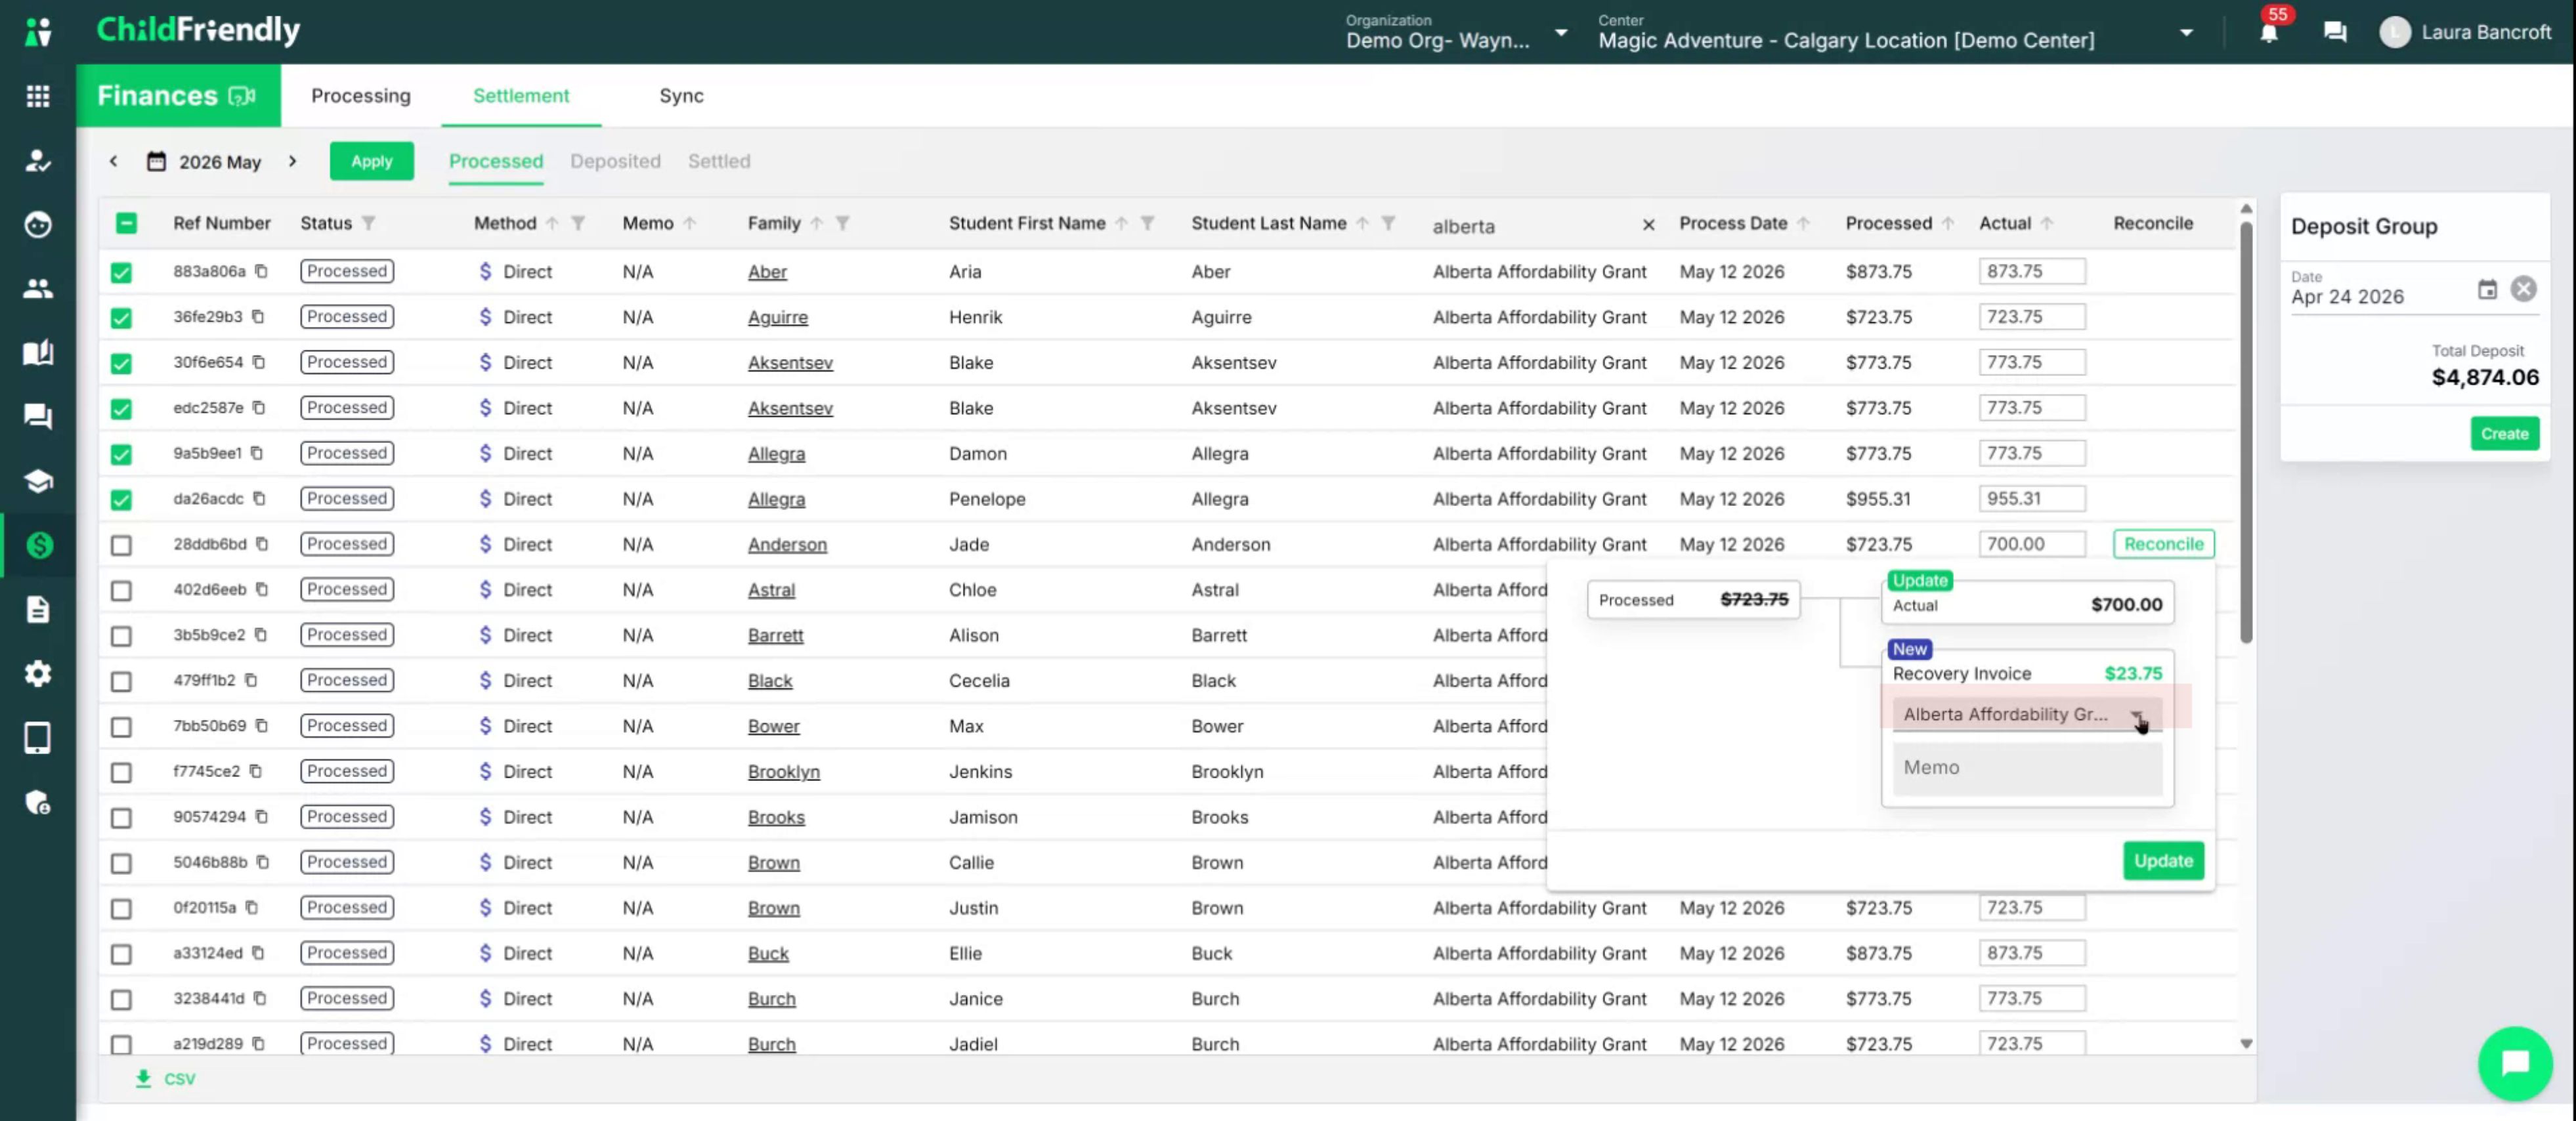
Enter a memo explaining why this additional invoice is being created (e.g., “Underpayment from third party – balance transferred to parent”).
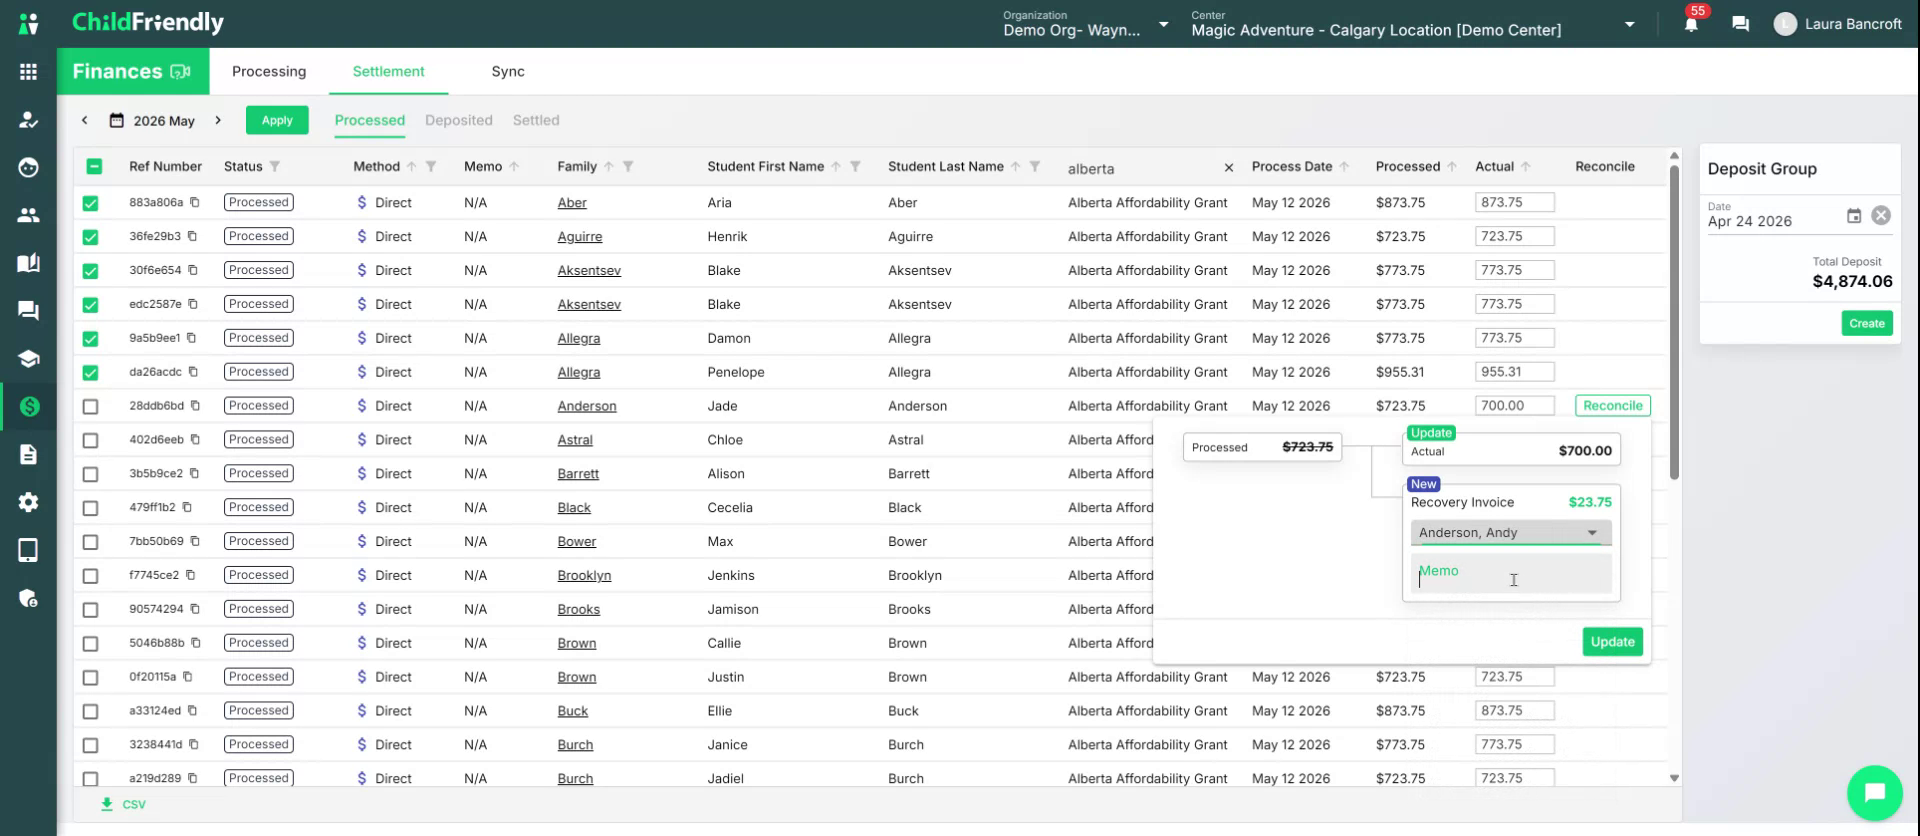
Click Update to confirm the reconciliation.
Once you click Update, the system will:
Update the original invoice and processed amount to the actual amount received (e.g., $700.00), and
Automatically create a new invoice for the difference, billed to the sponsor you selected.
You can later return to the Processing tab, filter for unpaid invoices, and collect payment or adjust claims with the third party as needed.
When you are satisfied that Jade’s record matches the statement, select her checkbox to include her in the deposit group.

Step 7: Complete Selection of All Children and Verify the Deposit Total
Continue this process of:
Confirming the actual amount matches the statement,
Reconciling any differences where required, and
Selecting each child whose amounts have been verified,
until you have selected all children listed on the third-party statement.
Look at the Deposit Group Total on the right-hand side and confirm that this total matches exactly the lump sum amount shown on the third-party statement.
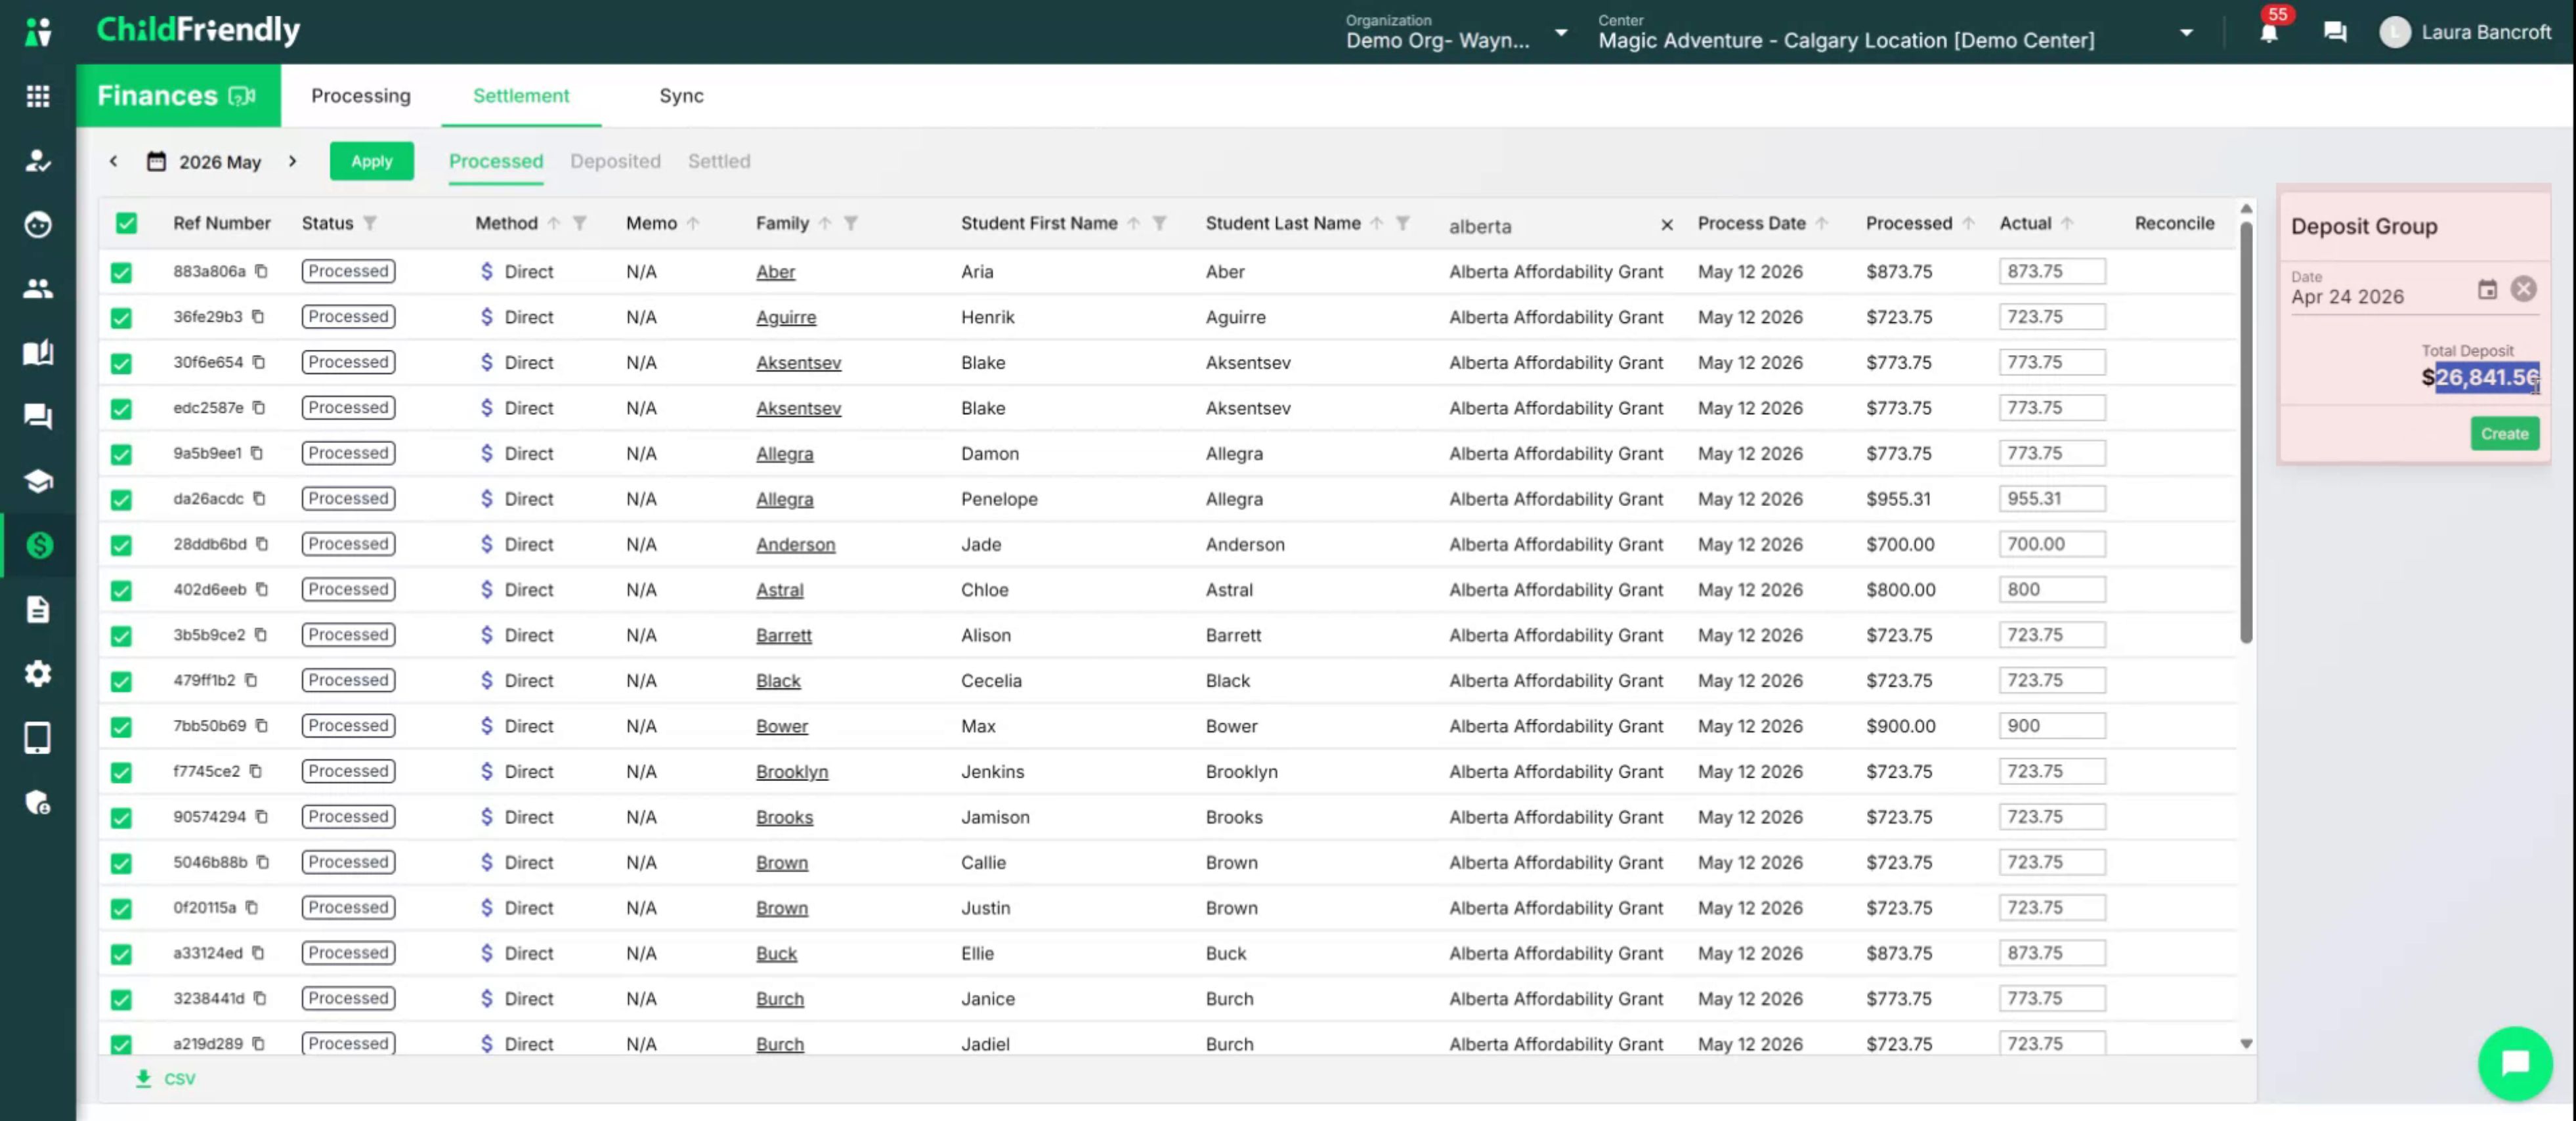
If the totals do not match, review your entries to identify and correct any errors before proceeding.
Step 8: Enter the Bank Deposit Date and Create the Deposit
When the Deposit Group Total matches the statement, enter the actual date that the lump sum was deposited into your bank account.
For this example, enter the date as May 12.

After entering the date, click Create to finalize the deposit group.
Once created, all selected payments are grouped into a single deposit so that they appear on your bank statement as one consolidated deposit, while still retaining the individual child-level breakdown in the system.
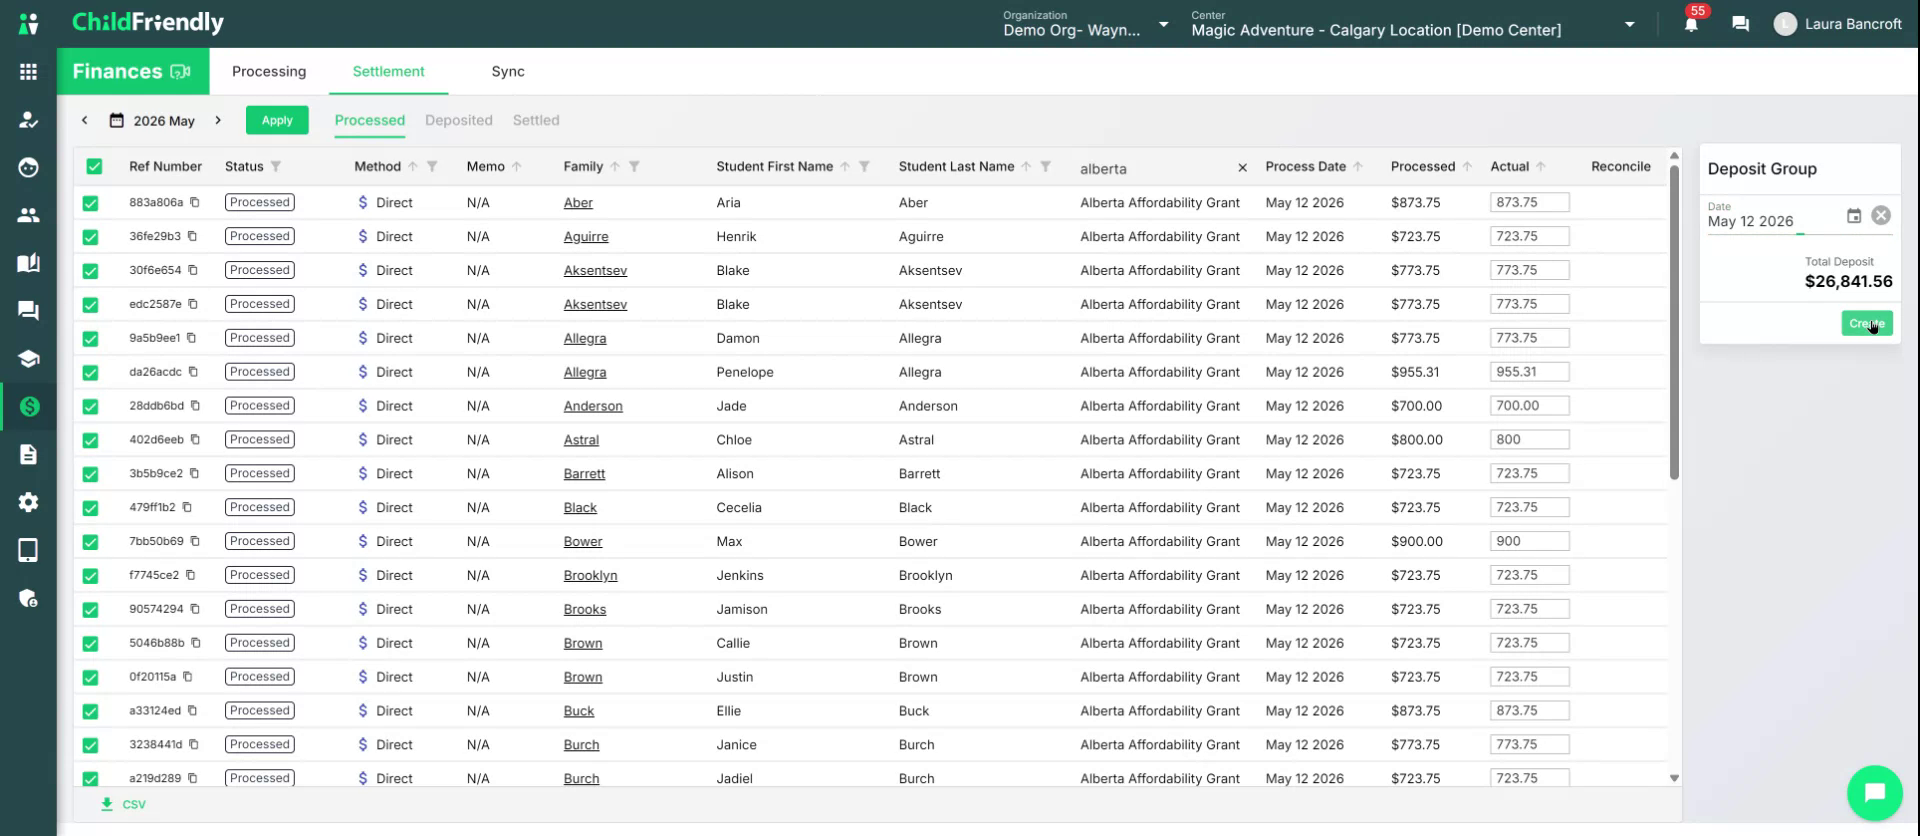
The payments you just processed will disappear from the Processed screen and will now appear under the Deposited screen.
Step 9: Revert a Deposit Group if Corrections Are Needed
If you made a mistake and need to correct the deposit:
In the Deposited screen, locate the relevant deposit group.
Select the checkbox next to that deposit.

Click the three-dot menu (more options).
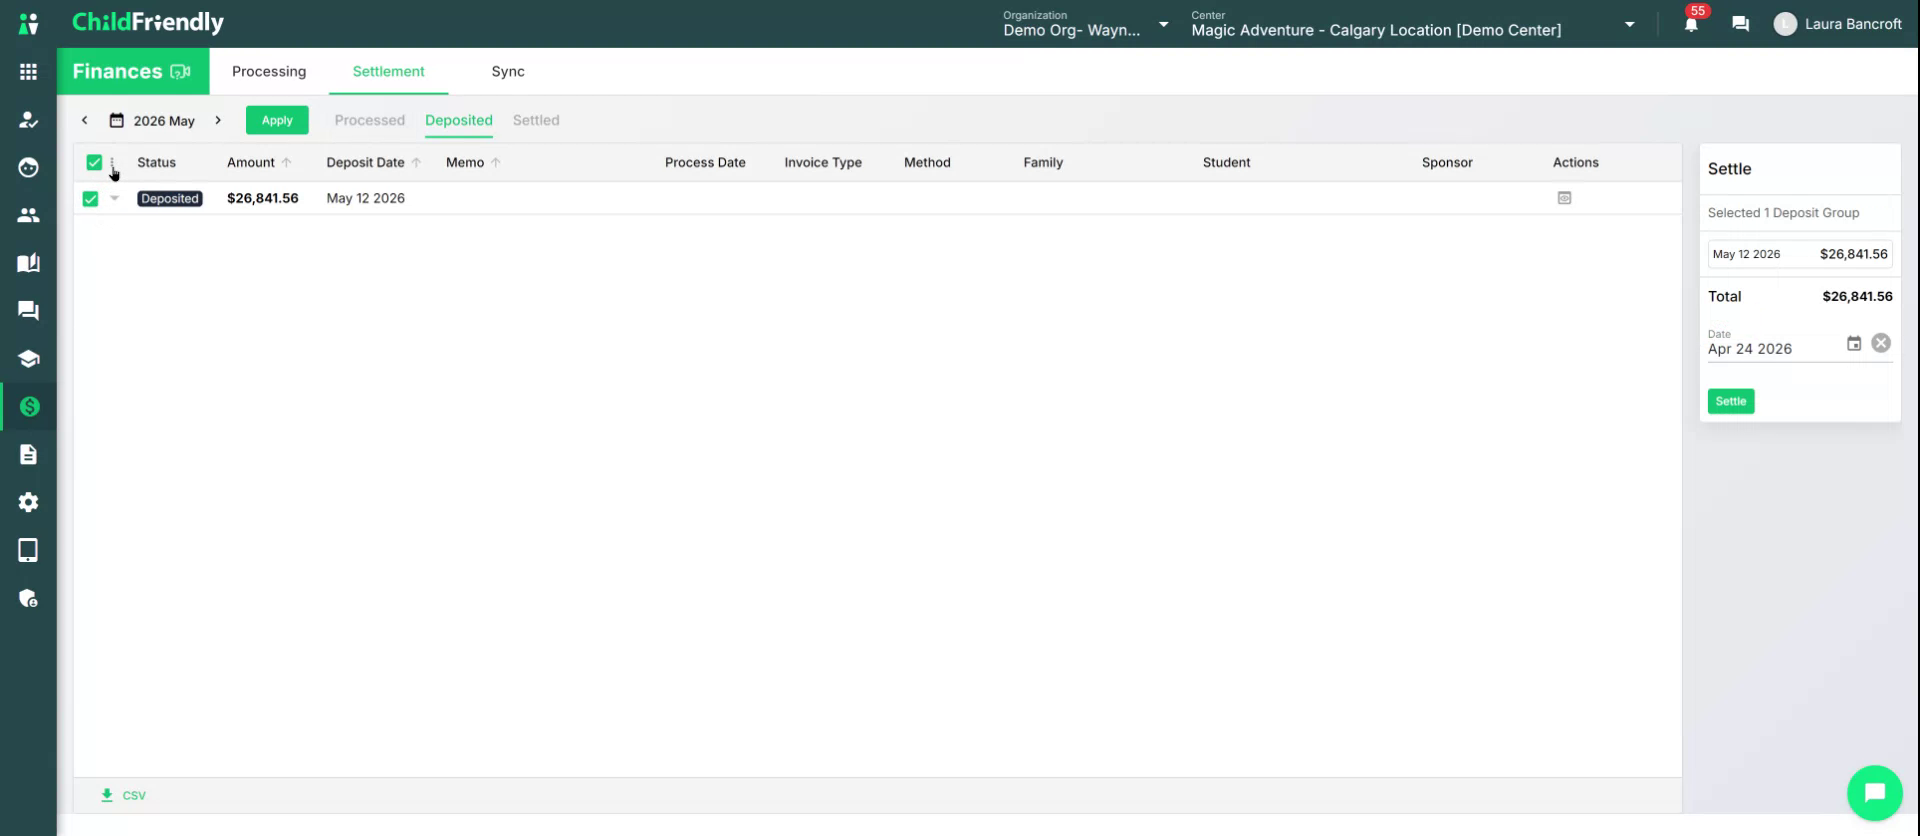
Choose Revert Deposit Group.
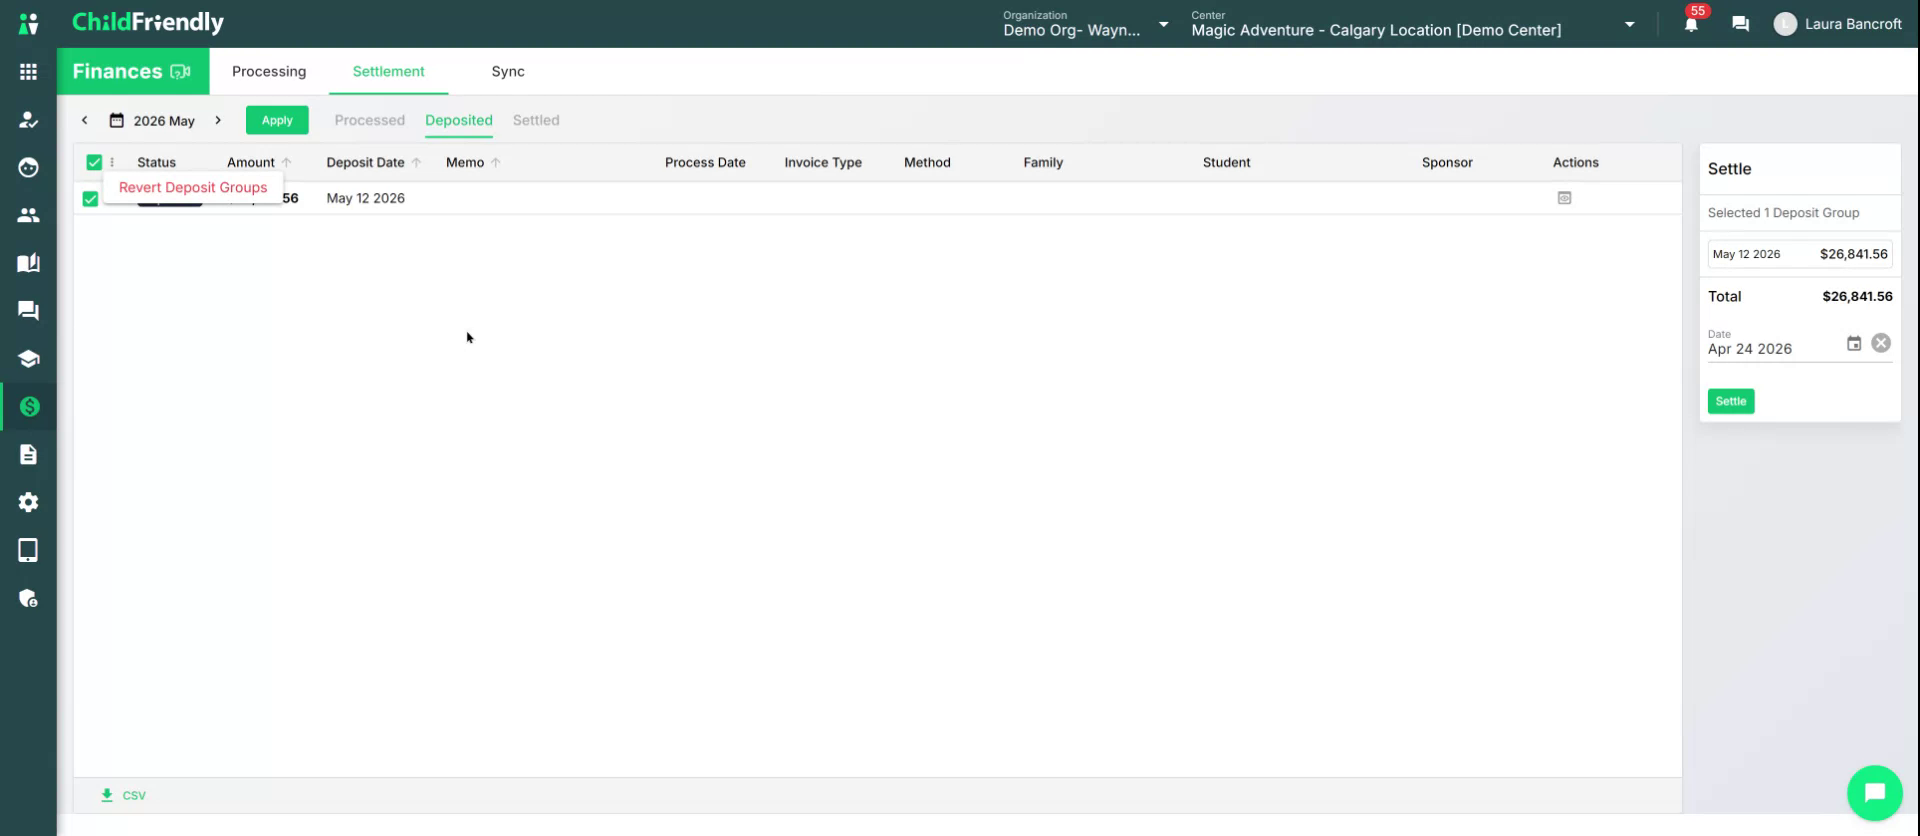
Reverting the deposit group will move those payments back to the Processed tab so you can make any necessary corrections and then re-create the deposit.Once everything is correct and reconciled, your third-party payment is fully recorded and reconciled to match both the third-party statement and your bank account.
Was this helpful?
Still need help? Ask the team