How to Process Returned Payments
This document explains how to locate deposited transactions, mark a payment as failed (NSF or returned), and track the resulting recovery invoices so you can collect the funds again and apply any penalties.
Last updated 3 months ago
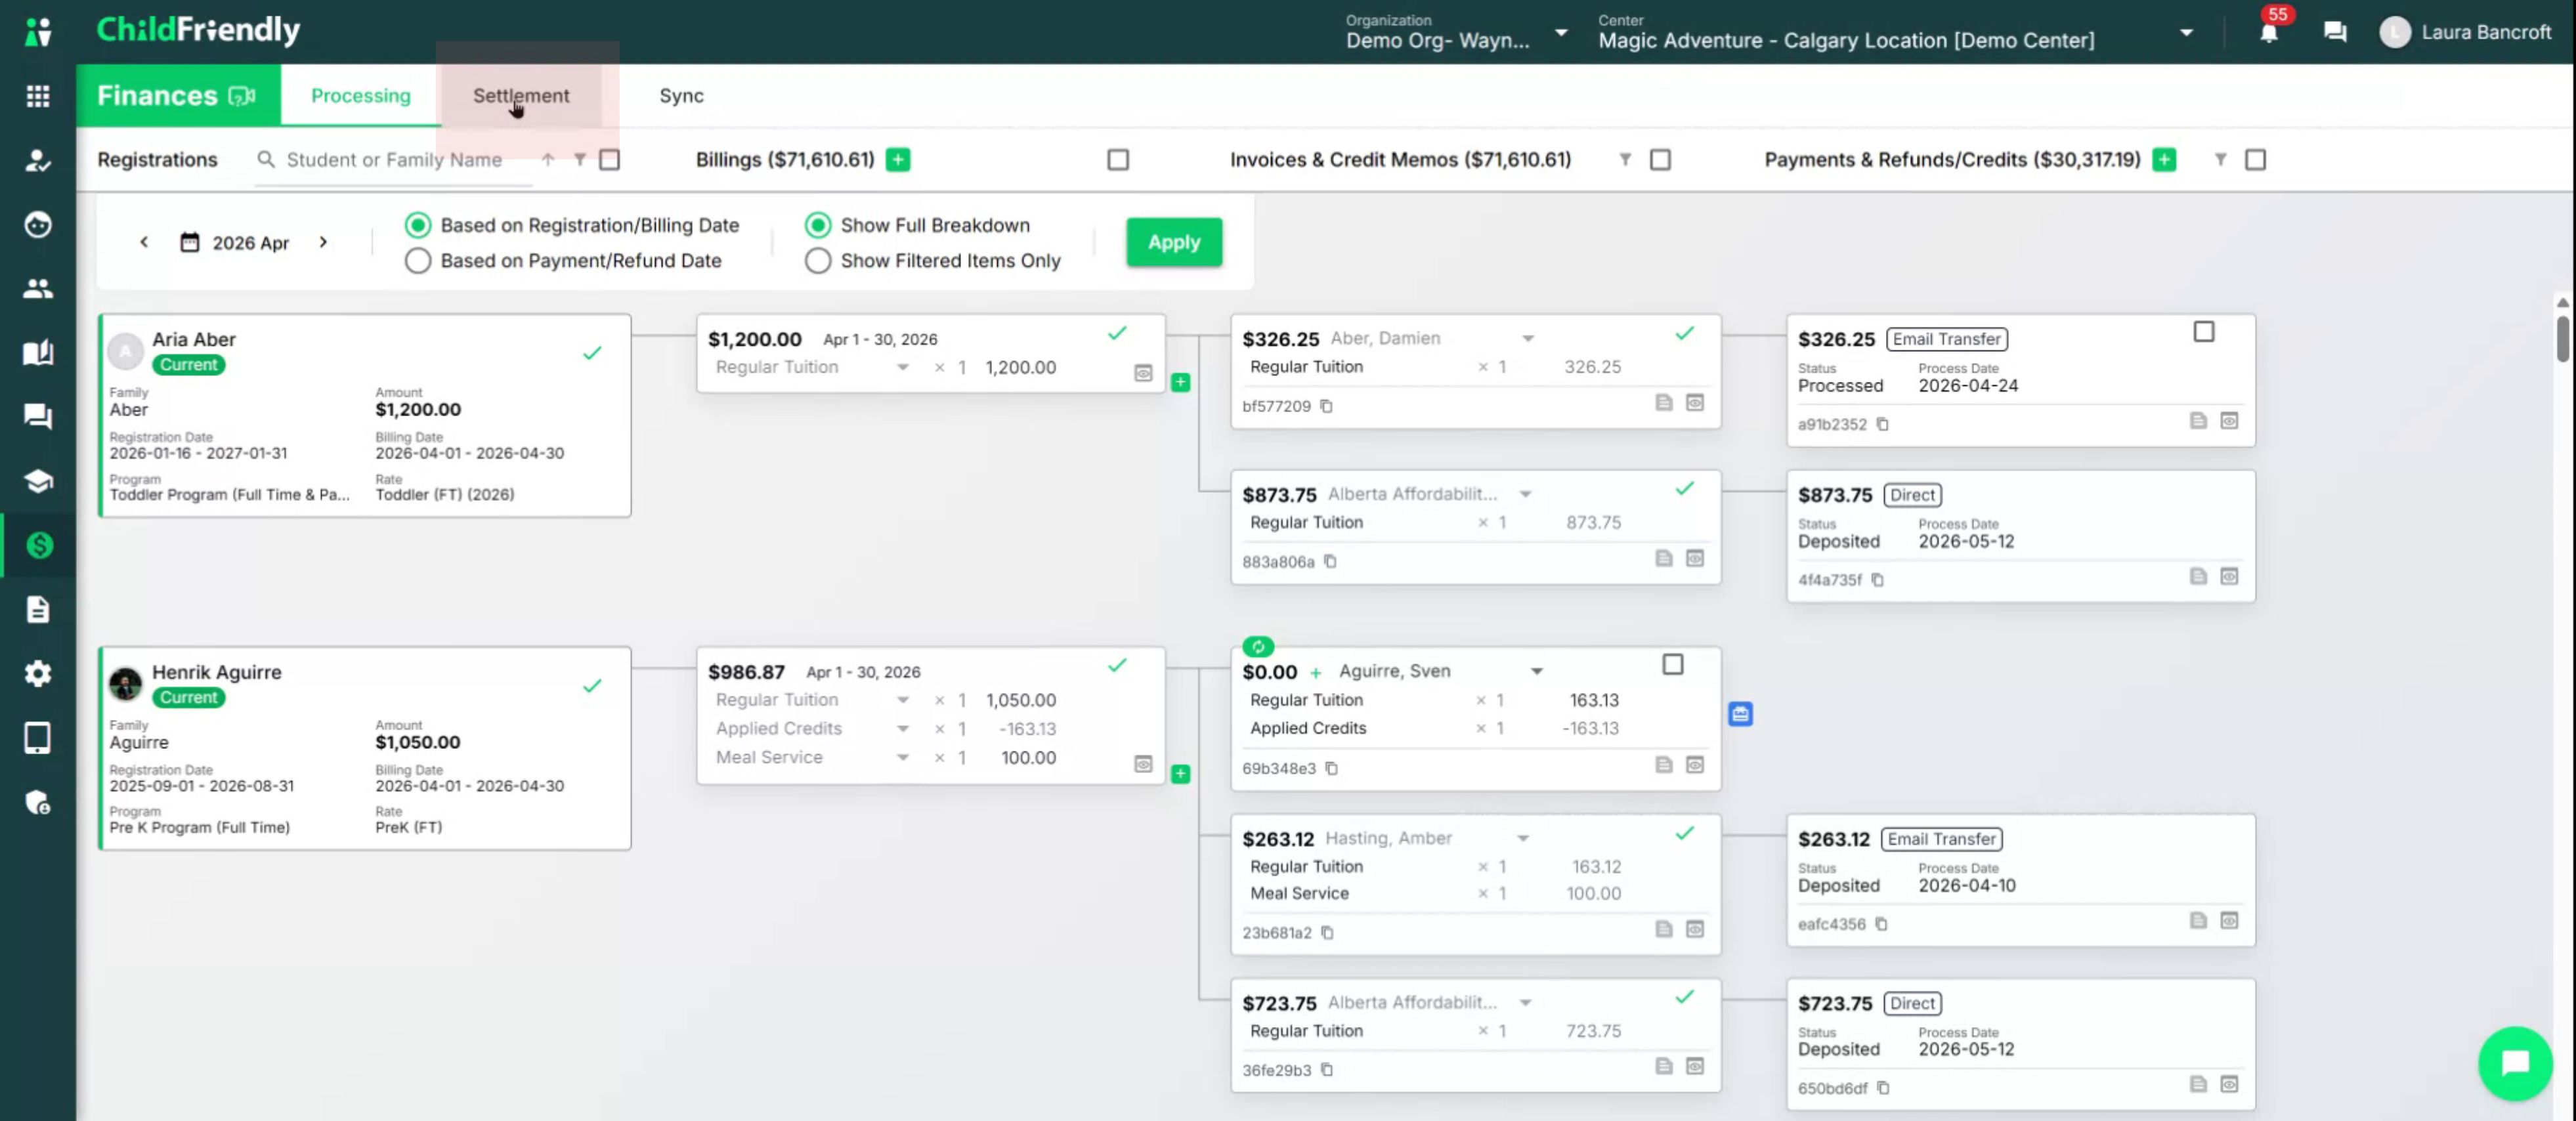
Step 1: Open the Settlement Tab in the Finances Module
Navigate to the Finances module in your system. Then go to the Settlement tab.
Step 2: View Deposited Transactions for the Relevant Period
Within the Settlement tab, select the Deposited section.
Filter for the date range in which the original transaction was recorded as deposited into the bank, then click Apply to load the results.
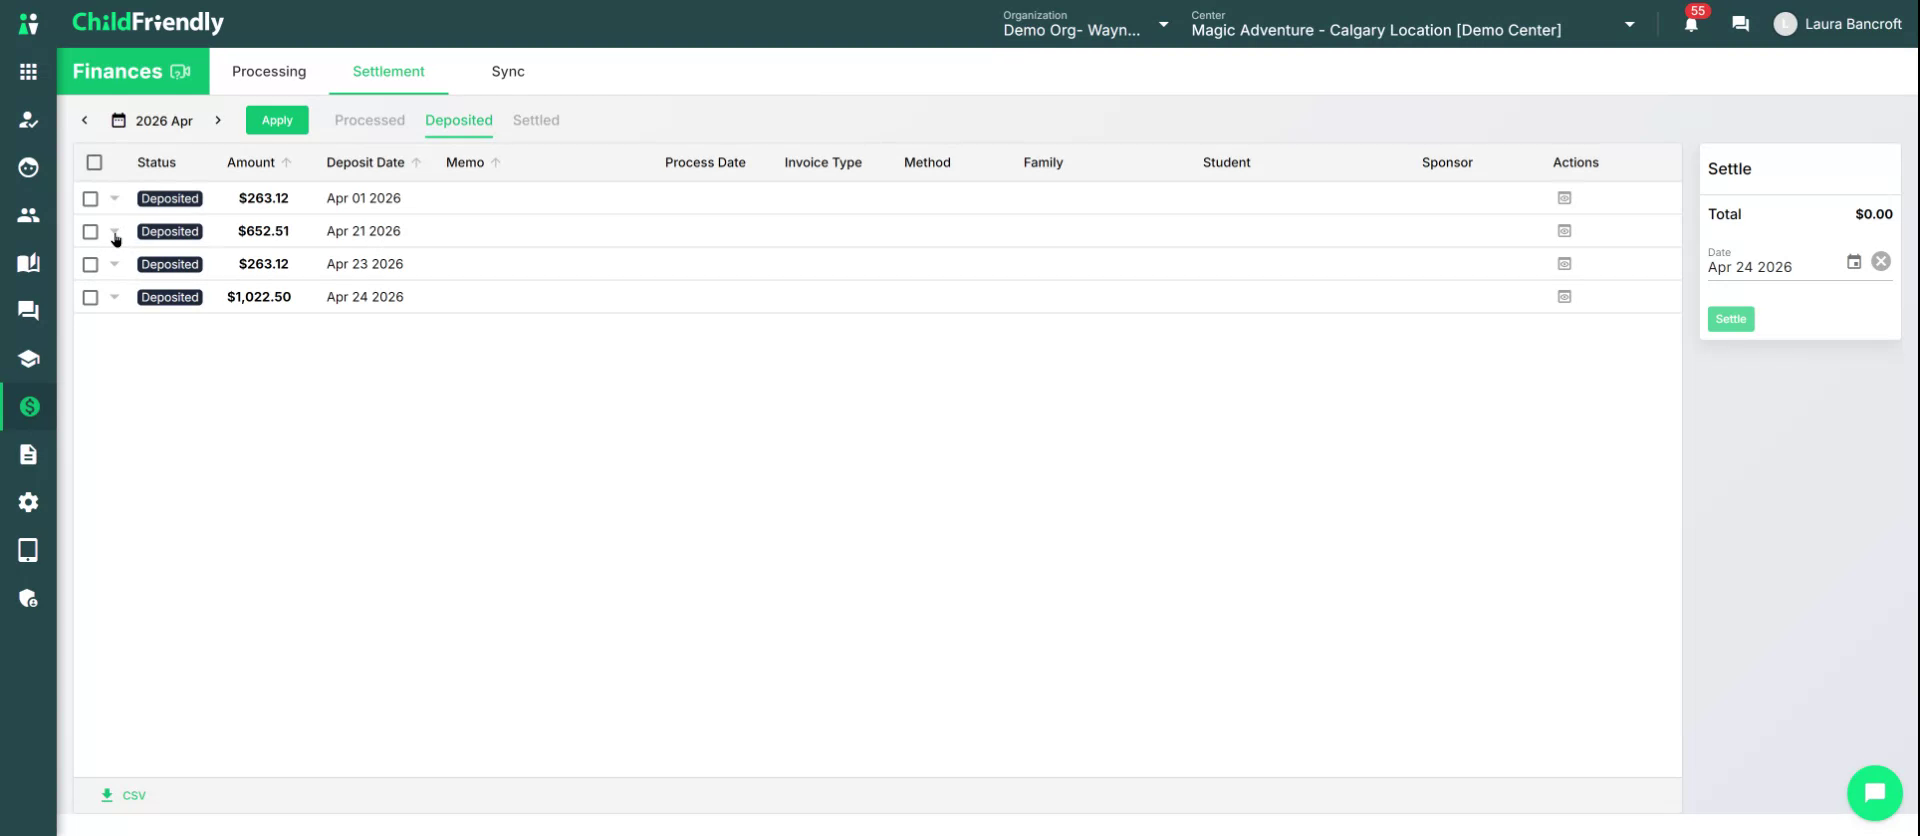
You will now see all groupings of transactions that were deposited to your bank account for the selected period.
Step 3: Identify the Original Deposit Group
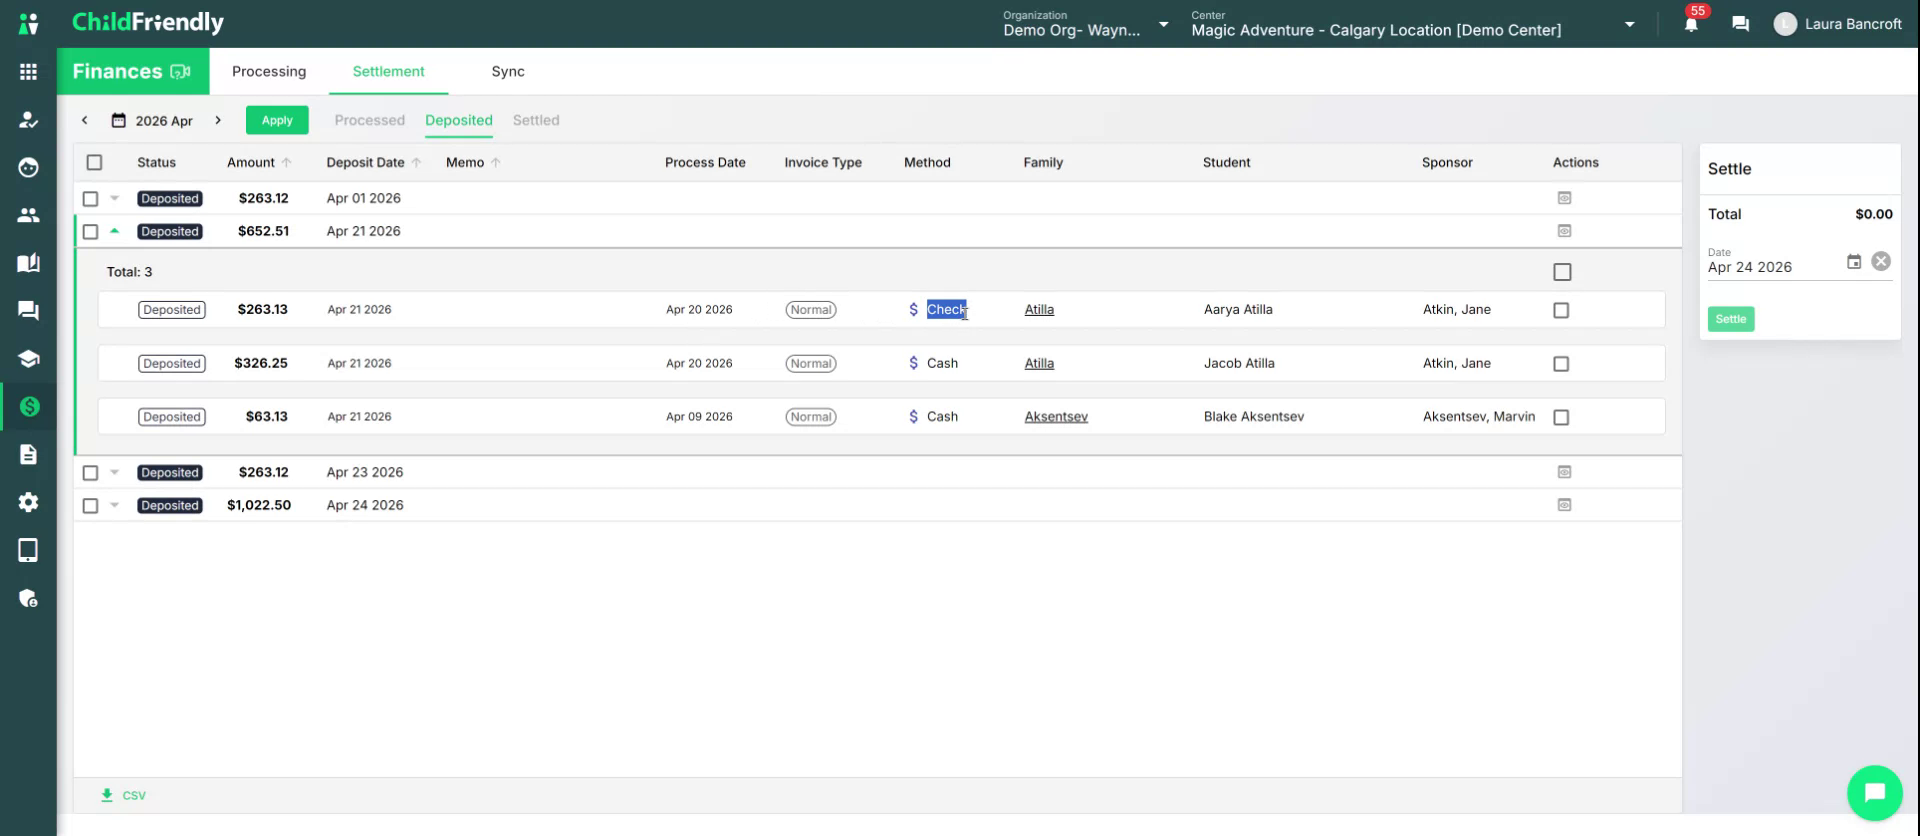
When you expand the deposit group, you will see a list of all the individual payments that make up that deposit. Within the list, locate the payment that was returned.
For example, if the payment was deposited in a deposit group on April 21, find that deposit group and expand it to view the details and total deposit amount. This deposit may be made up of multiple transactions (e.g., one check and two cash payments) that were grouped together and deposited on that date.
Step 4: Mark the Payment as Failed (NSF)
Once you find the applicable payment, go to the Actions column, select the checkbox for that payment, and choose Fail Selected Payments.
In this example, the check from Jane has gone NSF.
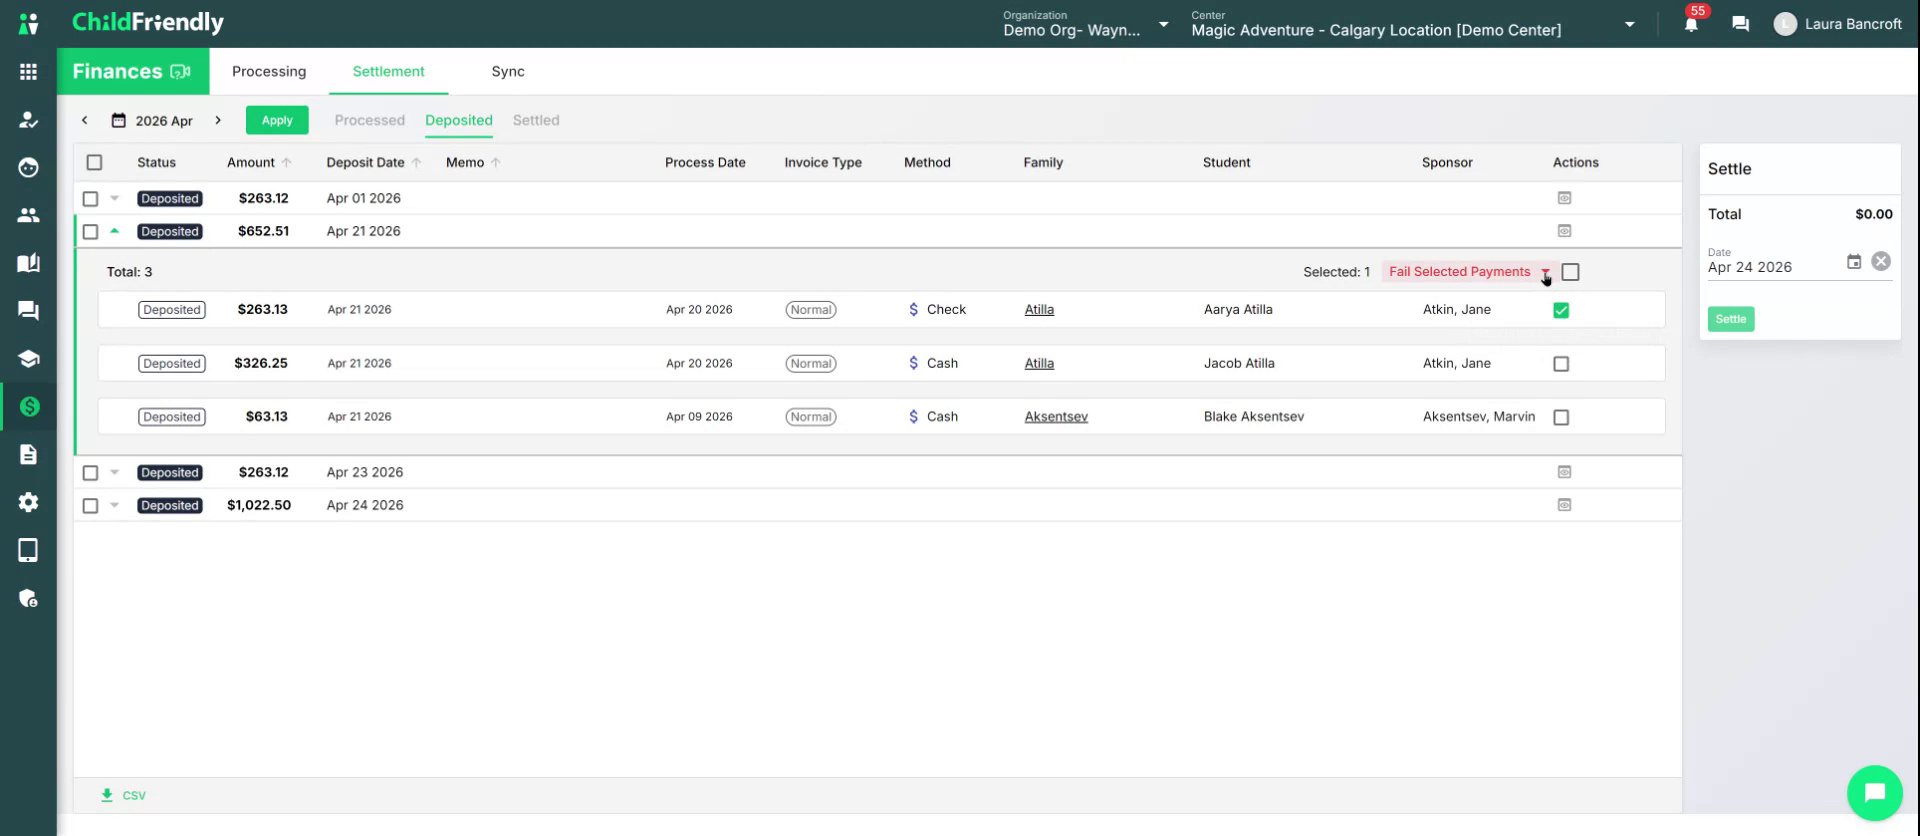
When prompted, select the date on which the payment offically failed and was withdrawn from your bank account (e.g., April 28)..
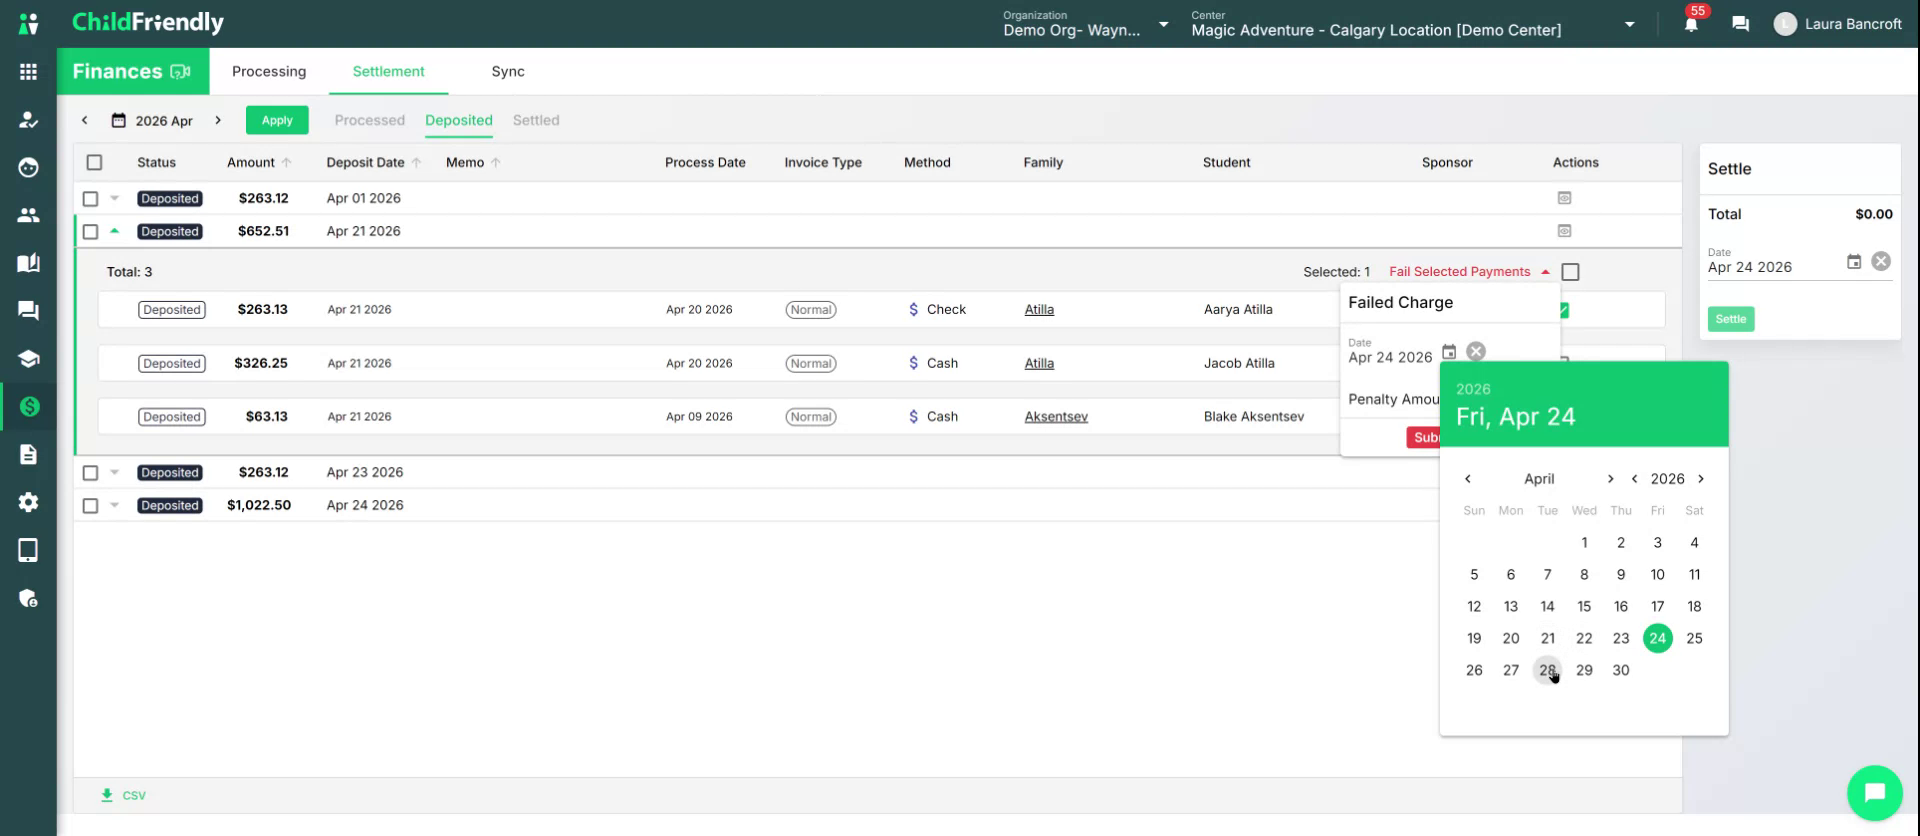
If applicable, enter any penalty amount you are charging the parent for the failed payment.
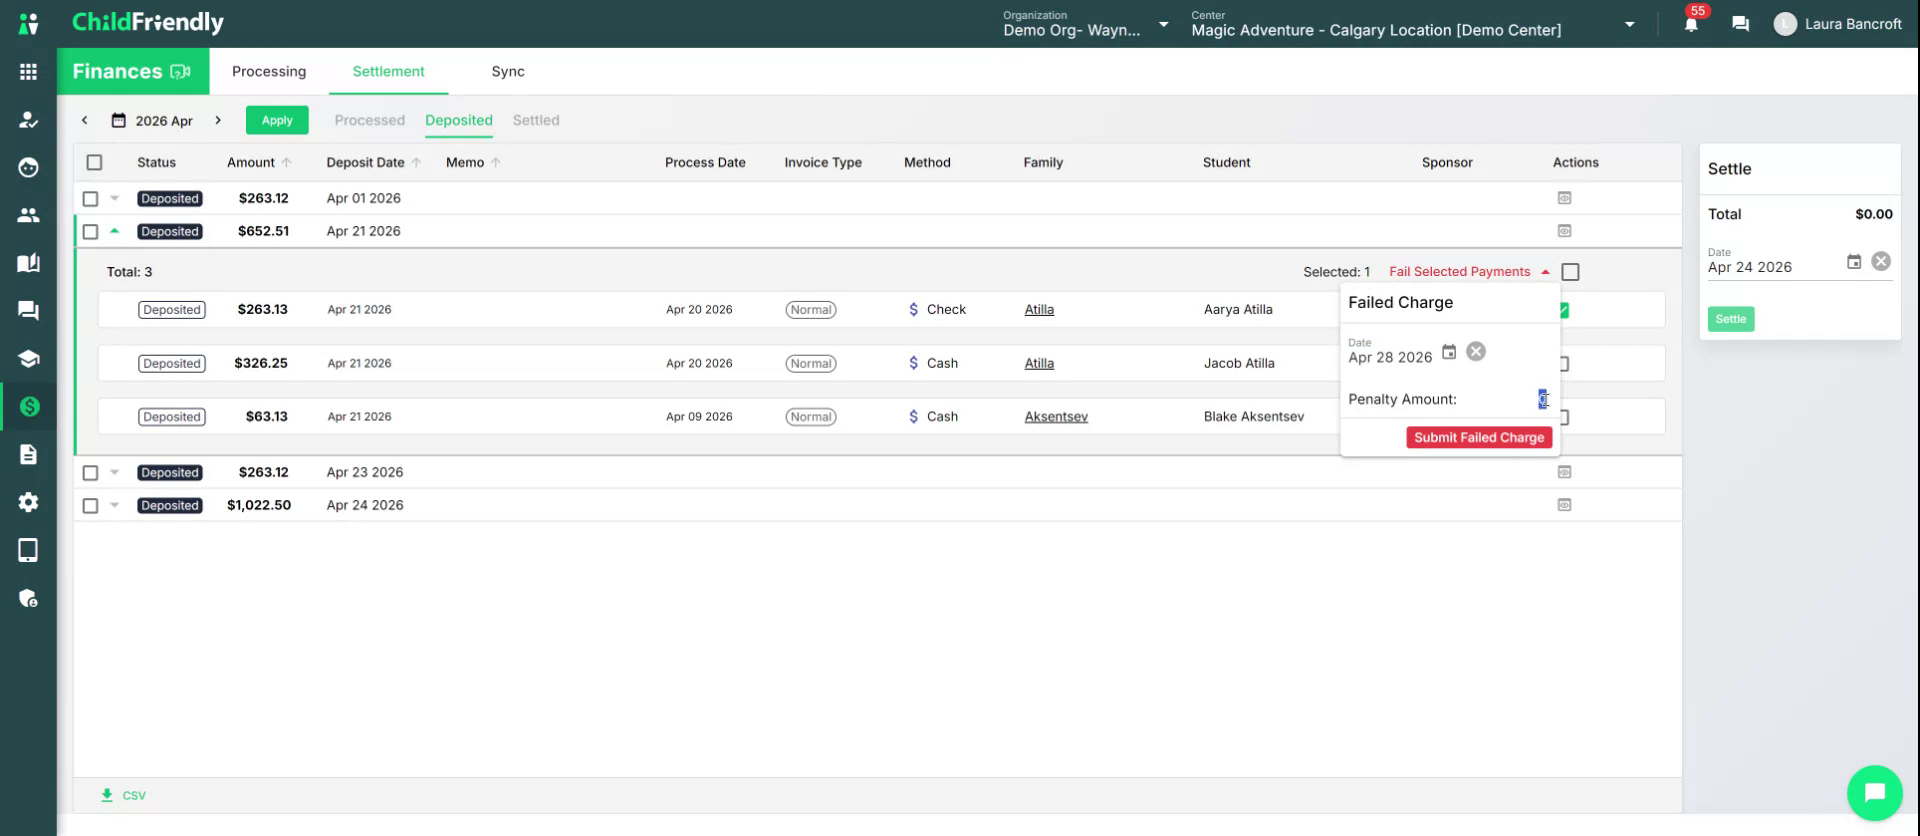
Then click Submit Failed Charge to finalize the failure.
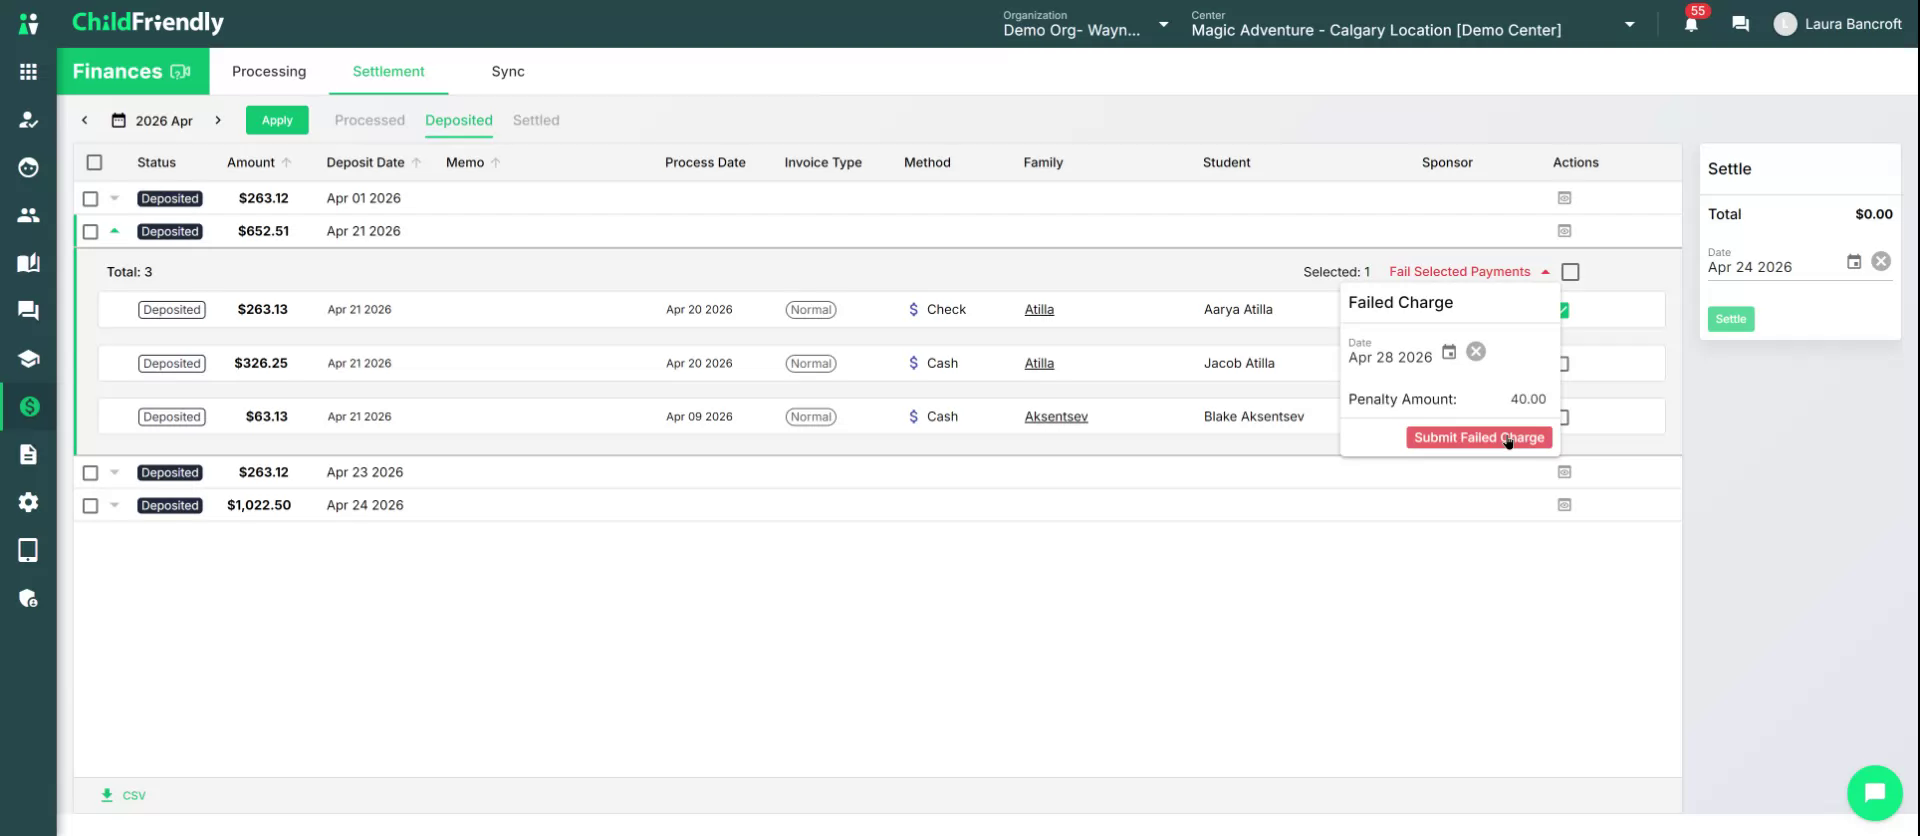
The deposit group will now be updated. The original deposit amount remains (since it did hit your bank account and appears on your bank statement), but you will now see a reversal and a recovery invoice for the failed amount. These items will appear in the Processing tab.
Step 5: Review Recovery Invoices in the Processing Tab
To view these or any failed payments and associated recovery invoices, you can navigate to the Processing tab.
Open the Invoices and Credits Memo filter. Choose Recovery Invoice as the filter value.

This filter will display all payments that failed and for which a recovery invoice was created (including the one you just processed).
Click Apply to run the filter.

You will now see a list of all recovery invoices, not just the most recent one. You may further filter by sponsor if you need a more granular view.
Find the recovery invoice where the payment was previously failed. You will see:
The original invoice (e.g., 263.13) that received a chargeback status (indicating failure).
The recovery invoice created for the original failed amount (e.g. $263.13) plus a new line item for any additional penalty (e.g., 40.00) added for the failed payment.
Step 6: Collect Payment on Recovery Invoices
Managing Failed Payments and Recoveries
Use the recovery invoice list to follow up with families and secure outstanding payments. Depending on the family’s preferences and account setup, you can collect these funds in two ways:
Manual Reprocessing: Accept alternative methods such as e-transfer, cash, or a new physical check.
Automatic Reprocessing: Use existing PAD, ACH, or credit card details already saved in the family’s account.
Automated Handling for PAD, ACH, and Credit Cards
When a pre-authorized payment fails, the system handles the heavy lifting for you:
Automatic Documentation: The system immediately generates a recovery invoice and records the chargeback. You do not need to manually record these failures in the Deposited tab.
Instant Notifications: Both you and the family receive an automated alert the moment a payment fails.
Parent Portal Integration: The family’s notification directs them to log into the Parent Portal to resolve the issue—such as updating their billing info or adding funds—and resubmit the payment themselves.
By utilizing these automated workflows, you ensure that every NSF or returned payment is accurately tracked, reversals are accounted for, and outstanding balances are recovered efficiently.
Was this helpful?
Still need help? Ask the team