How to Run Payroll Reports
Use the Payroll report in ChildFriendly to verify staff hours, pay rates, and positions against your payroll records. This process shows you how to filter by date, review staff details, customize visible columns, drill into attendance records, and export the data for accounting purposes.
Last updated 3 months ago
Step 1: Navigate to the Payroll Report
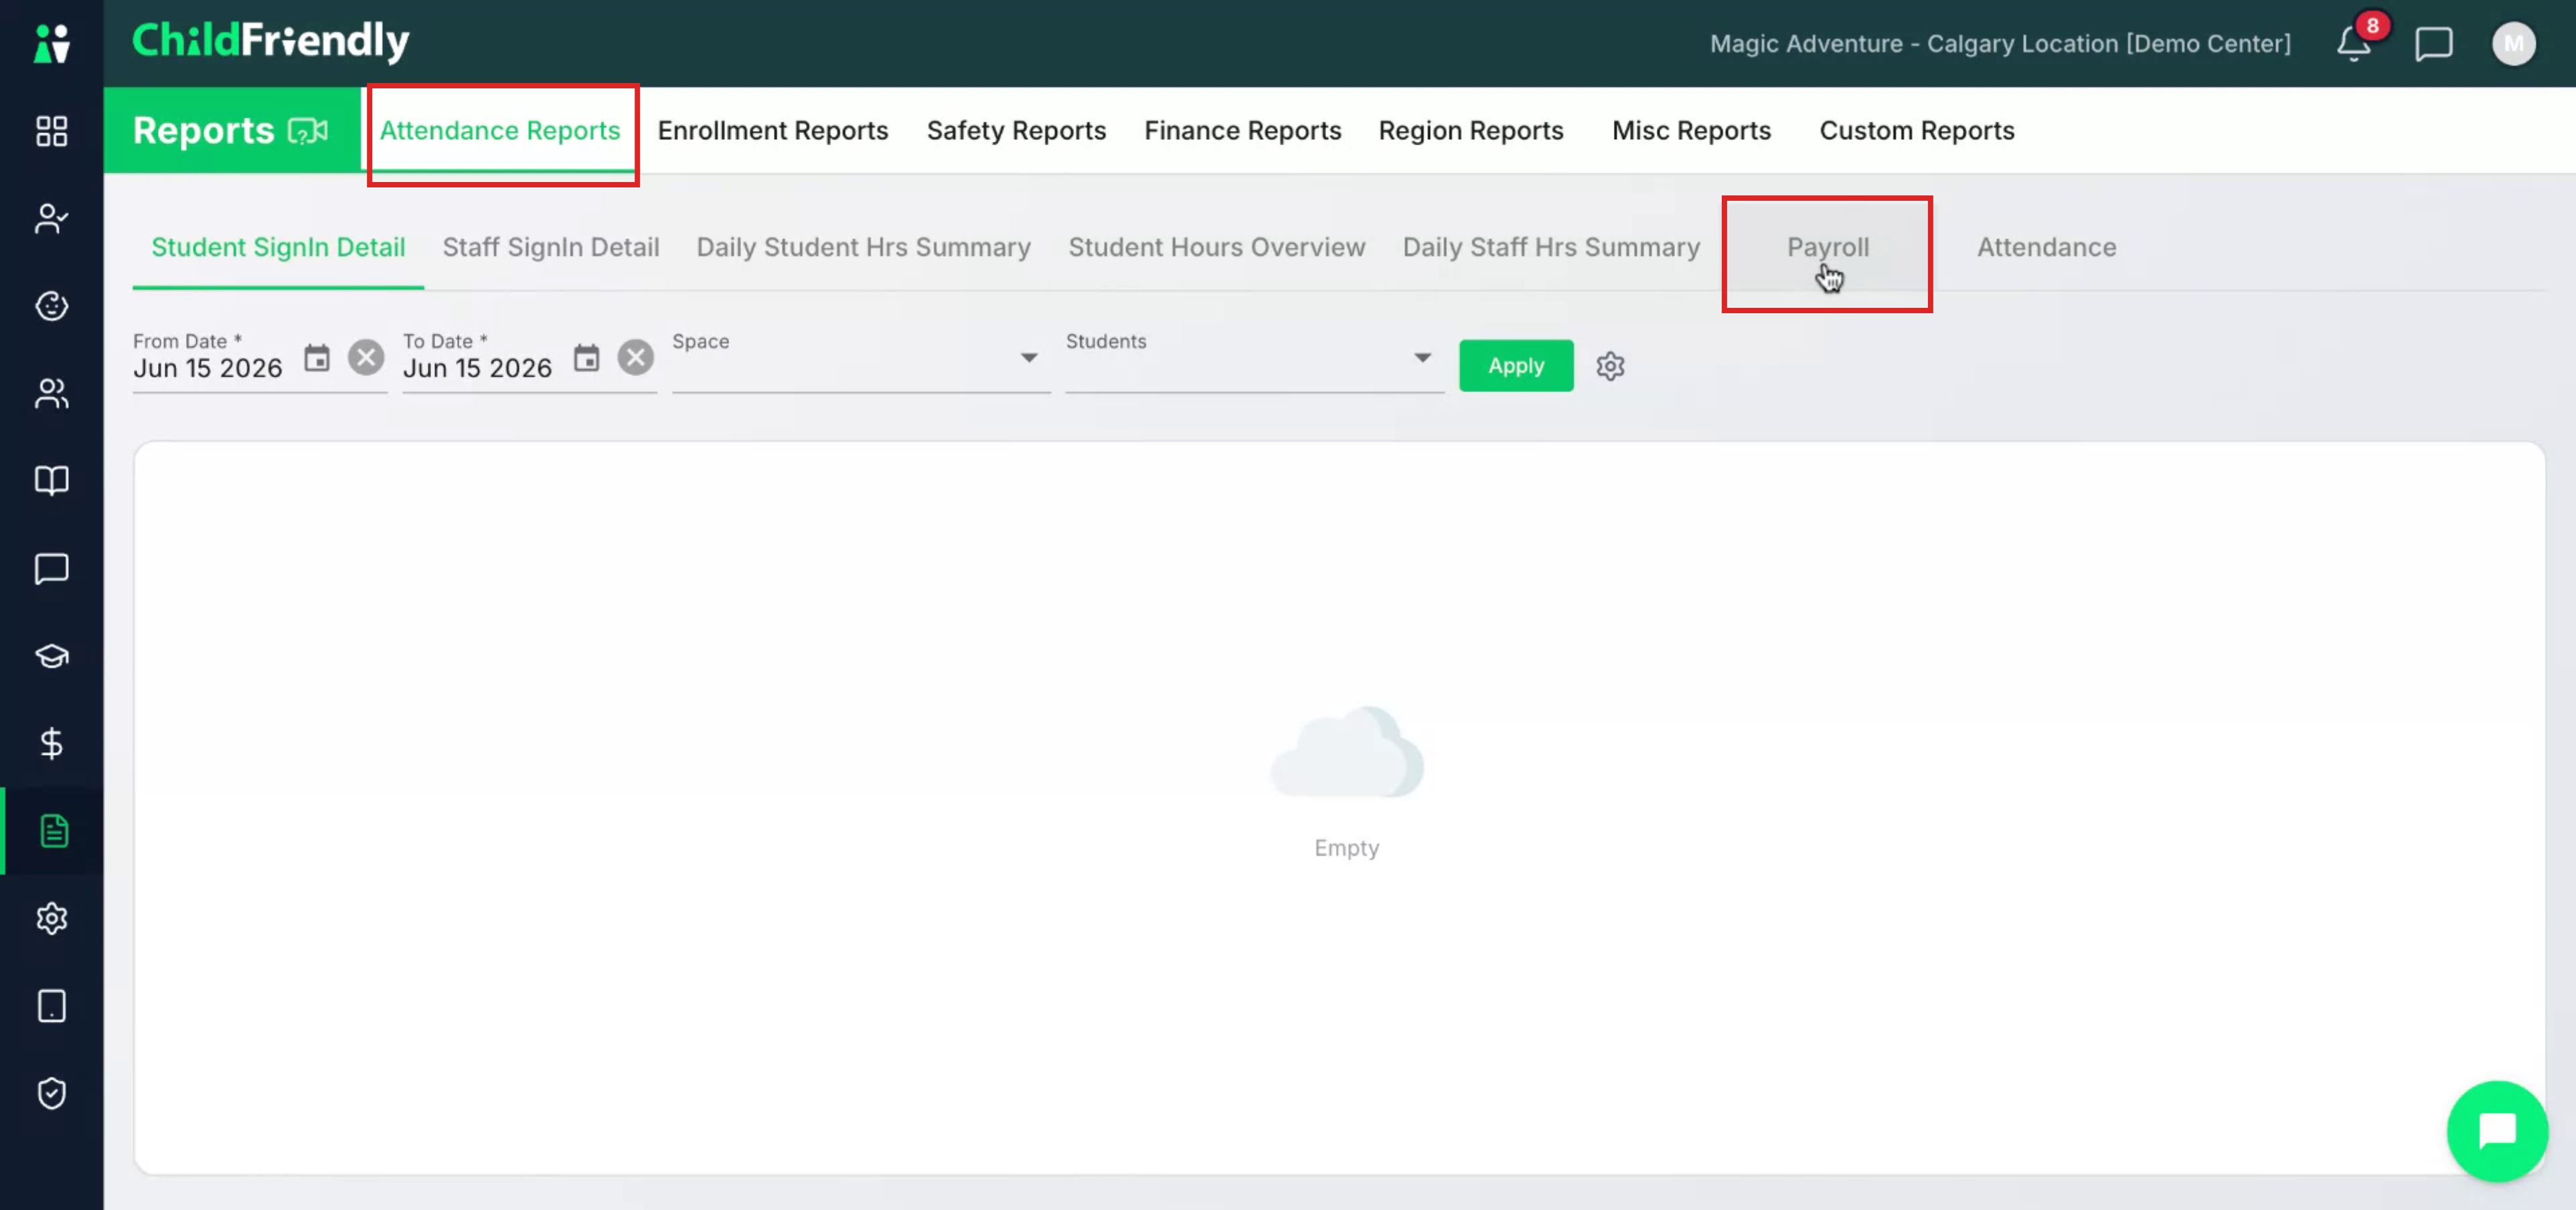
Ensure you are in the Reports module. In the Attendance Reports section, open the Payroll tab.
Step 2: Set the Date or Date Range
Use the date filters to specify the reporting period. You can select a full date range or a single specific date if preferred.
Select your desired date range.
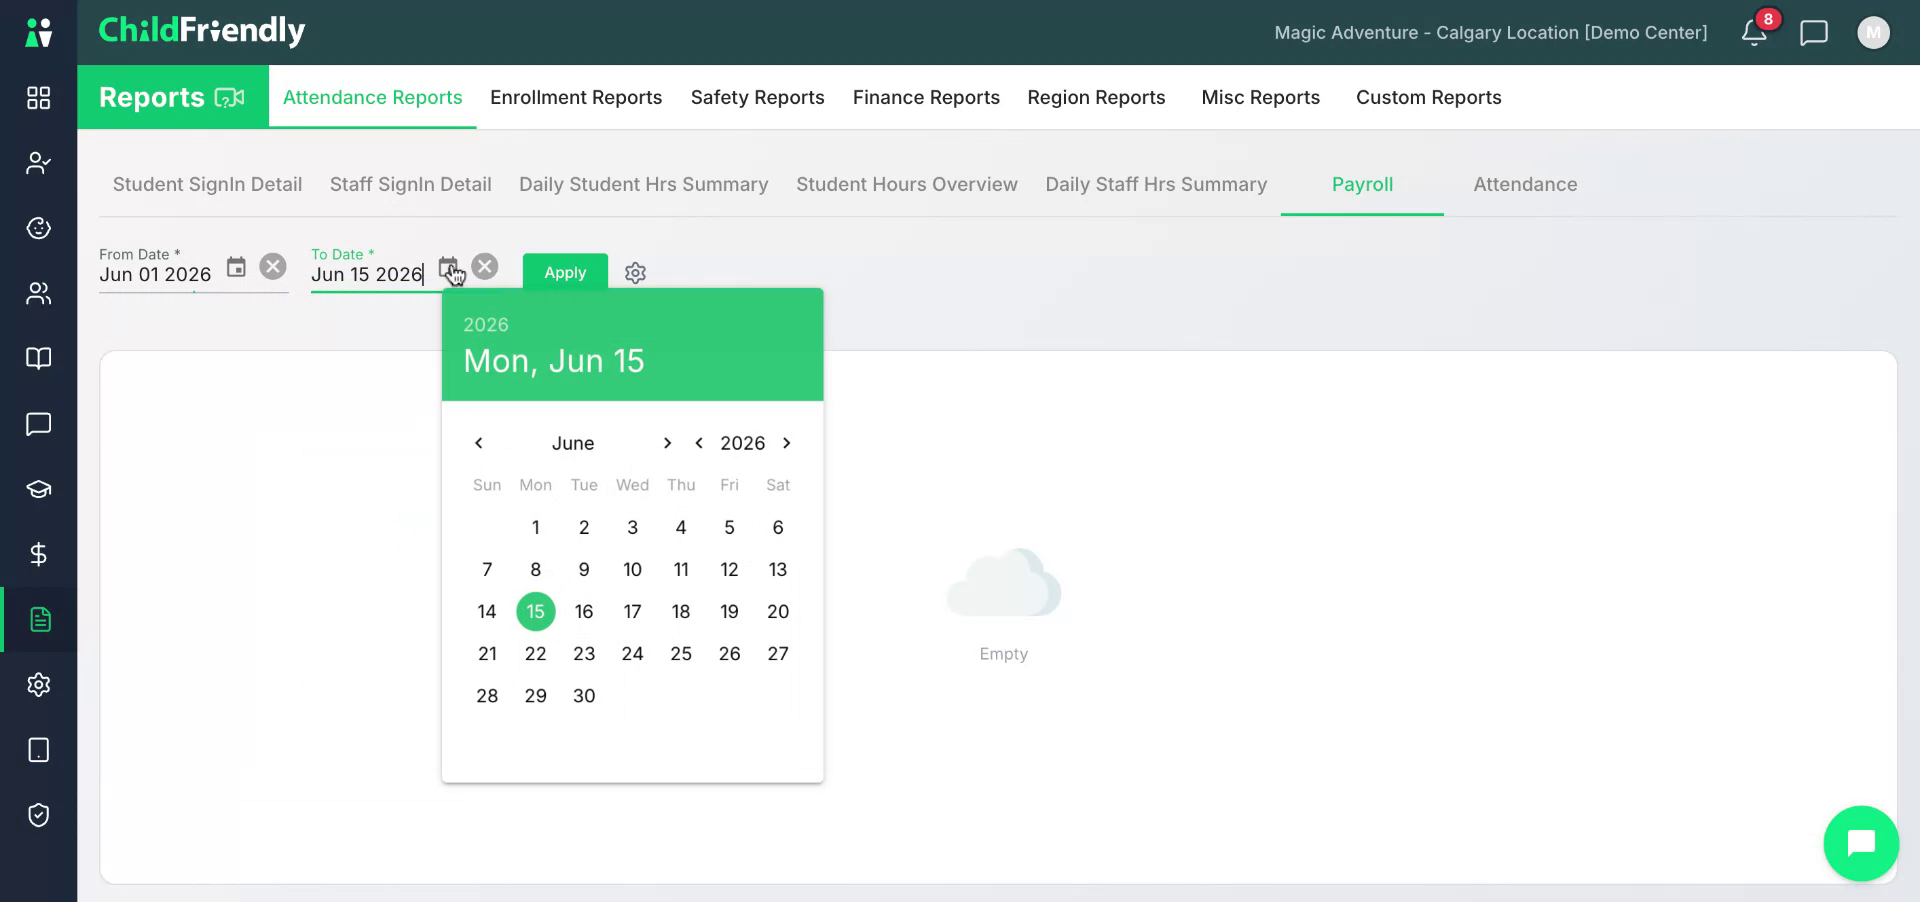
Then click the Apply button to generate the report.
Step 3: Review the Payroll Summary List
After applying the filters, a list will populate showing key payroll-related columns.
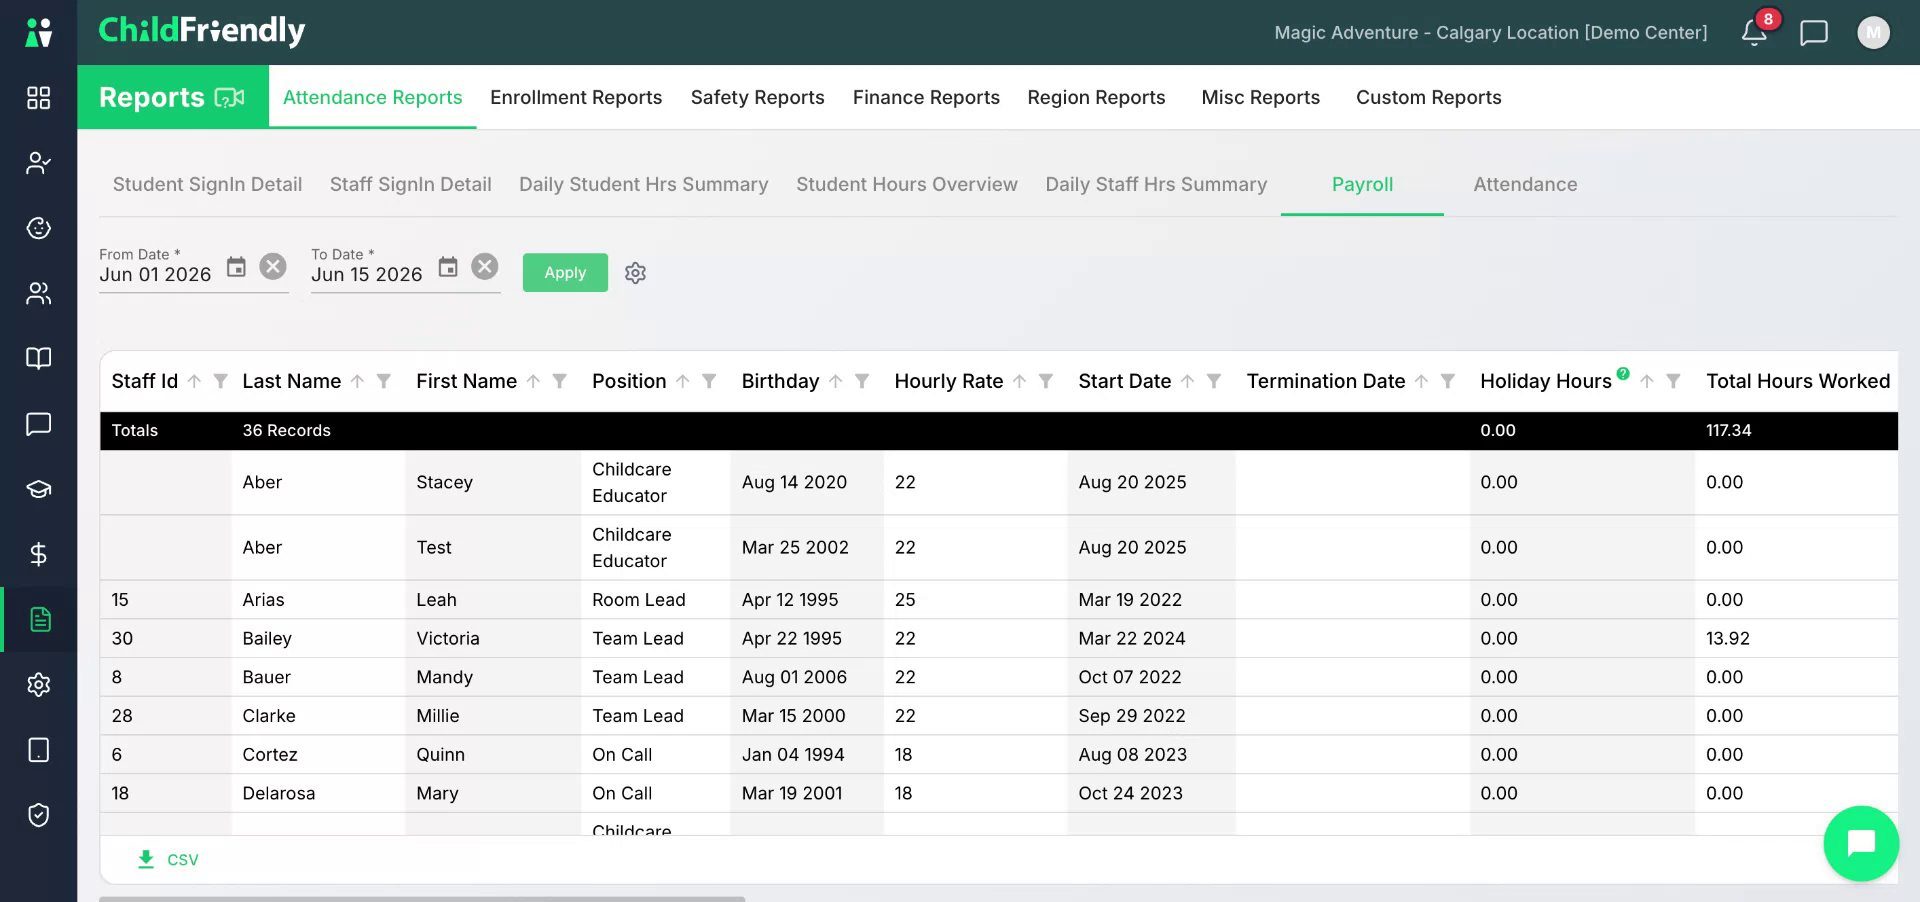
Review information such as:
Staff ID
Last name and first name
Position
Birth date
Hourly rate
Start date and (if applicable) termination date
Holiday hours
Total hours worked in the reporting period
Use the horizontal scroll bar to view additional details, including regular hours, banked hours, admin notes, and a breakdown of hours by type (e.g., admin, prep, childcare, cleaning, and other work types configured in the Setup module).
Step 4: Drill into an Individual Staff Member’s Attendance
To view more detailed information for a specific staff member, click on their name in the list.
This opens the Attendance section for that staff member, where you can review their shifts in detail for clarification.

Step 5: Use Additional Filters to Narrow Results
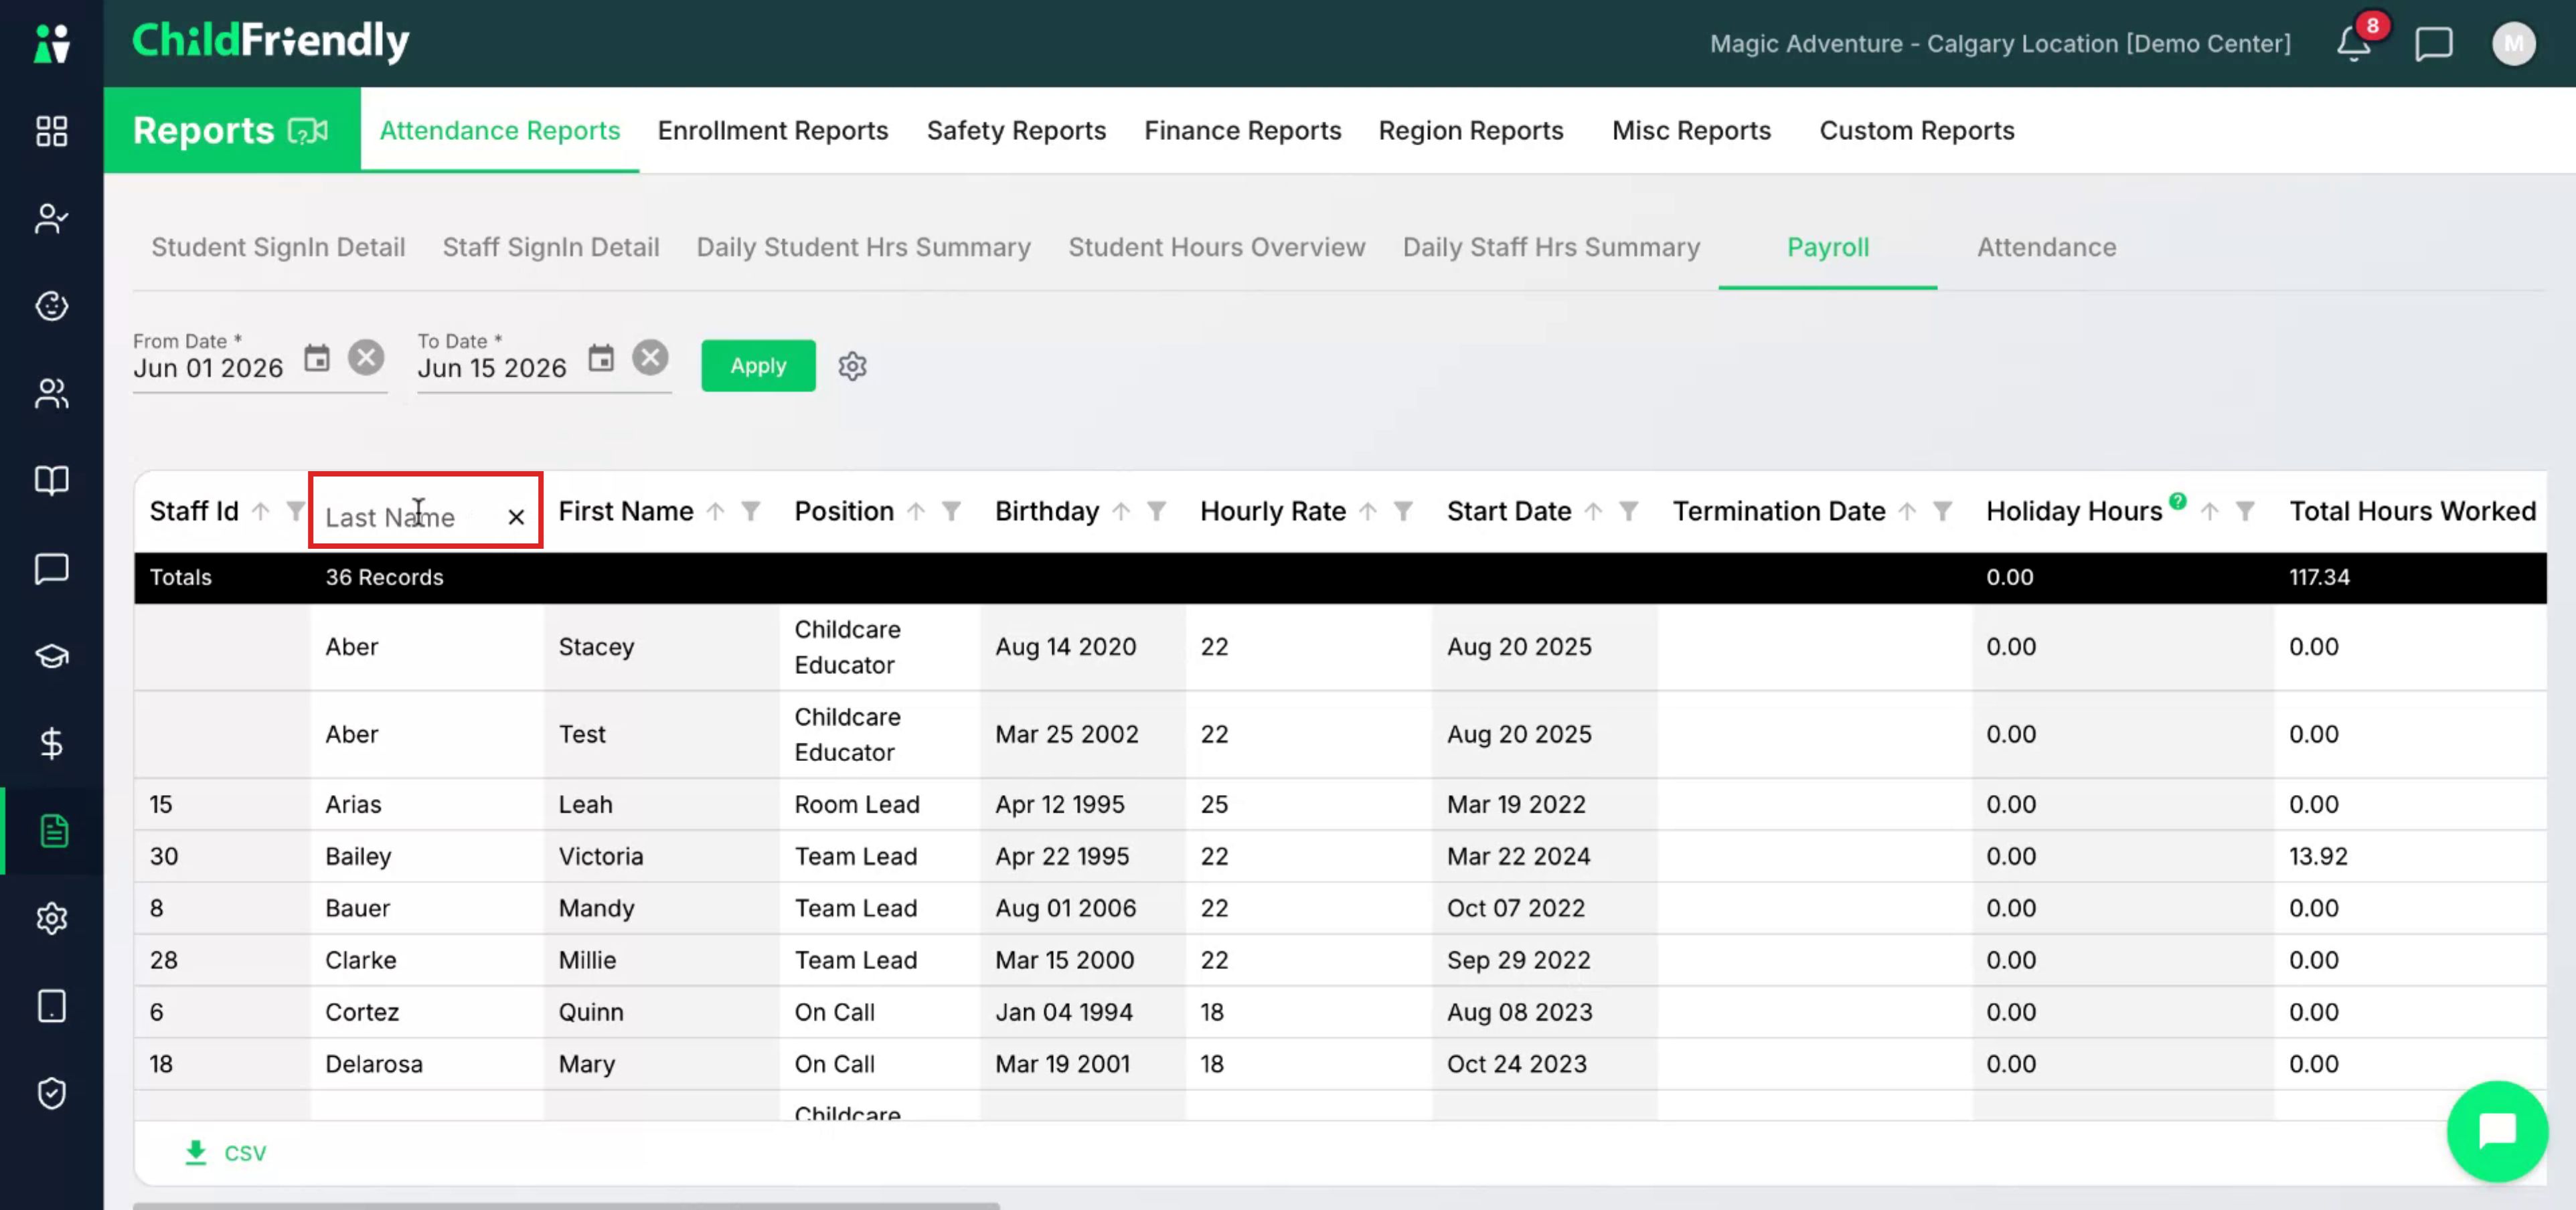
Within the report, you can further refine your results using additional filters such as position, name, holiday hours, and other available options. Click the filter control to open the filter panel for each column.
Enter or select your desired filter parameters to narrow down the list.
Step 6: Customize Visible Columns and Their Order
To adjust which columns are displayed and their order, open the Settings icon for column configuration.
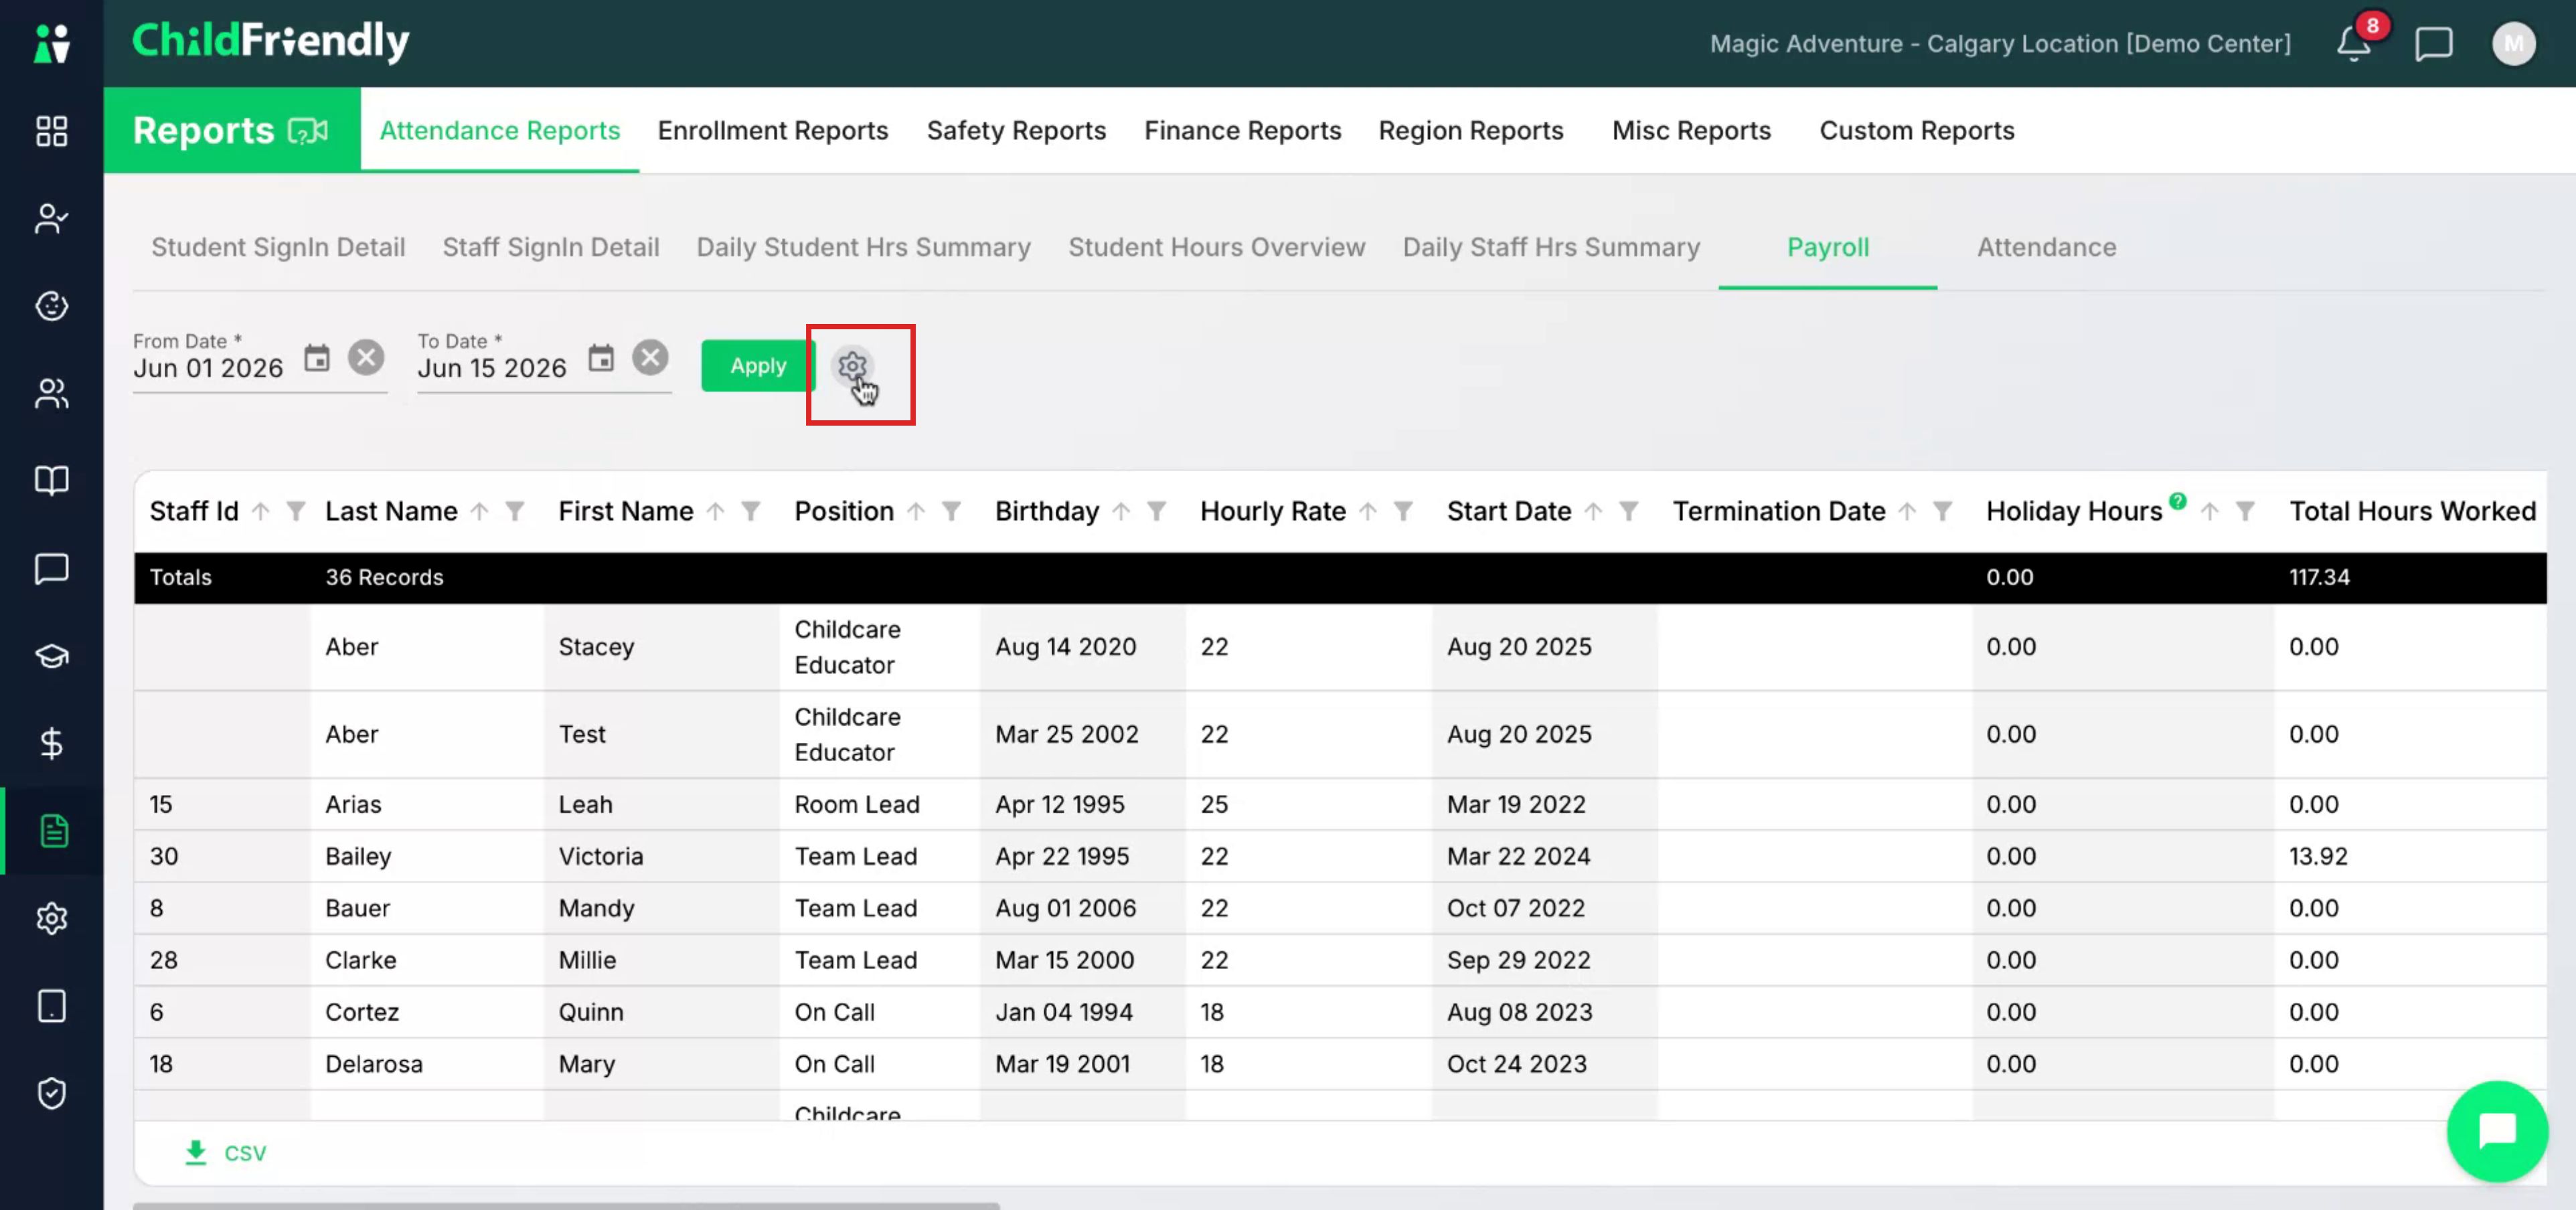
In the column settings:
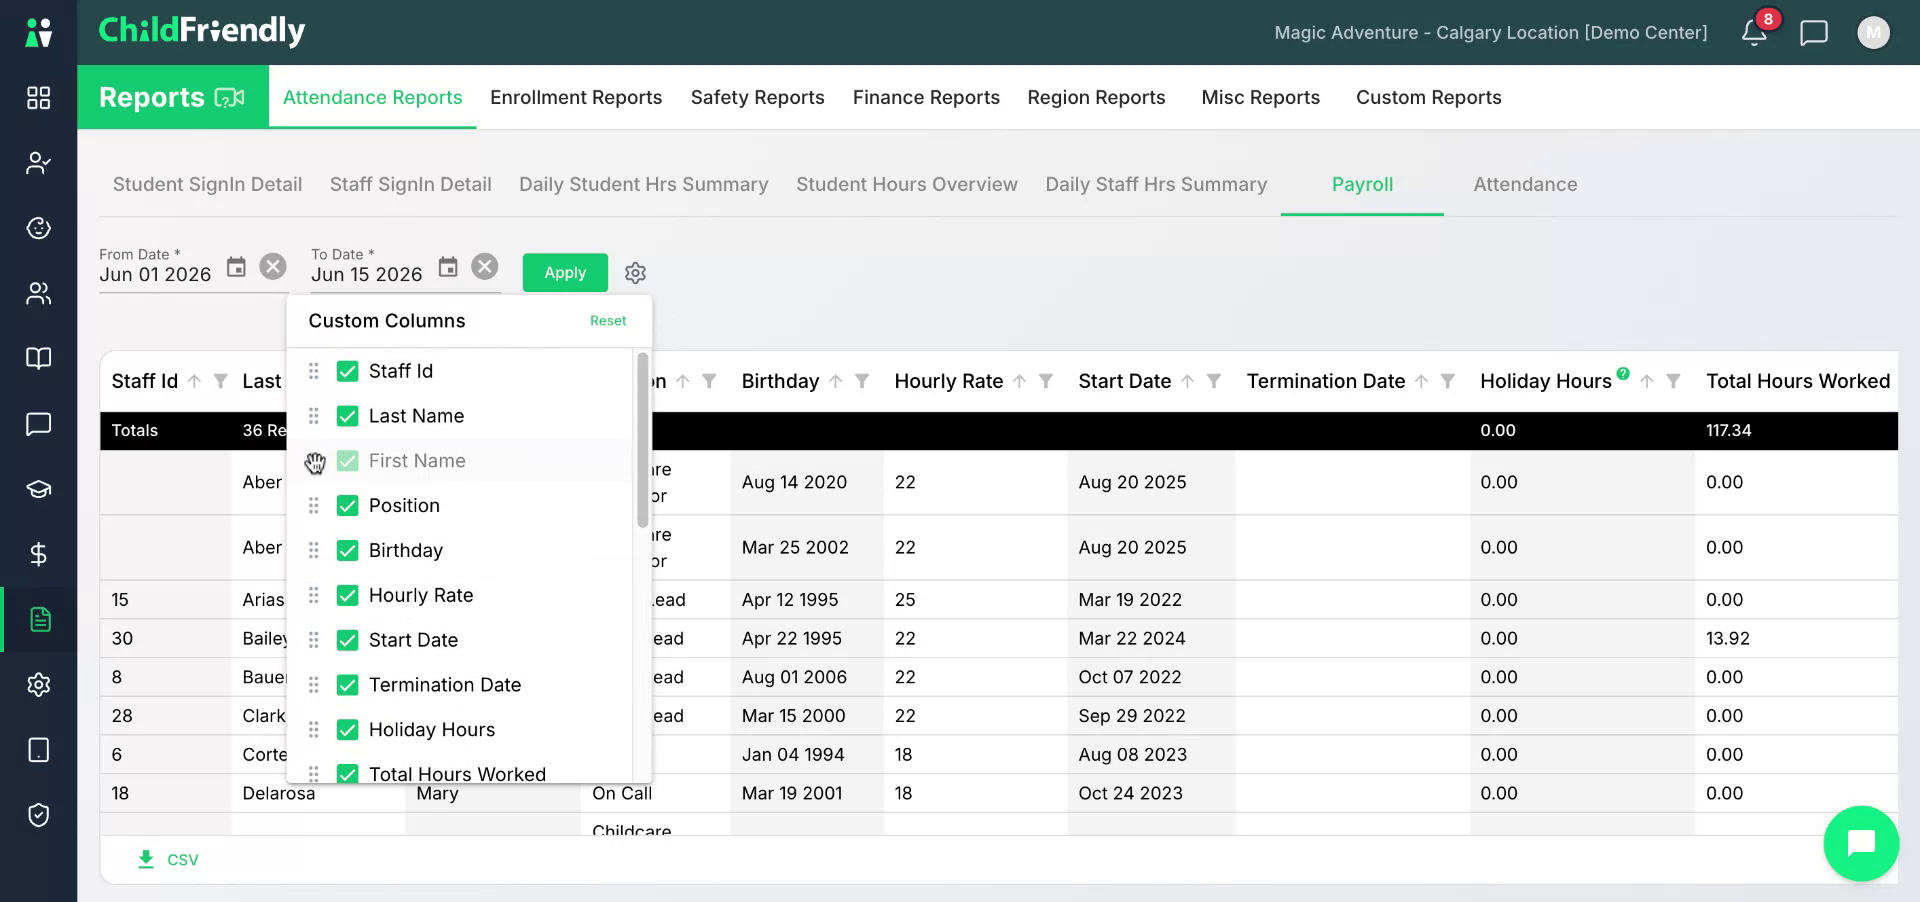
Deselect any columns you do not want to see in the report.

You can also change the column order.
Move columns to adjust their position in the table. For example, you can place First Name before Last Name,
If you need to restore the default column setup at any time, click Reset.
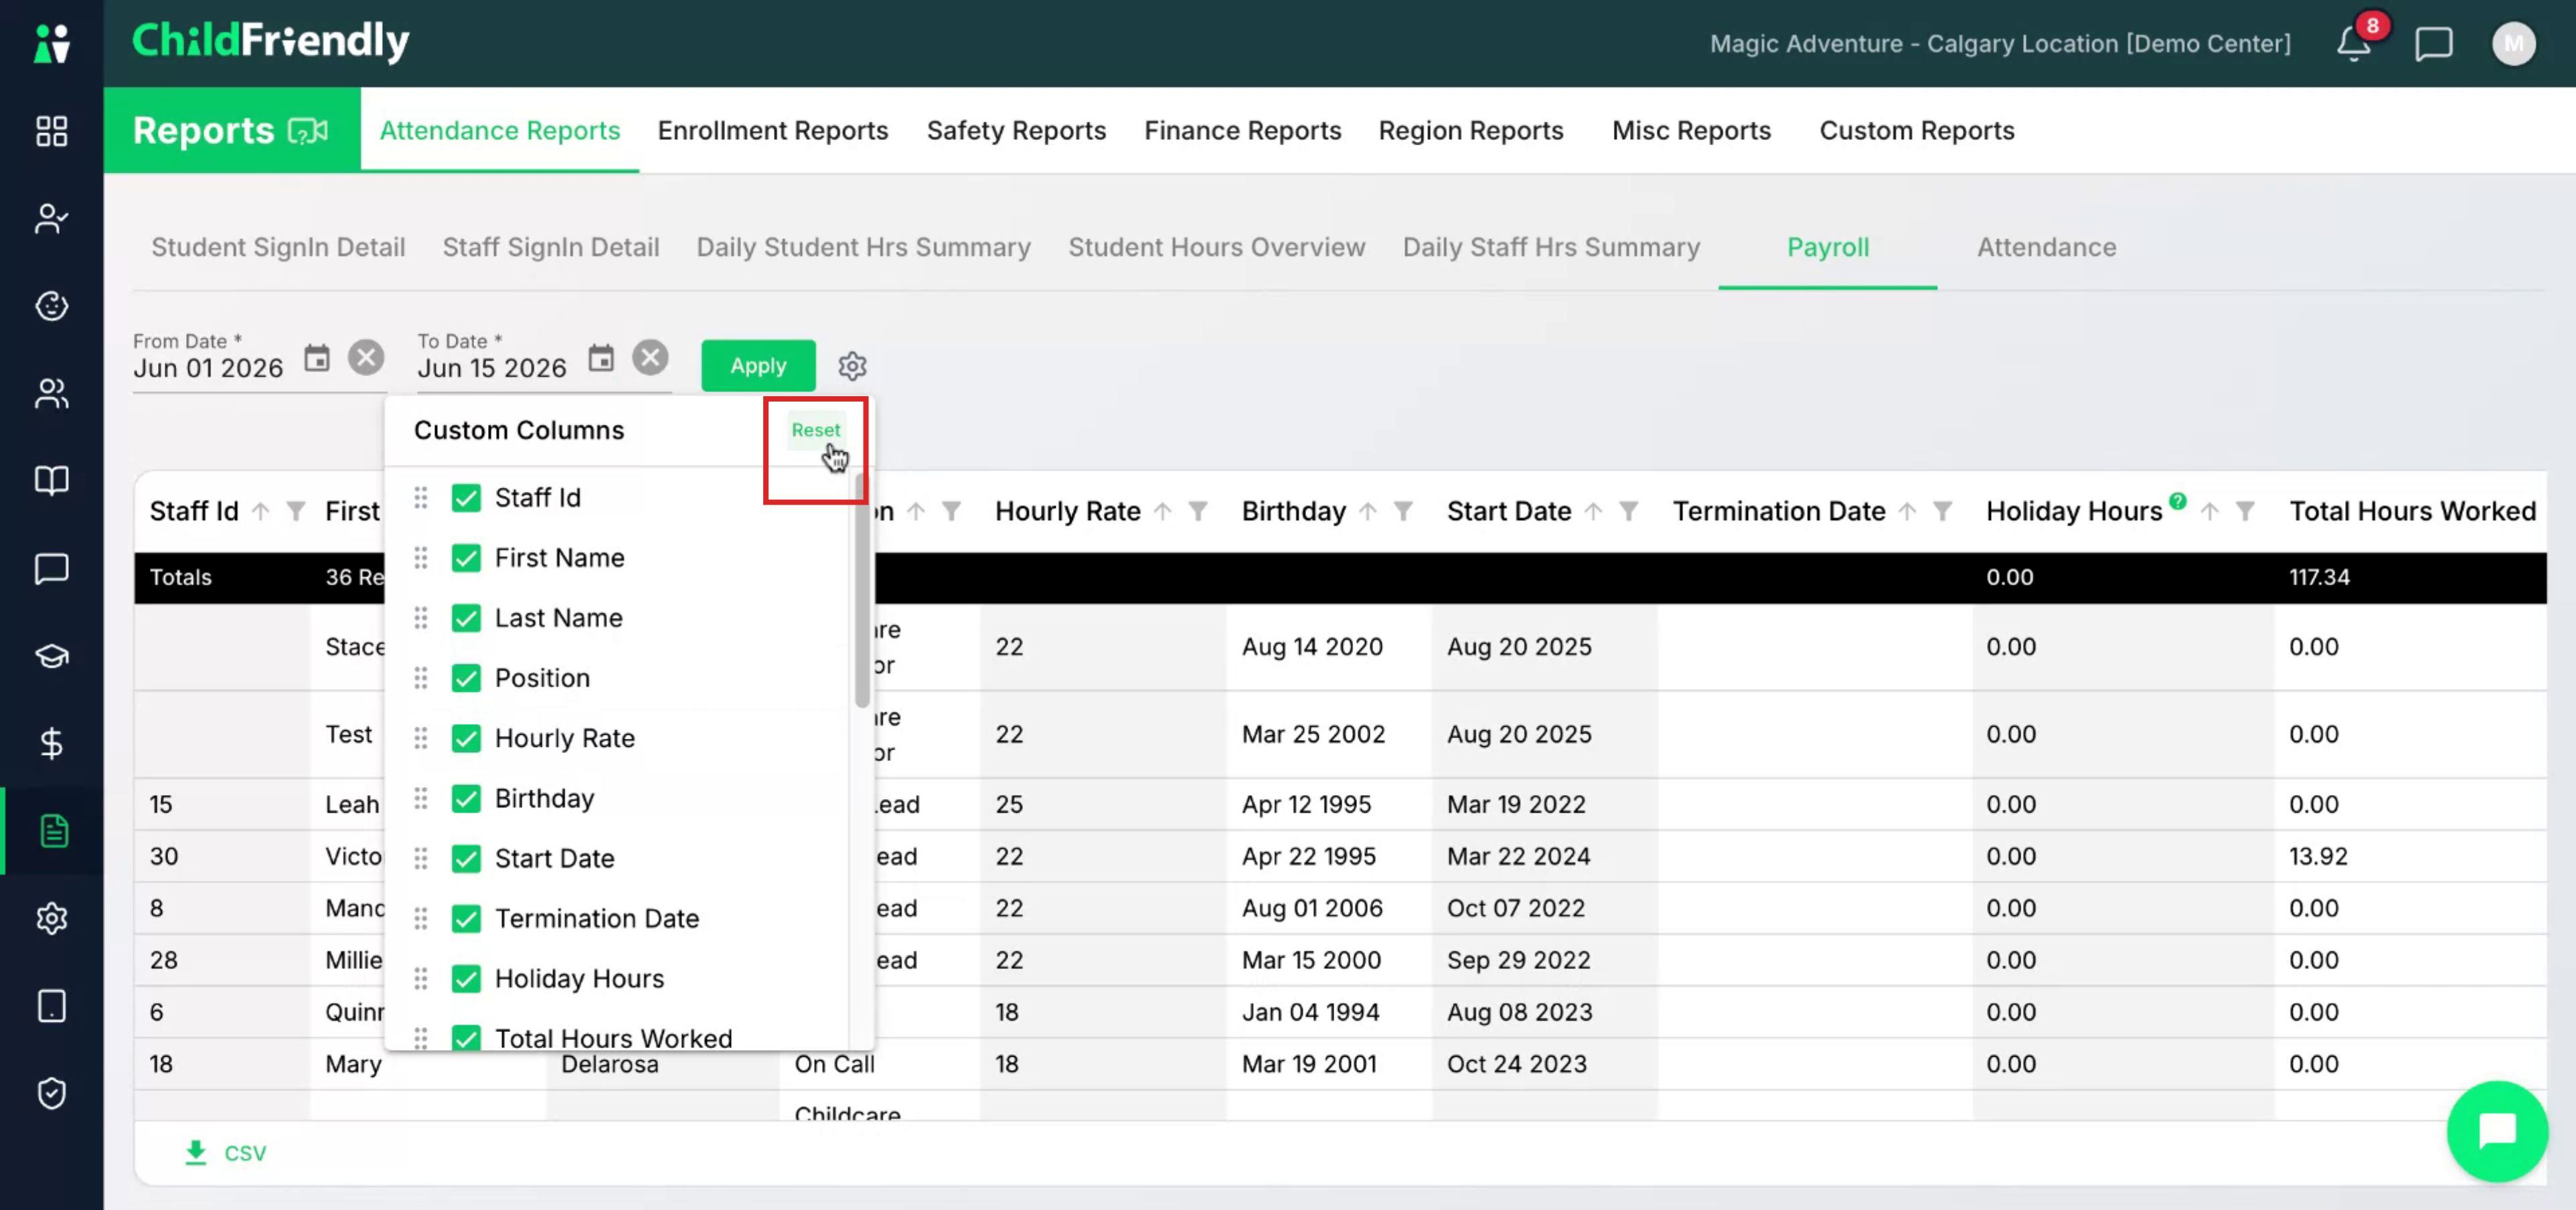
Any changes you make will be immediately reflected in the report table.
Step 7: Export Payroll Data for Accounting
To use the payroll data in external tools, click the CSV icon in the bottom-left corner of the report to download the results as an Excel-compatible spreadsheet.
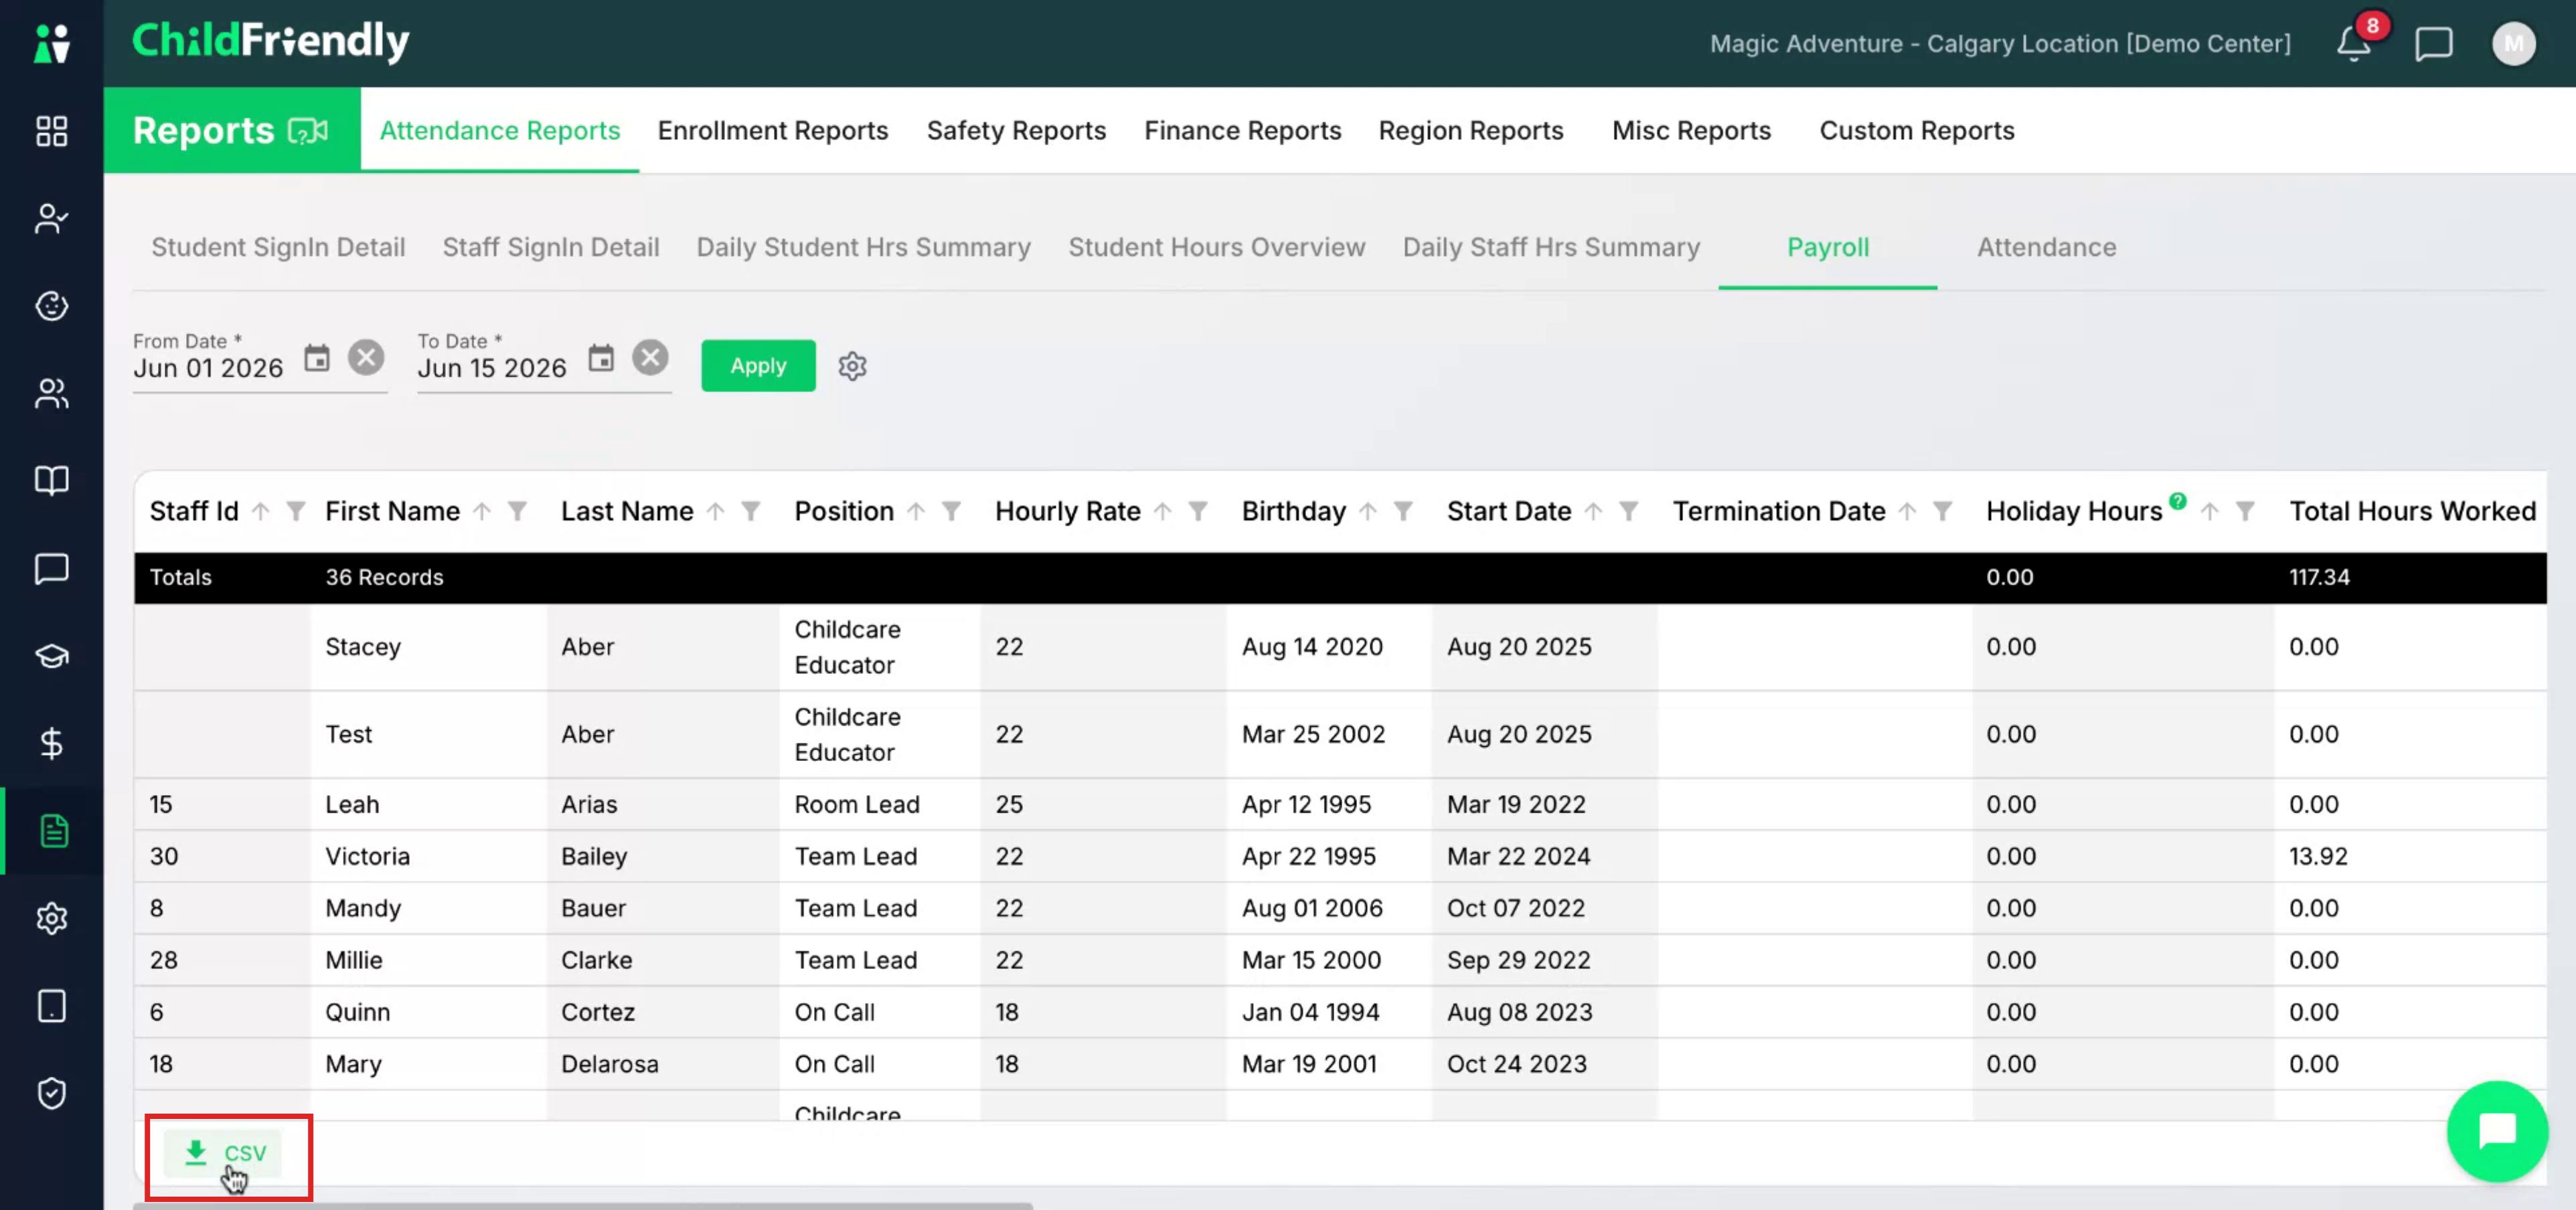
Use the exported payroll records to reconcile with your own payroll system and for internal accounting purposes. If you require further assistance, contact a member of the ChildFriendly support team.
Was this helpful?
Still need help? Ask the team