Orientation to the Reports Module
This document provides a concise overview of the Reports module in ChildFriendly, including how to navigate report categories, use filters, customize columns, and export reports.
Last updated 3 months ago
Step 1: Access the Reports Module
Navigate to the Reports module from the menu on the left-hand side of the ChildFriendly interface. Here you will see multiple report categories displayed along the top of the screen, such as:
Attendance (attendance-related reports)
Enrollment (enrollment and registration reports)
Safety/Medical (including allergy reports)
Finance
Region-Specific (for your state or province)
Miscellaneous
Custom Reports (for reports built specifically for you at an additional cost and pinned to your profile)
Take a moment to explore each main category and review the sub-reports listed beneath them.
Step 2: Review Filters and Global Settings
Within any selected report, locate the filter section along the top. Filters vary slightly from report to report depending on the report’s purpose, but are always available to help you refine the data shown.
On the right-hand side of every report, click the gear (settings) icon to open additional options.

In this menu, select Custom Columns to configure which columns are visible in the report.
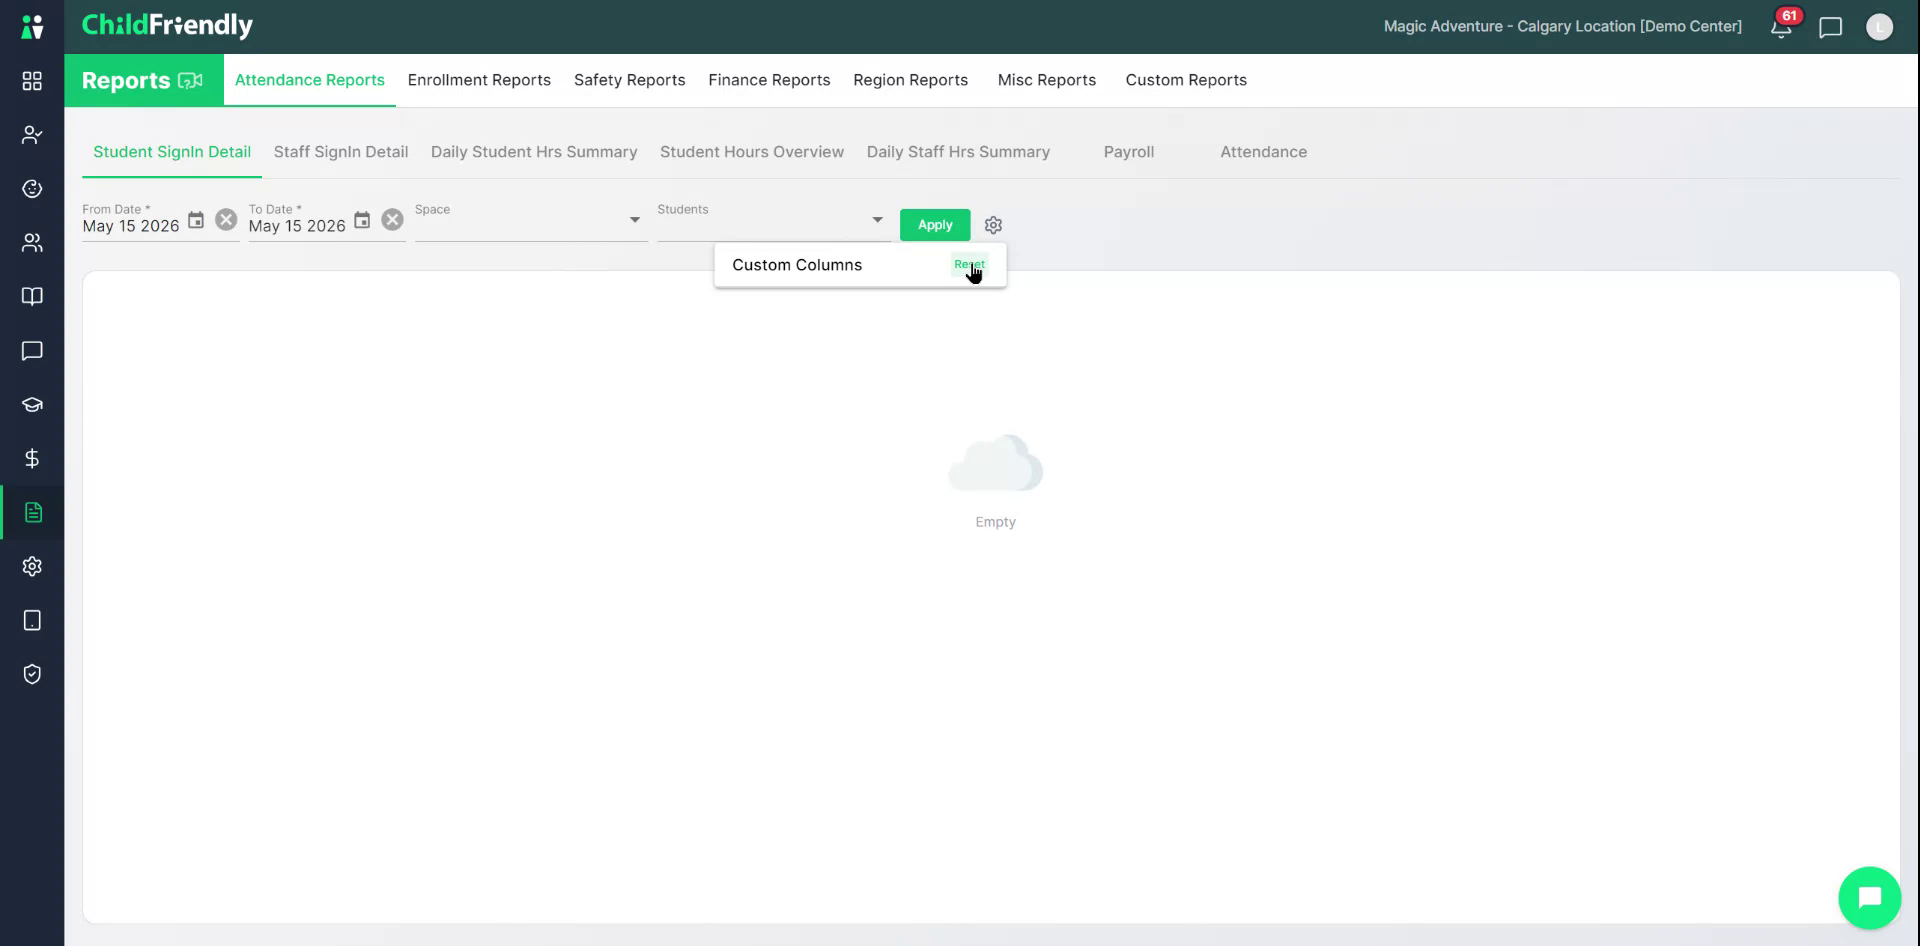
Every report includes this settings section so you can customize the columns displayed according to your needs.
Step 3: An Example Report
Let's review and example together. From the list of available reports in the Attendance Reports tab, open the Payroll Report.
In the payroll report, first select the appropriate pay period from the filter options, then click Apply to load the data for that period.

Step 4: Customize Visible Columns in the Payroll Report
With the payroll report loaded, open the Custom Columns settings again to choose which columns you want to display. For example, you may wish to hide some columns and only show key details such as the staff name and a limited set of other relevant fields.
After selecting your desired columns, click Apply to update the report view.

Only the columns you selected will now be visible in the payroll report.
Step 5: Export the Report
Once your report is filtered and customized, export it by using the export option located in the bottom left-hand corner of the report screen. This export capability, along with filters and column customization, is available for all reports in the module.
Was this helpful?
Still need help? Ask the team