How to Set Up Programs within a Center
Use this process to configure programs for a specific center so that families can see and register for them online. Programs define what parents see, how age eligibility works, which groups and rates apply, and how enrollment, deposits, and rollovers are managed.
Last updated About 2 months ago
Step 1: Confirm Prerequisites Before Setting Up Programs
Before configuring programs for a specific center, ensure you have already:
Completed all organization details for your organization.
Set up the General, Spaces, Groups, and Rates section for this center.
If you have not finished these sections, go back to the previous videos, review them, and complete the setup for the center's general, spaces, groups, and rates sections first.
Step 2: Understand What a Program Is and How Parents See It
If you need definitions or clarification at any time, open the setup guide, which includes explanations of programs, groups, and other setup elements.
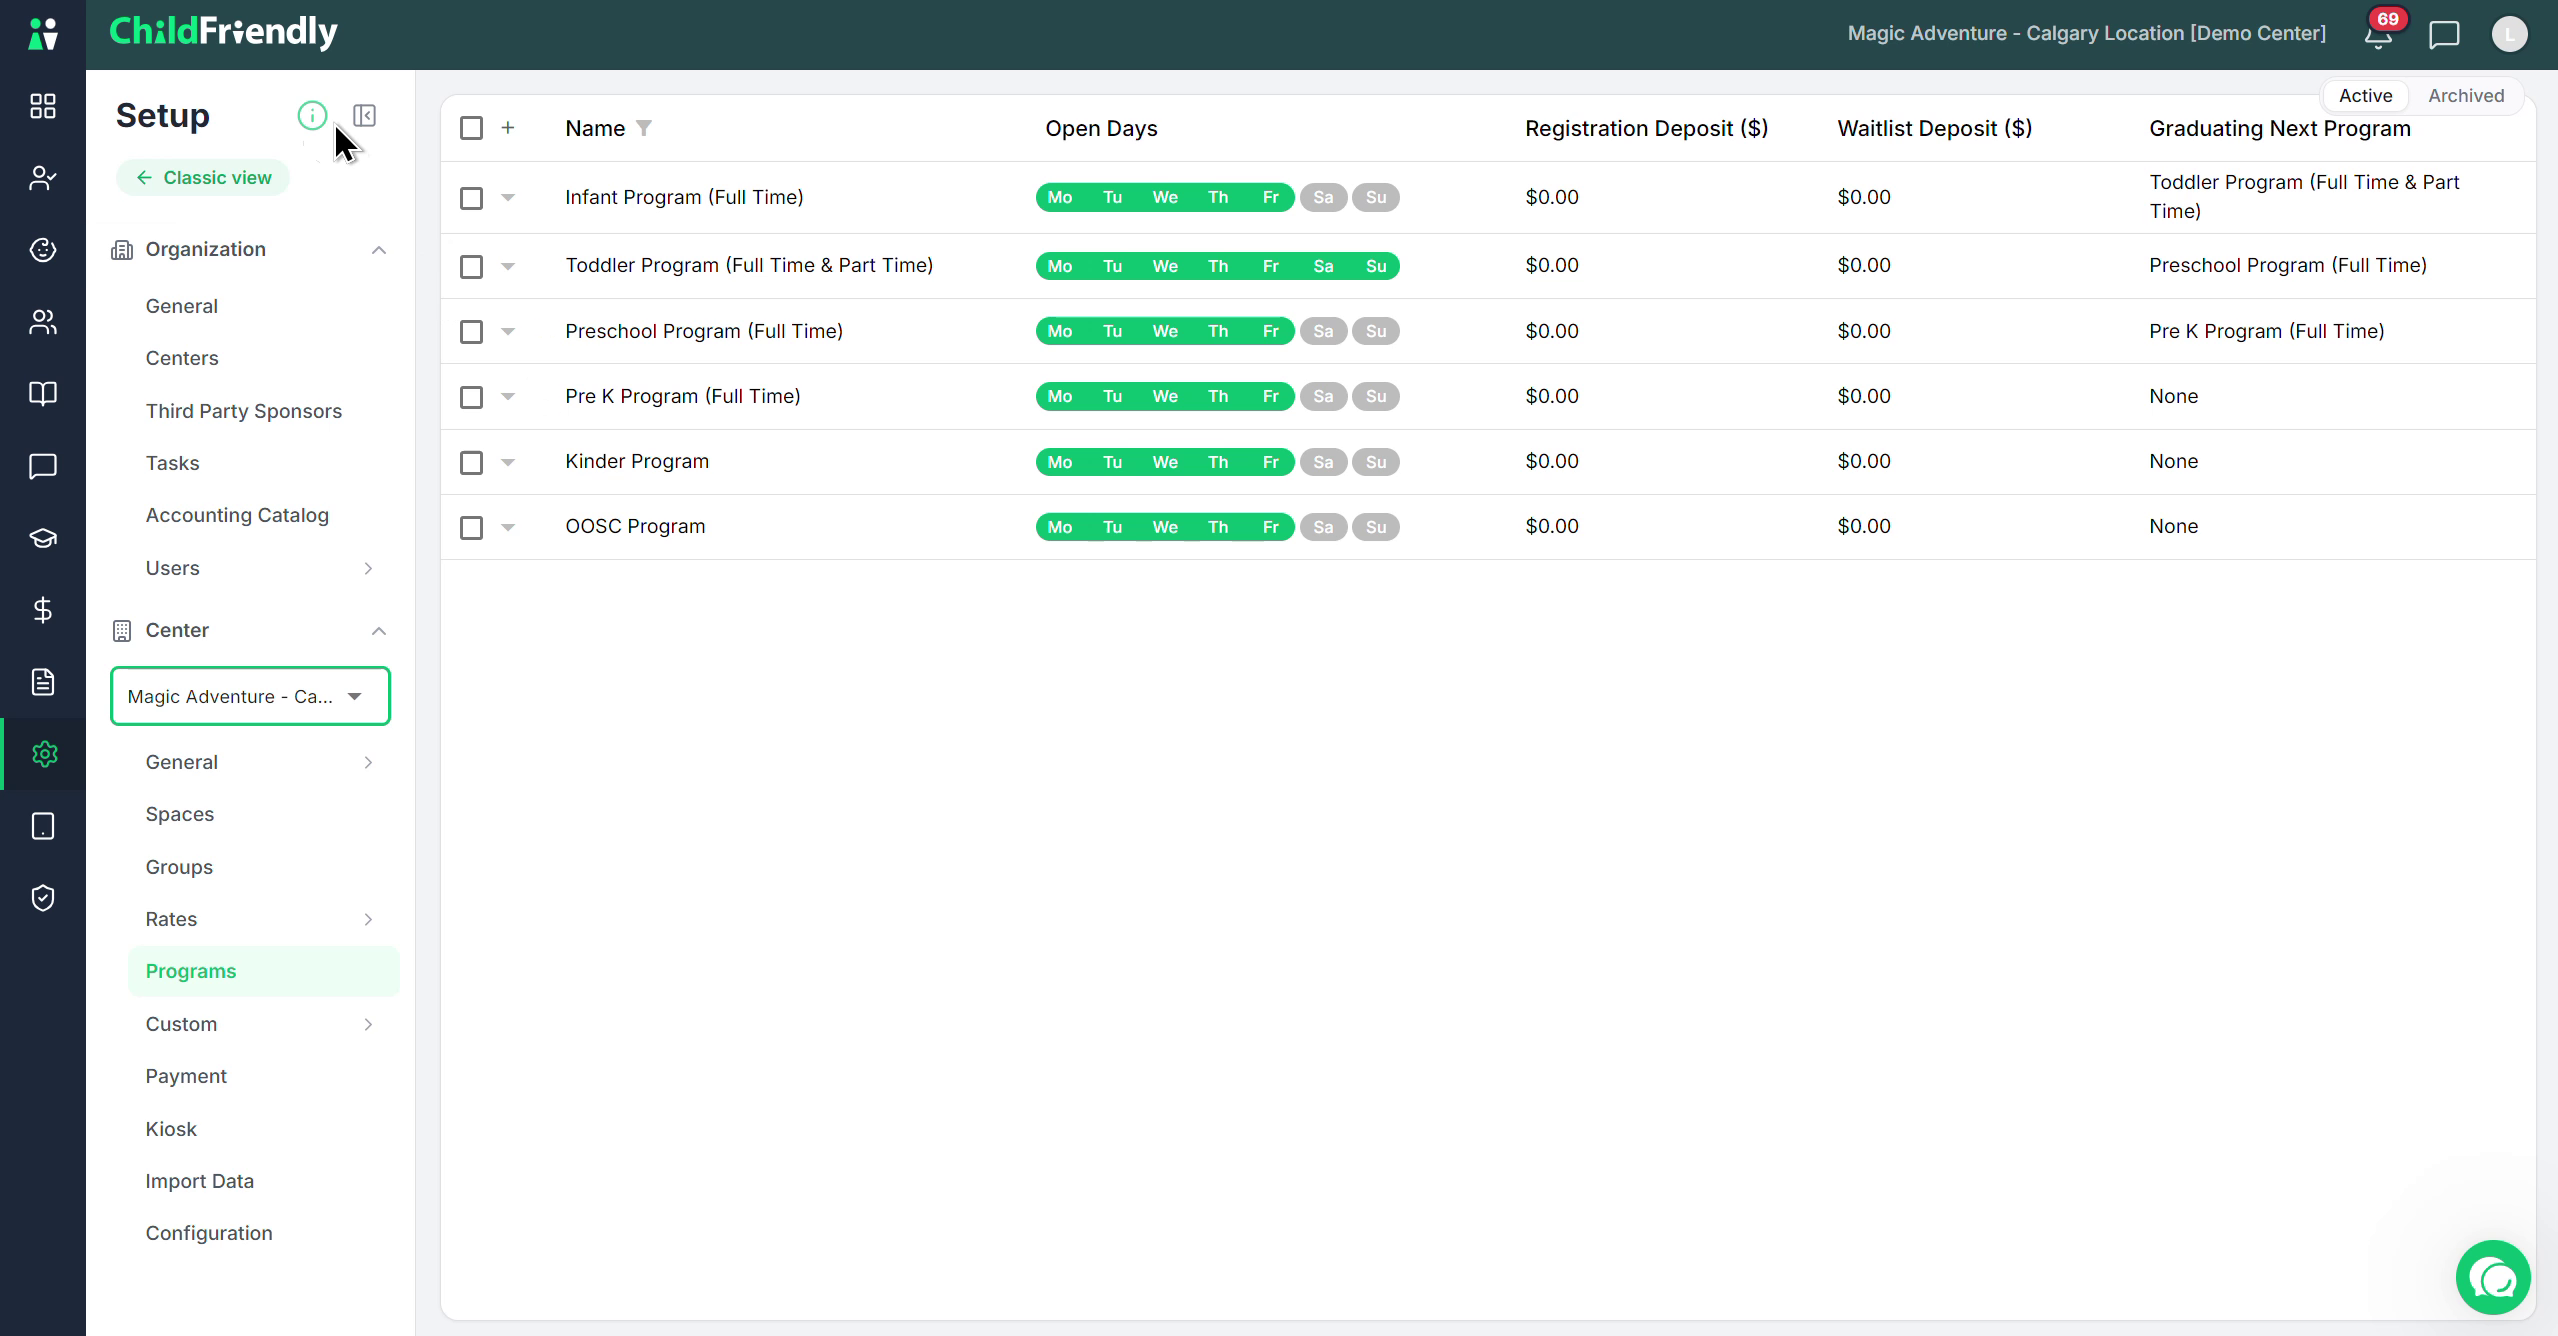
A program is what parents see and register for in the online portal. Parents:
see programs, not specific groups/rooms (e.g., they will not see “Sunbeams Group”).
will enter their child’s age and requested start date.
are shown only programs for which their child is age-eligible as of that start date.
see each eligible program as either Available (can apply) or Waitlisted (can join waitlist).
Because program names are visible to parents, ensure program names are clear and parent-friendly. Avoid internal codes like “IFT”; instead, use descriptive names such as “Infant – Full Time.”
Step 3: Add, Delete, or Archive Programs
To manage programs for the center:
Navigate to the Programs tab under the applicable Center in the Set Up module.
Add a new program: Click the plus (+) icon.
Delete a program:
Select the program and choose Delete using the triple dot menu option.
Note: If a program has already been used (e.g., children have been registered in it), it cannot be deleted, only acrhived.
Archive a program (when it has been used and cannot be deleted):
Archive it to move it from the Active list to the Archived list.
Archived programs are no longer available for future registrations by parents or admin staff.
Unarchive a program (if you archived it by mistake or want to reuse it):
Go to the Archived section on the right.
Find the archived program and reinstate it.

Step 4: Duplicate or Edit Existing Programs
To efficiently add new programs:
Duplicate a program: Use the duplicate option to create a copy of an existing program, then adjust only the fields that differ (e.g., age range or rates).
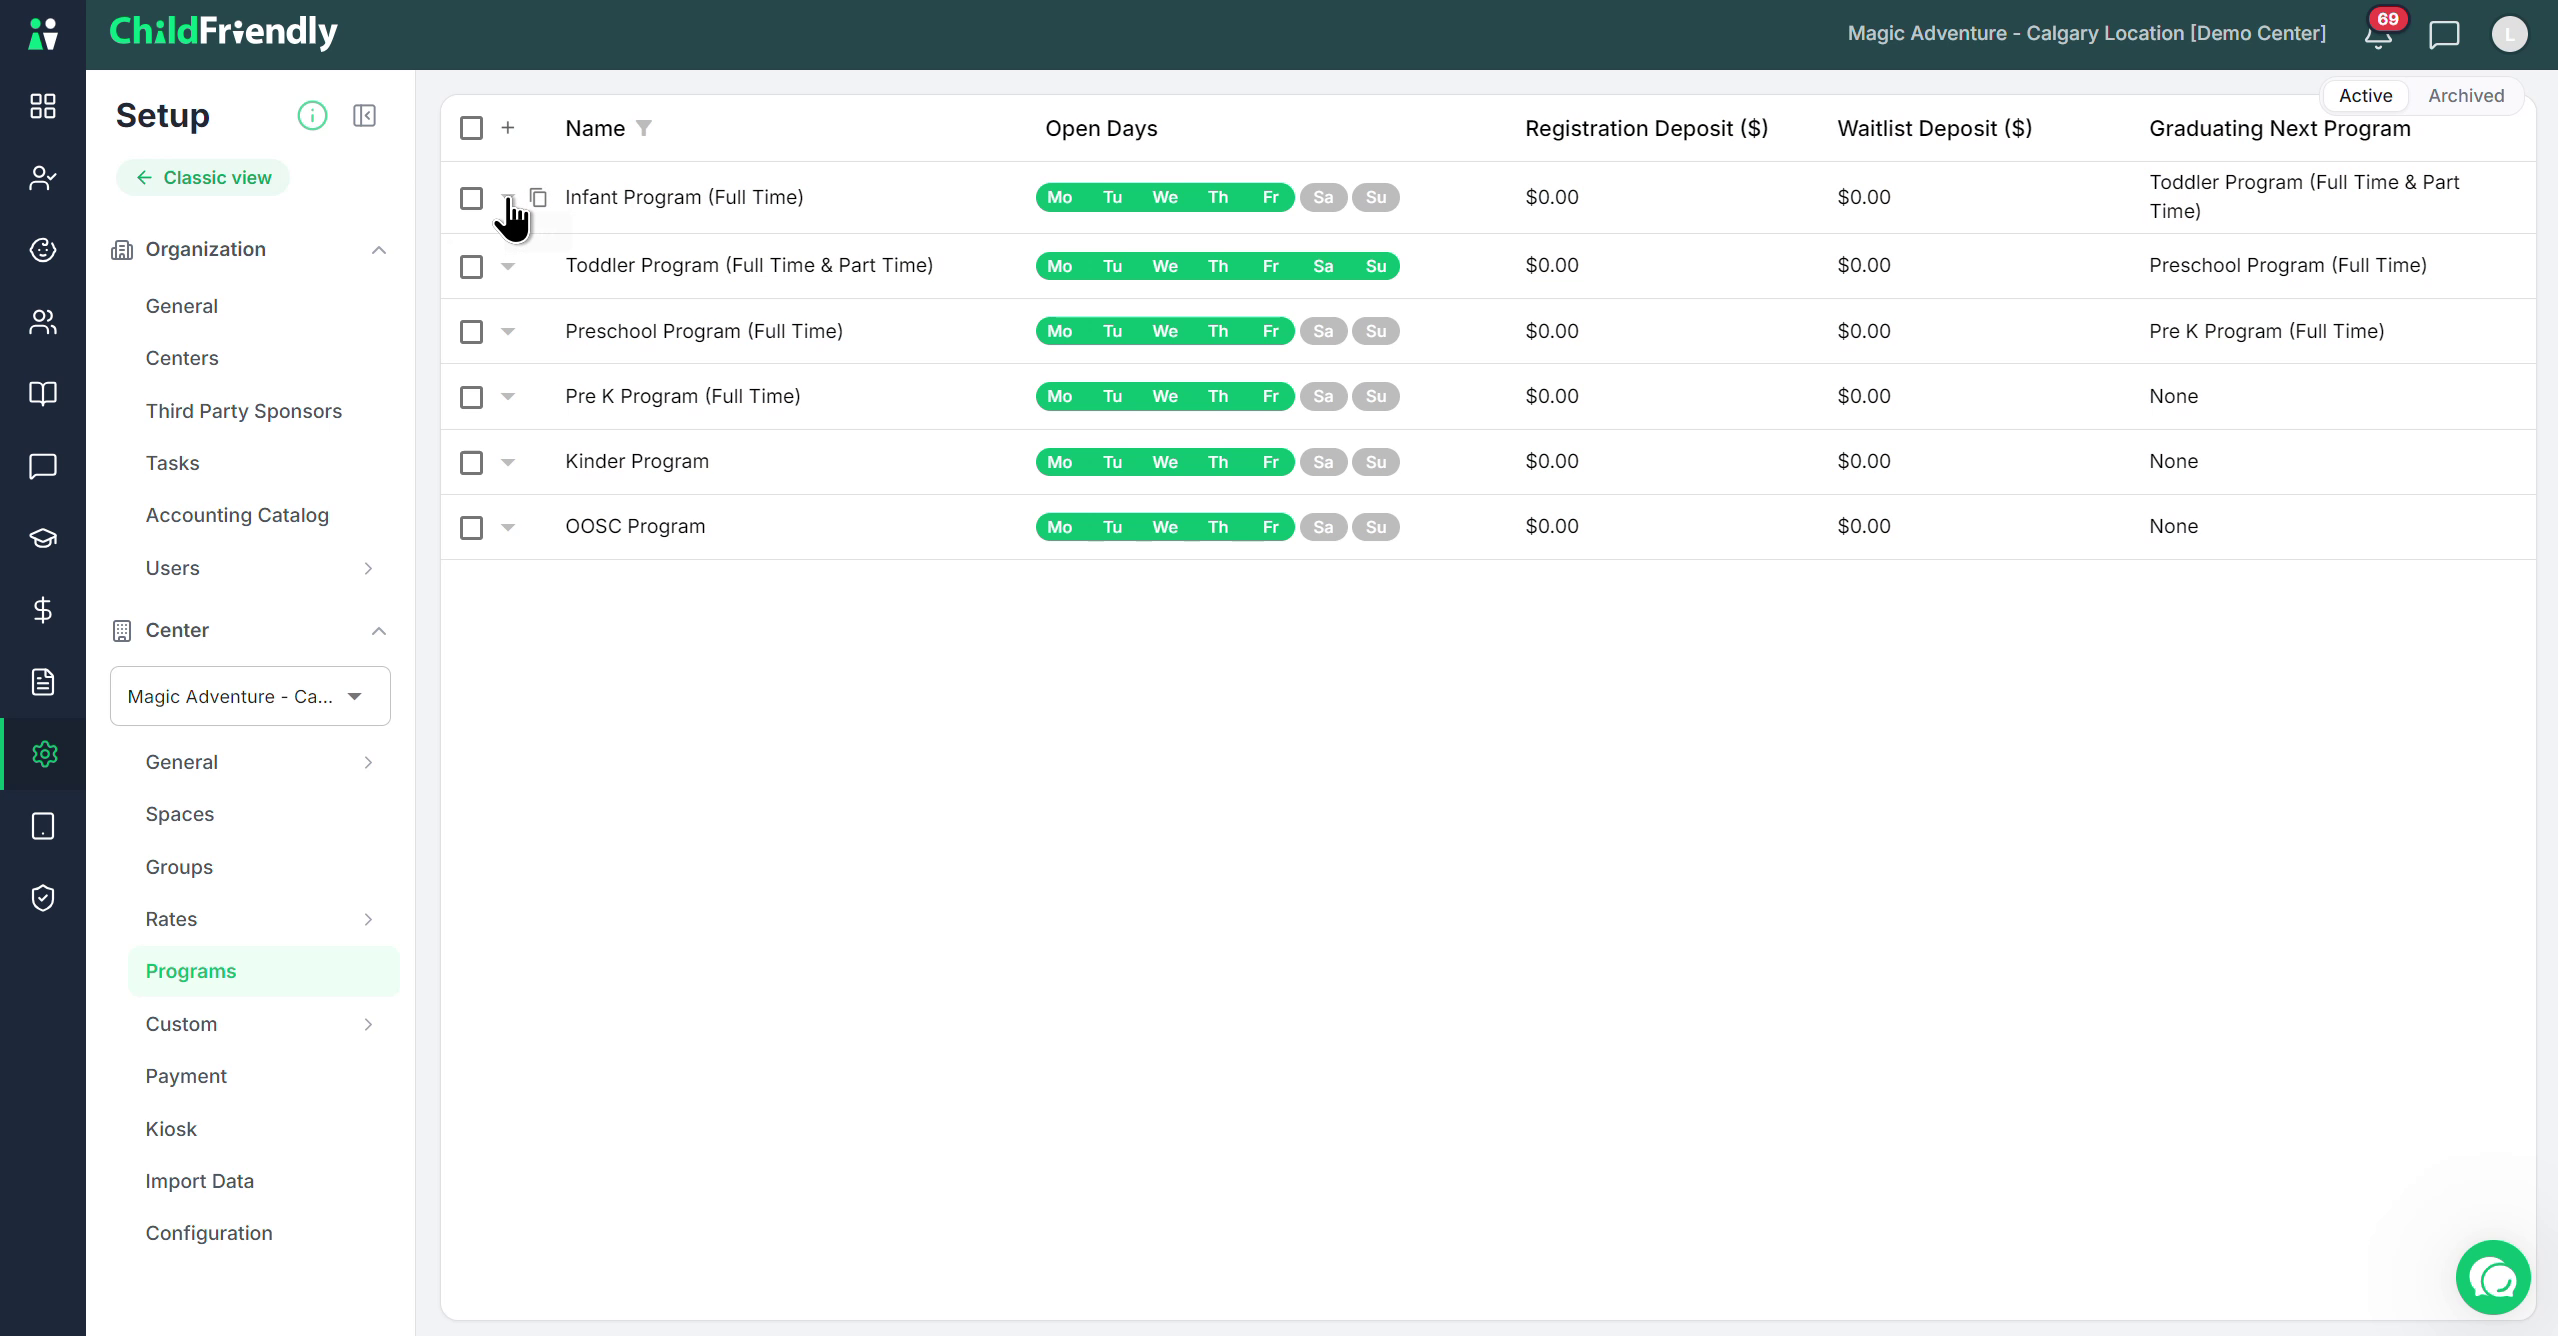
Edit a program: Expand the program to view and modify its fields.
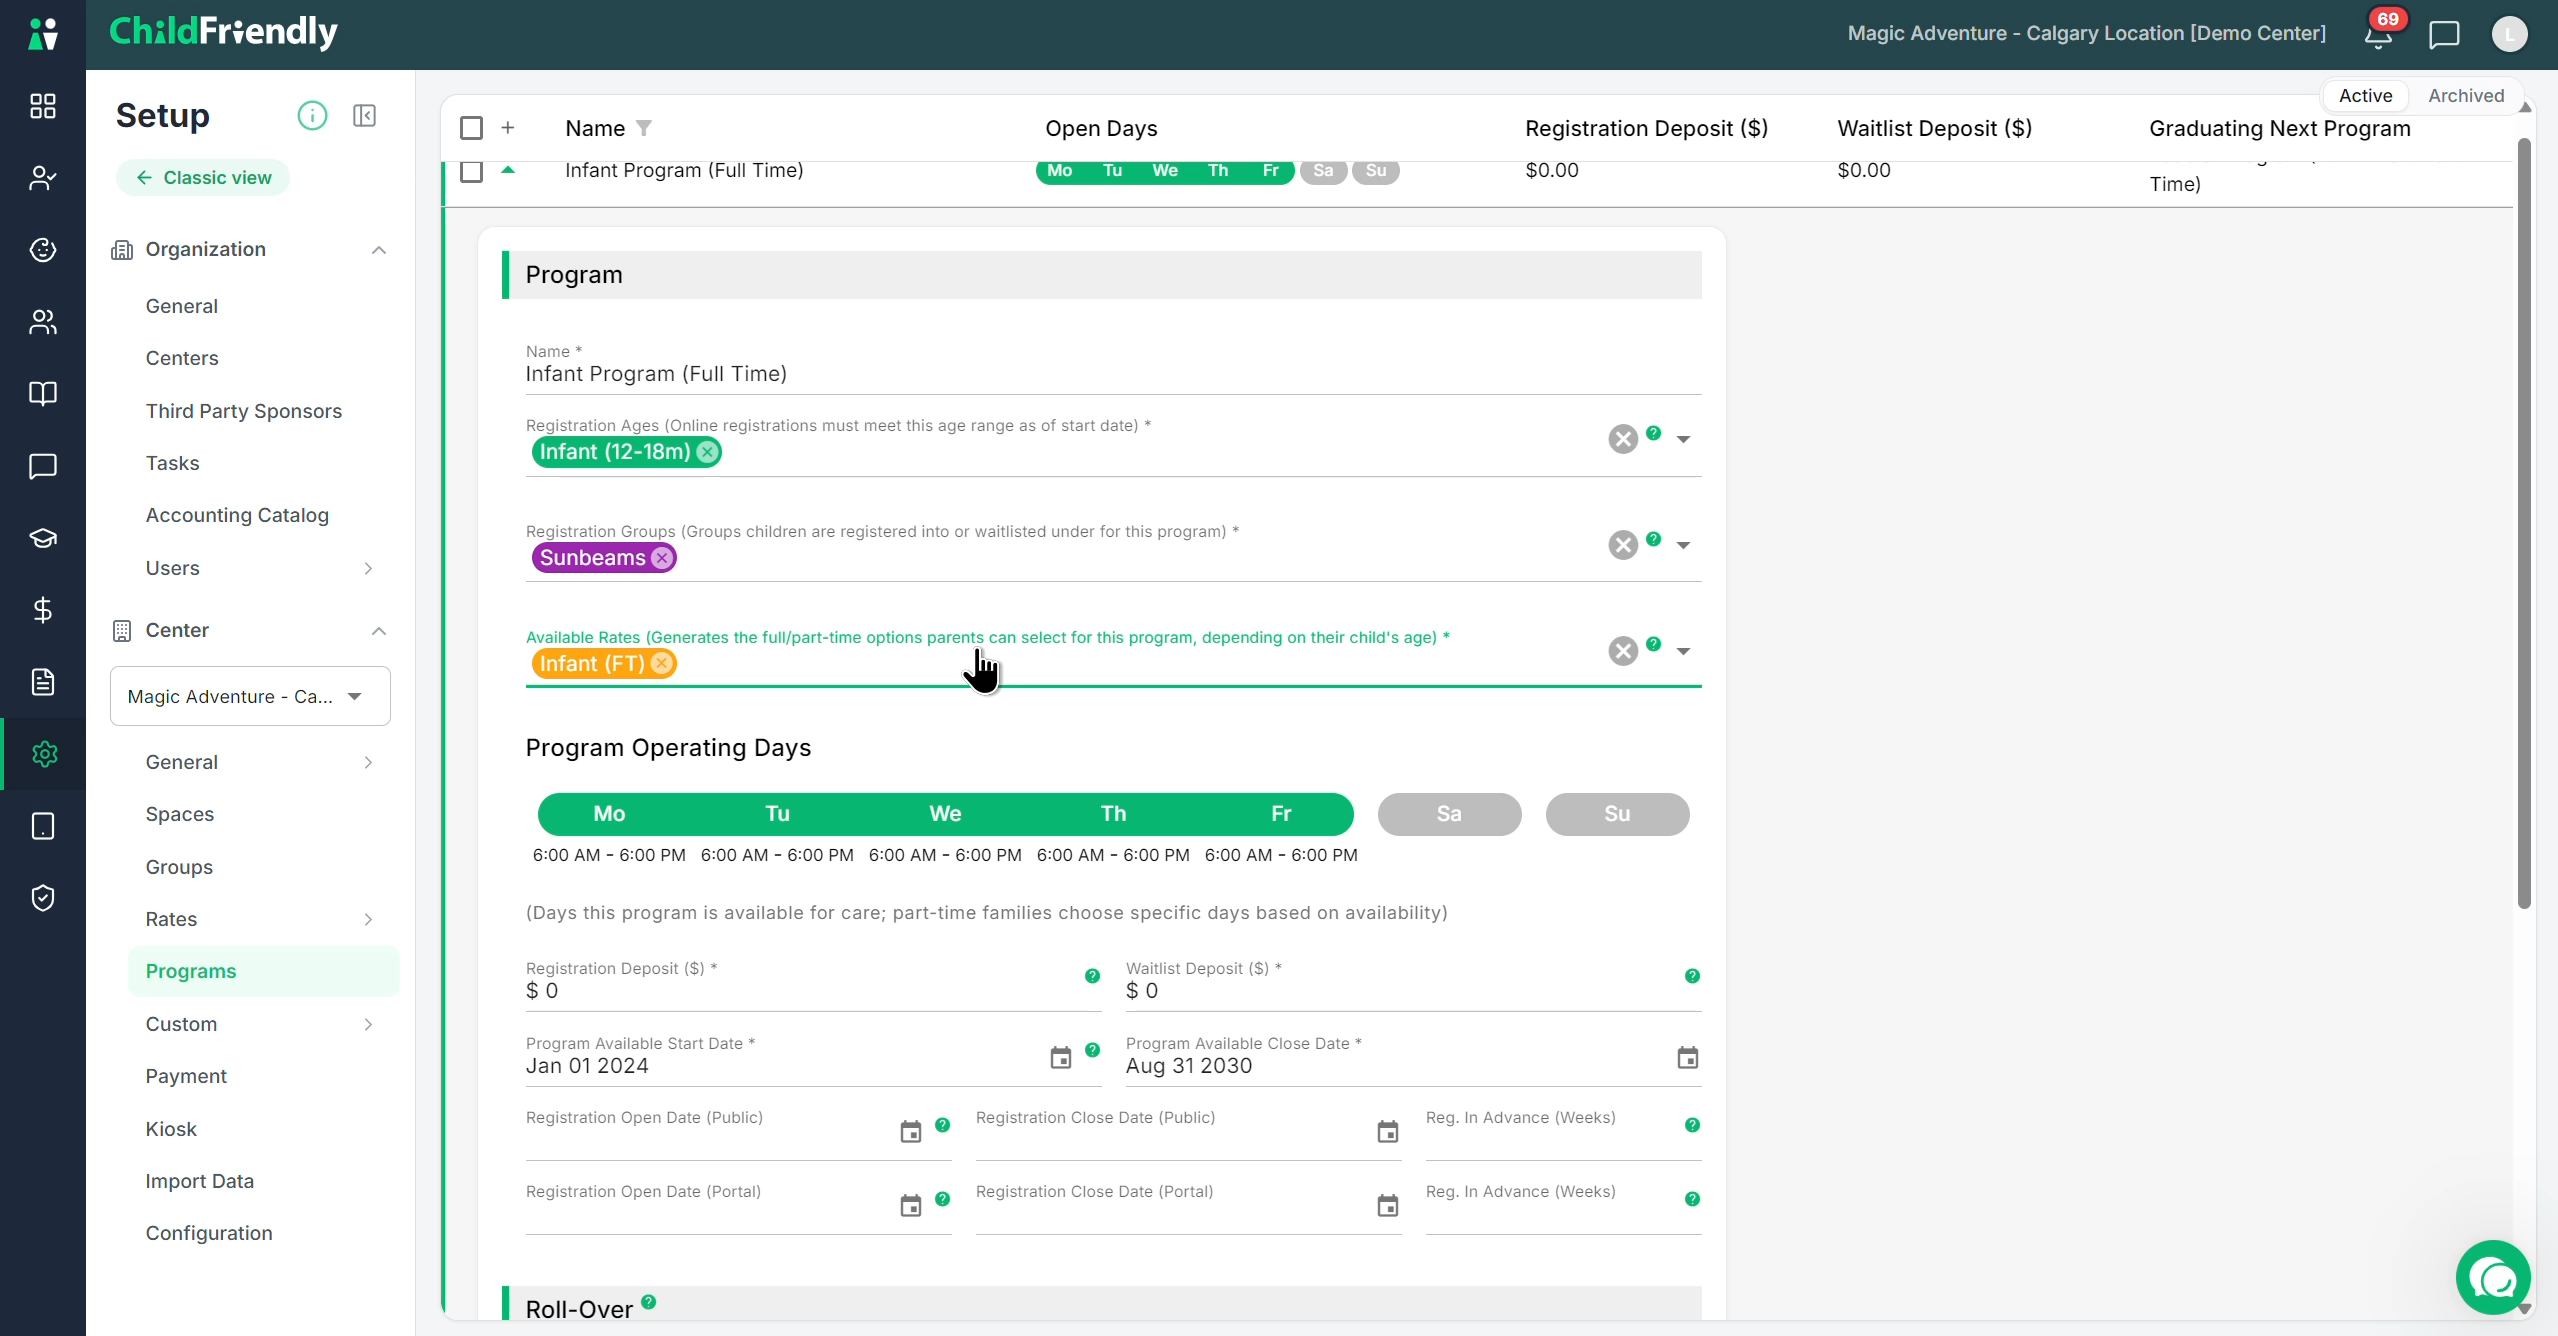
Within the expanded view, you will configure all required fields described in the next steps.
Step 5: Define the Program Name and Registration Age Range
Inside the program:
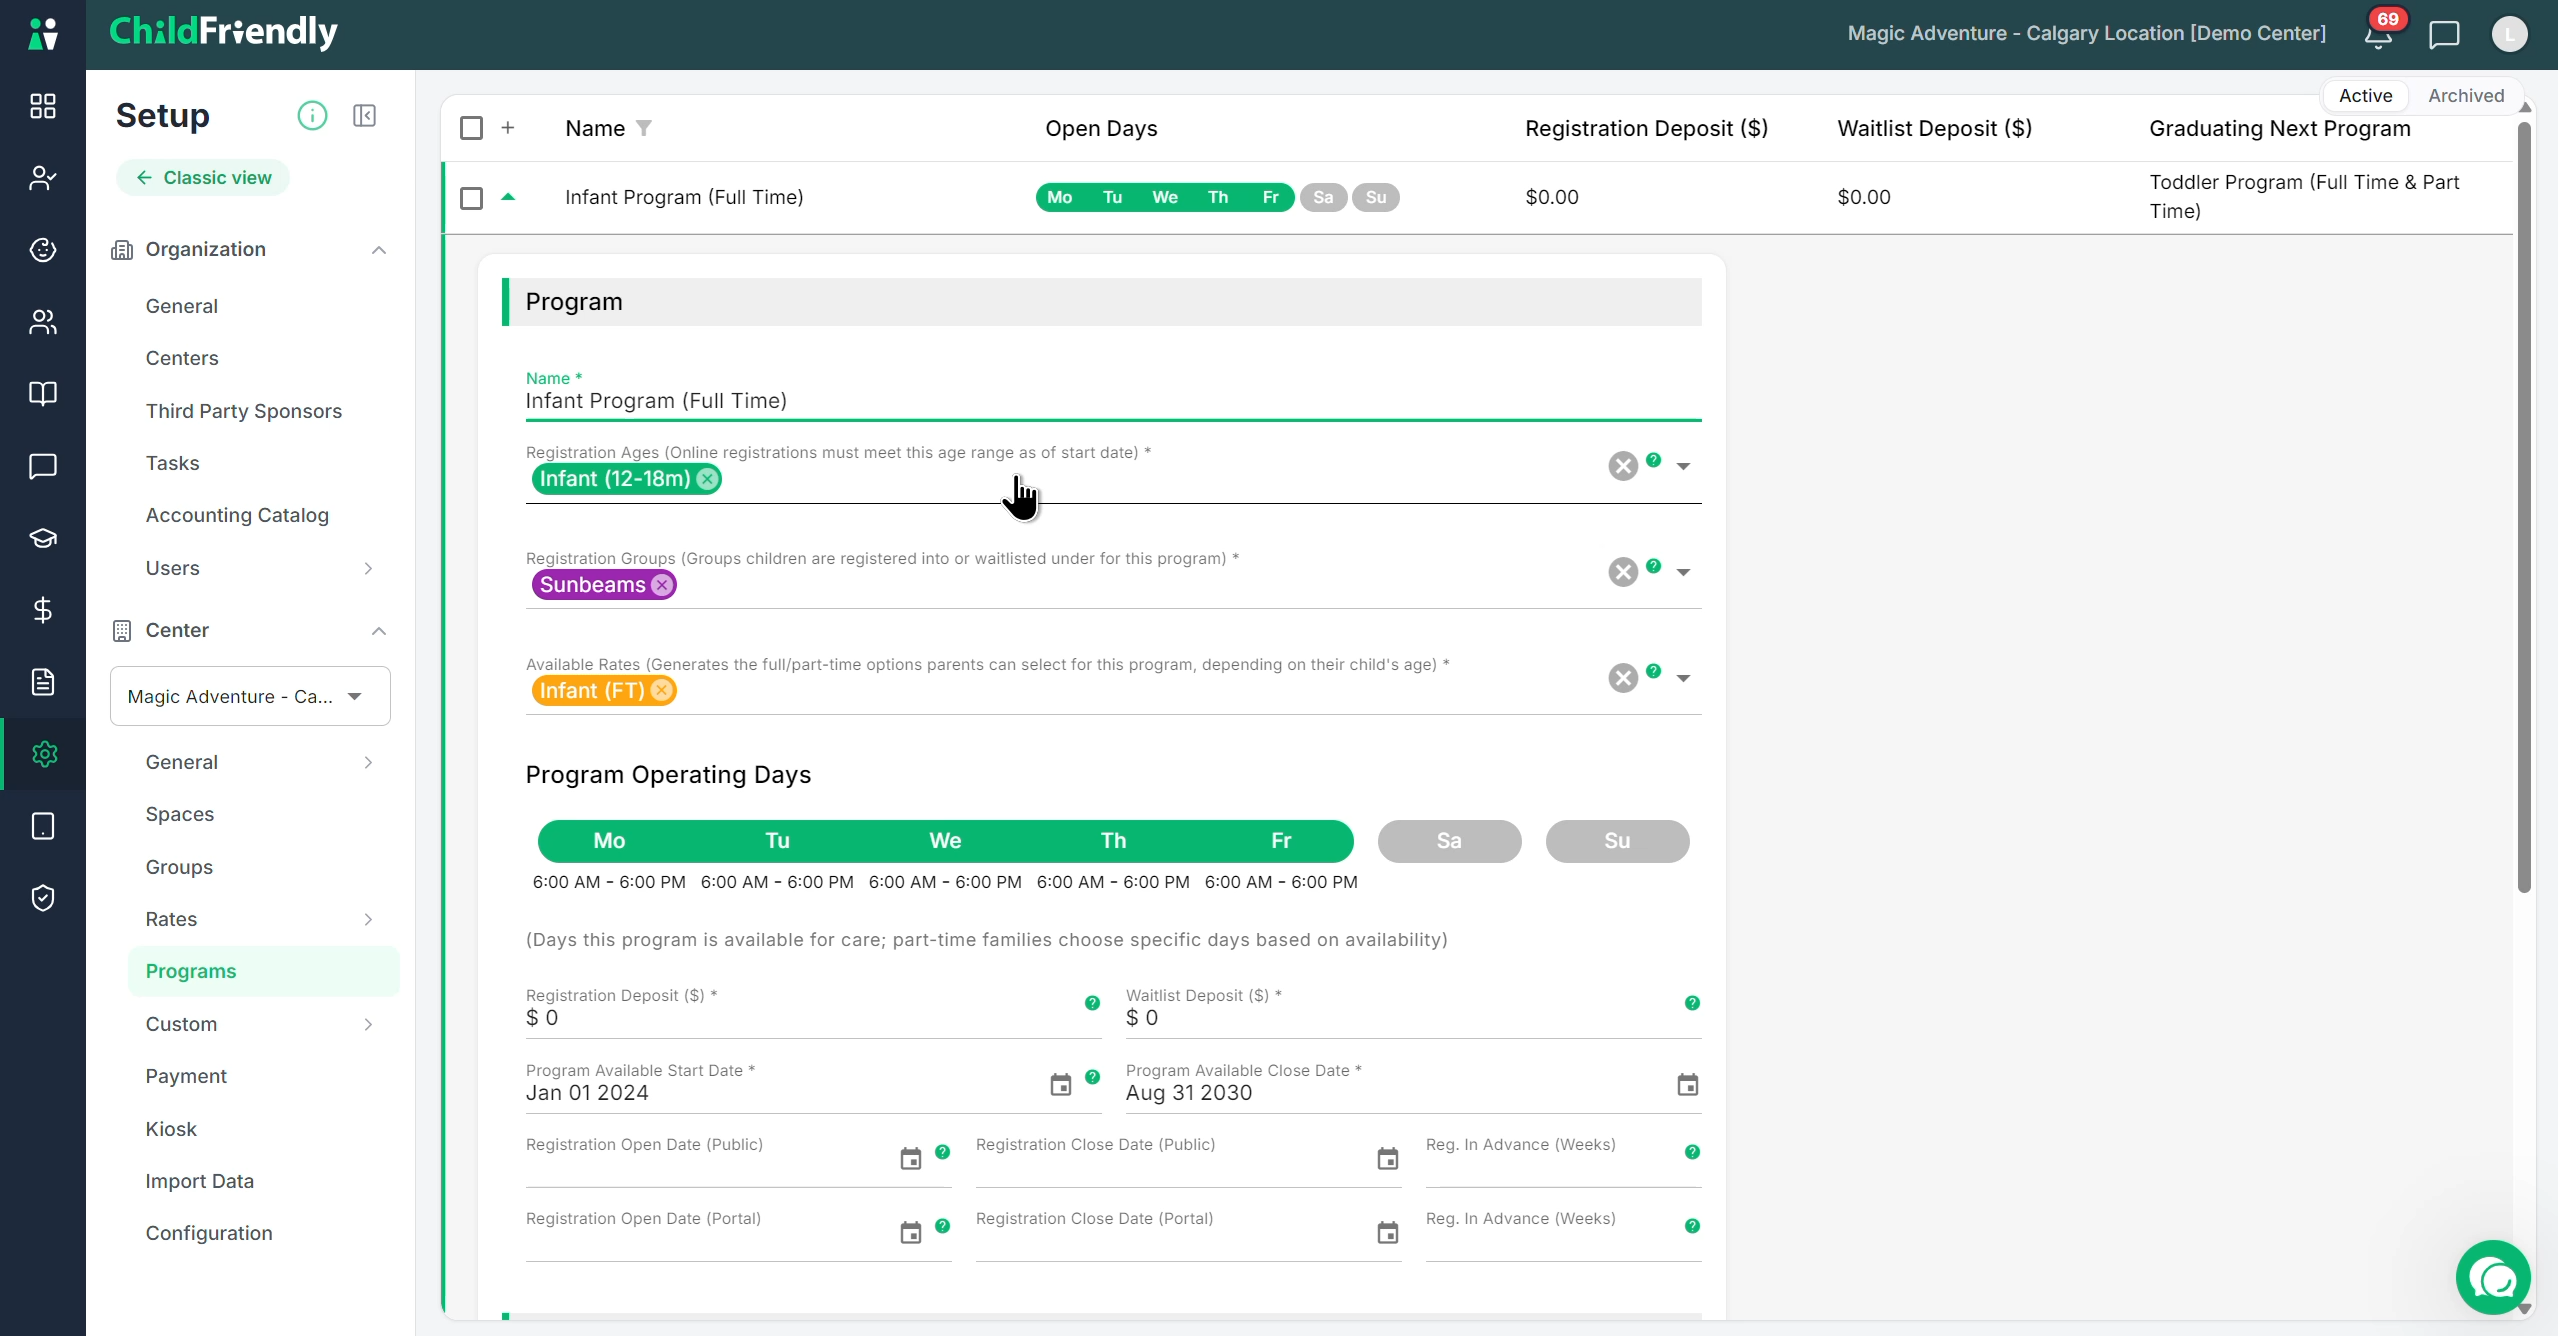
Set the Program Name
Enter a clear, descriptive name that parents will understand.
Set the Registration Ages
Specify the exact age range required for a child to be eligible as of the requested start date.
This may differ from the age ranges you configured in the Groups section.
Example: If a child is registering for an Infant program with a start date of September 1, they must meet the infant age criteria as of September 1 to qualify.
Step 6: Assign Registration Groups to the Program
Configure which groups belong to this program:
Add all groups that fall under this program.
Example: If you have 3–4 infant groups that are part of the Infant Full-Time program, add all those groups here.
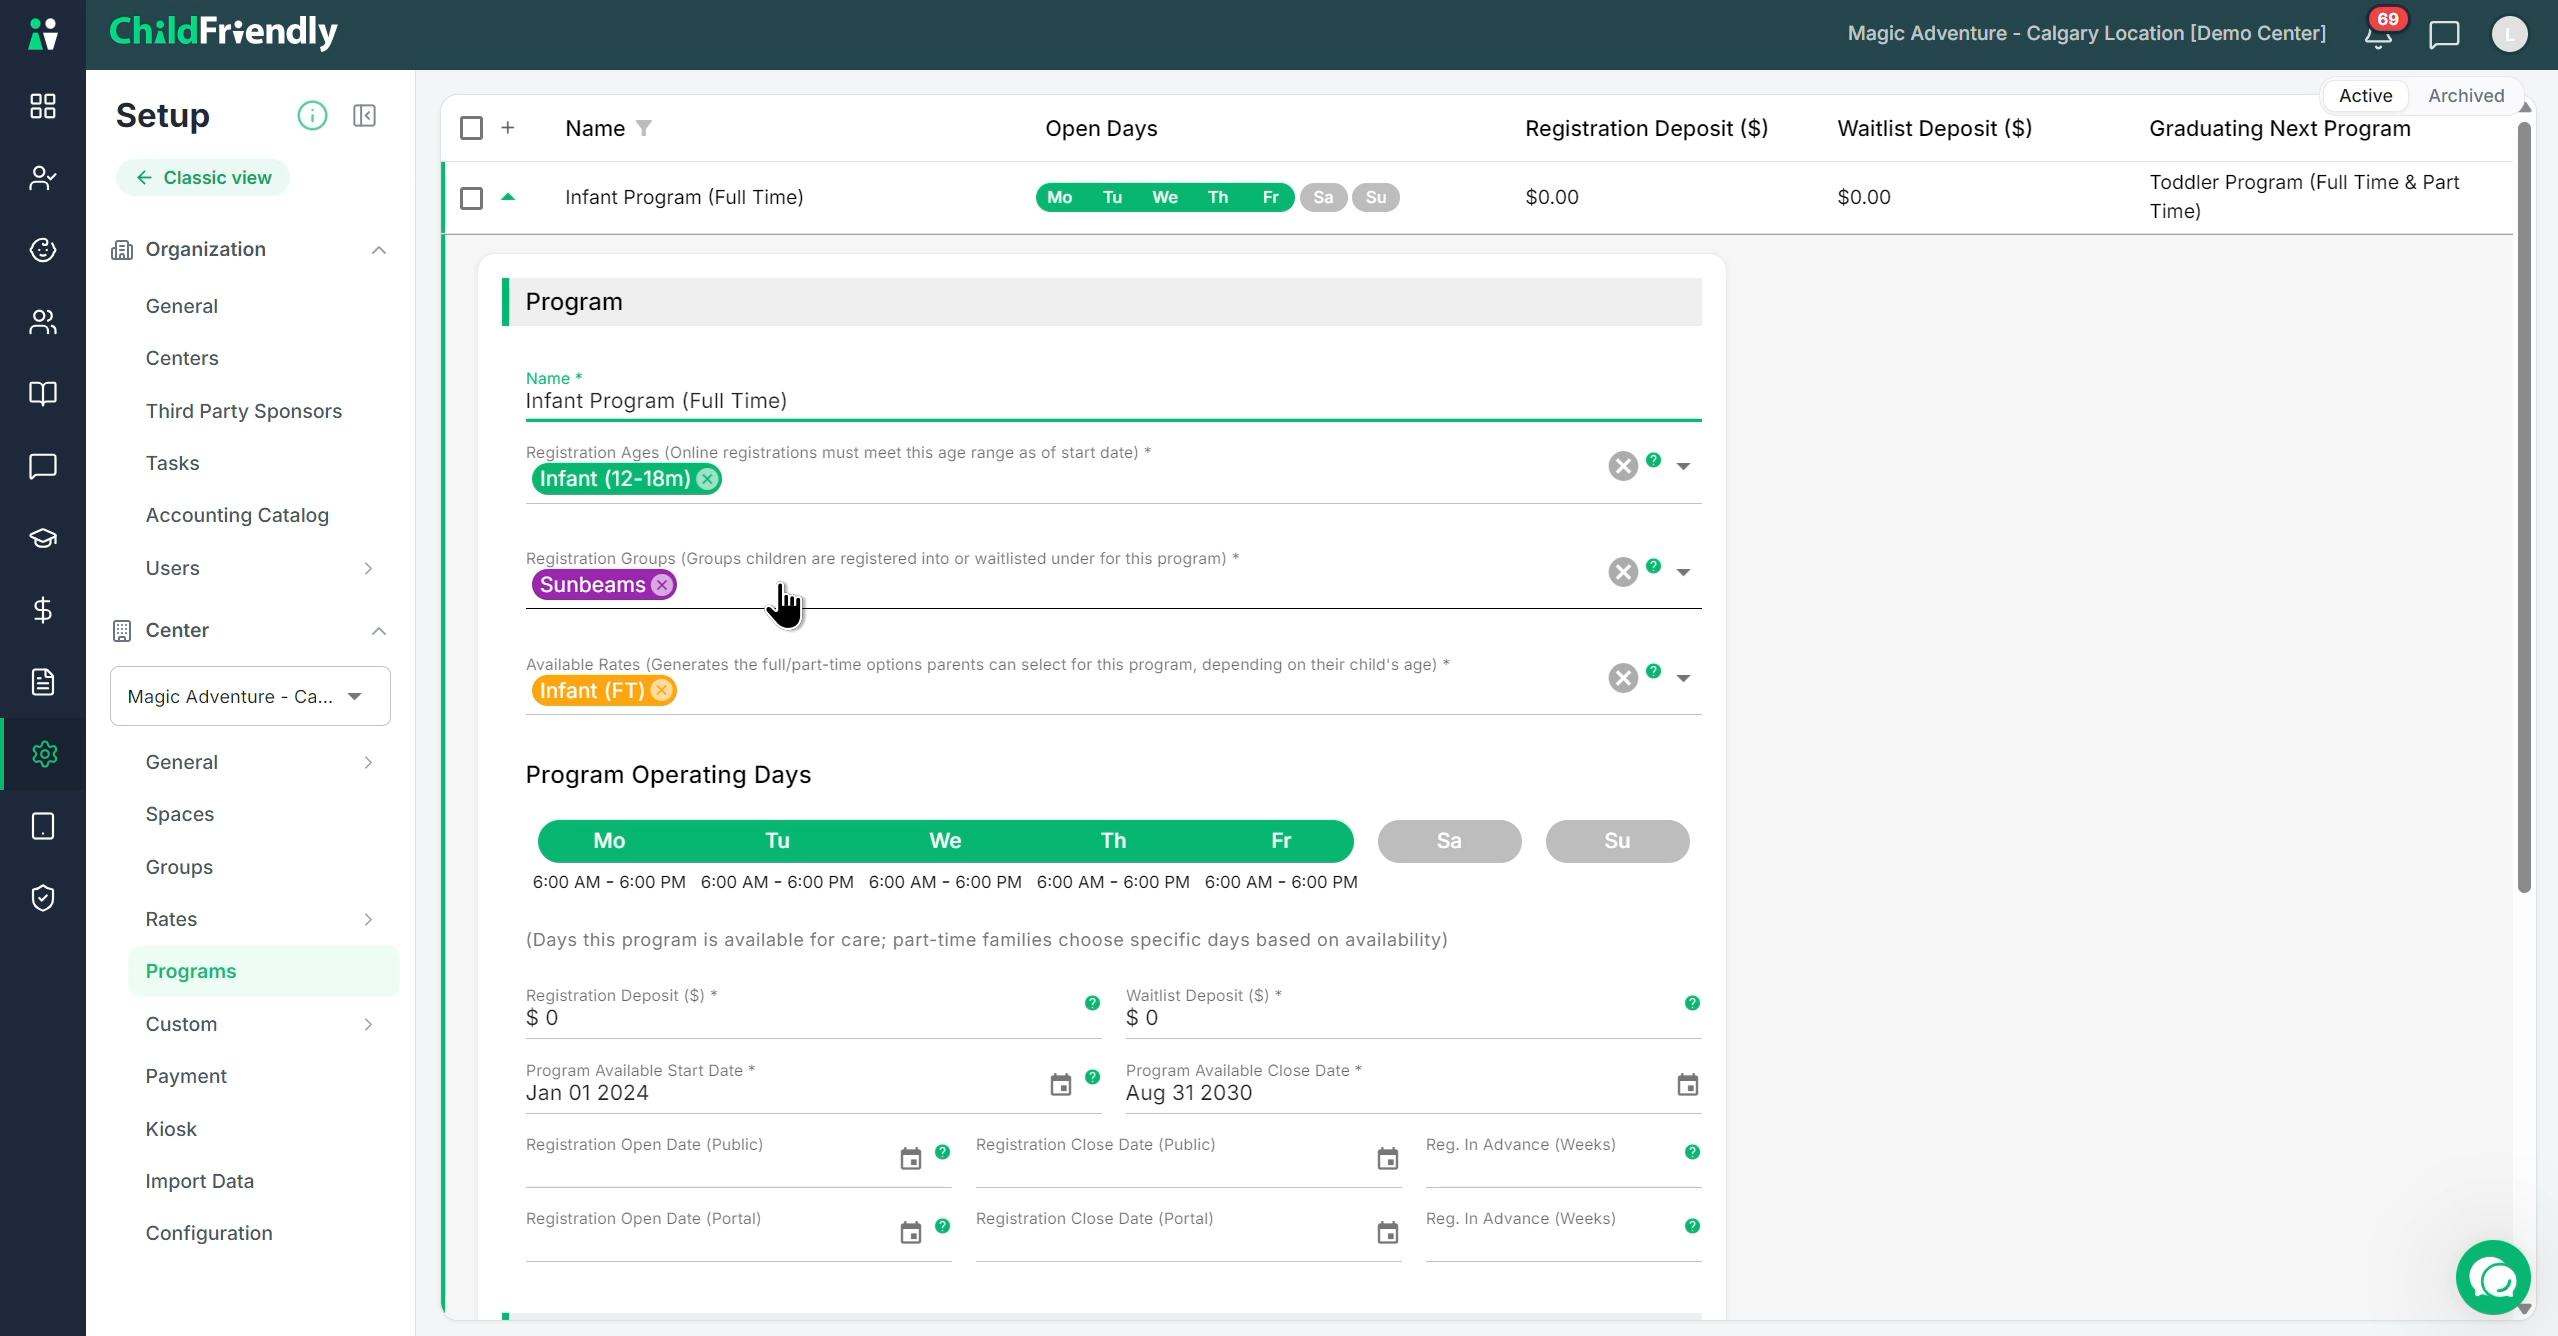
💡 Quick Tip on Shared Groups: A single group can live inside multiple programs. For instance, the Preschool Chipmunk group can be tied to a Full-Time and a Part-Time enrollment track.
As families register, the system counts the physical spaces in real time. It guarantees the total number of children across both programs never exceeds the maximum capacity allowed for the Chipmunk room.
Smart Automation at a Glance:
Dual-Track Occupancy: Evaluates full-time and part-time schedules together.
Zero Double-Counting: Locks down capacity limits across different program types.
Instant Waitlists: Prompts a waitlist option the second the room's capacity is reached for a specific start date.
Step 7: Select Available Rates for the Program
Specify which rates are available within this program:
Choose the applicable rate options, such as Infant Full-Time rate.
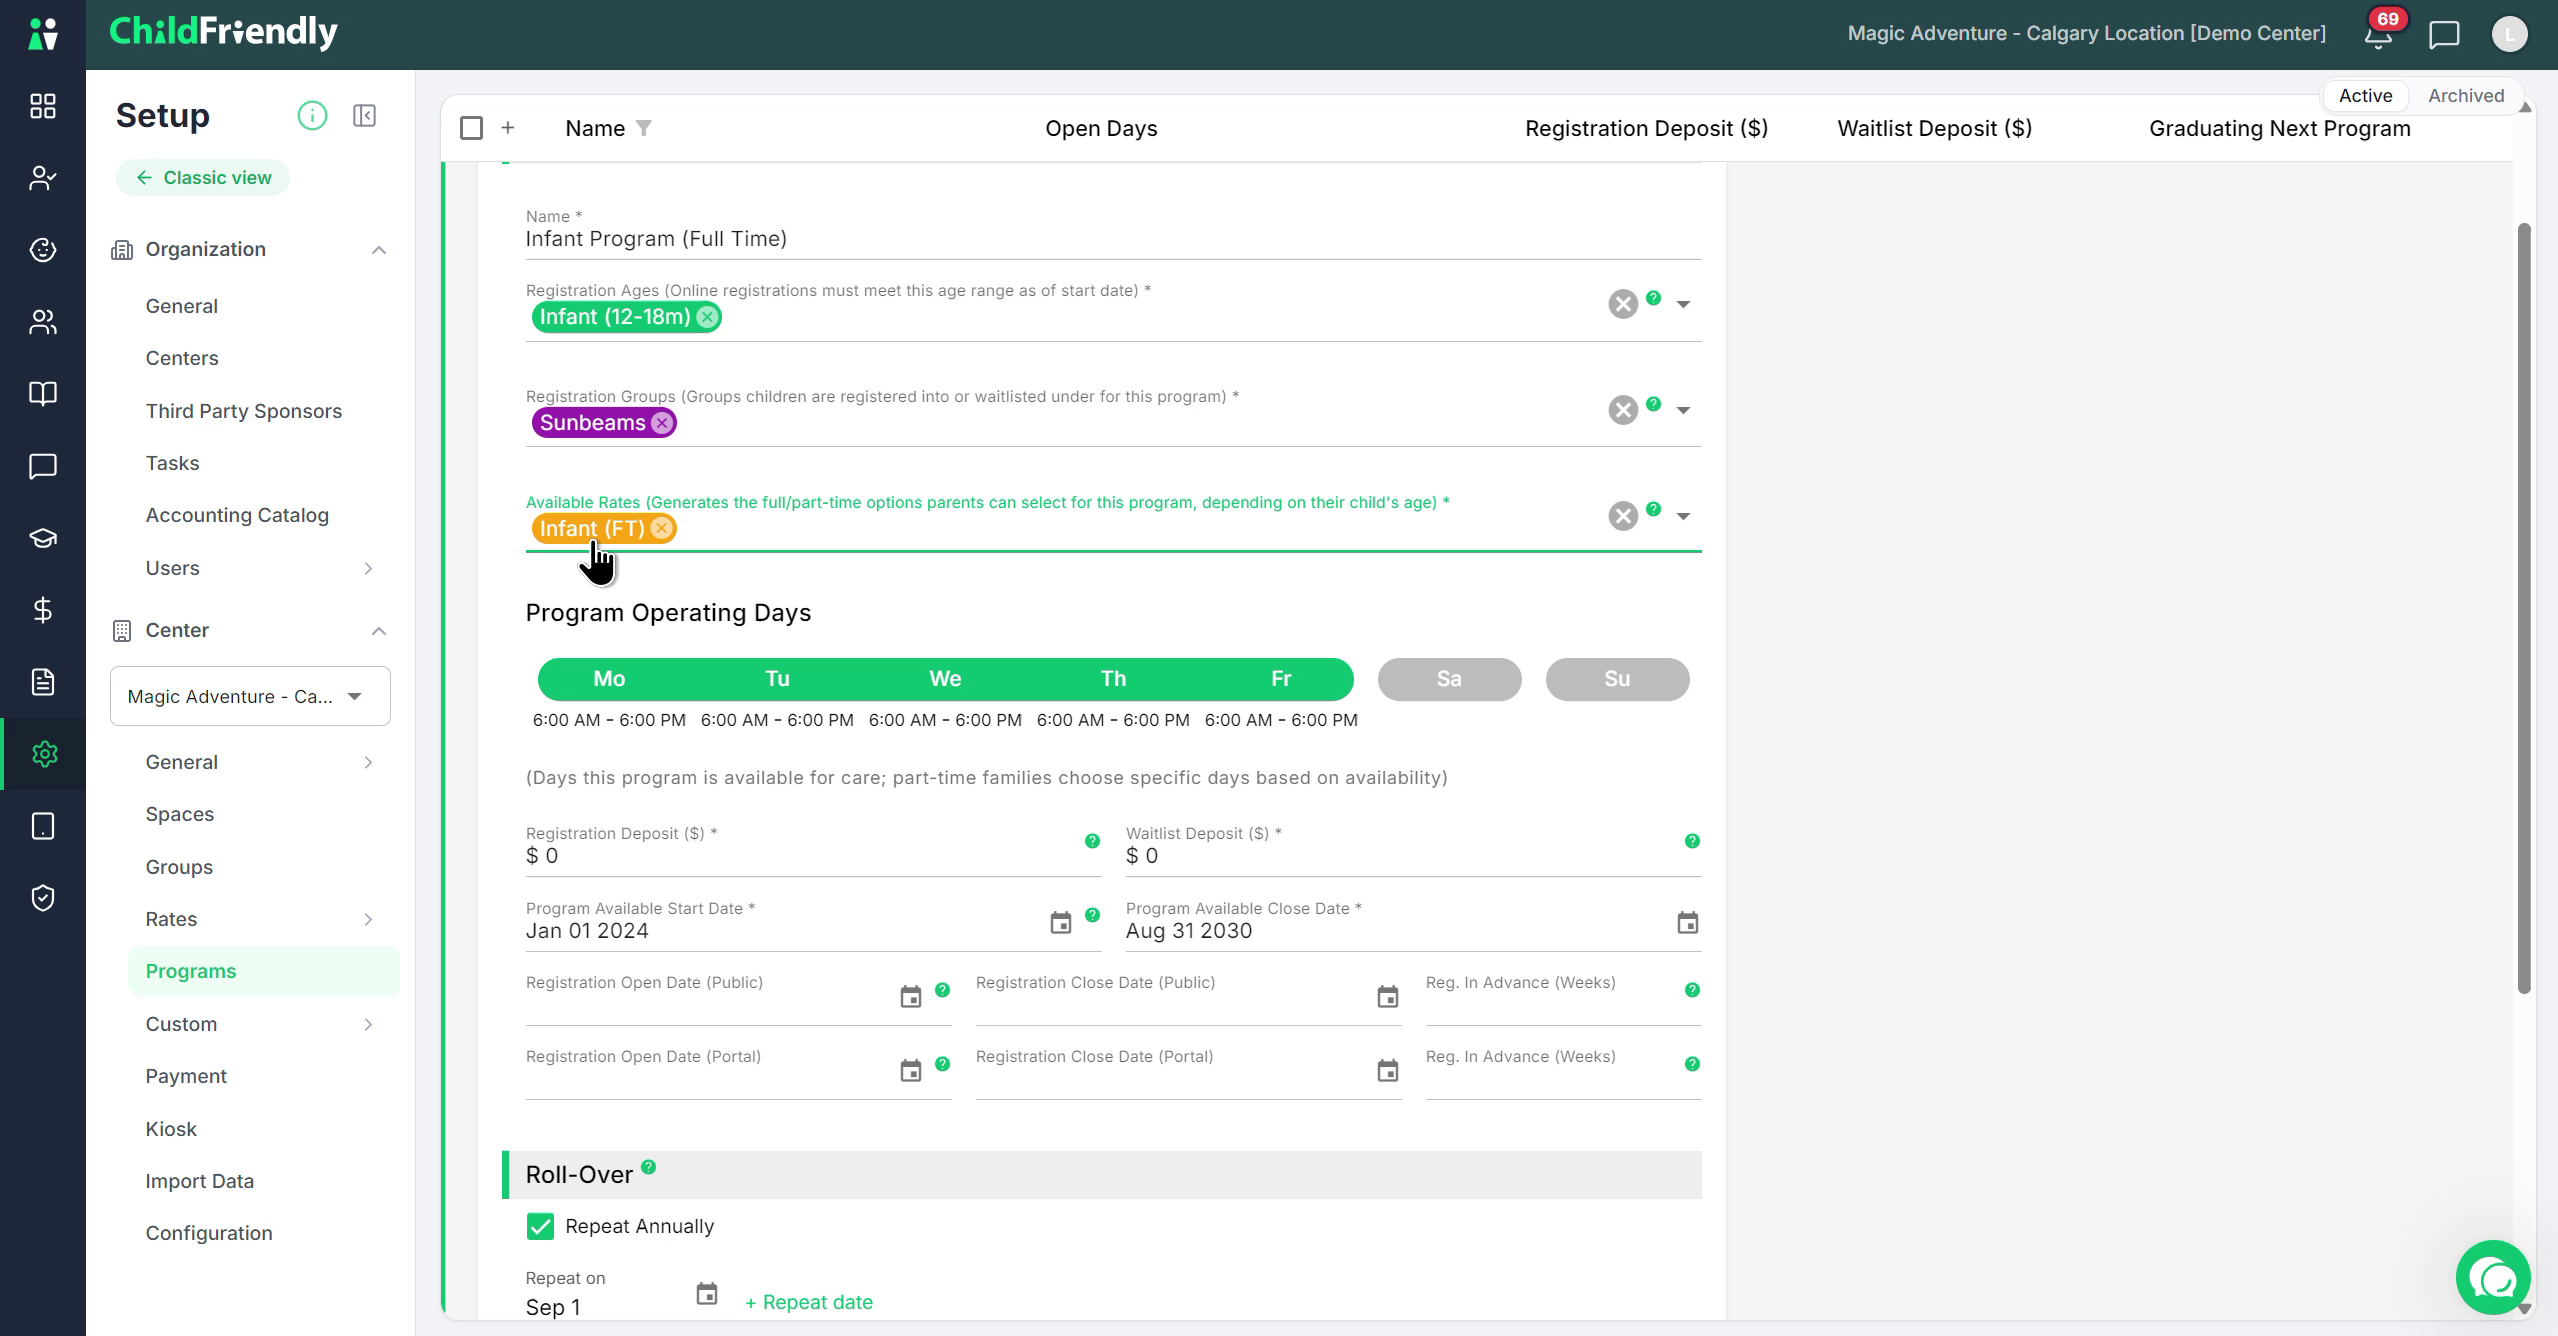
When a parent selects this program:
They will see only the rates you have enabled (e.g., full-time and/or part-time).
For part-time rates, they can select days according to what is available and allowed under that rate's configuration. See the How to Set Up Rates video for more details.
Step 8: Set Program Operating Days and Times
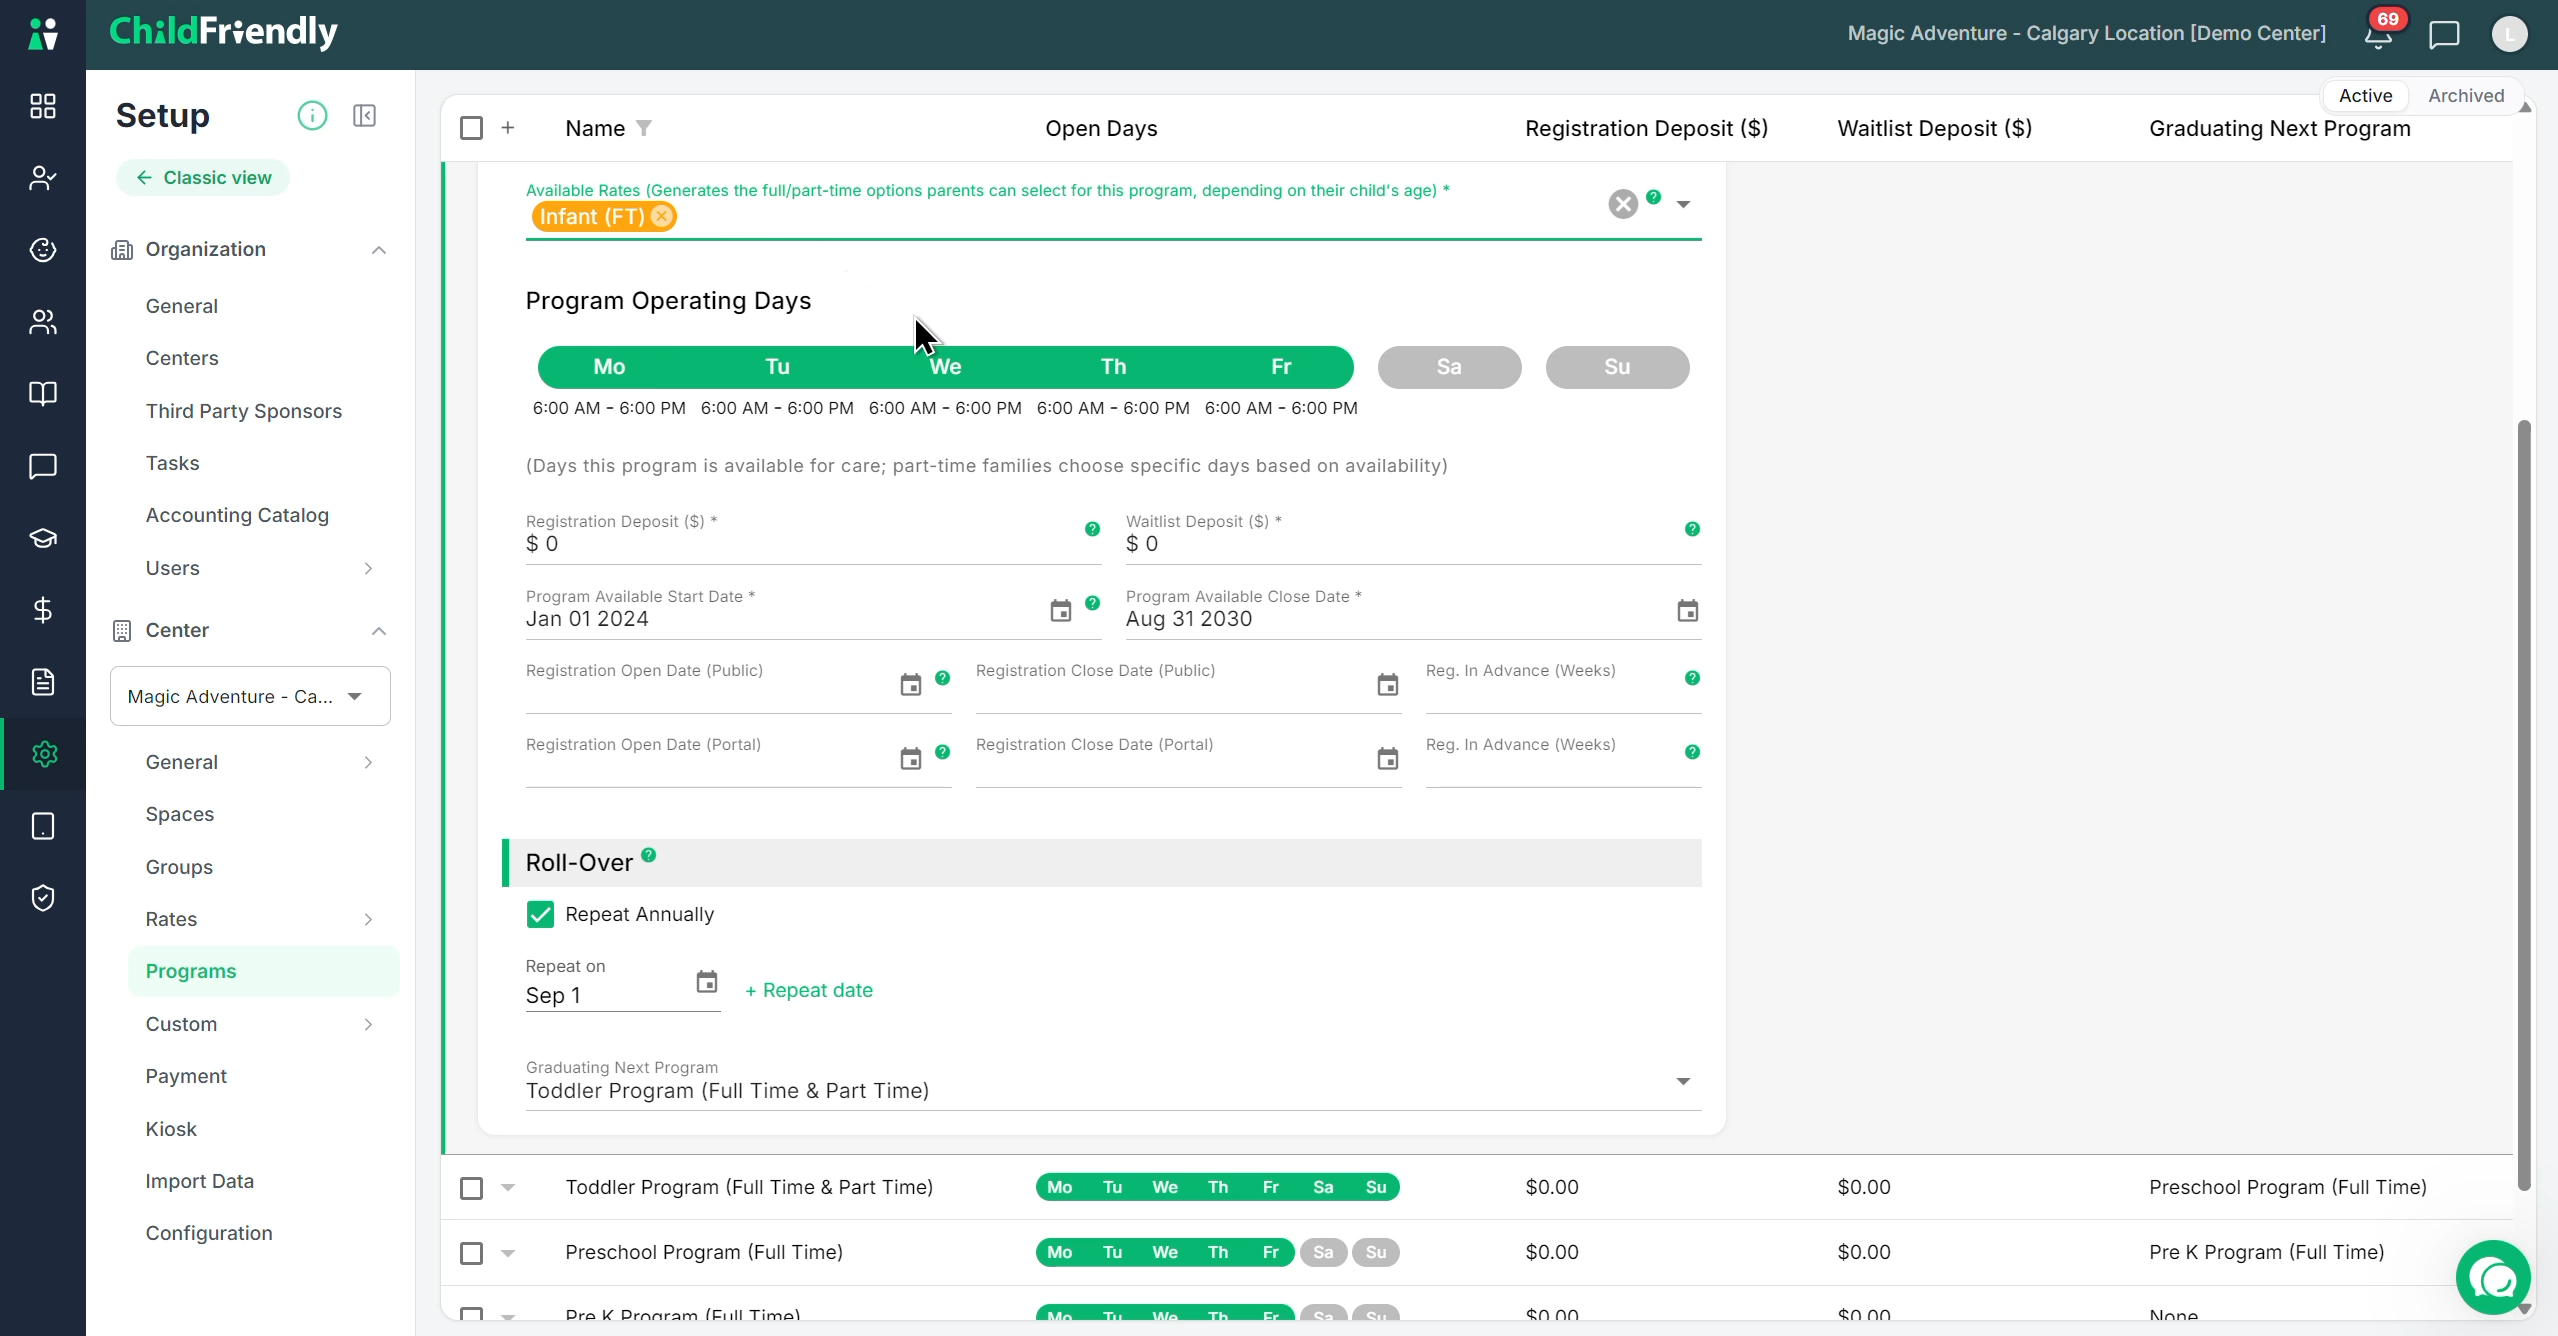
Configure when the program operates:
Select the days of the week and times during which this program runs.
This setting is especially important for part-time programs. For example:
If you have a 2-day per week part-time rate and set operating days to Monday and Wednesday, parents will only be able to choose Monday and Wednesday for that program. They will not be able to select Tuesday and Thursday instead, for instance.
Other days will not appear as options because the program does not operate on those days.
Step 9: Configure Registration Deposit and Waitlist Deposit
Set how much you charge families when they register:
Registration Deposit
Enter the amount required to confirm a registration (e.g., $100).
This amount is:
Automatically charged during online registration via credit card.
Recorded in the system as a credit toward the family’s tuition (i.e., a prepaid amount).
If your center does not apply the deposit to tuition:
You will need a workflow step (e.g., in the onboarding dashboard checklist) to remove the credit created by the deposit.
Waitlist Deposit (if applicable)
If you charge a deposit when families join the waitlist instead of securing a spot, configure that amount similarly.
Step 10: Set Program Start/Close Dates and Registration Window
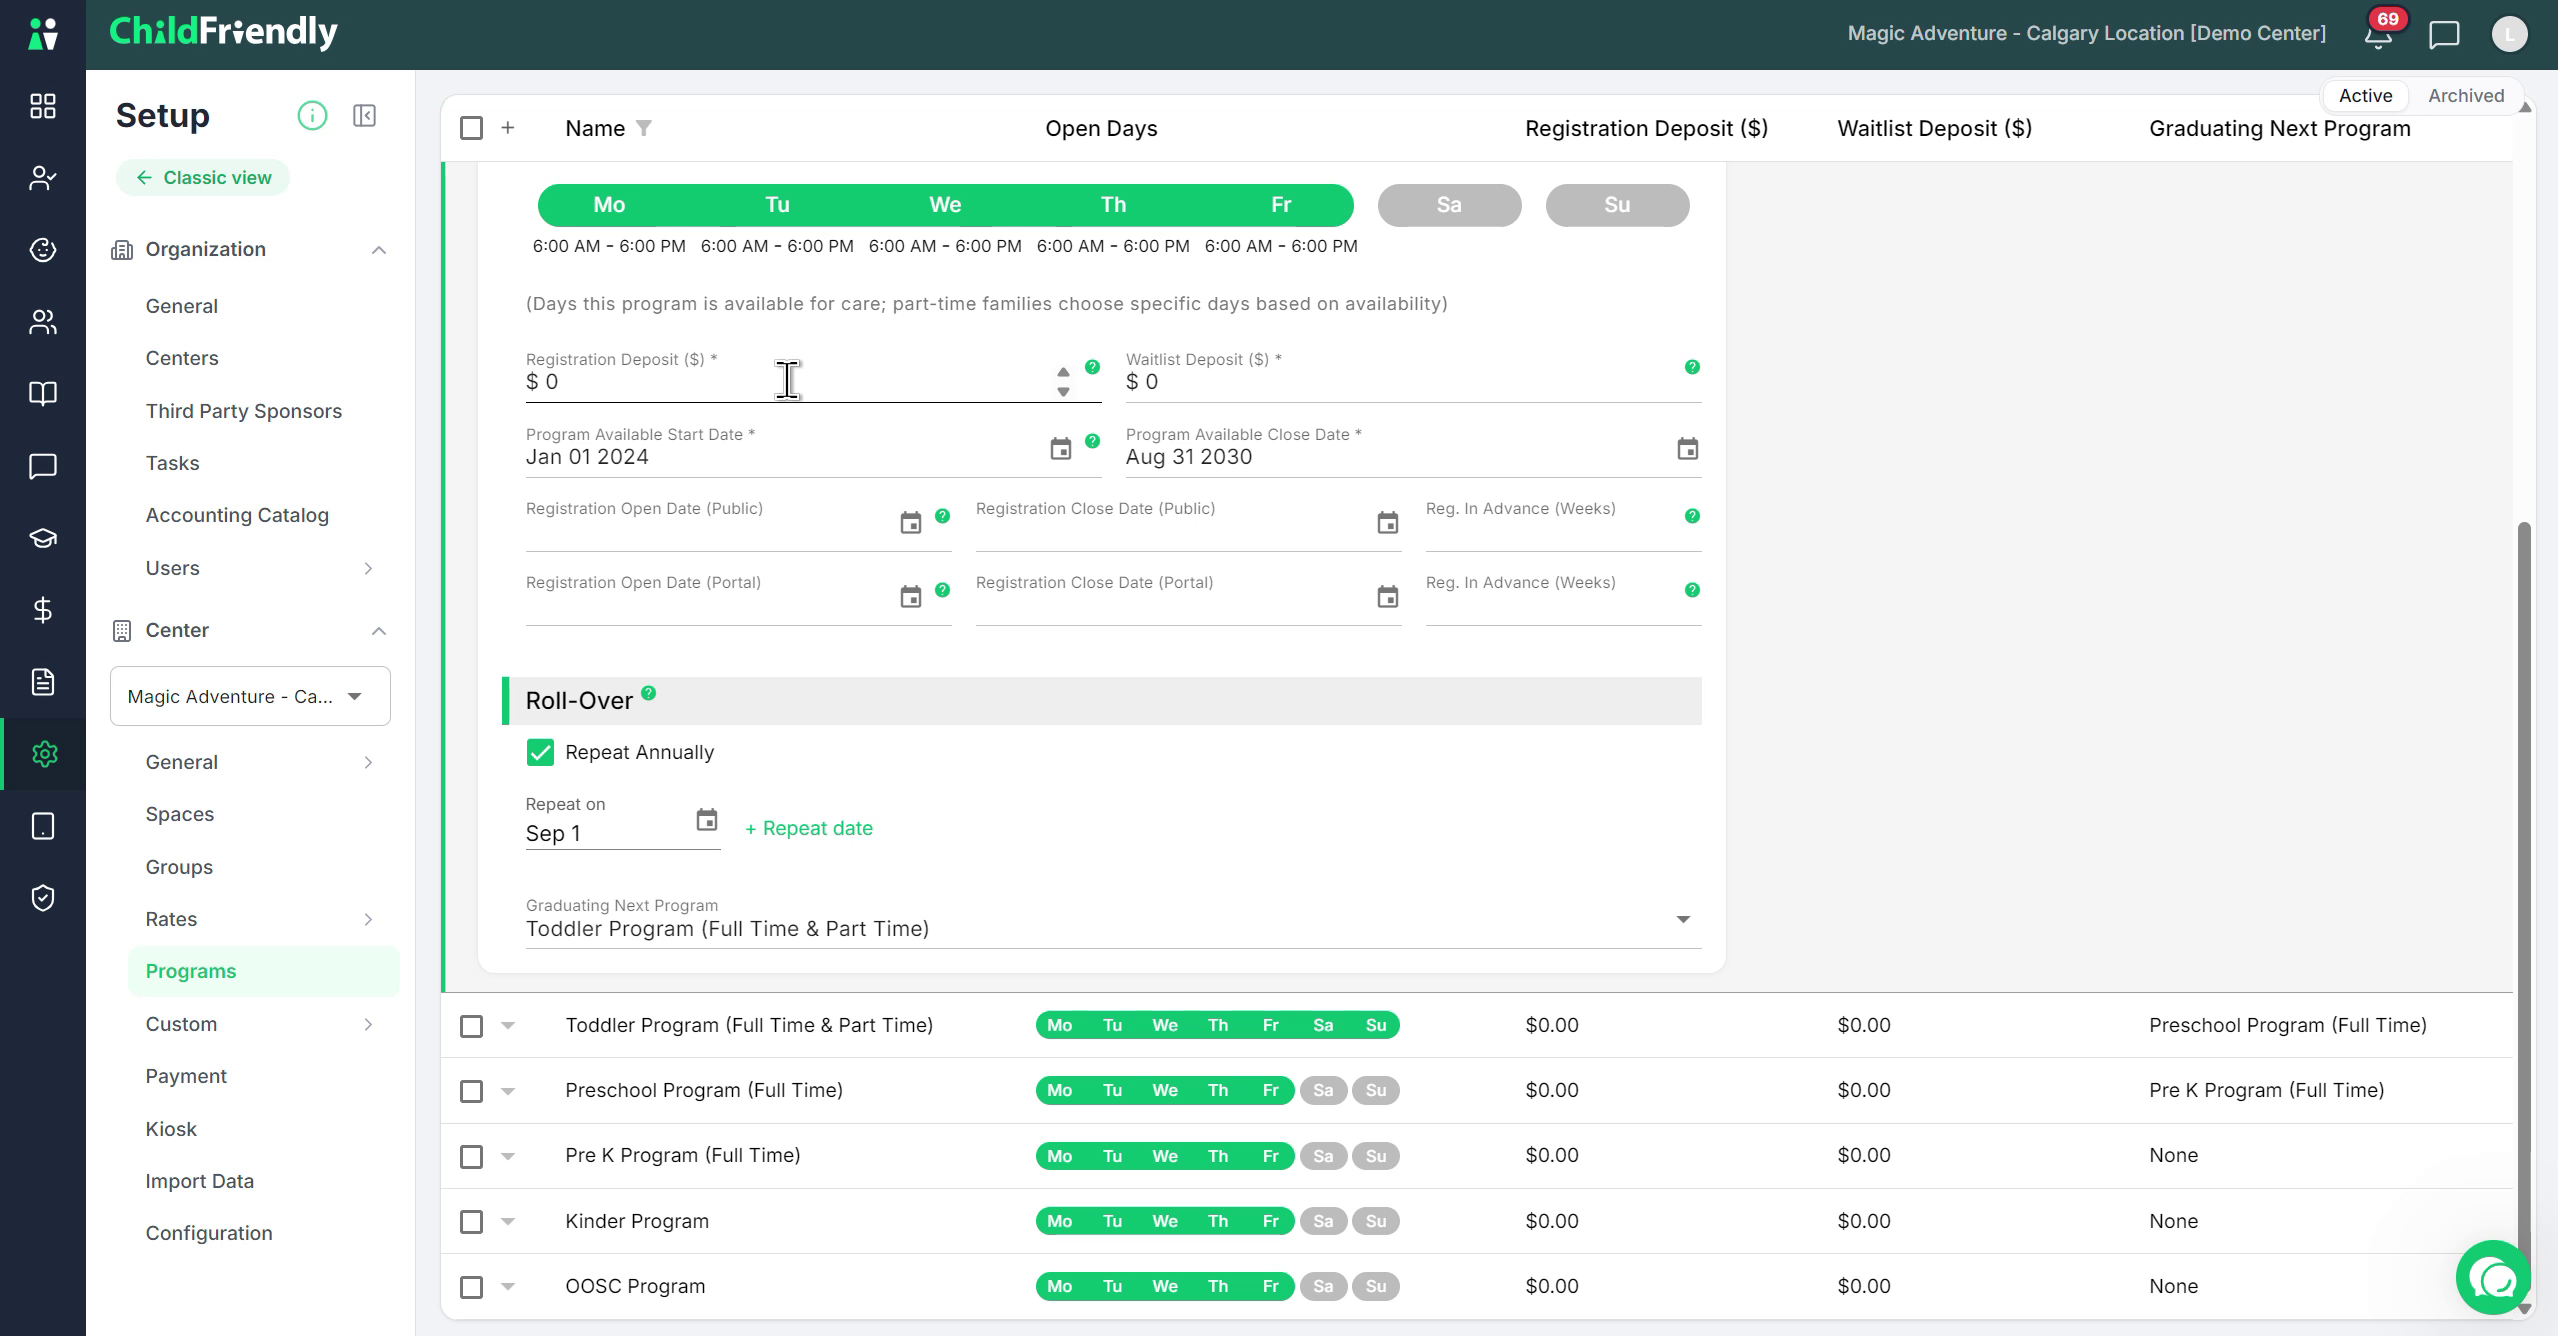
Configure when the program runs and when registration is open:
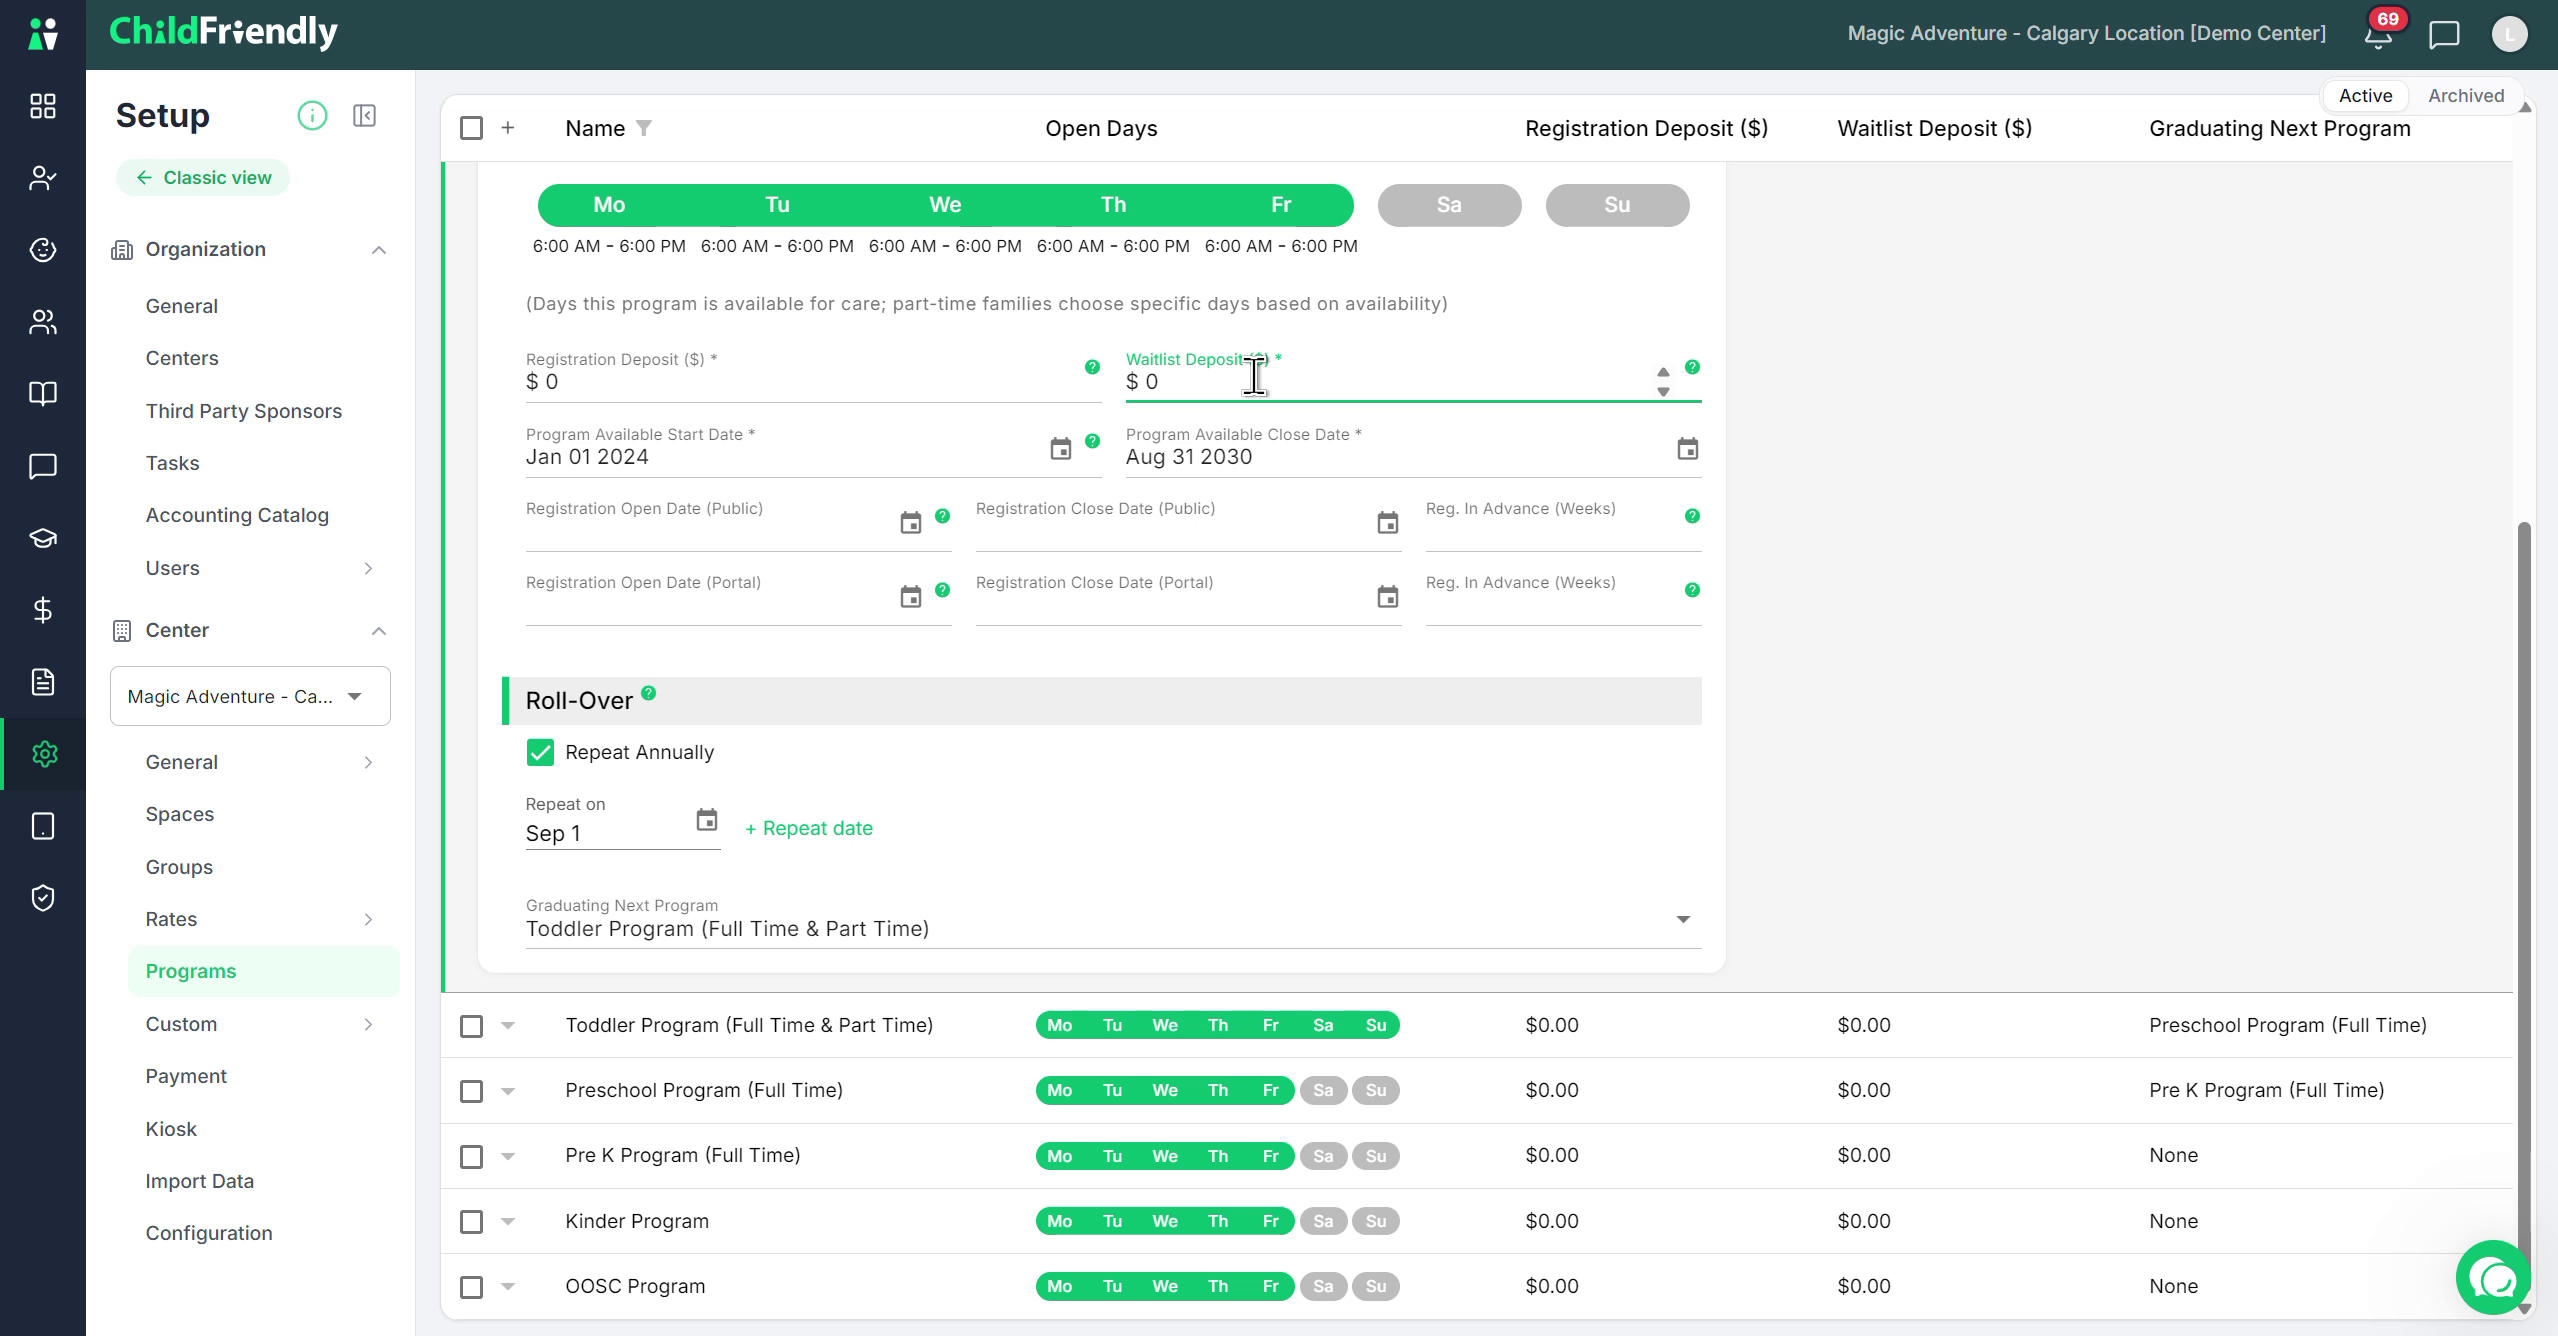
Program Available Start Date
The date from which students can actually attend this program.
Example: If it is currently January but you are setting up a program starting in September, enter September 1 as the start date.
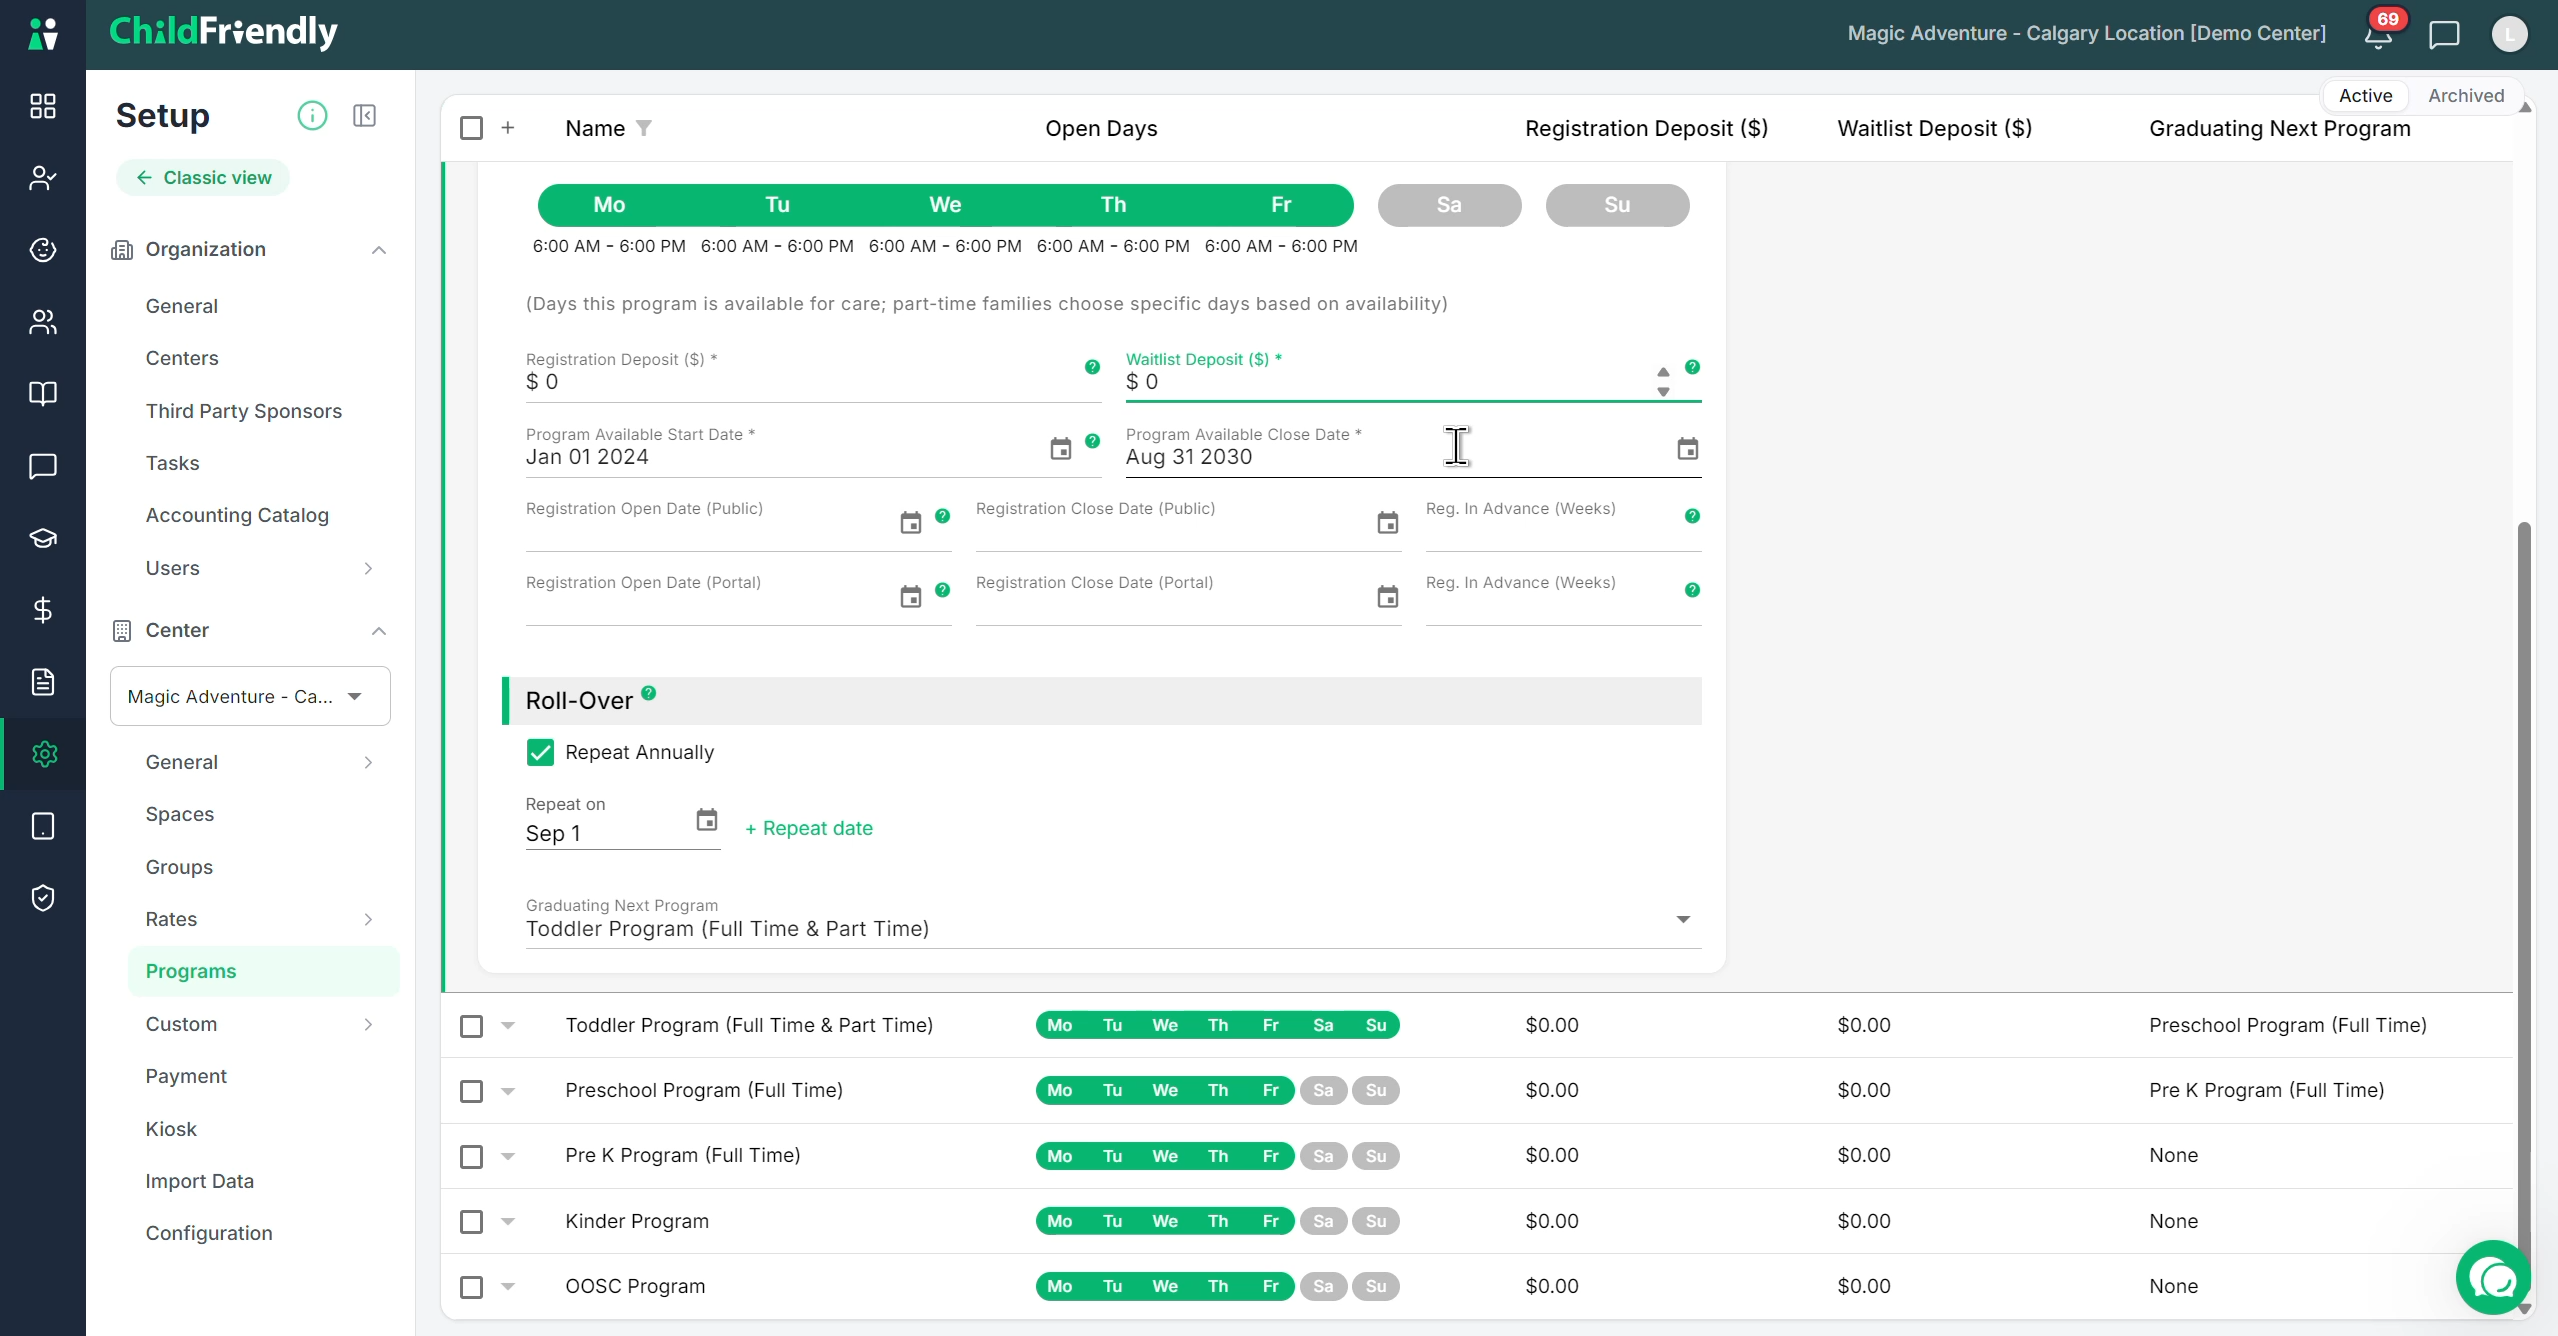
Program Close Date
The date when the program ends.
For ongoing programs, you can enter a distant future date.
For fixed-term programs (e.g., September to June), enter the appropriate end date (e.g., June 30 of that year).
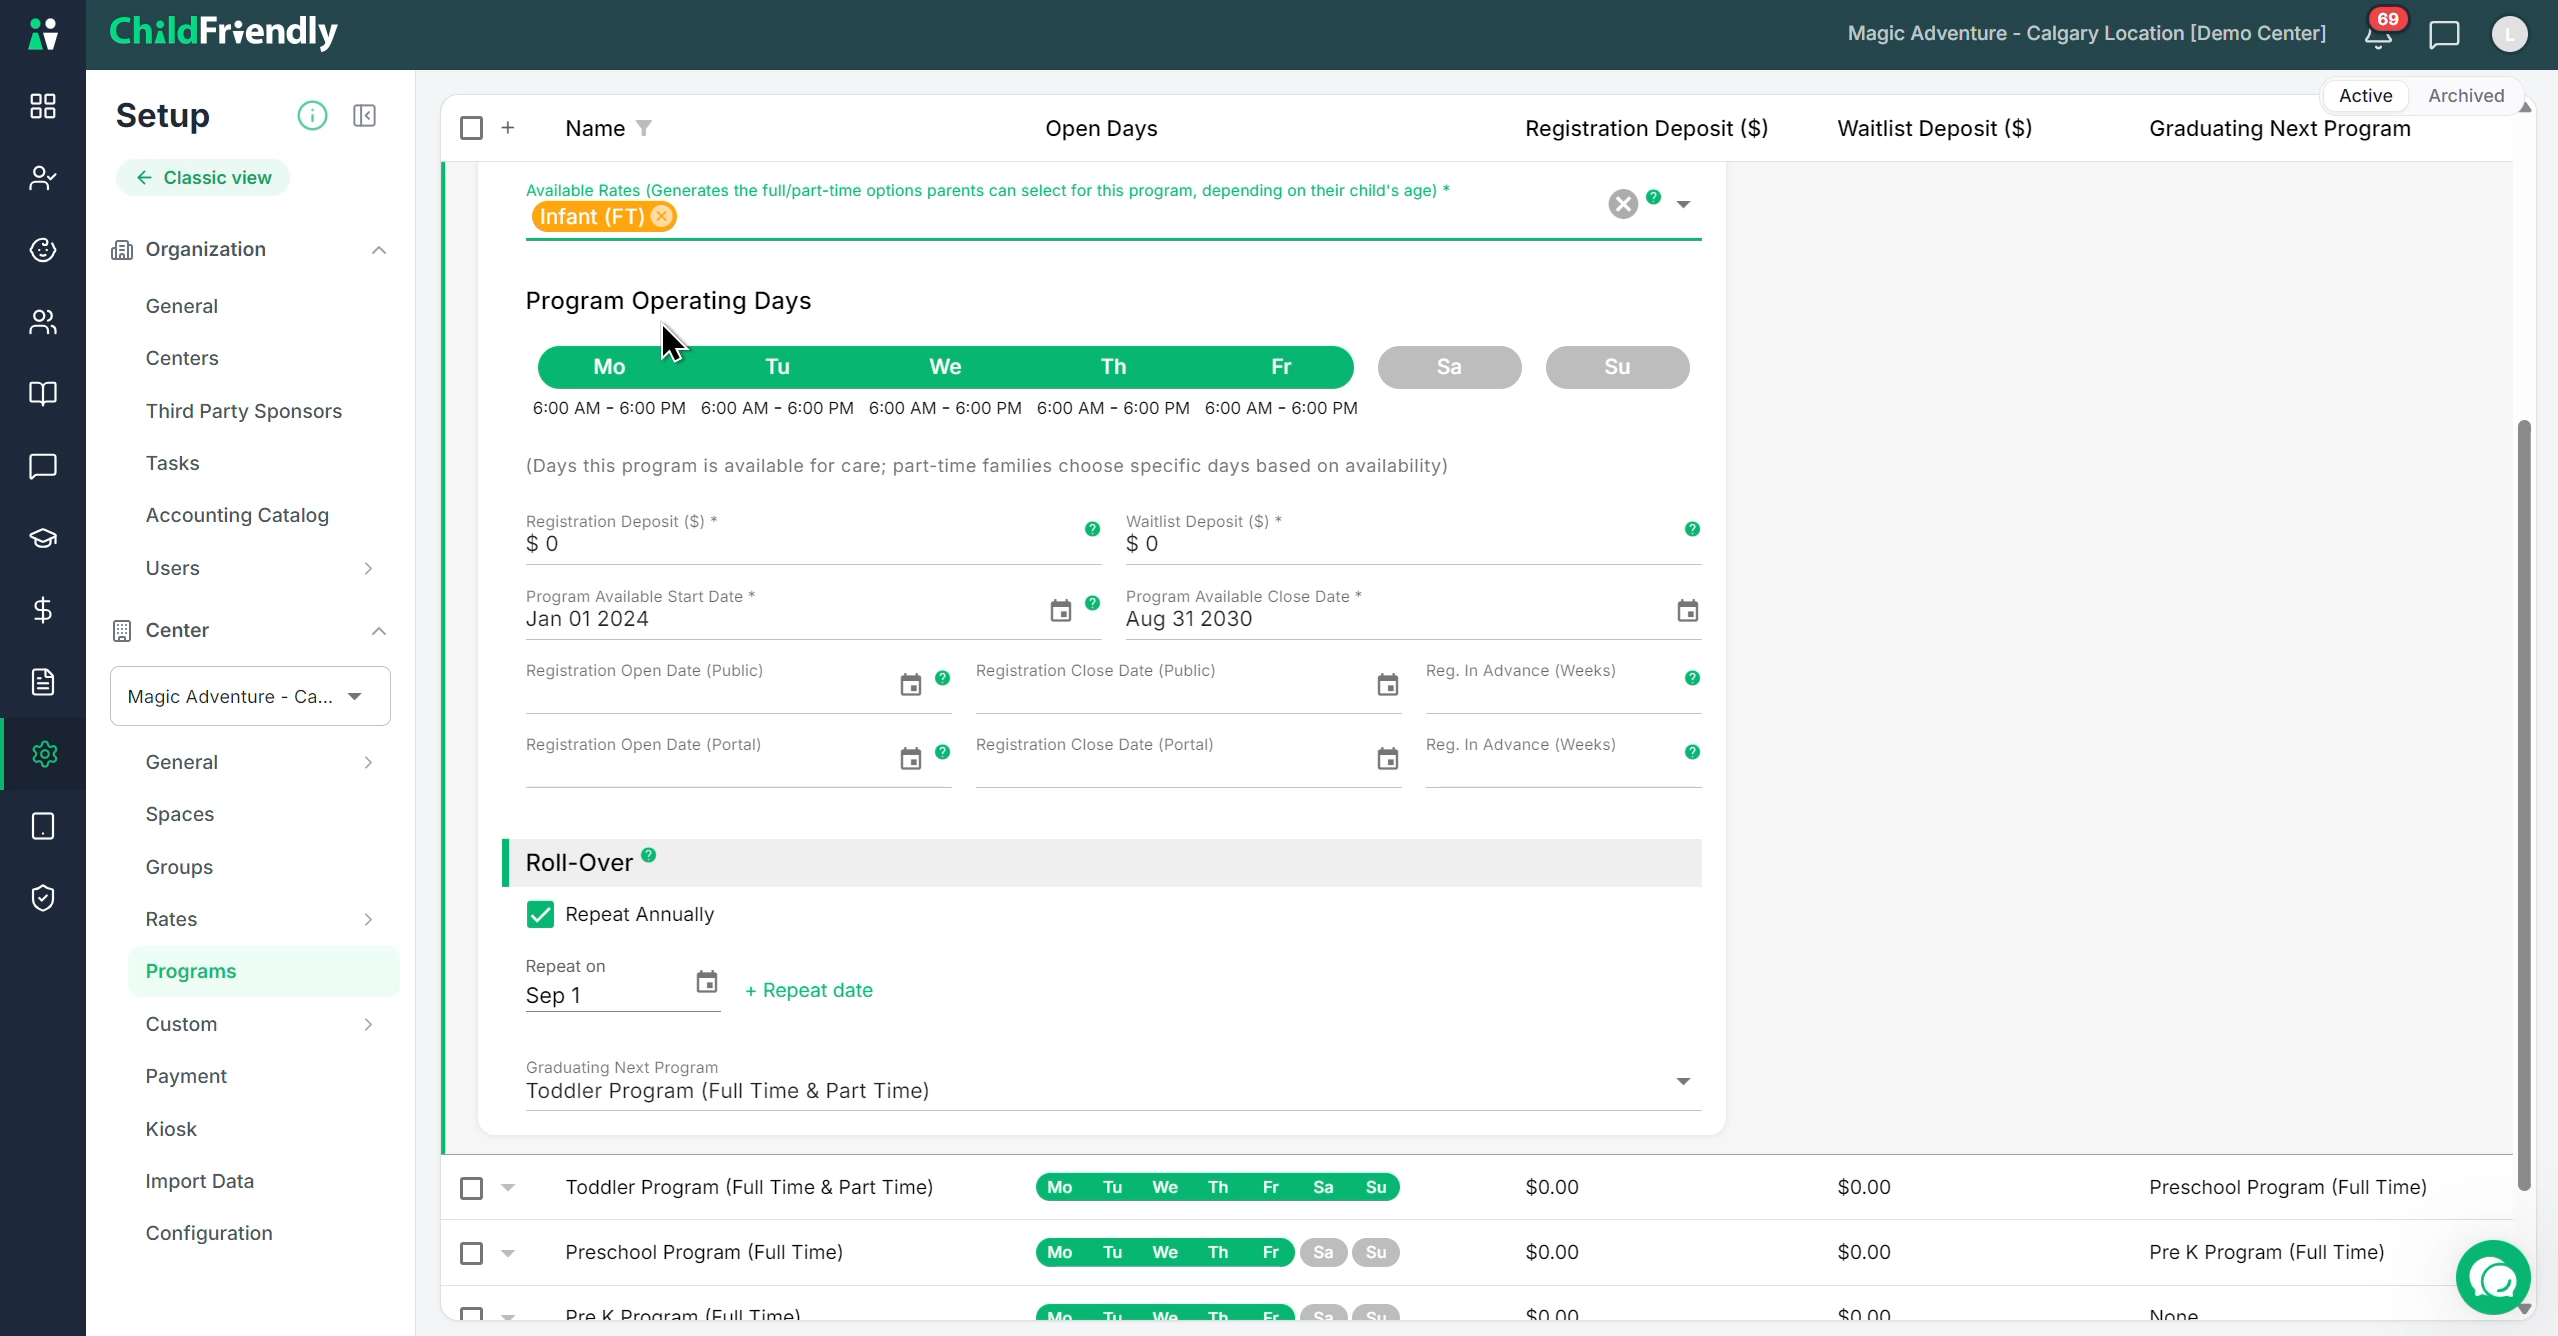
Registration Open Date / Registration Close Date (Public)
These define when public registration is available via:
The online URL
The embedded form on your website
Example:
Program start date: January 1, 2024
Registration open date: September 2023 (four months in advance), so you can be full by January 1.
Set a Registration Close Date for when you want to stop accepting registrations for that program.
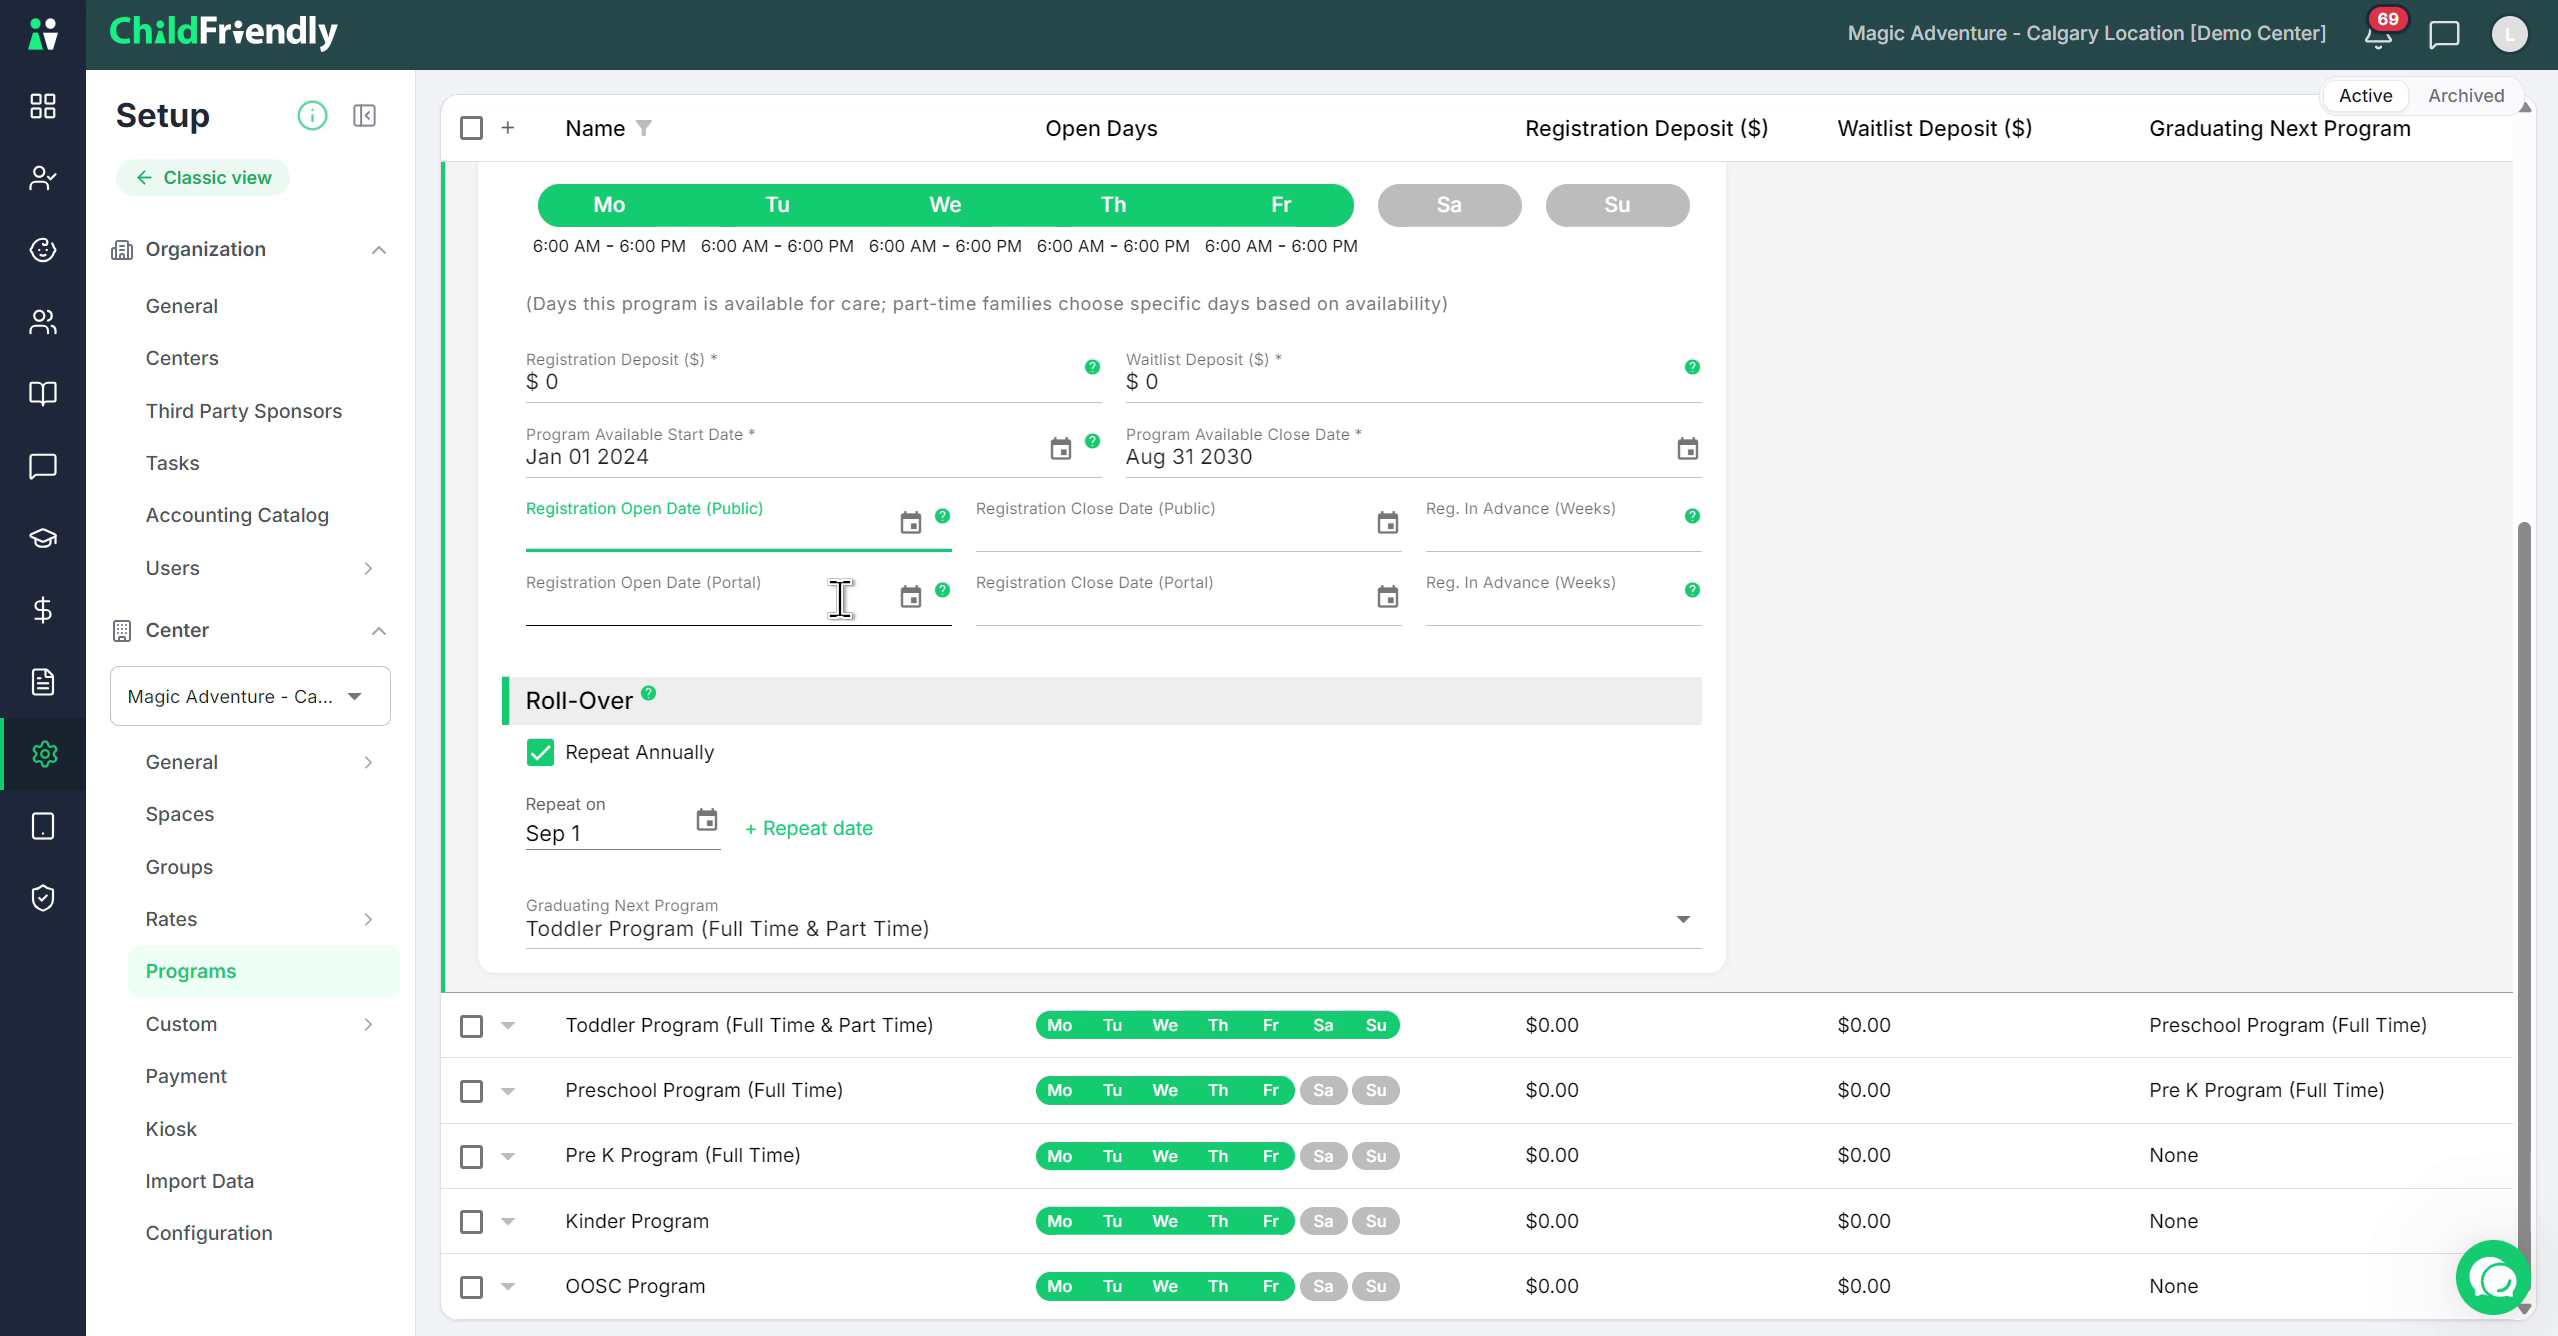
Priority Registration for Existing Families (Portal)
The system distinguishes public dates from portal access for existing families.
To offer pre-registration/priority registration:
Adjust the dates in the Registration Open and Close (Portal) fields so that current families can log into their ChildFriendly portal and register earlier than the public registration window.
Step 11: Limit How Far in Advance Parents Can Register
Use the Weeks in Advance setting to control long-term future registrations:
Enter the maximum number of weeks in advance parents can register (available for both public and portal)
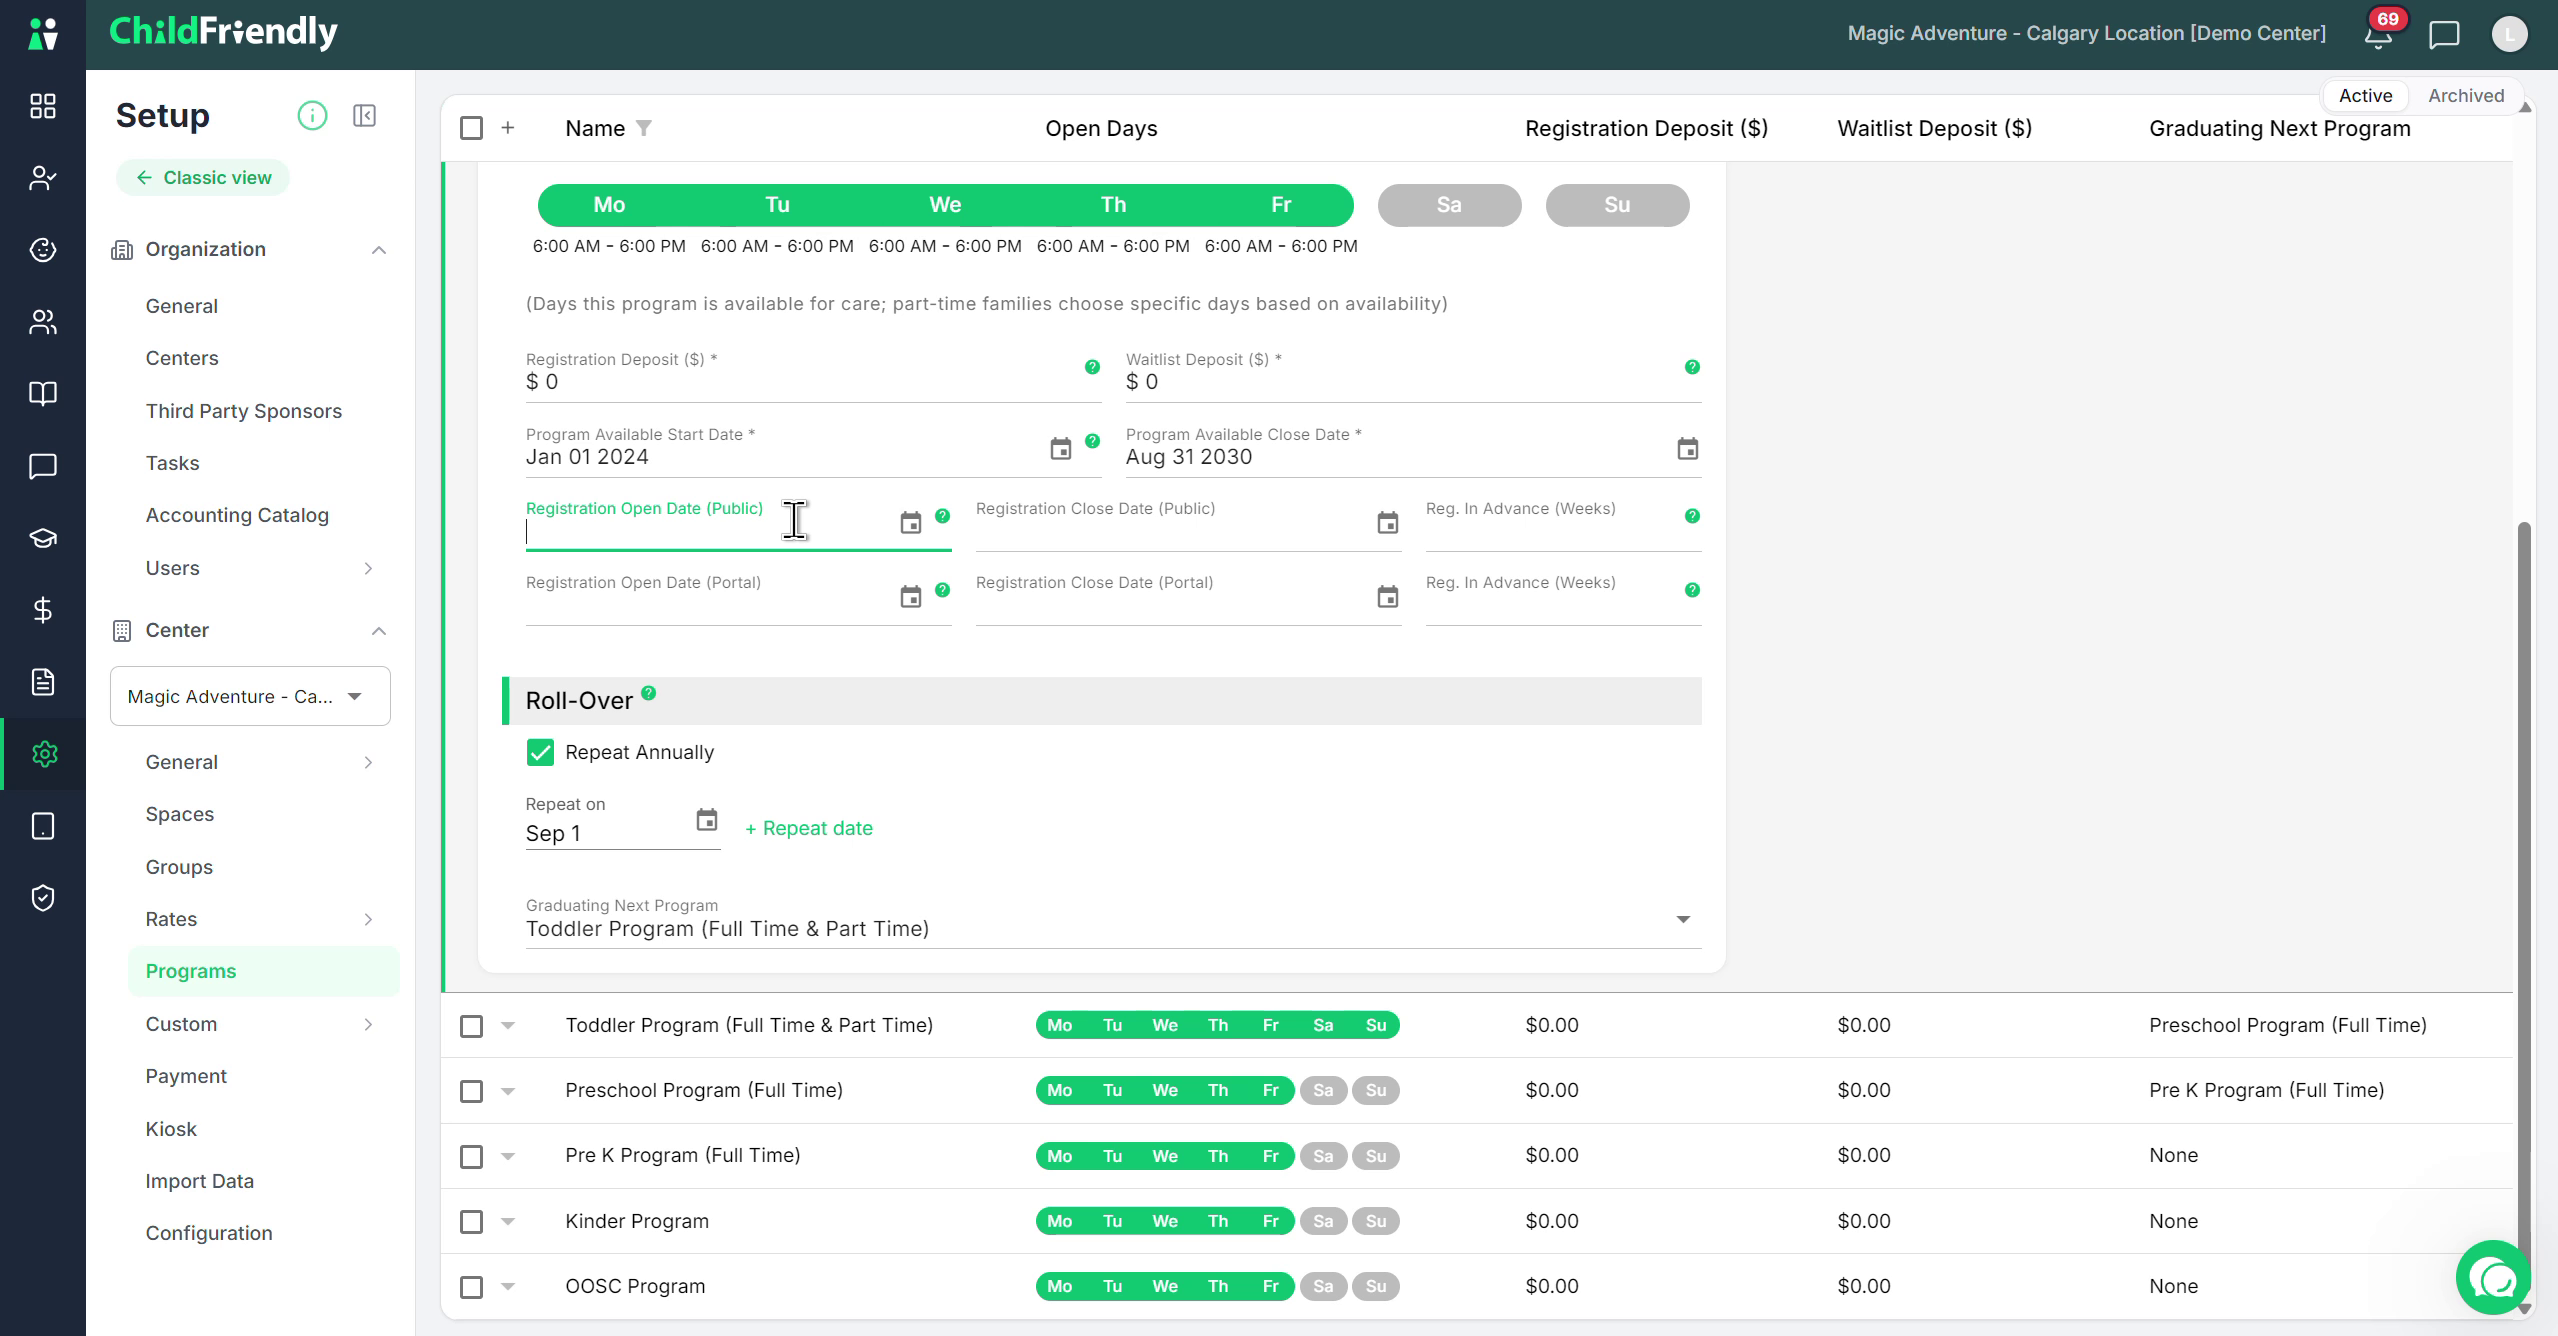
If a parent chooses a start date that is more than this number of weeks in the future from today:
They will only be offered the waitlist option, even if space is available.
This helps prevent:
Parents registering years into the future.
Long-term “held” spots that sit empty for months.
Example:
For a continuous childcare program, you might allow registrations only 4–8 weeks in advance so that space is managed efficiently.
Step 12: Configure Rollover to Automate Program Transitions
Use the Rollover section to automate moving children from one program to the next:
Open the Rollover section.
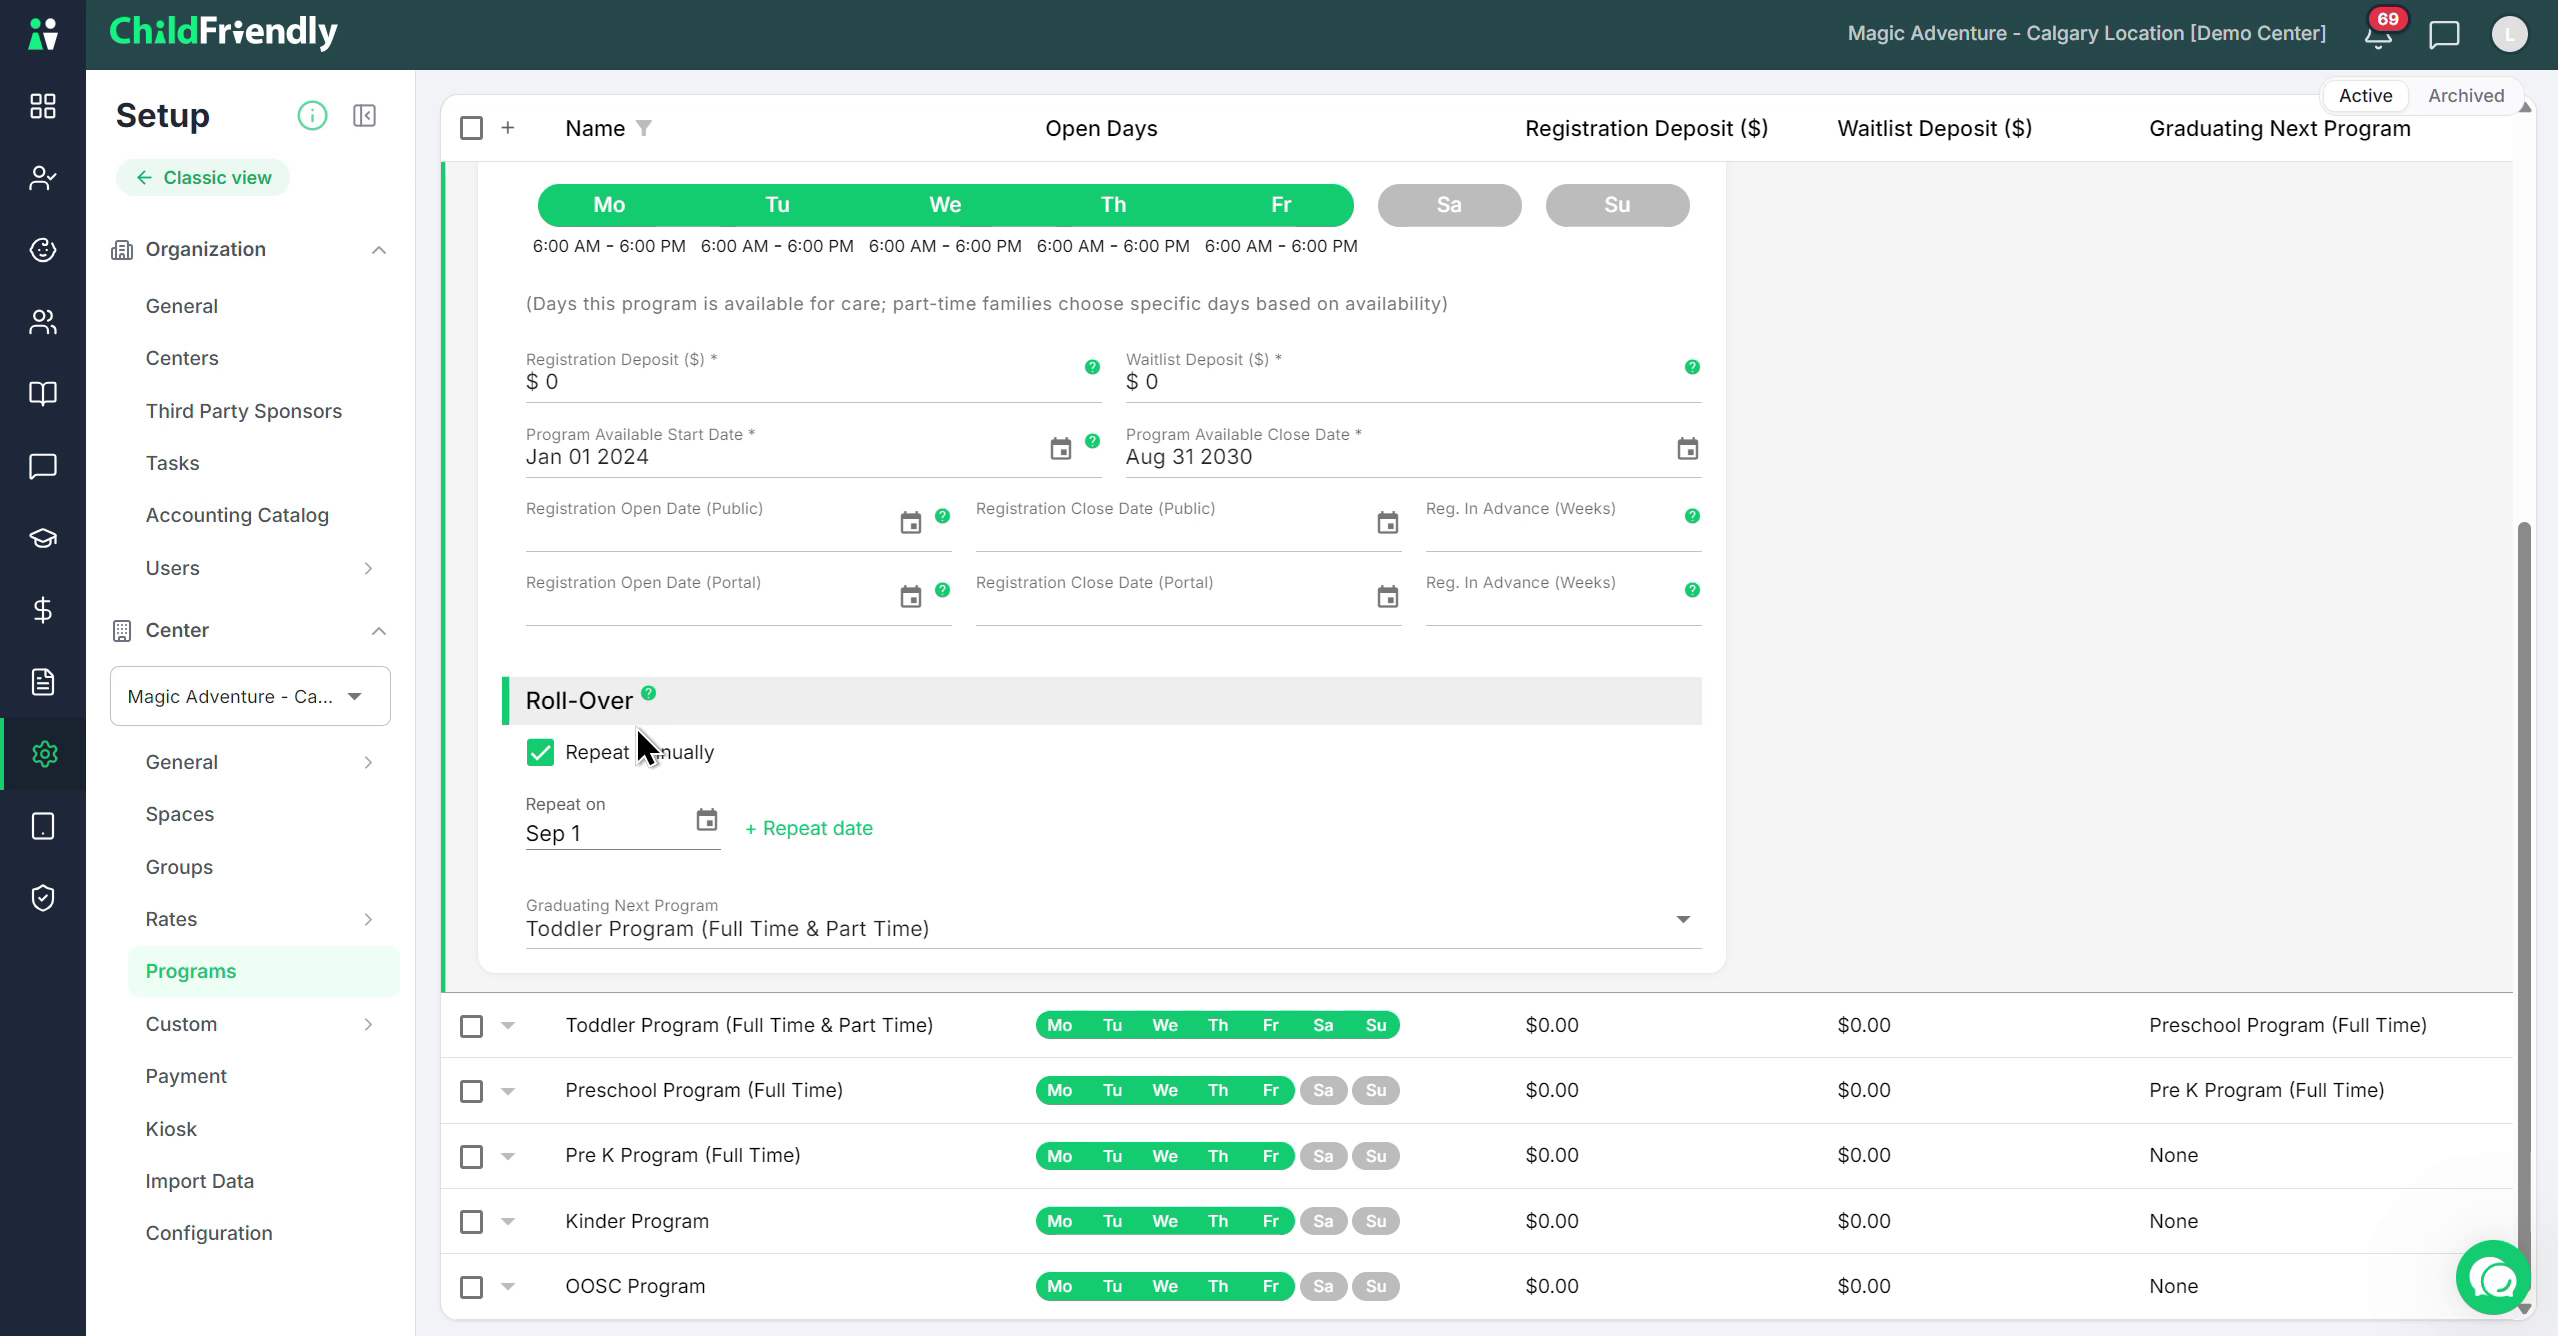
Set Rollover Dates
Choose the dates on which the system should check whether children still qualify for a program (based on age or grade).
Example:
Every September 1, ChildFriendly checks if children in the Infant program are still within the registration age range set for that program.
If a child is no longer an infant as of that date (e.g., they no longer meet the 12–18 months age range), the SMART enrollment system recommends that they move or "graduate" to the next program (see point 2 below).
You will see these recommendations under the registration section of the child's profile, via the Families module.
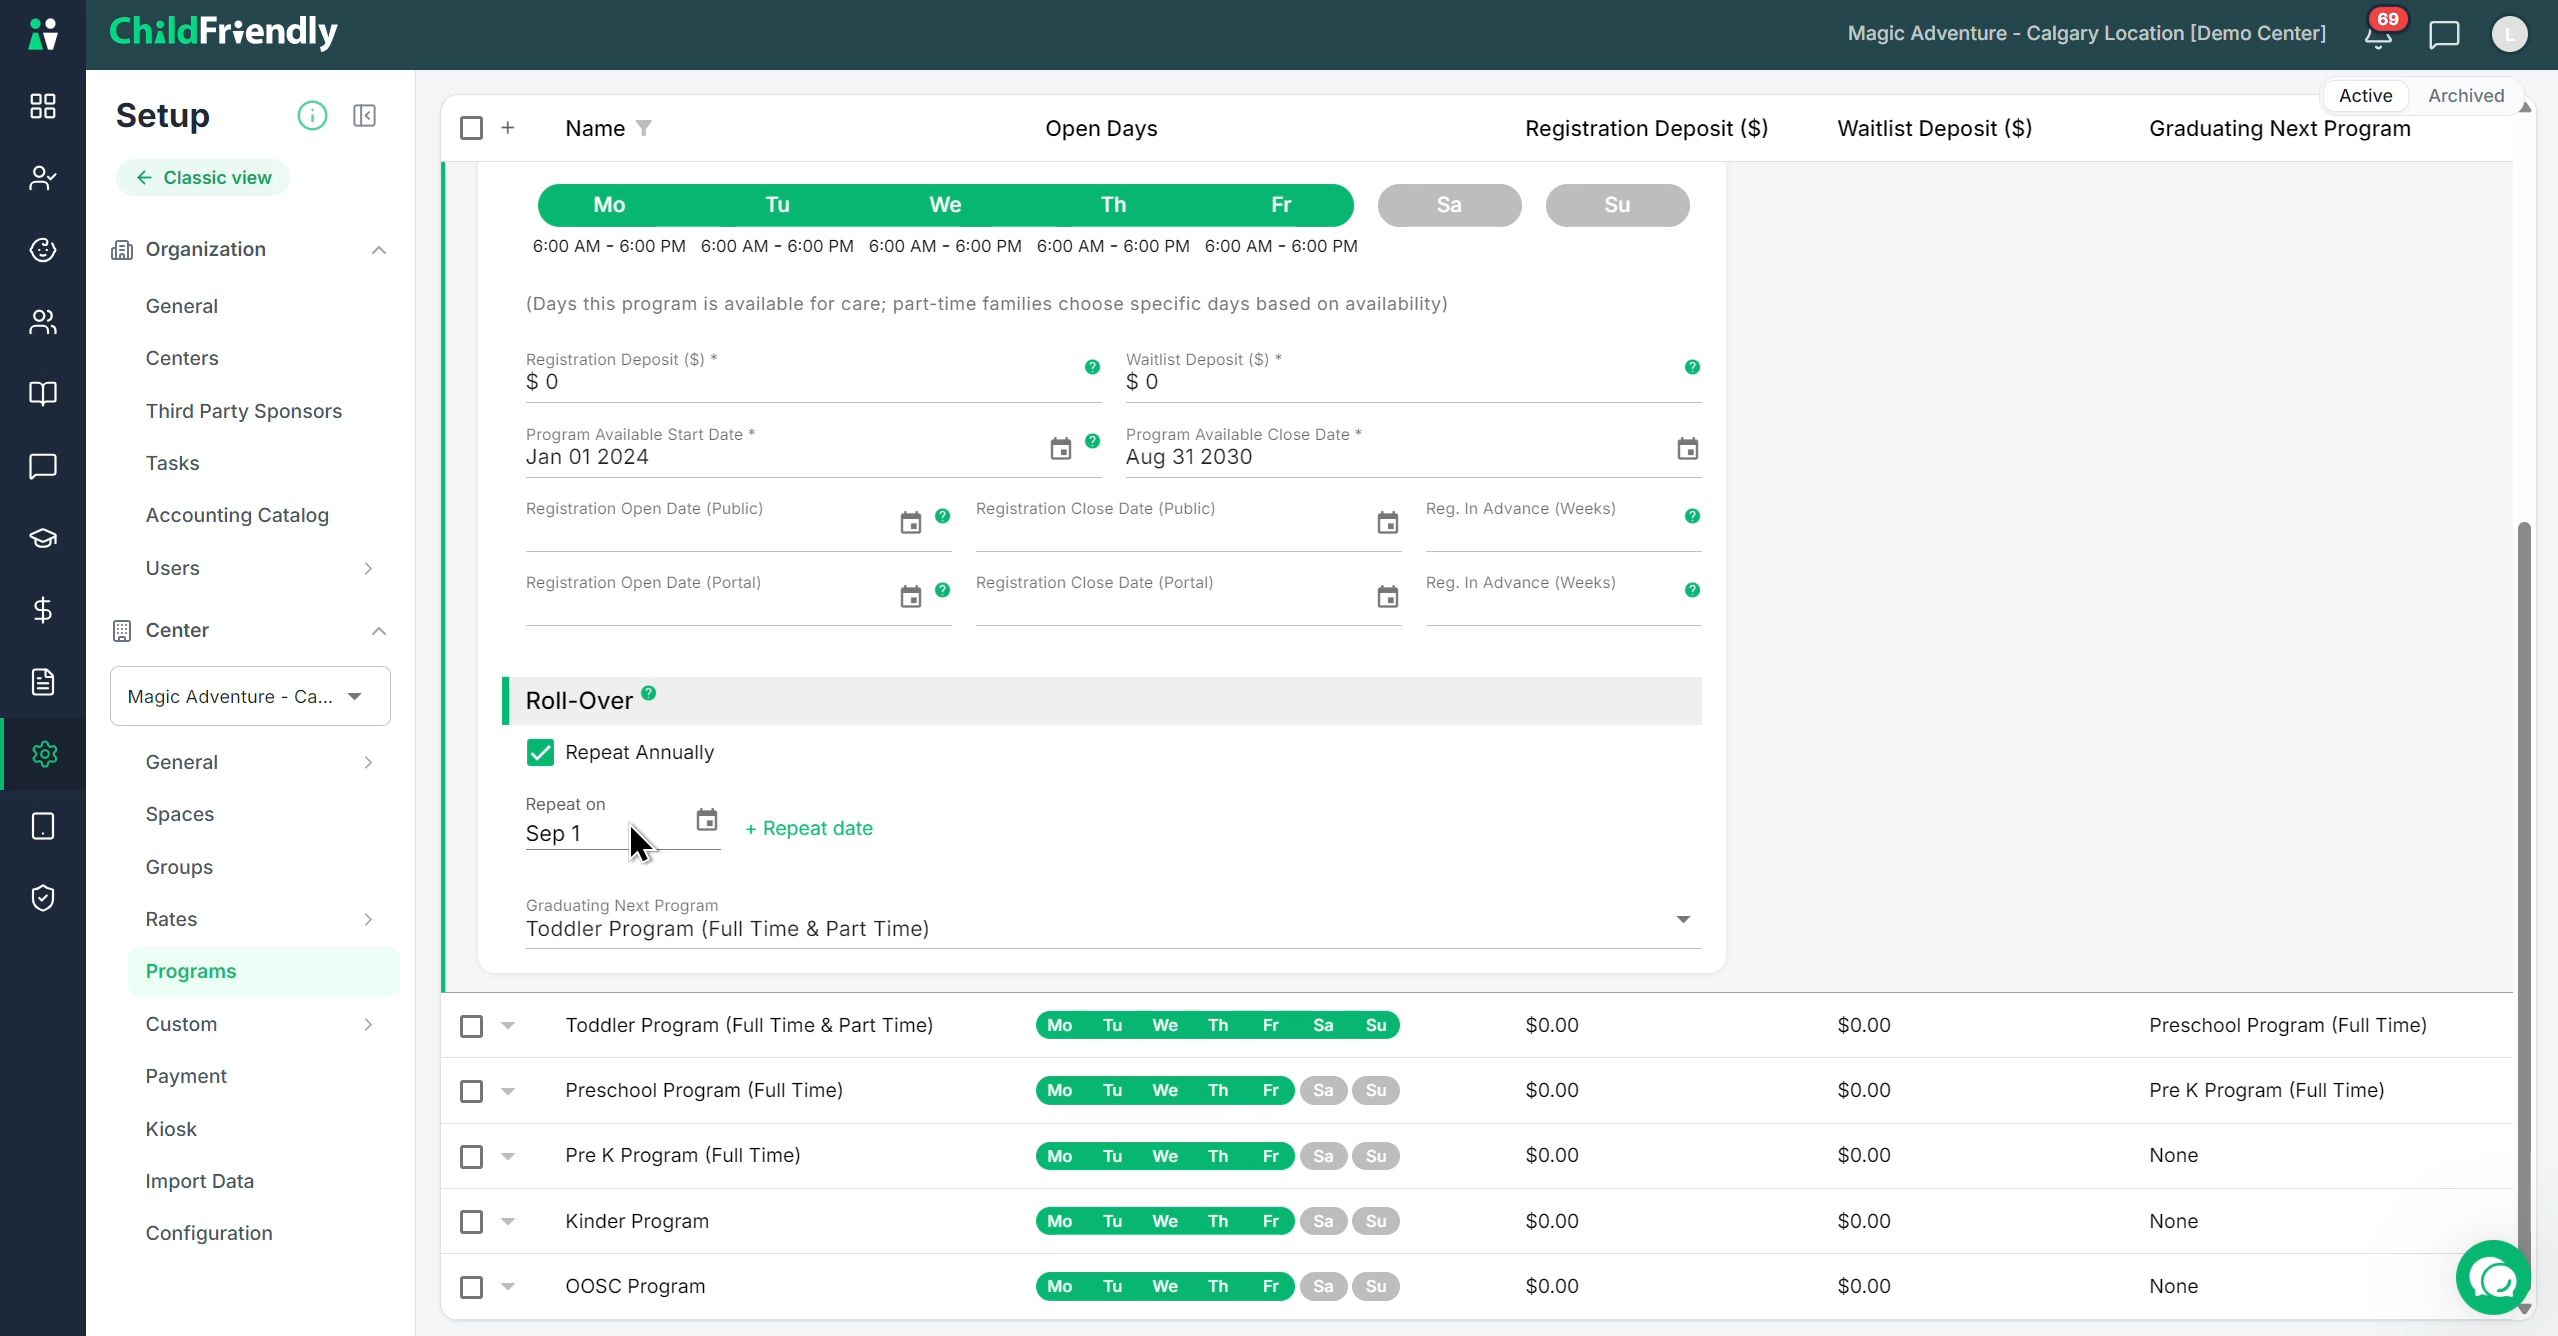
You can add multiple dates (e.g., January 1 and September 1) if you like to move children up more than once a year. Some centers, even set it to check monthly, while others prefer less group transitions throughout the year and opt for just every Sepetmber, like a school.
Select the Graduating (Next) Program
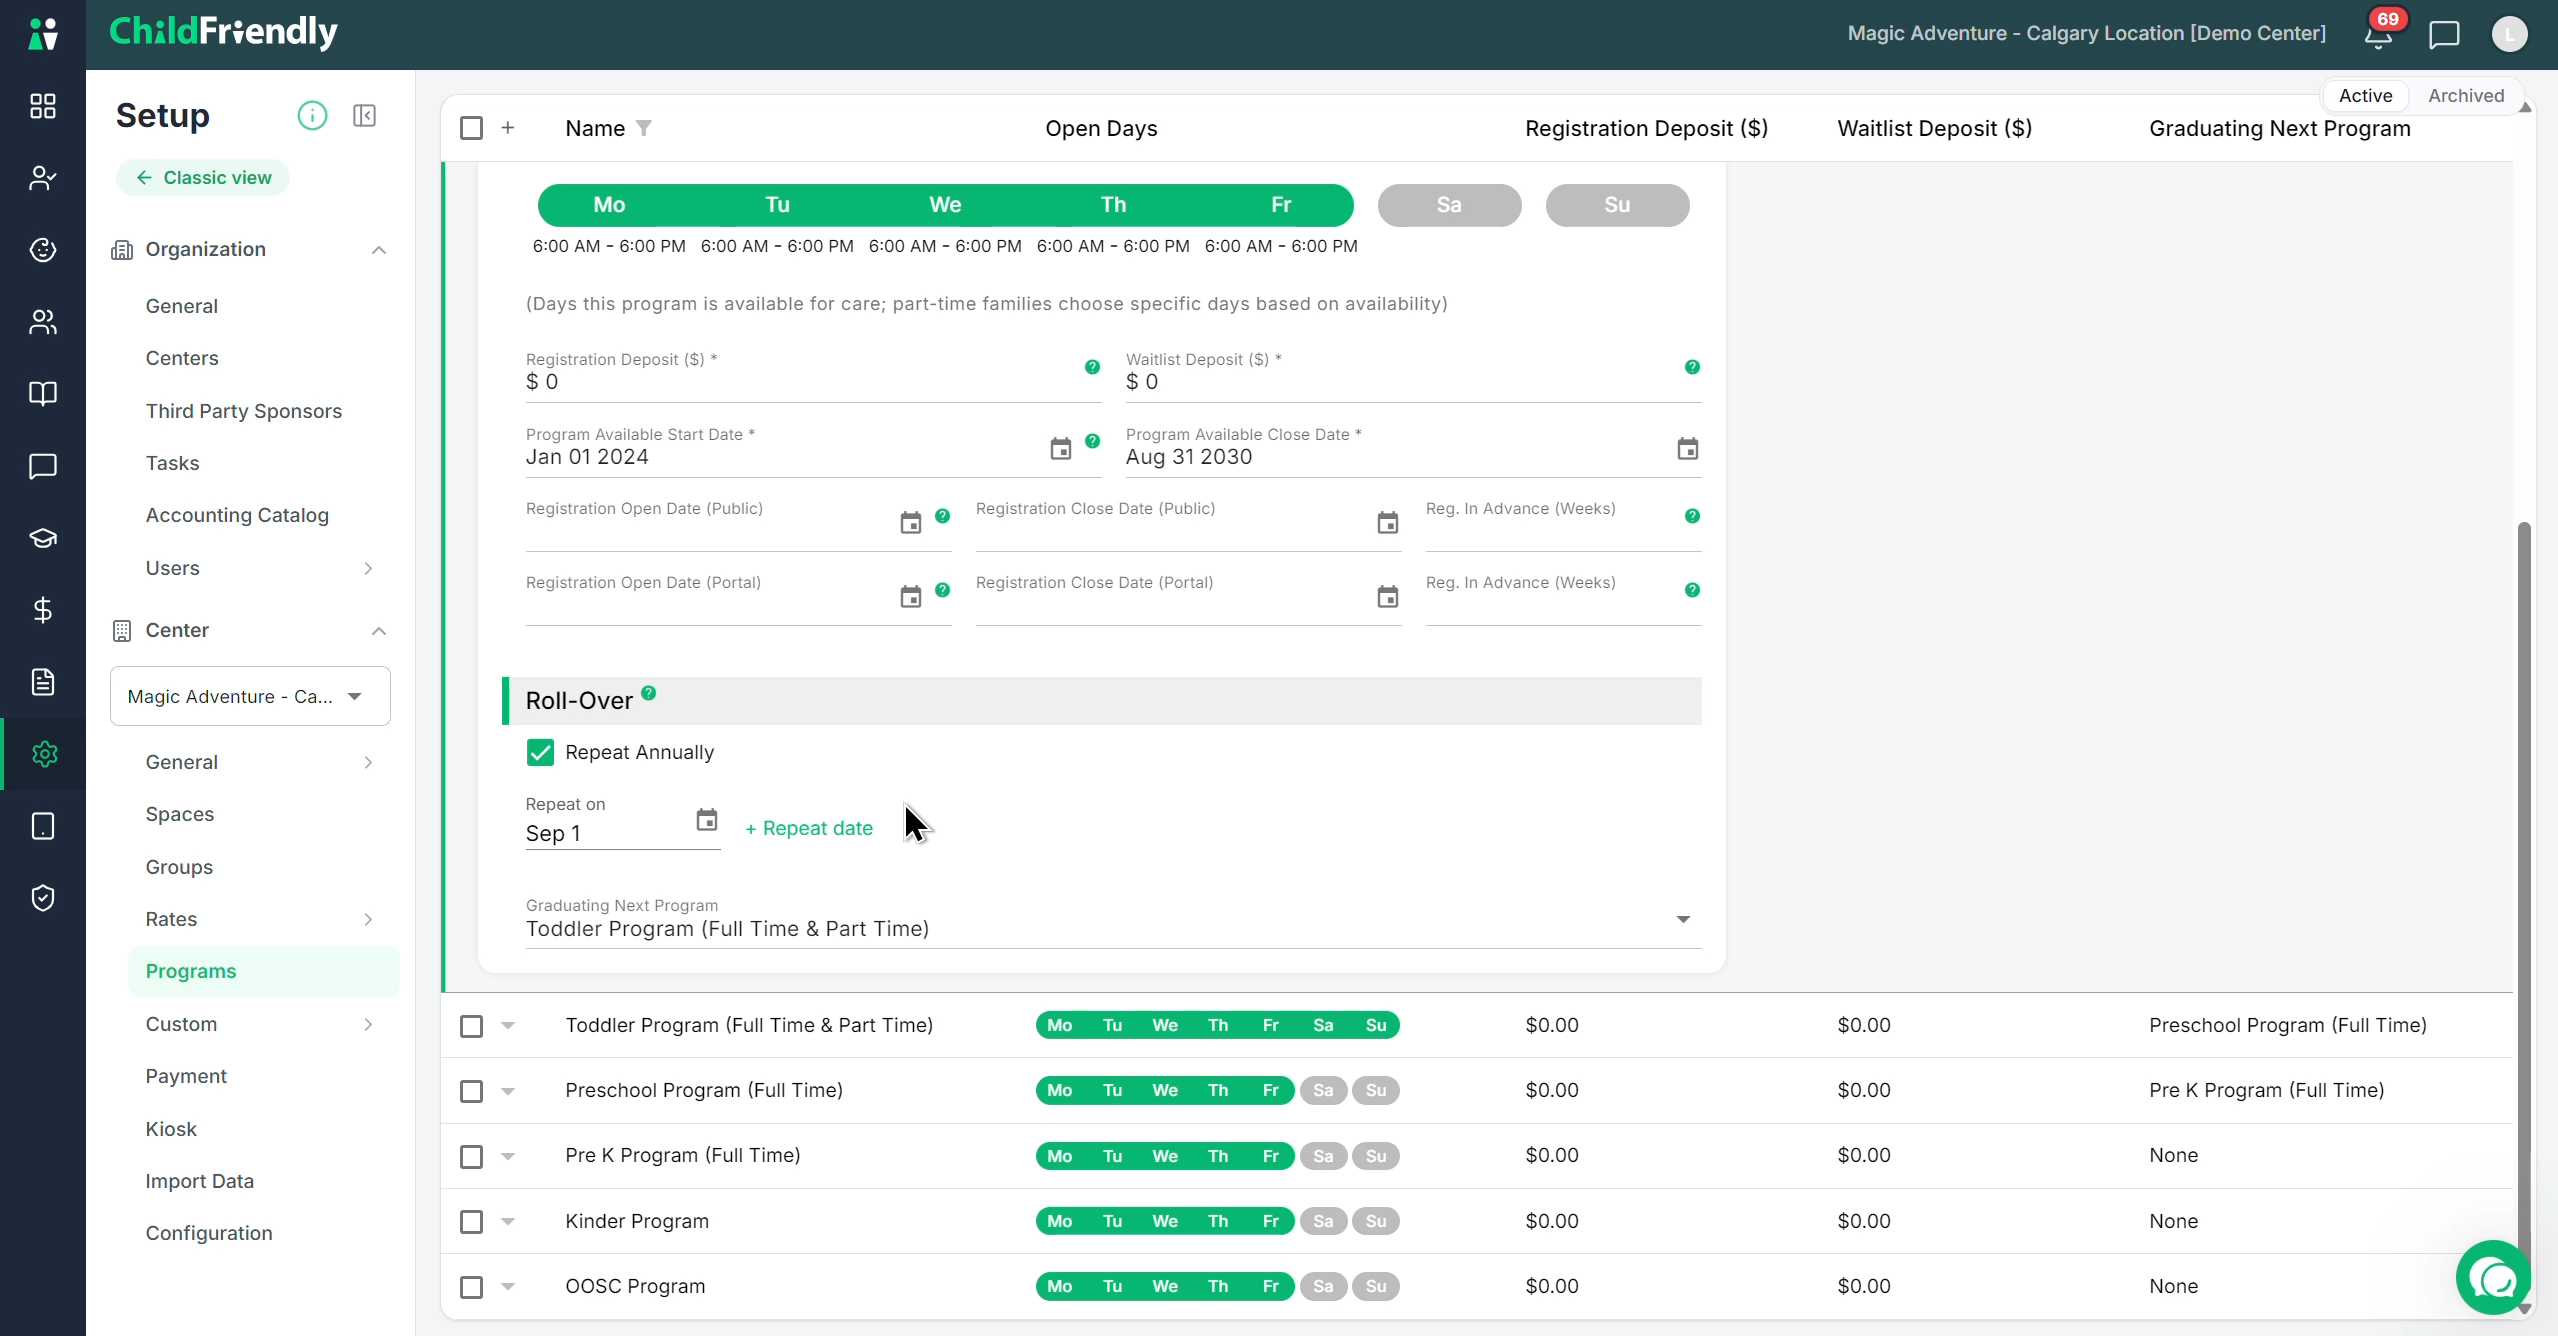
Specify the next program for children who age out of that program (e.g., from Infant to Toddler).
The system will then:
Automatically recommend moving these children into the next program on the specified rollover dates.
Help you keep enrollment full and accurate.
Make forecasting and reporting much easier and reduce administrative workload.
Step 13: Finalize Programs and Continue With Remaining Setup
Once you have configured all programs (names, ages, groups, rates, dates, deposits, weeks in advance, and rollover):
Review each program to ensure the information is accurate and parent-friendly.
Confirm that all required fields are completed and that rollover paths are correct.
You are almost done with your center setup. Continue by watching the next videos to complete the remaining configuration steps for your center.