How to Authenticate your Domain & Configure Automated Emails
This article explains how to authenticate your email domain and configure automated emails in ChildFriendly so that messages are sent directly from your center's professional email address and are less likely to be marked as spam. You will learn how to: - Authenticate Your Domain: Set up secure, professional email delivery to keep your messages out of parent spam folders. - Automate the Enrollment Pipeline: Configure automated emails that trigger seamlessly at every stage of the family journey—starting from the initial Inquiry, moving to the Tour, all the way to fully Registered. - Save Administrative Time: Keep parents consistently informed and engaged throughout the entire enrollment process without requiring manual follow-ups from your front office staff.
Last updated About 2 months ago
Step 1: Open the Setup Module and Select Your Center
From the left-hand side menu, open the Setup module.
Then select the specific center you want to configure.
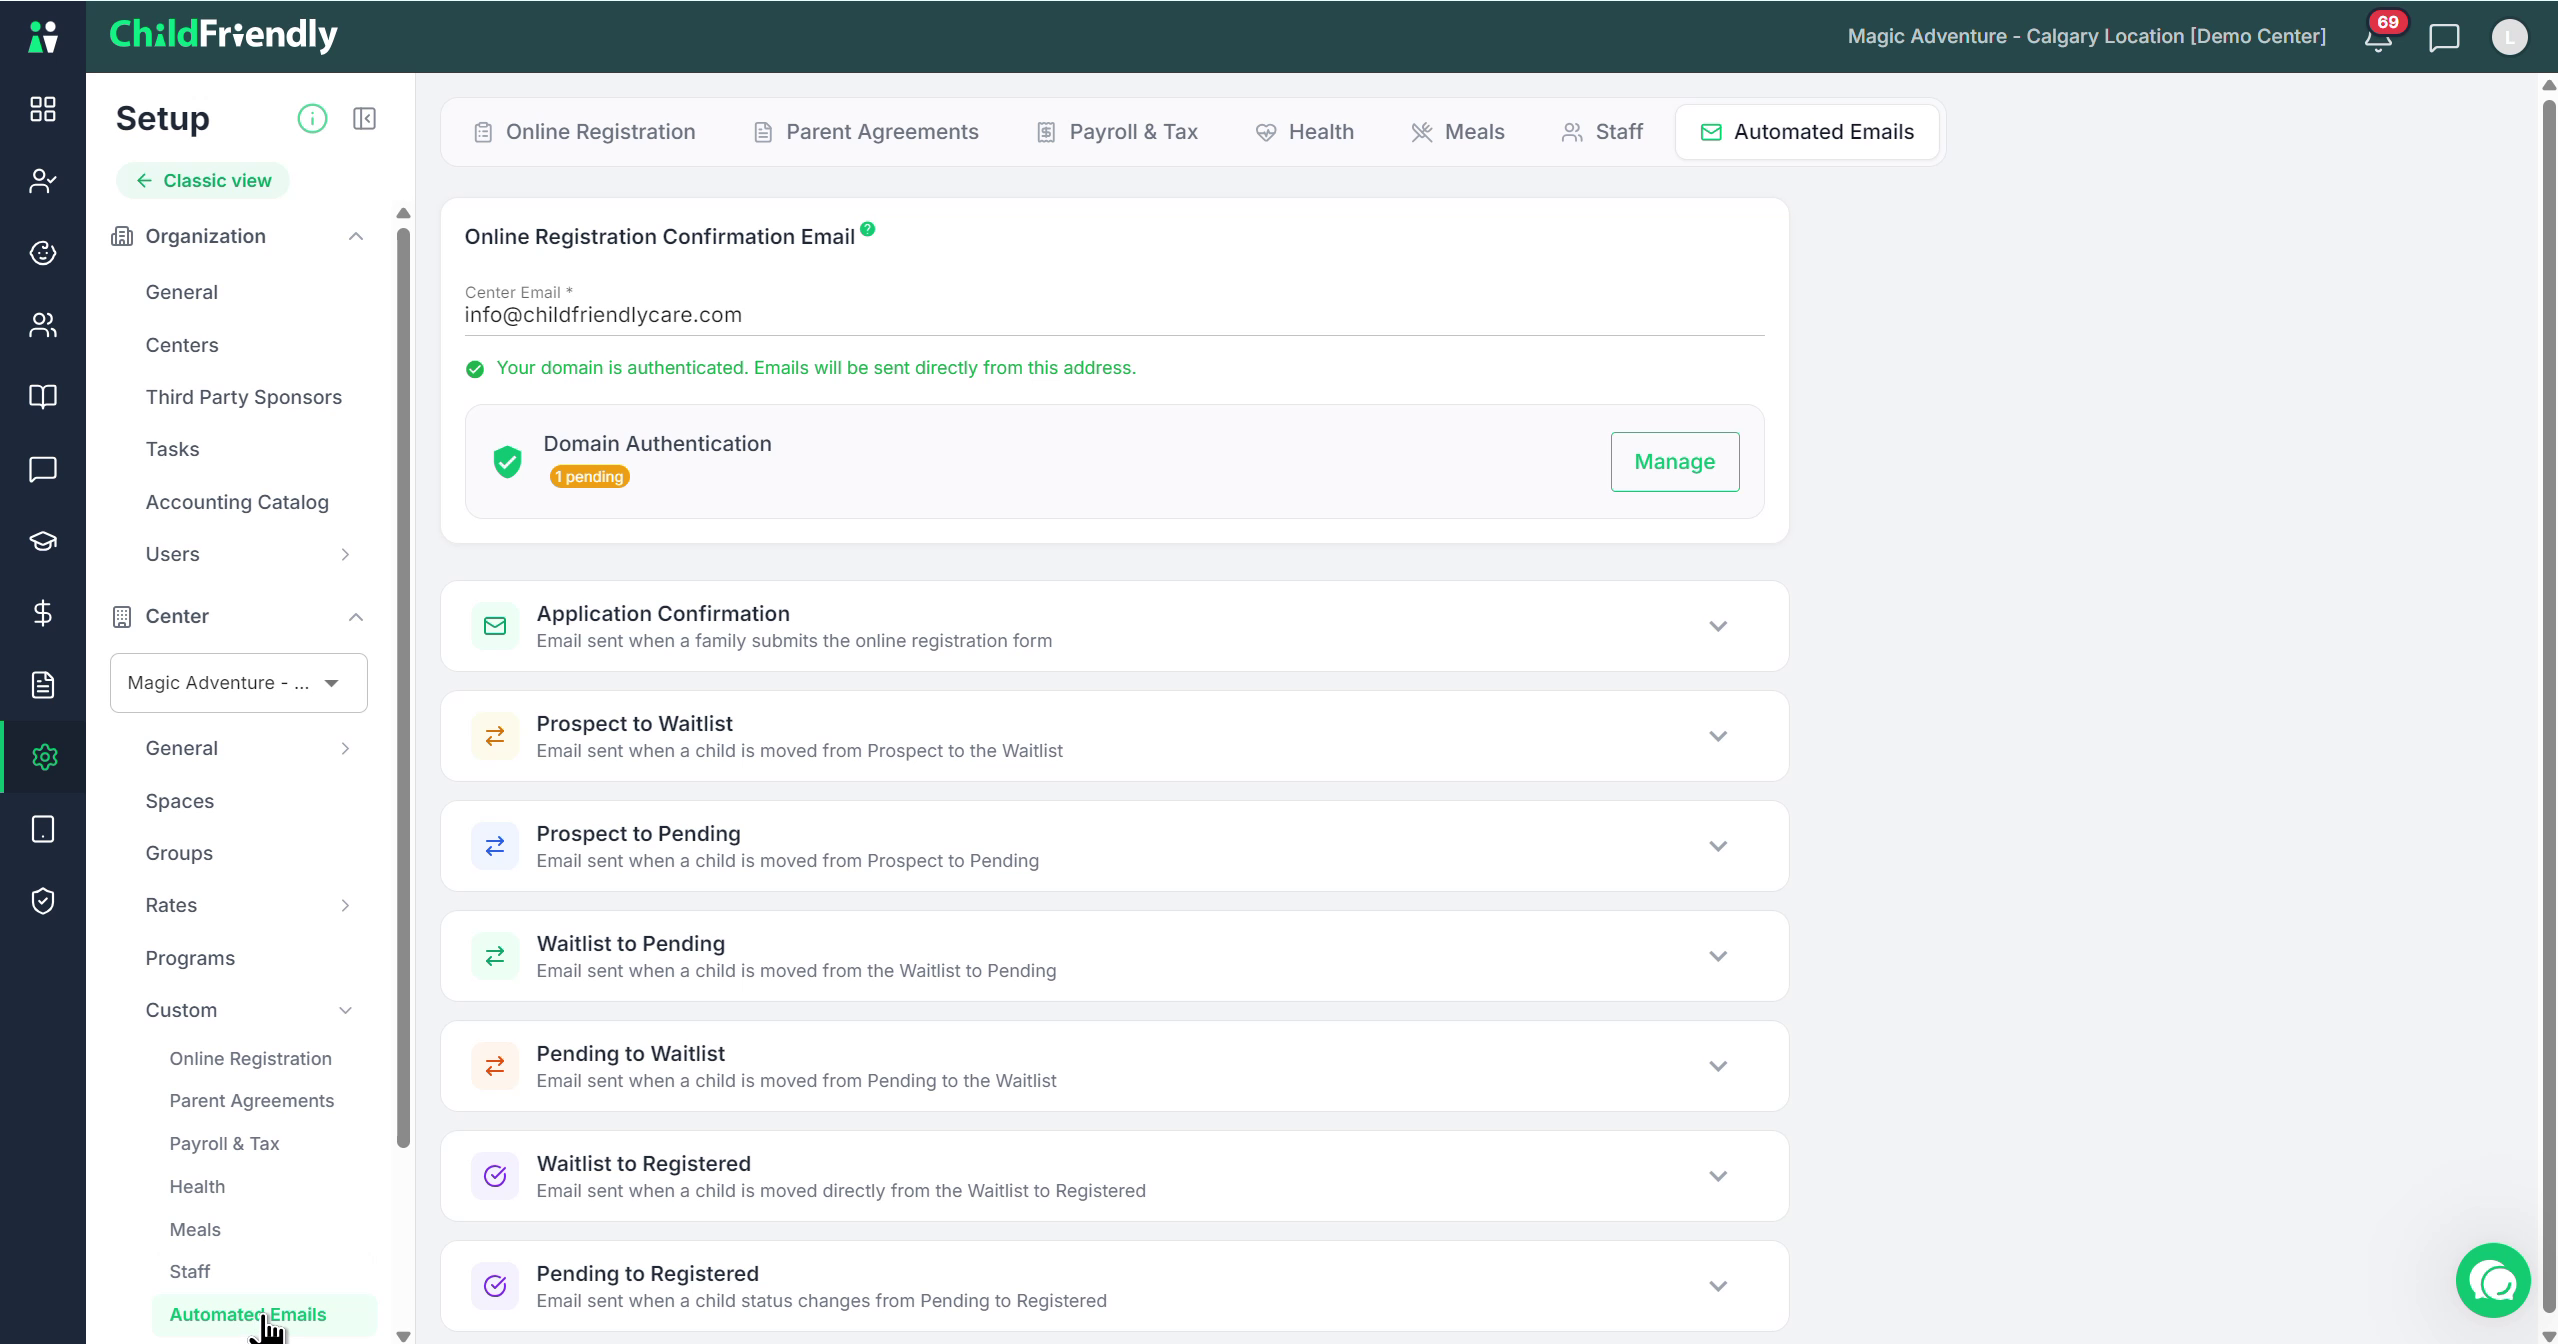
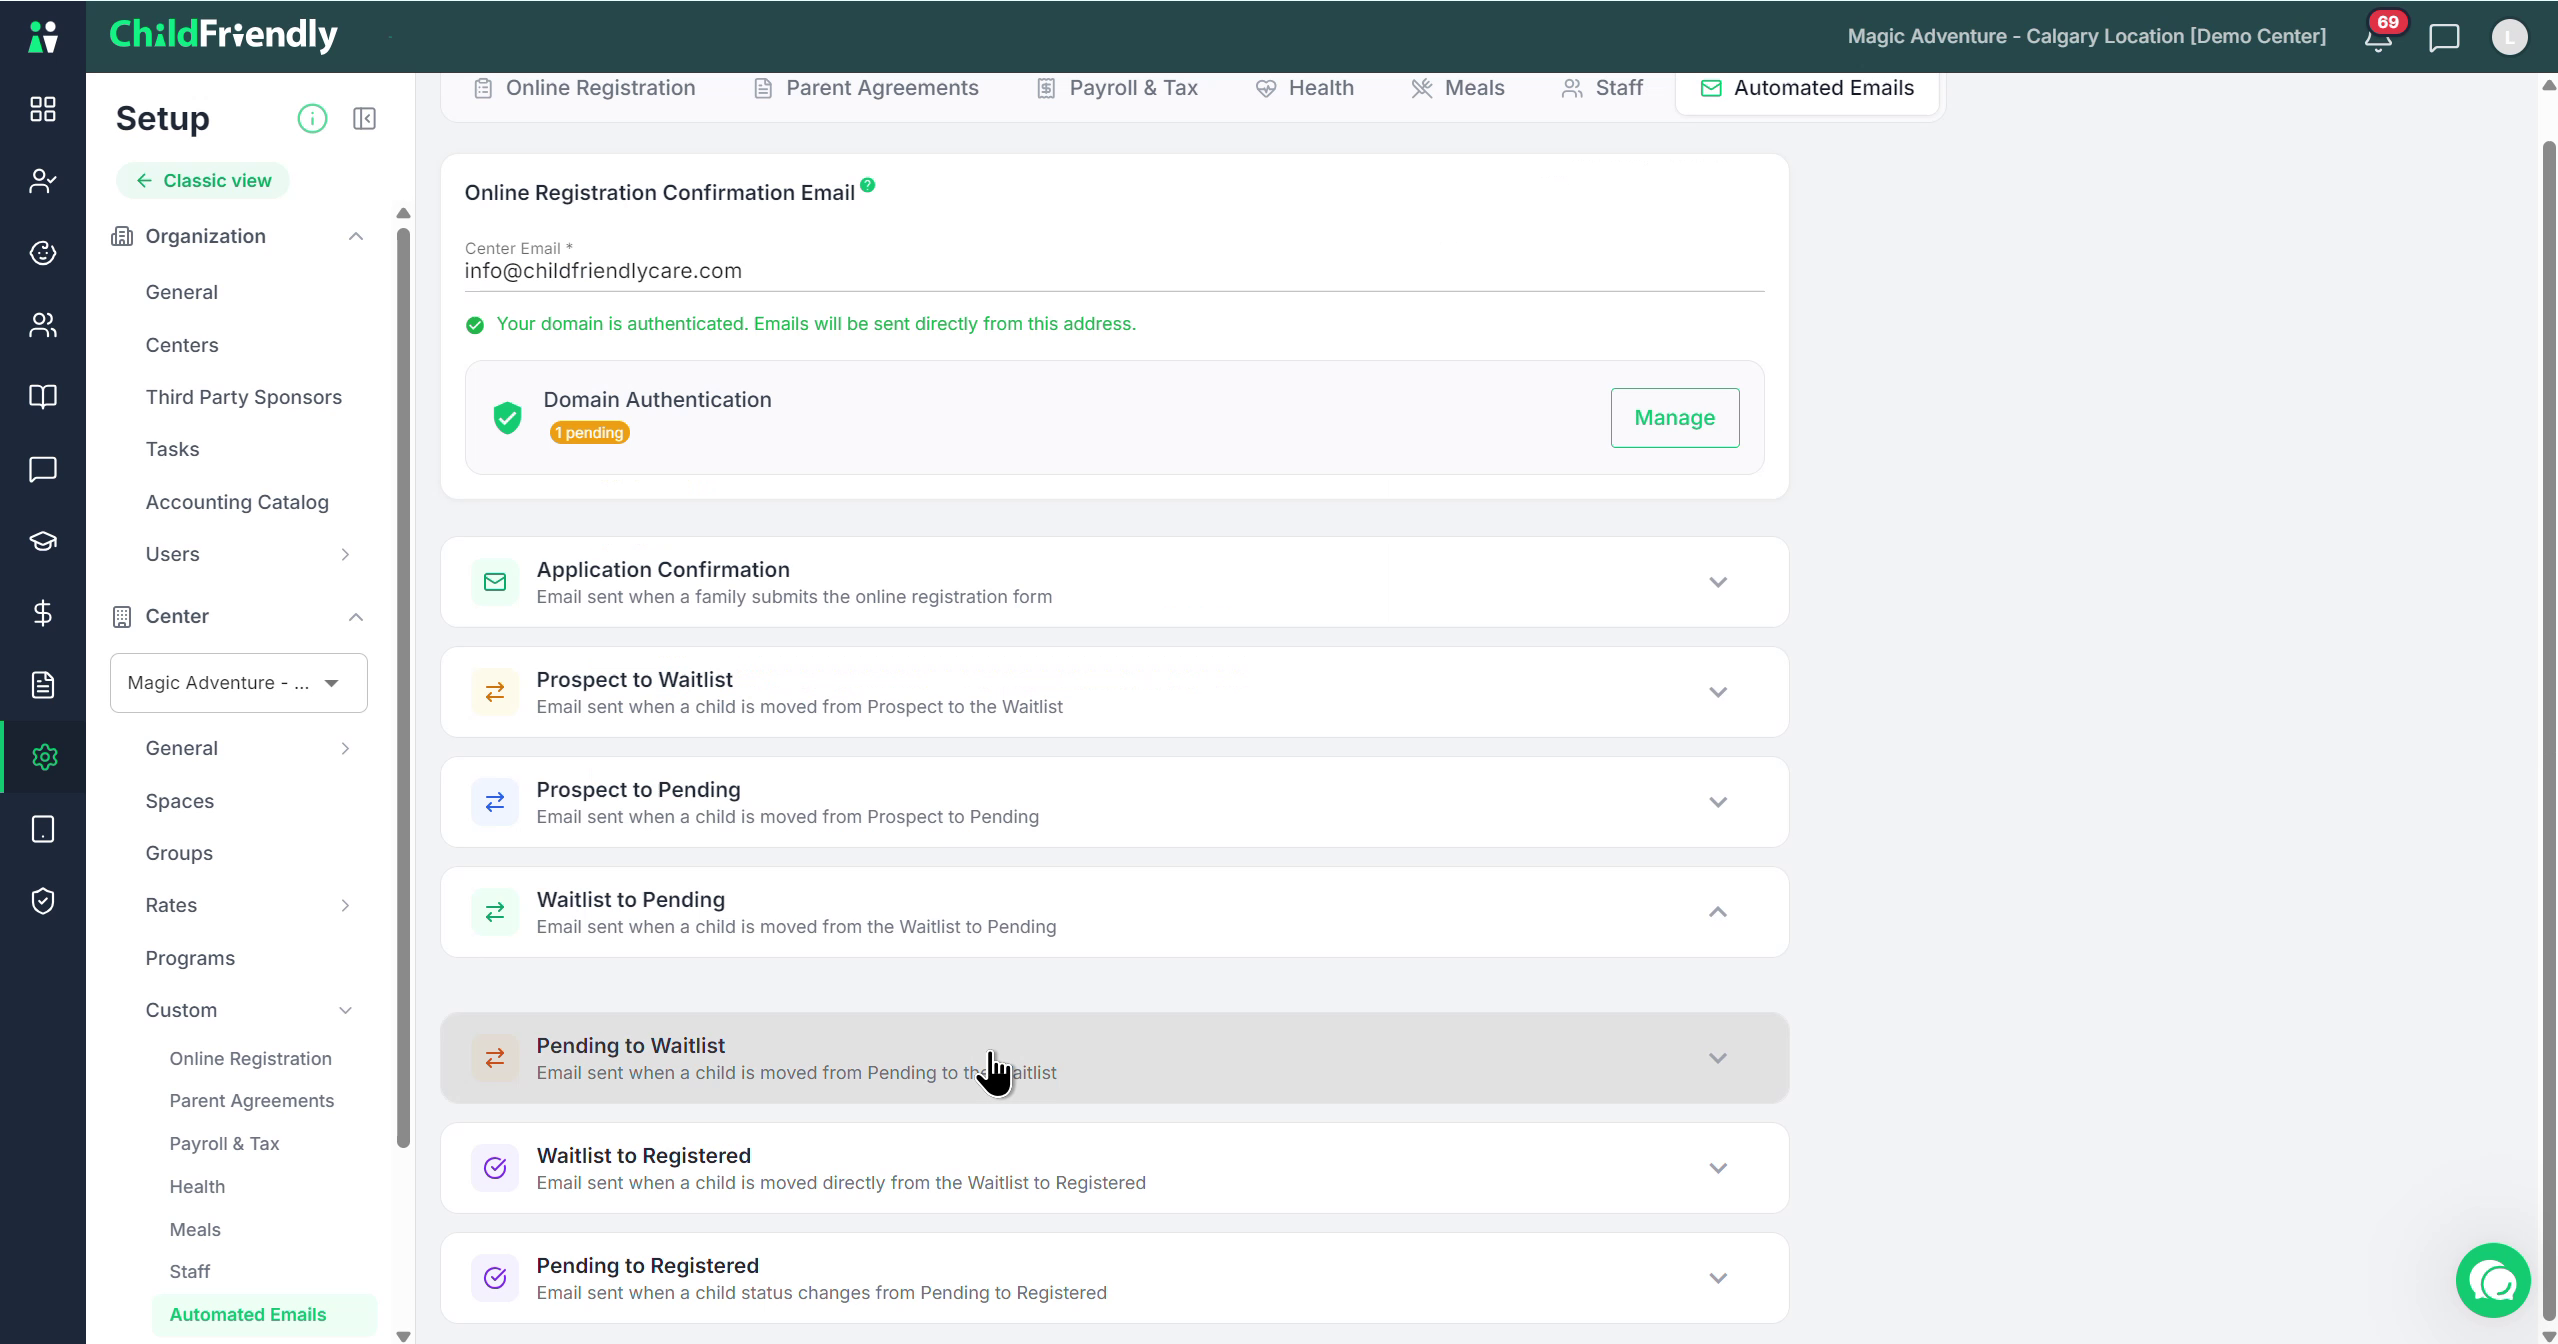
Under the Custom section, go to Automated Emails.
Step 2: Configure the Center Email and Open Domain Authentication
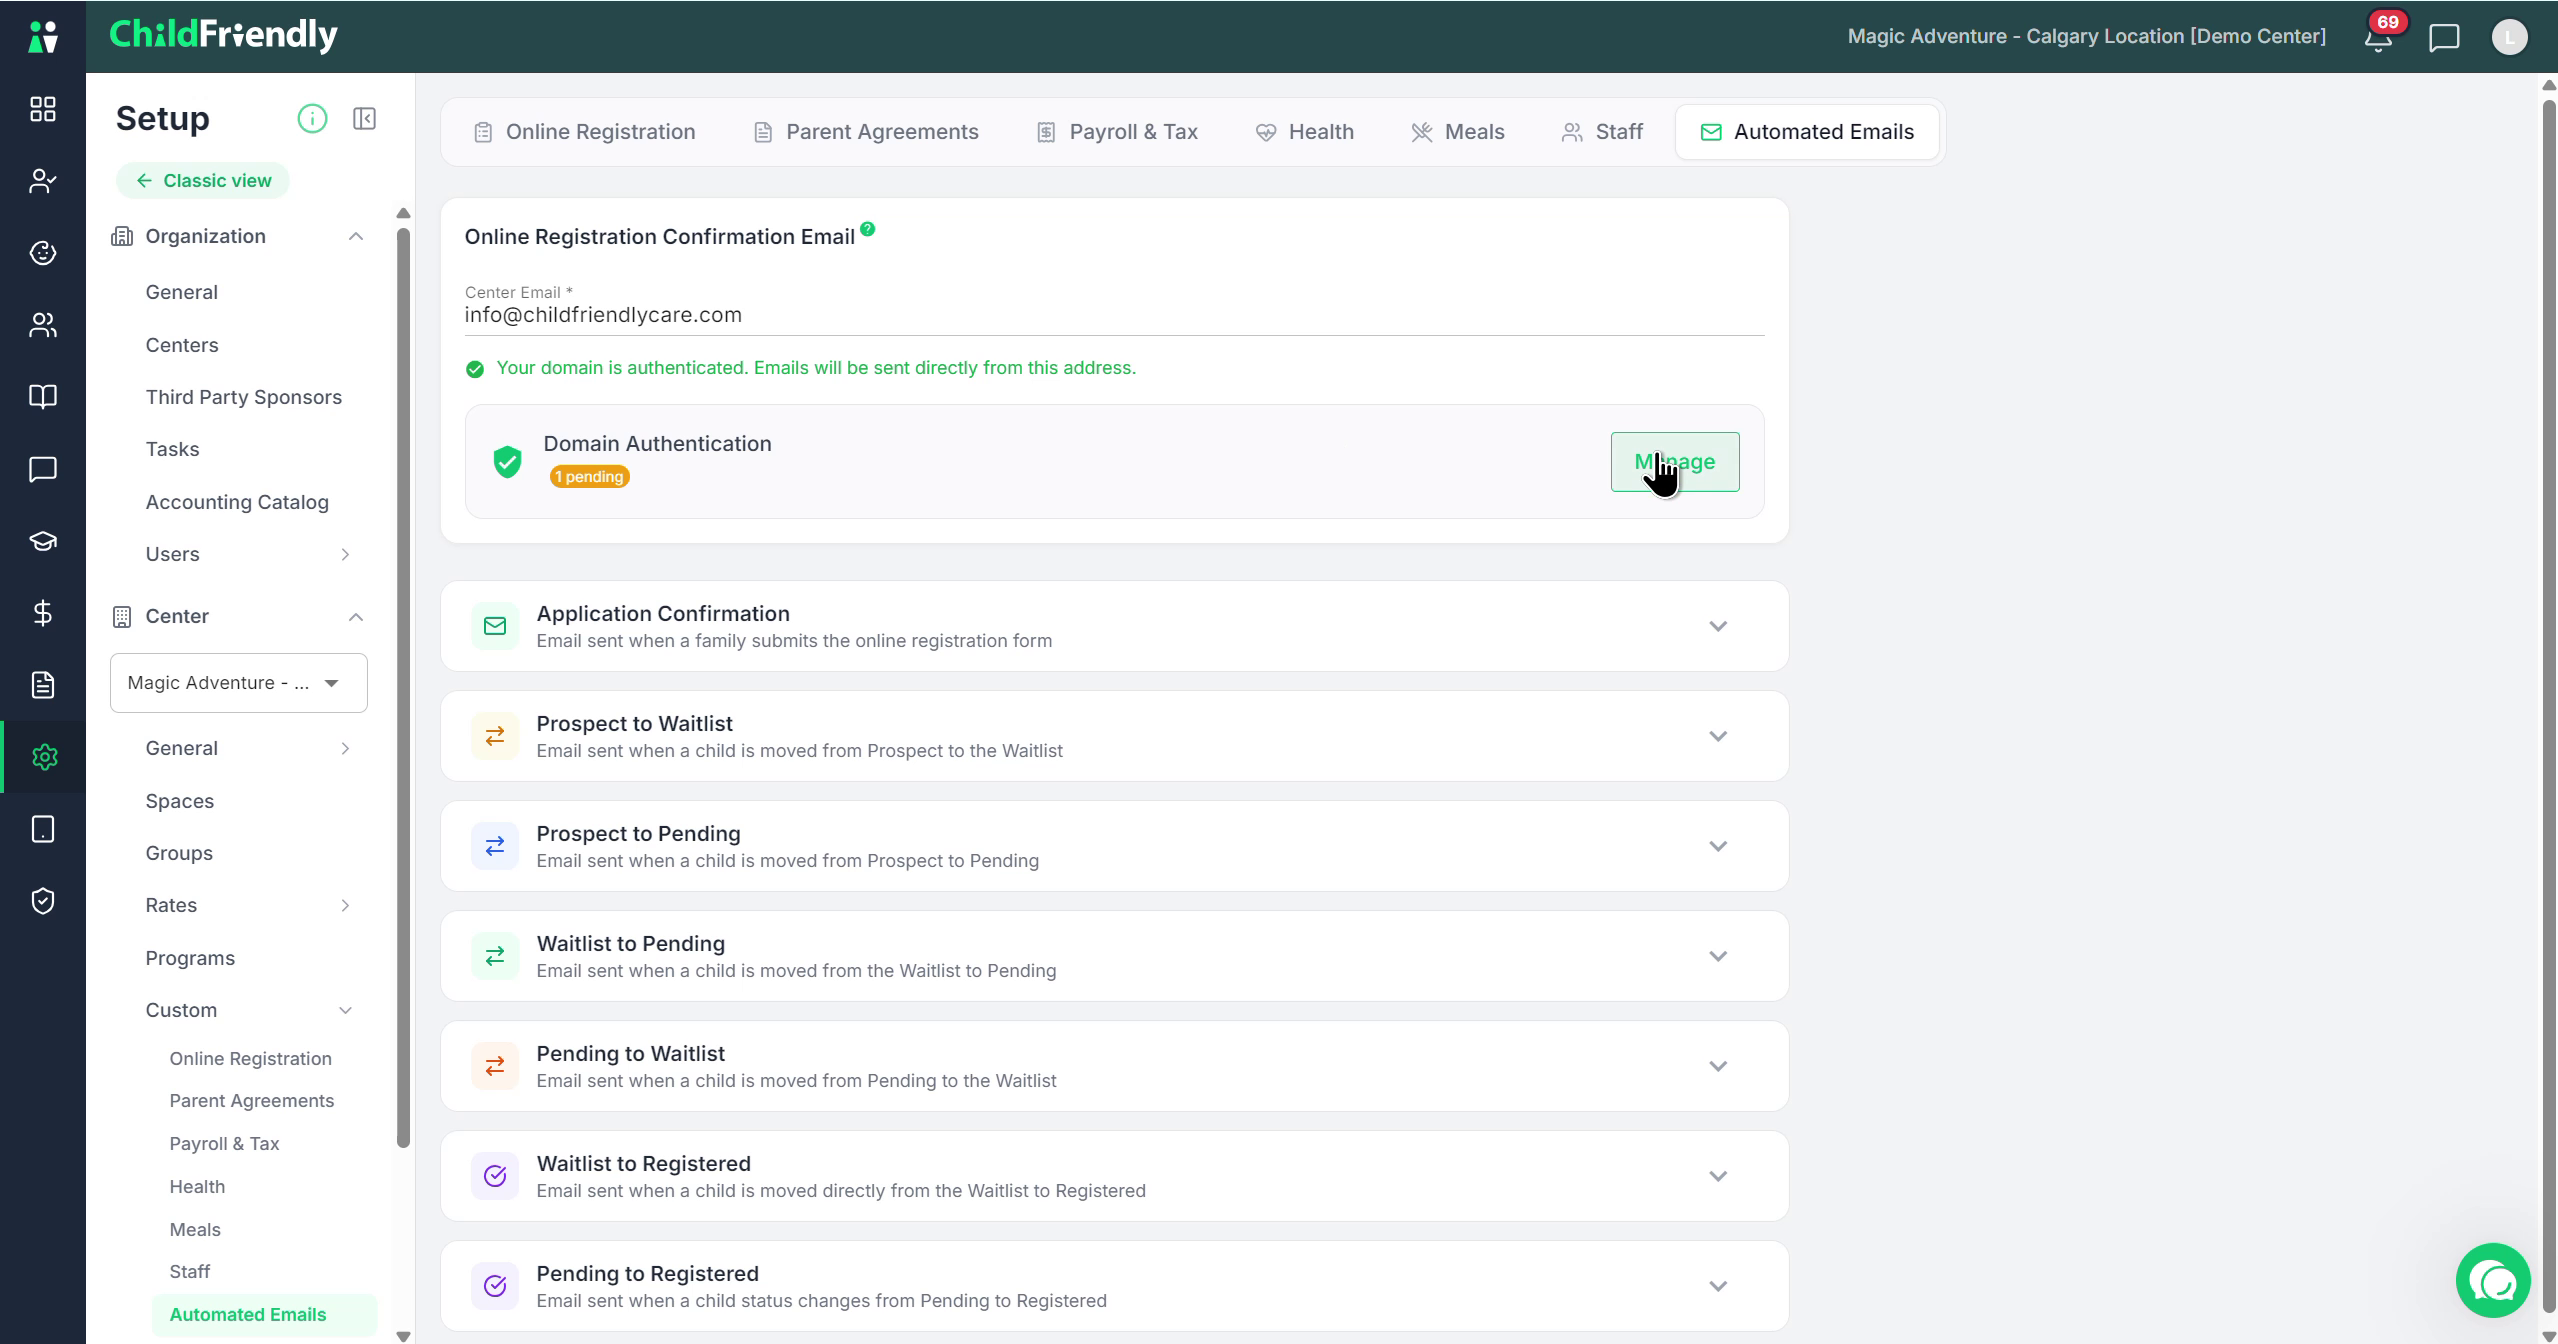
At the top of the Automated Emails page, locate the field where you enter the center email address that emails should be sent from. Enter the email address you want to use for outgoing automated messages.
In this same area, you will see options for domain authentication. To begin authenticating your domain, click Manage.
Step 3: Enter Your Custom Domain and Copy DNS Records
In the domain management window, enter your custom domain (for example, yourcenter.com).

After entering the domain, you will need to select and use the provided CNAME records.
Copy each of the displayed CNAME records.
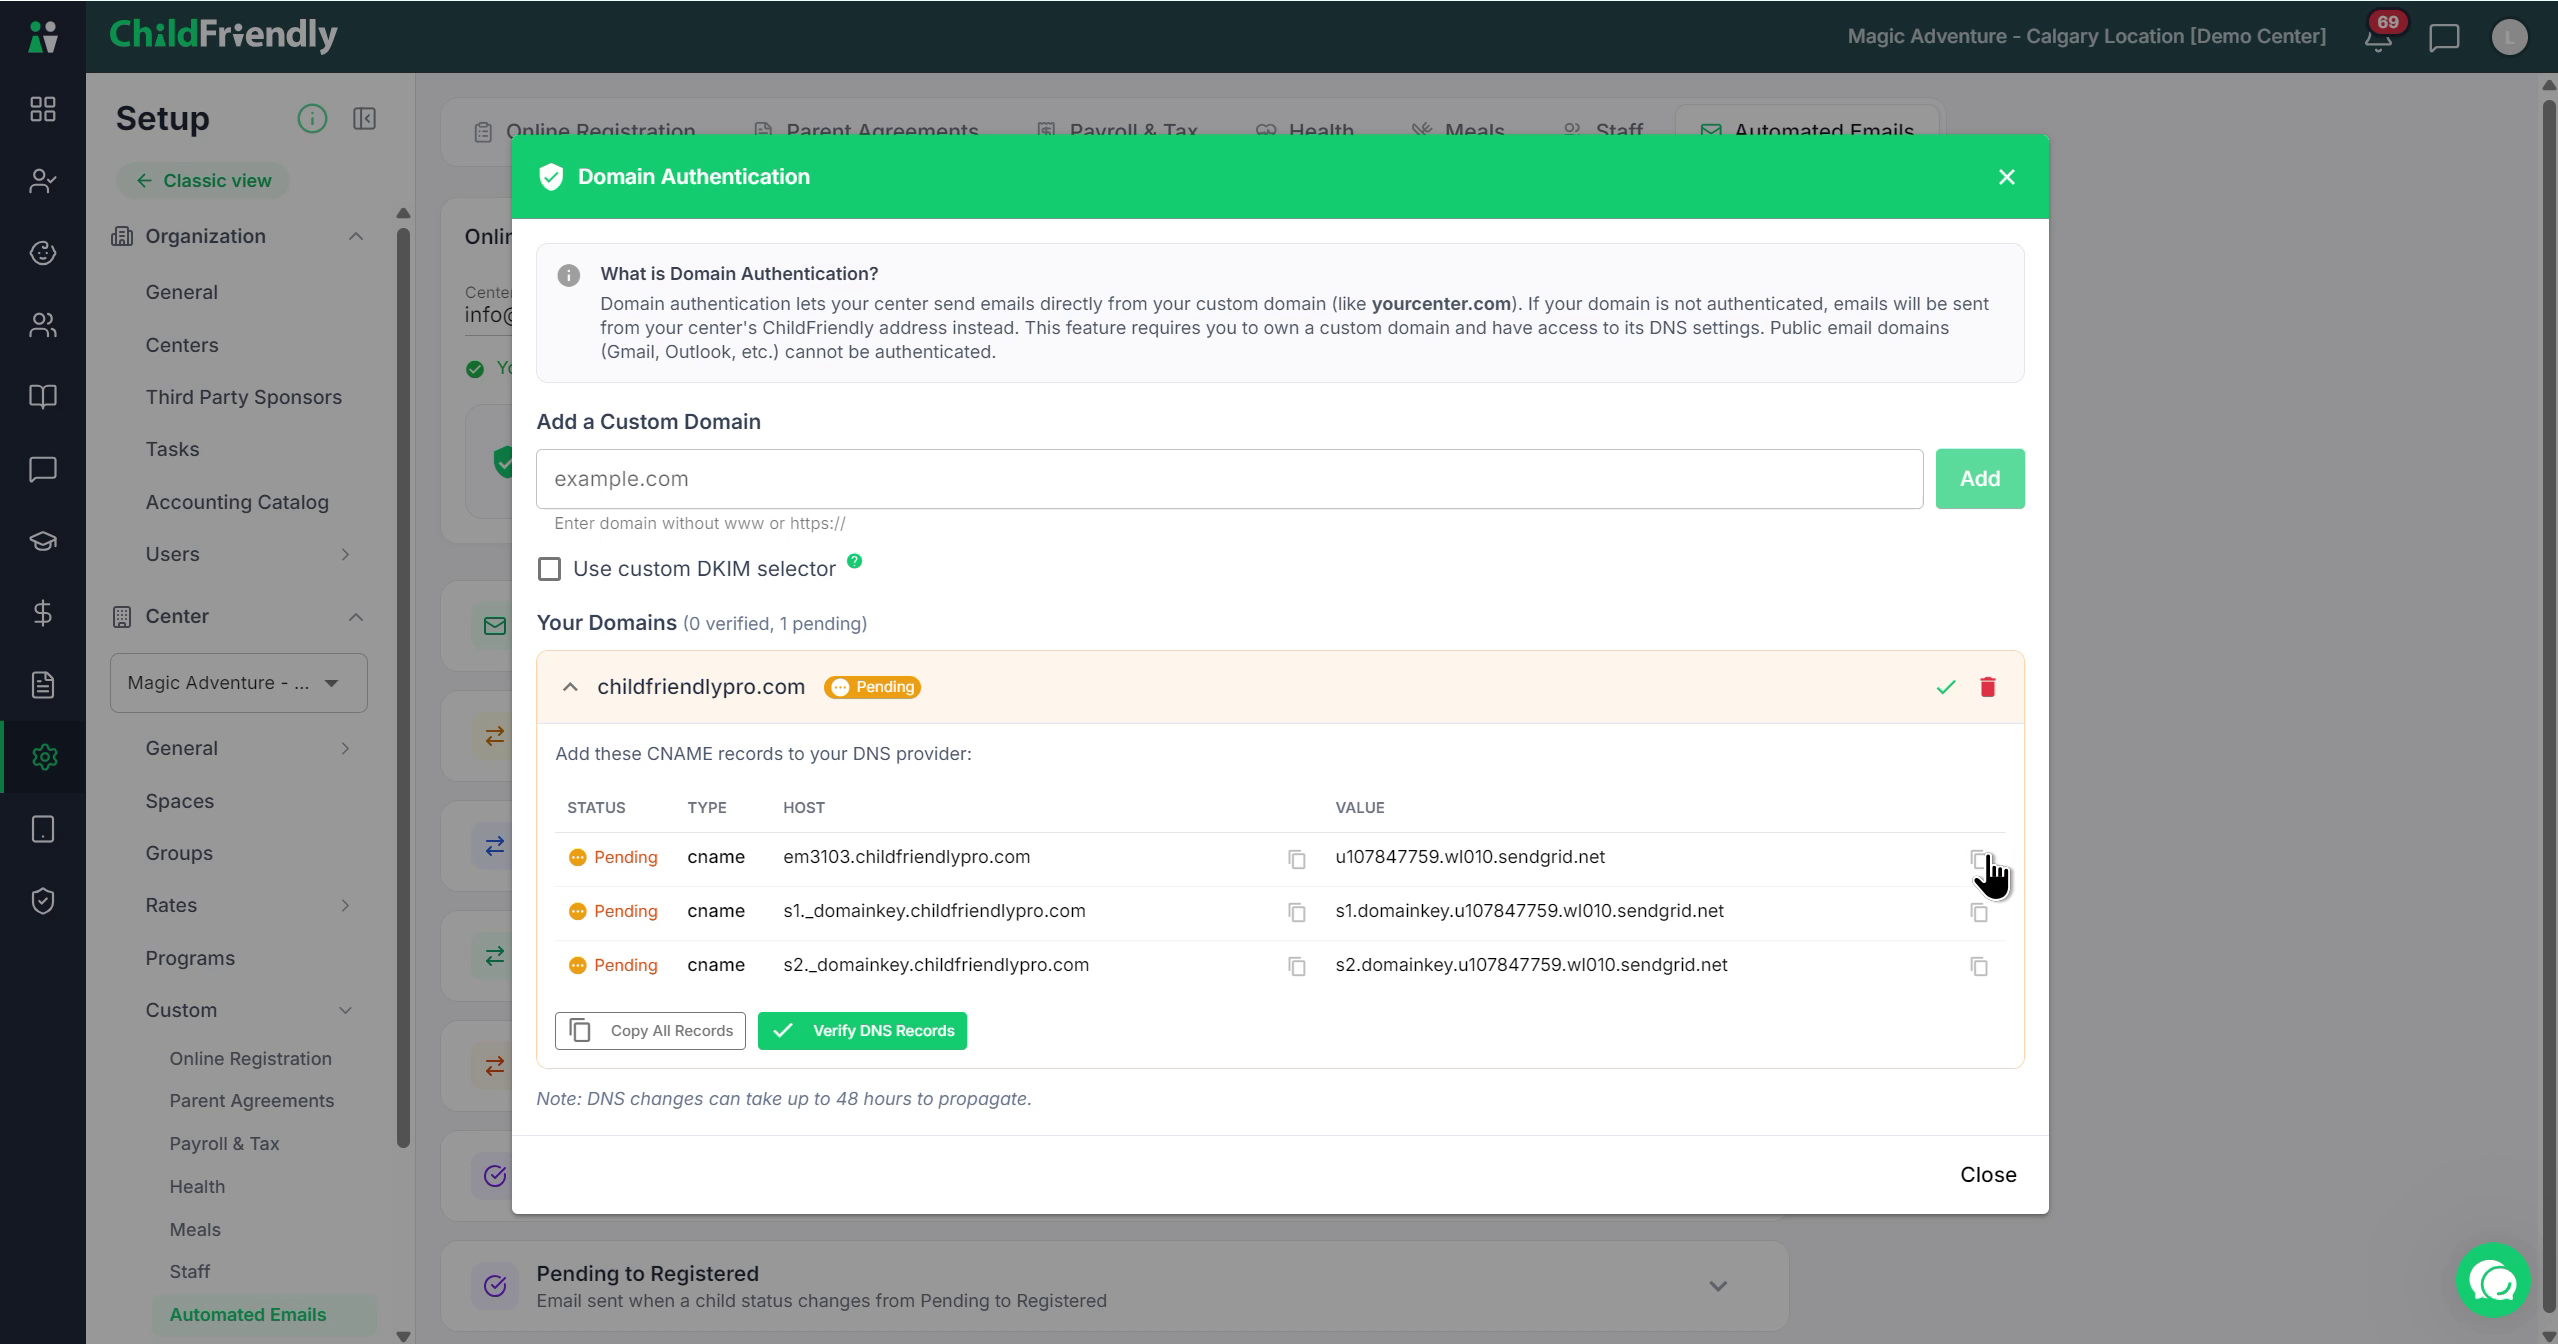
Paste and add these CNAME records into the DNS settings of your domain provider (such as GoDaddy, Namecheap, or your hosting provider).
When all records have been added to your DNS provider, click Verify.
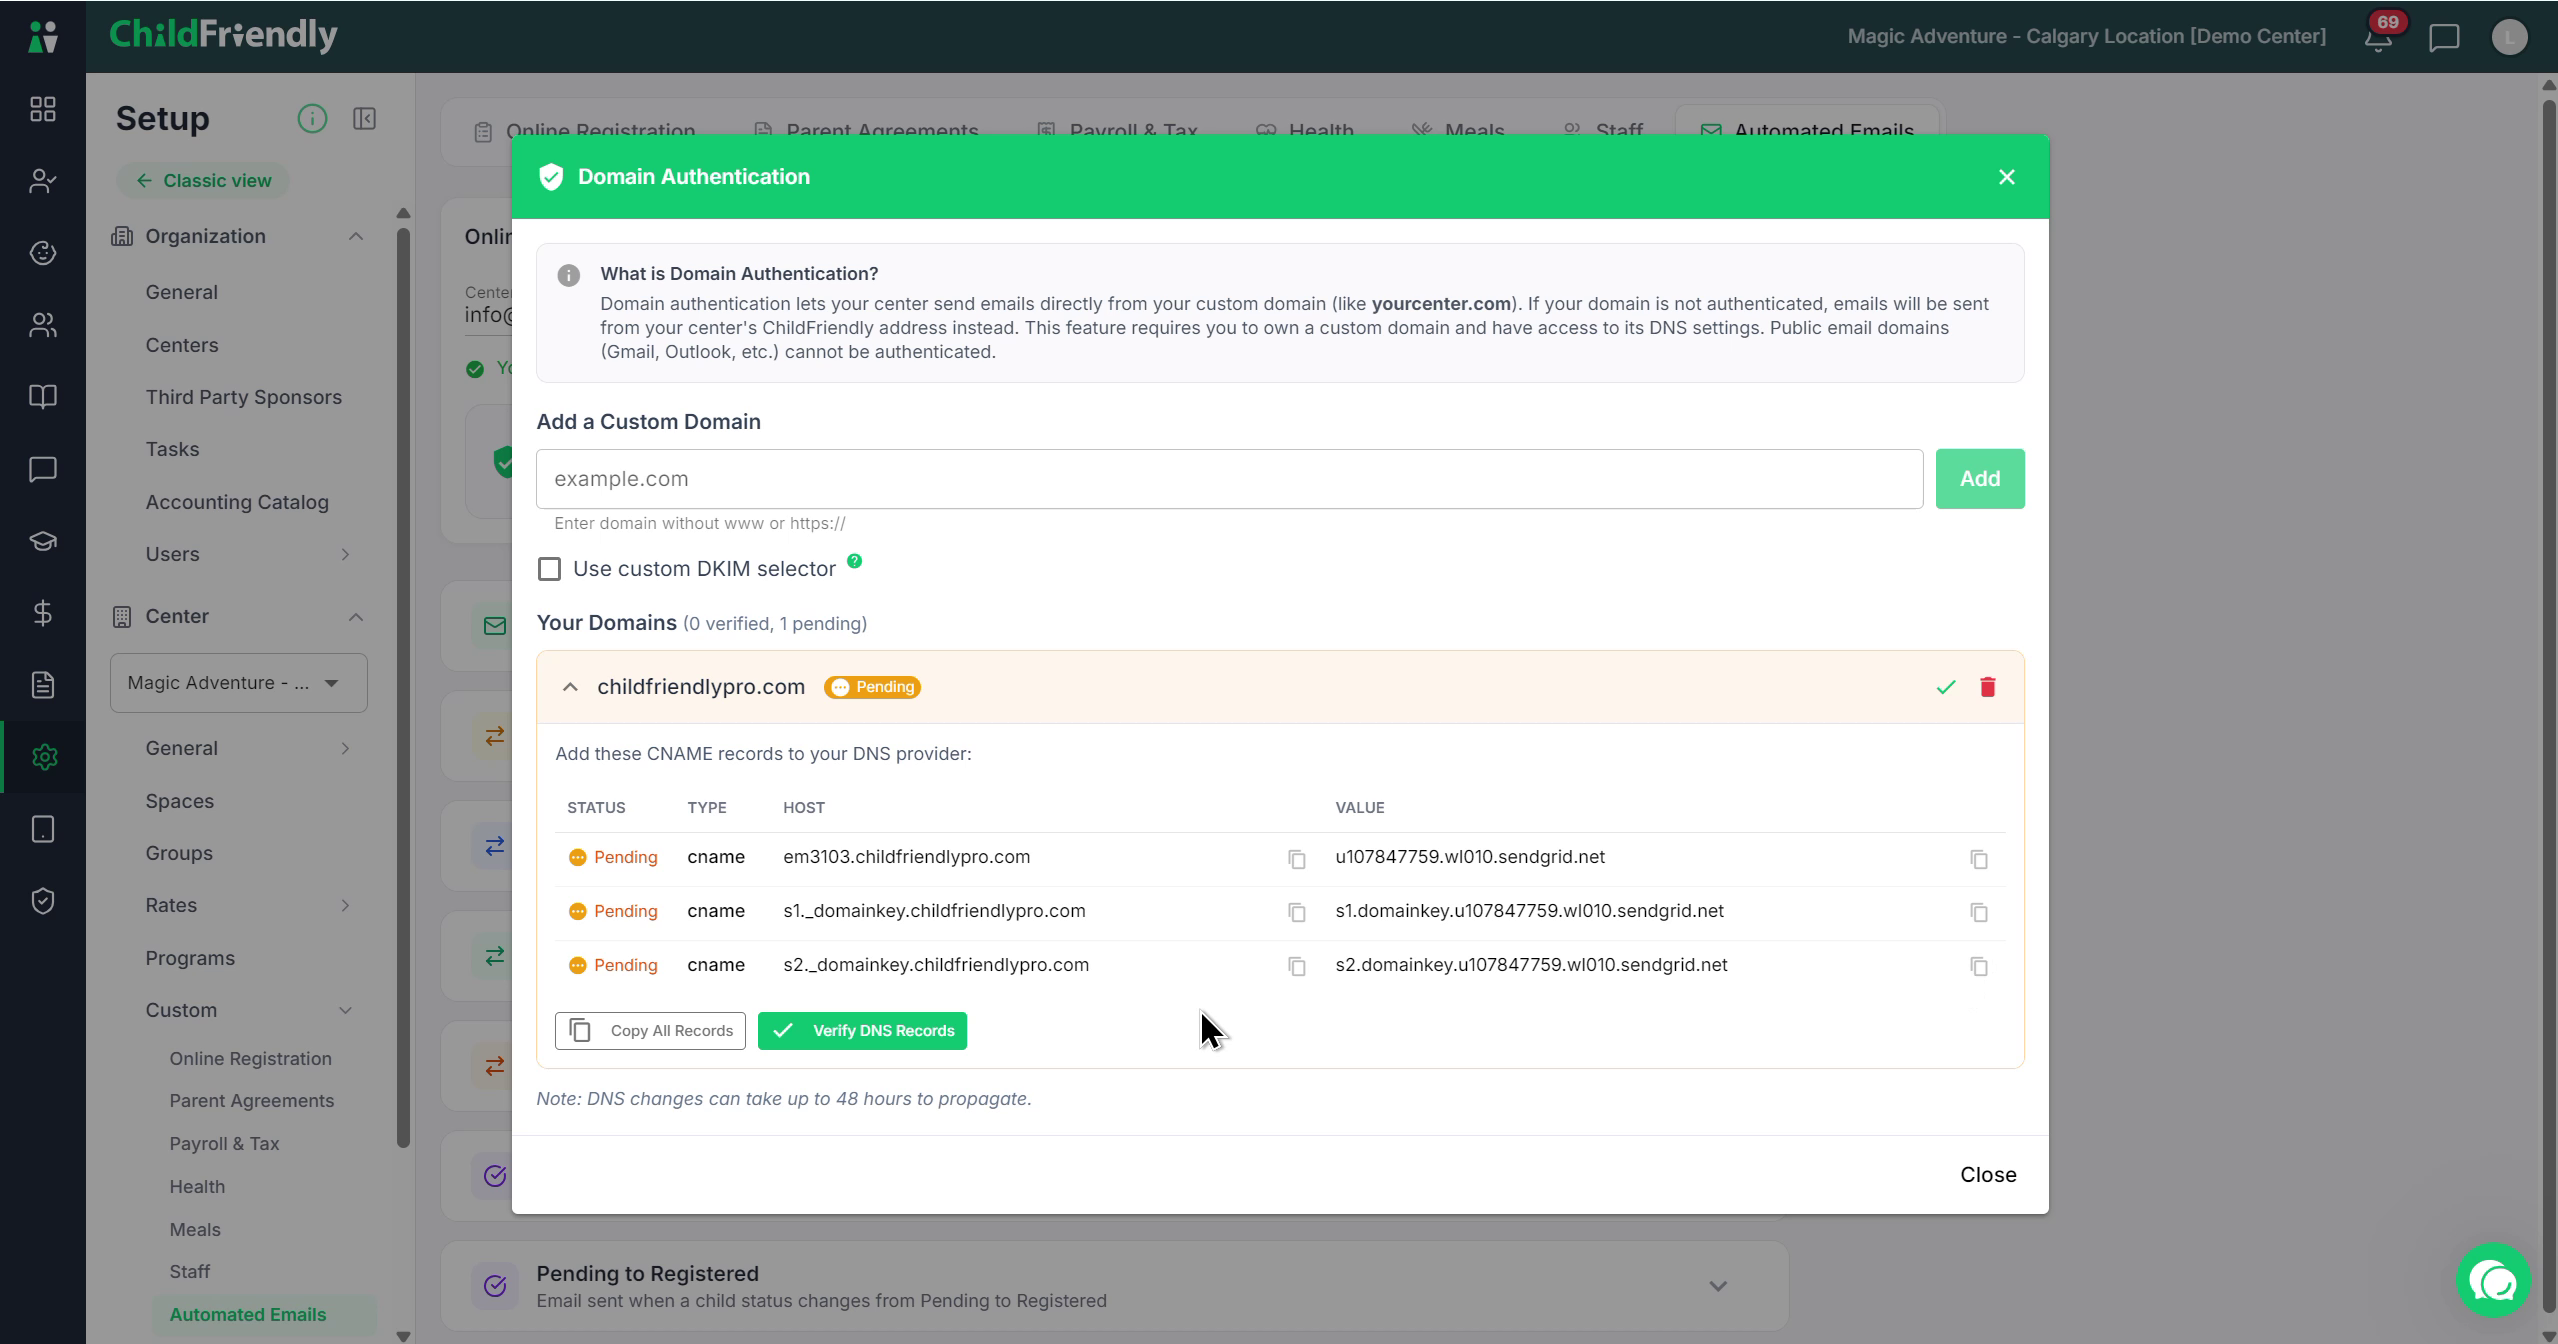
Verification can take up to 48 hours. Continue checking back until the status shows that the domain has been successfully verified.
Without domain authentication, automated emails will be sent from a generic ChildFriendly “do not reply” address. Authenticating your domain ensures emails are sent from your own domain for better professionalism and deliverability. Once authenticated, any user whose login email uses that domain will have their automated emails sent from their own email address associated with that domain.
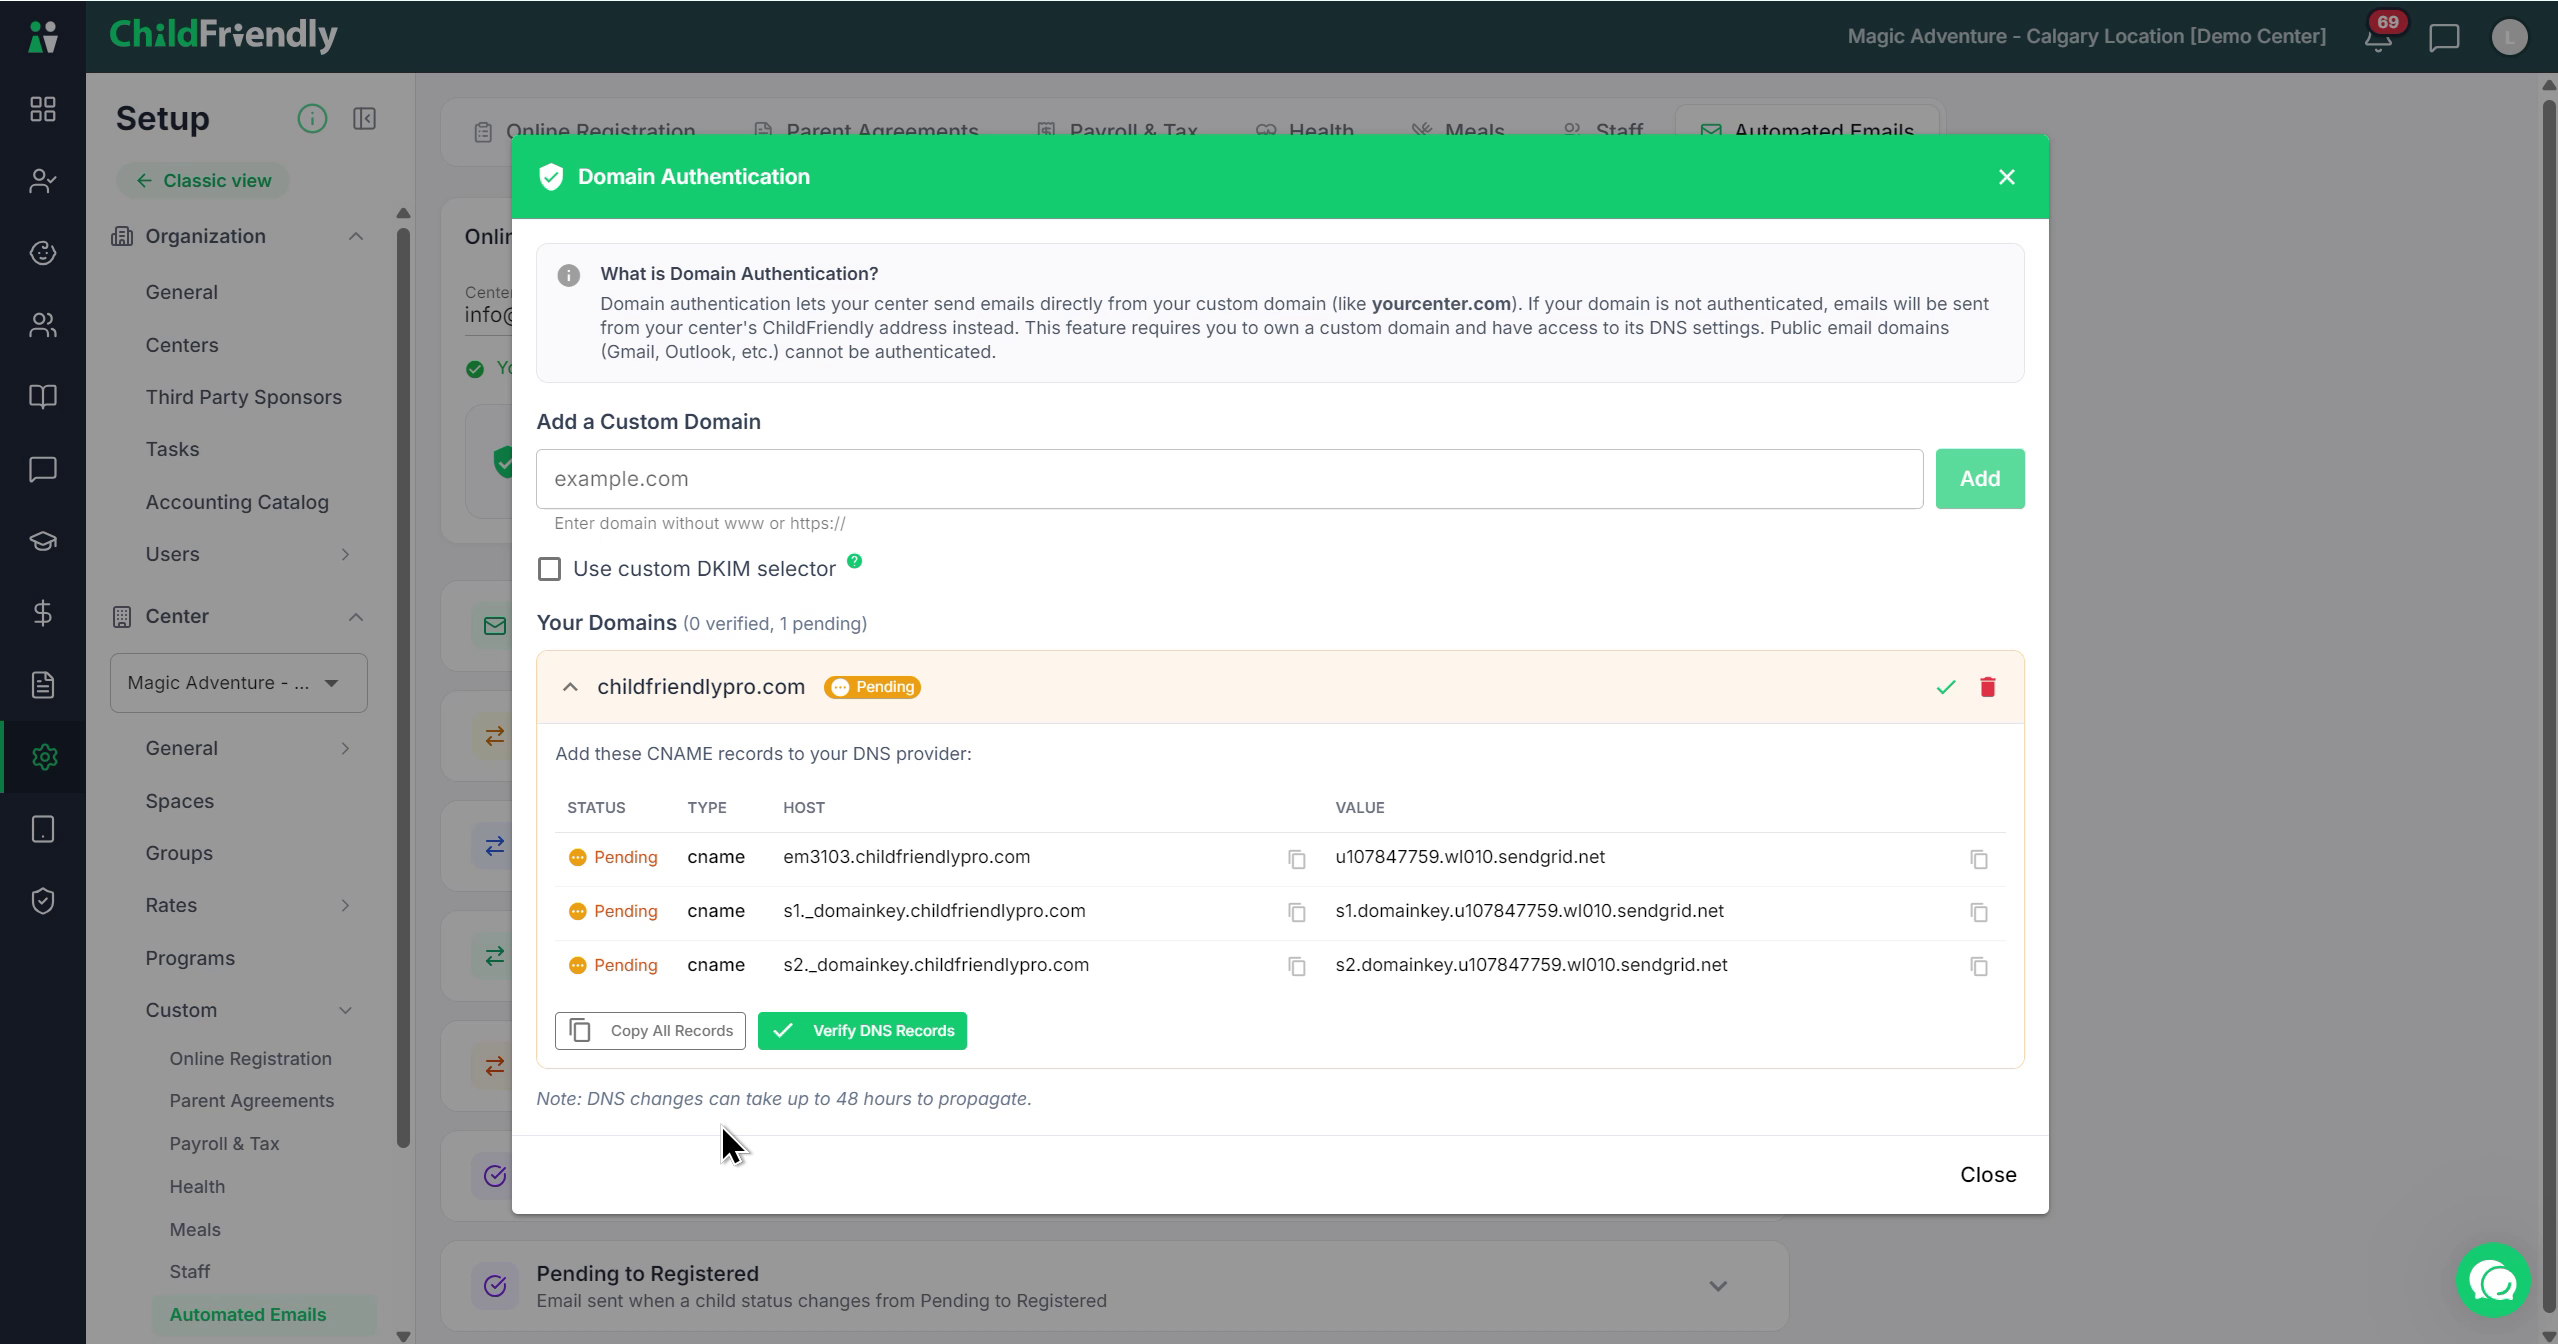
This will also significantly reduce the chance that emails are flagged as spam.
If you are unsure how to add CNAME records to your DNS provider, contact the company that hosts your domain or your IT support person to complete this step.
Step 4: Configure the Application Confirmation Email
Once your domain is set (or while it is verifying), you can configure the content of your automated emails.
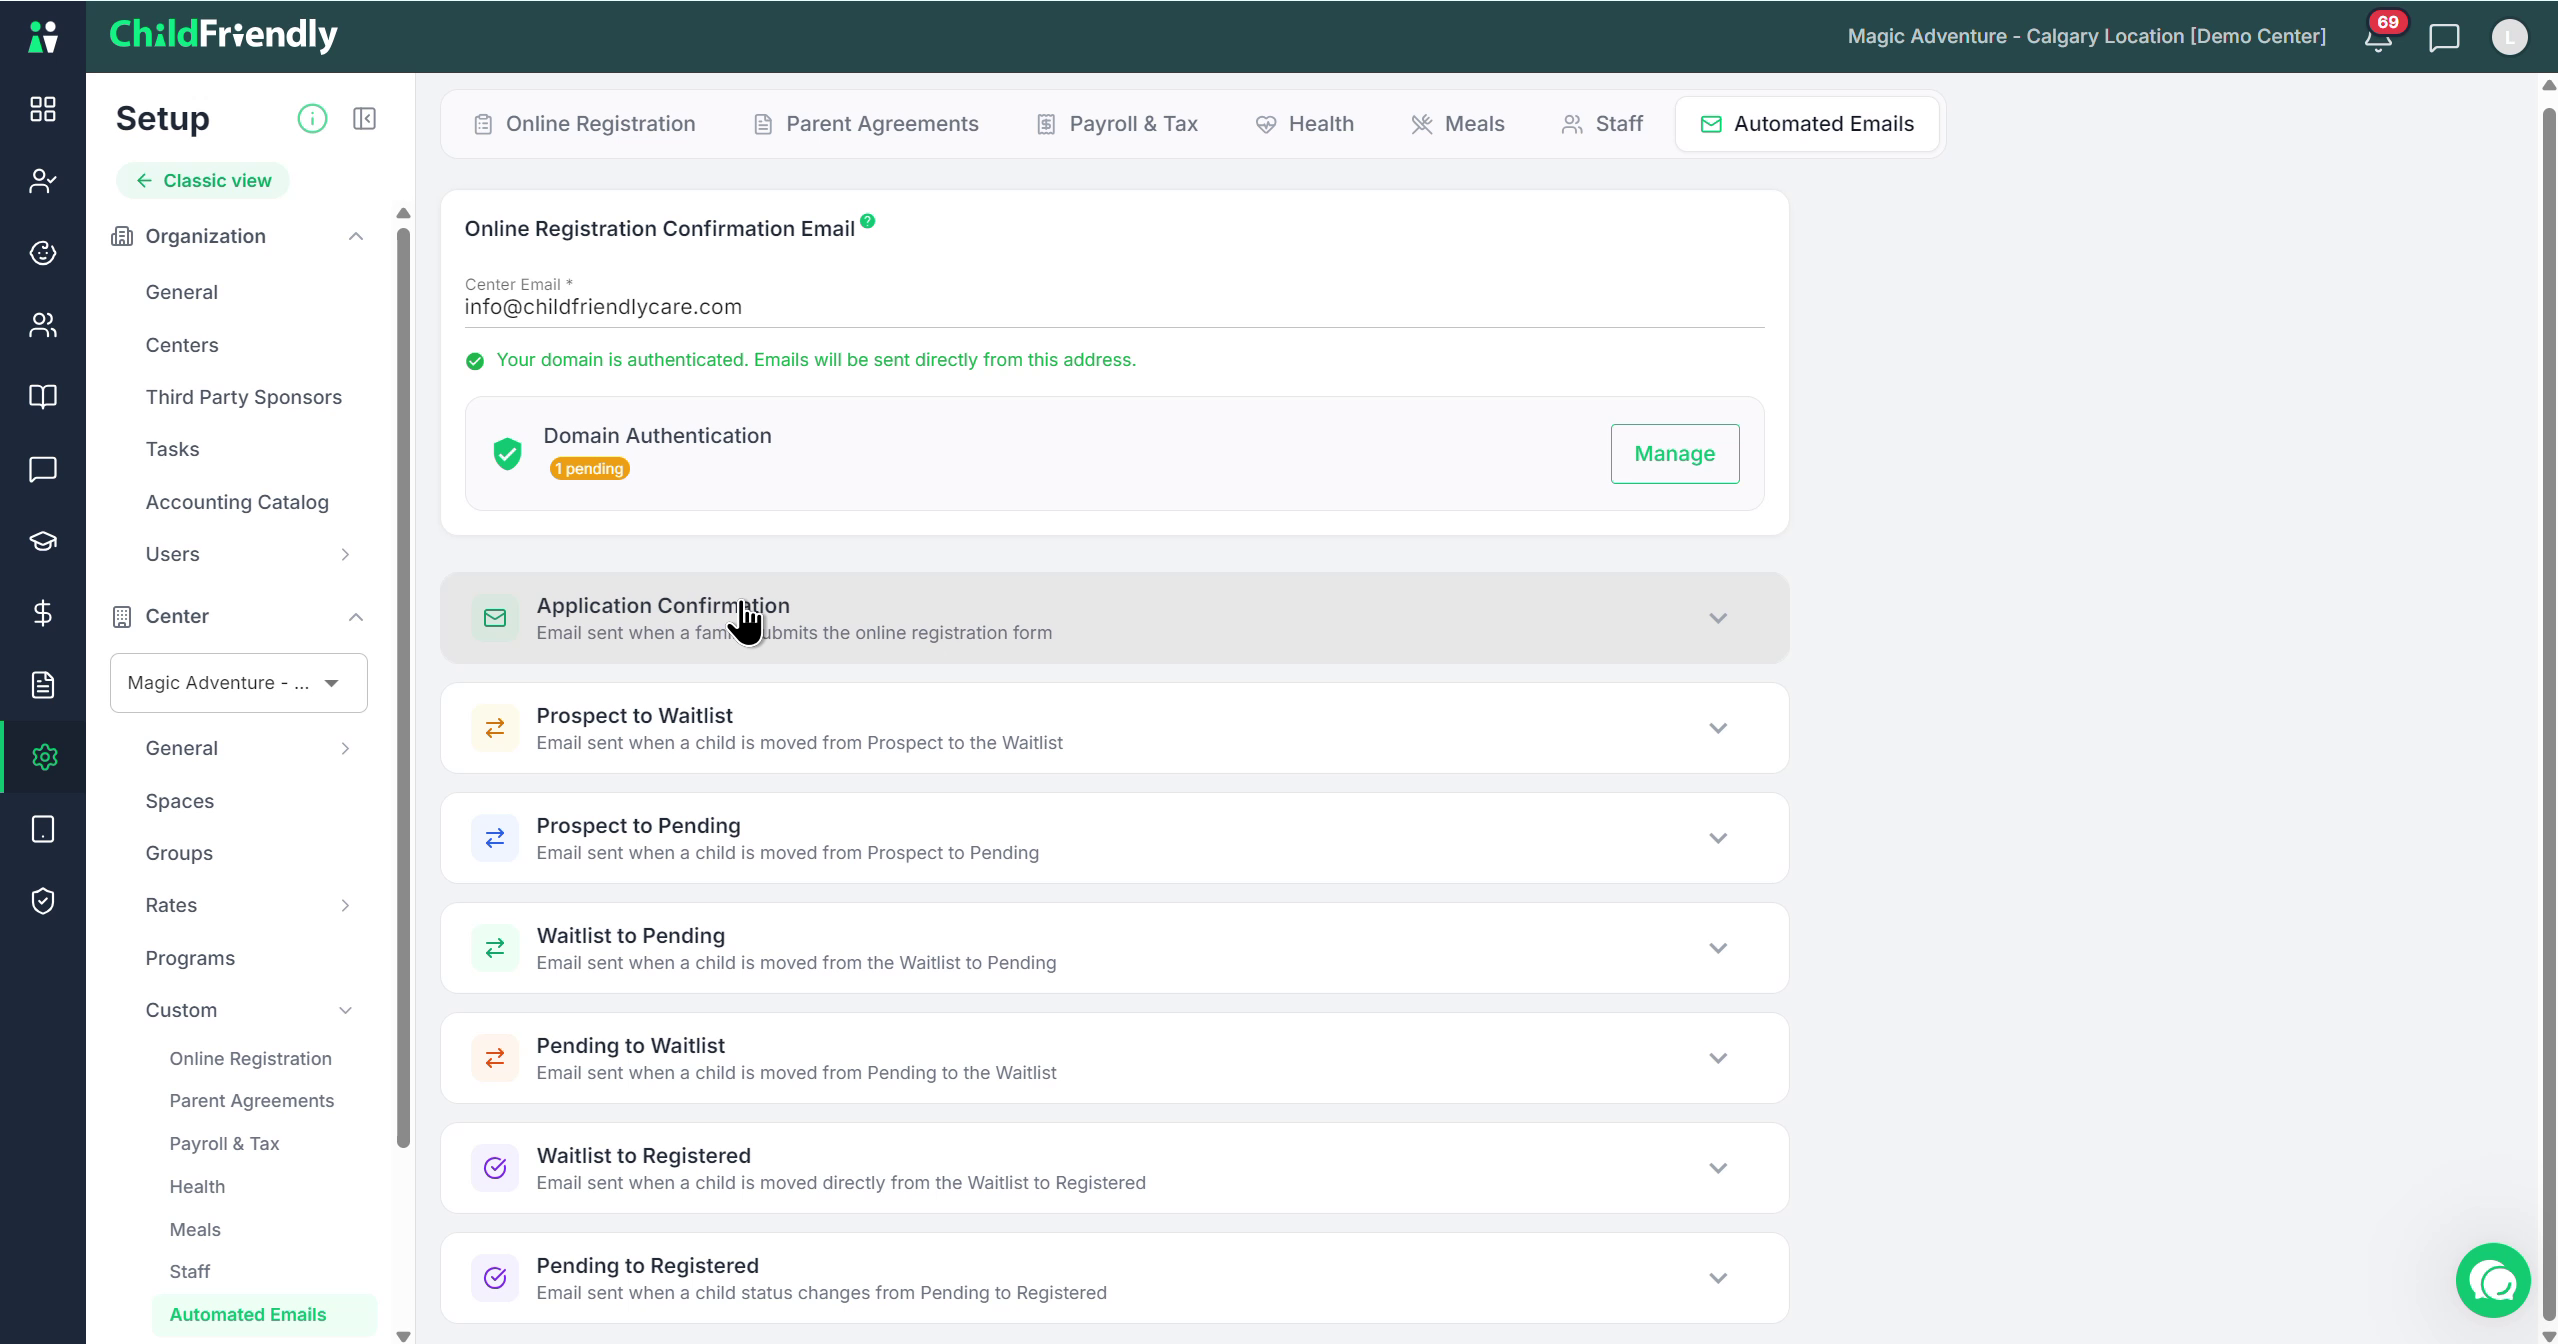
Start with the Application Confirmation Email. This is sent to families after they complete your online registration form for a specific program.
Expand this email to see and edit its details.
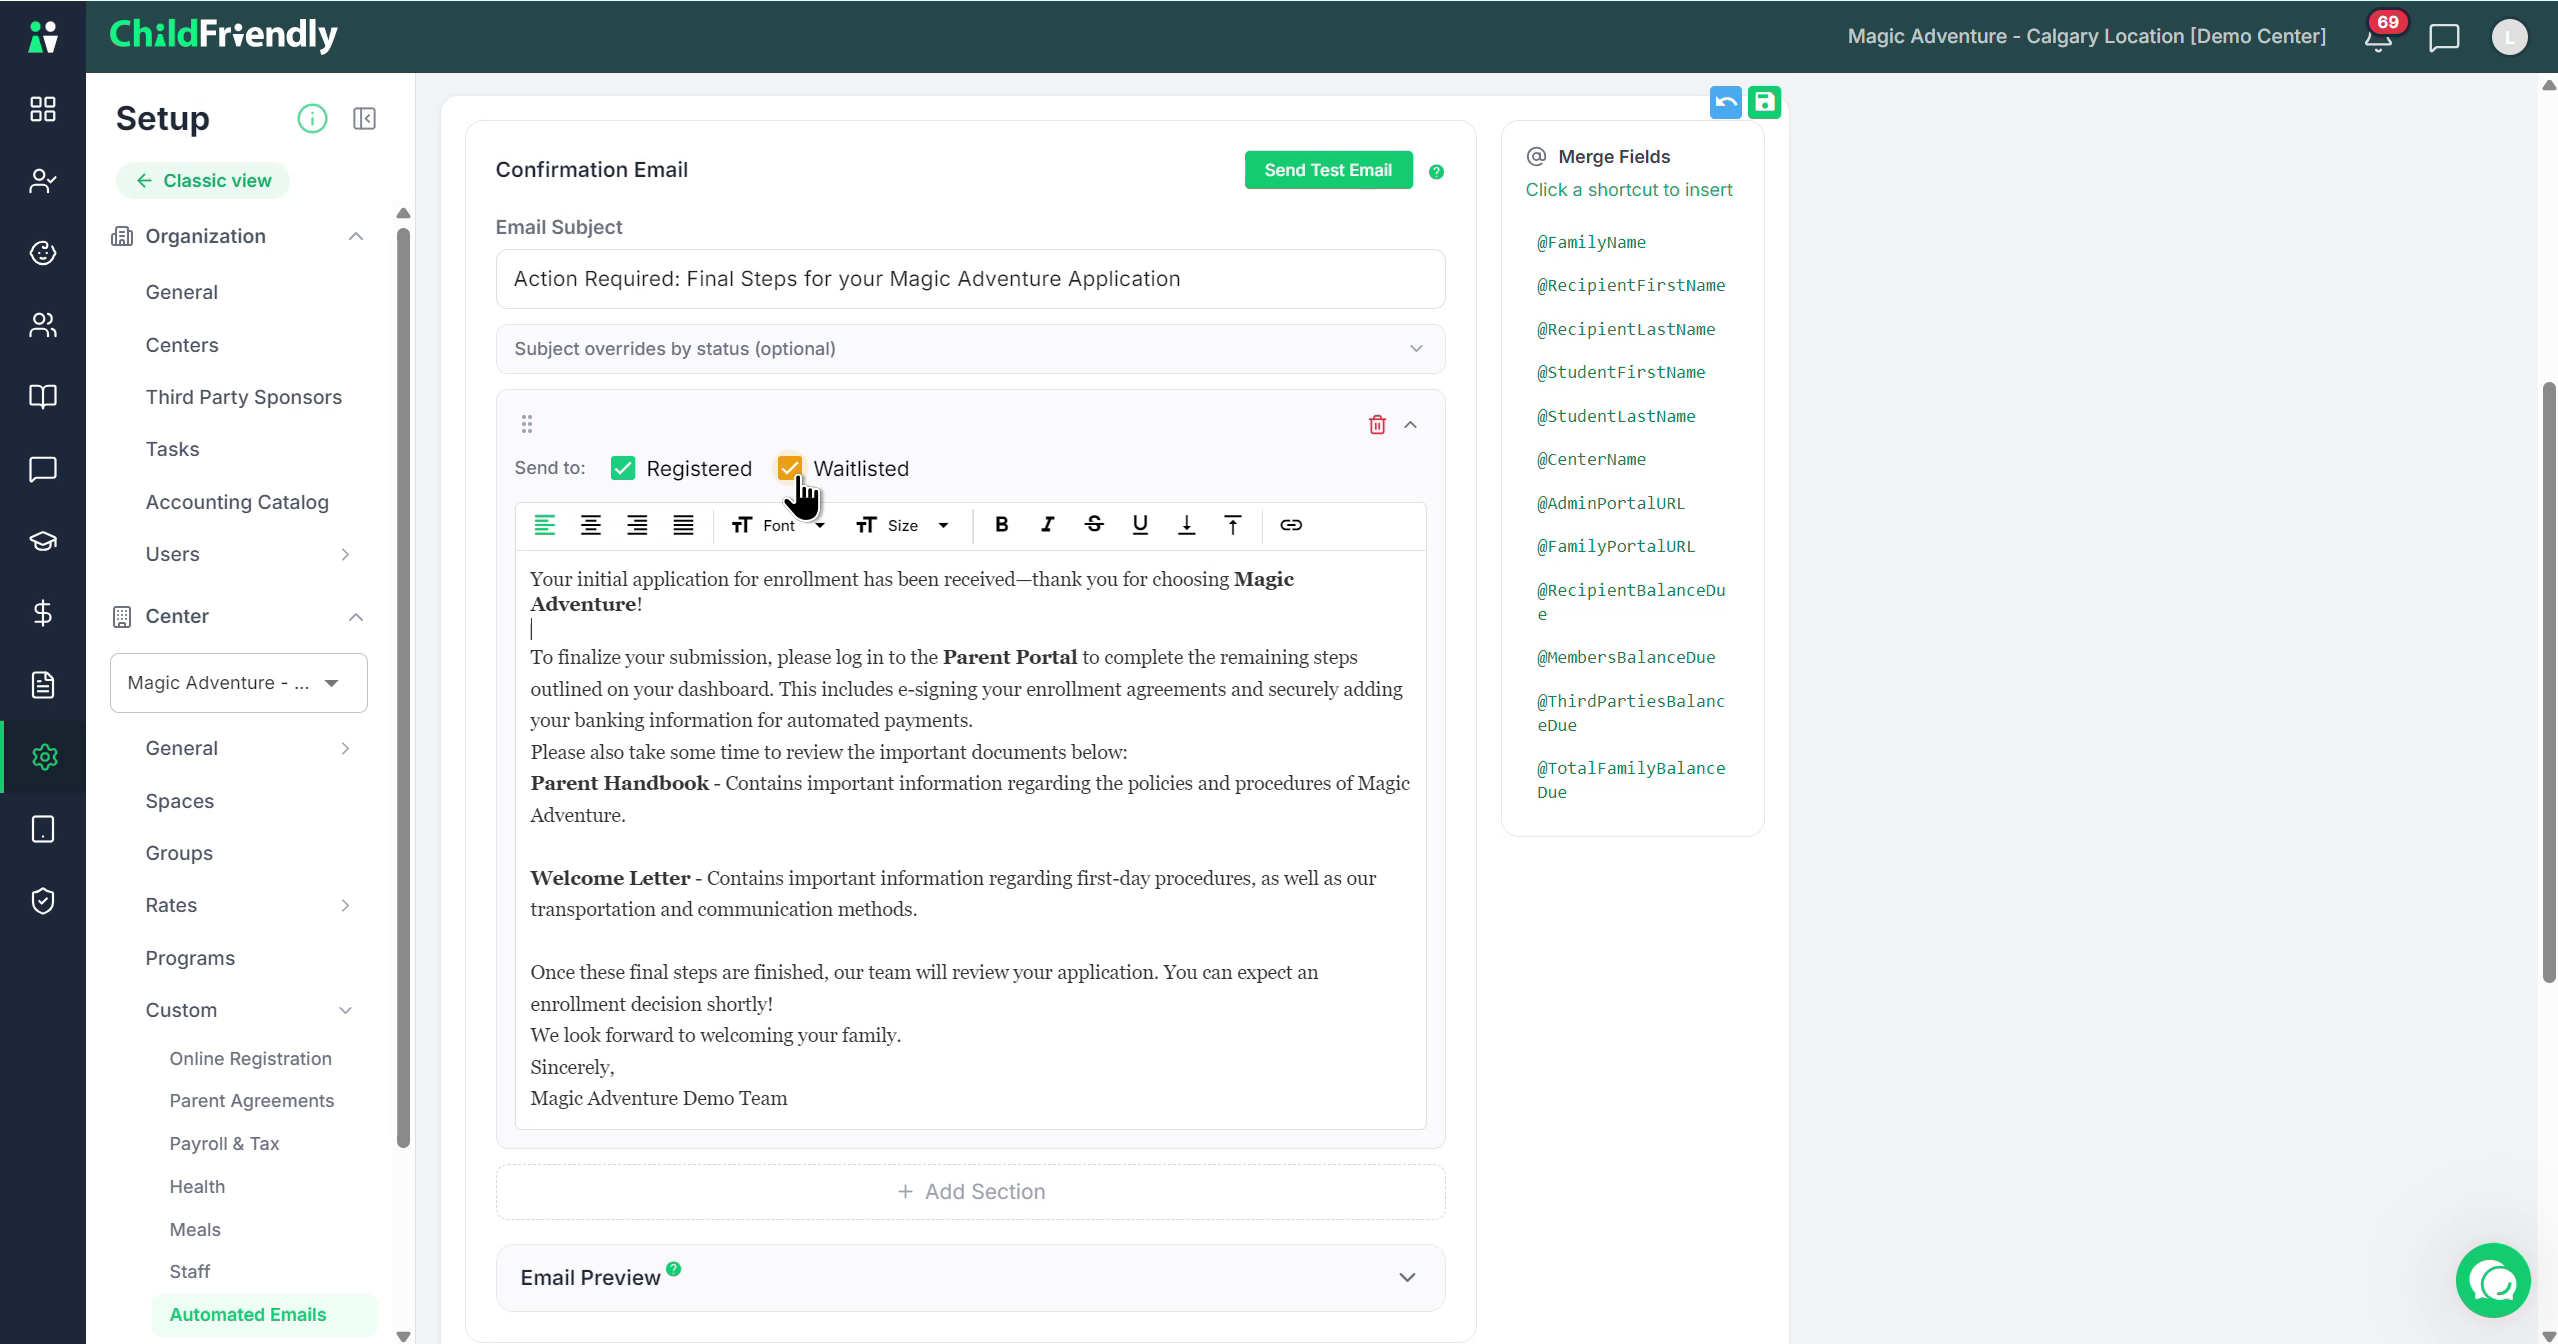
In the editor, you can add and edit different sections of the email content.
For example, you might add text explaining next steps, and links to parent handbooks and welcome packages.
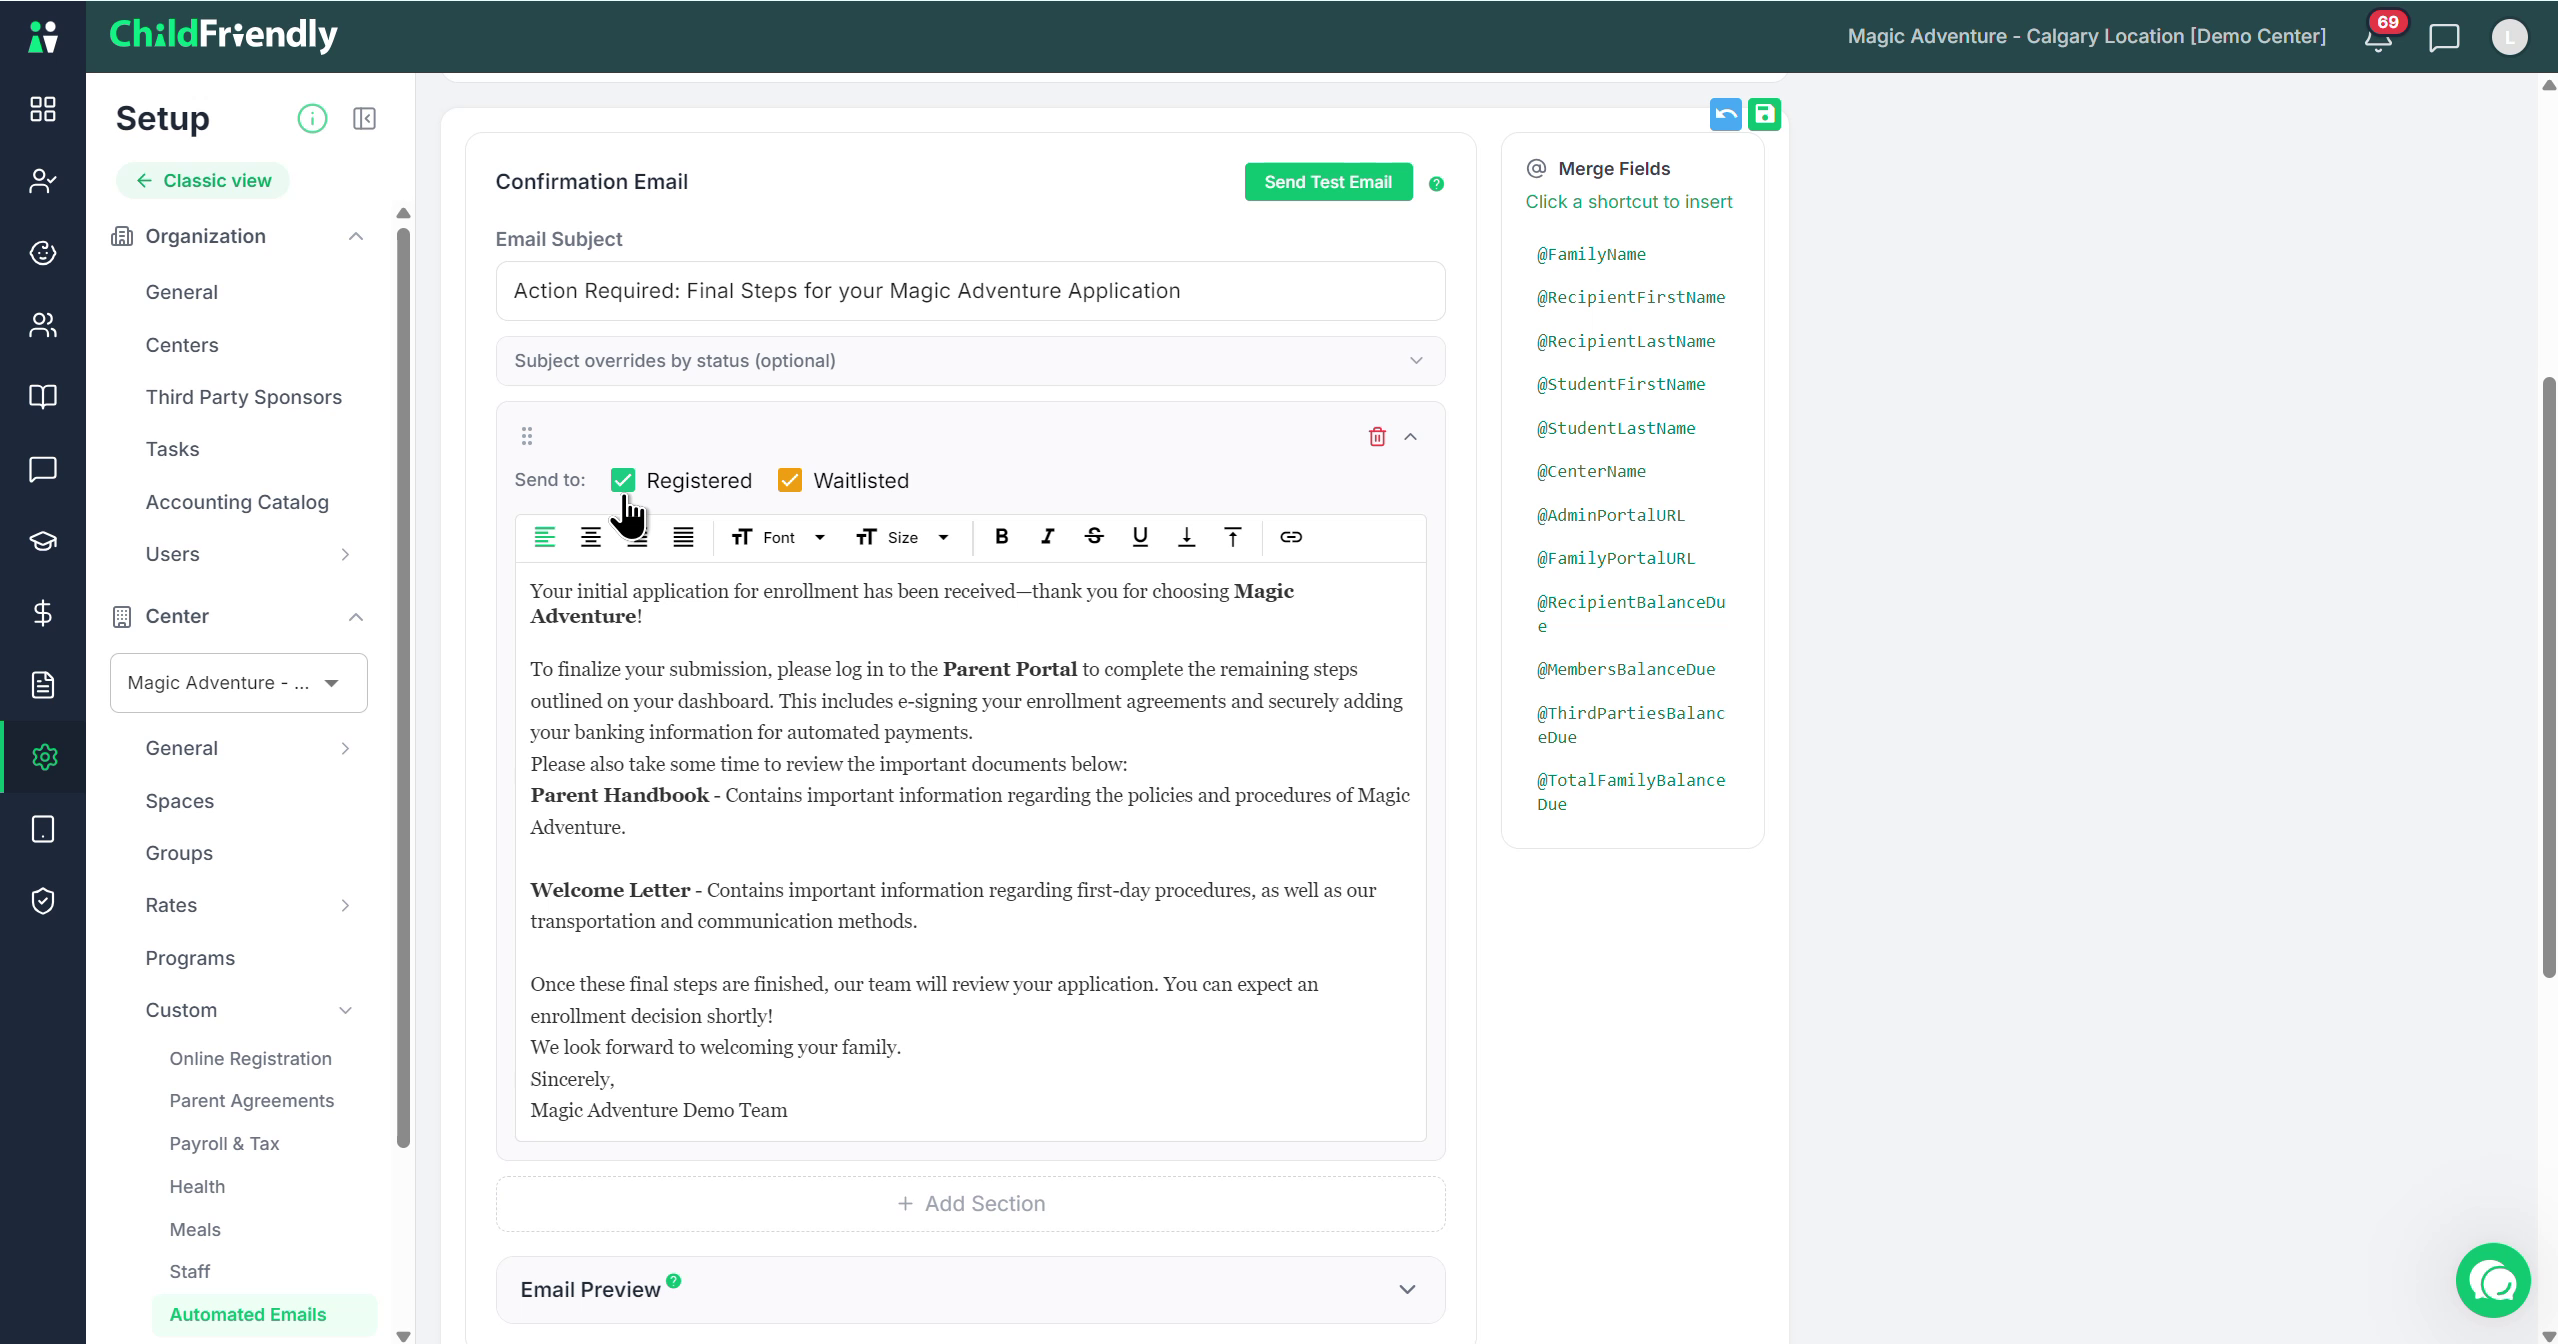
Set the sending conditions of each section. For instance, you can choose to send a specific section only when someone fills out an application for a program that has open space. Alternatively, if they apply for a full program and are waitlisted, they can receive entirely different content. You can create a distinct section for each scenario and apply them separately, or check both options to send the exact same content regardless of their status.
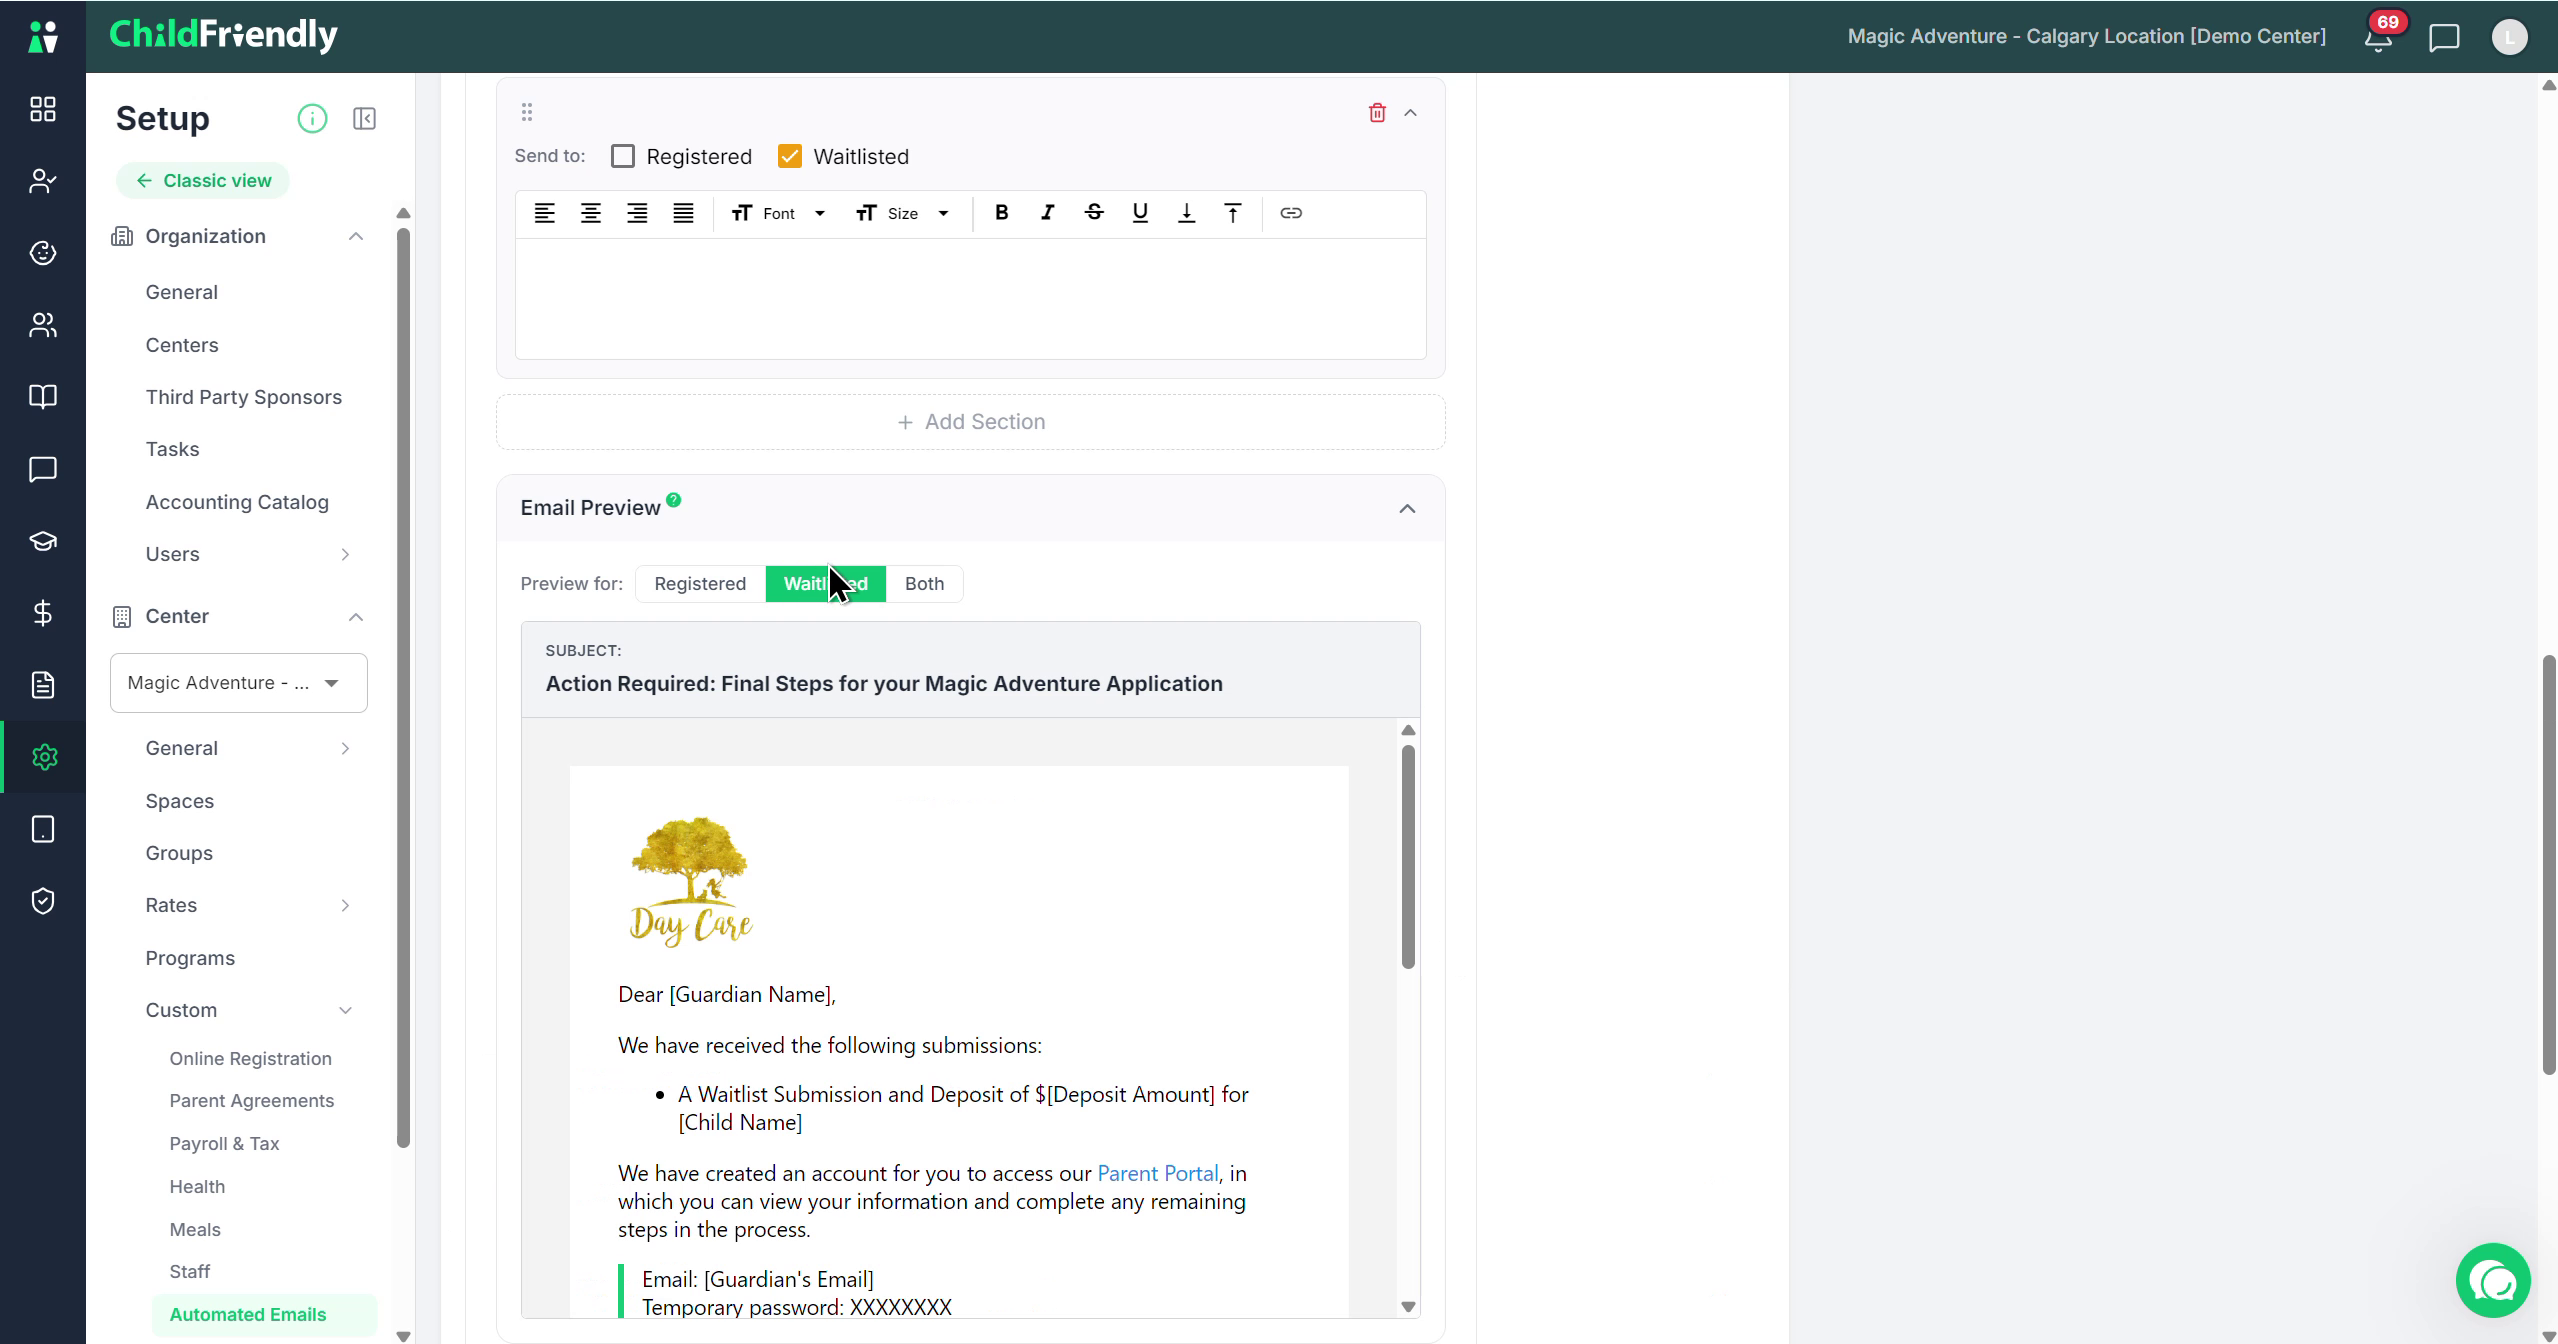
When you are ready, use the Preview function to see how the email looks from a parent's perspective. The initial section of the preview contains the parent's temporary password and login information; this part is locked and cannot be changed. Any subsequent sections display your customization.
Step 5: Customize the Prospect-to-Waitlist Confirmation Email
The next email you can configure is the confirmation email sent when a child is moved from the Prospect list (in the Admin Dashboard which contains children who inquired or toured) to the Waitlist.
If you want this email to be sent automatically, enable it by toggling it On.
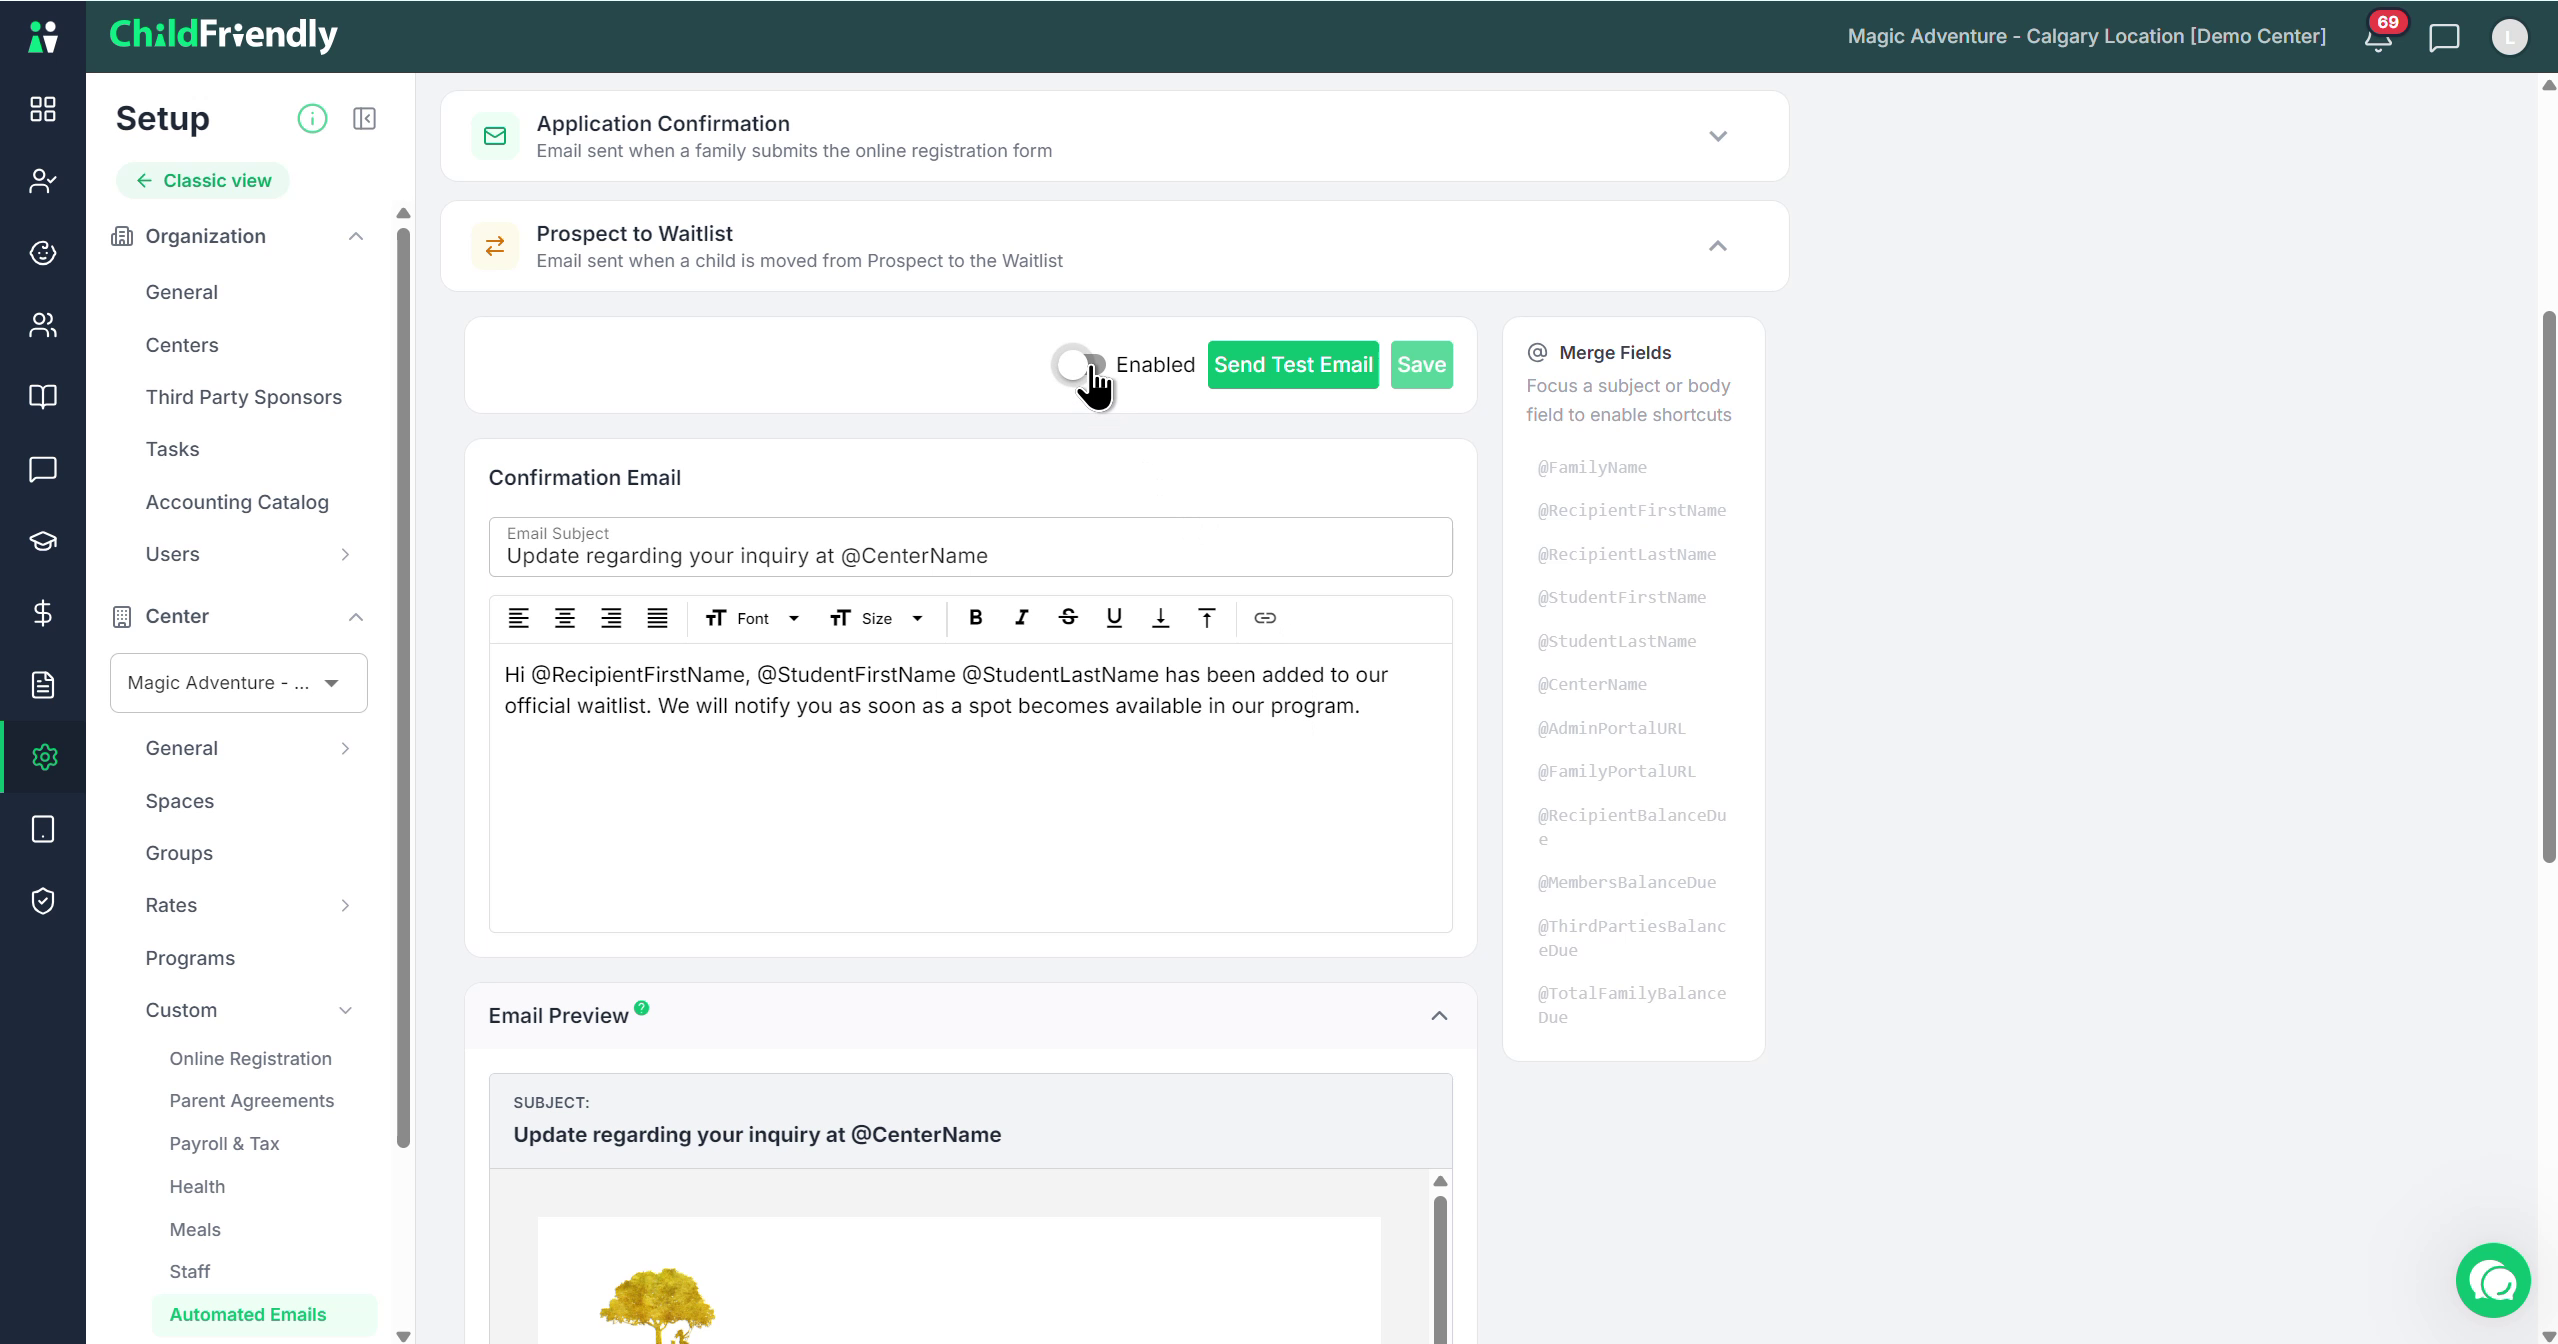
You can send a test email to review its appearance and content, and be sure to save any changes.
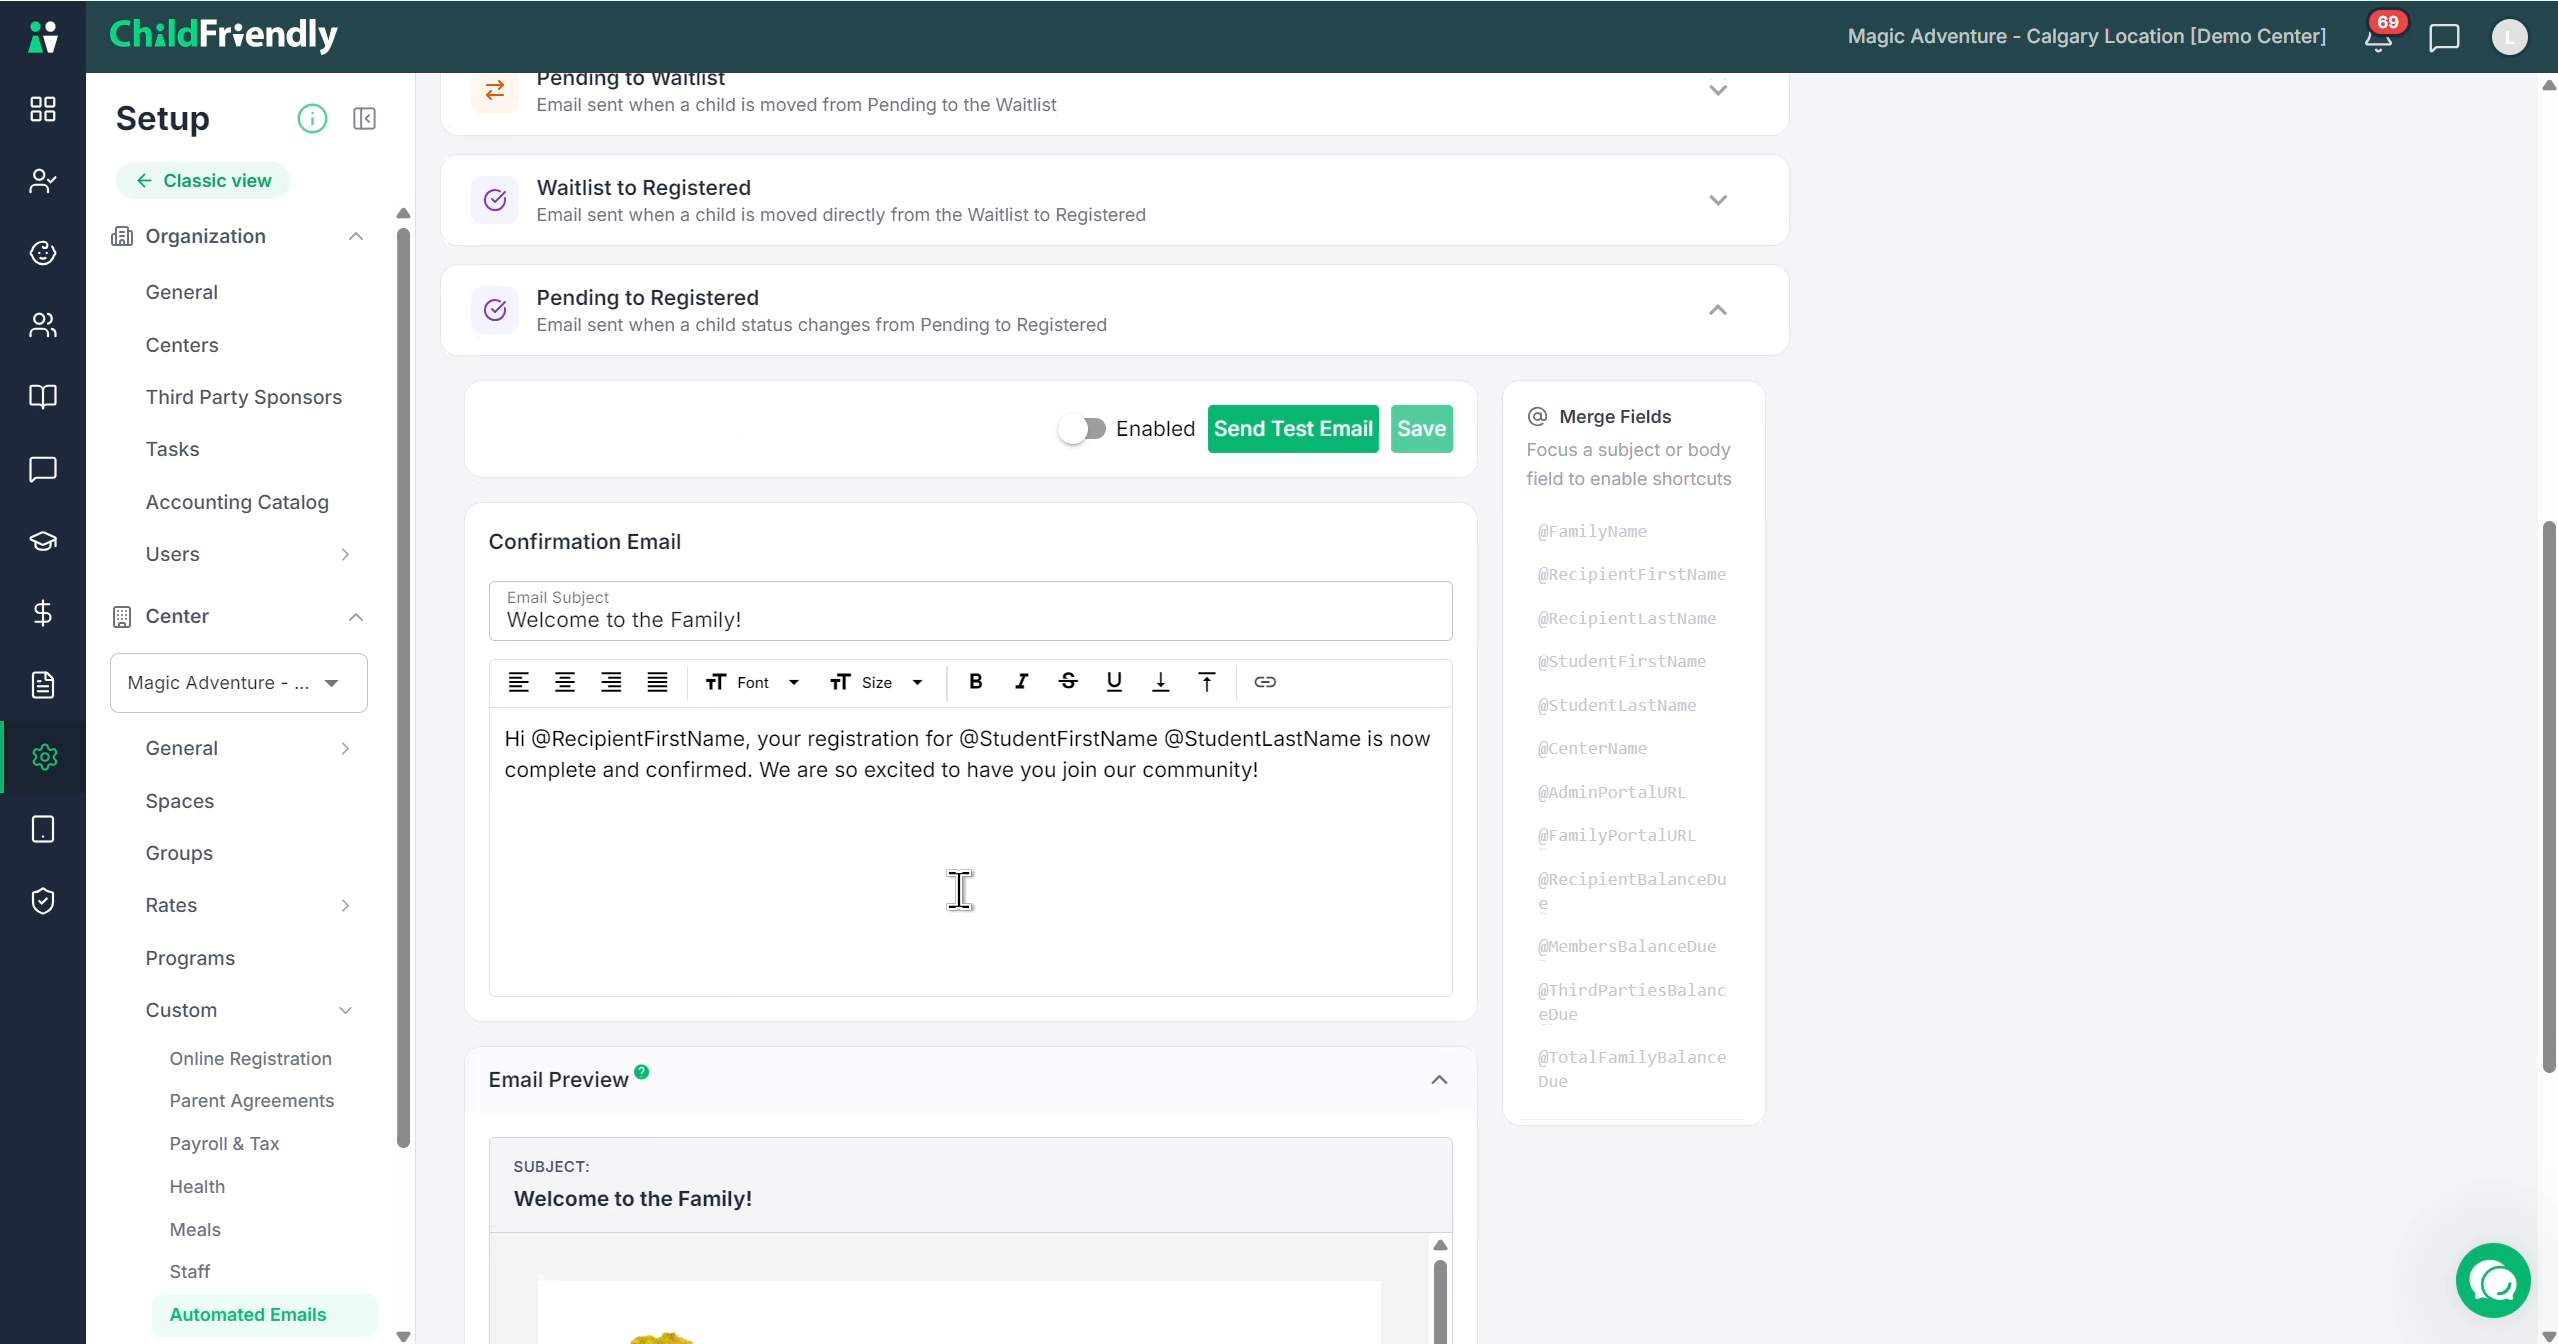
All automated email templates support special fields: type an @ symbol followed by a field name (for example, @family_name or @center_name) to automatically populate the actual family or center details in the email, enhancing personalization and professionalism. You can always use the preview function to confirm these fields are working as expected. Review the menu on thr ight for the list of shortcuts available.
Step 6: Configure the Prospect-to-Pending Registration Email
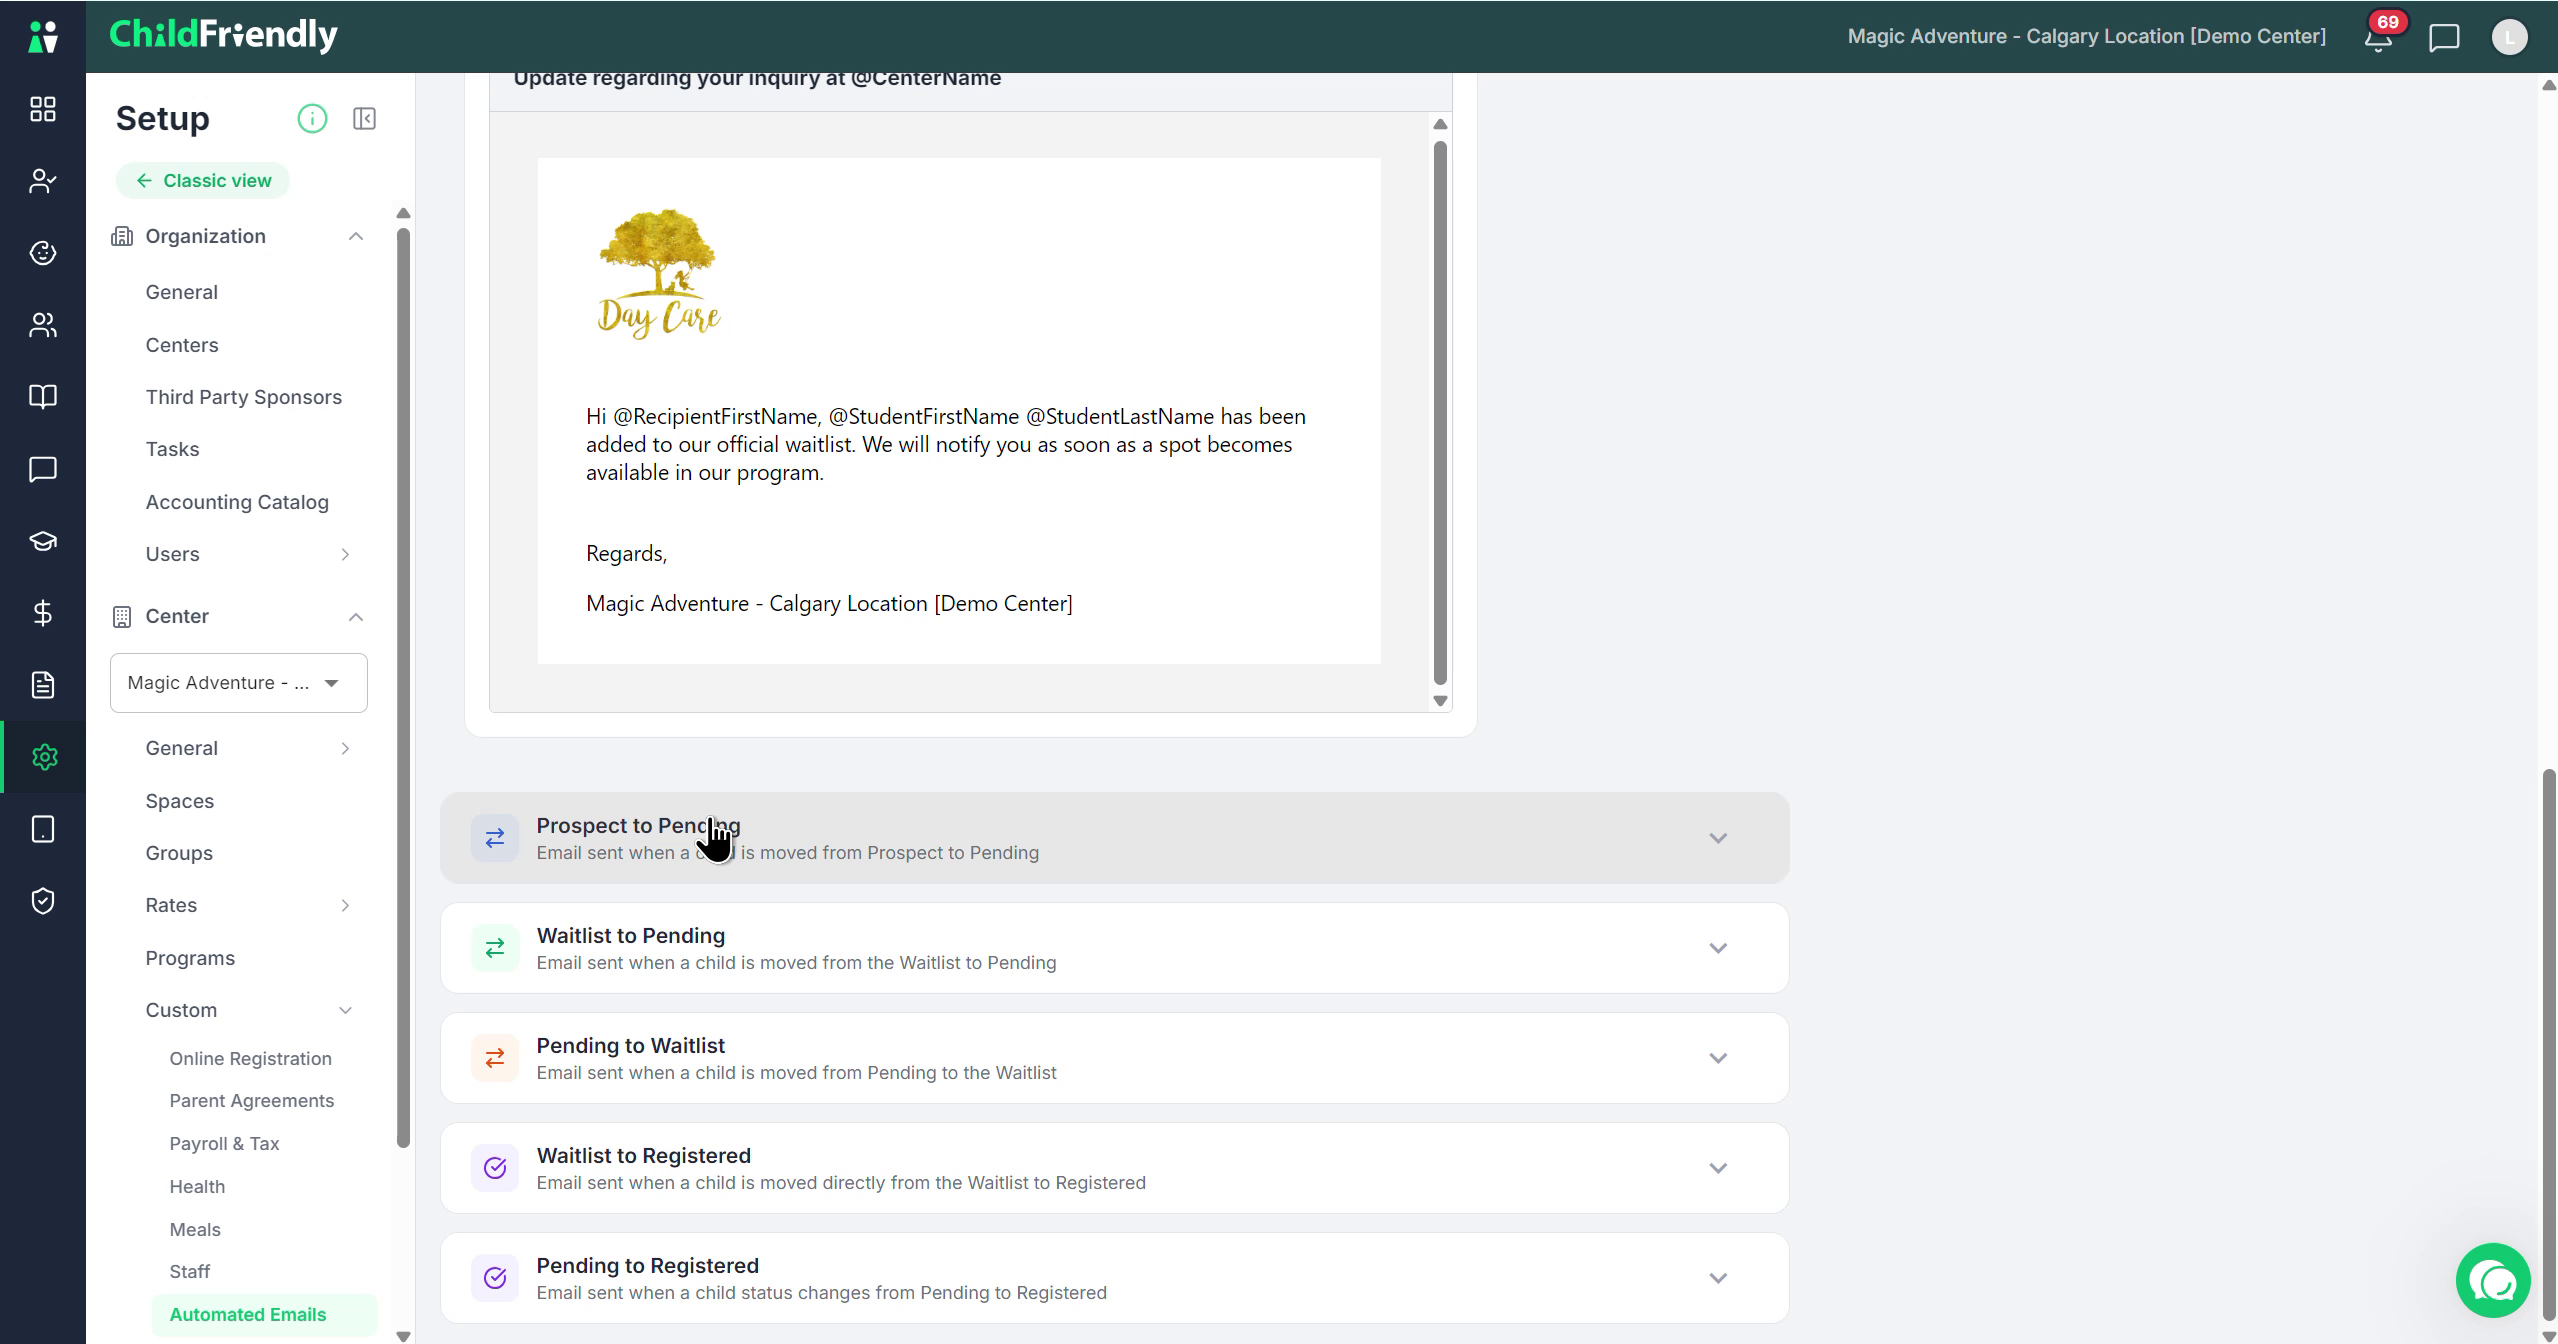
Next, customize the email that is sent when a child is moved from a Prospective Inquiry or tour to Pending Registration.
Configure this email in the same way as the others: enable it, edit the content, use special fields, send a test email, and save your changes.
Step 7: Configure the Waitlist-to-Pending Registration Email
Configure the email that is sent when a child is moved from the Waitlist to Pending Registration.
Follow the same process: enable the email, edit the body, use special fields, preview, test, and save.
Step 8: Configure the Pending-to-Waitlist Email
Set up the automated email that is sent when a child is moved from Pending Registration back to the Waitlist.
Again, enable this email if desired, customize the message, and save your settings.
Step 9: Configure the Waitlist-to-Registered Email
Configure the email that is sent when a student moves from the Waitlist to Registered status.
Enable the template, update the content to reflect that the child has been officially registered, and save your changes.

Step 10: Configure the Pending-to-Registered Email
Finally, configure the email that is sent when a student moves from Pending Registration to Registered status.
Enable the email, customize the message to confirm official registration, and save.