How to Pull Key Reports for Licensing Compliance
This article outlines how to access and use key compliance-related reports within the system when responding to requests from licensing or health officers. It covers attendance details, illness and incident logs, medical and allergy care and medication records, emergency information forms, and expiry tracking for staff credentials.
Last updated 2 months ago
Step 1: Access the Live Attendance Report for Incident Review
In this video, we are going to review some of the key reports that are really handy when you're dealing with your licensing or health officers. There are other reports as well, but this focuses on just the core reports.
The first report is a attendance report found in the Dashboard module.
On the left-hand menu, go to Attendance.
Click the Records tab.
Use this area whenever an incident occurs and you need exact details such as:
Time of the incident
Room/space where it occurred
How many staff and students were present
Set your date and time range for the incident:
For example, if the incident happened at 10:00 AM, set the range from 10:00 AM to 10:10 AM.
If needed, filter for a specific student or staff member and select the specific space where the incident occurred.
Click Apply to run the report.
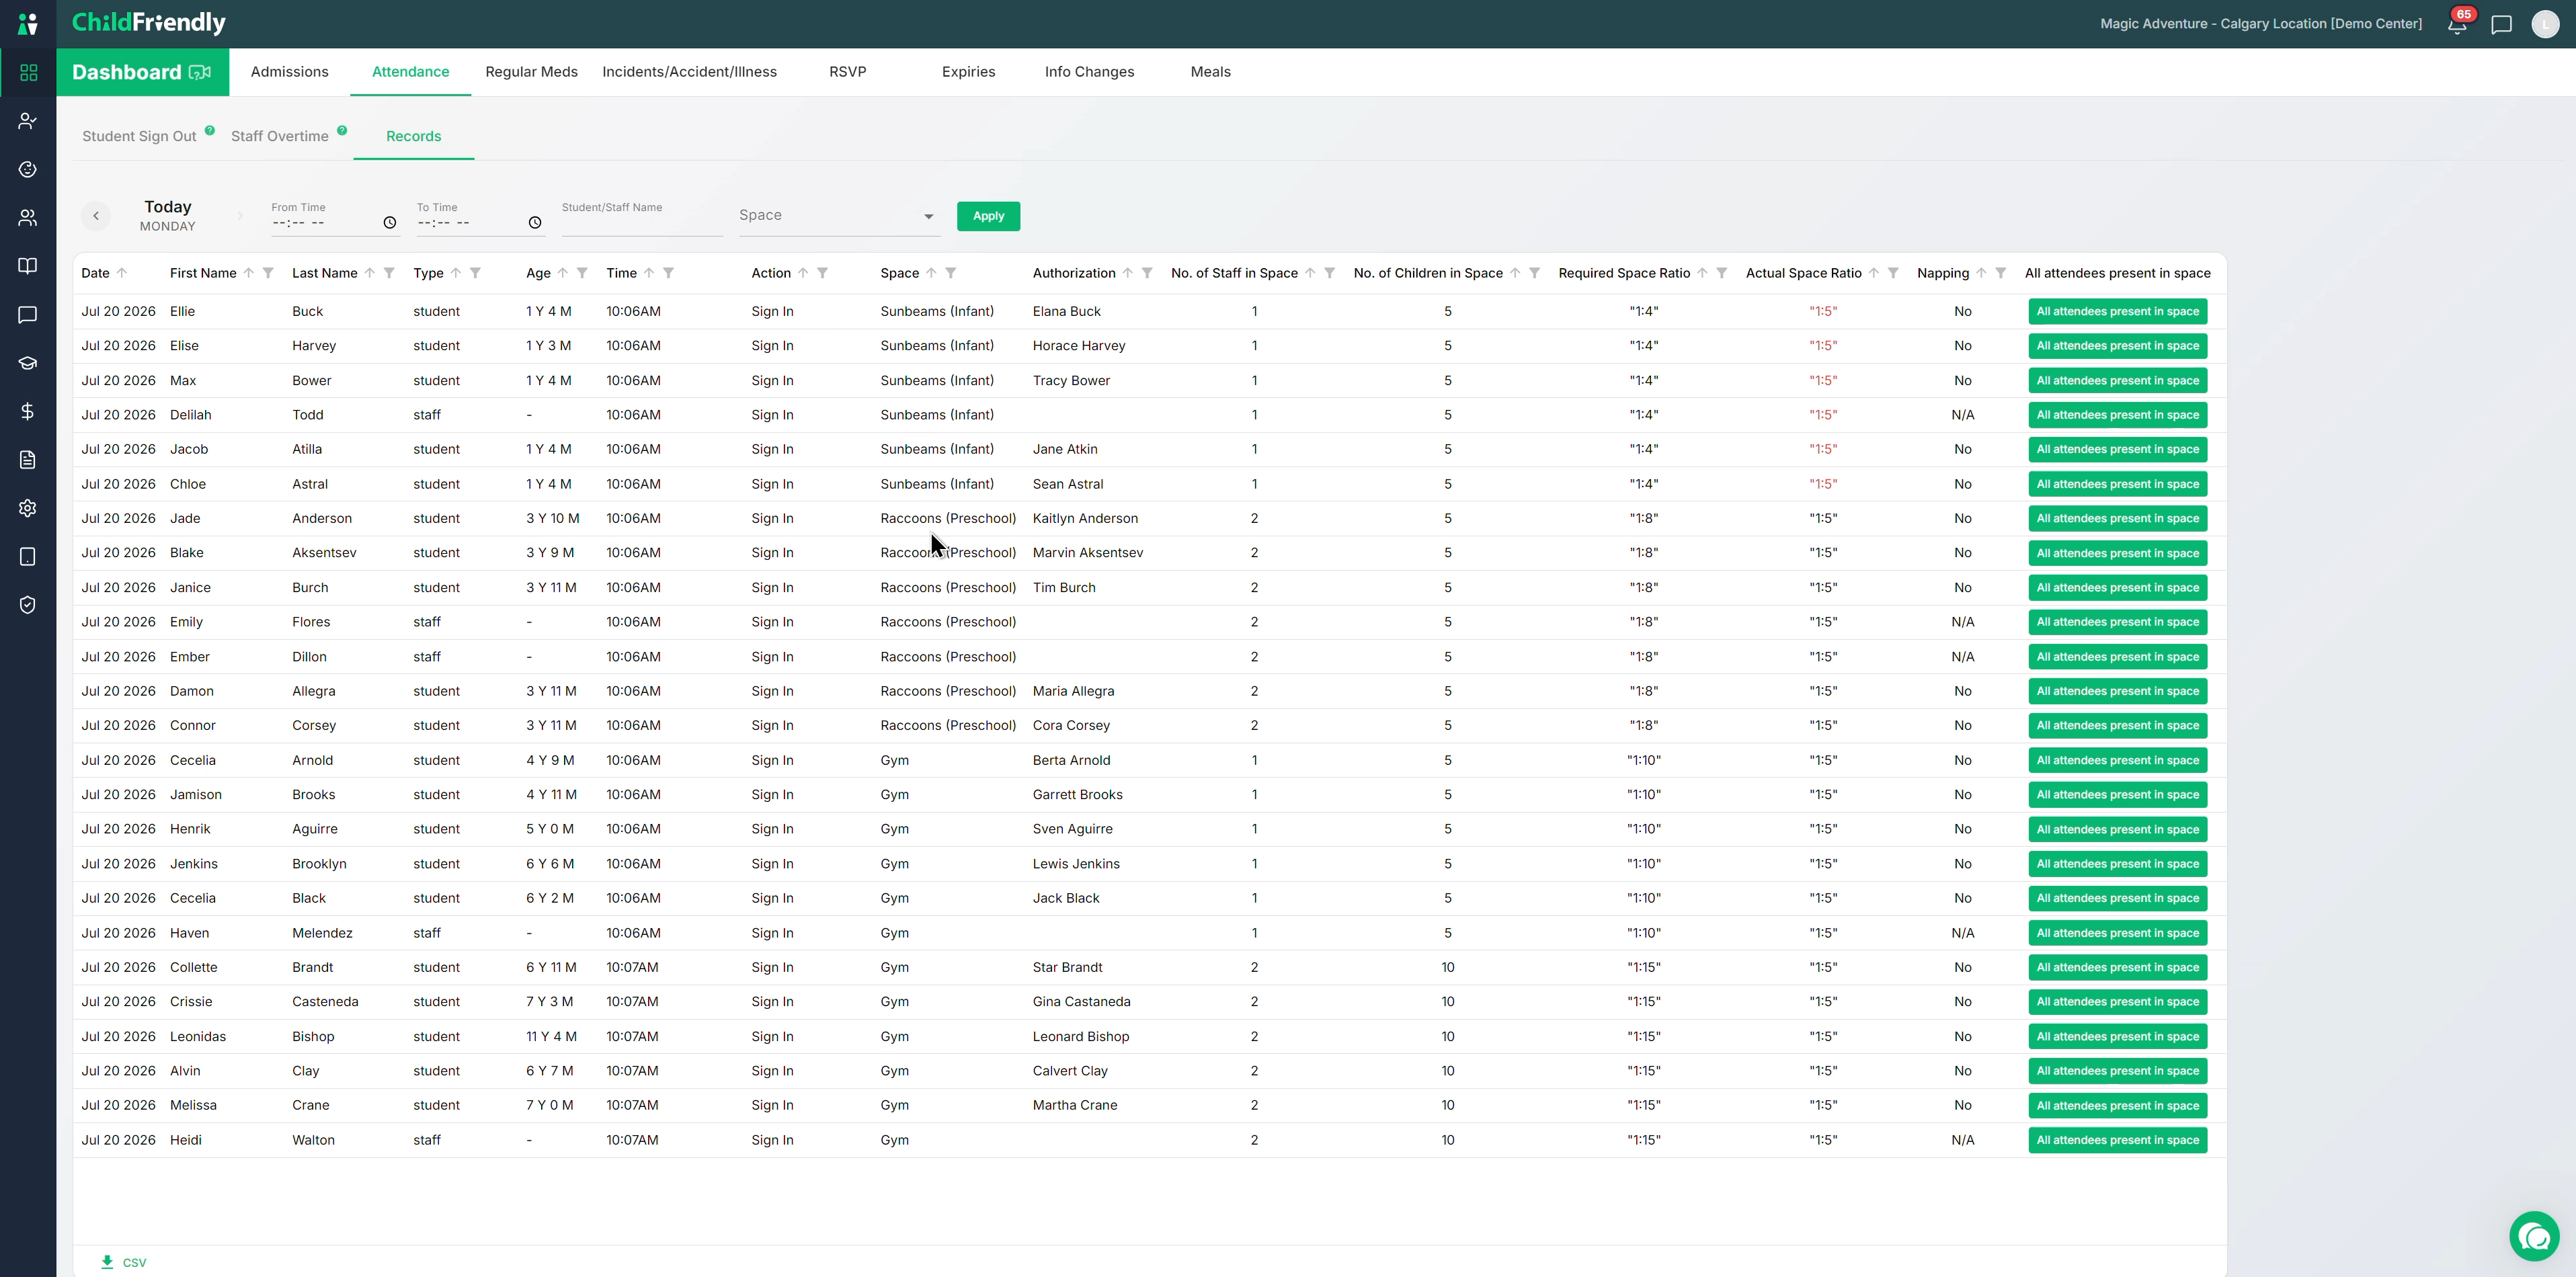
Review the attendance logs returned for the selected filters, including:
Student/staff name and role
Age
Timestamp of each log
Action (sign-in, room move, sign-out)
Space they signed into/out of or moved to/from
Who authorized the action (staff or parent)
Number of staff and students in the space at that moment
Required ratio vs. actual ratio (red indicates out-of-ratio)
Whether the room was in naptime
Scroll horizontally to see all available columns and locate the time of the incident.
Use the “All attendees present in the space” toggle:
Click the toggle beside the relevant log to show everyone in the room at that exact time.
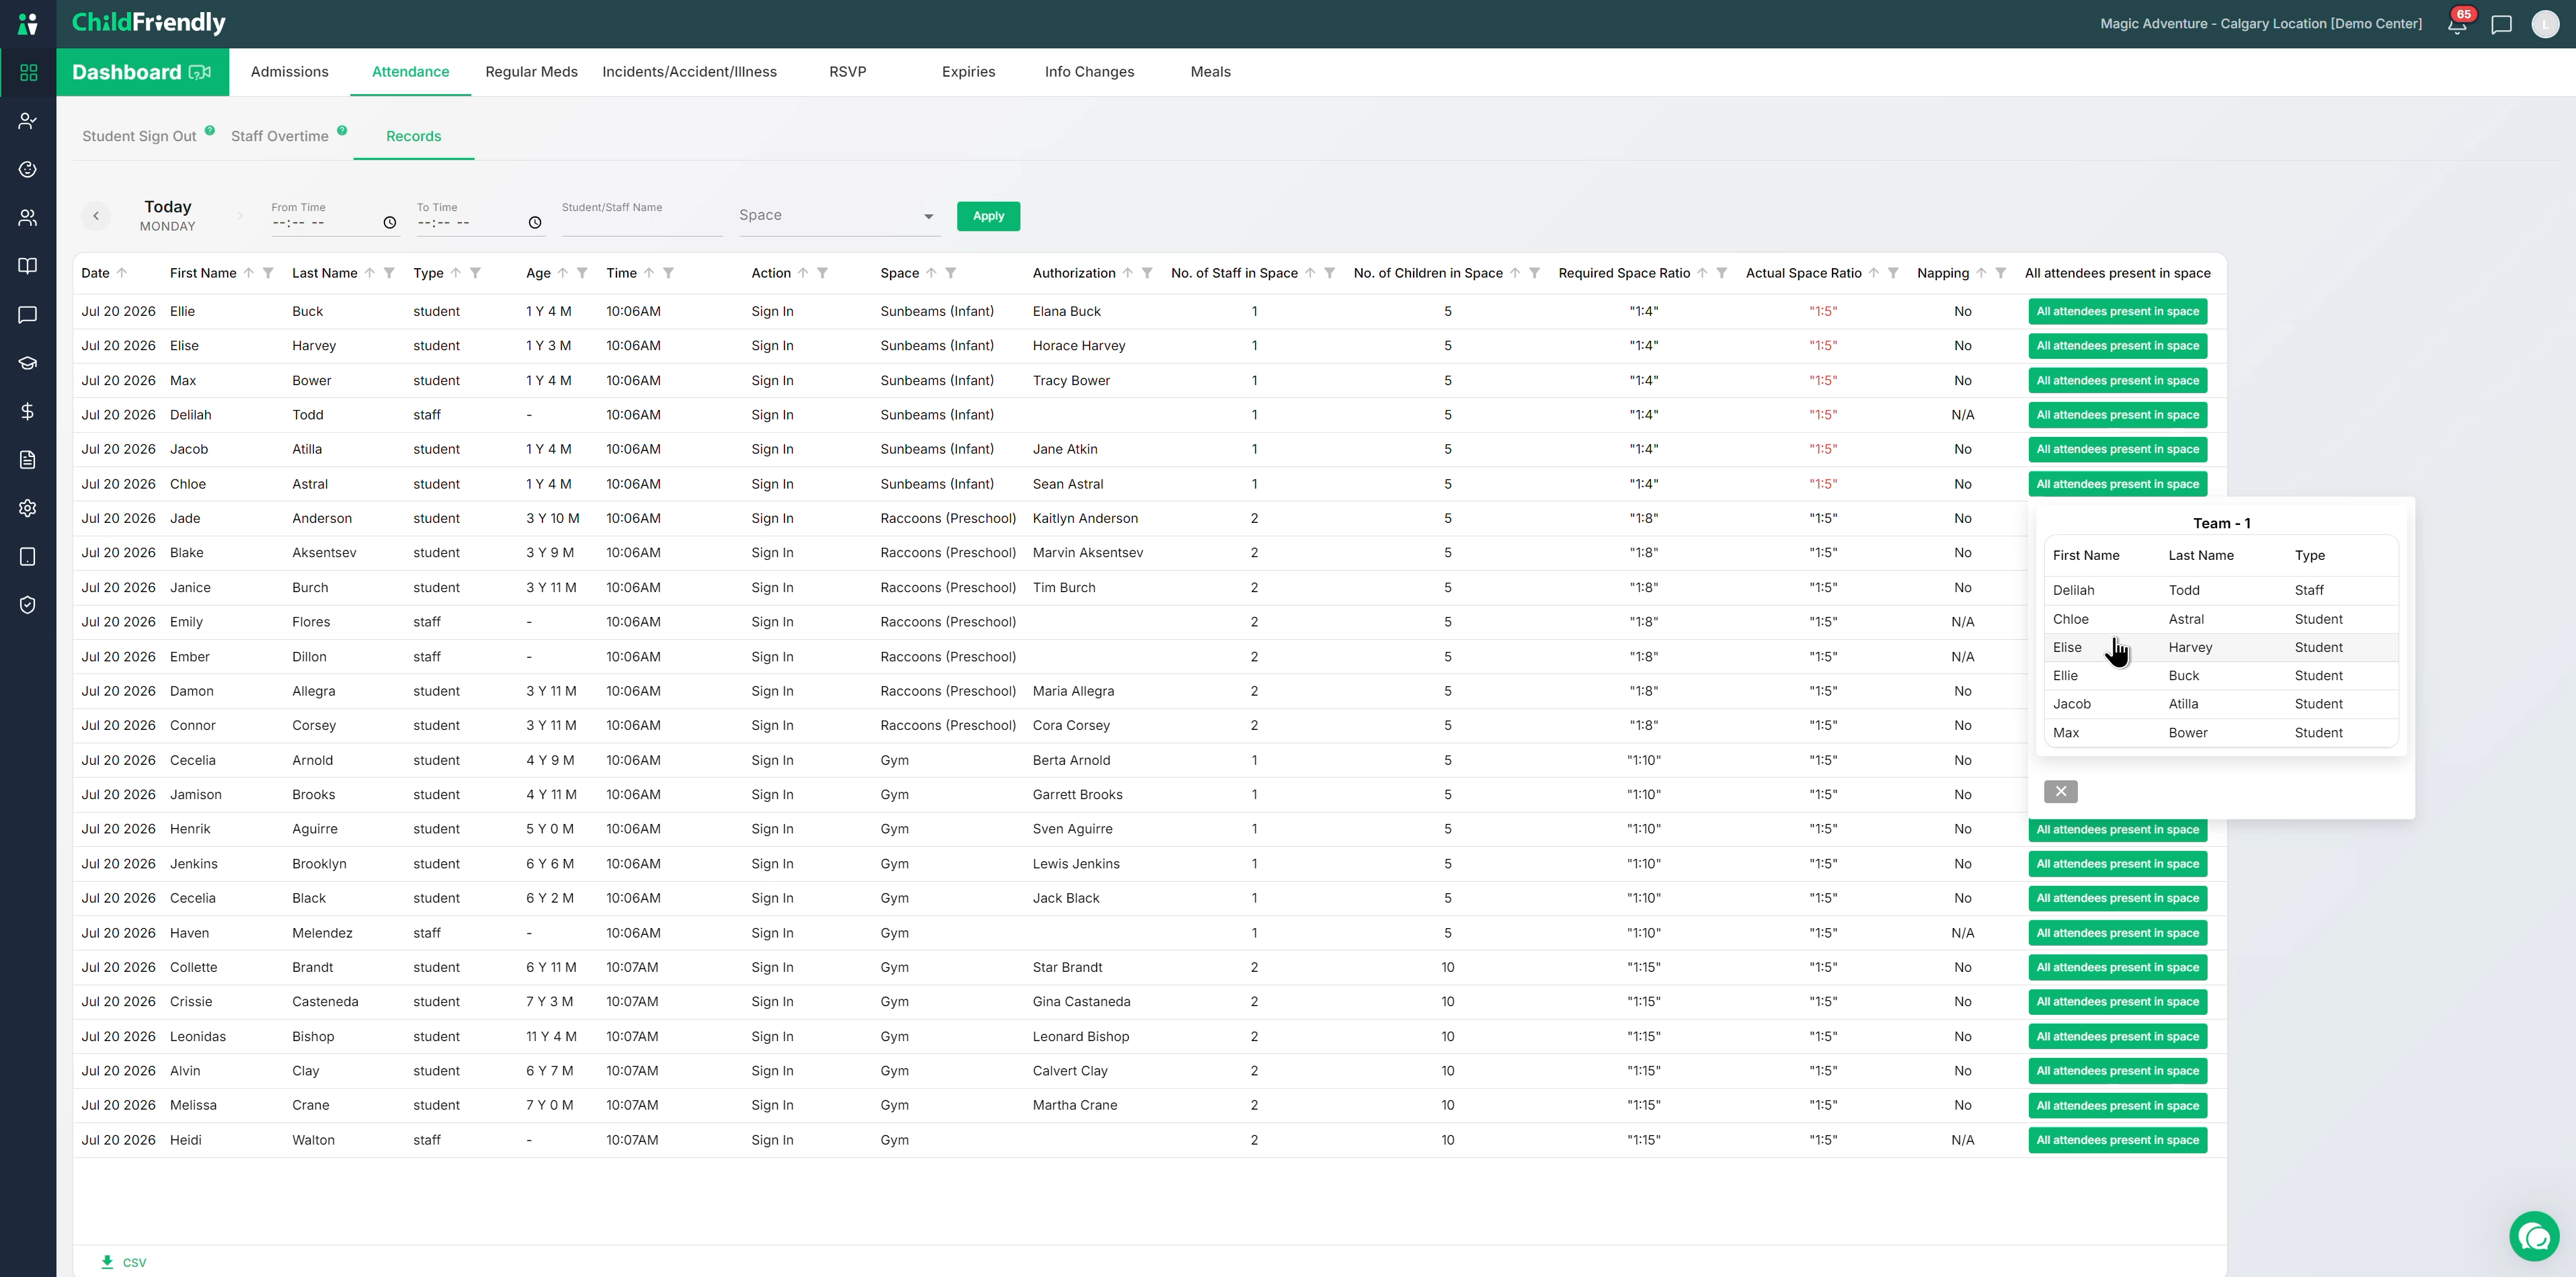
You will see all groups, staff, and students present, making it easy to show licensing who was in the room and what the ratios were at the moment of the incident.
Step 2: Navigate to Safety Reports in the Reports Module
The next set of reports is accessed through the Reports module on the left-hand menu.
Click Reports in the left-hand navigation.
Within Reports, locate the Safety Reports section.
Click Safety Reports.
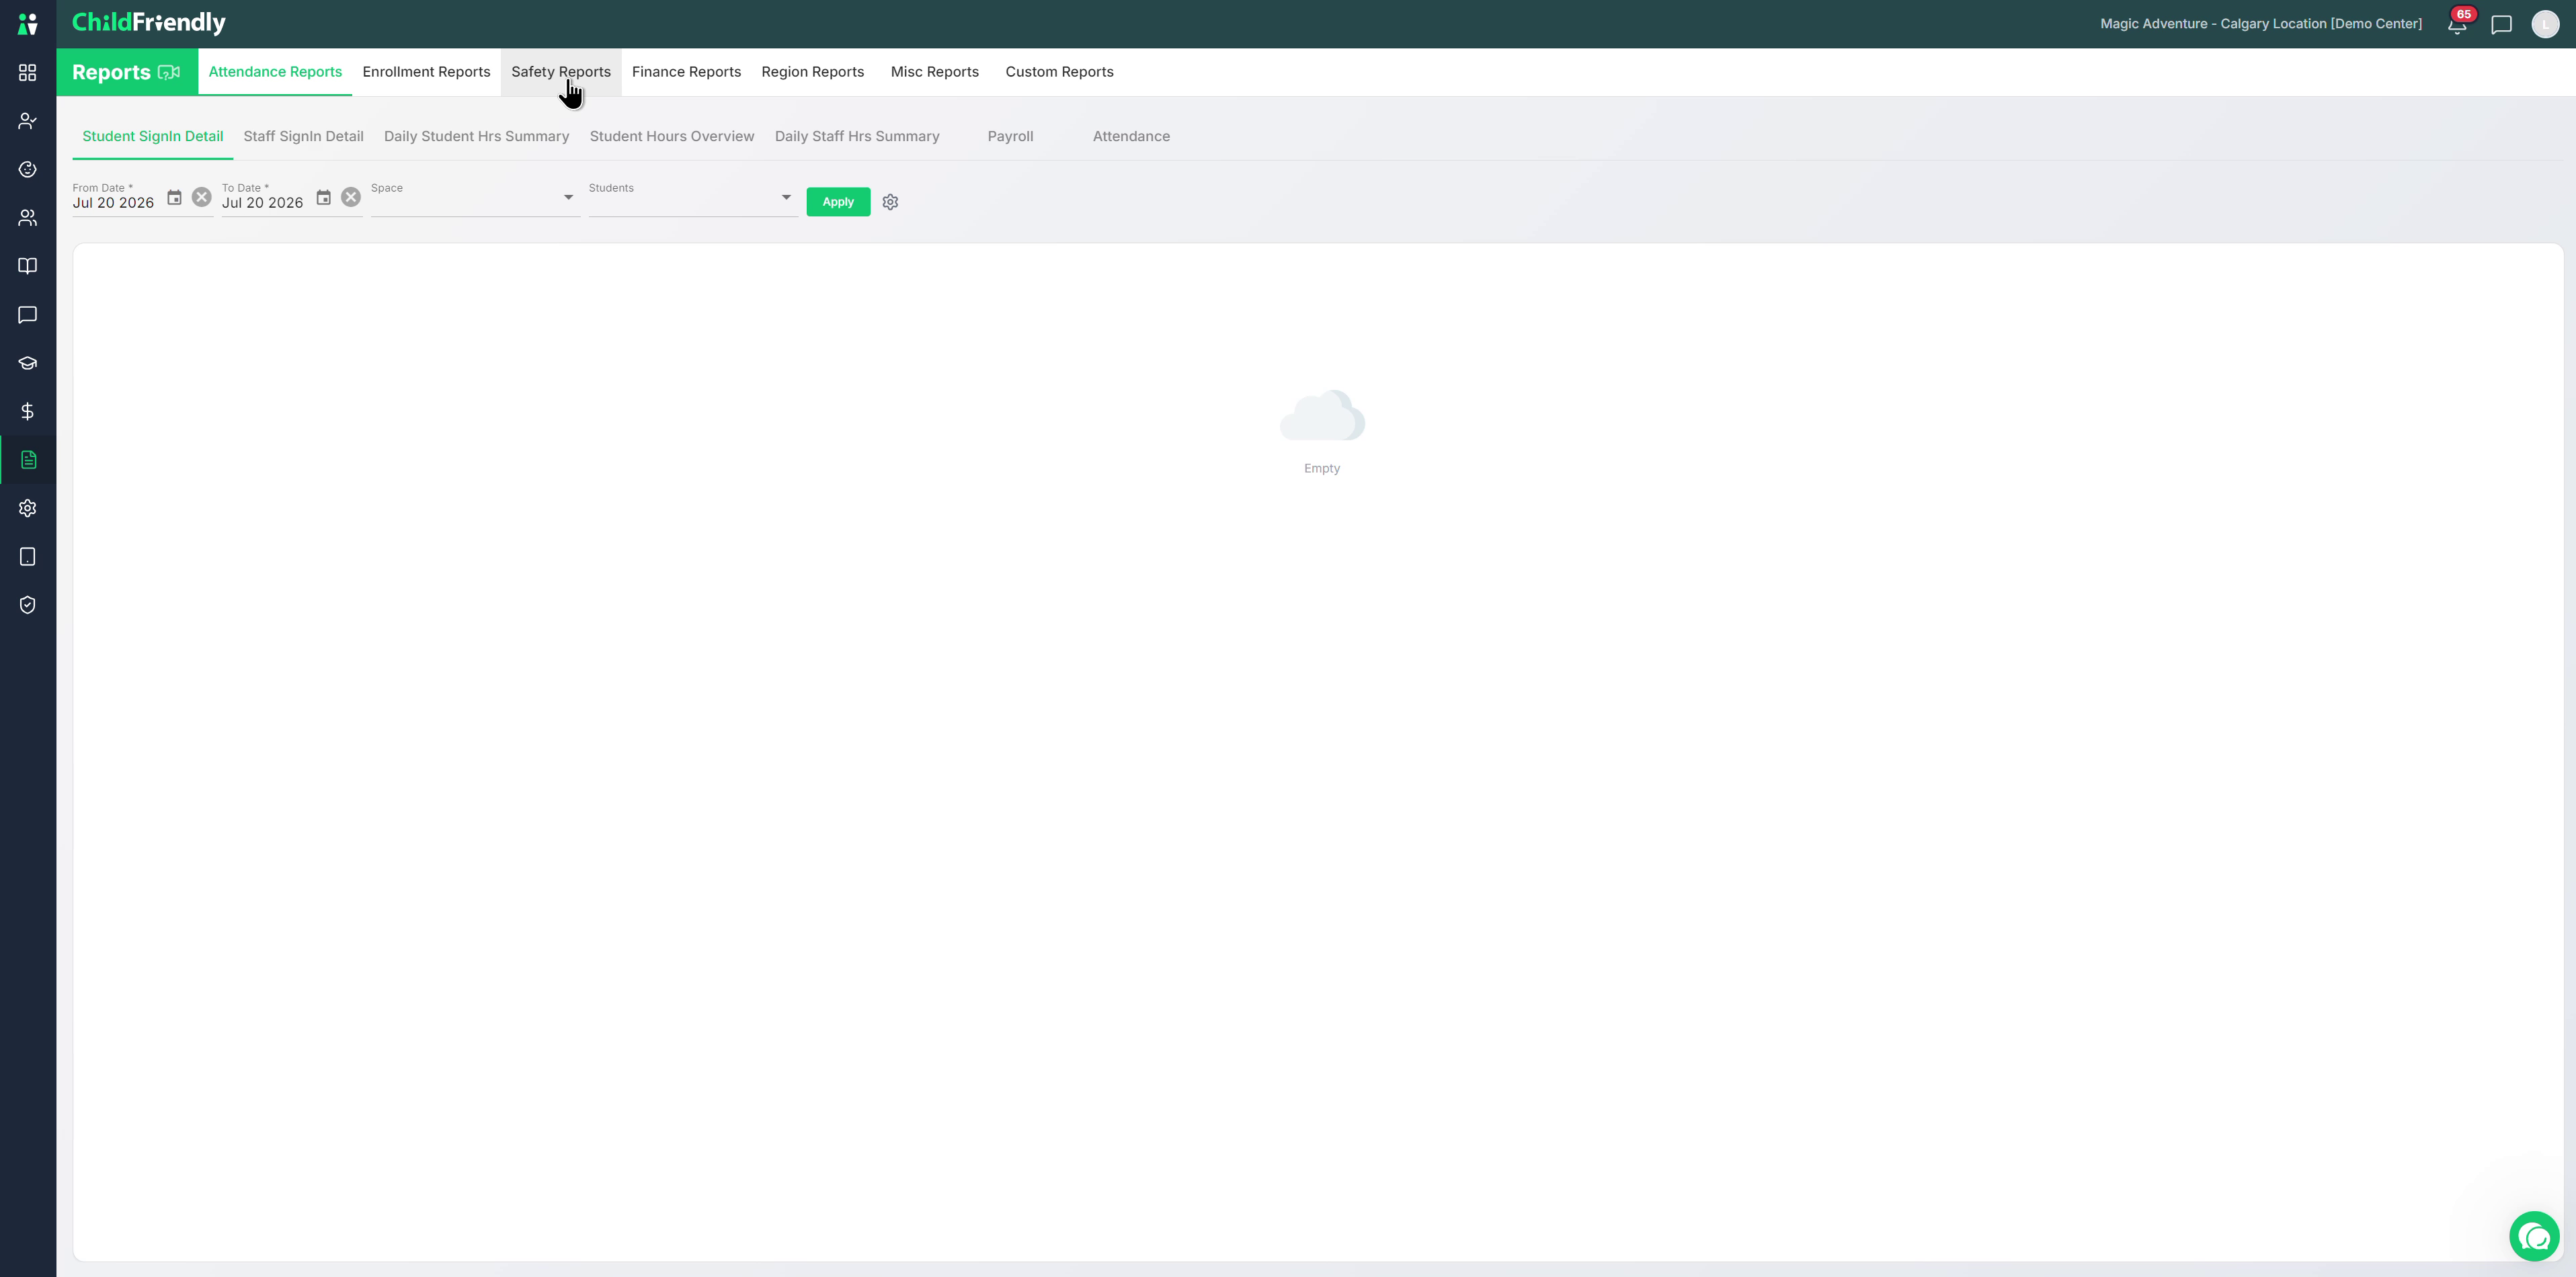
These Safety Reports are specifically for information requested by licensing officers during visits, not for financial grants or subsidies (those are under Region Reports and are state/province-specific).
Step 3: Run and Export the Illness Log
Licensing or health officers may request a log of all illnesses, for example during an outbreak or to review illness incident reports.
In Safety Reports, click Illness Log.
Set the date range for which you want to see illness entries.
Optionally, filter by group to narrow down to a specific room or class.
Click Apply.
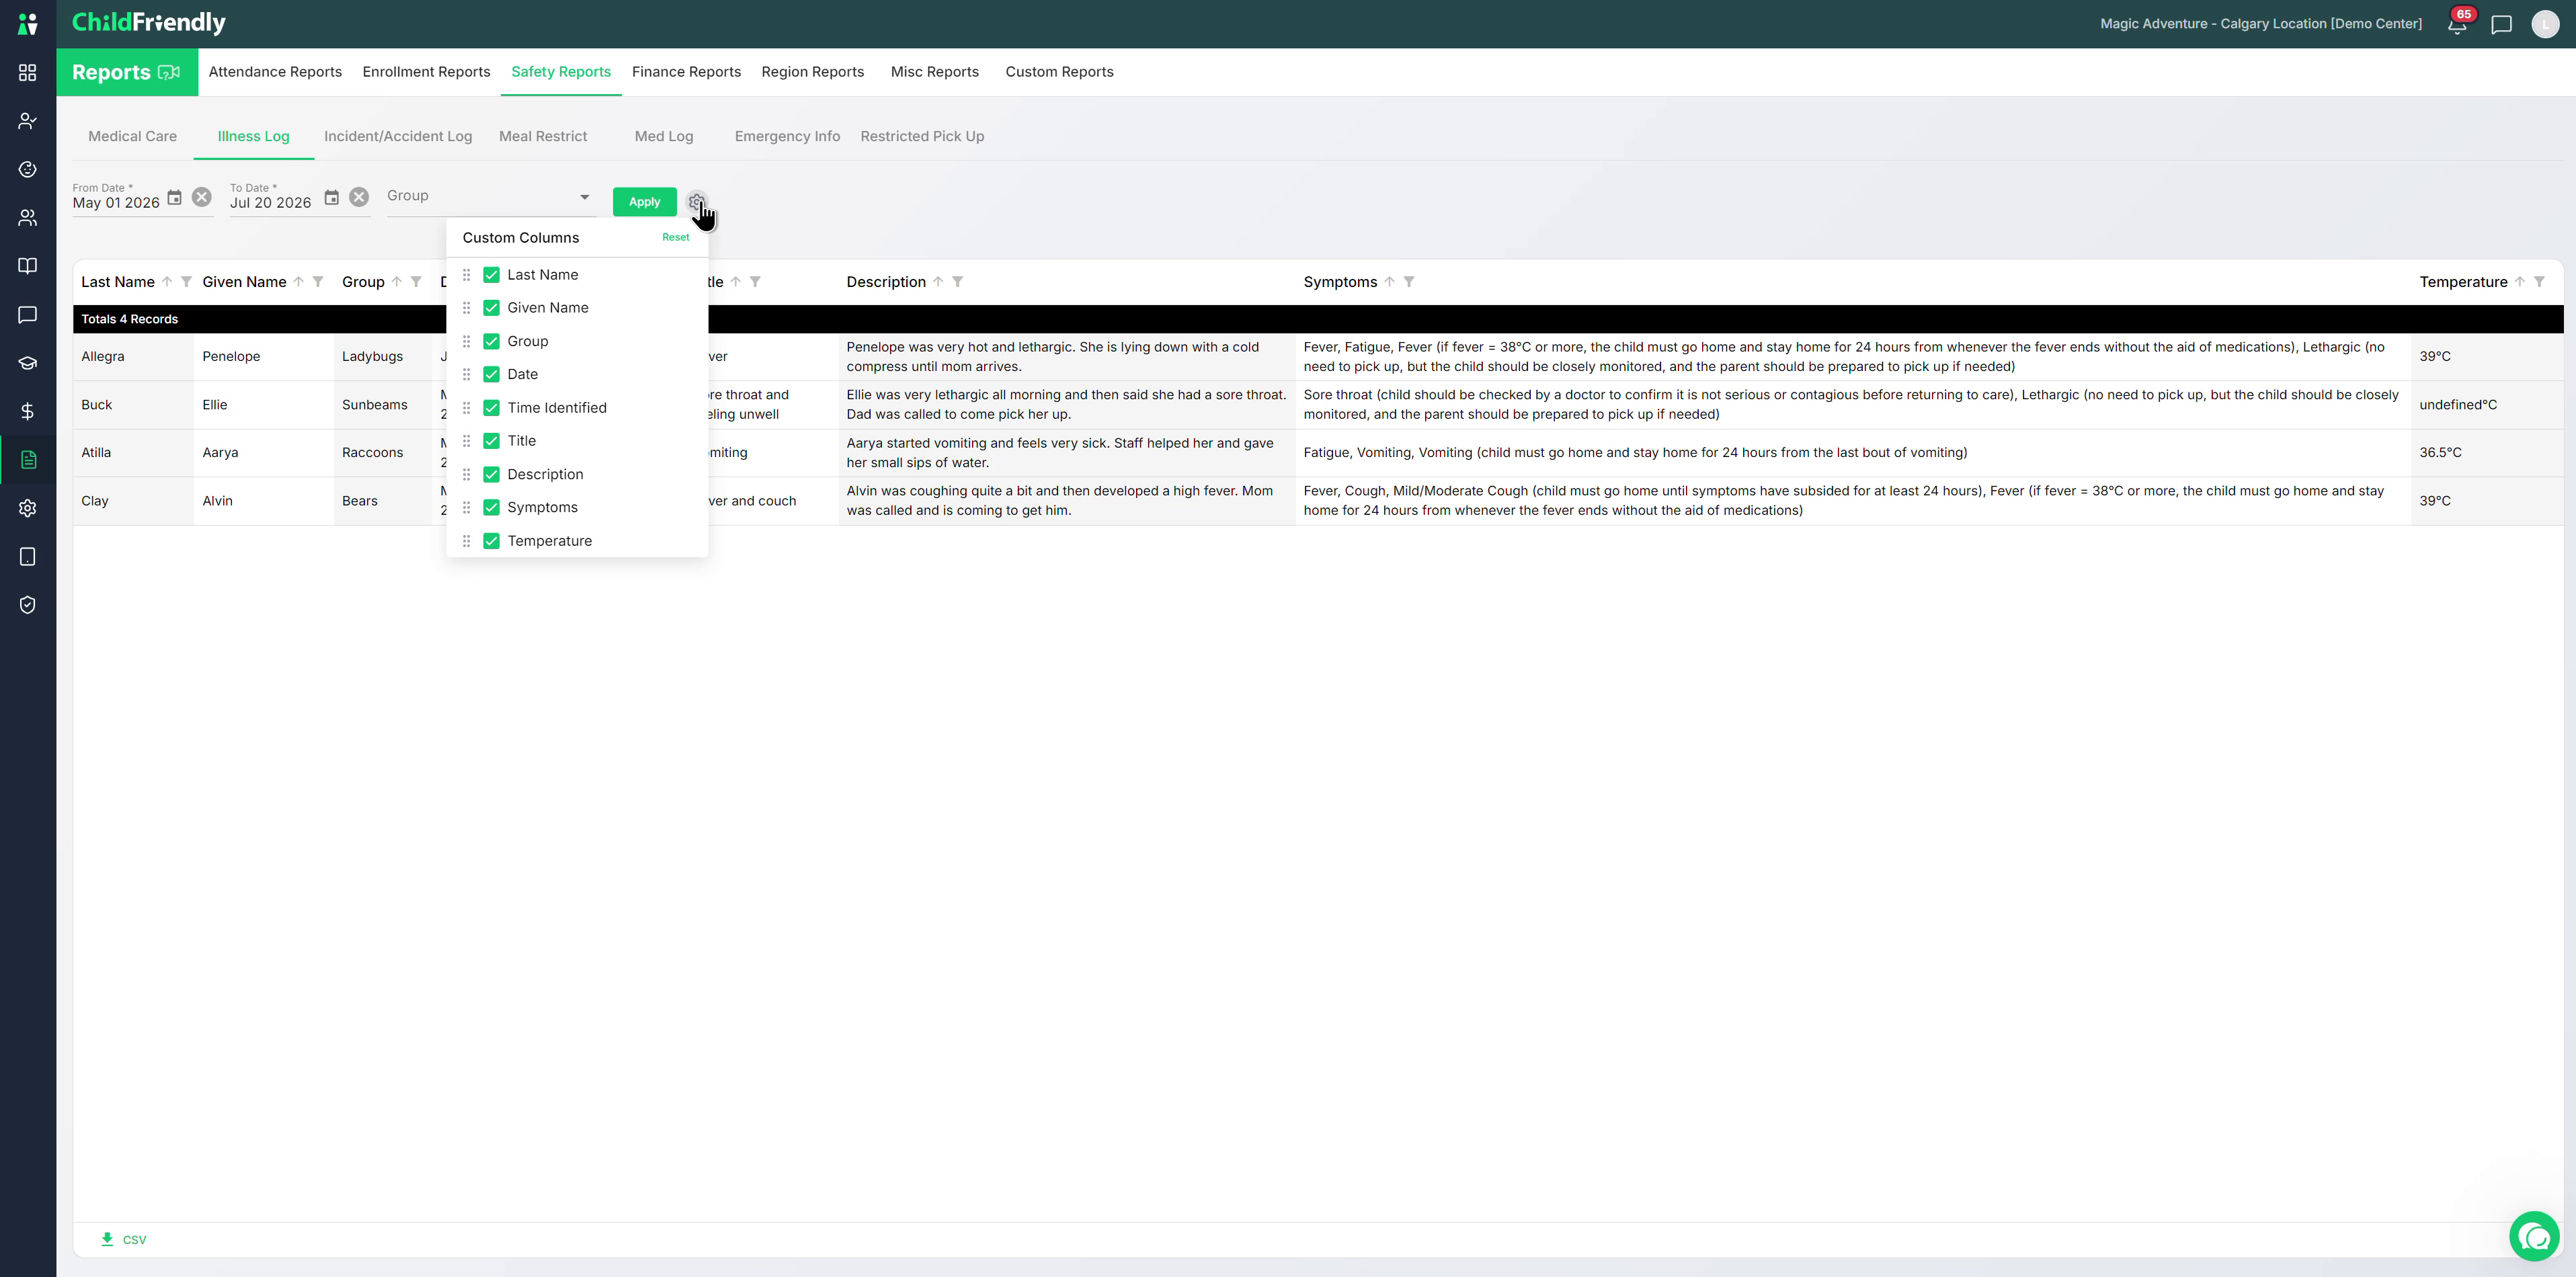
Review the resulting illness log, which includes:
Title of the illness report
Date and time of illness
Symptoms, temperature, and all fields from the illness incident report
To export or share:
Download the report as a CSV file if you need to email it to licensing or print it.
Adjust which columns are displayed, if needed:
Click the gear icon to choose which columns are shown.
Drag and drop to reorder columns.
Step 4: Use the Incident and Accident Log
The Incident and Accident Log works similarly to the Illness Log and is often requested by licensing.
In Safety Reports, click Incident and Accident Log.
Set the date range for all incidents and accidents you want to review.
Optionally, filter by group to see incidents for a specific room or class.
Click Apply.
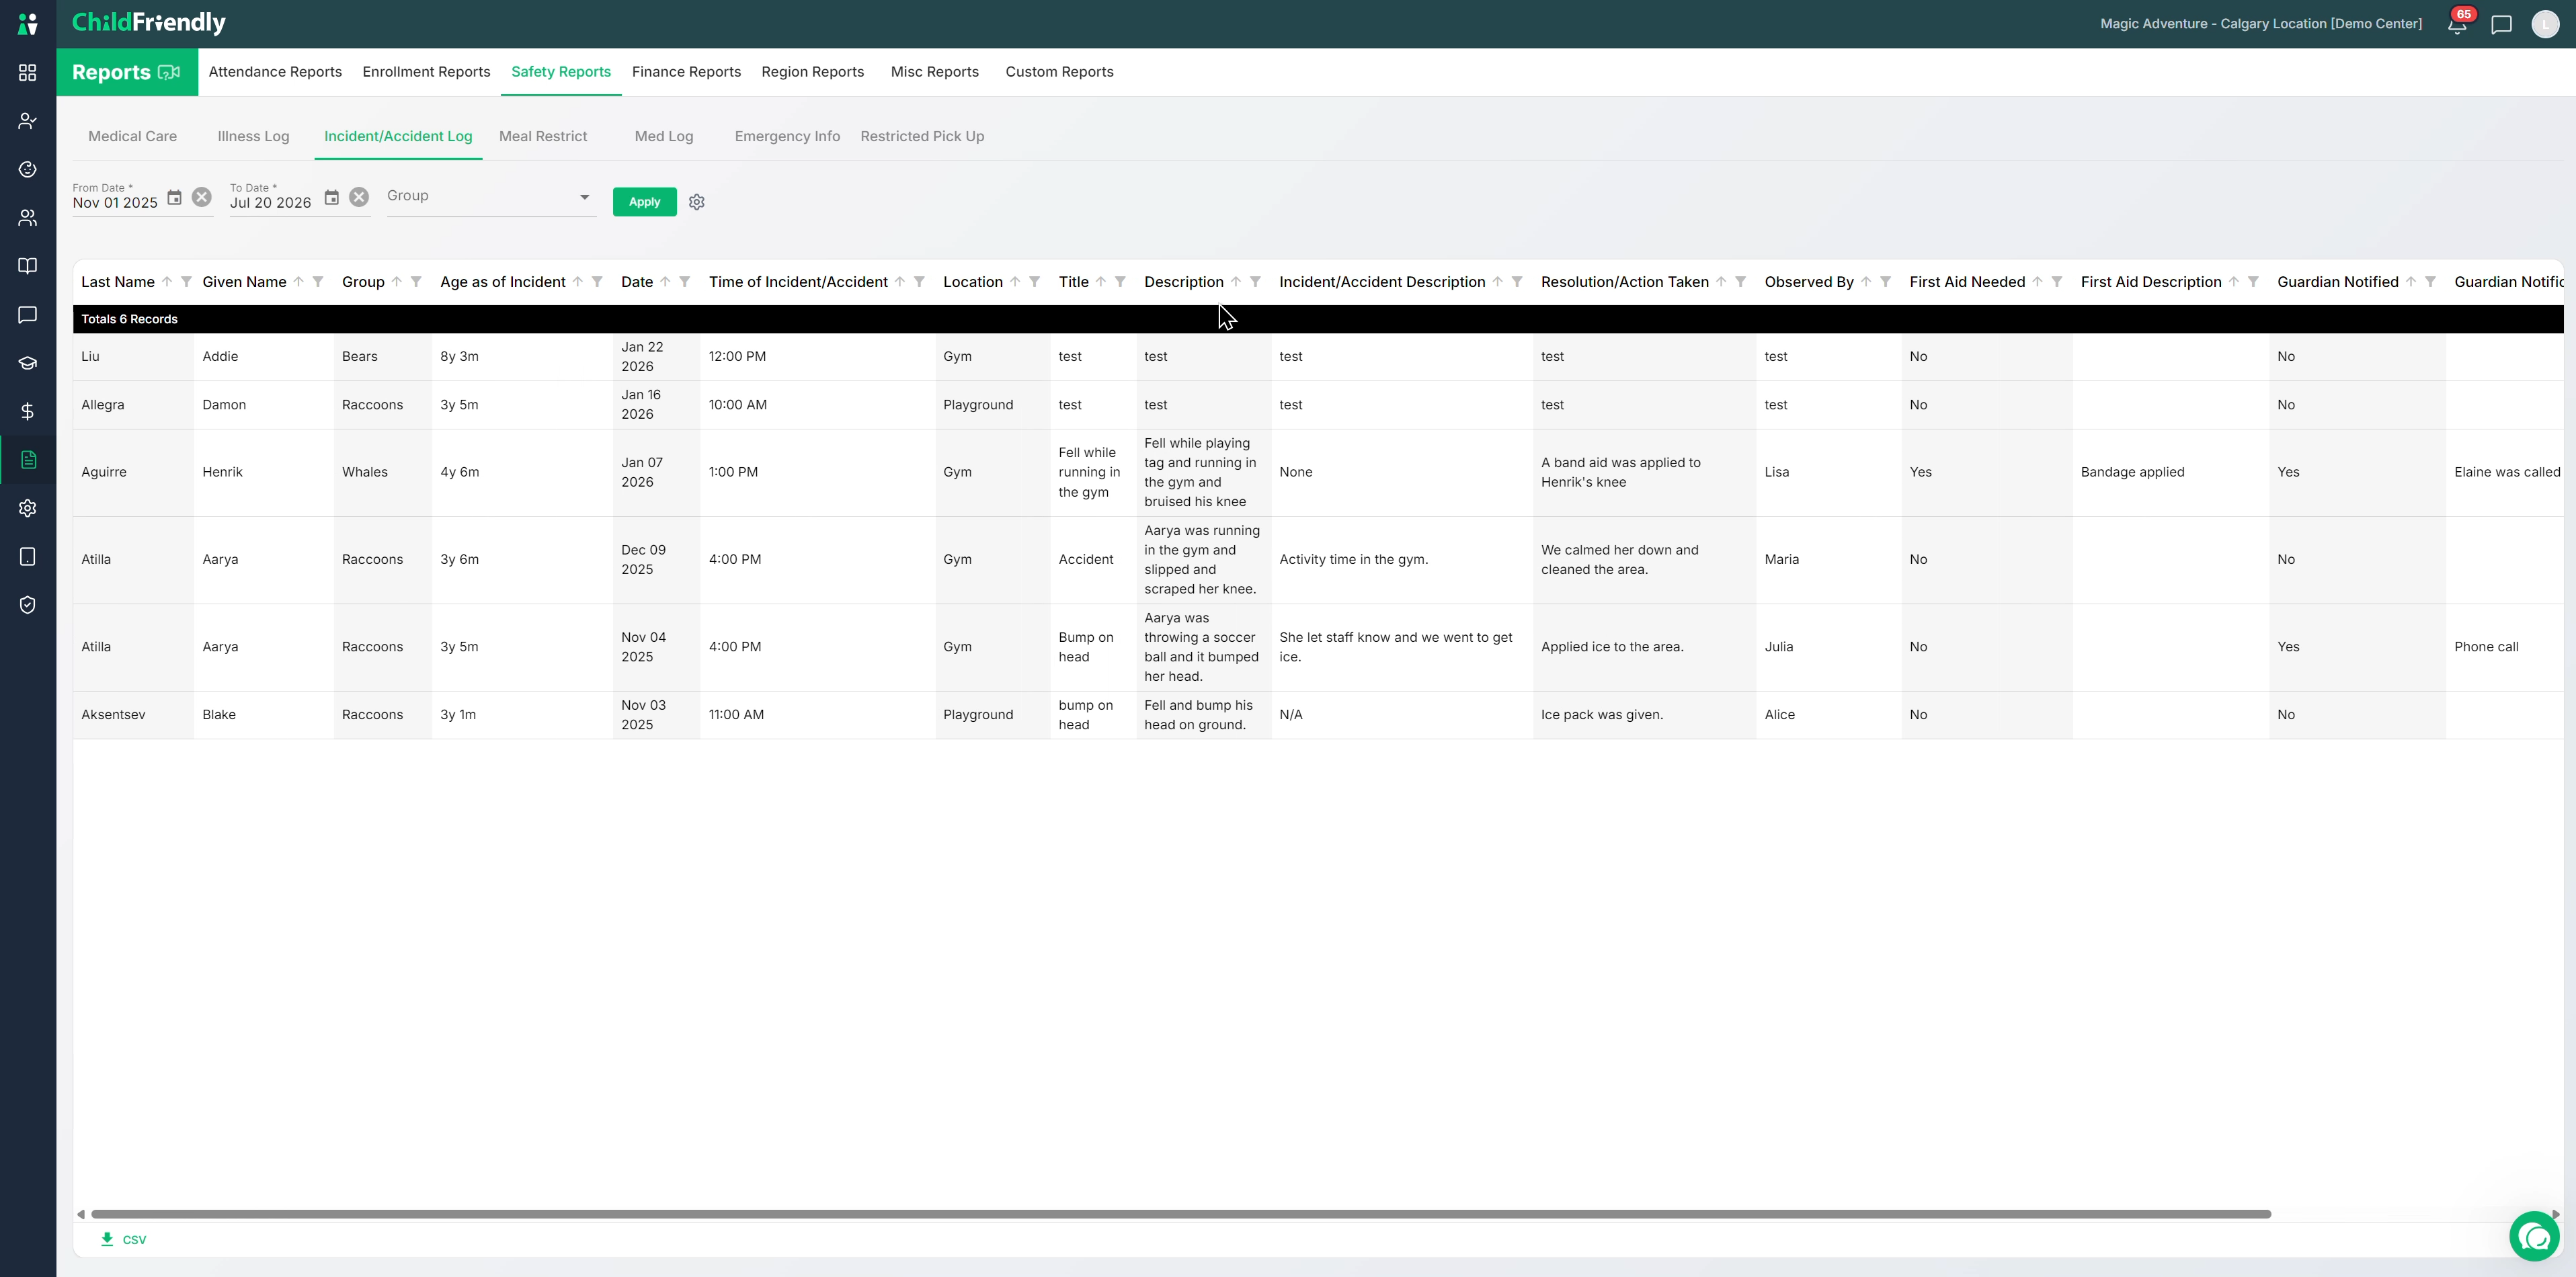
Once filtered, review the log:
Every incident or accident within the selected date range is listed.
All fields from your incident/accident report forms (completed via the journal) are included, meeting licensing requirements.
Export the report as needed (e.g., CSV) if licensing requests a copy.
Step 5: Generate and Customize the Medical Care Report
The Medical Care Report is useful for posting up-to-date medical information in rooms, as often required by licensing.
In Safety Reports, open the Medical Care Report.
Select the month/date range for which you want medical care information.
Optionally, filter by group (room/class) to view specific students.
Click Apply.
Review the snapshot of medical information, which may include:
Medical conditions
Allergies
Immunizations
Medications on file
Flagged pickup restrictions (e.g., court orders)
Prohibited meals
Special needs
Child photo (helpful for substitutes)
Note: Only children who have data in these medical fields will appear; not every child in the center is listed by default.
If you do not need all available details:
Use the column settings to show/hide specific columns (e.g., only child name, photo, and allergies).
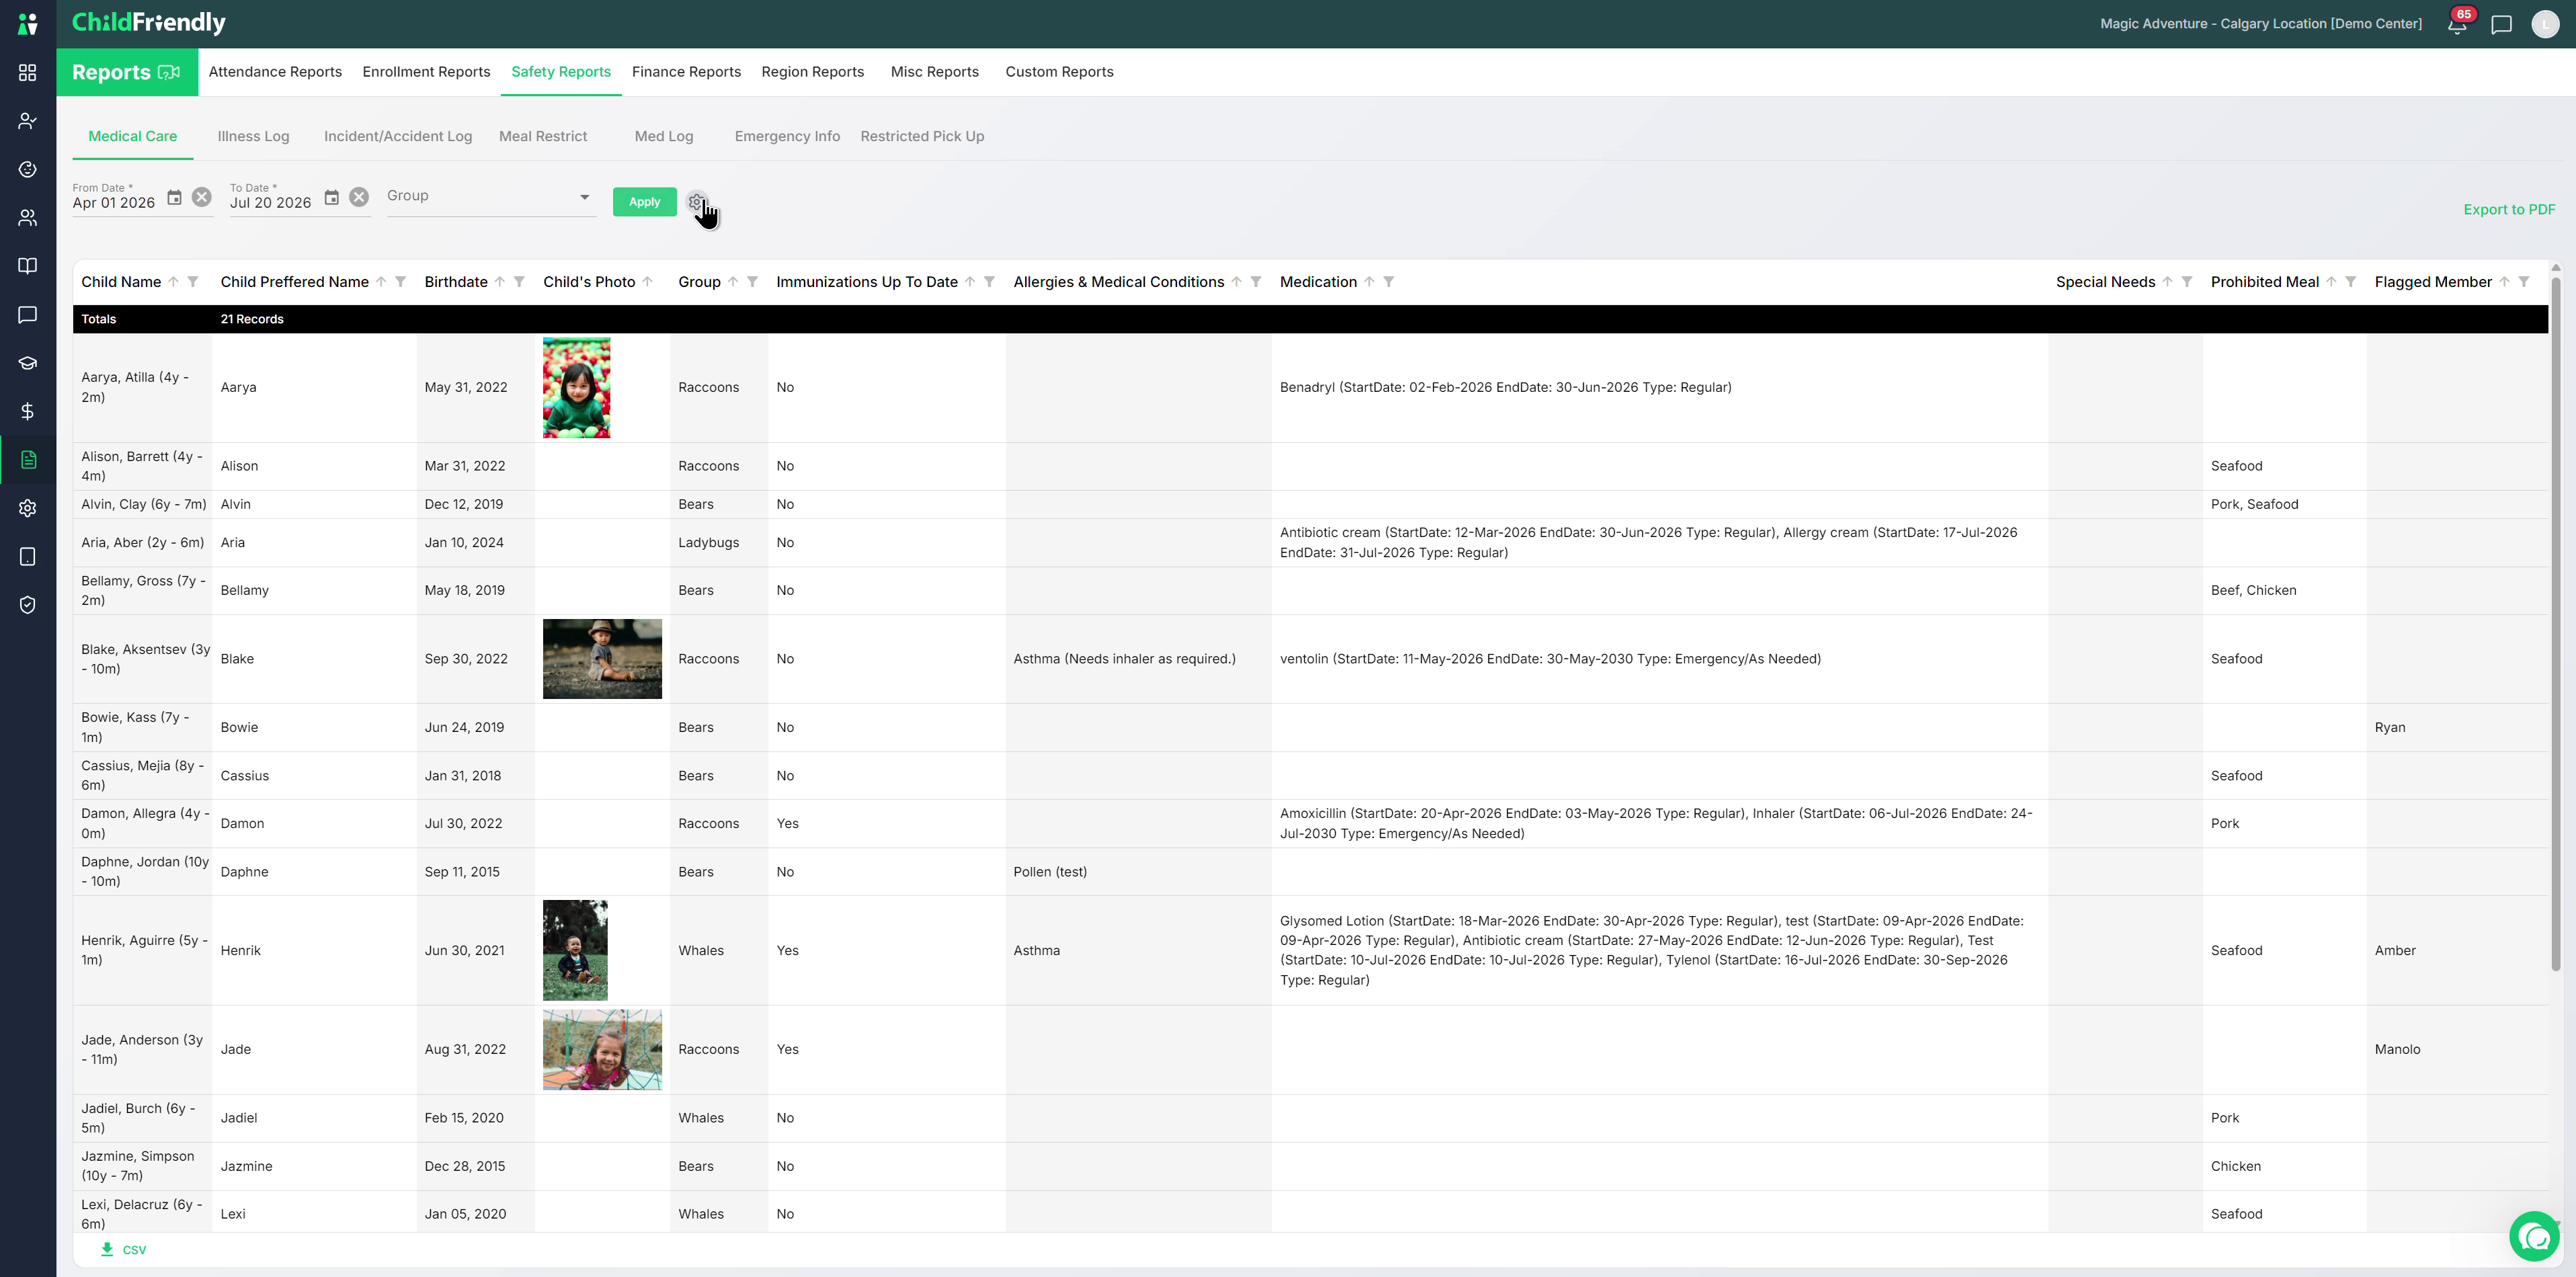
Click Apply after adjusting columns.
Print the report as needed to post on staff boards or in rooms, according to your local regulations and licensing officer’s expectations.
Step 6: Produce Emergency Info Forms (Portable Emergency Report)
The Emergency Info Report is a portable emergency form that should be printed and kept in a binder for offline access during emergencies (e.g., fire, evacuation, loss of internet).
In Safety Reports, open the Emergency Info Report.
Set the current date or month you wish to filter for.
Optionally, filter by group.
Click Apply to generate the list of children.
To print all children in bulk:
Multi-select all records.
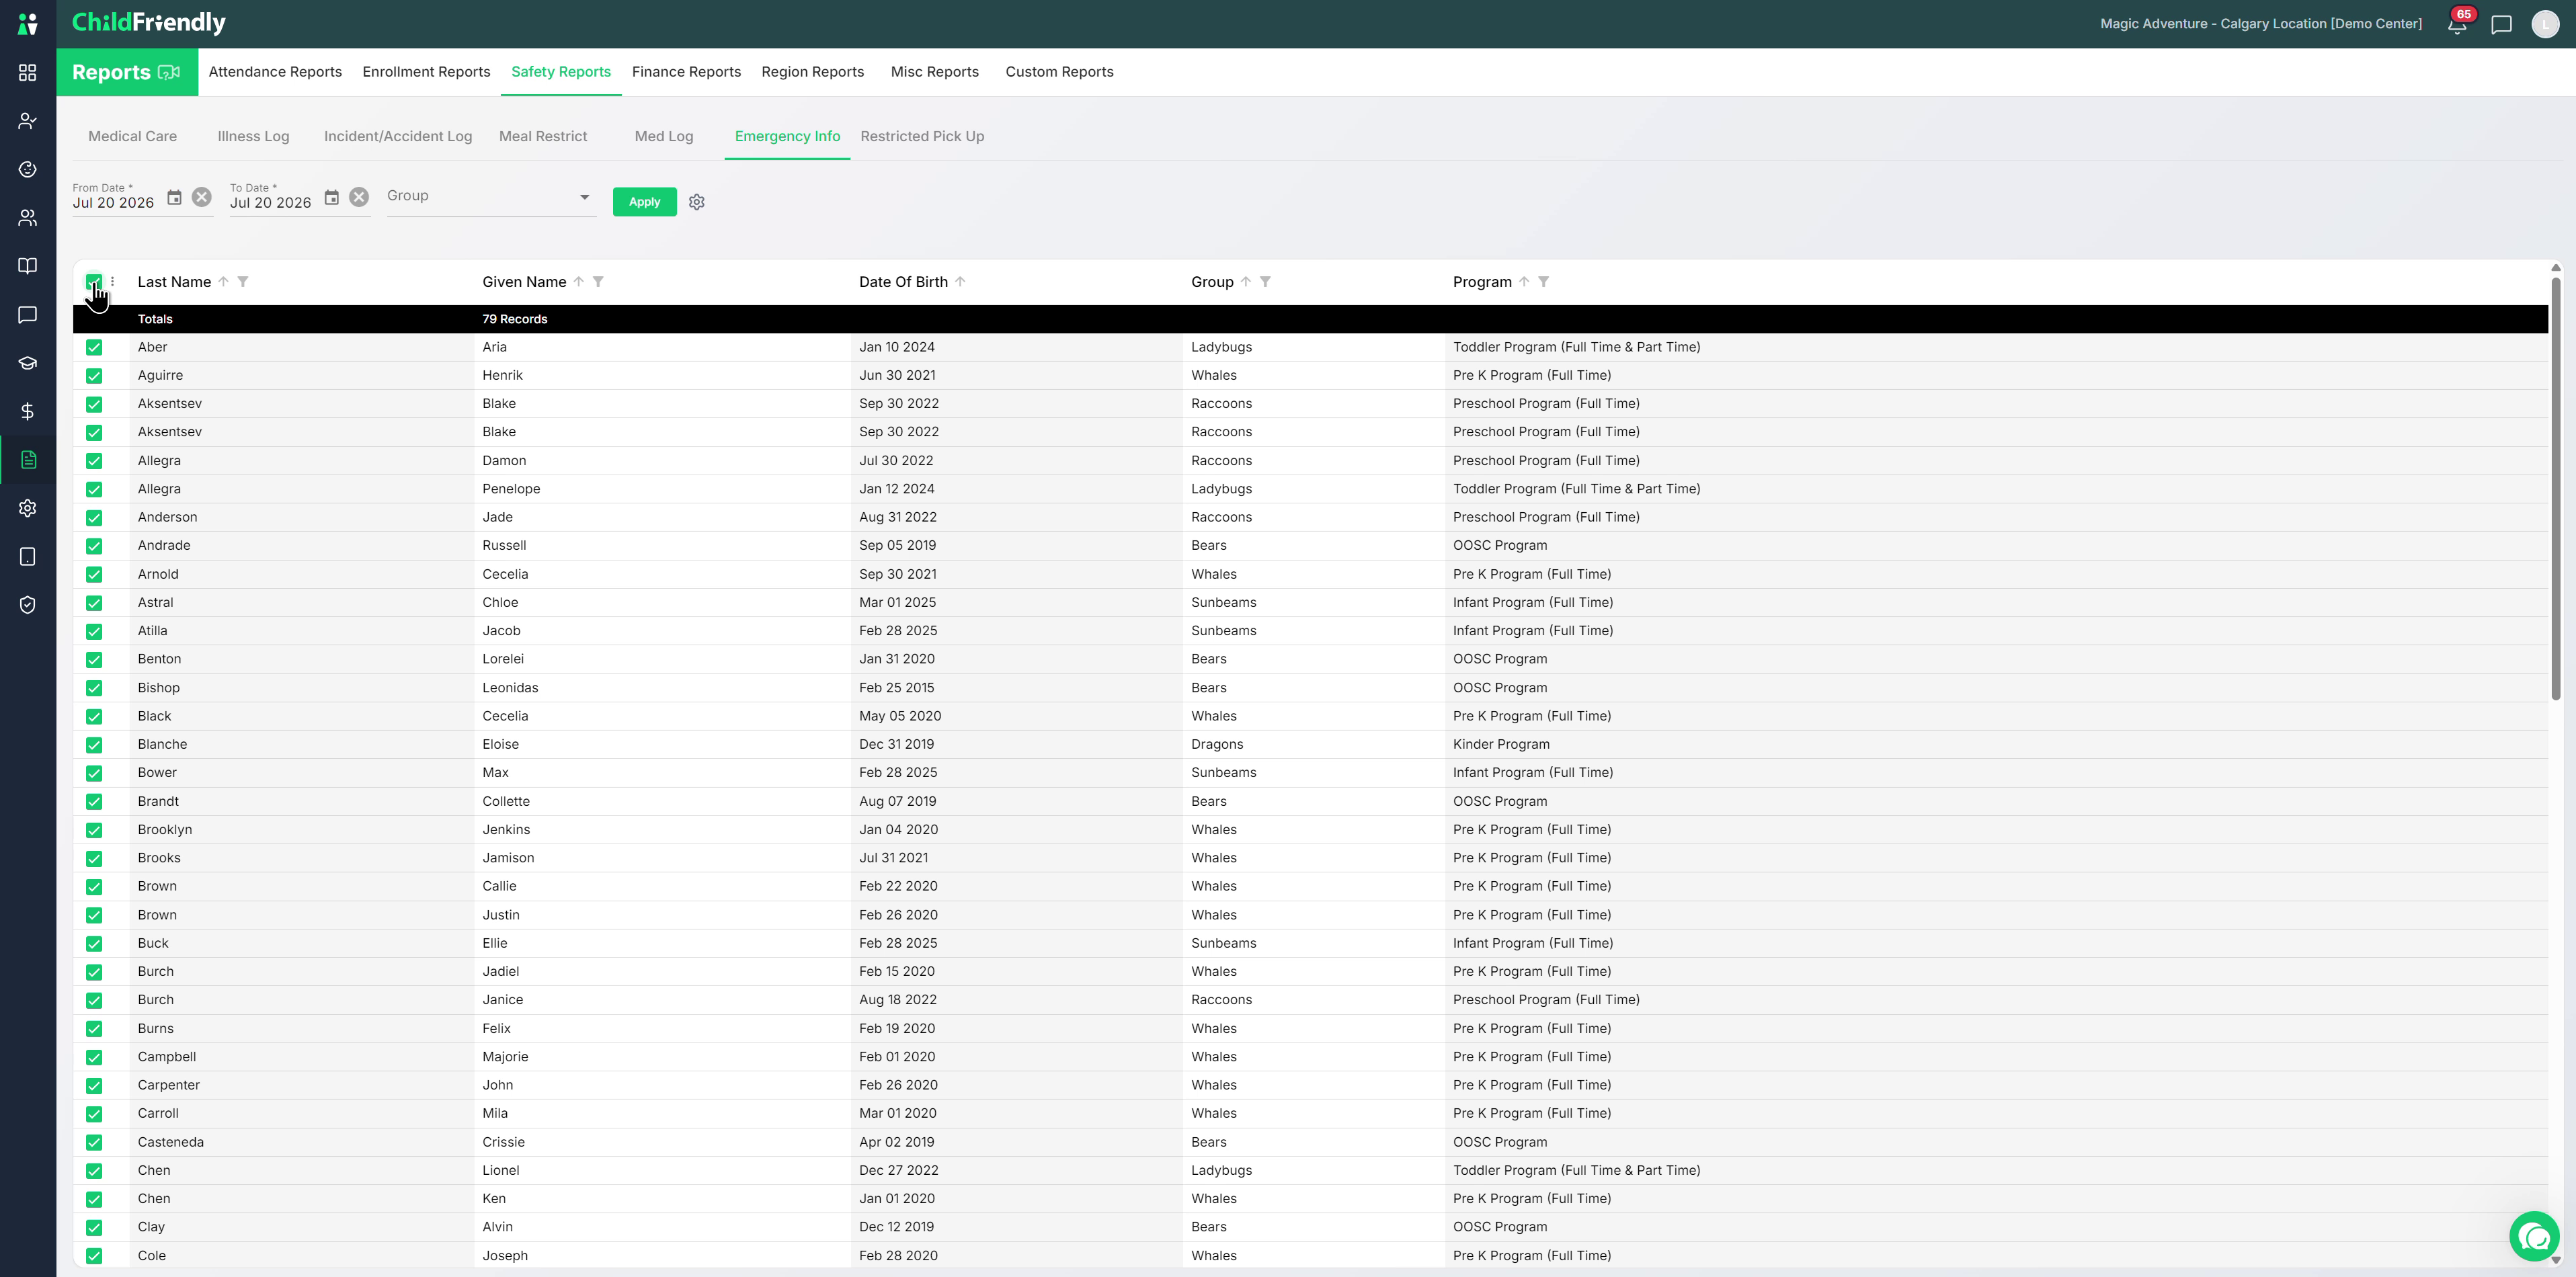
Click the triple dots menu.
Choose Generate PDF.
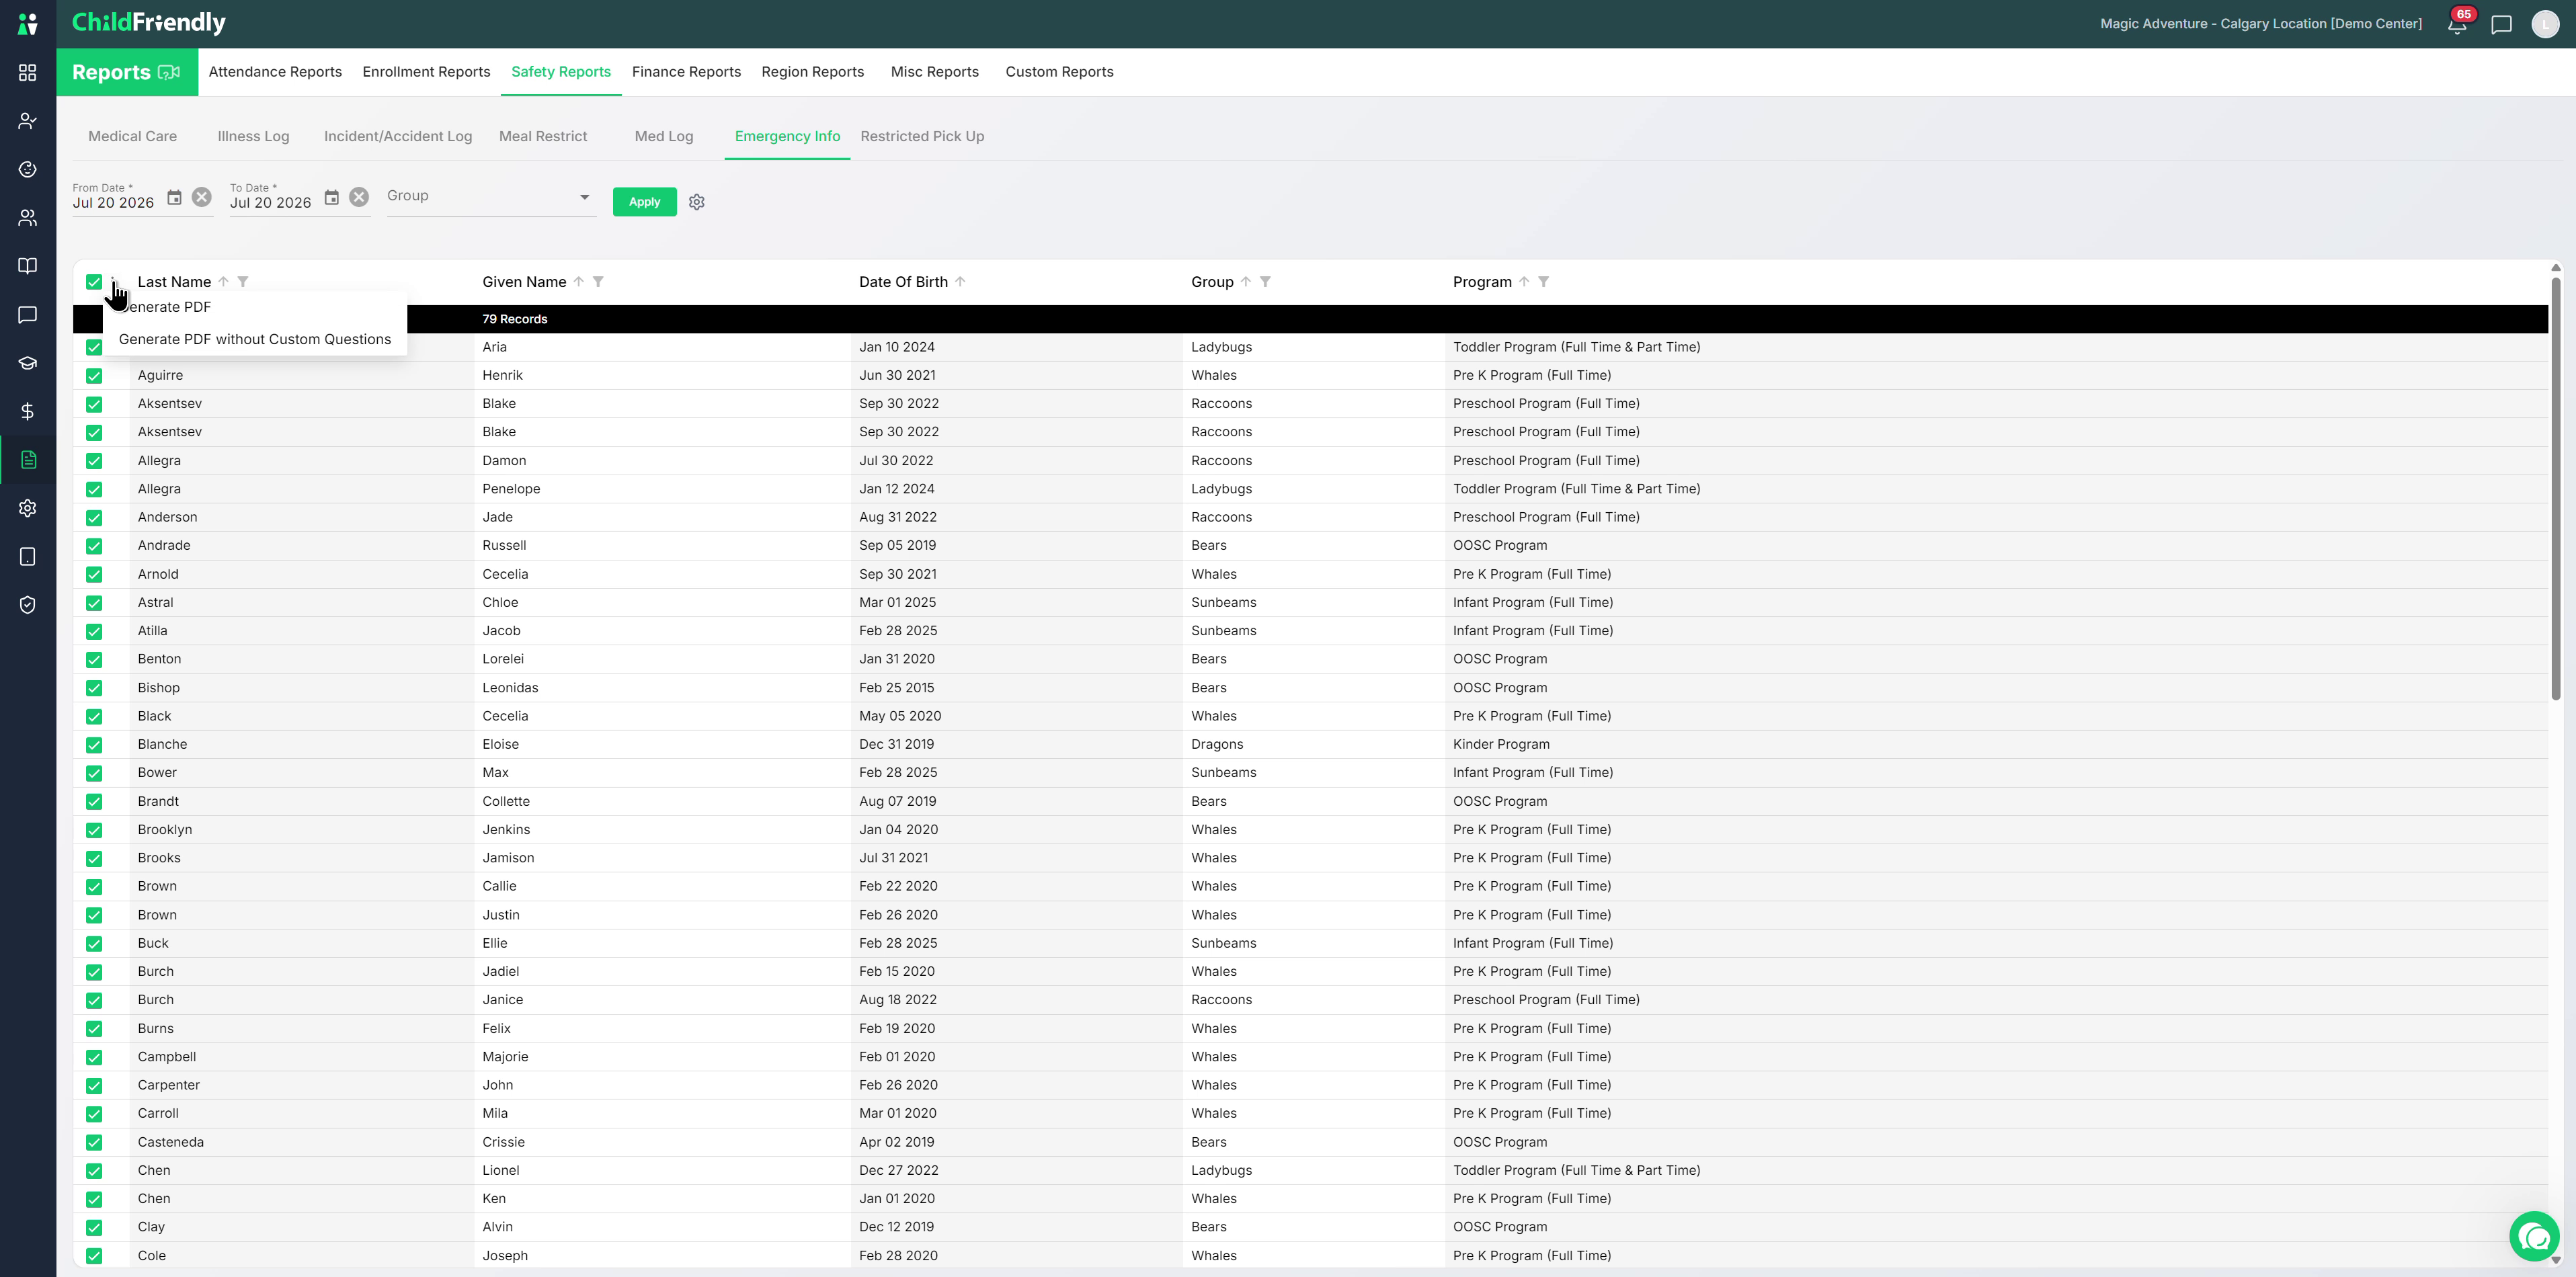
Select whether to generate:
A PDF without custom registration questions, or
A regular PDF with custom registration questions.
One combined PDF is generated, with each child on a separate page for easy printing and filing.
To print for a single child:
Select just that one child.
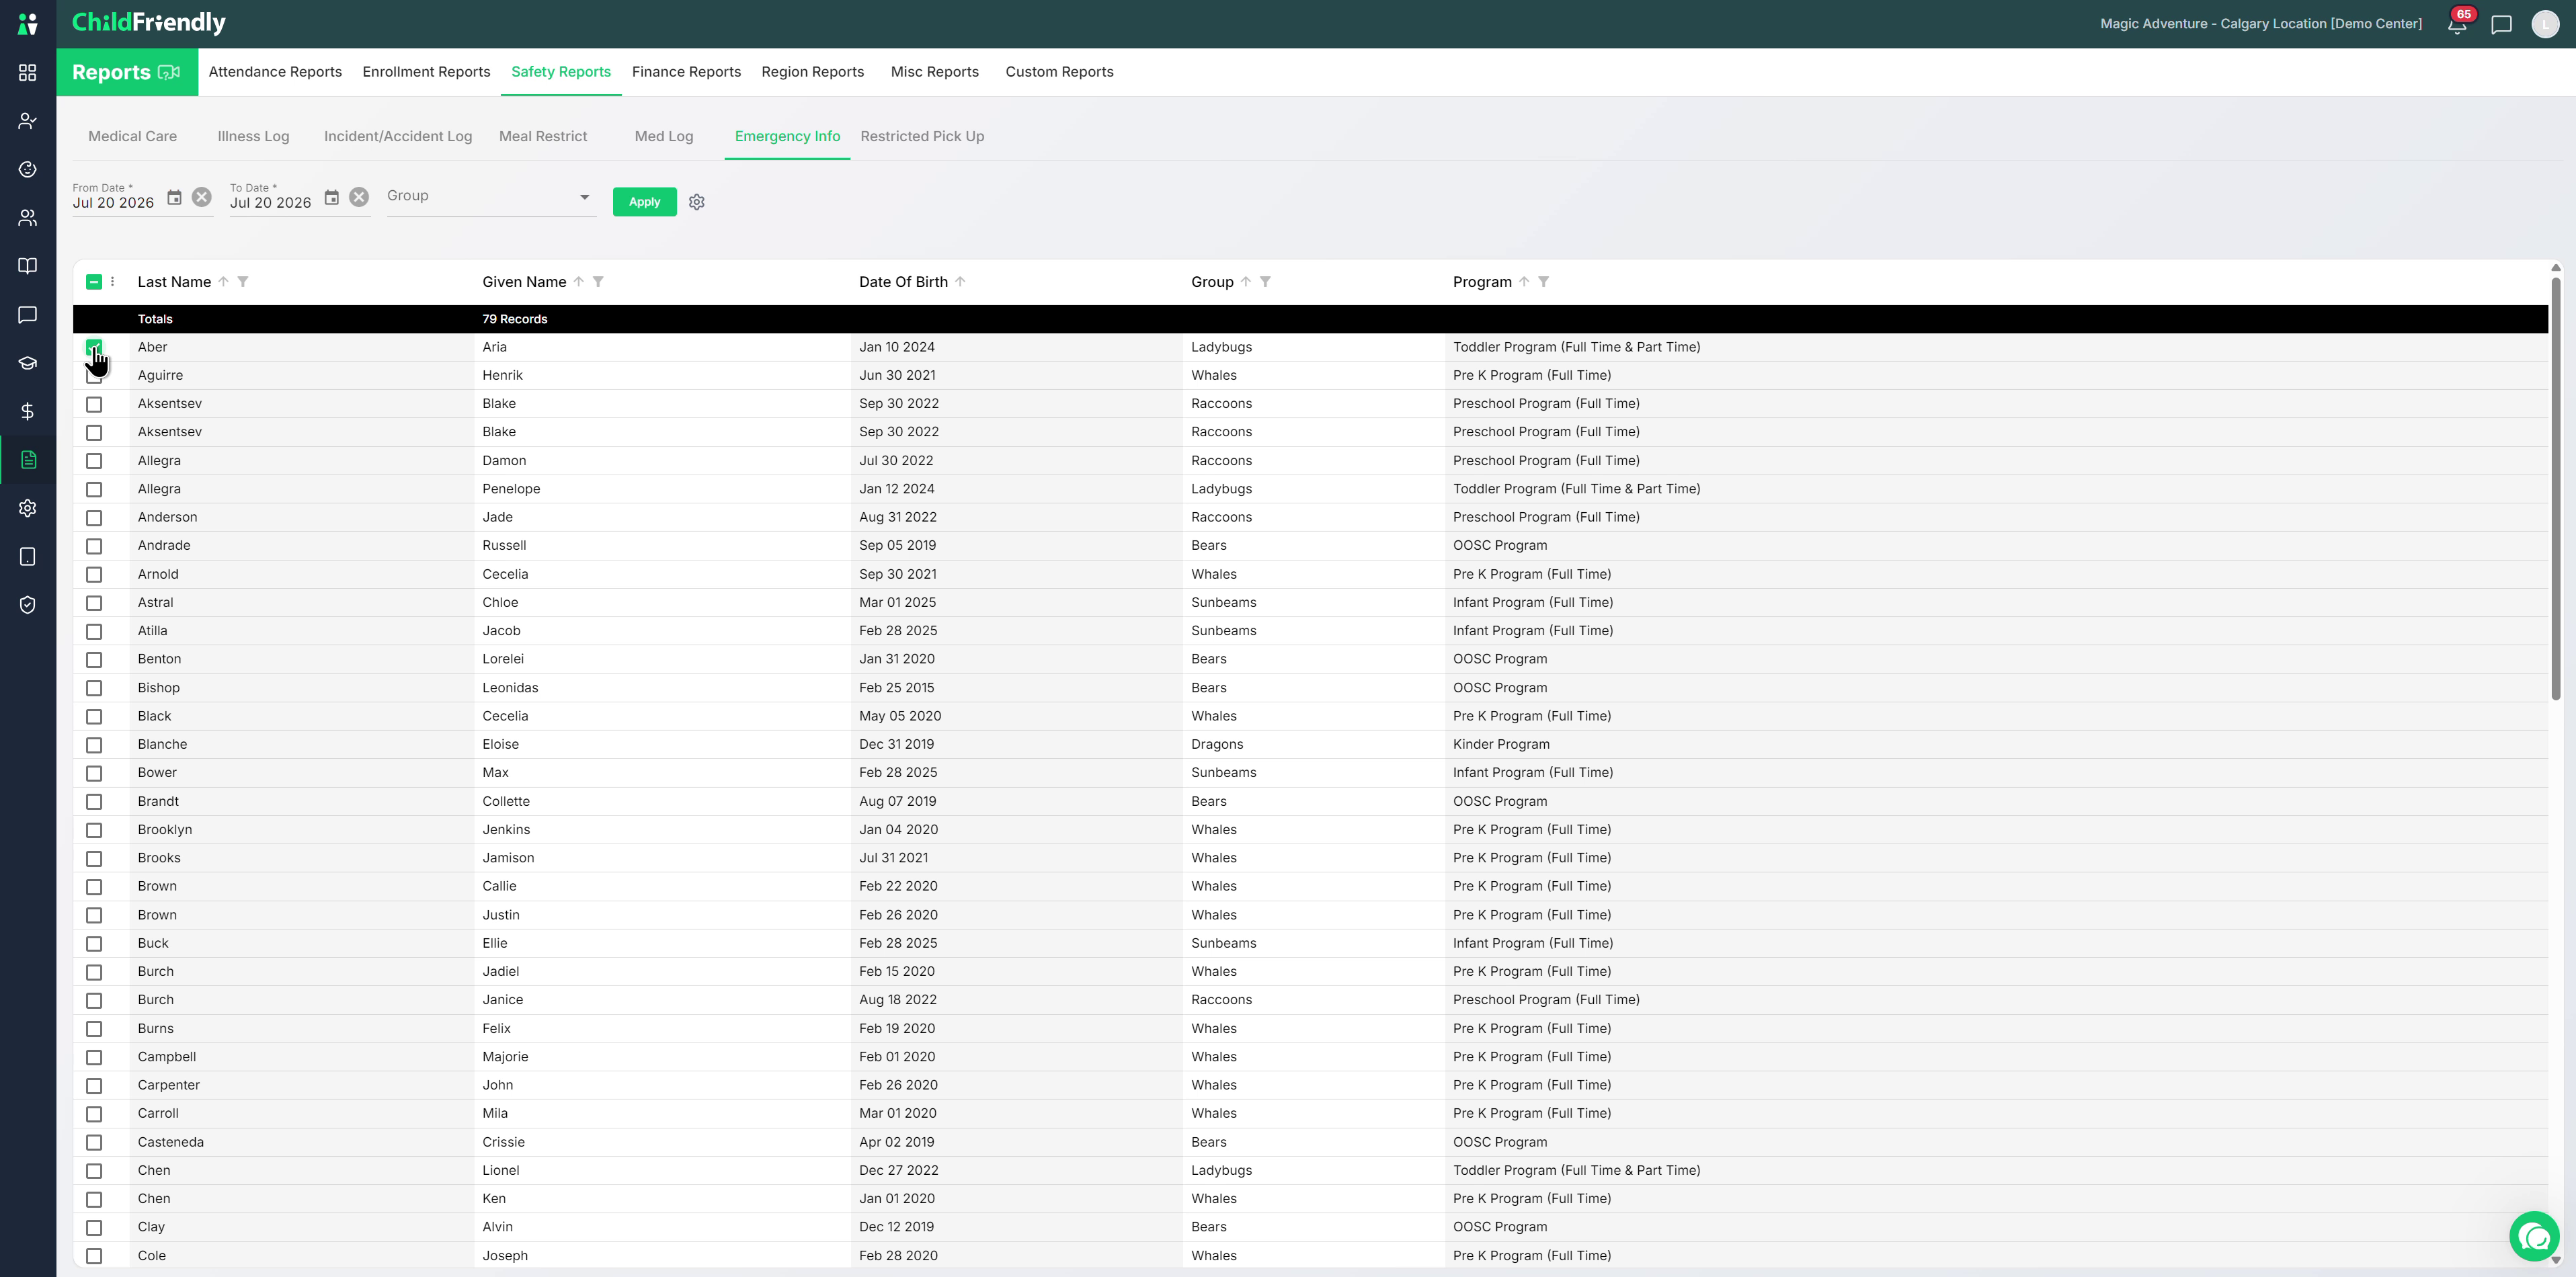
Generate the PDF as above.
The file will go to your Downloads.
Print from your downloads folder.
File printed forms in a master binder (commonly alphabetized) and update them whenever records change or new children start.
Step 7: Review and Export the Medication Log
The Medication Log compiles all medication administration records, which licensing often needs to confirm compliance.
In Safety Reports, open the Medication Log.
Set the date range for which you want to view medication records.
Click Apply.
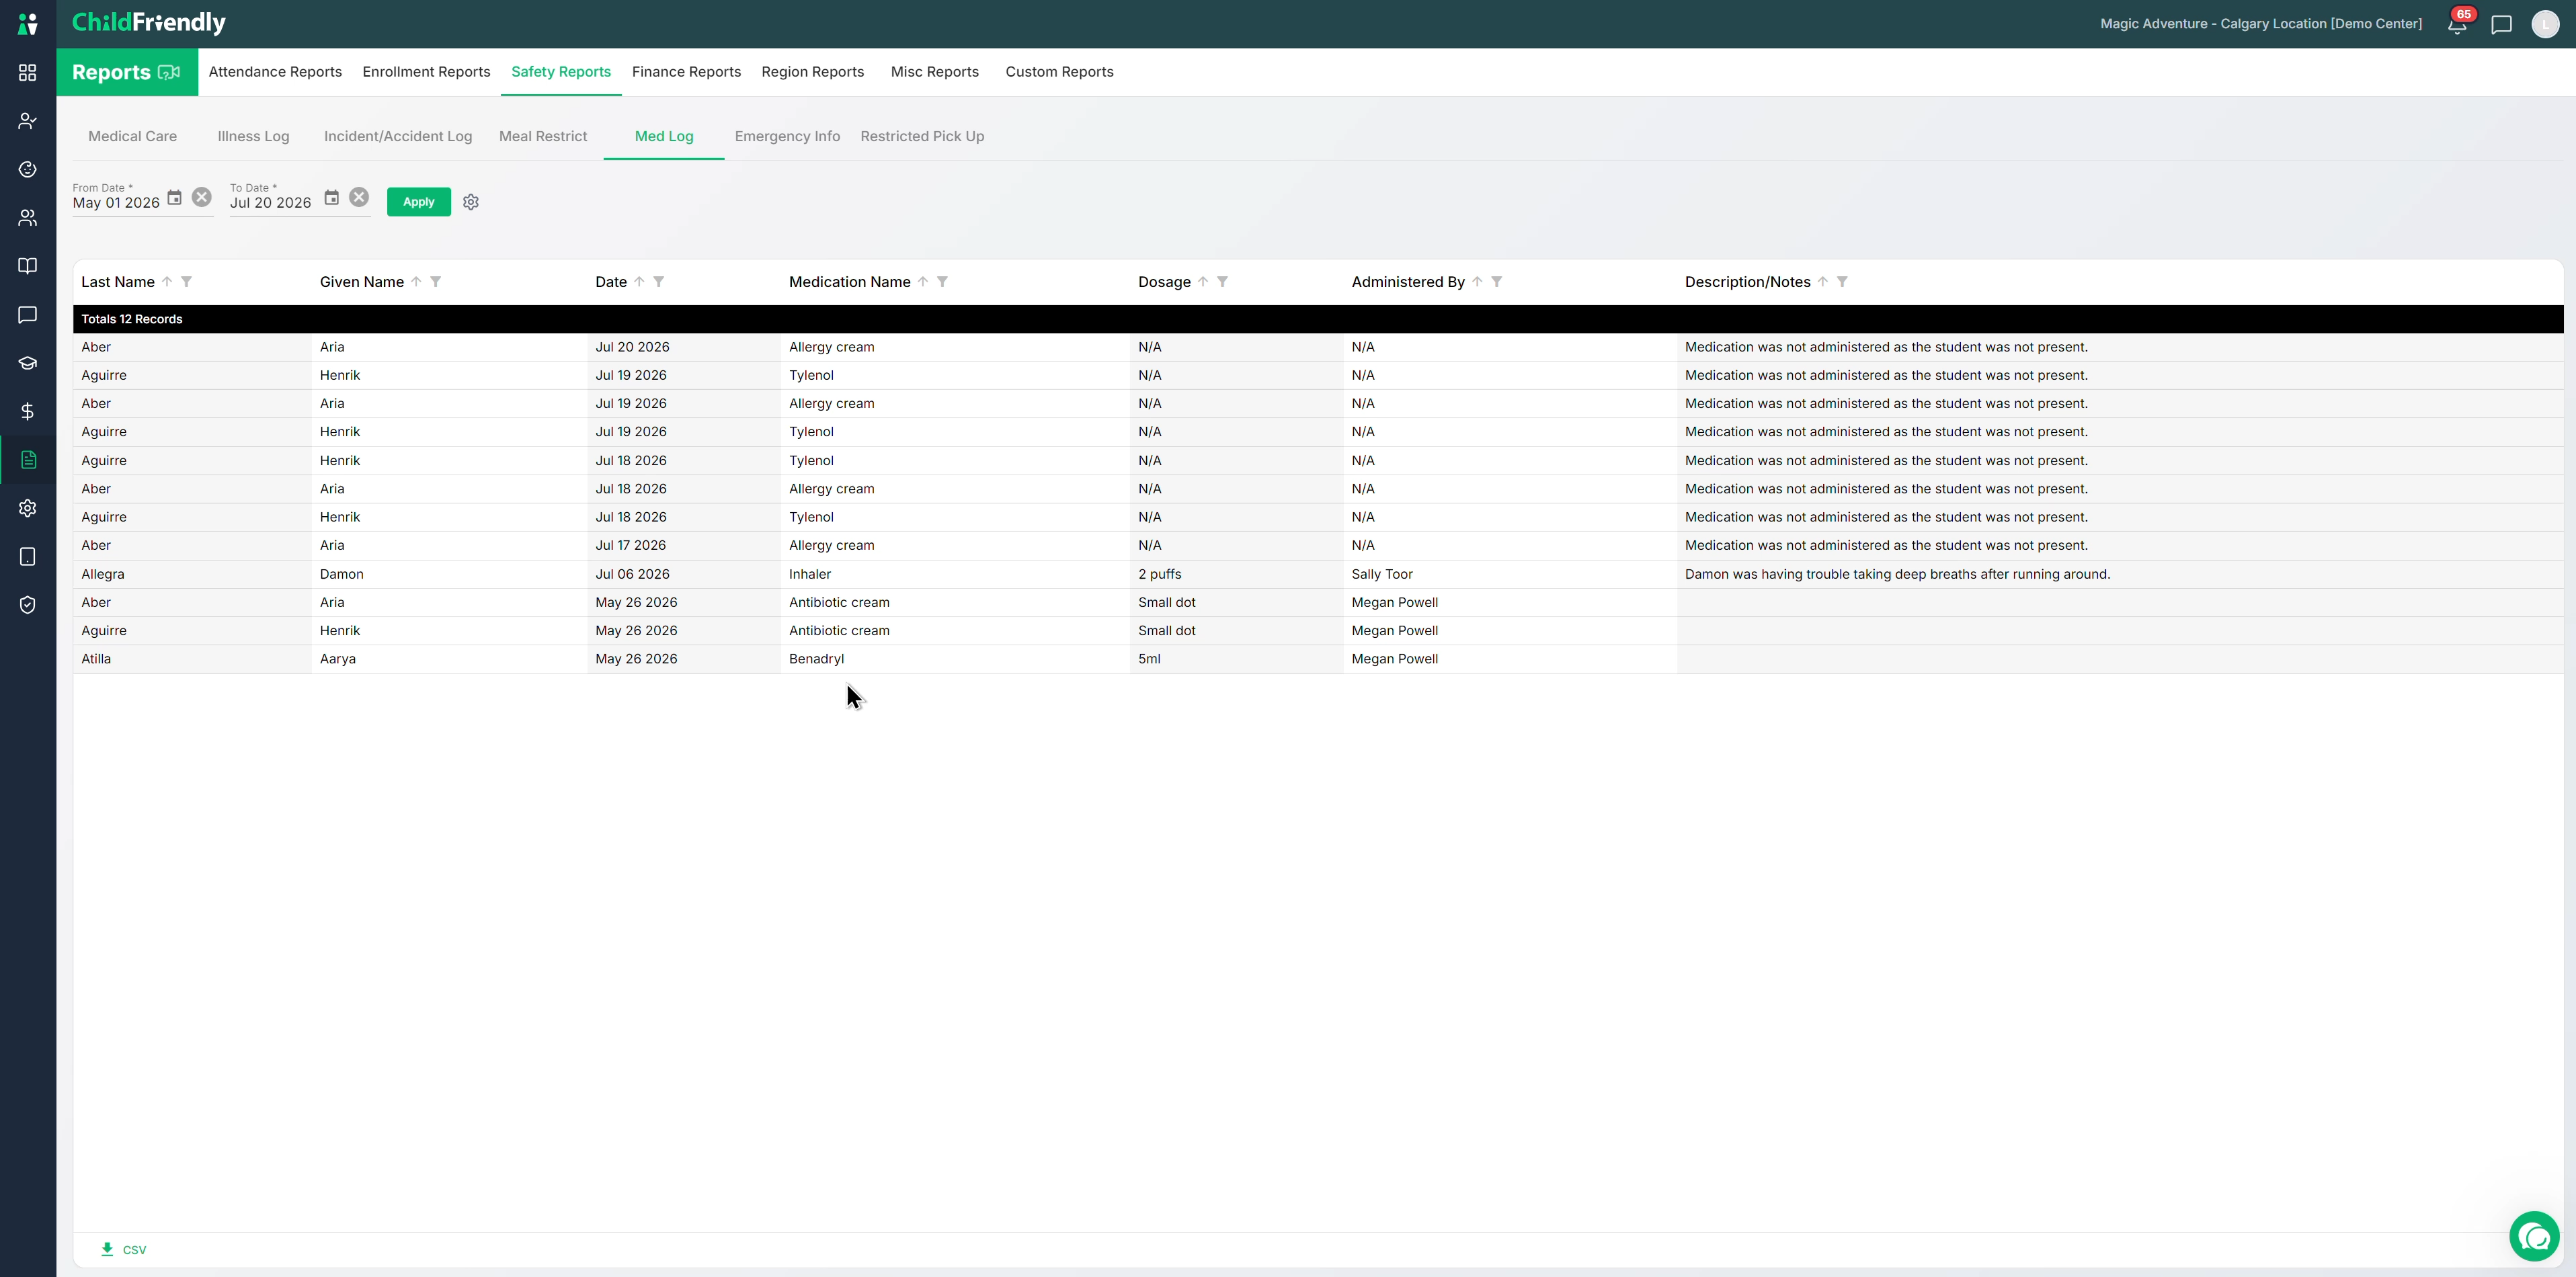
Review the list of all medication administrations in the period, including:
Description and notes
Who administered the medication
Dosage
All other fields from the administration form
Export this report as a CSV if you need a simple file to share with licensing.
You can also access medication information via the Dashboard:
From the Dashboard, go to Regular Meds and Records.
Set your desired date range to view all medications at a glance.
Click Apply.
Review all medications submitted in that period and expand any entry to see full details.
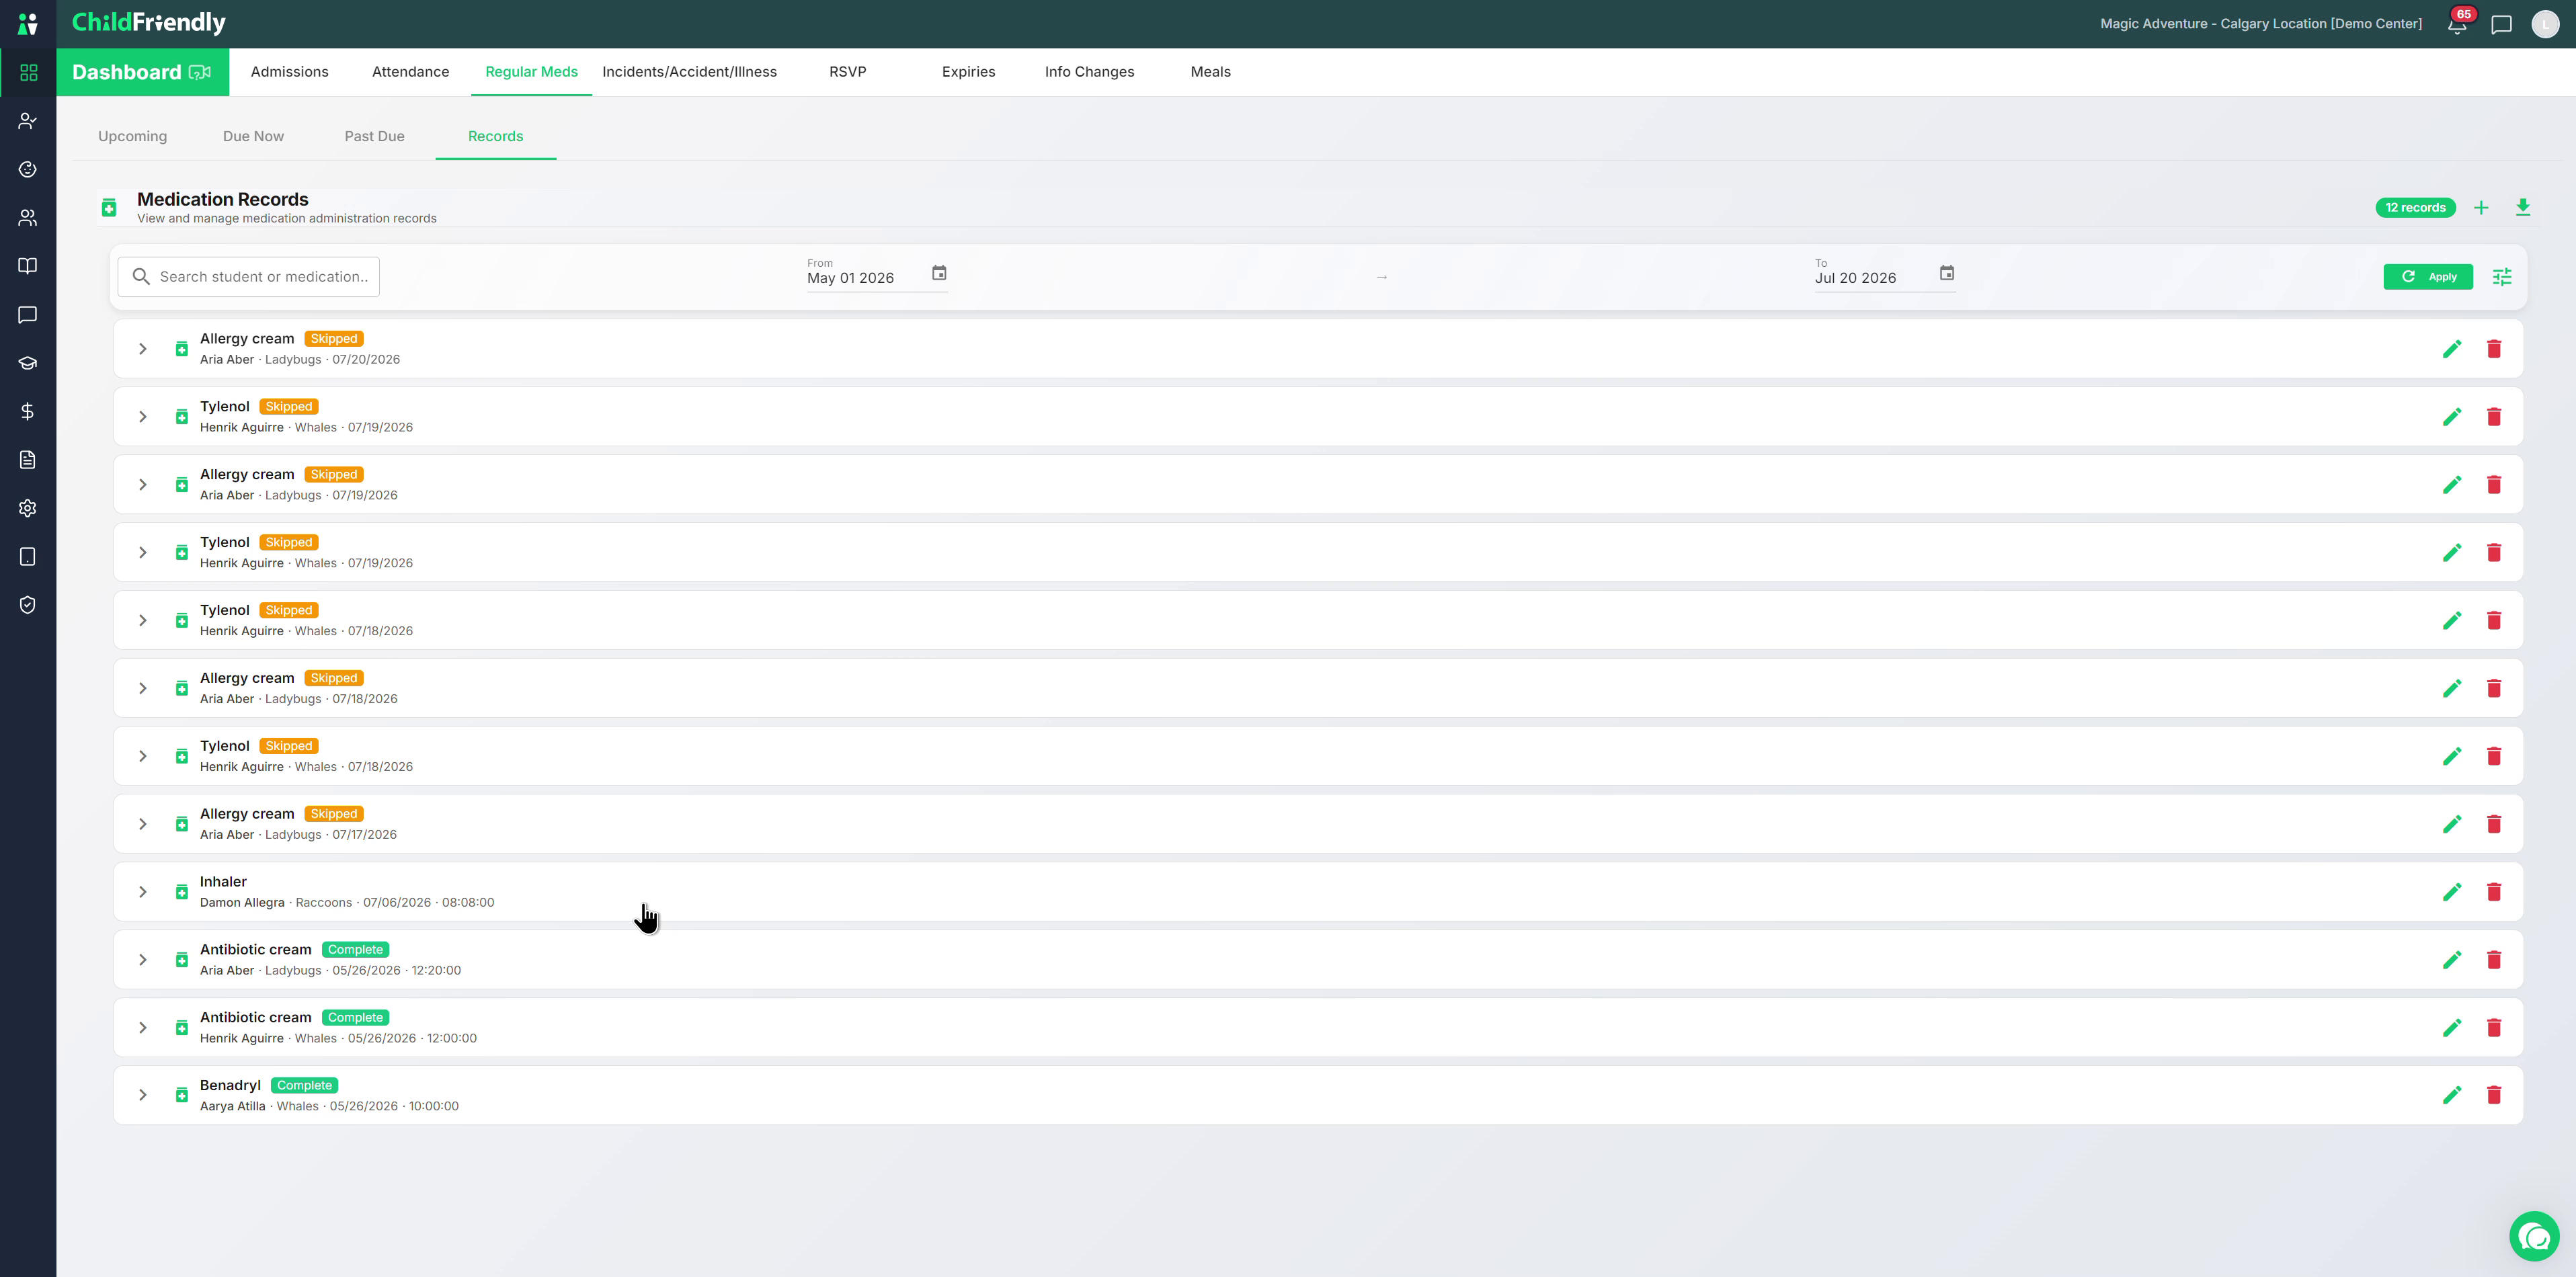
For a clean CSV export, it is recommended to use the Reports module.
Step 8: Monitor Staff and Record Expiries for Licensing
There is one more report frequently requested by licensing officers: the Expiries report, which tracks upcoming expiries such as staff criminal record checks and first aid certifications.
In the Dashboard, go to the Expiries tab.
In the Expiries tab, use the date range filter to see upcoming expiries (e.g., for the next few months).
Review the resulting list:
Which records are expiring within the selected range
Current status
Exact expiry dates
Optionally filter:
By staff or
By record type (e.g., Criminal Record Check, First Aid).
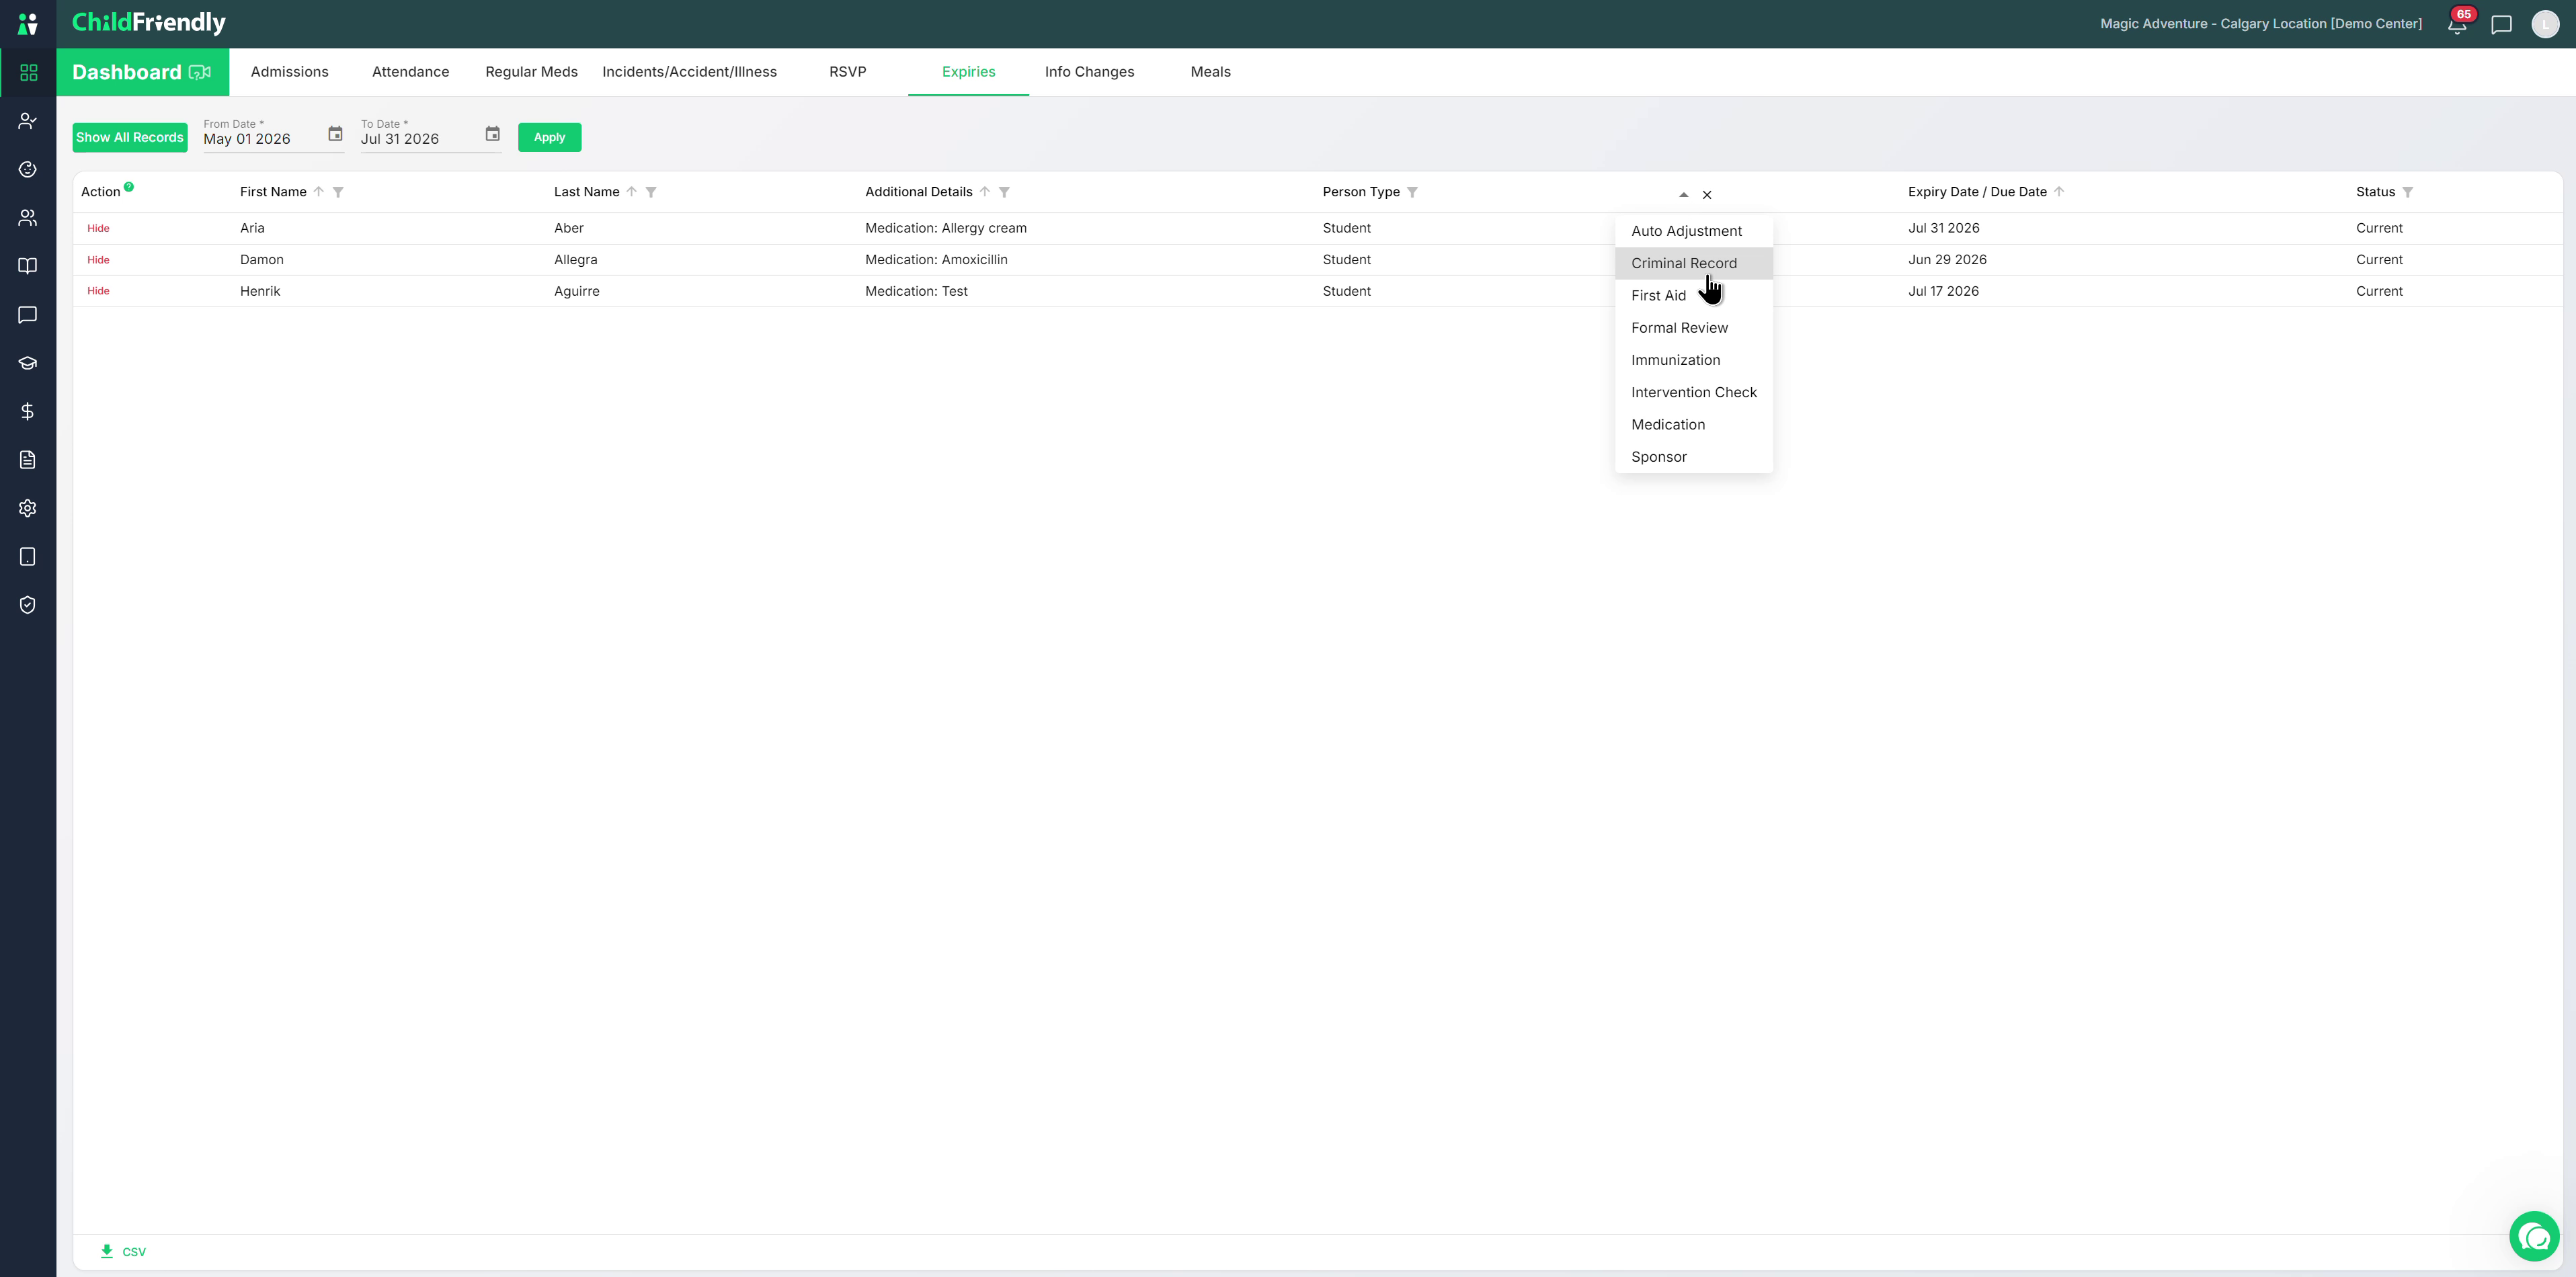
Export the expiry list to CSV if you need to provide it to licensing or keep a local copy.
These are the key reports you will most often need to pull when responding to licensing or health officer requests.